I can hear you read the title "No Helen! Not another Financier recipe….please!" I know, I know, I have made them plenty of time myself, I have also seen them successfully baked and talked about on otherblogs, so why would I subject my house to the wonderful aromas of dark chocolate and almonds on a sunday afternoon? To help a reader in search of a good recipe, that’s why… About a month ago, I received an email from A. asking me if I had a good recipe, easy enough for her to reproduce for dark chocolate financiers she had sampled at a local bakery and especially for a version in which the chocolate was not overpowering, but just "in the right amount".
First, I felt very flattered that a reader would come out and ask for help (everyday somebody new comes out of lurkdom, and that is always appreciated). Then I thought I had the perfect excuse to bake and sample many variations of one of my favorite mini cakes as I don’t lack financiers recipes. I could not tackle this project right away as I was entertaining a guest last month (and I have to admit, myself at the same time) and we had already decided on a fewitems to baketogether. I decided that this past week was the perfect time to try different chocolate financiers recipe and finally nailing the one that had the perfect balance of chocolate to pastry. I know that everybody’s taste vary greatly in that regard but I think I have achieved success and hope that A. likes the outcome as much as we did.
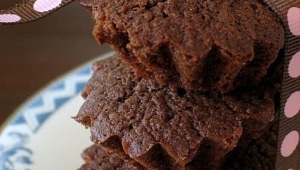
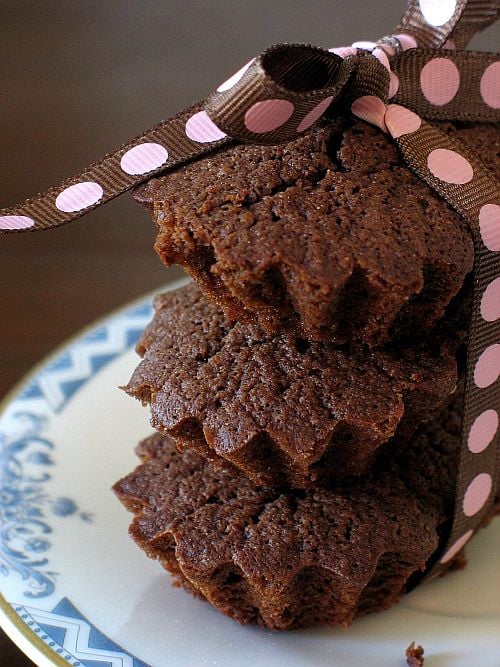
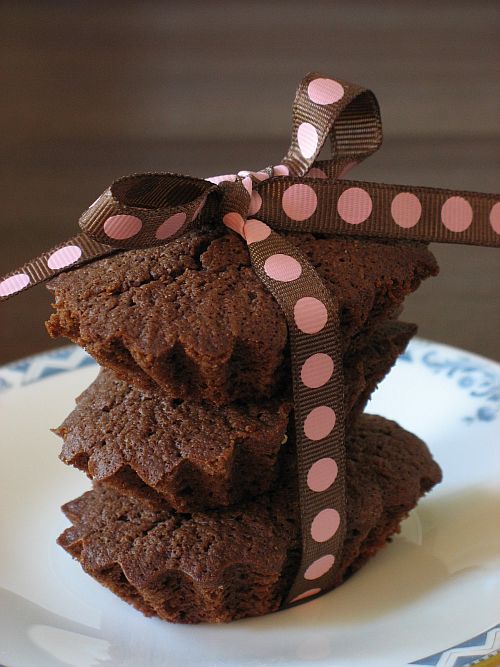
I found a great recipe in a magazine I brought back from home this past Christmas and it was already adapted from Master Chocolatier Jean Paul Hevin. With such a source I felt confident to be steered in a good direction. Financiers are so easy to make, only the name makes them seem fancy. Not having the classic rectangular molds to make them (but they are on their way…thanks mom!), I used mini rectangular tart molds. Really people, do not hesitate making a recipe just because you do not have the "appropriate" or "classical" pans….what is more important?….Taste! Right!
I also made a hapy discovery while baking and sampling various recipes. Financiers are traditionally made with ground almonds and somehow in the middle of all that baking frenzy, I ran out….well, I found out that ground graham crackers make a suitable substitute, (in the same quantity) when you are in that predicament.
both in taste and flavor….who would have thought?! Anyway, on with the recipe…
Dark Chocolate Financiers, adapted from Jean Paul Hevin:
Makes 12-16 depending on your molds
150 gr. semisweet chocolate chips (or chopped block)
150 gr. heavy cream
55 gr. powdered sugar
60 gr. butter (melted)
40 gr. flour
40 gr. ground almonds
1/2 tsp. baking powder
3 egg whites
It is best to do everything by hand as you can control the folding of all the various ingredients better, and really it requires only a minimum of elbow grease.
In a heavy bottom saucepan, heat the cream to boiling point, pour over the chocolate and let sit for 2 minutes. Gently stir to melt the chocolate and cream together until smooth.
In a separate bowl, combine the powdered sugar, flour, ground almonds, baking powder.
In a small bowl, beat the egg whites for a minute, just to break them up. Add them to the flour mixture carefully, before they are completely incorporated, add the melted butter. Finally, fold in the chocolate/cream mixture and fold until smooth.
Divide the batter into the molds (preferably coated with cooking spray or buttered), and bake at 350F for 15 to 20 minutes, depending on your oven.
Let cool 5 minutes before you unmold them.
Well, the only issue I have with this recipe is that it does not make enough!!! So, A. I hope you get to try them soon and tell me what you think.
How to combine a house guest, a Daring Baker challenge and a sunburn…just ask your crazy little Tartelette!
The challenge this month took on a complete different meaning for me. If you have been following my posts lately, you have noticed that they have been fewer and quite short in story telling, kind of drive by but not exactly. Well, you see, I had the very important job this month to be Godmother extraordinaire to a beautiful 18 year old soul named Sophie. My god child is a little storm of a woman and I bet you she will melt a thousand hearts before she meets the right guy. In the meantime, I wanted to melt hers and become the coolest godmother ever….and when Veronica and Patricia announced the Daring Bakers’ August challenge as a Milk Chocolate and Caramel Tart from Eric Kayser’s Sweet and Savory Tarts, I knew I had just the ticket….except we only got to it this past weekend!!
I was too busy taking her around town whenever I had a day or afternoon off , or even an hour to go shoe shopping (guys take a hint here for your daughters…works like a charm to fix “boys issues”). Her last days were just around the corner and still no tart….Oh believe me, we got quite busy in the kitchen, especially making sourdough bread every other day (those French and their bread!), making lasagna, pizza, Financiers, brownies, macarons…well, you get the picture.
Saturday night, we took her out to dinner at Middleton Place (watch The Patriot) and took the time to stroll the plantation’s gardens and ate a fabulous meal of seafood and pecan pies…and it was on a very satisfied stomach (read I ate my pie and finished hers) that I started on the tart. No way I was going to loose my crown of Coolest Godmother by not completing the challenge.
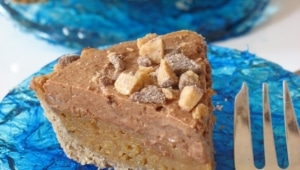
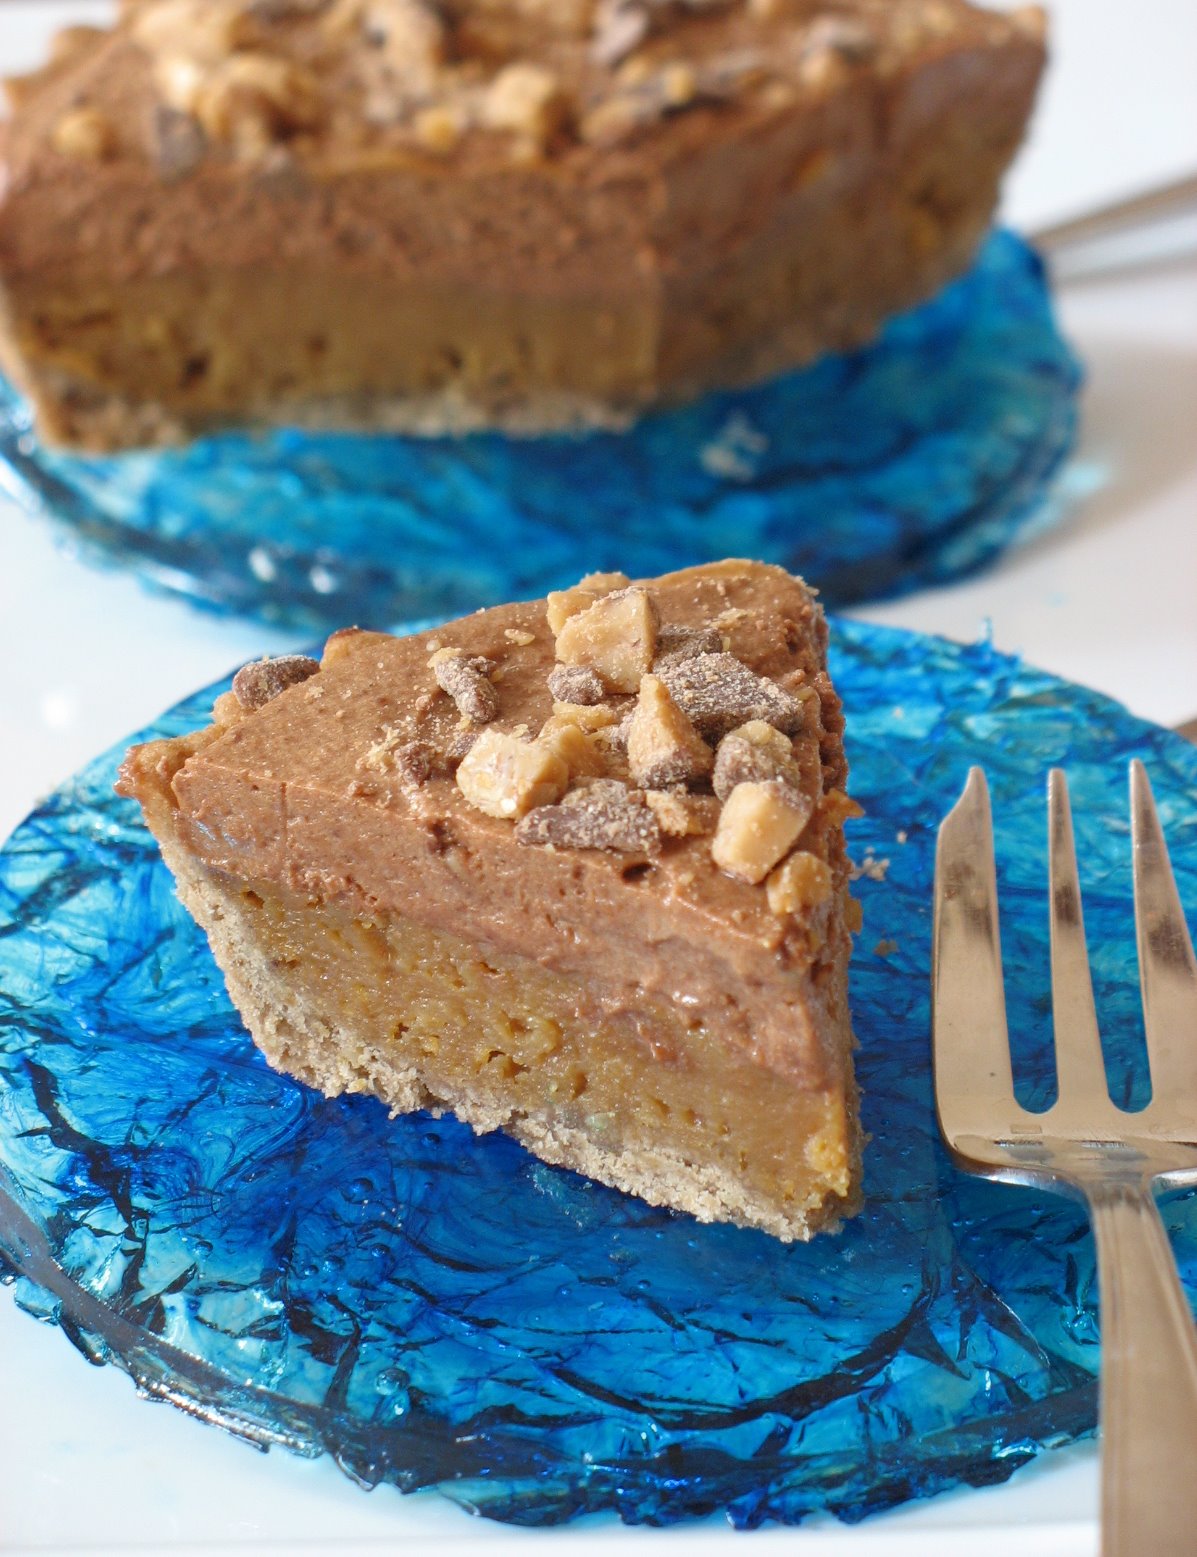
The tart is based on 3 components that you can spread out over several days if necessary plus a decoration element, which I took some liberty with by the look of my tarts (blue sugar plates). The recipe is very straightforward and the tart presents no major hurdle if you know some about sugar. The chocolate shortbread crust came together without a glitch but I had to omit the cinnamon (with Veronica’s approval) called for because Sophie does not like it (and remember I am Zee Coolest Godmother). I wish I had made some with though because it needed that extra kick in my opinion.
The caramel layer seemed to have given some trouble to other Daring Bakers. Lisa, I still don’t know why yours was so liquidy….and yes, people think I am officially crazy when I take your phone calls in the middle of grocery shopping! Anyways, I would love to say I know why mine set out just fine and not others, truth is that Sophie and B. were so involved in a game of Othello that I had to make sure she was saving the family’s honor and I completely forgot about the tart in the oven….I think I baked them for 25 instead of 15 minutes, and the explanation might be in the translation of the book and temperature conversions, not given appropriately in English. I made the caramel layer Sunday after a full day at the beach and a double dose of sunburn. I made the caramel using the dry method, as it is the one I am most familiar with. I understand it scared some Daring Bakers and some did actually ruin a few pots trying it, I have to admit that I had the luxury of burning a few restaurant saucepans and never my own learning it so I see why they would feel tempted to use the alternative given by Veronica to make a water/sugar/corn syrup caramel which takes longer but is somewhat foolproof. My word of advice for novices who are tempted by the dry method: low/medium heat is best and sugar clumps “declump” if you lower your heat and let the sugar melt at its own pace.
Monday during my lunch break, I came home to make the final part of the tart. I found Sophie and B. watching Donkey Skin. : “A fairy godmother helps a princess disguise herself so she won’t have to marry a man she doesn’t love”…(See where I am going with this?) Time to finish this baby and get my stripes!!
The mousse sent me back to my restaurant days big time. When I learned how to make mousse it was the old traditional way: melt chocolate, separate eggs, add yolks to chocolate, whip the whites to firm peaks and fold in the chocolate mass. In a large restaurant turning tables 2-3 times a night, this method can be quite costly and it’s not before long that you have to resort to the quicky approach of melted chocolate folded in whipped cream. Now you understand why my eyes popped and had to smirk when I read that even Eric Kayser used this method…the fraud…no just kidding….I don’t really like mousses like that, and I can’t say whether it is because I used to make it day in and day out or because I find too heavy. Egg whites mousse are really delicate and intense in flavors whereas the whipped cream ones are too dairy tasting. Just my thoughts people, don’t start coming at me with your spoon to bang me on the head….I just expressed an opinion, nothing else.
½ lb (250 g) chocolate shortbread pastry (see recipe below)
1 ½ cups (300 g) granulated sugar
1 cup (250 g) heavy cream (30-40 percent butterfat) or crème fraiche
¼ cup (50 g) butter
2 whole eggs
1 egg yolk
2 ½ tablespoons (15 g) flour
1 ¼ cups (300 g) whipping cream
½ lb (250 g) milk chocolate
1. Preheat oven to 325 °F (160 °C).
2. Line the baking pan with the chocolate shortbread pastry and bake blind for 15 minutes.
3. In a saucepan, caramelize 1 cup (200 g) granulated sugar using the dry method until it turns a golden caramel color. Incorporate the heavy cream or crème fraiche and then add butter. Mix thoroughly. Set aside to cool.
4. In a mixing bowl, beat the whole eggs with the extra egg yolk, then incorporate the flour.
5. Pour this into the cream-caramel mixture and mix thoroughly.
6. Spread it out in the tart shell and bake for 15 minutes. Remove from oven and allow to cool.
7. Prepare the milk chocolate mousse: beat the whipping cream until stiff. Melt the milk chocolate in the microwave or in a bain-marie, and fold it gently into the whipped cream.
8. Pour the chocolate mousse over the cooled caramel mixture, smoothing it with a spatula. Chill for one hour in the refrigerator.
To decorate: melt ½ cup (100g) granulated sugar in a saucepan until it reaches an amber color. Pour it onto waxed paper laid out on a flat surface. Leave to cool. Break it into small fragments and stick them lightly into the top of the tart.
1 cup (250g ) unsalted butter, softened
1 cup plus 2 tablespoons (150 g) confectioners’ sugar
½ cup (50 g) ground hazelnuts
2 level teaspoons (5 g) ground cinnamon
2 eggs4 ½ cups (400 g) cake flour
2 ½ teaspoons (10 g) baking powder
1 ½ tablespoons (10 g) cocoa powder
A day ahead
1. In a mixing bowl of a food processor, cream the butter.
2. Add the confectioners’ sugar, the ground hazelnuts, and the cinnamon, and mix together
3. Add the eggs, one by one, mixing constantly
4. Sift in the flour, the baking powder, and the cocoa powder, and mix well.
5. Form a ball with the dough, cover in plastic wrap, and chill overnight.
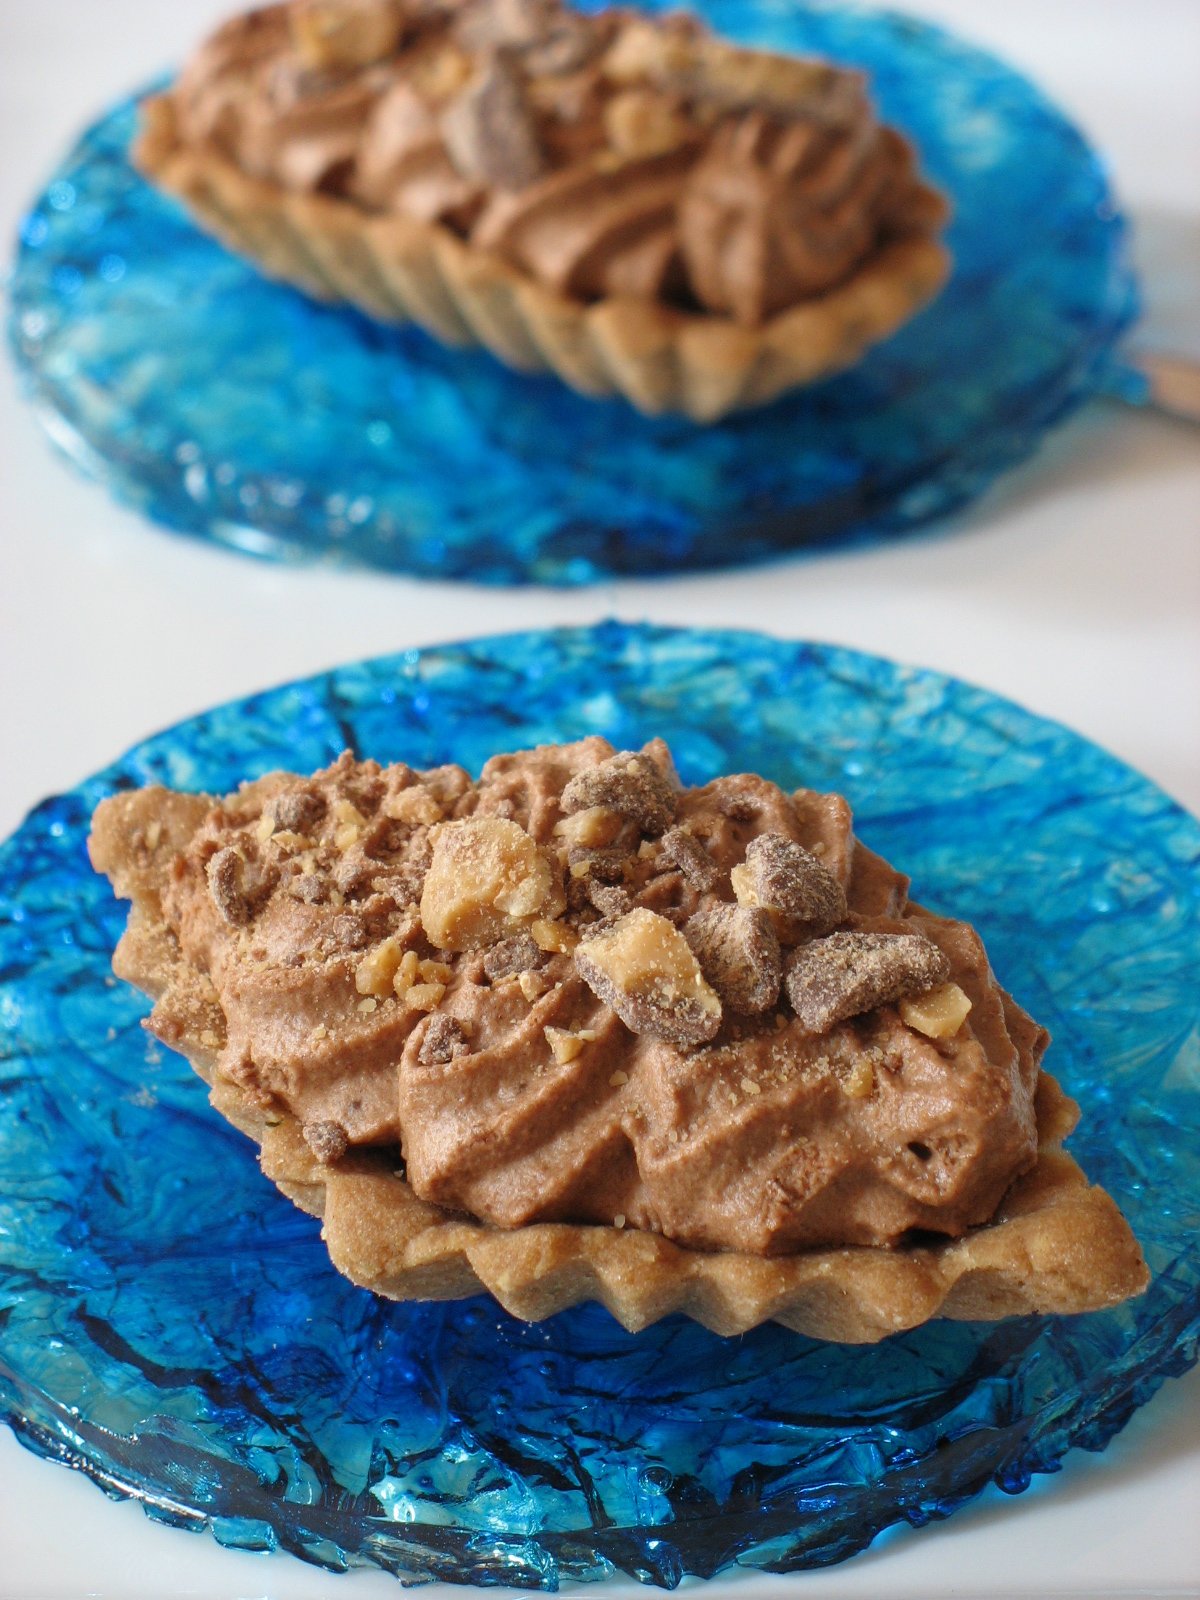
Alright, so we are now Monday night and it is time to finally taste the tarts. I made several sizes just to see what we could play with and I spooned it in a pastry bag fitted with a large start tip and swirled it around on top of the caramel.
I remembered I had some Milk Chocolate Toffee (think homemade Heath Bar) that I had made a couple of weeks prior and crushed the remainder on top of the tarts.
At first I thought I was not that inspired to dress them up a little for their beauty shots but you know what happens in those cases…my mind goes stir crazy and I decided to give them pretty little glass- marbled like plates made out of clear caramel and food coloring so completely edible if you ever should need more sugar! That part, Sophie did not see come together as I made them after I dropped her off at the airport today. The house was eerily quiet, suddenly too big and although I finally had all my kitchen space back to myself, I did not want it anymore….I wanted to share it with her again…I guess that’s why they put “mother” in godmother…Well, girl, I hope you like them and “non, ca ne pique pas”…!!
Well, both Sophie and Bill loved it, or they lie very well….I was not so keen on it. I wish I had made half with cinnamon and half without because it really needed something to offset all that sugar. But I love milk chocolate, hazelnuts and caramel so I have to really thank Veronica and Patricia for choosing this recipe and the rest of the Daring Bakers for going along with it!
Note: I apologize for the quick post you read here but I still have company for another week or so and it seems that I am fullfilling my godmother part pretty good. Sophie is quite busy having made some friends her age and discovered the joys (hmm,hmm…) of dating in America. Yes, French people have different dating rules and "games". I try to calm her nerves while waiting for the stupid "three days no call" rules that guys like to play here. In the meantime, I am making her cakes!!
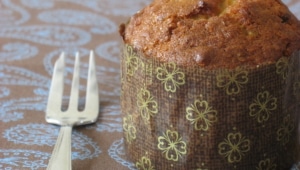
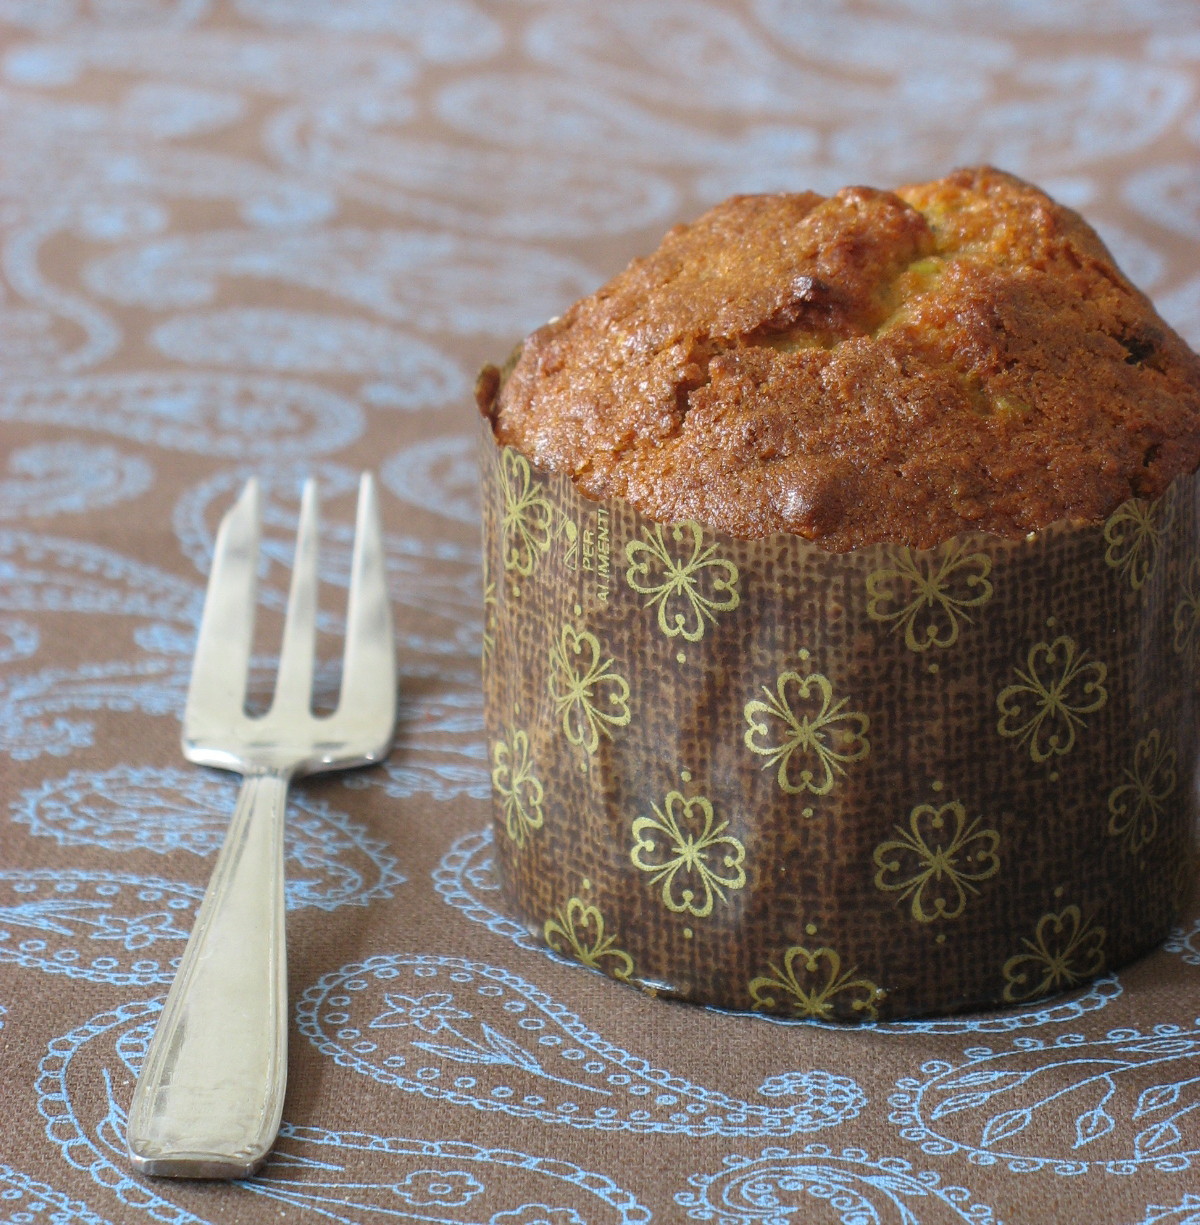
You know a cake has to be good when it pops up over the years on some of the best food blogs out there. I hope I will carry the torch with honor. Clotilde presented the original and Heidi and Jen made some perfectly mouth watering renditions. The cake appealed to me so much that I made it the exact same say I read about it. The only thing that surprised me is in the lengthy steps undertook by my predecessors in mixing the two different batters. The original recipe they followed called for making the chocolate batter first, then rinsing the bowl to prepare the pistachio one. I don’t know about you, but in a 100F + weather and very little intention to mix, rinse, mix, bake, wash, I knew I had to come up with an easier way to achieve the same result.
I remembered my beloved zebra cakes, or my mom’s comforting marbled chocolate-vanilla cake and decided to go the same route: make one plain batter, divide it in half and add to each part the elements they needed to create both the chocolate and pistachio batters. I wouldn’t call this blasphemy, just practicality…especially when a mob of hungry teenagers was starting to crowd my kitchen!
Gateau Surprise Chocolat Pistachio, adapted from this blog:
Makes 12 cakes
270g plain all-purpose flour
2 tsp baking powder
1 tsp baking soda
150g unsalted butter, room temperature
250g caster sugar
4 eggs
1½ cups plain yoghurt or sour cream
1½ tsp vanilla extract
2 tbsp unsweetened cocoa powder
1 cup chocolate chips
1/3 cup shelled pistachio, finely chopped
Preheat oven to 180°C. Grease 12 small paper cake cases.
In a food processor mix together the sugar and butter until fluffy. Add in the eggs one at a time, pulsing in between each addition. Add in the yoghurt and the vanilla extract, pulse again. Add the baking powder, baking soda and all of the flour. Divide the batter in half. In one half, add the cocoa powder, in the other the pistachios and chocolate chips. Then using an ice cream scoop, place one scoop of batter into each paper case. Rinse the scoop and add the pistachio batter on top of the chocolate.use an ice scoop to place the pistachio batter on top. Smooth out the surface using a spatula. Bake in the oven for 30 minutes or until a toothpick comes out clean. Allow to rest for 5 minutes then turn out onto a wire rack to cool completely.
It is always a blessing to have family visits. My parents come regularly, so much so that my produce guy often asks me about them and when they will visit next and they are almost on a first name basis with the mail man! I am surprised that only my brother and his family and my cousin in Savoie are the only ones who also made the trip, with all these paid vacations it should be a no brainer for the others to come visit their "favorite" cousin (cough, cough…) and discover a part of the world they do not know. So having Sophie around is absolutely fantastic on very many different levels. I get to talk about the family, speak French and laugh at the simple words I cannot find easily anymore. When I left she was 7-8 years old, so I also get the chance to discover a maturing young woman full of questions, hope, incertainties and love for life.
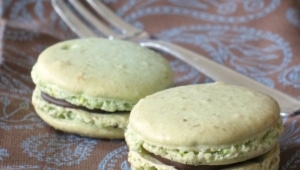
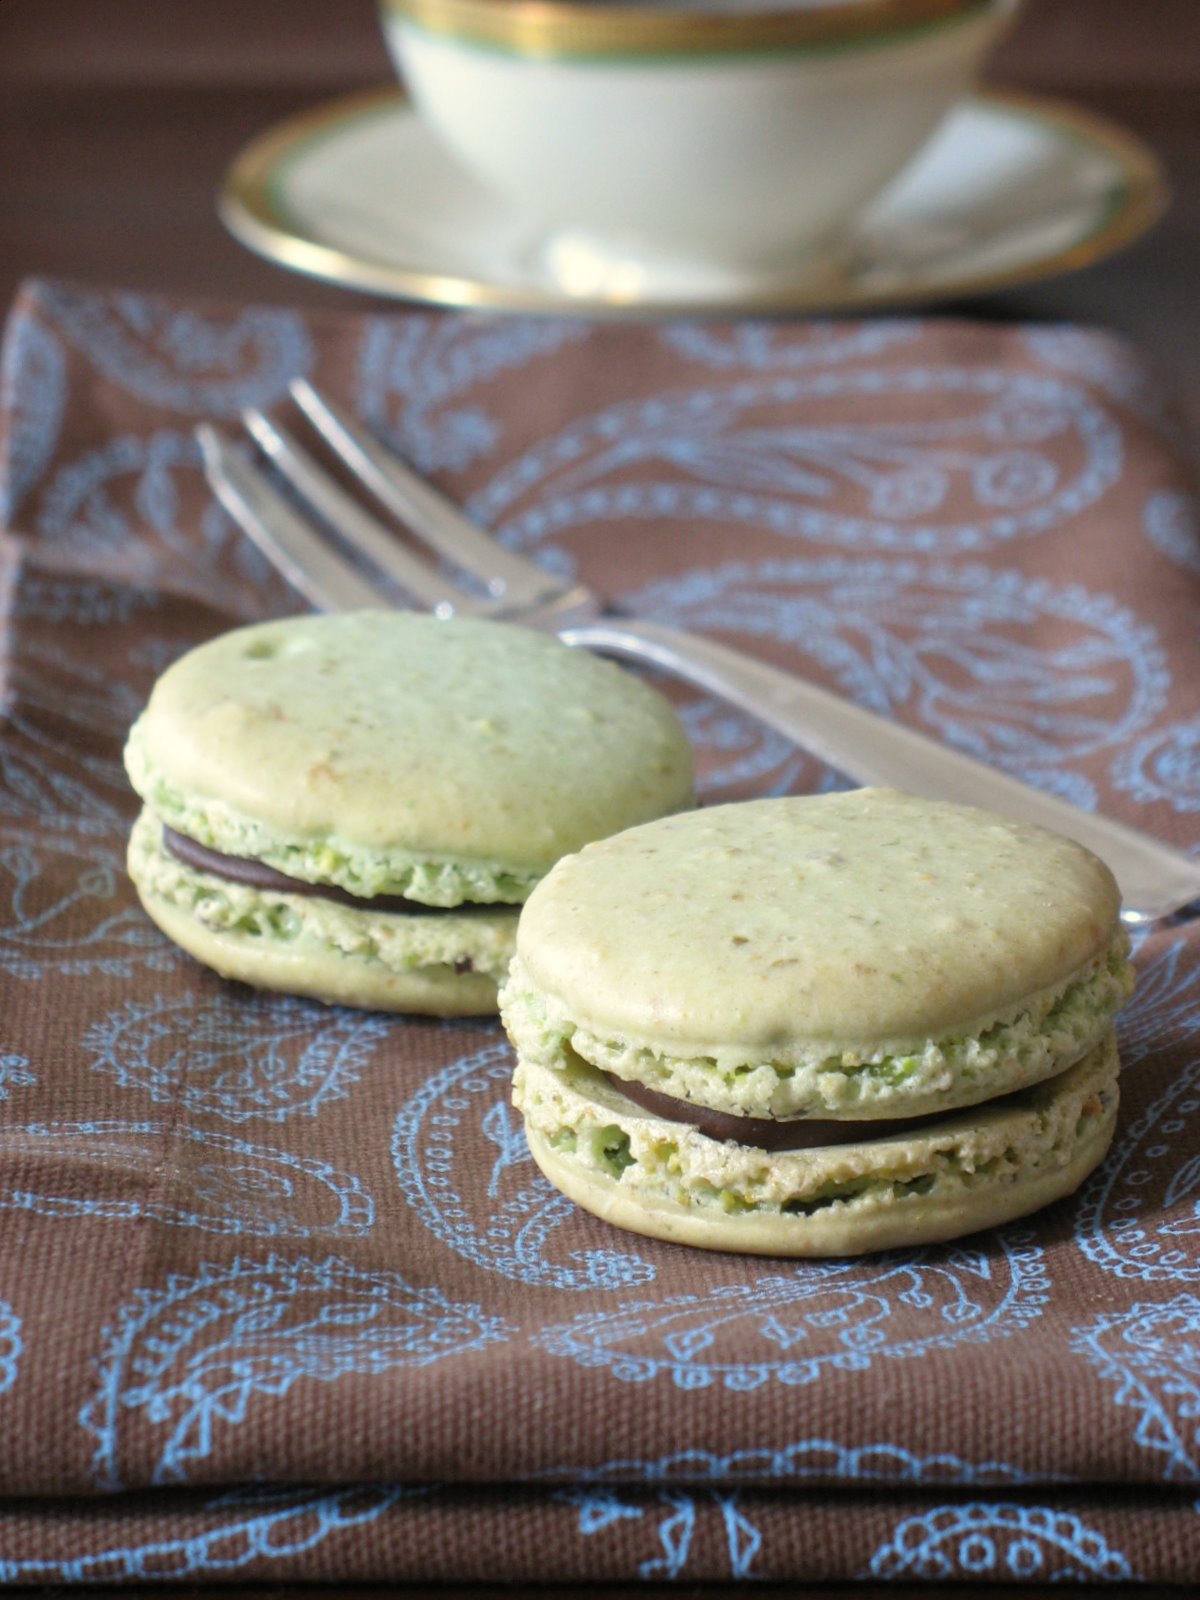
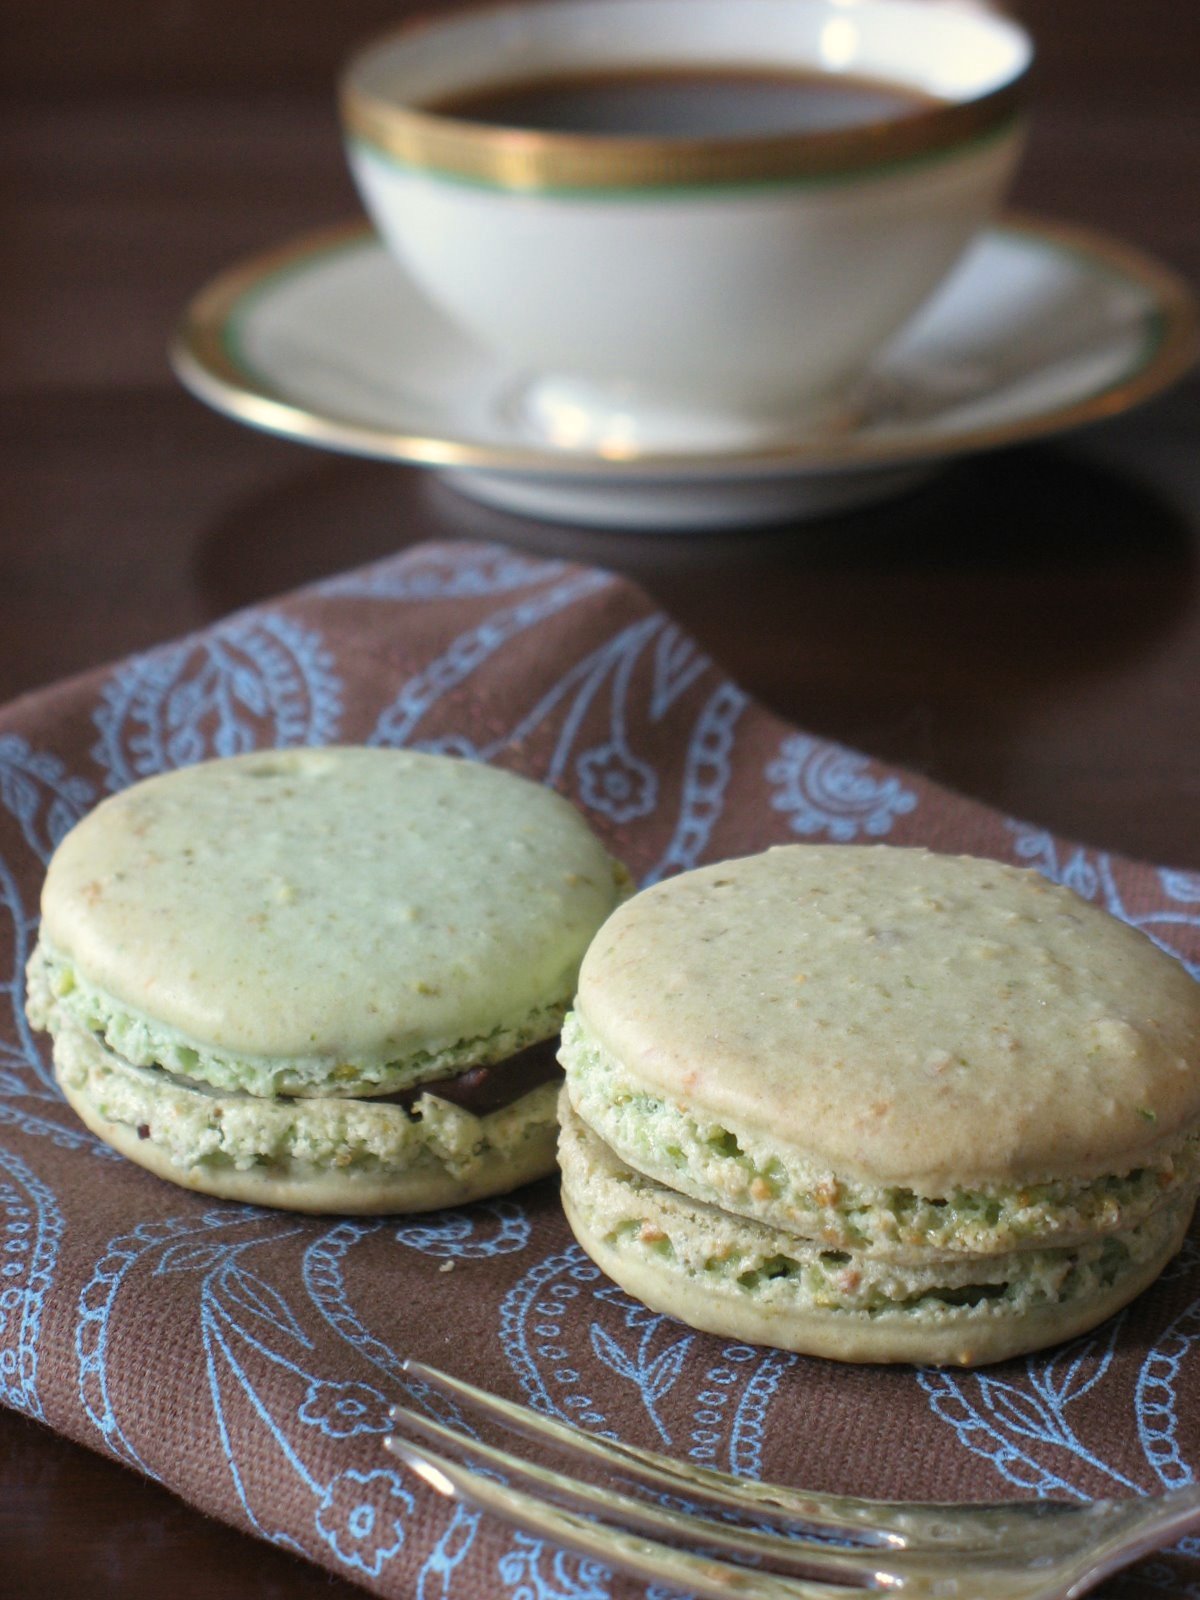
I also like having visitors as I can show them this country like they have never seen it before, far away from images of huge skyscrapers, bright neon signs and fast food joints. Ok, so we went to Krispy Kremes, but come on folks! that is a mandatory on the list of culinary treats I have to educate her palate about. Charleston is rich in history, landscape and native animals (she saw her first alligator on a canoe ride in the Lowcountry swamps yesterday) and of course rich in food influences from the Barbadoes, Spain, France, England and Africa. The link with macarons? Well, at the end of the day, after trying many a local delicacies, it’s all about the macarons people, and Sophie asked if I could teach her how to make them. As the good hostess that I am I felt it was necessary to fulfill her wishes..twist my arm right?!
For the second time around I went for another recipe than the one I often use for macarons, and opted not to use the Italian meringue method for the shells. Indeed, this recipe does not require that the egg whites be whipped with a hot sugar syrup, but instead mixed in with the powdered sugar/nuts method. The only reason why I chose this method was that it was over 100 degrees outside and after an afternoon roasting at the beach, we did not feel like standing in front of the stove waiting for the sugar syrup to reach proper temperature. I found this particular one for pistachio in one of my new favorites by a talented French pastry chef, Stephane Glacier, in "Un Amour de Macaron". The filling was a simple chocolate ganache with a hint of ground ginger.
We whipped, folded and mixed. We giggled, talked and dipped our fingers in the batter and the ganache. We filled, broke and sampled some…and we packaged half of them in little goodie bags and took some to the neighbors. It’s all about Southern hospitality!
Pistachio Macarons, adapted from Stephane Glacier.
Makes 35
225 gr powdered sugar
60 gr almonds
65 gr pistachios
3 egg whites (about 100gr)
green food coloring (optional) (powdered is better)
25 gr granulated sugar
In a food processor, run the nuts and powdered sugar until the nuts are finely ground. Run through a sieve if needed.
Whip the egg whites until foamy, slowly add the granulated sugar, until they are glossy. Add the green food coloring if using.
Slowly fold the nut/sugar mixture into the whites with a wide spatula. The mixture should remain shiny and flow easily.
Fill a pastry bag with the batter and pipe small rounds onto parchment lined baking sheets.
Let the macarons rest for 20 minutes.
Preheat the oven to 315 and when they are ready, bake them for 12-15 minutes.
Let cool, remove from the paper and fill with the ganache.
Chocolate Ganache Filling:
8 ounces (227 grams) semisweet or bittersweet chocolate
3/4 cup (180 ml) heavy whipping cream
2 tablespoons (28 grams) unsalted butter
1 tsp. ground ginger
Place the chocolate in a medium sized bowl. Set aside. Heat the cream in a medium sized saucepan over medium heat. Bring just to a boil. Immediately pour the boiling cream over the chocolate and allow to stand for 5 minutes. Add the butter and stir with a whisk until smooth. Add the ground ginger. Let cool to room temperature and use as desired.
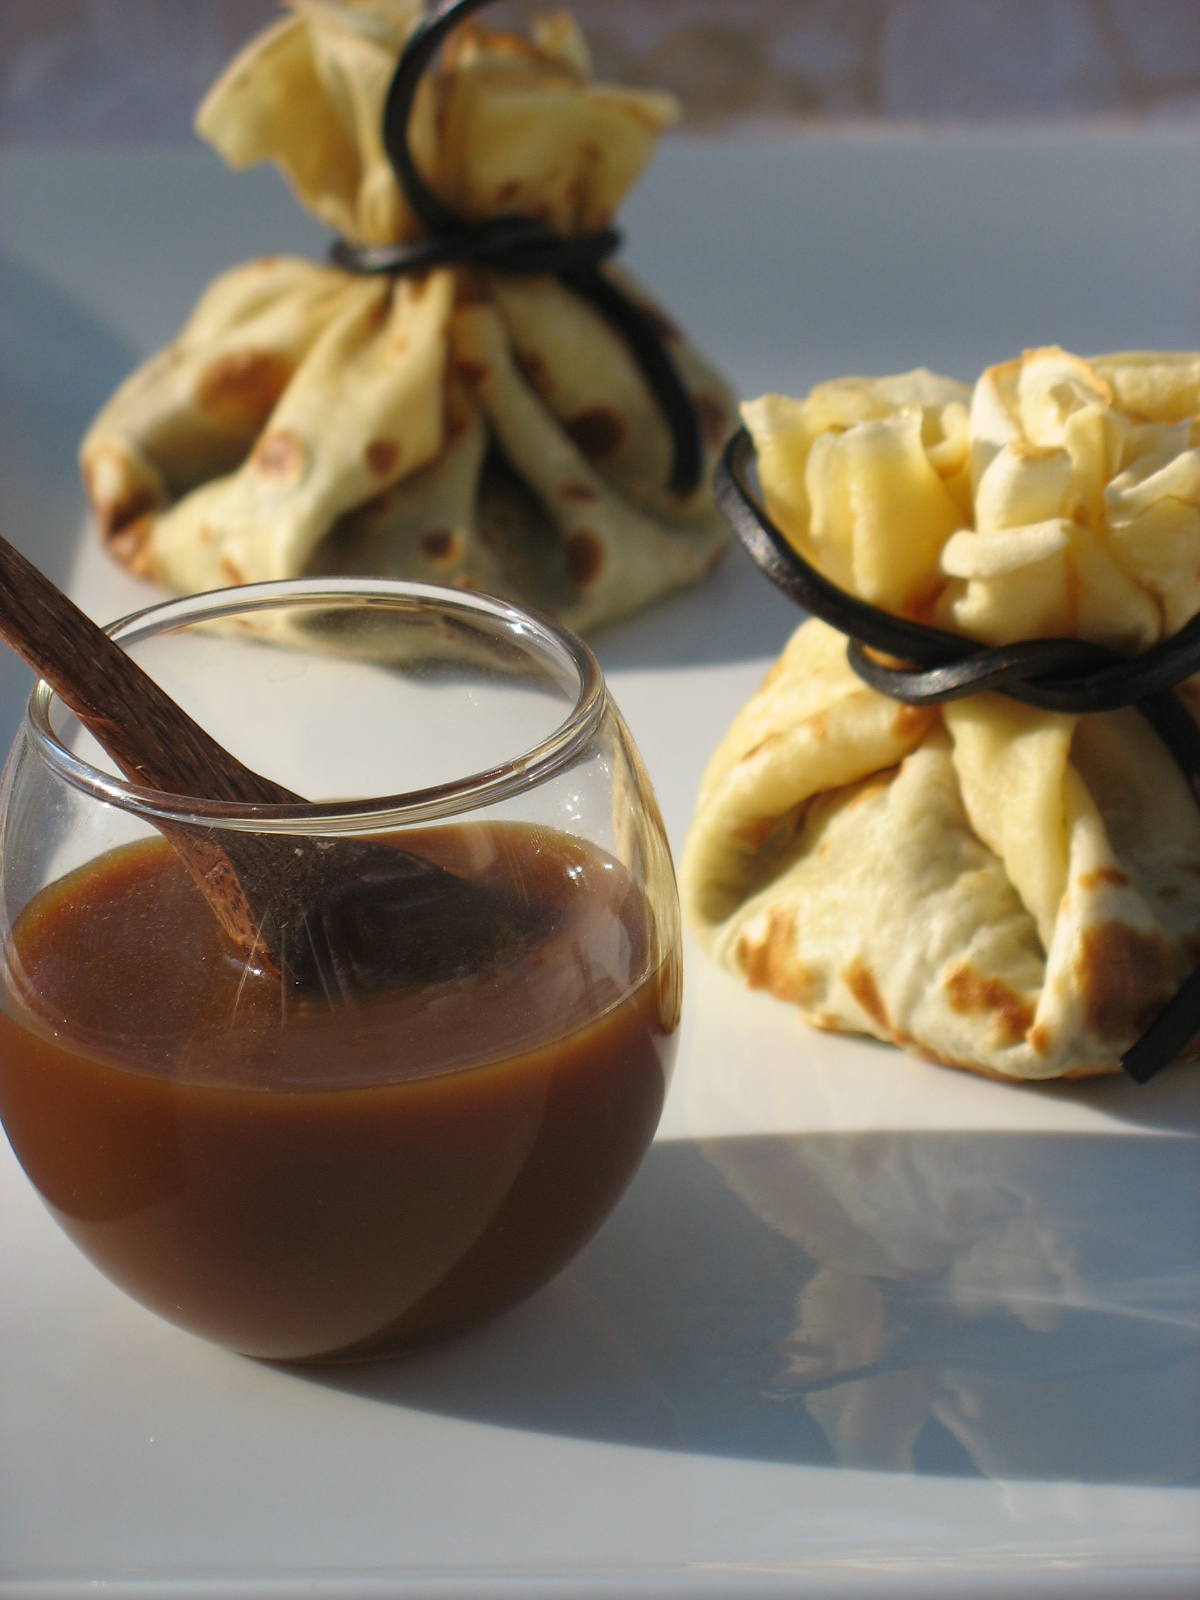
Under other circumstances I would have started this post with the title "Banana Crepes and Salted Butter Caramel Sauce", but Andrew wanted sauces to be the center of attention in this month "Waiter There Is Something In My…" so my favorite caramel sauce took center stage.
There are very few things I love more than crepes in the desser category. Summer or winter I do not mind standing in front of the cooktop and flipping a batch. Oh yeah, I am a flipper! As soon as that crepe is pulling out from the side and loose from the bottom, I will flip it. There is enough batter for a couple to end up on the floor (makes the dog happy) or stuck to the ceiling (makes the husband worried). I like them sweet with a spritz of lemon juice and sugar or filled with my mother’s strawberry jam. That’s when I am being good….When I am being bad, I will load them up with Nutella, bananas, drizzle some caramel sauce, a good amount of whipped cream and some chopped nuts. Maybe just some chocolate, coconut sorbet and again that awesome sauce.
Allright there is obviously something that I love as equally as my sweet crepes and it is that heavenly and damned salted butter caramel sauce. It is heaven on a spoon, soft and good, it is evil on your thighs, especially if you eat it at the rate we do! Try it once and there is no going back!! I noticed I always have jar of it in the fridge and it is one of the first things I put in goodie baskets for friends and family. It was not always so and I can’t believe I have let such a long time pass by before making it! I was first introduced to it while reading one of my favorite blogs, Chocolate and Caetera. Guillemette makes the most tempting creations and when I read her post about the sauce, I was hooked. I am sure that caramel sauce also helped win HHDD #10 Cheesecakes.
Now that everybody has been introduced, let’s proceed with the fun. If you read French, head over to Marmiton where you will find the crepe recipe under (I translated) "the best crepe batter in the world". Now if you post such a title, you’d better have some back up or a strong faith in your recipe! Well….It became "the best" I had made so far after I added 1/2 cup light beer to the batter. See, to me there is no crepe without beer or cider. It helps the dough relax better, it helps it become airy and light without adding too much butter or oil to the batter.
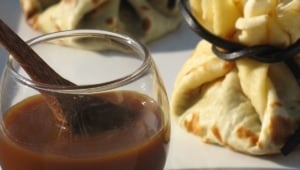
The banana filling pretty much came together as I was going along….can’t mess up too much cooking nanners in butter, sugar and rum now can you?!! Once the crepes were flipped and filled I tied them up in little bundles with cut strings of licorice. The sauce served alongside really gave them another dimension. Can’t you tell we enjoyed dessert that evening?!
Salted Butter Caramel Sauce
240 gr. sugar
80 ml water
115 gr salted butter
150 ml heavy whipping cream
In a heavy saucepan set over low heat, combine the sugar and water and heat just until the sugar is dissolved. Add the butter. Let it come to a boil and cook until it reaches a golden caramel color. Remove from the heat and add the cream ( it will splatter and get crazy, but do not fear and trust the recipe). Whisk to combine and put back on the stove. Let it come to a boil again over low heat and cook 10-15 minutes until you reach a nice creamy consistency. Pour into a jar and try to refrain yourself from drinking it!
Crepe Batter
Makes 12 crepes
250 g flour
2 cups milk
3 eggs
1 Tb. oil
pinch of salt
1/2 cup light beer
In a blender or food processor, combine all the igredients and pulse until fully incorporated and no lumps remain.
If you decide to do it by hand: combine the flour and salt in a bowl. Make a well in the center and add the eggs, oil and a little bit of milk. Work the batter with a whisk, and slowly add the remaining milk, until the batter comes together and the lumps disappear. Add the beer.
No matter what method you used, strain the batter if necessary. Refrigerate, covered for an hour.
In a saute pan set over medium high heat, laddle 1/4 -1/3 cup batter (depending on the size of your pan) and cook 1-2 minutes on each side.
For the filling:
This is not a recipe per se because I only made enough for 4 crepes:
Cut 4 bananas into thin slices. In a pan, melt 4 Tb sugar with 4 TB butter, add 1/4 cup rum and cook until the sugar is melted. Add the bananas and cook them until soft. Remove them fom the pan. Let cool.
Melt 1/2 cup of dark chocolate with 1/4 cup heavy cream in the microwave.
To Assemble:
Fill each crepe with about 2 Tb. melted chocolate and 14 cup bananas. Gather the edges of the crepe together and tie up with a string of licorice. Serve with plenty of caramel sauce.
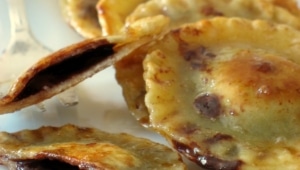
Yes, I know…it may sound weird but they were utterly delicious! What prompted me to venture into the world of dumplings, ravioli and other dough wrapped around a filling was this month’s installment of Waiter, There’s Something In My…Dumpling, hosted by Johanna from The Passionate Cook. The directives were very generous with the definition of "dumpling" so it enabled your little Tartelette to go ahead and make one of her favorites: Toasted Hazelnut Ravioli.
It all started one winter weekend that we hosted a crepe party with our neighbors and I made my favorite crepes by filling them with Nutella and smothering them with a Frangelico Caramel Sauce. After the guests were gone and our plates licked clean, I started looking for a way to make sweet ravioli. I have made pasta dough before, painstakingly rolling it out by hand since B. said no to a pasta machine (he likes his countertops bare…like that is possible with a baker in the house!!), so that process was not new to me. I love toasted and grilled everything and very often end up toasting leftover savory ravioli and topping my salads with some and some cubed mozzarella and freshly cut basil..yumm..But I disgress, this is a sweet blog after all…
The sweet ravioli dough comes together very fast in a food processor and beside the rolling (very thin) part, it is a cinch to make. I thought about serving them with a dark chocolate ganache on the side, but after everybody had a couple of bites, the general consensus was that the Frangelico caramel sauce was quite enough. It is a multi step recipe but the dough needs to rest for a couple of hours and up to one day. You can make it, roll it out, fill and boil the ravioli later on and toast them right before serving. They are great with a scoop of vanilla ice cream and more caramel sauce drizzled on top!
Toasted Nutella Ravioli:
5 oz. semolina flour
1 ½ oz almonds
1 oz flour
1 oz. sugar
1 egg
¼ cup to 1/3 cup milk
Put all the dry ingredients into a food processor and pulse until the nuts are finely ground. Add the eggs and ¼ cup milk and pulse until the dough comes together. If it does not seem smooth, slowly add the remaining milk, one tablespoon at a time, until soft and smooth but not sticky. If your dough seems to wet, you can add some flour, one tablespoon at a time until it becomes a little dryer. The dough is versatile enough to let you play around until you get it to the right consistency.
Place it a bowl and cover with plastic wrap. Refrigerate for at least 2 hours, up to one day.
When ready to use, roll it out very thin on a lightly floured surface. If you have a pasta machine, I’ll let you decide the setting since I am not familiar with them, but it want the dough to be paper thin. Cut out rounds with a cookie 3 inch cookie cutter, fill with a heaping teaspoon of Nutella. With a pastry brush, lightly brush some water around the edges, place another round of dough on top, smooth out any air pocket and seal gently with your fingertips.
Boil the ravioli like you would fresh savory ones, about 5 minutes, drain. At this point you can layer them in between sheets of parchment paper and refrigerate until you are ready to toast and plate them.
For the sauce: Melt together 2 Tb. butter, 2 Tb brown sugar ad 2 Tb Frangelico until the sugar melts and the sauce becomes thick. Set aside.
To assemble: Melt some butter in a sauté pan (or coat with cooking spray) and toast the ravioli until golden brown. Plate them and drizzle some caramel sauce over and enjoy!
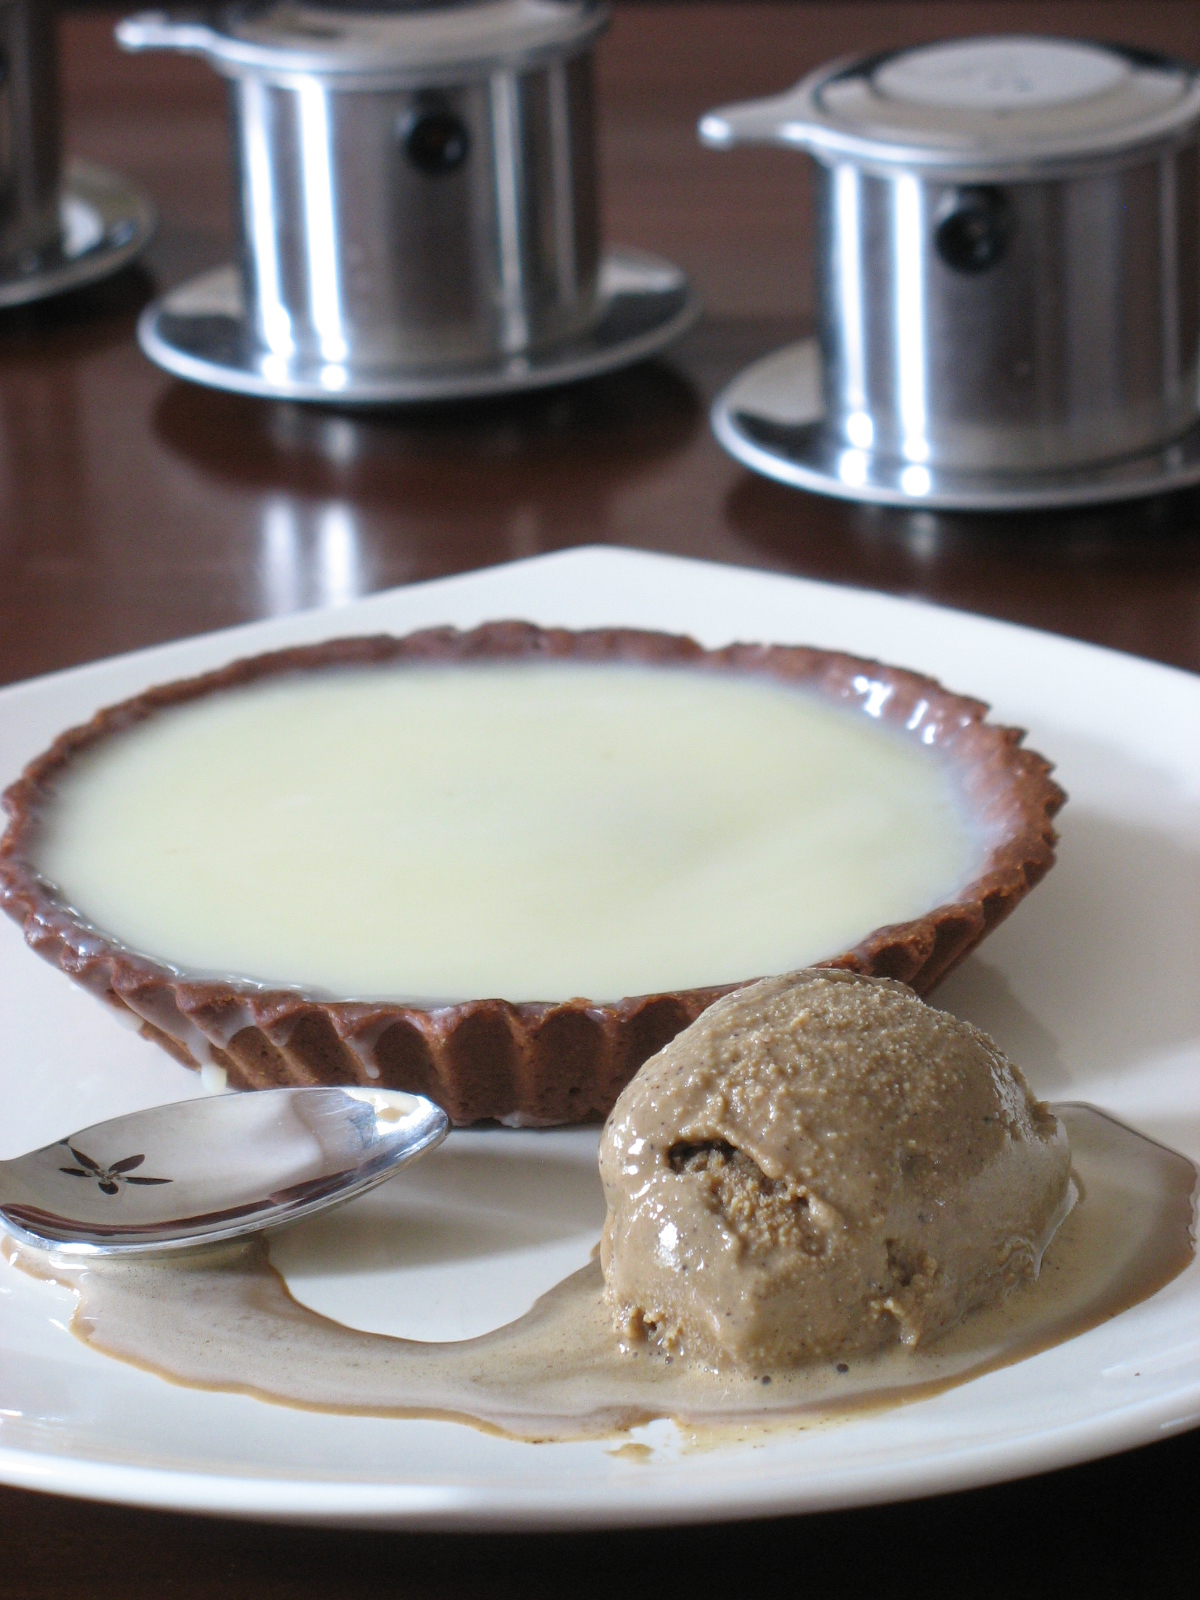
I wish I could remember when I first heard about the Vietnamese coffee filters you see in the pictures. Was it in a magazine, on a food show on tv…dunno… All I know is that I thought they would be a great piece of conversation when time came to serve coffee to my guests. I love having friends over and to me plating foods in fun or interesting dishes is as much important as making or eating it. These work like mini French coffee presses, you just set them up on top of your cup or mug, pour some coffee into them, screw the lid and let the water drip. I have had them for about five years now and I use them constantly not only because they are fun, but they give the best coffee too.
In France, Asian food is very different than here and I remember going to more Vietnamese restaurants than Chinese or Thai, and as a kid I would automatically go for ice cream or fruits and not coffee to ed my meal. My parents would always end up their meal with a little cup of sake, the ladies' cups would have a little flower in the bottom and the men’s the picture of a naked lady…don’t ask me why, but we (the brother and I) thought that was truly hilarious especially around 7-8 years old. Anyway….no Vietnamese coffee in all my childhood years of eating Vietnamese foods…It was not until I got here to the US that "Roomie" introduced me to Vietnamese coffee and I have been hooked ever since! If you are a coffee drinker what not try this sweet but light combination of sweetened condensed milk topped with Vietnamese coffee or if you can’t find it, a French roast or a coffee with chicory.
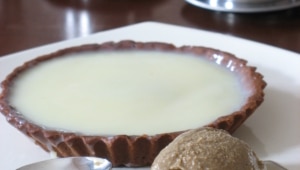
A couple of weeks ago, Old Chef and I were playing our favorite game: come up with new menu items for upcoming catering functions. B. thinks it is hilarious to watch us elaborate because we seem to have a language of our own, a mix of French and English, words flying across dishes and piles of notes, sketches of towering concoctions of sugar, butter, cream, fruits, nuts,… We love doing that over a good cup of coffee at the end of an event or after a long day on the phone placing orders and visiting purveyors. I knew he would like Vietnamese coffee as much as the filters necessary to make it and after a cup or two, we had come up with a couple of different desserts featuring it. These tartlets and ice cream are one of them….yes, you’ll have to stay tuned for next week’s second installment because today’s dessert is not the one we decided we would keep in the end.
This one was not bad but the white chocolate ganache was overly sweet. Since we try to be cost effective, and we foresee people leaving half the tart on their plate even if we make them smaller, we decided to make another version. Don’t get me wrong, the flavors are great: coffee, cardamom, white chocolate, dark chocolate, and work well together but the white chocolate is the overkill with a condensed milk sweetened Vietnamese coffee, no matter how powerful.
In the meantime, here is part one of our experiments:
Vietnamese Coffee Ice Cream:
6 large egg yolks
2 cups whole milk, divided
1/4 teaspoon salt
1 (15-ounce) can sweetenedcondensed milk
1/4 cup freshly ground French roast coffee
Whisk egg yolks in a large bowl and set aside.
In a medium saucepan over medium heat, heat the milk to scalding with the groud coffee. Pour 1/3 hot milk over yolks, whisking constantly until well combined. Pour in remaining hot milk, then pour mixture back into saucepan and return to low heat. Stir constantly until mixture has thickened enough to coat back of wooden spoon. Remove from heat and stir in the condensed milk. Strain in a fine mesh colander to filter out as much of the coffee grounds as possible. Let cool to room temperature, cover ad refrigerate until completely cold. Freeze in an ice cream machine according to manufacturer’s directions.
For the Dark Chocolate Tartlets Dough:
1/4 cup toasted and skinned hazelnuts
1 cup powdered sugar, divided
1/2 cup (1 stick) unsalted butter
1/4 cup cocoa powder
1/4 teaspoon salt
11/3 cups all-purpose flour
2 large eggs
Place hazelnuts and 2 tablespoons confectioners’ sugar in food processor. Pulse until the nuts are finely ground. In bowl of electric mixer fitted with paddle attachment, cream butter, cocoa powder, ground nuts and salt on medium speed until well-combined. Slowly add remaining powdered sugar and flour and mix well. Slowly add eggs and mix until incorporated. Shape dough into a ball and flatten into a disc. Wrap with plastic wrap and refrigerate overnight.
When ready to use, roll in between sheets of plastic wraps and cut out rounds to fit 4 4-inch tartlet molds. Prick with a fork and bake at 350F for 15 minutes. Let cool completely.
For the Cardamom White Chocolate Ganache:
2 pods cardamom, crushed
1 cup heavy cream
12 oz white chocolate
Set the white chocolate in a bowl. Heat the cream with the cardamom until very hot. Pour the cream over the white chocolate. Let sitfor a couple of minutes and stir until completely smooth. Pour into the cooled dark chocolate tartlet shells.and refrigerate until set.
To plate: make yourself a nice cup of coffee and serve the tartlets with a generous scoop if ice cream.
Note: I was going to post this tuesday night but decided to do a little roud of my favorite blogs and went right away to visit my girl Anita at Dessert First and stumbled upon her latest delectable creation: Chocolate and Vietnamese Coffee Tart ! I am not surprised anymore when Anita, Bea and I share a dessert with you guys and they are eerily similar in concept or taste (and believe me it has happened more than once!)….all 3 of us are Taurus!
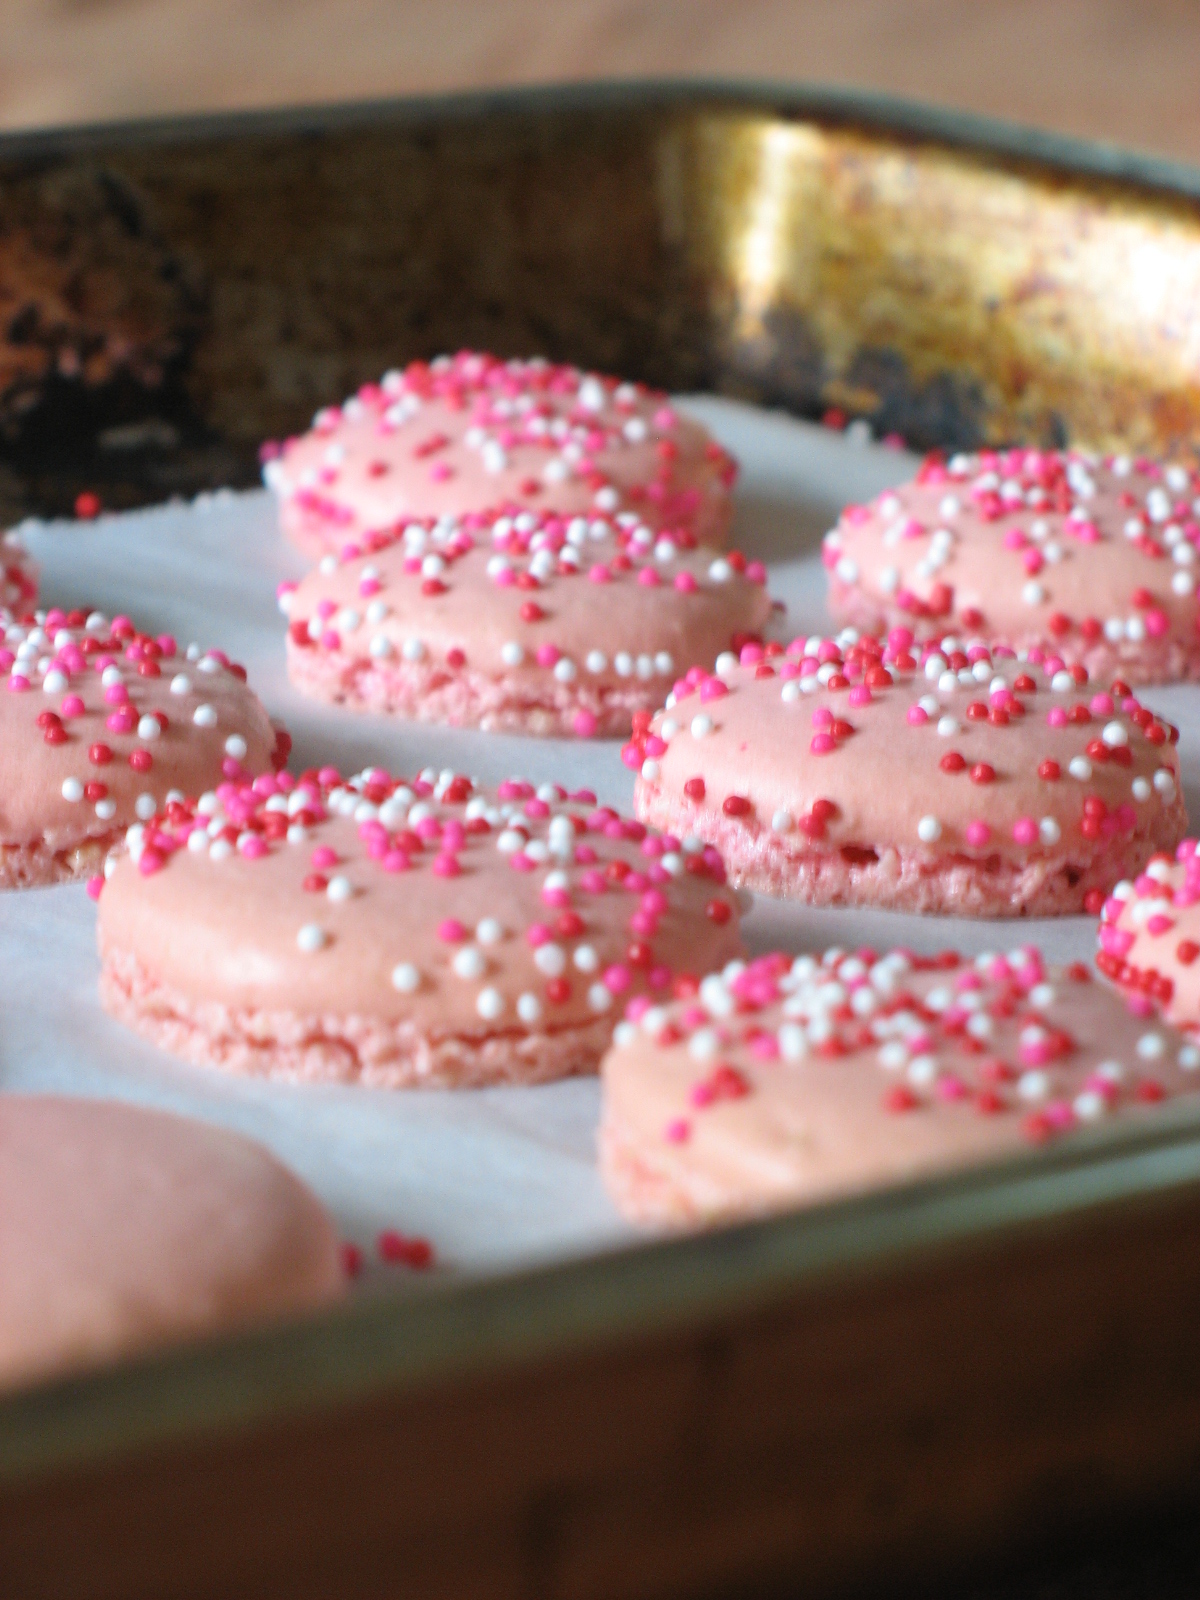
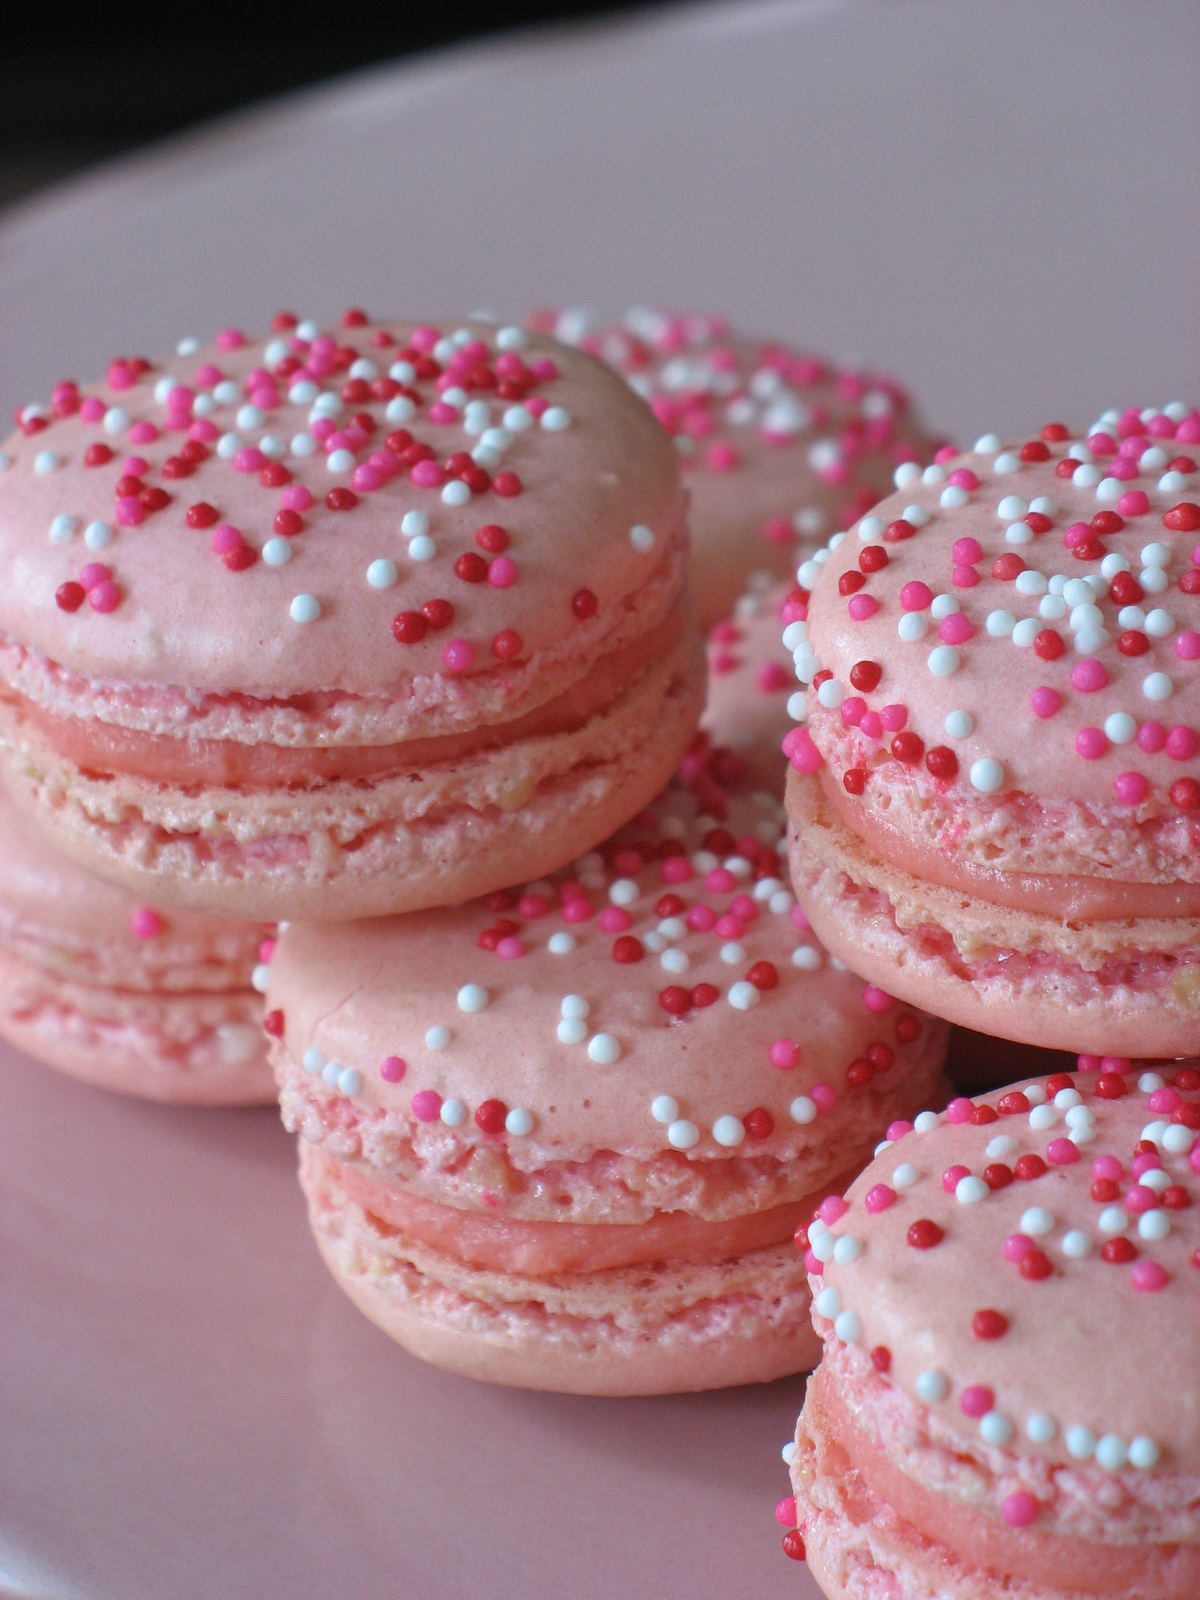
Pink macarons, ok…but what is "tagada" you may ask. "Fraises Tagada" is one of my childhood favorite candies, and it is pink, and it is good and it makes me giddy like a kid again. I just like saying the name over and over! Since I introduced B. to the line of Haribo candies, the licorice rolls and "fraises tagada" have become his favorites, so it was no surprise that when we came back from Christmas with my parents in France that we had several bags tucked away in our suitcase. I thought we had gone through all the stash when I found a bag that had fallen behind my pastry box. The candy is like little pink pieces of strawberry flavored marshmallows.
I know I said May was the month of things pretty and delicate but when you read the reason why I made these, you will understand.
I started thinking about these ever since I saw Requia' post about a pink event to support the fight against breast cancer. I wanted to make them very pink and very giddy…Well, yeah I am weird: just looking at them makes me happy, feels me with hope and the color even calms me down. I put it in the back of my mind until Bea’s savory pink "verrines" reminded me it was high time I cranked up the mixer.
Cancer makes no distinction of gender, reace, age and social status. We live with cancer, know somebody with it and hold the hands of too many friends going through the same thing. Cancer is global, cancer is universal…so is hope, so is the fight against it. A few weeks ago I participated in Barbara's yellow event for LiveStrong Day, and today I want to pay tribute to all the women and men devasted by breast cancer.
I also wish to pay tribute to my grandma who found out in her early 8os (yes, you read right) that she had breast cancer. When her doctor suggested biopsies, exams, breast removal and what not, she looked at him straight in the eyes and said "you’re crazy…let me live". AH!!! And there you have it, my grandmother in a nutshell…and the essence of the way I lead my life. She passed away at 93 from a cancer that had invaded her tiny frame but never her spirits or her will to live.
Now, and before you all start to yawn…These are just plain macarons shells colored with neon pink powder dye, with different pink sparkles and filled with a "fraises tagada" and white chocolate ganache. For the macaron shells I followed a different recipe than my favored Italian meringue one, and with good results. The first tray looked like the meringue was not folded enough so I gave it a couple of extra turns and the remaining tray turned out beautiful…I think I could get addicted to this lazier method!!
Pink Macarons and Fraises Tagada White Chocolate Ganache
In a food preocessor, grind the almonds and powdered sugar togther to make sure they are really fine. Pass through a sieve and set aside.
Note: when I process them very fine, I usually skip the sieving step and just break any lumps with my fingers.
Start whipping the whites on low speed to break them up, and slowly increase as to obtain a soft foam. Slowly add the granulated suage, one TB at a time until the meringue is tight and glossy.
Stop the machine and fold in the coloring and the almond/powdered sugar. The batter should flow like magma. Try a spoonful on a plate. The little peak created by the meringue should flatten when tapped on the counter top.
Line 2 baking sheet with parchment paper and preheat the oven to 300 F.
Fill a pastry bag with the batter and drop rounds on the baking sheet. Add the sprinkles. Let dry for 30 minutes and bake for 10-12 minutes.
Once they are cooled. Fill each with about 1 Tb. of the ganache.
Fraises Tagada White Chocolate Ganache:
2 cups fraise tagada candy
1 cup white chocolate chips
1/2 cup heavy cream
Heat the cream until hot. Drop the chips and candy into the cream and stir until all are melted and come together. Let cool.
If you read French, here are some more "Fraises Tagada" recipes:
First of all, I would like to thank all of you for wishing me a Happy Birthday (32 for the curious). You sure know how to make a girl feel special!
Late wednesday night I was cleaning the kitchen after an afternoon of baking and macaron making when I gave a serious look into the fruit bowl: the bananas I had bought two days earlier were already having a mini meltdown. It is quite amazing how fruits wilt faster than you can use it over here. At first, I thought of the usual: bananatartelettes, bread puddings, muffins, cakes, breakfast treats…
It was hot you see, so I went for a cold treat instead and I am glad I did. I was tempted to make ice cream but changed my mind for something a little bit more elaborate when I learned we might have company on thursday night. Our dinner party did not take place but I was able to serve this to B. and the neighbors tonight while playing cards.
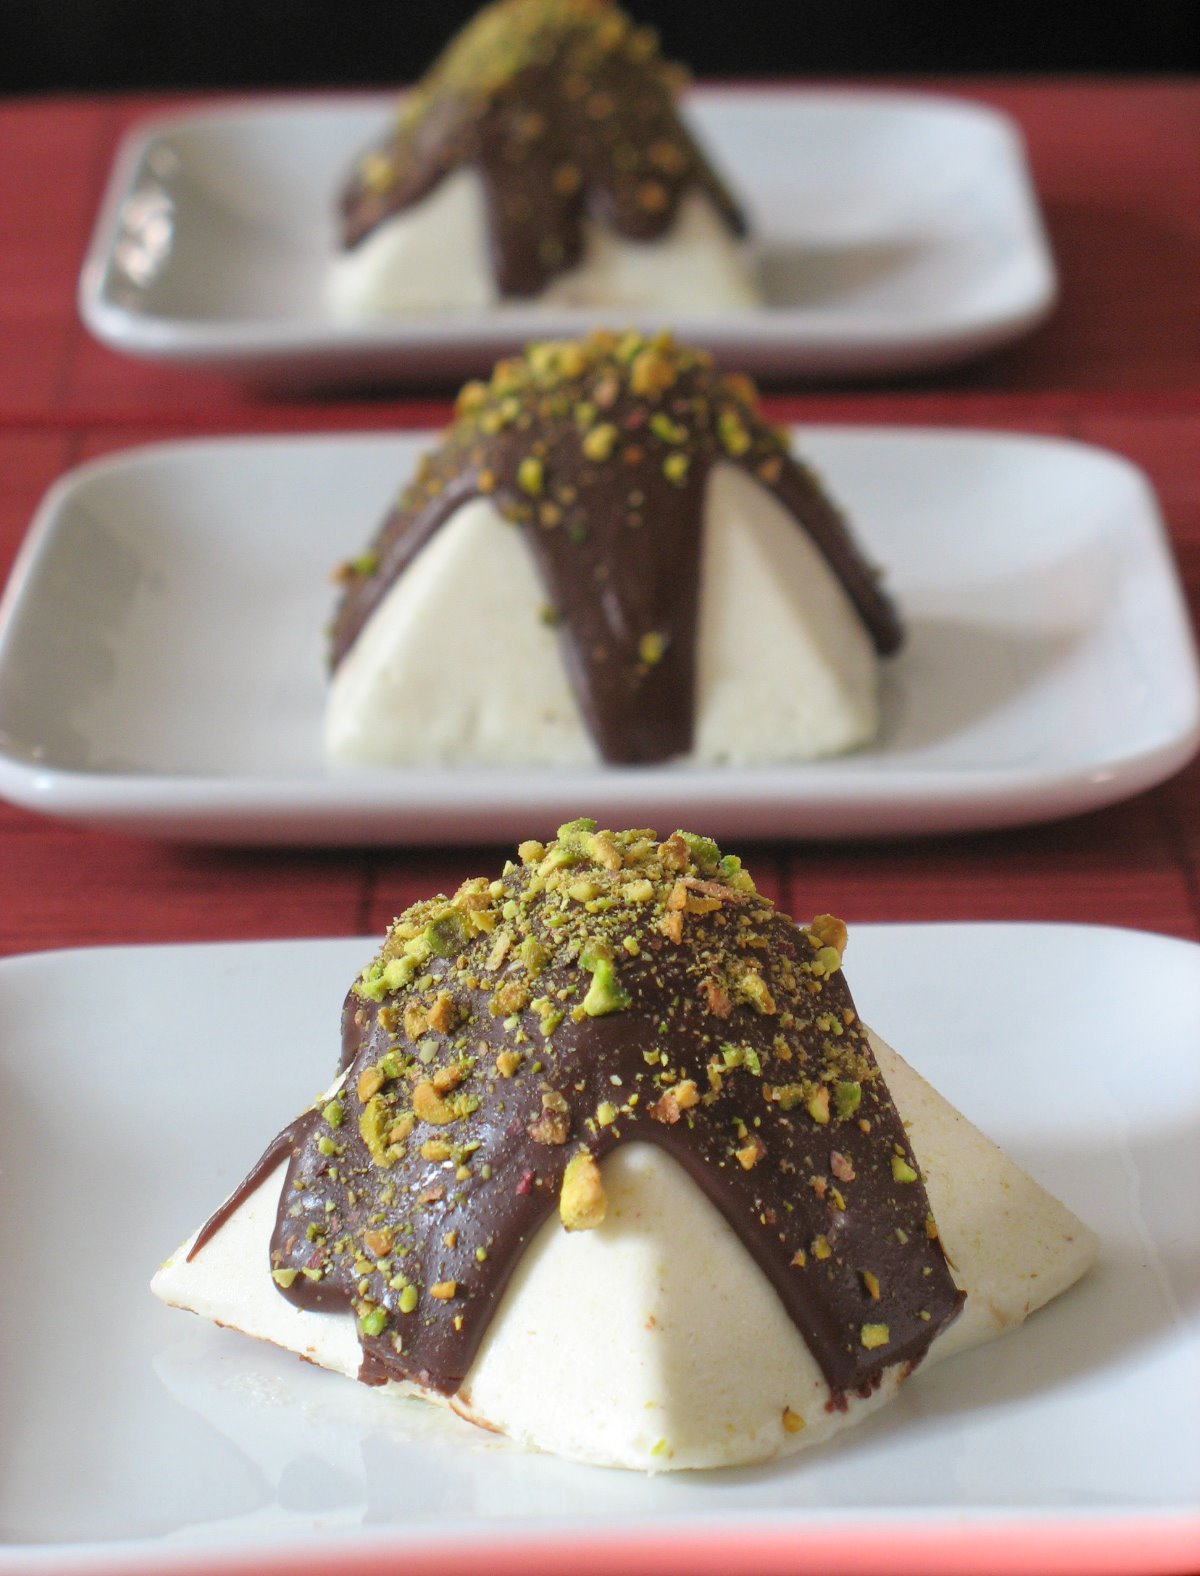
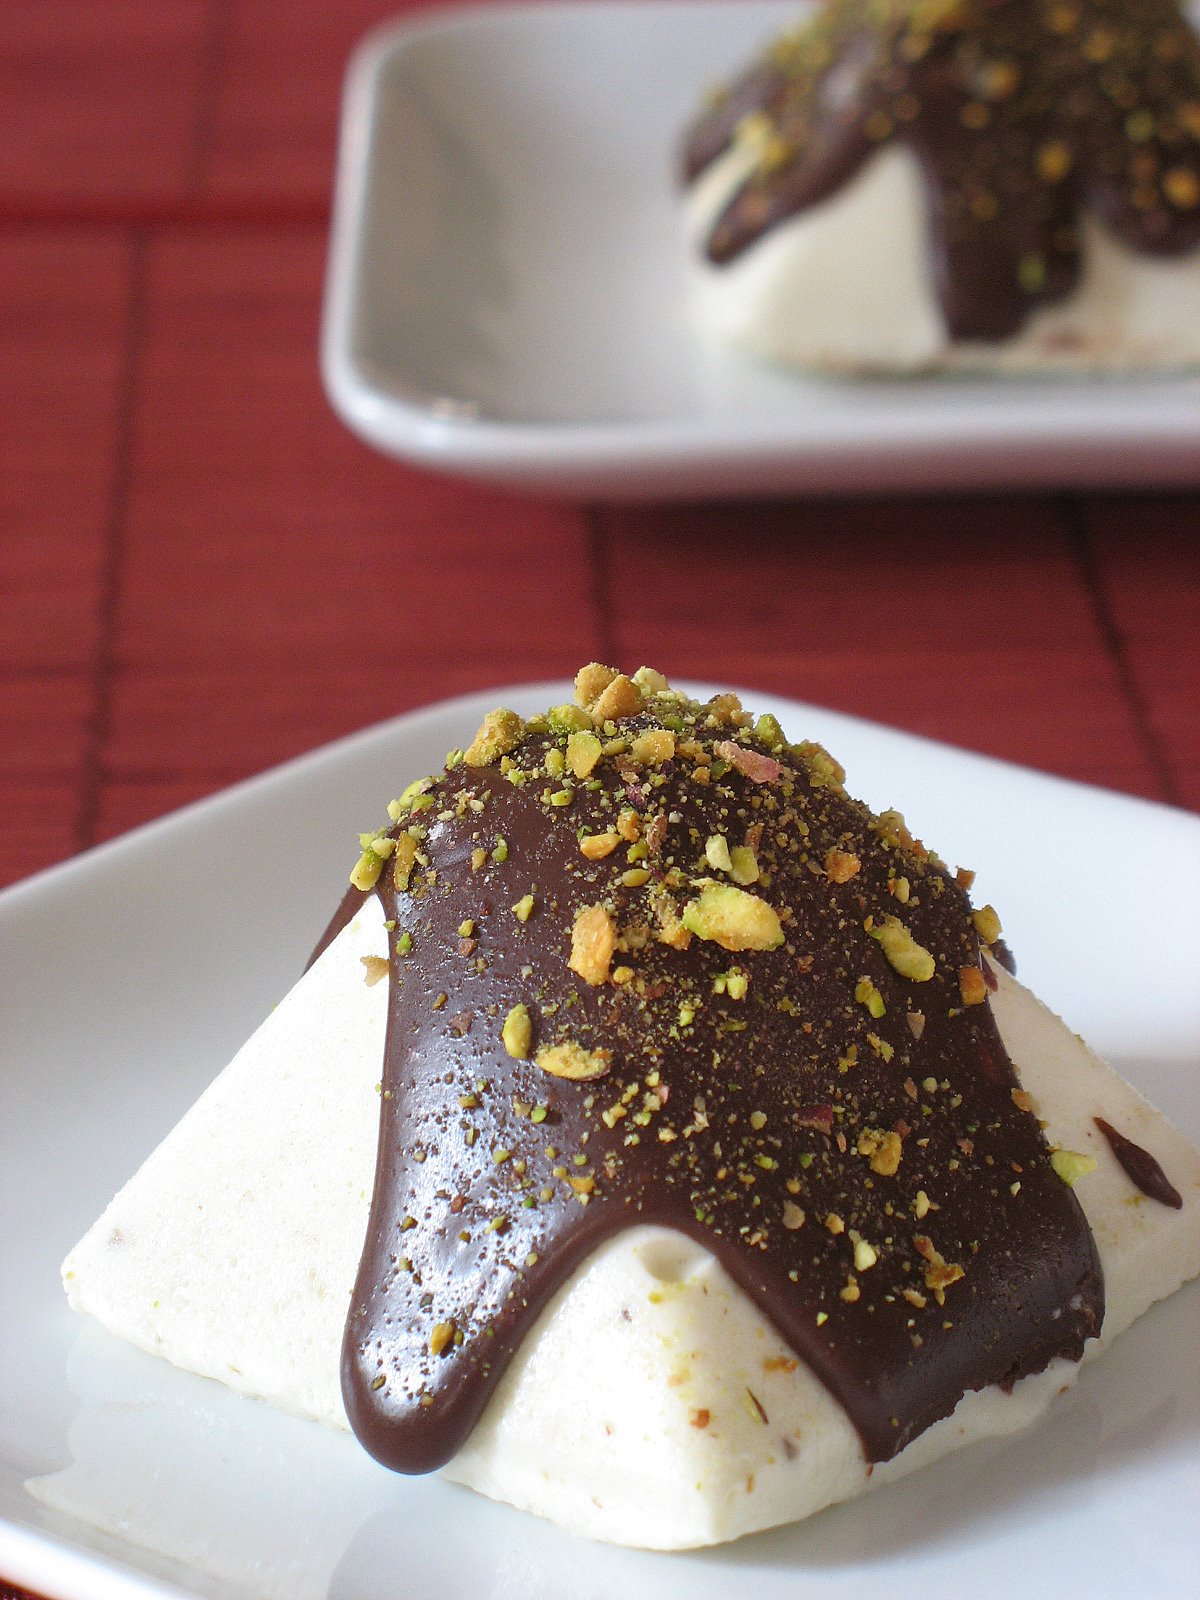
These parfaits were adapted from my other Sugar Daddy, Richard Leach. I have been mesmerized by his creativity, techniques and use of seasonal produce. His book might seem daunting at first but there is not one recipe that did not turn out delicious and even if one dish is made out of 4-5 elements you can definitely make them separately, like I did with these Banana Parfaits. I made the original recipe (post later this week) then had enough leftover parfait batter to make individual servings without guilding the lillies like he did (nothing wrong with that but I have more than one job and less than one day to do them all!).
Banana & Mascarpone Mousse Parfaits, inspired by Richard Leach:
Serves 8
2 eggs, separated
1/2 cup sugar
1 cup pureed bananas
1/2 cup mascarpone, at room temperature
1 cup heavy cream
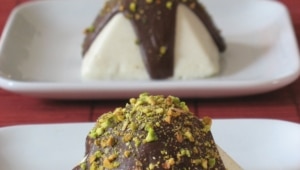
In an electric mixer bowl, whisk the egg yokls and 1/4 cup of sugar until pale and fluffy. In a separate bowl, stir the banana puree and mascarpone until smooth. Fold the yolk mixture into the banana mixture. Whisk the egg whites until firm peaks. Add the remaining 1/4 cup of sugar, 1 Tb. at a time and continue to whip until glossy. Fold the whites into the banana mixture. Whip the cream to soft peaks and add to the banana mix. Spoon into different shape molds. I used silicon pyramid shaped ones. Freeze overnight.
Chocolate Glaze:
Heat 3/4 cup heavy cream to boiling point. Remove from heat and add 1 cup dark chocolate chips. Let stand for 2 minutes ten whisk until incoporated. Let cool to room temperature
To assemble: Unmold the banana parfaits and drizzle the chocolate ganache on top, sprinkle with pistachios if desired.
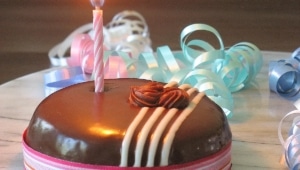
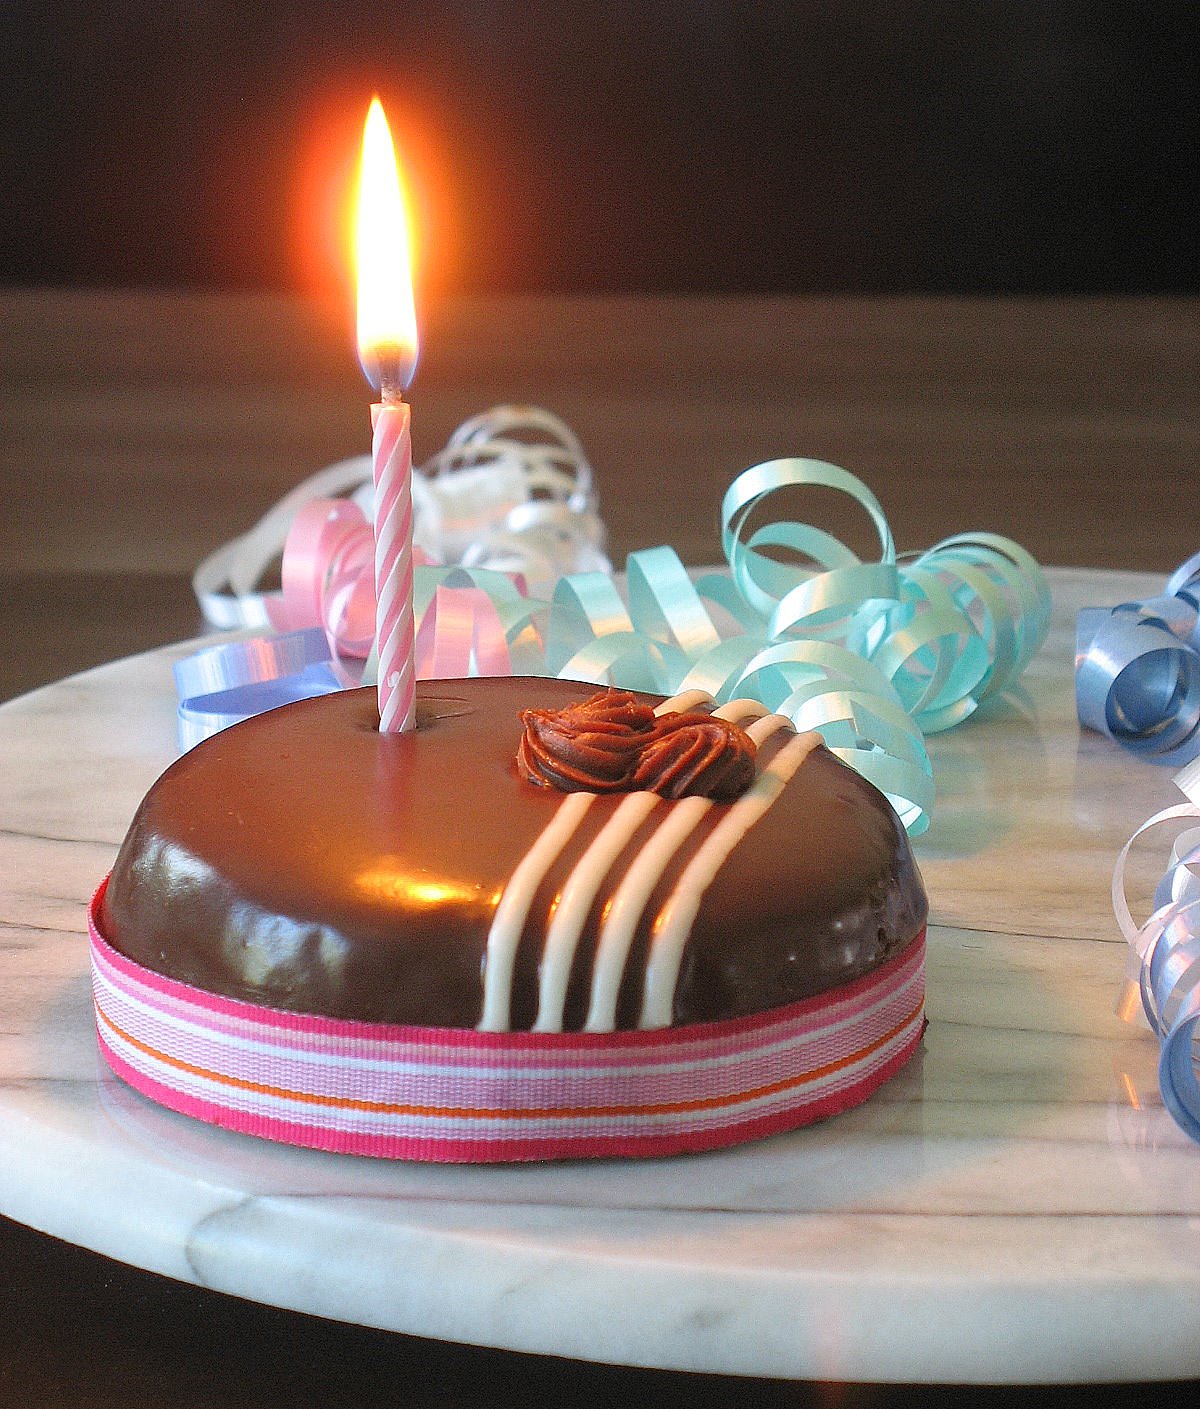
Tomorrow is my birthday (30 something and rocking…) and Kate’s (20 something and rocking…)
I had no idea when I started this blog over a year ago that blogging would come with benefits. Not only did I become part of a wonderful group of talented, supportive and Daring Bakers (if you knew how fantastic they are you’d get teary-eyed too), I have also been asked to be one of the co-administrators of the Daily Tiffin by my dear friend Meeta….and last but not least I have met a funny and talented young lady, Kate of Applemint while I was hosting HHDD 11.
After exchanging emails we realized we shared the same birthday: May 13th…. We decided to celebrate this coincidence that we would both bake each other a cake.
Euh…Helen, today is May 12th….Ah maybe here in northern America but in Hong Kong where Kate lives it is already the 13th and I want her to see my birthday cake as soon as she turns her computer on. She has made me an awesome lemon sponge with lemon grass and lime leaf mousse with mango compote jelly. I love it! I asked what her favorite flavor(s) was and the answer came in one sweet sentence: "anything with dark chocolate".
In her honor I made a deep dark Devils Food Cake with Dark Chocolate and White Chocolate Ganache.
1 1/3 cups all-purpose flour
1/2 cup unsweetened cocoa powder
3/4 teaspoon baking soda
1/2 teaspoon baking powder
1/4 teaspoon salt
1 1/4 sticks (10 tablespoons) unsalted butter, at room temperature
1/2 cup (packed) light brown sugar
1/2 cup sugar
3 large eggs, at room temperature
1 teaspoon pure vanilla extract
2 ounces bittersweet chocolate, melted and cooled
1/2 cup buttermilk or whole milk, at room temperature
1/2 cup boiling water
4 ounces semisweet or milk chocolate, finely chopped, or 2/3 cup store-bought mini chocolate chips
Center a rack in the oven and preheat the oven to 350 degrees F. Butter two 8-x-2-inch round cake pans, dust the insides with flour, tap out the excess and line the bottoms with parchment or wax paper. Put the pans on a baking sheet.
Sift together the flour, cocoa, baking soda, baking powder and salt.
Working with a stand mixer, preferably fitted with a paddle attachment, or with a hand mixer in a large bowl, beat the butter on medium speed until soft and creamy. Add the sugars and continue to beat for another 3 minutes. Add the eggs one by one, beating for 1 minute after each addition. Beat in the vanilla.
Reduce the mixer speed to low and mix in the melted chocolate. When it is fully incorporated, add the dry ingredients alternately with the buttermilk, adding the dry ingredients in 3 additions and the milk in 2 (begin and end with the dry ingredients). Still working on low speed, mix in the boiling water, which will thin the batter considerably. Switch to a rubber spatula, scrape down the bowl and stir in the chopped chocolate. Divide the batter evenly between the two pans and smooth the tops with the rubber spatula.
Bake for 25 to 30 minutes, rotating the pans at the midway point. Transfer the cake pans to a rack and cool for about 5 minutes, then run a knife around the sides of the cakes, unmold them and peel off the paper liners. Invert and cool to room temperature right side up. Cut 8 4-inch rounds with a cookie cutter. Refrigerate for a couple of hours.
For the glaze:
6 ounces bittersweet chocolate, finely chopped
2/3 cup heavy whipping cream
1 tsp vanilla
2 ounces white chocolate
Put the chopped chocolate in a medium bowl. In a small saucepan, bring the cream to a boil. Remove pan from heat and add the chopped chocolate. Let stand for 1 minute then gently stir until chocolate is melted and the glaze is smooth. Gently stir in the vanilla. Transfer glaze to a small bowl and cover the surface of the glaze with plastic wrap and let cool for 5 minutes at room temperature before using.
Place the chilled cakes, still on the cake round, on a wire rack set over a baking sheet. Slowly pour the hot glaze onto the center of the cake. Smooth the glaze over the top and sides, letting the excess drip onto the baking sheet . Melt the white chocolate and srizzle over the cake.
Kate, I wish you all the best for this new year and wish for the day that you can show me the sights of Hong Kong!
Since I’ll be celebrating my birthday out somewhere tomorrow, I take this opportunity to wish all mothers out there a wonderful Mother’s Day tomorrow. My mom will get her own special post June 3rd when they celebrate Mother’s Day in France.