
chocolate

Food And Photography – Guest Posting

Inspiration


Seeing my desserts through a lens, becoming the "director of photography" of my own baking ( and I say that in the lightest way possible, wink!)…I would have never thought I would enjoy it so much, live it so much and want to learn from professional food photographers. That’s why I have always refrained from answering readers' questions about food photography, (vast and subjective topic) but when Leemei from My Cooking Hut asked if I’d be interested to write about my experiences as a food blogger-photographer, I figured it was a sign I needed to sit down and do so.

We all blog differently, we all photograph differently and we all think about it differently, but in the end we all try to do something that is enjoyable and fulfilling for where we are at that moment in our life. Since some of you asked, I hope that you will take this guest post as it is: an account of my experiences and doings in "dessert photography" and not as a "photo 101". I leave that for the books and the pros, who will always be my source of inspiration.
Click for the photography guest post. Thank you Leemei for the opportunity!

Chocolate Cupcakes - Happy Thanksgiving!


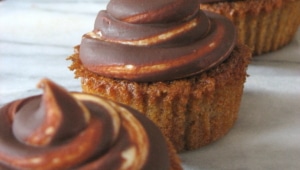
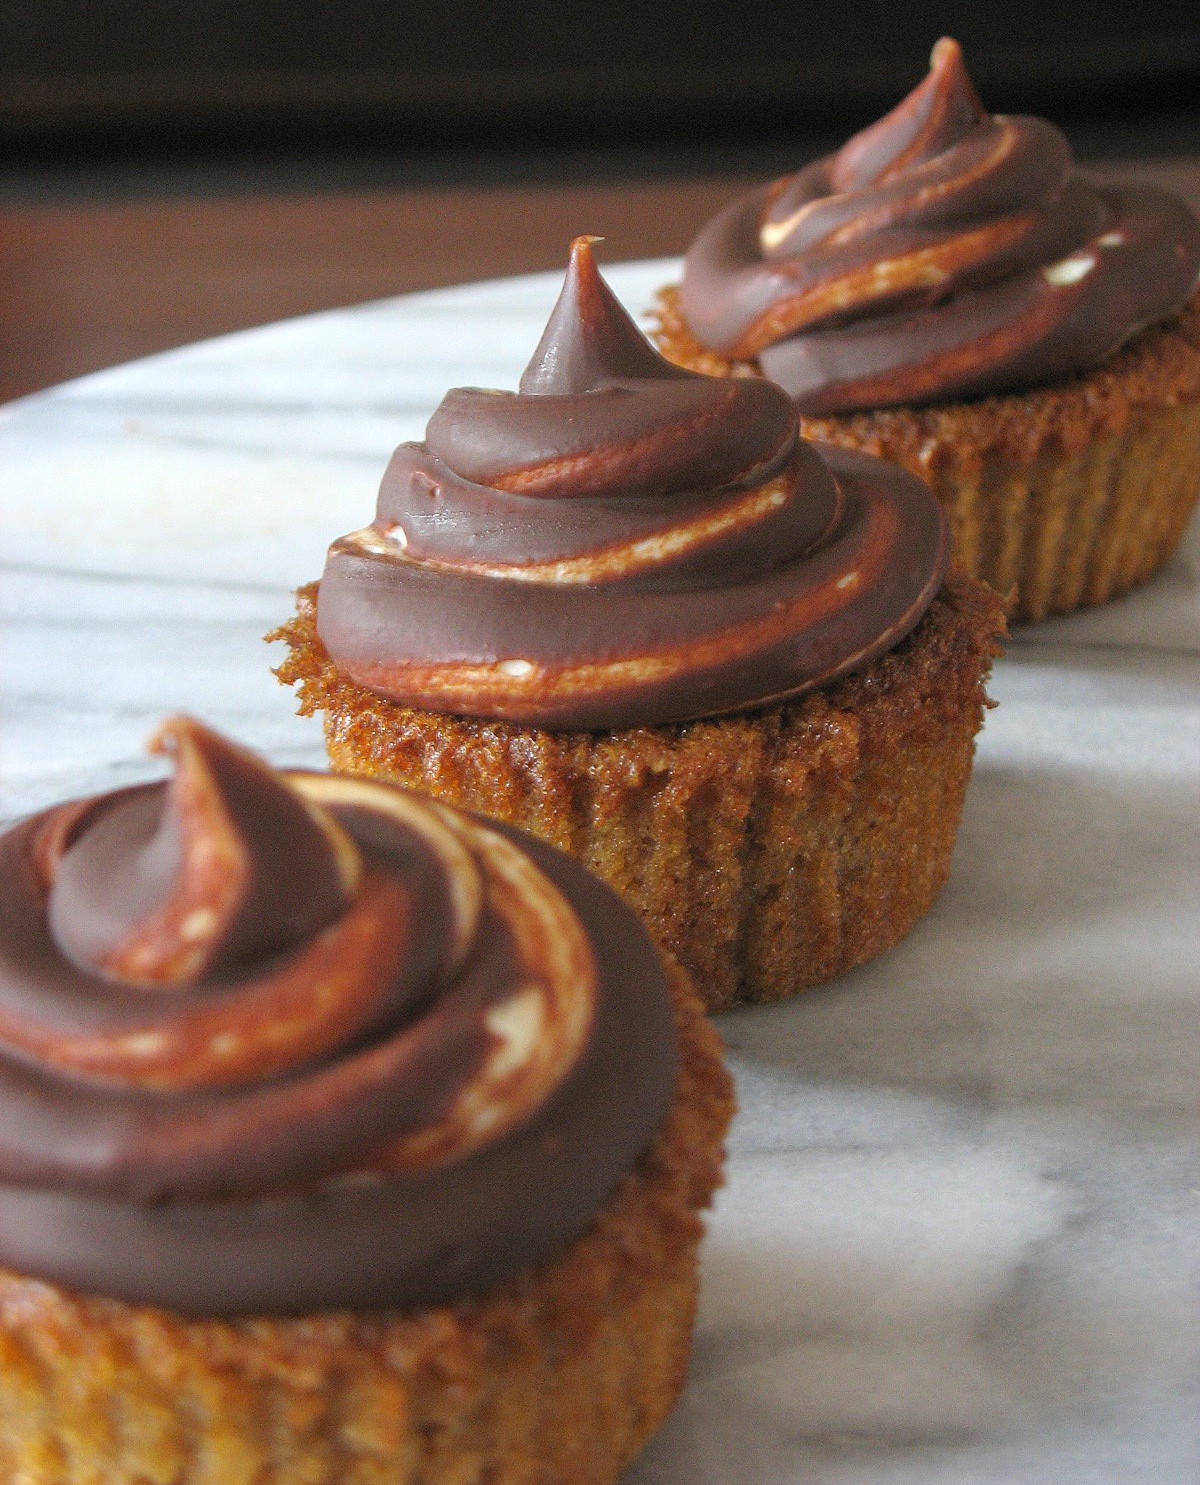
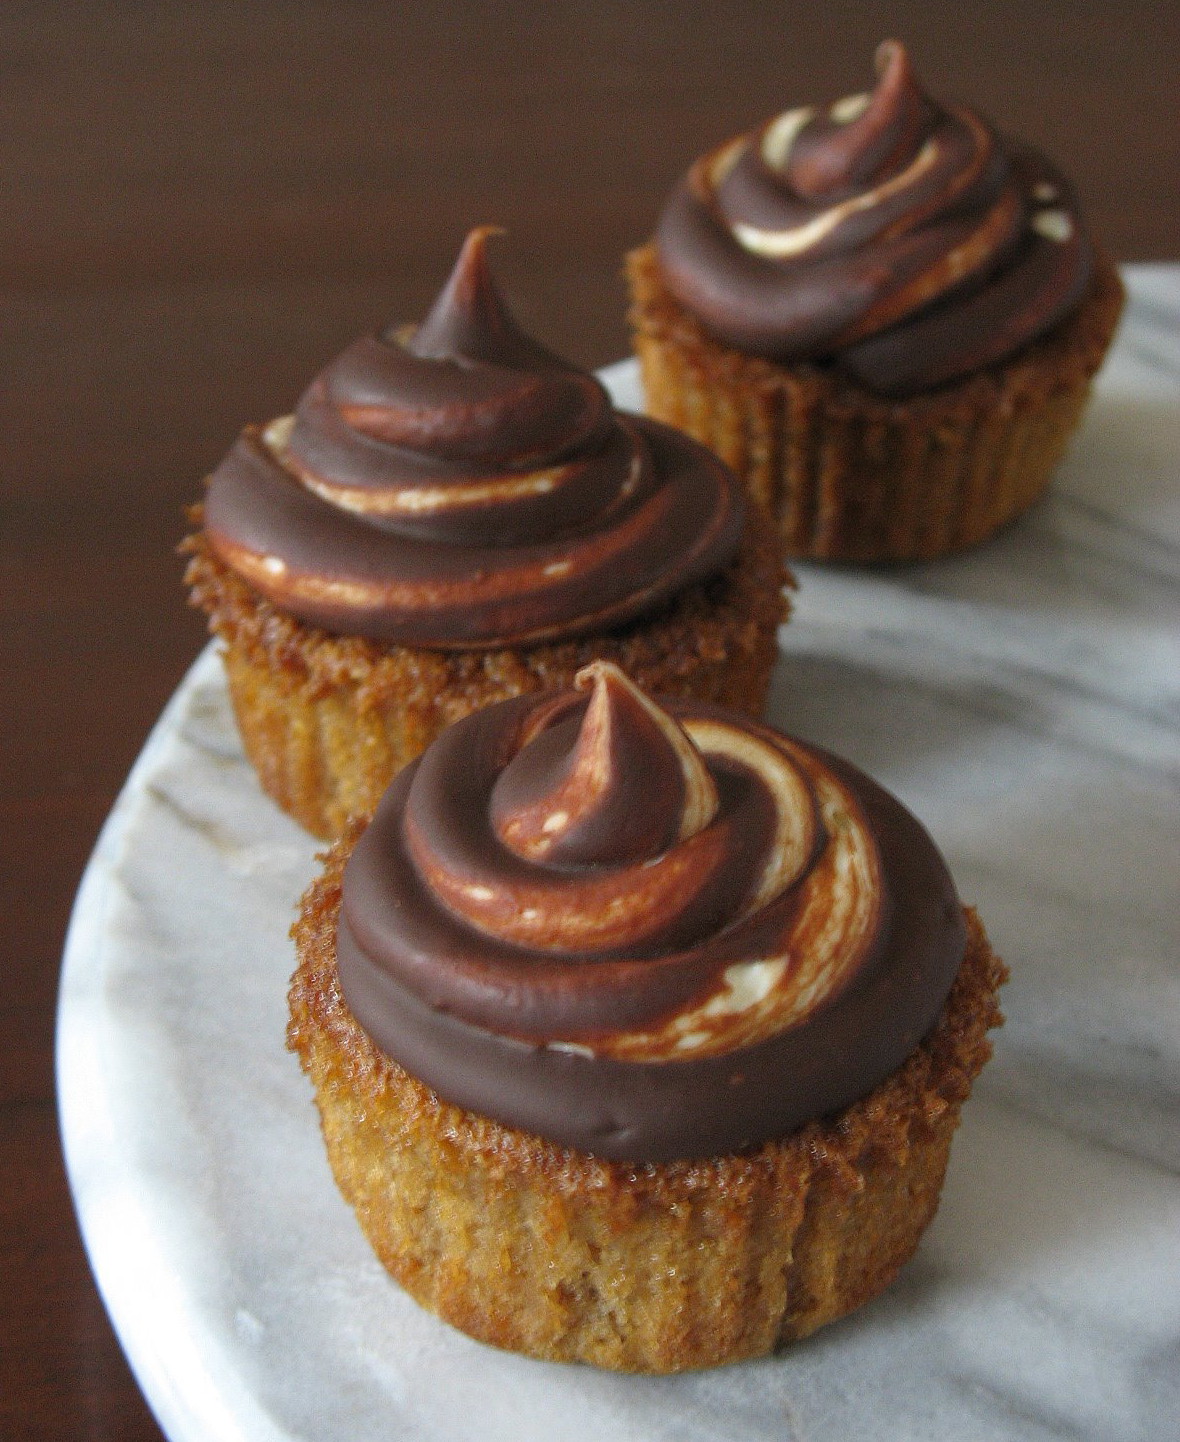
That would be rude to leave you without a dessert and a recipe wouldn’t it? My photo subjects for the guest post were chocolate buttermilk cupcakes with cream cheese buttercream. No intense bubbling sugar or multi layer dessert. I know how to kick back and relax too!! Actually I live surrounded by cupcake fiends so once in a while, it feels good to let loose whilst in the middle of baking and photographing for the book. There is something really satisfying in a simple chocolate cupcake, whether it be unwrapping that mini cake or adding sprinkles to it. Something so essential and basic when you are solitary writing and baking, that it brings you back to reality in just a few bites. Especially when your little nephew asks "Auntie Helen, can you make me chocolate cupcakes with snow frosting and plenty of sprinkles on top?"….Ah the simple things are good….

Buttermilk Chocolate Cupcakes:
Makes about 18-20 depending on the size.

4 oz fine-quality semisweet chocolate
1 cups hot brewed coffee
2 ½ cups unbleached all-purpose flour
1 ½ cups unsweetened cocoa powder (not Dutch process)
2 tsp baking soda
¾ tsp baking powder
1/2 tsp salt
3 large eggs
1 1/2 cups sugar
¾ cup canola oil
1 ½ cups buttermilk
1 tsp pure vanilla extract

Preheat oven to 300 degrees. Lightly coat the inside of your cupcake wrappers with cooking spray. In a bowl, combine the chocolate and the hot coffee and let stand, stirring occasionally until the chocolate is melted and the mixture is smooth, about 5 minutes. Sift together the flour, cocoa powder, baking soda, baking powder, and salt. Set aside. With your electric mixer, beat together the eggs and sugar until pale and thick (about 5 minutes). Slowly add the oil, buttermilk, vanilla, and the previously melted chocolate mixture to eggs/sugar mixture. Beat until well incorporated. Add the flour mixture in 3 increments and beat until smooth. Divide the batter among your cupcake liners and bake for about 25 minutes or until a knife or toothpick inserted in the middle comes out clean.

For the cream cheese buttercream:
1 1/2 sticks (170 gr) butter at room temperature
4 oz (120gr) cream cheese, softened
3 egg whites
1/2 cup (100gr) sugar
2 Tb water
1 tsp vanilla extract or vanilla paste or 1/2 vanilla bean split open and seeded.

In the bowl of stand mixer, whip the egg whites until they have soft peaks. In the meantime, combine 2 Tb water with the sugar to a boil in a heavy saucepan and bring the syrup to 250F. Slowly add the sugar syrup to the egg whites. If you use hand beaters, this is even easier and there is less hot syrup splatter on the side of your bowl and in the whisk attachment of the stand mixer. Continue to whip until the meringue is completely cooled. Slowly add the butter, one tablespoon at a time. The mass might curdle but no panic, continue to whip until it all comes together. Add the cream cheese, the same way, a little at a time until everything is smooth. Whisk in the vanilla extract, or paste or bean. Keep it in the fridge up to 4 days or in the freezer for up to a month.

*******************************************************************************

Sweet Work Part 2


The second part of my interview with Anita for the release of her book "Field Guide To Cookies" is up in the latest edition of Desserts Magazine! Watch out now….it’s a whole issue of just cookies! Perfect for this month of gift giving. No, I don’t get a cent for promoting the magazine, I just get excited when I see quality work and passion shared for food and baking in particular. Sharing….it’s all about sharing. Now…go get Anita’s book ok?!!!

Chestnut Cupcakes & Swirled Chocolate Frosting

I can never resist a sweet blogging event and when Cheryl of Cupcake Bakeshop and Garrett of Vanilla Garlic announced a Cupcake Round Up event, my mind started salivating….Oh yeah, by now it is not my mouth anymore…!

I have had less time these past few days to be as creative as I would like to (more personal training clients, crafts projects to finish up…) but I did not want to miss the opportunity to show up with something of my own at this event.
I had half a can of chestnut puree left from the other day so I looked for a recipe that would allow me to include it in the ingredient list without perturbing the other liquid/dry ingredient ratios.I got inspired by this recipe from Magnolia Bakery and the frosting came about according to what I add in the pantry and refrigerator. I love cream cheese frosting, I love chocolate and I love chestnuts. I did not want the frosting to be too sweet so I reduced the amount of powdered sugar one would normally use and used bittersweet chocolate. It was perfect to balance the smoothness of the chestnut. i kept them on the small side as B. is trying to watch his sweets intake and they made a perfect little bite to have with coffee after dinner.

Chestnut Cupackes with Swirled Cream Cheese and Chocolate Frosting, adapted from Magnolia Bakery:

Makes 12

1 cup all-purpose flour
1/2 teaspoon baking soda
1 stick unsalted butter, softened
1/2 cup granulated sugar
1/2 cup firmly packed light brown sugar
2 large eggs, at room temperature
3 ounces chestnut puree
1/2 cup buttermilk
1/2 teaspoon vanilla extract

Frosting:
4 oz. cream cheese, softened
2Tb. butter, softened
1/4 cup powdered sugar
4 oz. melted chocolate

Preheat oven to 350 degrees.
Line a 12-cup muffin tin with cupcake papers. Set aside.
In a small bowl, sift together the flour and baking soda. Set aside.
In a large bowl, on the medium speed of an electric mixer, cream the butter until smooth. Add the sugars and beat until fluffy, about 3 minutes. Add the eggs, one at a time, beating well after each addition. Add the chestnut puree. Mix well.
Add the dry ingredients in three parts, alternating with the buttermilk and vanilla.
Carefully spoon the batter into the cupcake liners, filling them about three-quarters full. Bake for 20–25 minutes, or until a cake tester inserted in the center of the cupcake comes out clean.
Cool the cupcakes in the tins for 15 minutes. Remove from the tins and cool completely on a wire rack before icing.

For the frosting: in a large mixing bowl, use a spatula to mix well the cream cheese, butter and powdered sugar.
Paint the inside of a pastry bag fitted with a plain round tip with the melted chocolate. Spoon the cream cheese mixture in the bag and decorate the cupcakes in whirly motion.

End result? I made them on tuesday and they are already gone…talk about self restriction! Bad me!

Sugar High Friday 27: Chocolate By Brand

…or in my case "A Tale of Two Michels":

When I read about the chosen theme for this month SHF on David Lebovitz’s blog I let out a little sigh…chocolate? again? Unbelievable as it seems, even I, the chocolate lover, was starting to gravitate towards more fruit based desserts after my chocolate filled holidays. But I kept on reading because after all, once you fall for chocolate you just keep on reading and eating and baking,…. The idea for this month was to pick a brand, any brand of chocolate and cook/bake with it.

I have to admit that although I do not consider myself a chocolate snob, I tend to buy higher end chocolate bars and blocks rather than store bought for some of my baking. The results are incomparable, and so are the textures and flavors. I have bought evey brands out there I could find in hope that even a cheap bar could taste as good but most of the time I have been disappointed. If I am going to include chocolate in a cake I choose Callebaut or Schockinag. They melt well, the chocolate retains its flavor through high temperature baking and I still have connections to get some big slabs at a moderate price. I use Valhrona if I make ganaches, creams and custards because the flavor really comes through and your palate can really tastes the chocolate.

Everybody has a different opinion about what kind and what brand of chocolate tastes better to them. I believe that one has to try as many different kinds of choclate brands and cocoa percentages to know what appeals to them. There is no shame in proclaiming loud and clear your love for a particular kind, whether it be dark, milk or white (not really chocolate I know but good anyhow). I confess that I am a milk chocolate fanatic, and dark chocolate higher than 65% does not appeal to me. For some reason it coats the back of my throat and leaves a very acidic tastes on my tongue. I am always in search a good quality milk chocolate, not one over saturated with cream, but one that is one molecule removed from a very smooth dark chocolate.

While at the Grande Epicerie at Le Bon Marche, I was lucky enough to find 2 really interesting (to me) chocolate bars. In my pursuit to like darker chocolate I bought a bar from Michel Chaudun via Weiss chocolatier, 70% dark chocolate with cocoa nibs. The second one was a milk chocolate bar from Michel Cluizel, "1er Cru de Plantation ‘Mangaro’ Milk Chocolate ".

I had a nibble of each the other day, and then I stacked one square of each and popped them in my mouth…and then I repeated this last bit by stacking them on top of a shortbread cookie…and then I wished I had a dozen or so of them…! But they were not easy to eat like that, if only I could melt them and serve them in a little shortbread crust… The solution was very easy: a chocolate ganache tart, and because I would melt the milk chocolate with an equal amount of dark chocolate the cream would not overpower the object of my desire.

Thank you to the two Michel for allowing me to create what is to me the best chocolate ganache tart I have had so far.

If you want to make this, use what your tastebuds qualify to be the best chocolate. Tastes is as subjective as love so use what you enjoy best.

Chocolate Ganache Tart, adapted from my head and Doris Greenspan (crust).

For 3 (4 inch) tarts

Crust:
1/2 stick butter
3/4 cups flour
1/4 cup powder sugar
1Tb cocoa powder

In a food processor, pulse all the crust ingredients. Empty in a bowl and knead until the dough comes together. The butter will warm up when in contact with your hands and will allow you to form the dough unto small disks. Wrap in plastic and refrigerate while you prepare the ganache.

Ganache filling:
5 oz dark chocolate
5 oz milk chocolate
1/2 cup + 2 Tb. heavy cream

Heat the cream over medium heat. When hot, remove from the stove and throw in the chocolates, let stand for a minute. Gently stir to incorporate all the chocolate. Let stand at room temperature while you prepare the tartlett crusts.

For the tart shells:
I used 4 inch round tartlet molds but you can use smaller ones if desired, I got 3 filled tart with the quantity of chocolate I had melted. That point is really make and bake as you go.
Remove the dough from the fridge and roll out between two sheets of plastic wrap. Fit the dough into the tartket molds, prick with a fork and refrigerate while you heat up the oven to 350 degrees. Pre bake until done. Let the shells cool completely.
Remove from the molds and fill with the ganache. Refrigerate until the ganache is completely set.

For the decor, I melted 1/2 cup of sugar woth 2 Tb of water until golden brown and spoon shapes and lines onto parchment paper. I let the caramel cooled completely,cut out stands and branches and stuck them in the tart.
Et Voila!

Ok, this was a rare splurge, combining 2 great names into one little tart, but hey it felt really good and the world around me almost stopped for a few minutes!