chocolate

Asheville Trip To Foodtopia Part 1

Chocolate Strawberry Cheesecake


Update: check Todd and Diane’s Part 1 here. Amazing!

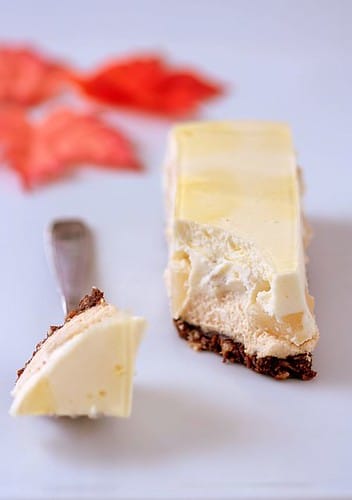
One of the first things I did when I got back from Asheville, NC was to email Jael and Dan Rattigan from The Chocolate Lounge and beg ask them to share a recipe, any recipe, from their outstanding repertoire. So happy they sent the one for their Chocolate Covered Strawberry Cheesecake (see end of post). Most delicious thing I have had in terms of cheesecakes. Really.

We were in NC to discover the Foodtopian Society of Asheville and we all fell in love with the pair, the minute we walked into their shop. Proof? We told Dodie (Super Mistress of Organization – Tourism Office PR Manager) that we had to take Brian, Todd and Diane there as soon as they’d arrive. Great chocolates, cakes, great photo opps, etc…Yeah, truth is we wanted more. More chocolate, more cookies and more of Jael and Dan. A couple of us even went back a third time and will have a post up soon.

Even though I have spent the last week being wined and dined by the wonderful chefs and artisans of Asheville, I did work very hard (smile and beg a lot primarily) to get you some of the dessert recipes I enjoyed on the trip. As a chef, I know it is no small gesture to part with one and I greatly thank the chefs who shared their creations with me and now you. This is one more example of the generosity of the artisan food crafters we have encountered.

As Diane mentioned one day, these people, restaurant owners, chefs, farmers, cheese makers, bakers, never talk about themselves. They talk about their crop, their product, how it evolved and how they evolved with it, not the other way around. They listened, they laughed, they patiently answered our questions, shared their knowledge and passion. We all took home different views and feelings from this trip I am sure, except one common trait uniting food professionals and food bloggers: we are passionate about food. We are all very tuned in to all of this so I think it was a pretty easy group to talk to but I know that they would have said and done the same for newbies to the concept of locally grown foods.

The Mighty Team


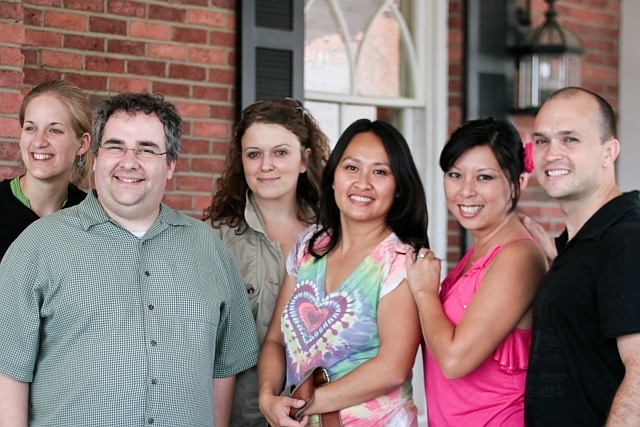
But who are these fellow food bloggers I keep mentionning? Let me tell you, I felt I had been a little sign that read "for good Kharma" when meeting them last week. Each of us had a little/lot of something to share and discover and oh my! Can we talk! And eat! And photograph! I have certainly made new friends, fell in love with the world again but dang country for being so wide! France is as big as Texas – a trip cross country is done in half a day! Yep, until I find a better way and until we meet again, I’ll just keep on reading their blogs.

From left to right: Alison at The Humble Gourmand, Brian from The Food Geek, Tami from Running With Tweezers, Diane from White on Rice Couple, Jaden from Steamy Kitchen and Todd from White On Rice Couple. Truly, honestly, amazingly, funny, smart, down to earth, talented and all around good people to be with. (And no, I am not saying that just because I can’t remember certain moments where lots of wine was poured and realised there might be video to remind me why.) On a side note, Tami works as a food stylist and you can guess that we were glued to her stories and experiences. Looking forward to taking her up on her offer to see her in action!

It's A Blogging Thing


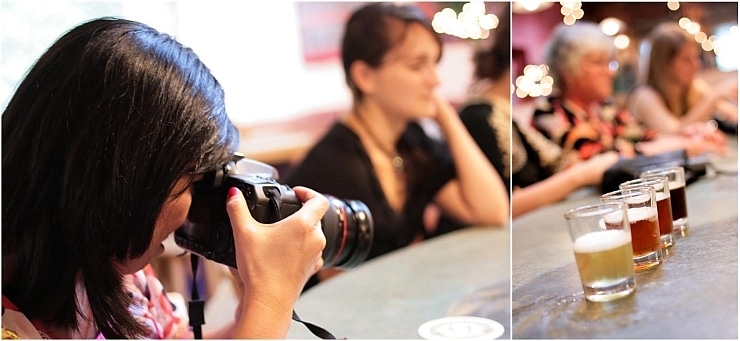
As soon as we had checked in at the hotel, we were off for a little walking tour of Asheville complete with a few gourmet samples and later on dinner. It hit me as we sat down at The Laughing Seed for a tasting of locally brewed beer that I was among hardcore food bloggers like me: listening with both ears, shooting with both eyes (one on the camera, one checking out the aesthetics around), all senses working like mad to capture it all. Having been to Asheville before, I can vouch that The Laughing Seed’s popularity is justified: great food, great kitchen staff, fresh ingredients and minimal fuss. Love this place and I was so happy to go back!

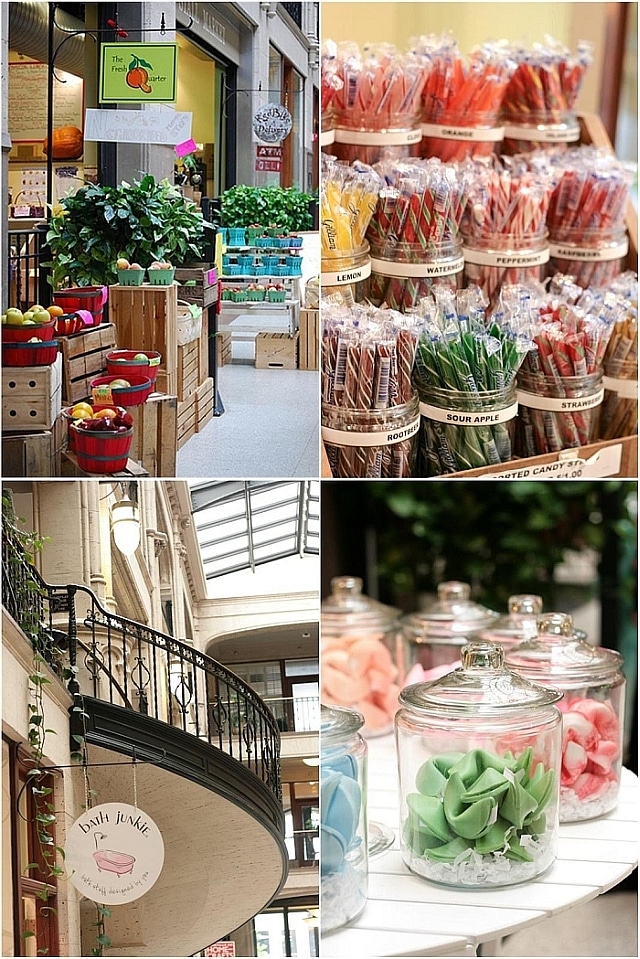
Inside Grove Arcade

Top left photo courtesy of Alison at The Humble Gourmand.

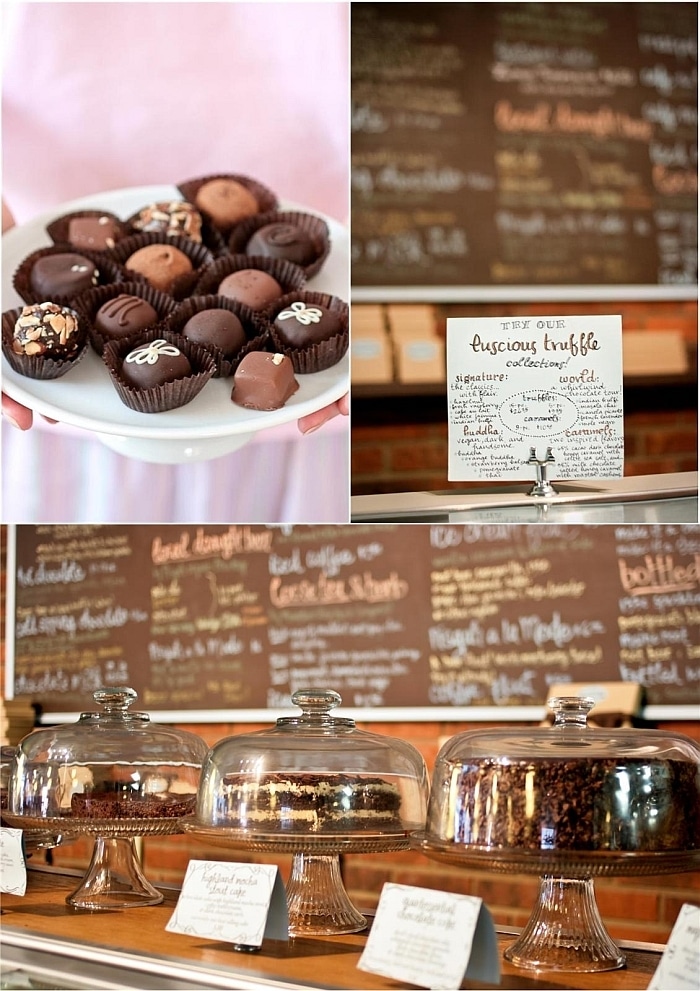
A little walk through Grove Arcade revealed more than just a "little walk": indoor fresh markets, specialty cheeses and honeys, cute little shops of all sorts. And then we entered Jael and Dan’s shop. We could have stayed there for hours. They are genuinely good artisan chocolatiers. Conversation flowed, questions arised and were patiently answered. They are so passionate and knowledgeable about their truffles making, very easy to listen to and get inspired by. Especially when Dan kept passing the chocolate covered roasted hazelnuts around. And they have coffees, amazing hot chocolates and a plethora of baked goods too! More on that with the Chocolate Covered Strawberry Cheesecake recipe.

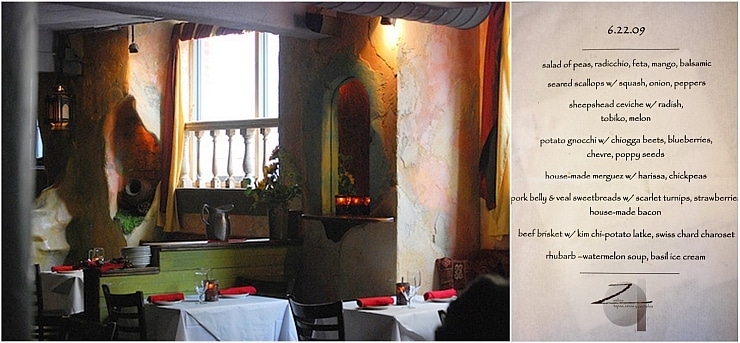
At Zambra

Left picture courtesy of Alison from The Humble Gourmand.

We had dinner reservation at Zambra and we kind of reluctantly left The Chocolate Lounge. Little did we know what awaited us at this tappas restaurant. The decor is as luscious as the food and at the same time comfortable and never intimidating, much like the plates that Executive Chef Adam Bannasch and his staff prepared. Jaden recognized right off the bat that portions would have to be somewhat downsized or we wouldn’t be able to make it through this 8 course meal. Me? You can’t ask me that question at the beginning of a meal! Of course I am going to say "bring it on!". Even with a small downsizing we still ended up rolling out of the restaurant in a certain food haze (or was it the sangria?). Content. Fresh, local and innovative food. Everything well balanced and perfectly executed. And that dessert! Most tasty fruit soup paired with an outstanding basil ice cream. Perfect balance of sugar and herb. Adam, anytime you feel like coming this side of Southern, I’d be happy to take you around our own restaurant gems!

As you can see, we were off to a pretty good start! We went back to The Chocolate Lounge with Brian, Diane and Todd the next day. Within a few minutes we were sitting with some tasty French press coffee and one of the best slices of cheesecakes I have ever had. I am not just saying that. I am not one to like fruit and chocolate, especially berries and chocolate, and I am not the best advocate of cheesecakes in the world. But this? This is something I would want to eat everyday. This Mousse of Strawberry Cheesecake not just "strawberry cheesecake". Run. To. Make. It.

I leave you with this fine introduction and recipe they wrote while I prepare part 2 of this trip. Trust me it gets even better!

At French Broad Chocolate


Chocolate Covered Strawberry Cheesecake, from Jael and Dan Rattigan.

Serves 12

The best time of year to enjoy this cake is when strawberries are in season, so it can be garnished with fresh berries. however, you’ll see that the puree is made from frozen berries (because the freezing and subsequent thawing releases the juice from the berry’s cells which were ruptured in the freezing process), so enjoy any time of year, and try the same recipe with a seasonal, locally-available fruit of your choosing!

Other ingredient notes: choose ingredients with the same care and attention you would use to pick a babysitter for your kid. dessert is serious business! we use all organic dairy, free-range local eggs, organic sugar, and a highly aromatic vanilla extract. as for chocolate: the ganache topping only uses 4 ounces, so get a couple bars of something you would enjoy nibbling, preferably with a fruit-forward bouquet to complement your berries!

Strawberry puree:
10 oz. frozen strawberries
2 Tbsp. sugar
2 tsp. freshly squeezed lemon juice

Almond crust:
2 cups whole raw almonds
2 oz soft unsalted butter
3 T sugar
¼ t salt

Strawberry cheesecake:
1 lb. cream cheese, room temp
1 cup (7.5 oz.) sugar
3 large eggs, room temp
1 ½ tsp pure vanilla extract
¼ tsp salt
12 oz sour cream, room temp
2/3 cup strawberry puree

Ganache topping:
4 oz. chocolate (50-55% cacao mass is best), finely chopped
4 ½ oz. cream
½ large egg (beat 1 egg, weigh it, and use half)

Prepare the strawberries:
Thaw strawberries and strain out the juice completely (reserve pulp, should be about 5 oz). Place juice in a small saucepan and, at a simmer, cook down to a third of original volume. (you should start with about 5-6 oz, and end with 2 oz.) Add sugar to reduction and stir to dissolve. Mix juice and pulp together with lemon juice.
blend in food processor or with immersion blender.

Prepare the crust:
Preheat oven to 400F and position a rack in the center.
Pulverize almonds, sugar, and salt in food processor until crumbly. Add butter and pulse to combine. Press into bottom and sides of 9” springform pan (2.5” tall)
bake 15-20 min, or until deep golden brown. Set aside to cool while you make the cheesecake.

Prepare the cheesecake:
Turn the oven down to 350F.
Beat cream cheese and sugar until very smooth (3 min) in a stand mixer at medium speed using the whisk attachment.(yes you read right. It gives the cake that mousse quality). Add eggs, 1 at a time, scraping bowl and beating after each just until smooth. Add vanilla & salt and beat until incorporated. Beat in sour cream. Beat in strawberry puree. Wrap the pan with the crust in a double layer of aluminum foil.
Pour batter into crust. Place in water bath (hot water) in a larger oven proof pan
bake 45-55 min.

5-10 min before cheesecake is done, make ganache topping:
Boil cream. Pour over chocolate and let sit a minute. Whisk gently until chocolate is melted and smooth. Gently whisk in egg. Spread over hot cheesecake (careful, and don’t pour it all in one place as cheesecake is fragile). Smooth out the top. Bake 12-15 more minutes until ganache is set along the sides. Remove from oven and place on a cooling rack, with a large mixing bowl over the pan (to cool slowly). When it reaches room temp, refrigerate. Chill 8 hours before unmolding. To unmold, run a thin blade knife around the cake pan sides. Remove springform. Gently slide cake onto serving plate. Store covered in refrigerator.
it’s easier to cut the cake if you heat the knife. run it under very hot water, then dry it. Slice!
Daring Bakers: One Cheesecake, Two Cheesecakes, Three Cheesecakes….

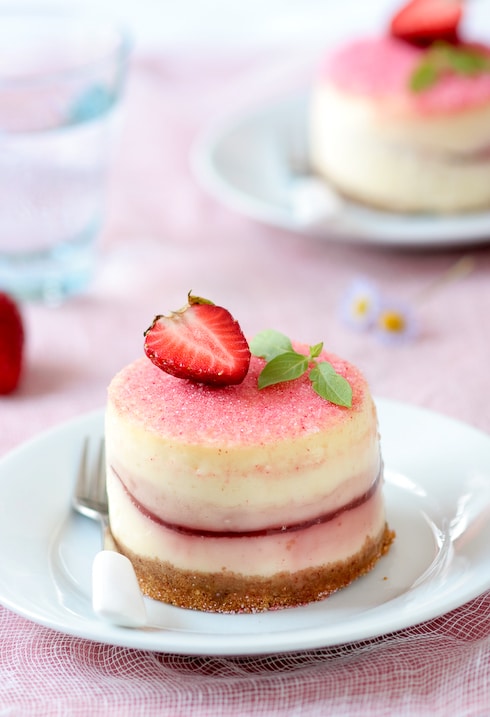
Cherry Blossom Strawberry Cheese Cake


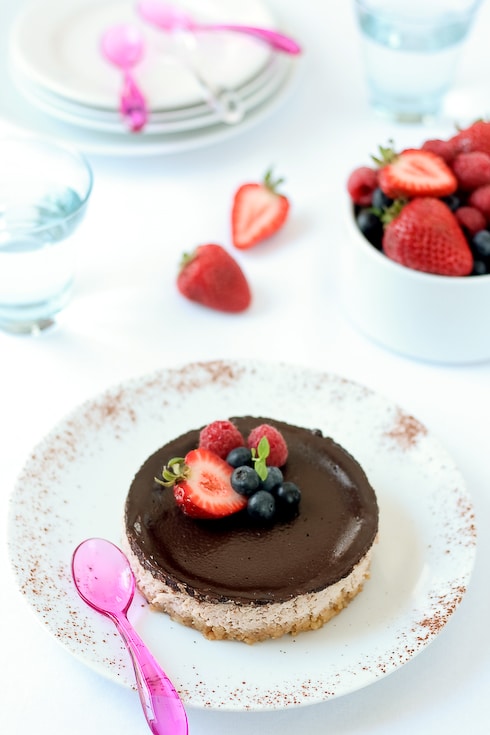
I giggle everytime I look a the picture above. It’s Daring Bakers time today and my Cherry Blossom Strawberry Cheesecake looks like it is smiling. Maybe it’s just me as I am eating some while typing this and smiling to know there is plenty left in the fridge.

And when I mean plenty, I am not exaggerating! For a household of two people this month challenge just kept on giving and we had no problem with it! We were given a simple cheesecake recipe and let loose with our creativity. If you let me loose in the kitchen on a Daring Baker’s challenge this can happen, or this.

It might look like I did again but really I did contain myself (no snorting Jen). Somewhat…

Daring Bakers Cheesecake Challenge


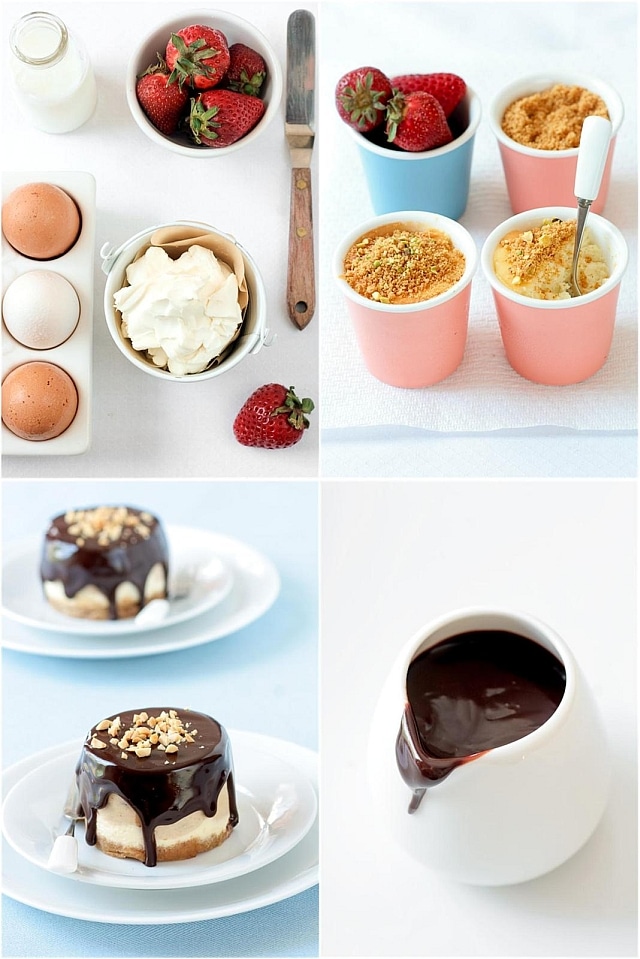
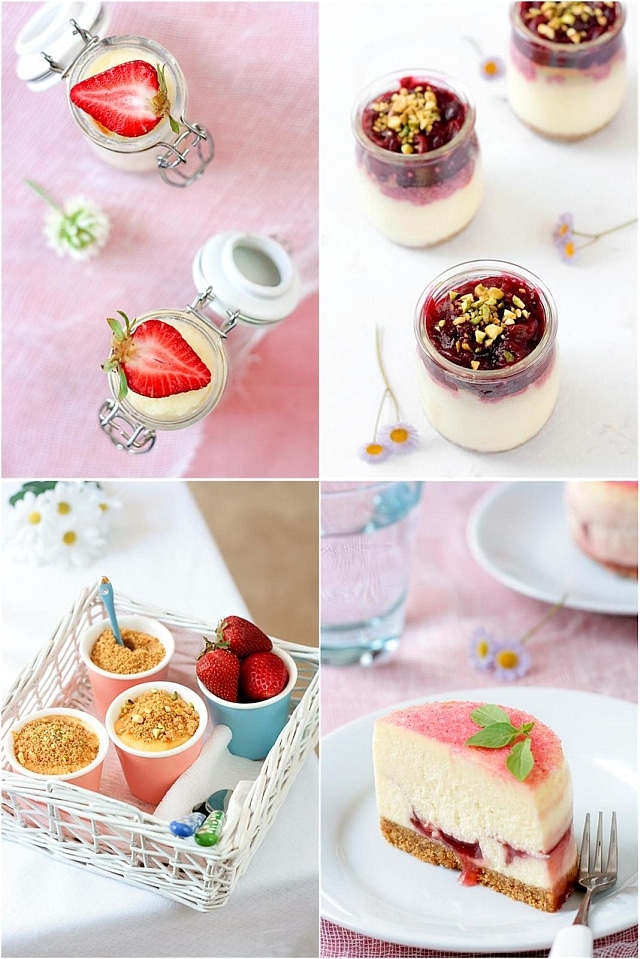
This recipe was really straightforward and the end result was smooth, creamy and not overly sweet which I really like. I started by making the entire recipe and used half to make 4 individual cheesecakes. Two were Cherry Blossom and Strawberry Lava Cheesecakes and two were Peanut Butter topped with a chocolate ganache. I piped the remaining batter in different cups and jars and played a bit.

I drew my inspiration from Spring since cherry trees are still blooming and used cherry blossom extract that Rachael from La Fuji Mama sent me while she was still in Japan. For the strawberry lava center, I cooked about a cup of fresh strawberries with some sugar, strained it and thickened it on the stove before spooning it in between the cheesecake layers.

Daring Bakers Cheesecake Challenge
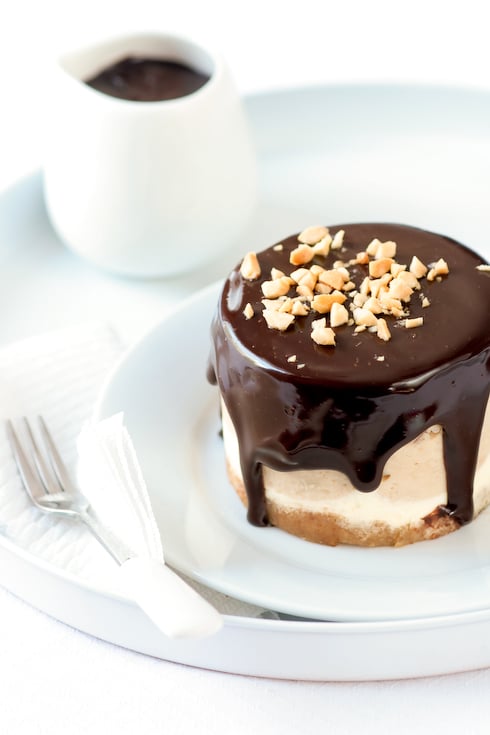
For the Peanut Butter ones, I just followed B’s strong desire to have a peanut butter and chocolate dessert. I mixed some of the batter with chunky peanut butter and added a few tablespoons of heavy cream and poured a simple bittersweet chocolate ganache on top with chopped roasted peanuts.

For the remaining batter, I spooned some of the graham cracker crumbs in different jars and topped with some plain cheesecake batter. The others were topped with a quick cranberry compote using frozen cranberries, sugar and lemon zest. And some were baked without crust and topped with a sprinkle of graham cracker crumbs and chopped pistachios.

Peanut Butter & Chocolate Cheesecake


One year ago: Daring Bakers – Cheesecake Pops.
Two years ago: Outrageous Brownies

The April 2009 challenge is hosted by Jenny from Jenny Bakes. She has chosen Abbey’s Infamous Cheesecake as the challenge.
Abbey’s Infamous Cheesecake:

Helen’s Kitchen Notes: For the cheesecakes baked in individual dessert rings, I lined them with parchment paper and wrapped them around a couple of layers of foil to prevent leaking since they were to be baked in a water bath. Just don’t be shy with the foil or you will have some leakage. I lowered the oven to 275F (convection) and baked them for the same amount of time. I also baked all the jars and cups in a water bath at 275F. The possibilities are endless with such an easy going recipe thus I including the recipe as given by the host and my variations and tips at the end.

crust:
2 cups / 180 g graham cracker crumbs
1 stick / 4 oz butter, melted
2 tbsp. / 24 g sugar
1 tsp. vanilla extract

cheesecake:
3 sticks of cream cheese, 8 oz each (total of 24 oz) room temperature
1 cup / 210 g sugar
3 large eggs
1 cup / 8 oz heavy cream
1 tbsp. lemon juice
1 tbsp. vanilla extract (or the innards of a vanilla bean)
1 tbsp liqueur, optional, but choose what will work well with your cheesecake

Preheat oven to 350 degrees F (Gas Mark 4 = 180C = Moderate heat). Begin to boil a large pot of water for the water bath.
Mix together the crust ingredients and press into your preferred pan. You can press the crust just into the bottom, or up the sides of the pan too – baker’s choice. Set crust aside.
Combine cream cheese and sugar in the bowl of a stand-mixer (or in a large bowl if using a hand-mixer) and cream together until smooth. Add eggs, one at a time, fully incorporating each before adding the next. Make sure to scrape down the bowl in between each egg. Add heavy cream, vanilla, lemon juice, and alcohol and blend until smooth and creamy.
Pour batter into prepared crust and tap the pan on the counter a few times to bring all air bubbles to the surface. Place pan into a larger pan and pour boiling water into the larger pan until halfway up the side of the cheesecake pan. If cheesecake pan is not airtight, cover bottom securely with foil before adding water.
Bake 45 to 55 minutes, until it is almost done – this can be hard to judge, but you’re looking for the cake to hold together, but still have a lot of jiggle to it in the center. You don’t want it to be completely firm at this stage. Close the oven door, turn the heat off, and let rest in the cooling oven for one hour. This lets the cake finish cooking and cool down gently enough so that it won’t crack on the top. After one hour, remove cheesecake from oven and lift carefully out of water bath. Let it finish cooling on the counter, and then cover and put in the fridge to chill. Once fully chilled, it is ready to serve.

Pan note: The creator of this recipe used to use a springform pan, but no matter how well she wrapped the thing in tin foil, water would always seep in and make the crust soggy. Now she uses one of those 1-use foil "casserole" shaped pans from the grocery store. They’re 8 or 9 inches wide and really deep, and best of all, water-tight. When it comes time to serve, just cut the foil away.

Prep notes: While the actual making of this cheesecake is a minimal time commitment, it does need to bake for almost an hour, cool in the oven for an hour, and chill overnight before it is served. Please plan accordingly!

Variations I used:
For the strawberry lava center: cook down 1 cup of clean strawberries with 1/4 cup of sugar and 1 tablespoon of lemon juice. Strain and cook the syrp until reduced by half. Let cool. Spoon some cake batter over the crumb crust, add some strawberry juice and seal with more batter.

For the peanut butter cheesecake: I added 1/3 cup of peanut butter to 1/4 of the recipe and added 3 tablespoons of heavy cream to make sure the batter would remain smooth.

For the chocolate gananche: I heated up 1/3 cup of heavy cream over medium heat and poured it over 2/3 cup of bittersweet chocolate. Let stand 2 minutes and stir to smooth.

For the cheesecake in souffle cups: I just buttered the cups and baked them without the crust which I sprinkled later on with some chopped pistachios.

For the cranberry topped ones: I poured some crumb crust at the bottom of glass jars, topped with the batter and baked them like that. Once cooled I added the cranberry compote that I made by cooking 2 cups of frozen cranberries with 1/4 cup of sugar, a dash of cinnamon and some lemon juice.


Chocolate Mango And Coconut Cream Cake

Chocolate Coconut & Mango Entremet


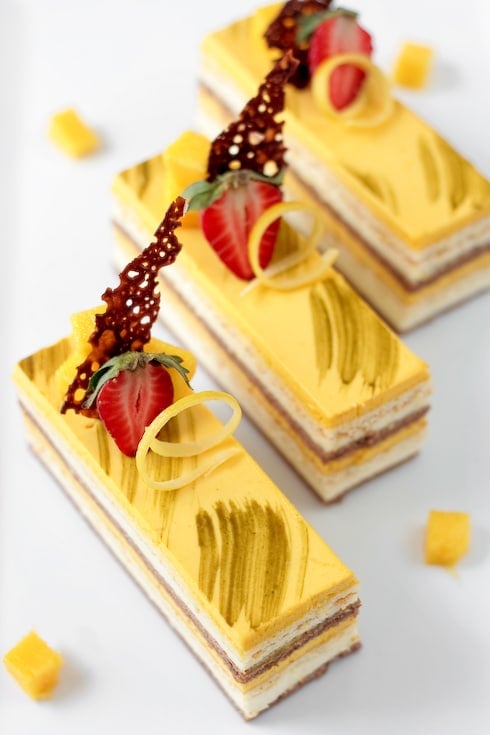
When others were painting eggs for Easter last week, I was busy painting a cake. Well, applying brush strokes to a birthday cake would be a more accurate description. Carol and Fifi paint, very well I might add. I just fiddle with a pastry brush because I am short on time to come up with other things to decorate this delicious Chocolate Mango And Coconut Entremet Cake.

I know, I know, being short on time and making a multi layer cake does not seem right in the same sentence. Well, welcome to my logic! It’s true I am not the most logical person for "real life" things although I am improving with each year that passes. The only domain for which I am extremely logical is in the kitchen and with food. Do not ask why. And just in case you needed proof, let me tell you a little story…


I was about 10 or 11 and learning maths and how to solve logical problems starting such as "if train A leaves the station at 11.35 and train B…" and this was about as far as my brain would register. Two trains, two times, one station…oy! My favorite though was the "mantel problem" (yes, yes, I did say mental mantel). It always went something like "if your mantel measures x across by y across, how much fabric do you need to go around it, leaving k amount for the corners as well as the top and bottom" (or something like that). I would just stare at my dad and feel really sorry for it that I could not wrap my head around the solution. Did not make sense. Long minutes of complete silence during which I could hear my dad shoes start to tap the floor under the dining room table. Oh that awful feeling of letting him down…

Most time it would end in excruciating diagrams and long line of equations that burried me further into maths and logic oblivion. Until one fine day when my dad finally understood that if I were going to learn that kind of language, he would have to translate it into my own. Instead of lining that darn mantel piece with fabric, he proclaimed we would line it up with chocolate bars! Yeah!! I can relate to that! Within a few minutes, my eyes lit up and I could start to hear some big motion happening inside my head…I was on a roll…

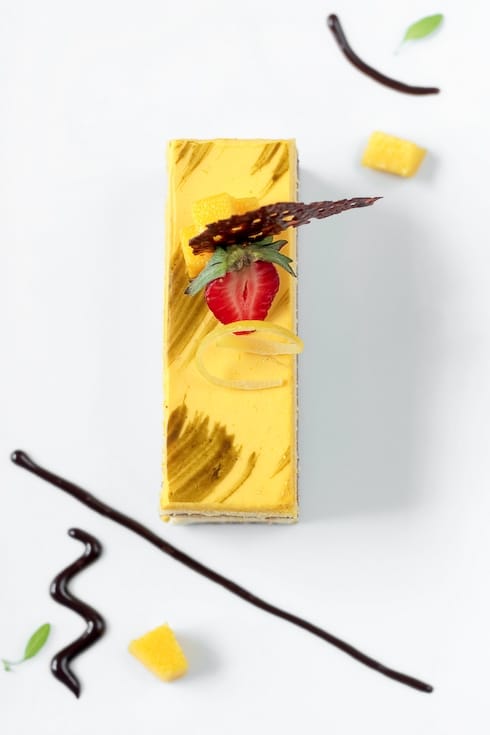
Chocolate Coconut and Mango Entremet


We did have birthday over Easter weekend in the family and a request for a summery-tropical-beach cake. When I mentionned coconut as part of the cake layers, a few raised their hand in protest. Ah yes, I had forgotten we had "coconut shreds haters" in the family. No problem. No shreds anywhere, just plenty of coconut milk in the Bavarian cream would do. I had just the right amount of Alfonso mango puree leftover from the panna cottas I made recently so it got turned into a lovely and silky mousse and let’s not forget the usual suspects like flour, butter, eggs, cocoa.

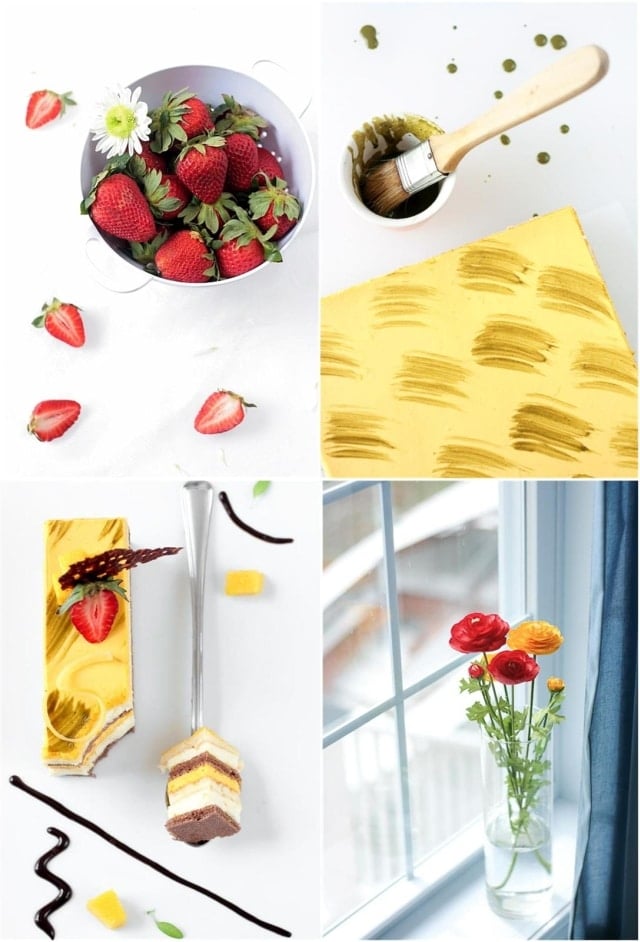
When someone asks for a multi layer entremet cake for a birthday, my logic is to say yes even if work is busy because I know I can make the task easy by spreading the job over a couple of days without fretting. You can make the cake layers ahead of time and keep them well covered in the fridge or refrigerator. The mousses will set up rather fast so make them the day you are ready to put it all together. Since I can’t paint, I gave up on the idea of doing a beach scene on top and used some matcha dissolved in water to brush some strokes on top of the cake.

I was a bit worried of combining so many different layers into one cake but it actually worked perfectly! The coconut milk in the Bavarian cream gave it a very soft flavor and not at all artificial (no one likes to eat flavored SPF 50) while the mango finished up that lovely tropical theme. Since the cocoa genoise was a little too simple on its own, I added some rum flavored simple syrup to flavor it a bit. It was an adult affair anyway. See…I am logical after all!

Chocolate Coconut and Mango Entremet


Chocolate – Mango and Coconut Cream Cake Recipe:

Serves 10-12

For the vanilla genoise:
3 large eggs
3 large egg yolks
1 teaspoon (4gr) vanilla extract
pinch of salt
¾ cup (150gr) of sugar
½ cup (70gr) cake flour
¼ cup (30gr) cornstarch

Preheat the oven to 400F and set a rack in the middle.Lightly spray a 12×17 baking sheet with cooking spray or lightly brush with melted butter. Set aside
Whisk the eggs, egg yolks, vanilla, salt and sugar together in a large bowl over a pan of simmering water. Whisk gently until the mixture is just lukewarm, about 100F on a candy thermometer(or test with your finger – it should be warm to the touch).
Transfer the mixture to the bowl of a stand mixer fitter with the whisk attachment (or hand held beaters) and whip on medium-high speed until the egg mixture is cooled and tripled in volume. The mixture will be thick and will form a slowly dissolving ribbon falling back onto the bowl when the whisk is lifted.
Over a medium bowl or a piece of parchment paper, sift together the flour and cornstarch.
Add one-third of the flour mixture to the beaten egg mixture. Use a rubber spatula to fold in the flour mixture, making sure to scrape all the way to the bottom of the bowl to prevent the flour mixture from making lumps. Repeat with another third of the flour mixture and finally with the remainder.
Pour the batter into the prepared pan and smooth the top with an offset spatula.
Bake the genoise for about 10 to 12 minutes. Make sure the cake does not over bake and become too dry or it will not roll properly. Let cool on a rack. Remove the cake from the baking sheet and invert it on a larger piece of parchment paper. Peel of the parchment paper that was lining the baking sheet. Set the cake aside.

For the cocoa genoise:
Same process but replace the amount of cornstarch with the same amount in cocoa powder and proceed with the recipe the same way.

For the coconut Bavarian cream:
1 tablespoon (7gr) powdered gelatin
3 tablespoons water
4 egg yolks
1/4 cup (50 gr) sugar
1 cup (250 ml) coconut milk
1 cup (250ml) heavy cream, cold

In a small bol, sprinkle the gelatin over the water and let stand to soften while you prepare the cream.
In a large bowl, whisk the egg yolks with the sugar until very pale. In the meantime, in a medium large saucepan set over medium heat, bring the coconut milk to a simmer. Slowly pour the milk over the yolks, whisking constantly to prevent them from curdling. Pour the mixture back into the saucepan over medium low heat and cook until the cream coats the back of a spoon (as if making creme anglaise). Add the softened gelatin and stir until melted completely into the cream. Let cool to room temperature.
In a stand mixer fitted with the whisk attachment, whip the cream to soft peaks on medium speed and fold it into the cooled cream base. Use within one hour.

For the mango mousse:
1.5 teaspoons (3.5gr) powdered gelatin
1 tablespoon (15gr) water
4 oz (120gr) mango puree (to make your own, see here)
2 tablespoons (25gr) sugar
1/2 cup (125ml) heavy cream, cold

In a small bowl, sprinkle the gelatin over the water and let it soften while you prepare the fruit.
In a medium saucepan, bring the mango puree and sugar to a simmer. Remove from the heat and add the softened gelatin. Stir until the gelatin is completely melted.
Transfer the fruit puree to a large bowl and let it cool to room temperature.
In a stand mixer fitted with the whisk attachment, whip the cream on medium speed until soft peaks form. Fold about 1/3 of the whipped cream into the fruit puree to lighten it up (do not worry about losing air at this point). Carefully fold in the rest of the whipped cream. Use within one hour.

Rum simple syrup:
1/2 cup (125ml)water
1/4 cup (50gr) sugar
2 tablespoons (30gr) rum

In a small saucepan set over medium high heat, bring all the ingredients to a simmer until the sugar dissolves, stirring occasionally. Let cool to room temperature.

Lemon glaze:
1.5 teaspoons (3.5gr) powdered gelatin
1 tablespoon (15gr)water
1/4 cup (62.5ml) water
1/4 cup (62.5ml) lemon juice
2 tablespoons (25gr) sugar

In a small bowl, sprinkle the gelatin over the water and let it soften.
In small saucepan set over medium high heat, bring the water, lemon juice and sugar to a simmer, stirring off and on to make sure the sugar dissolves properly. Add the gelatin and stir until completely dissolved. Let cool to room temperature (if the mixture gels, warm up over low heat until barely melted again).

To assemble:
Line an 8×8 baking pan with parchment paper of foil, leaving a border on the sides to make it easy to remove when set. You can also use a cake frame of the same dimensions.
Cut two 8×8 cake layers in each of the genoises. Place one layer of the chocolate genoise at the bottom of your pan and brush with some rum syrup. Pour half the coconut Bavarian on top and smooth with an offset spatula. Top with a layer of vanilla genoise, brush some rum syrup on top. Pour half the mango mousse and smooth with an offset spatula. Repeat the process with the second half of cakes and creams. Refrigerate until set. Pour the lemon glaze over the cake and let set in the fridge.
Cut through the cake with a knife dipped in hot water to prevent breaking the glaze instead of slicing through it.

Little Time, Little Chocolate Mud Cake Cookie Sandwiches

Chocolate Mud Cake Cookies


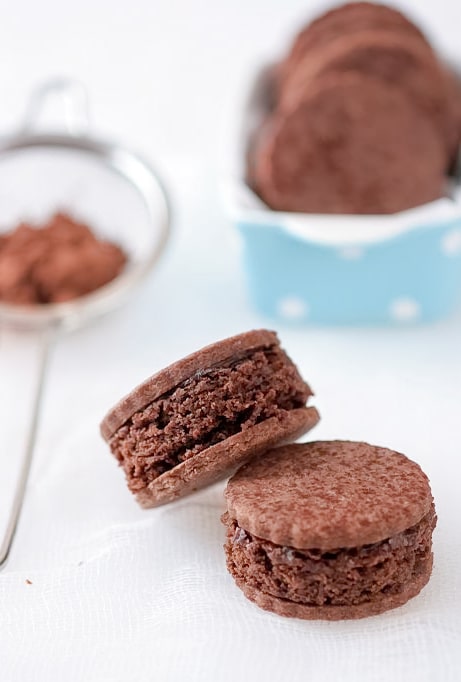
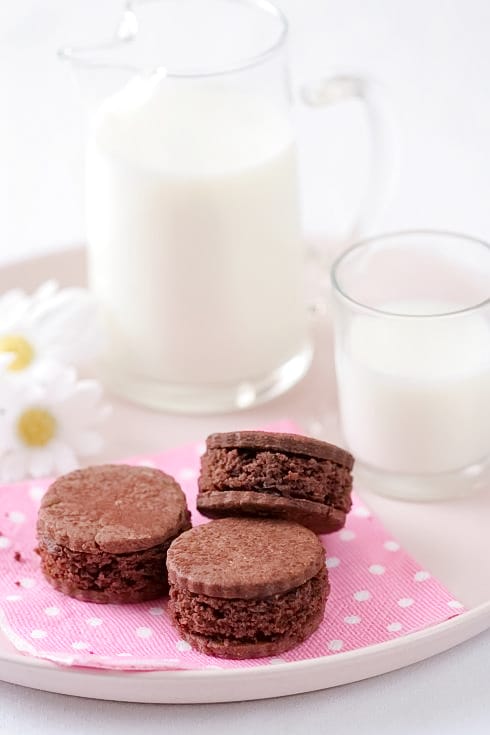
I can hardly believe my parents have been here a week already. Actually, I can notice it rather clearly: I only had time to make cookies this week! But these little bites of heaven were enough to keep us talking and eating for a few days! Imagine a chocolate cake with a hint of coffee sandwiched between two dark chocolate shortbread cookies and held together by a dab of chocolate ganache. The combination of textures is just perfect.

A good bit of time is spent around the dinner table catching up, making plans. It’s like being on vacation at home. The weather has been gorgeous and we have spent most afternoons out and about, sightseeing, catching the first flower blooms and enjoying the warm, already summer like temperatures. I hope I don’t sound like a broken record with my "parent stories" but it is one of the most important things on my agenda right now. I want to write it down and share so I can remember and be reminded. It’s a good break for them and a good break for me.

Chocolate Mud Cake Cookies


I know B. loves having them around too as he and my mom are like two peas in a pod and he loves catching up with the family "back home". He’s been so gracious in giving our "together time" for the next few weeks that I wanted to bake him something special. I know the man loves cookies. Small word if you saw his face when I asked what kind he would like. "Something fun!" he said.

Small cookies are always fun and since it was for him and I know he likes cakes as much as cookies. Mud cake cookie sandwiches fit the bill perfectly. It may sound odd, ok I admit it, it did sound really strange to my parents but trust me, it works. These are probably the best fun bites I have had in a while. Crunch, creamy and soft. They are great with a simple glass of milk but they are also perfect with homemade chocolate sorbet. Pure chocolate therapy.

Chocolate Mud Cake Cookies


Chocolate Mud Cake Cookie Sandwiches Recipe:

Makes 24

For the Chocolate Sable Cookies:
1 stick butter (113 grams) butter, at room temperature
¼ cup (50 grams) sugar
½ vanilla bean, seeded or 2 teaspoons pure vanilla extract or 2 teaspoons vanilla bean paste
2 egg yolks
1 ½ cups (190 grams) all purpose flour, minus 3 tablespoons
3 tablespoons (16gr) cocoa powder
Pinch of salt
1 to 2 tablespoons heavy cream (optional)

Preheat oven to 350F.
In a stand mixer fitted with the paddle attachment, whip the butter and sugar until light and creamy. Add vanilla, then the egg yolks, one at a time, scraping the bottom and side of the bowl in between each addition. Add the flour, cocoa powder and salt and beat until the dough just starts to come together. Add some heavy cream if the dough still looks very crumbly and dry. Gather the dough into a ball, flatten it a little to a small disk and wrap it well in plastic wrap. Refrigerate two hours before using.
Lightly flour your work area well and start rolling the dough from the center out, lifting it from the work area every 2-3 times you roll over it. With a 2 1/2-inch cookie cutter, cut out 48 rounds in the dough, gathering scraps and rerolling as you go (you might need to refrigerate the dough for 20 minutes if it becomes too soft to roll out easily).
Place the cookies on 2 parchment lined baking sheets and refrigerate 20 minutes. Bake for 10-12 minutes. Let cool.

For the ganache:
6 oz (180gr) bittersweet chocolate, chopped
1/3 cup heavy cream

Place the chocolate in a medium size bowl and set aside.
In a small saucepan set over medium high heat, bring the cream to a boil. Remove from the heat and pour it over the chocolate. Let the mixture stand for 3 to 5 minutes. Slowly stir the chocolate and cream together until the ganache is completely smooth. Let cool to room temperature.

For the Mud Cake (adapted from Pamela Clark):
1 stick (113gr) butter, at room temperature
4 oz (120gr) dark chocolate, chopped
1 cup (200gr) sugar
1/2 cup (125ml) water
3 tablespoons (30gr) coffee liqueur
2 egg yolks
1 cup (125gr) all purpose flour
3 tablespoons (16gr) cocoa powder

Preheat oven to 350F. Slightly coat two 8-x12-inch pans with cooking spray and line them with a piece of parchment paper. Slightly coat the parchment paper with cooking spray or vegetable oil.
In a small pot set over low heat, combine the butter, chocolate, sugar and water and stir until everything is melted and smooth. Remove from the heat, add the coffee liqueur and let cool to room temperature. Whisk in the egg yolks, then the flour and cocoa powder. Divide the batter between the prepared pans and bake for 20 minutes. Let cool completely. Cut 24 rounds of the same size as the cookies.

To assemble the cookies:
Spread a small amount of chocolate ganache under each cookie and sandwich a mud cake round in between two of them. Dust with cocoa powder if desired

Profiteroles With Chartreuse Ice Cream & A Book Giveaway

(For the book giveaway, scroll down to the end of this post)

I am really excited to introduce you to Anita from Married With Dinner as my guest blogger this weekend. When I first started blogging, there weren’t as many blogs to get lost into captivated by delicious recipes and lovely photos. One lucky day 3 years ago, I landed on Anita’s blog and I could not stop reading, still can’t. We virtually met around a box of macarons and I can’t wait for the day I bake a batch with her. As their "about" page states, "Married …with dinner chronicles the continuing adventures of a couple of San Francisco food dorks. Cameron and Anita are both professional writers, amateur cooks, cocktail geeks, and avid diners." I am always in admiration of their mixology knowledge and creations, as well as their awareness of local artisans, food and produce. I can’t wait for the day we meet when we can celebrate life and friendship around a good meal.

profiteroles-close[1]


When Tartelette asked me to take a turn at posting, I froze. See, I love to cook, I’m a pretty good bread-baker, and I’ve been known to crank out the occasional homespun cake or pie. But to create something worthy of Tartelette — something as beautiful and impressive and drool-worthy as the sorts of things you’re used to seeing here — well, I wasn’t quite sure I was the right girl for the job.

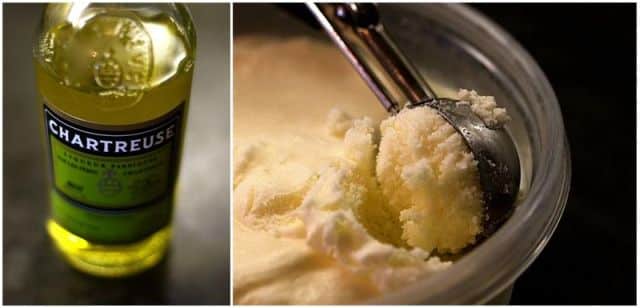
I poured over cookbooks, went through my archives, begged friends for ideas. Then, when I’d almost given up, I sat down to do my weekly meal planning… and inspiration struck. In the back of my "to-try-someday" recipe file was a dessert I’d been wanting to make, tucked away for an occasion when I needed something special: Ice cream flavored with the French herbal liqueur Chartreuse.

Chartreuse is one of my favorite liqueurs; its spicy complexity adds a layer of mystery to so many wonderful cocktails, and it’s also a fabulous treat to sip on its own as a digestif. But until I read David Lebovitz’s ice cream compendium, The Perfect Scoop, it had never occurred to me to use it in food. It only took me 18 months to actually find a suitable occasion!

dip2


I spun a batch and set it in the freezer to firm up overnight. The next morning, I couldn’t wait to taste a sample: Oh, what a heavenly thing it was, light and bright from the addition of sour cream, with a haunting herbal shadow of Chartreuse in the place where you’d expect to find vanilla. I’d only intended to sample a small spoonful, to check the result of my work. But I couldn’t stop: I ended up eating a whole bowl of the stuff for breakfast!

When I confessed to David that his recipe was so good that I’d scarfed an entire serving before work, he wasn’t surprised: "I love that recipe," he confided, and patiently assured me I shouldn’t worry about its detrimental effects on my morning routine. "I actually developed it for a low-fat magazine — It is healthy!"

Of course, I’m of the school of thought that even full-fat ice cream is good for you. After all, there’s nothing wrong with eggs and dairy, in moderation. But David’s lean-and-clean version is a worthy treat in its own right, not just as a healthy alternative. Without any eggs, you might expect it to be more like a gelato. But instead, it’s almost sherbet-like, with a snowy lightness that sets off the richness of any accompaniments.

dip


Unfortunately, even the most delicious bowl of ice cream looks a little ho-hum in photos, and we needed a Tartelette-worthy masterpiece! So I decided to take the plunge and try my hand at a batch of profiteroles to fill with the ice cream. And here’s a secret I wished I’d known years ago: As long as you have a pastry bag and a stand mixer, making pate a choux — the basis for eclairs, cream puffs, and profiteroles — is surprisingly simple.

But if, despite my assurances, the idea of whisking eggs into a hot dough seems a little too intimidating, you have my permission to sidestep the profiteroles, provided that you give this beautiful Chartreuse ice cream a little boost of richness with a drizzle of hot fudge. After all, as David told me, "Chocolate sauce is obligatory, even at breakfast."

profiteroles-success[1]


Chartreuse Ice Cream Recipe from The Perfect Scoop

The published recipe made a little too much base to fit comfortably in my Cuisinart ice-cream maker without overflowing, so I’ve scaled the measurements down 25% from David’s original.

2 cups whole milk
1 cup sour cream
1/2 cup + 1T sugar
2-1/2T green Chartreuse

Puree all the ingredients in a blender, and process until smooth. Chill the mixture thoroughly, then freeze according to your ice-cream maker’s usual method.

Choux Pastry Puffs Recipe adapted from Tartelette’s Choux a la Creme with modifications from Baking with Julia

85g all-purpose flour
75ml water
75ml whole milk
65g unsalted butter
2 eggs + 1 egg white
1T sugar
pinch of salt

Preheat the oven to 425F. Set up a stand mixer with a paddle attachment.
Sift the flour and set aside. Heat the water, milk, butter, and salt to a full rolling boil. Stir the flour into the liquid with a heavy wooden spoon, adding it as fast as it can be absorbed, but not all at once or it will form clumps. Cook the paste, stirring constantly and breaking up lumps if necessary, until the mixture comes away from the sides of the pan, about 2 to 3 minutes.
Transfer the dough to the mixer bowl and stir at low speed to cool the paste slightly, so that the eggs will not cook when added. On medium-low, mix in the eggs one at a time, then the egg white. The dough should have the consistency of thick mayonnaise.
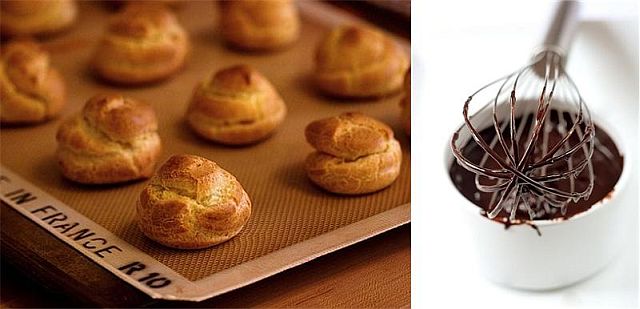
While the dough is still warm, place it in a pastry bag fitted with a large round tip. Pipe quarter-sized puffs about 1 inch apart on a baking sheet lined with parchment or a silicone mat, then use a moistened spoon (or finger) to smooth out the tails at the top.
Bake at for 15 minutes at 425F without opening the oven door, then reduce heat to 350F and continue to bake until done, about 7 to 12 minutes.
To check for doneness, remove one puff from the sheet and tap the underside with your fingers; it should feel firm and hollow. (If you undercook the puffs, they may deflate as they cool, so err on the side of golden brown rather than pale). When baked through, remove the puffs from the oven and let cool.

Easiest Chocolate Sauce Recipe

Confession time: I cheated and used a jar of Scharffen-Berger chocolate sauce I already had on hand. (It’s delicious and locally made, so it’s hard to feel too guilty.) But making your own chocolate sauce is dead simple with this recipe, which I’ve used in the past with great results.

6oz best-quality bittersweet chocolate, chopped
3T water
1/4 cup heavy cream

Set a a heatproof bowl set over a saucepan of simmering water. Melt all ingredients in the bowl, stirring until the mixture is smooth.

To assemble the profiteroles:
Cut each puff in half through the equator; it’s easiest if you use a serrated knife. Place three bottom layers on each plate; top each with a small scoop of chartreuse ice cream. Place the tops on the puffs, and drizzle with chocolate sauce.

You will have plenty of leftover ice cream for weeknight treats (or breakfast!).

————————————————————————————-

I also want to thank you for stopping here like you do by giving one lucky person a copy of The Baker’s Odyssey, by Greg Patent, a whopping 400 pages dedicated to the recipes and culinary history of American immigrants from all over the world. I have already mentionned this gem of a book with the Princess Torte recipe and I would love to send the extra copy that I have to one of you.

All you have to do is leave a comment between today Friday February 20th and Monday February 23rd midnight (US Eastern time). A reader will be chosen at random and announced later that week (duplicate comments will be deleted and if you wish to remain anonymous, please at least sign Zorro or something)

A Daring Baker’s Tuile Frenzy

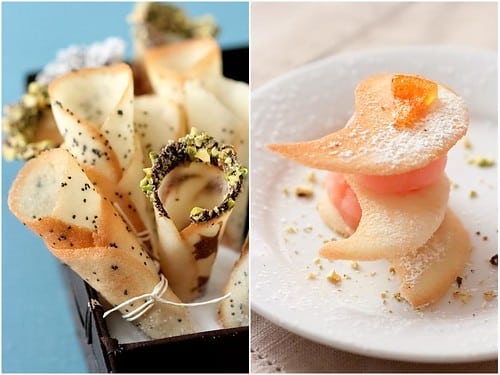
Nougatine Tuiles With Star Anise Mousse


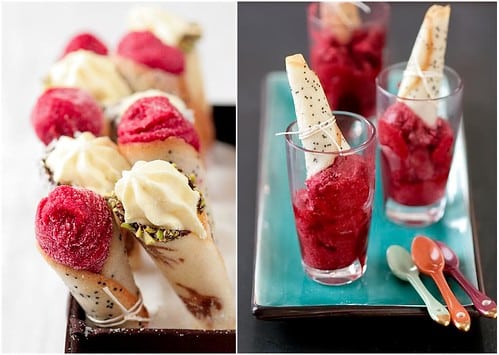
Sometimes I feel B. thinks I am crazy. Often, I know B. thinks I am crazy. Prime example this month was when he walked in the kitchen one day and saw all countertops covered with all sorts of tuile (twea-l) cookies. Traditional dough tuiles, nougatine tuiles, chocolate tuiles, mousses and sorbets of all sorts, tuile cones, tuiles cups, tuiles cannoli… He looked at me puzzled and said "I thought you said you did not know what you wanted to do with the Daring Bakers' challenge". I looked up and exclaimed "well, I could not decide which one to do so I made them all. Hungry?!"

This month’s challenge is brought to us by Karen of Bake My Day and Zorra of 1x umruehren bitte aka Kochtopf. They have chosen Tuiles from The Chocolate Book by Angélique Schmeink and Nougatine and Chocolate Tuiles from Michel Roux.

Yes, this month we could chose from 3 different recipes to make the tuile cookies and we had complete freedom for the choices of filling. I like tuiles. A lot. I like making them. A lot. After the initial "which one to do"…I ended up making them all. It started with the simple tuile cones and throughout the day I found myself coming up with more combinations, shapes for the tuiles to accommodate all the sorbets and mousses I had in the freezer. Talk about one good January freezer cleaning!! You know, like when you need more bread for your cheese, then more cheese for your bread, and so forth and so on….

Sugar Tuiles And Tuile Leaves With Grapefruit Sorbet


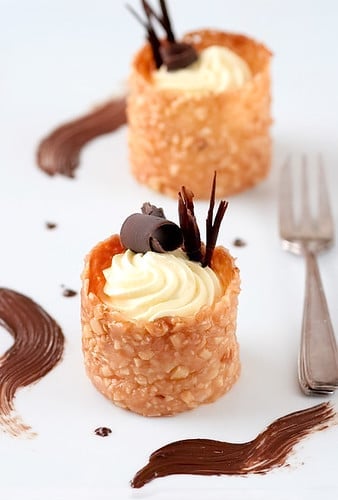
Let’s see…. I started with the nougatine recipe as my own little wink at a New Year’s Eve dessert at the restaurant years ago where I had decided to serve nougatine cornucopias filled with different sorbets. It was pouring rain and a 100% humidity and as the day was unfolding so where my cornucopias. I was checking on them as if they were my first born. This time, I waited for a dry day and made nougatine cups that I filled with a vanilla and star anise mousse (first picture).

Sugar Tuiles With Mixed Berry Sorbet And Vanilla Bean Mousse


I made another sugar tuile recipe to make poppy seed cones for raspberry-strawberry sorbet, and swirled cocoa and vanilla cones dipped in chocolate and filled with a vanilla bean mousse ( same recipe as the one with the star anise but without the spice this time). Then I made a leaf stencil and layered the leaves wiht a grapefruit sorbet and topped with a piece of candied grapefruit. I had extras so I filled shot glasses with the the berry sorbet and topped them with a poppy seed cone.

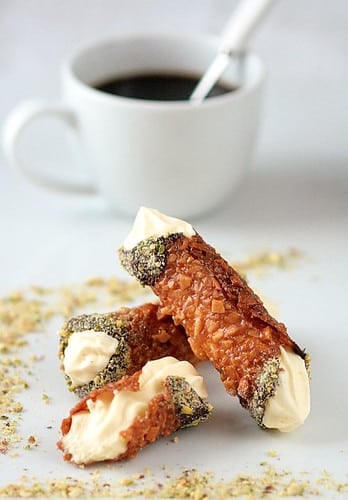
Nougatine Cannoli With Vanilla Mousse


I had some nougatine dough left in the fridge so I went ahead and made nougatine cannoli that I filled with the remaining vanilla bean mousse. These were so thin they almost shattered in between your fingertips…but absolutely delicious!

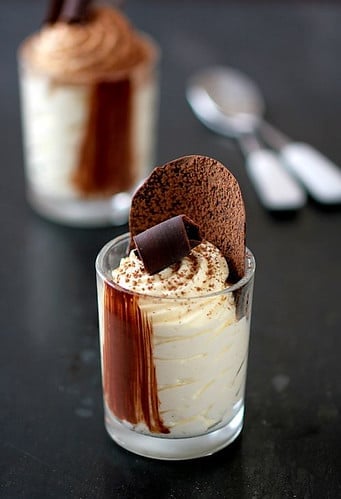
Bailey's Cream and Chocolate Tuiles


Finally I tempered some dark chocolate and made the chocolate tuiles to go alongside a simple Bailey’s cream.

Now you understand why I sometimes get "the look" but I also get another one from the neighbors when I tell them to come over for desserts!!

Recipe for Nougatine Tuiles, adapted from Michel Roux’s Finest Desserts
125 grams sliced almonds
165 grams sugar
15 grams butter (optional)
1/2 tablespoon oil (vegetable, sunflower, peanut)

Preheat oven to 350F.
Spread the almonds on a baking sheet and toast in the oven until lightly browned. Cook the sugar in a heavy based saucepan over low heat, stirring gently and continuously with a spatula, until it melts to a light golden caramel. Add the almonds and stir over low heat for 1 minute, then stir in the butter until completely absorbed. (This is not essential, but will give the nougat an added sheen) Pour the nougatine onto an oiled baking sheet
Place a baking sheet toward the front of the warm oven, leaving the door half open. The warmth will keep the cookies malleable. Work with one piece at a time, of a size appropriate to the shape you want. Roll out each piece on a warm, lightly oiled baking sheet or lightly oiled marbled surface. It is essential to work quickly, since the nougatine rapidly becomes brittle. Heat the nougatine in a microwave oven for a few seconds only to soften it if needed. Roll the nougatine into the appropriate thickness for your desired shape, but never thicker than 1/8 inch or 3 mm. Quickly cut out your chosen shapes using cookie cutters, or the blade or heel of a chef’s knife. To mold the nougatine, drape it very rapidly over the mold so that it follows the shape and contours. Leave until completely cold before removing from the mold. Or, cut out and using your fingers or a knife, push into folds or pleats… use as a basket, twirl round a knitting needle..Nougatine based shapes can be made two or three days in advance, Keep them in a very dry place and do not fill with something like a mousse more than 2 hours prior to serving.

Recipe for Vanilla Star Anise Mousse:
3 egg yolks
pinch of salt
1/2 tablespoon (3.5gr) powdered gelatin + 2 tablespoons water
100ml water
1 /2 cup (100gr) sugar
1 star anise
1 cup heavy cream
1 teaspoon vanilla bean paste

In the bowl of a stand mixer, whisk the egg yolks and the salt. In a small bowl, sprinkle the gelatin over the water, set aside. Combine the remaining water, sugar and star anise in a heavy saucepan. Cover and bring to a rapid boil over medium high heat (prevents crystallization of the sugar on the side of the pan). Once boiling, uncover and cook the syrup reaches 238F. Remove the star anise and pour the syrup in a container with a spout, it will be easier to add the to the yolks. Pour the syrup slowly and into a steady stream into the egg yolks with the machine running on medium high. Melt the gelatin in the microwave for 10 seconds or into the (now empty) saucepan until dissolved. Add it to the yolk mixture and continue to whisk on medium high until it triples in volume and cools to room temperature. In a separate bowl, whip the heavy cream to soft peaks with the vanilla paste. Gently fold the egg yolk mixture into the whipped cream and use immediately.

Vanilla Tuiles, adapted from Bo Friberg’s The Professional Pastry Chef:

4 ounces unsalted butter, softened
4 ounces powdered sugar, sifted
1/2 cup egg whites, at room temperature
1 teaspoon vanilla extract
4 ounces all purpose flour, sifted

Cream the butter and powdered sugar together in a stand mixer fitted with the paddle attachment. Add the egg whites and vanilla and beat until just coming together. Add the flour to the butter mixture and mix until incorporated. Do not overmix. Use right away or store in the refrigerator, taking it out 30 minutes before you plan to use it.
Cut out two 4 inch round stencils in a piece of card stock paper and place them on a parchment lined baking sheet. Spread a little of the batter over the stencils, carefully lift the card stock paper, and bake 5-8 minutes at 350F until the edges are just getting golden brown.
To make cocoa swirls, take about one tablespoon of the batter and add one teaspoon of sifted cocoa powder and mix thoroughly. Pipe dots and swirl them around with a toothpick on the tuiles before they go in oven.
Shape the tuiles around a couple of cones or Bismarck tubes. Let cool completely before storing in an airtight container.

Recipe for Grapefruit Sorbet:

2 cups (500ml) freshly squeezed pink grapefruit juice
1 cup (100gr) sugar
4 cups (1 liter)water
2 tablespoons vodka (optional)

In a saucepan, combine the sugar and water and bring to a boil, stirring to dissolve the sugar. Add the vodka (if using)and let cool to room temperature.
Pass the grapefruit juice through a sieve to remove the pulp and add it to the sugar syrup, stirring well to blend.
Pour into the container of an ice cream maker, and freeze according to the manufacturer’s instructions. Transfer to a container and freeze until firm before serving.

Chocolate Tuiles, adapted from Michel Roux’s Finest Desserts

9 oz/250 grams dark or white couverture or best-quality bittersweet chocolate, chopped

Temper the couverture. Place the template on a sheet of rodoïde (or use a clean sheet of sturdy plastic such as a folder) and fill with about 1 tbs of the mixture. Repeat the process a little distance away from the first one. As soon as you have 5 tuiles fit, slide them onto a mold or rolling pin (side of a glass) to curve. Let cool completely, lift tuiles off the plastic only after the chocolate has set and just before serving, so that they keep their shine.

Bailey’s cream:

4 oz (120gr) mascarpone cheese, at room temperature
2 tablespoons (20gr)sugar
1/4 cup Bailey’s Irish cream
75 ml. heavy cream

In a large mixing bowl, whisk the mascarpone with the sugar until light. Whisk in the liqueur. Whip the heavy cream to medium stiff peaks, and fold into the mascarpone. Divide among ramekins or glasses and serve with the chocolate tuiles.

Please visit the other Daring Bakers to see their take on the challenge!

Chocolate Espresso Mousse Cakes

Chocolate Espresso Mousse Cakes & Latte Ice Cream


"You sound like you are far away…there are lots of fuzzies on the line", my mom said earlier on the phone as I was standing on the edge of the water watching Bailey timidly dip his paws in the cold marsh.
"Well mom…I am far away…and outside and it’s really cold and rainy. That’s probably why".
"I know where you are, obviously but what on earth are you doing outside in the rain?"
"I am taking a taking a trip home"
"ugh?…"
"This is picture perfect January Parisian weather, mom. It’s cold, it’s damp, I can smell the leaves, the grass and I can hear the silence"
"hear the silence. Your grandma used to say that."

Well, I doubt it was bliss, peace of mind, or calm I experienced then as my feet were getting cold and the dog was looping around his leash from boredom but this moment spent outside did make me feel at home for a short while. Mom advised I got in and made myself some coffee, to which I enthusiastically agreed as I had the perfect slice of cake to go with it. Turned the coffee pot on and plated that one little cake I had saved and sat down in front of the fireplace. Then it felt cozy and warm…all the way down to my chilled bones. The temperatures have indeed dipped quite dramatically for the region and I may be the only crazy out there walking with a smile on my face, happy to bundle up in extra layers. It really put me in a mood for chocolate, coffee-ish and/or nutty desserts.

Making Chocolate Mousse


When a friend called asking if I could make a cake for a dinner party of 8 she was hosting, I don’t think I even asked her preference. I happily volunteered a moist chocolate cake filled with a silky and rich chocolate mousse with a touch of espresso. I also made a pint of latte ice cream for her to plate with it. A couple days later she called as I was putting the layers in the oven and inquired how the cakes were coming along. I drew a blank, my blood froze solid. "Cakes? How many do you need for 8?!!". She figured that since I like to make individual desserts that I would make petits cakes while I thought since she liked larger cakes that she was expecting one tall cake. Hmmm…since two 8-inch layers were already in the oven I said I’d make eight cakes out of that, somehow.

Instead of trying to cut 16 rounds, fit them into rings and fill with mousse, I went on with my original idea, only slightly modified. Once the layers were baked and cooled, I layered them with the mousse, refrigerated until set, cut the cake in 8 servings and cut off the round edge of each slice so they would stand straight on a plate. I decided to skip an icing of buttercream or ganache as the mousse was already rich. I used the trimmed tops of the cakes instead and I broke these into pieces, dried them in the oven, processed them to fine crumbs and coated each individual gateau with those.

One couple could not make it to the party. Their loss, our choco-espresso bliss…

Chocolate Espresso Mousse Cake & Latte Ice Cream


Chocolate Espresso Mousse Cake Recipe:

Serves 8

For the cake:
1 stick (113gr) butter
1 cup (200gr) sugar
1/2 cup (45gr) natural cocoa powder
2 eggs
1 1/2 cups (185gr) all purpose flour
1 teaspoon (5gr) baking powder
1 teaspoon (5gr) espresso powder
1/2 teaspoon (2.5gr) baking soda
1 cup (250ml) warm water

Preheat oven to 325F. Butter two 8-inch round baking pans, sprinkle some flour into the pans, shake it around and tap the excess off. Line the bottoms with two 8 inch circles of parchment paper. Set aside.
In a mixer fitted with the paddle attachment, mix together the butter and sugar until light and creamy. On low speed, add the cocoa and mix until incorporated. Add the eggs, one at a time, beating well after each addition. Scrape the bowl with a spatula to make sure they are properly mixed in. Add the flour, baking powder, espresso powder and baking soda and mix on medium-low speed while slowly adding the warm water and mix until smooth. Divide the batter between the prepared pans and bake for 30 to 40 minutes or until a toothpick inserted in the middle comes out clean. Let cool to room temperature and unmold the cakes.
Lower the oven temperature to 300F. Level the cakes by trimming the tops off and break them in pieces. Place those on a baking sheet and bake for 15 minutes or until dried. Let cool completely and process them until smooth in food processor. Set the crumbs aside.

For the mousse:
6 oz semisweet chocolate, chopped
1/4 cup (62.5ml) whole milk
1 teaspoon espresso powder
1/2 stick (55gr) butter
1 egg yolk
1 cup (250ml) heavy cream, cold

In a bowl set over a pan of simmering water (make sure that the bowl fits snuggly over the pan and does not touch the water), melt together the chocolate, milk, espresso powder and butter. Remove from the heat and let cool to lukewarm. Whisk in the egg yolk. In a mixer, whip the cream to medium peaks and fold it into the chocolate mixture.

To assemble:
Place one cake layer in a springform pan, top with the mousse and place the second cake layer on top. Refrigerate until the mousse is firm, about one hour. Run a knife dipped in hot water around the edge of the cake and unmold. Use a long knife to cut the cake into 8 slices and make sure to dip it in hot water and wipe it clean each time to get clean cuts. Trim the ends of each slices to obtain triangles. Coat each piece with the reserved cake crumbs.
Serve with ice cream or some whipped cream if desired.

Chocolate Chesnut Vanilla Yule Log or Raspberry Vanilla Meyer Lemon?

Milk Chocolate And Chestnut Yule Log


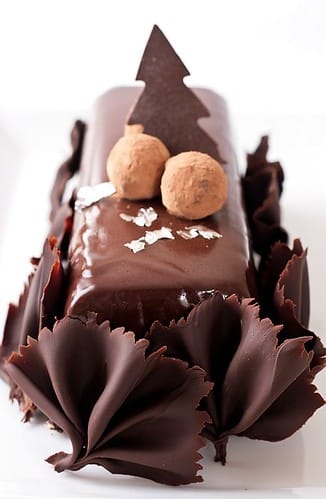
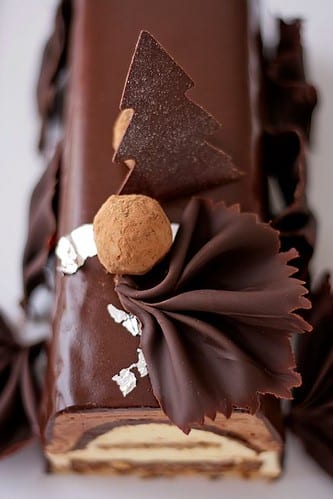
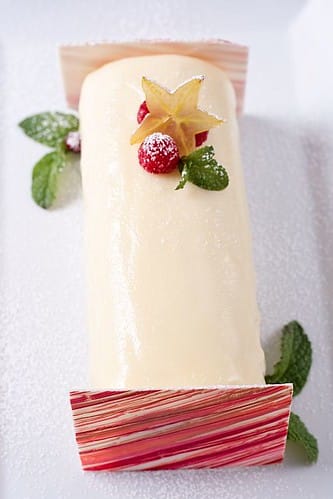
Now say that twelve times real fast after after one too many glasses of Champagne!! These Yule Logs are the desserts I served the family on Christmas dinner and between the 12 of us there were barely enough left for a midnight snack! I did not intend to double the work and make two "just" for fun but between the ubber chocolate fans and the "I ate too much but I still want dessert" peeps, and for my sake of a stress free meal where everybody was happy, I knew that making two was a necessity. Interesting how I belong to both groups…Let’s face it, it’s dessert, it’s mousse, it’s chocolate and it was delicious!

It was also the dessert chosen by the adventurous Hilda from Saffron and Blueberry and Marion from Il en Faut Peu Pour Etre Heureux for the December Daring Bakers' Challenge: a French Yule Log by Flore from Florilege Gourmand. I loved the traditional cake Yule Log we made last year but this entremet version suits me perfectly…if there is mousse and creme brulee and anything contrasting in texture such as a layer of crisp or feuillantine….I am coming running!!

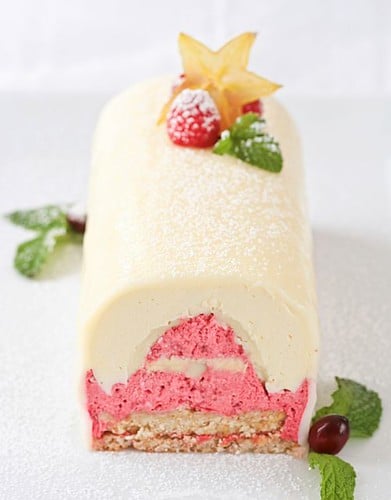
I loved that even with the rules laid out to make a log filled with 6 different components, we still had plenty of room to use our favorite combos and flavors. Each log had to include a dacquoise layer, a feuillantine insert, a creme brulee insert, a ganache insert, a mousse and an icing. Yes…both my logs have 7 components…Again, not trying to be special….just playing with aesthetics and visuals by splitting the mousse component in two and flavoring differently.

The dark chocolate Yule Log had hazelnut dacquoise layer, a milk chocolate feuillantine, a milk chocolate and chesnut mousse, a vanilla mousse, a chestnut creme brulee, a dark chocolate ganache and a dark chocolate icing.
The white chocolate Yule Log had an almond dacquoise, a white chocolate feuillantine, a raspberry mousse, a a vanilla mousse, a Meyer Lemon creme brulee, a white chocolate ganache and a white chocolate icing.

Milk Chocolate And Chestnut Yule Log


Because I was working with two logs at the same time, (and getting Christmas together) it was easier for each log to make the vanilla mousse recipe, divide it in half and add milk chocolate and chesnut puree to one part and do the same for the other log adding pureed raspberries to half the mousse. I used the traditional French gavottes for the feuillantine part in the chocolate log as the recipe stated but I ate too many (!) to have enough for the other one so I subbed with cereals like I had done in the Poire D’Eve cake last month. The chesnut puree was from a can sent by mom in one of her care packages and the Meyer lemon addition to the creme brulee in the second log was a last minute addition after a neighbor gave us a couple….but I can’t ever turn those down!

I also went very DIY with the inserts and molds (just ask Lisa, she’s got pixel proofs!). The rounded vanilla insert in the chocolate log was creating by pushing a foil covered pvc pipe down the chocolate-chestnut mousse, freezing that part and then taking the insert out, brushing the ganache on and then filling it with the vanilla mousse. The mold was a traditional French loaf pan I brought with me when I moved here…a girl’s gotta have her necessities, right?!!
The rounded mold for the white chocolate log was made by cutting an aluminium foil pan and molding it around a wine bottle and setting it in the bottom of another loaf pan. The mousse set up was created by using another foil wrapped pvc pipe but a foil wrapped paper towel insert-roll thingie works the same. Since I did not have the right size of rhodoids sheets used to line up the loaf pans I cut sheet protectors (you know the ones used to protect your important documents during presentations) and used them the same way…but plastic wrap works just as well.

For the sake of keeping this post to less than a mile and not losing your attention too long, I am only writing down the instructions for the chocolate log with the changes I made in italics for the raspberry one.

Milk Chocolate And Chestnut Yule Log


Chocolate Chesnut Yule Log:

Note: You can use the Dacquoise for the bottom of your Yule Log only, or as bottom and top layers, or if using a Yule log mold (half-pipe) to line your entire mold with the biscuit. Take care to spread the Dacquoise accordingly.

2.8 oz (3/4cup + 1Tbsp / 80g) ground hazelnuts
1.75 oz (1/2 cup / 50g) confectioner’s sugar
2Tbsp (15g) all-purpose flour
3.5oz (100g / ~100ml) about 3 medium egg whites
1.75 oz (4 Tbsp / 50g) granulated sugar

Finely mix the hazelnuts and the confectioner’s sugar. (If you have a mixer, you can use it by pulsing the ingredients together for no longer than 30 seconds)
Sift the flour into the mix. Beat the eggs whites, gradually adding the granulated sugar until stiff. Pour the hazelnut mixture into the egg whites and blend delicately with a spatula.
Grease a piece of parchment paper and line your baking pan with it. Spread the batter on a piece of parchment paper to an area slightly larger than your desired shape (circle, long strip etc…) and to a height of 1/3 inches (8mm).
Bake at 350°F (180°C) for approximately 15 minutes (depends on your oven), until golden. Let cool and cut to the desired shape.
For the raspberry log I used almonds instead.

Vanilla Mousse: (divided in half before the end to add the chocolate and chesnut)
2/3 cup (160g) heavy cream (35% fat content)
2/3 cup (160g) whole milk
1 vanilla bean
4 medium-sized egg yolks
3 oz (6 Tbsp / 80g) granulated sugar
3 Tbsp (25g) cornstarch, sifted
4g / 2 tsp powdered gelatin or 2 sheets gelatin
1 cup (240g) whipping cream (35% fat content)

Pour the milk and 2/3 cup cream into a saucepan. Split the vanilla bean in half, scrape the seeds from the vanilla bean halves into milk and put the vanilla bean in as well. Heat to boiling, then turn the heat off, cover and let infuse for at least 30 minutes. Then remove the vanilla bean. Beat the egg yolks with the sugar until white, thick and fluffy. Add the cornstarch, beating carefully to ensure that there are no lumps. While whisking vigorously, pour some of the milk into the yolk mixture to temper it. Put infused milk back on the stove on medium heat. Pour yolk mixture back into the milk while whisking vigorously. Keep whisking vigorously until mixture thickens considerably. As soon as the mixture starts to boil, leave on for only 2 more minutes. (The recipe says you should remove the vanilla bean at this time but in the interest of no one getting burned, that can be done after you take the pastry cream off the stove.) Add the gelatin and let it melt completely, stirring once or twice. Divide the batter in two equal parts.
For the milk chocolate-chesnut variation: add 1/4 cup melted milk chocolate and 1/4 cup chesnut puree to one half of the cream.
For the raspberry log: add 1/2 cup pureed raspberries to half the cream.
Whip the 1 cup whipping cream until stiff and add gradually to the pastry cream. Blend delicately with a spatula.

Dark Chocolate Ganache insert:
1.75 oz (4 Tbsp / 50g) granulated sugar
4.5oz (2/3 cup – 1 Tbsp/ 135g) heavy cream
5 oz (135g) dark chocolate, finely chopped
3Tbsp + 1/2tsp (45g) unsalted butter softened

Make a caramel: Using the dry method, melt the sugar by spreading it in an even layer in a small saucepan with high sides. Heat over medium-high heat, watching it carefully as the sugar begins to melt. Never stir the mixture. As the sugar starts to melt, swirl the pan occasionally to allow the sugar to melt evenly. Cook to dark amber color (for most of you that means darker than last month’s challenge).
While the sugar is melting, heat the cream until boiling. Pour cream into the caramel and stir thoroughly. Be very careful as it may splatter and boil.
Pour the hot caramel-milk mixture over the dark chocolate. Wait 30 seconds and stir until smooth. Add the softened butter and whip hard and fast (if you have a plunging mixer use it). The chocolate should be smooth and shiny.
For the white chocolate ganache insert: change the chocolate and skip the butter, proceed the same way.

Lemon White Chocolate Raspberry Yule Log


Feuillantine insert:
3.5 oz (100g) milk chocolate
1 2/3 Tbsp (25g) butter
2 Tbsp (1 oz / 30g) praline (or bring 1/2 cup of sugar to an amber caramel and spread it on 1/2 cup almonds and ground until fine)
2.1oz (60g) lace crepes(gavottes) or rice krispies or corn flakes or Special K
Melt the chocolate and butter in a double boiler.Add the praline and the coarsely crushed lace crepes. Mix quickly to thoroughly coat with the chocolate. Spread between two sheets of wax paper to a size slightly larger than your desired shape. Refrigerate until hard.
For the raspberry log: replace the milk chocolate with white.

Chestnut Creme Brulee:
1 cup (230g) heavy cream
4 medium-sized (72g) egg yolks
0.75 oz (2 Tbsp / 25g) granulated sugar
1/2 cup chesnut puree

Heat the cream to just boiling. Whisk together the sugar and egg yolks (but do not beat until white). Add the chestnut puree. Pour the cream over the sugar/yolk mixture. Mix well. Wipe with a very wet cloth and then cover your baking mold (whatever shape is going to fit on the inside of your Yule log/cake) with parchment paper. Pour the cream into the mold and bake at 275°F (100°C) for about 1 hour or until firm on the edges and slightly wobbly in the center.
For the raspberry log: replace the chestnut puree with 1 tablespoon of Meyer lemon juice and zest of a whole one.

Dark Chocolate Icing:
Note: I recommend doubling it to make eaiser to spread evenly.
4g / 2 tsp powdered gelatin or 2 sheets gelatin
¼ cup (60g) heavy cream
2.1 oz (5 Tbsp / 60g) granulated sugar
¼ cup (50g) water1/3 cup (30g) unsweetened cocoa powder

Soften the gelatin in cold water for 15 minutes. (if using powdered, use 2 tablespoons of water) Boil the rest of the ingredients and cook an additional 3 minutes after boiling. Add gelatin to the chocolate mixture. Mix well. Let cool while checking the texture regularly. As soon as the mixture is smooth and coats a spoon well (it is starting to gelify), use immediately.
For the raspberry log: use 100 gr of white chocolate, milk instead of cream and no cocoa.

For the chocolate fans: everything is explained very well by Alice Medrich with Julia Child in this tutorial.

Lemon White Chocolate Raspberry Yule Log


Thank you ladies for another tasty challenge!

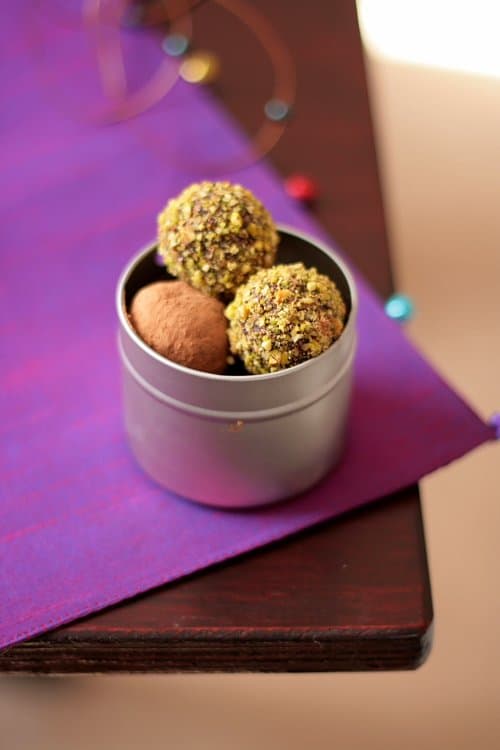
Lavender And Espresso Truffles

Lavender And Espresso Truffles


Christmas is right around the corner isn’t it?! I am fully in the holiday spirit, at least I think I am. No, I know I am once I get home, close the door and start baking and filling boxes with goodies to be shipped off to friends and given to the family on Christmas day. Indeed, it’s been a little strange looking at snowmen and pine trees while we were in shorts today…no kidding. Well, B. was because I am a "frileuse" as we say back home; always chilly. I am currently living winter vicariously through my pal Jen in Colorado who keeps filling my head with pictures of snow, ice, skiing and delicious holiday treats while I am rolling truffles.

We all have our traditions comes Christmas and there are a couple that my family never miss. My grandmother was famous for her marzipan stuffed dates and walnuts while since I was old enough to hold a spatula, I have been the one making truffles. I flew home the first Christmas after my grandma died and without exchanging a word one night my mom went to the pantry, pulled out the dates, nuts and marzipan and we made the stuffed fruits. There was quite a bit of reminiscing, a lot of crying and raw feelings shared. It was one of the best moments of my life. Through my grandma’s passing I discovered what it meant for my mom to continue with certain things just the way they were. It brings people together, it gives you a breakthrough or a headache but your heart is full and your soul growing.

While grandma was playing with marzipan, I was never more than a couple of feet away, strirring and scooping and rolling ganache for truffles. You can safely assume that once I moved here, this is the one thing I never miss doing during the holidays. The truffle batter I use is a basic ganache that I flavor differently depending on my mood or what people ask for. Depending on the time available I might hand dip them in tempered chocolate (Go Jen!) and decorate them but this year it is so not happening so I made them the way we do in my family, rolled in cocoa or nuts, etc…

Photobucket


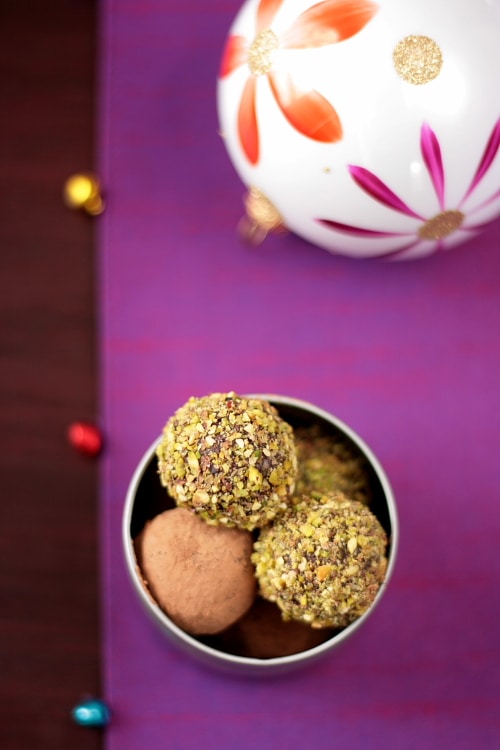
I have only made two kinds so far, lavender infused truffles and espresso truffles. Once the ganache was made, I let it harden in the fridge for a couple of hours and then scooped out little balls that I rolled and place on a parchment baking sheet and place them "naked" back in the fridge. The reason behind this little "curing" it is to help them develop a natural skin so that the cocoa powder won’t seep in the truffles as they stand waiting for their delicious (for you!) fate. On the other hand I find it a lot easier to have the nuts adhere to the chocolate right after you have rolled them in between your hands and your body heat has softened the ganache a bit.

I made a firm ganache with semisweet chocolate (Callebaut) and since all chocolate vary, your ganache may set up differently so if it turns out too soft, add more chocolate in your next batch or if it was too firm add a little more cream. I used a ratio of 8 oz of chocolate for 1/2 cup of cream but if you want to use milk or white chocolate increase the ratio to 12 oz for the same amount of cream. Adding alcohol will soften the ganache unless you add the same amount of chocolate so for every ounce of liqueur (about 2 tablespoons) that you use, increase the chocolate by one ounce also. For milk or white ganaches, add 2 ounces of chocolate for every ounce of liqueur. If you want to know more about chocolate, I strongly recommend this wonderful book "The Art Of Chocolate" by Elaine Gonzales.

Lavender Truffles

Makes 30 to 35 truffles

1/2 cup (125ml) heavy cream
1 tablespoon (1gr) edible lavender buds
8 oz semisweet chocolate, chopped
cocoa powder for rolling

In a small heavy saucepan placed over low heat, bring the cream to a simmer. Remove from the heat and let stand 30 minutes. Strain the lavender and bring the cream back to a simmer. Once hot, add the chocolate and let stand for a couple of minutes then stir until the ganache is completely smooth. Let cool to room temperature then refrigerate until firm, about 2 hours. With a spoon or a melon baller, scoop out balls of ganache, roll them in between your palms fairly quickly and set them on a baking sheet. Refrigerate overnight. Roll them in the cocoa powder and keep refrigerated until ready to use.

Espresso Truffles:

Makes 30-35

1/2 cup (125ml) heavy cream
2 teaspoons espresso powder
2 tablespoons (1 oz) coffee liqueur
9 oz semisweet chocolate, chopped
1 1/2 cups finely chopped pistachios

In a small heavy saucepan, bring the cream and espresso powder to a simmer over low heat. Add the liqueur and remove from the heat. Add the chocolate and let stand a couple of minutes then stir the ganache until completely smooth.Let cool to room temperature then refrigerate until firm, about 2 hours. With a spoon or a melon baller, scoop out balls of ganache, roll them in between your palms fairly quickly and roll them in the pistachios and keep refrigerated until ready to use.

Lavender And Espresso Truffles


For more cookies and sweet treat ideas, check Susan’s Eat Christmas Cookies, Season 2!

Poire D’Eve

Poire D'Eve


I know, I know…no pictures of Lisa’s wedding cake yet, at least not today….One reason is that I have been saving this wonderful Poire D’Eve cake for a week now and another reason is that I have hundreds of pictures to go through from the wedding and a few other attendees have graciously allowed me to use their shots too so I am working on a little montage. I actually started writing about it yesterday and this morning tons of little details came rushing to my mind so I need to "sit" on it a couple more days to do it justice.

I can’t tell you how much your visits and excitement over this past week have meant to me and I promise to tell you all about it. As ubber critical me, I did find faults until both Lisa and Wayne decided to smear some cake on their noses, but I guess that is normal when you bake for such a dear friend…under the watch of other foodies….Thank you Kelly and Lisa for staying up late, talking to me while I was "spatulating" (new word) the same corner over and over again. Thank you K. for not taking that same spatula and knocking me over the head with it although your look was screaming "put that thing down….Now!!"

Allright, I will give something away about this cake. It was a three tiered square cake which bottom layer was Lisa’s mom favorite carrot cake filled with cream cheese frosting, the middle layer was Lisa’s favorite pumpkin cake with butterscotch filling from Marcel Desaulniers, and the top layer that the two lovebirds have kept and froze was Lisa’s Mothership Chocolate Cake adapted from Orangette. The whole cake was covered in her favorite Italian meringue buttercream from Jacques Torres. I don’t know if it was the near freezing temperatures, the beverages flowing a plenty or just good appetites, but at the end of the night there was just about half the carrot cake left…and I had made the cake for more than the accounted number of guests….I like when people are not shy to eat cake 🙂 Now that your teeth are shattering and your stomach growling, I hope you can wait until the weekend for the recap!!

Bavarian Mousse Ingredients


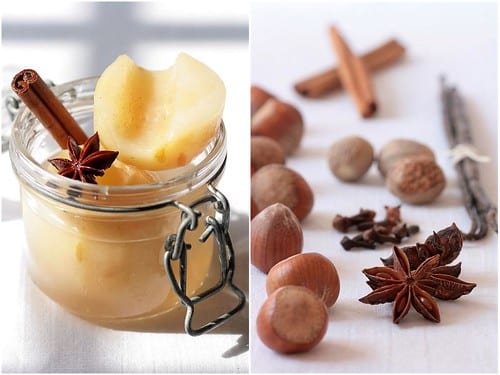
In the meantime, let’s share a slice of this pear cake, shall we? I forgot to mention the other day that the Chai Persimmon Tatin was inspired by one of my pastry heroes, Hidemi Sugino from his The Dessert Book that Inne graciously sent me last year and even though the recipes are translated, I tend to get inspired by the pictures and the dominant flavors and then change it around. This Poire D’Eve is also inspired by one of his creations, the Pomme D’Eve cake in his other book. Now, this one was given to me by a Japanes exchange student I met a couple of months ago and when we started talking about Japan, I mentioned Sugino and she had her mom send it to me….in Japanese. Needless to say, I once again looked at the picture of his mousse apple cake sandwich between sheets of caramel mousse, apple mousse, vanilla and chocolate genoise and decided to develop a recipe for its cousin, the Poire D’Eve.

I know, Eve ate an apple, not a pear…but if she had had a Forelle pear poached in spices such as star anise, cinnamon, cloves, vanilla and folded with a light bavarian cream, she might have changed her mind. I liked the original apple cake mixing apple, caramel, chocolate so I decided to use these flavors in different texture contrast and medium for this cake. Like Eve and her apple, Forelles are my guilty pleasure when it comes to pears. It is similar in size to a Seckel pear and grows mostly in the Pacific Northwest. When I saw them popping up at the grocery store, I immediately bought a case. They are the perfect snacking pear, both in size and flavor since they remain firm and not milly for a long time. They fit in your pocket, purse or pocket and have this absolute tantalizing fragrance. I bought the case right before my trip so I did poach a bunch of them and preserved them in their poaching syrup. For this recipe I used some I had poached that day so I wrote the recipe accordingly.

Spiced Poached Pears Diptych


The base is a milk chocolate feuillantine topped with a salted butter caramel mousse and a vanilla bavarian cream with diced spiced poached pears throughout. Before applying a glaze made with the poaching syrup I gave the cake some brush strokes with some yellow pearl dust mixed with a bit of water. The finished cake got the two thumbs up from B. who is not that big of a pear fan and commented that the caramel and chocolate complimented the fruits very well. Trust me, he does not only say that because I cook him dinner….he is really my most severe critique!!

Do not be afraid at the term "feuillantine". It is a entremets or cake base usually made with crushed "crepes dentelle" cookies but I was out (ate too many with ice cream) so I substituted crushed corn flakes and added a bit of chopped hazelnuts to enhance the mousses and it worked like a charm. I used the same caramel mousse as the one used in The Translatique, minus the chocolate. The bavarian cream is as easy as 1-2-3 if you have a little patience since you start by making a creme anglaise, adding some gelatin and once cooled, folding in some whipped cream and the poached pears. The spices and strokes of gold dust were the touches that have me in full blown holiday mood right now!! As always, be reassured that you can prepare this step over a couple of days (my head is more scattered than ever these days so any "time" help is welcome)

Poire D'Eve


Poire D’Eve

Serves 8-10

For the poached pears:
4 small pears, Forelles or Seckels, skinned, cored and left whole
3 cups of water
1/2 cup sugar
4 star anise
2 cinnamon sticks
one whole nutmeg
1/2 vanilla bean
4 cloves

Over high heat bring the pears, water, sugar and all the spices to a boil (leave the nutmeg whole). Reduce the heat to medium low heat and let the fruit simmer for 30 minutes or until just about fork tender. Remove the pears and put the liquid back on stove and let it reduce down to half its volume. Remove from the heat and strain all the spices. Reserve the liquid for the cake glaze.

For the Feuillantine:
5 oz (150 gr) milk chocolate
4 Tablespoons (55 gr) butter
1 cup (30 gr) corn flakes
2 oz (60 gr) toasted and skinned hazelnuts

Line a 8×8 square pan with aluminium foil and set aside (use a square pastry frame if you have one). Put the cornflakes and hazelnuts in a small freezer bag, close the seam and roll your rolling pin over it until finely crushed (do not run the mixture in the food processor, you want to keep some rough pieces). On top of a double boiler set over medium heat, melt together the chocolate and butter until they come together. Remove from the heat and stir in the cornflakes mixture. Immediately pat the mixture with your fingertips or the back of the spoon at the bottom of the line pan. Set aside while you prepare the mousses.

For the caramel mousse:
1/2 cup granulated sugar
2 Tb water
2 Tb salted butter, room temperature
1 cup heavy cream, divided

Measure 3/4 cup of cream and refrigerate, this portion will be used to make whipped cream so keep it well chilled. In a microwave or small saucepan, heat the 1/4 cup remaining until it is fairly hot. It will be added to the caramel and by being hot it will prevent the caramel from seizing on you and clumping up. In a heavy bottomed saucepan, add the sugar to the water over medium high heat and cook, without stirring until you get a dark brown caramel. Take the pan off the heat and add the butter and 1/4 cream. It will bubble like mad but it will not run over….if the butter and cream are not cold the bubbling will be minimal and short lived. Stir with a wooden spoon to smooth the caramel if necessary. Let it cool to room temperature Whip the remaining heavy cream to soft peaks in the bowl of a stand mixer fitted with the whisk attachment. Fold 1/3 of the whipped cream to the caramel to loosen it up and then add the remaining whipped cream. Spread over the feuillantine base and refrigerate until completely set.

For the Vanilla Pear Bavarian Cream:
4 poached pears (see above), chopped in small dices
4 egg yolks
1/4 cup (50 gr) sugar
1 cup (250 ml) whole milk
1/2 vanilla bean
1 Tb powdered gelatin, sprinkled over 3 Tb water
1 cup heavy cream

In a large bowl, whisk the egg yolks with the sugar until very pale. In the meantime, in a large saucepan set over medium heat, bring the milk and the vanilla bean (split open and scraped over the milk) to a boil. Slowly pour the milk over the yolks, whisking constantly. Pour the mixture back into the saucepan over medium low heat and cook until the cream coats the back of a spoon (as if making creme anglaise). Add the softened gelatin and stir until melted completely into the cream. Let cool to room temperature.
Whip the heavy cream to soft peaks and fold it into the cooled cream base. Fold in the pear dices. Pour the mixture over the caramel mousse until set.

At this point you can skip the painting and glaze but it makes it all the more festive.
For the paint, mix some gold dust with water to make a "paint" and brush in small strokes over the cake. Freeze the cake before applying the warm glaze, do so even if you skip the painting so your mousse won’t melt.

Pear Syrup Glaze:
1/2 cup reserved poaching syrup
1 1/2 teaspoon gelatin, sprinkled over 1 Tablespoon water

Bring the poaching syrup to a boil, add the gelatin and stir until completely dissolved. Let cool to room temperature (if the mixture gels, warm up over low heat until barely melted again). Pour it over the frozen cake and let set in the fridge.
Cut through the cake with a knife dipped in hot water to prevent breaking the glaze instead of slicing through it.

Note: I have terrible manners as I keep forgetting to thank Cenk from Cafe Fernando and the DMBLGIT judges for awarding the Toasted Coconut and Berries Charlottes the overall first place in last month event. I am truly honored and thrilled!