
caramels

Daring Bakers, Caramel Cake and Soft Grand Marnier Caramels

Photobucket


I can hardly believe that the Daring Bakers are already two years old and that next month will be my own two year anniversary with the group. I can hardly believe that it went from Lisa emailing me with "hey there are four of us making biscotti, are you interested?" to "hey should we have a name?" to a full blown multi national group of bakers of all ages and all levels. We may all see the challenges differently but it does not matter as long there is a good dose of butter, sugar, flour! I am learning so much about others, the way they approach recipes and ideas as well as their cultures. Cheers to two years Daring Bakers and to many more!

I love when things come full circle or half circle or when there is a little something somewhere, a little detail that makes sense to me or/and others. It did this month in the sweetest way (pun completely intended), when Dolores from Culinary Curiosity , along with Alex from Blondie and Brownie and Jenny of Foray into Food chose Shuna’s Caramel Cake as our November Challenge. When I first started reading food blogs, I tuned in to Shuna’s Eggbeater almost everyday. It took me forever and a day to leave a comment as every time I finished her last sentence I felt so inadequate posting a simple "Wonderful post". She has right the words to describe our industry, about being a chef, a woman, a human being wearing her heart upon her sleeve. I laugh, I cry, I shake my head "yes" and when she announced she was moving to London I was so thrilled for her…following what’s next and embracing all the unknowns that go with it.

Photobucket


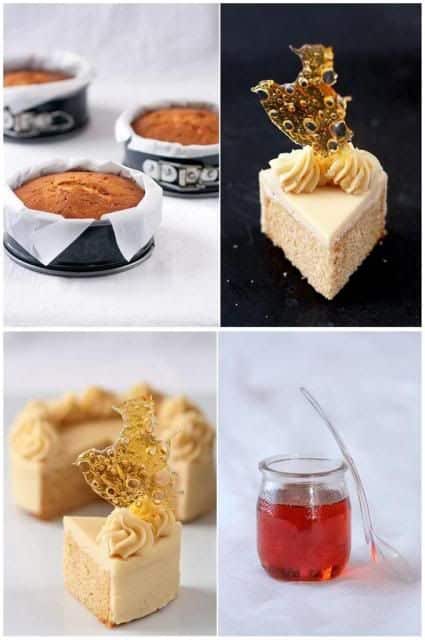
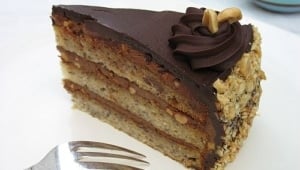
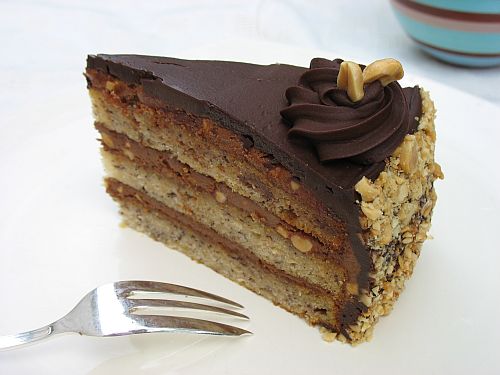
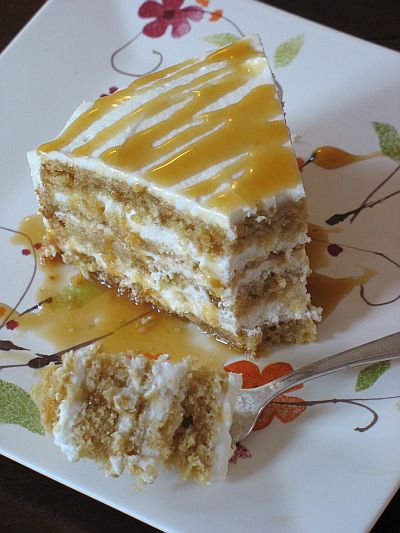
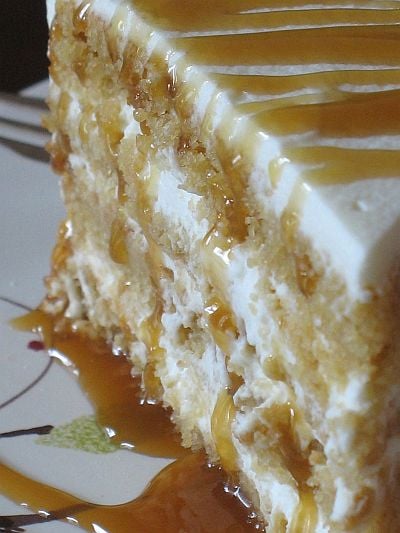
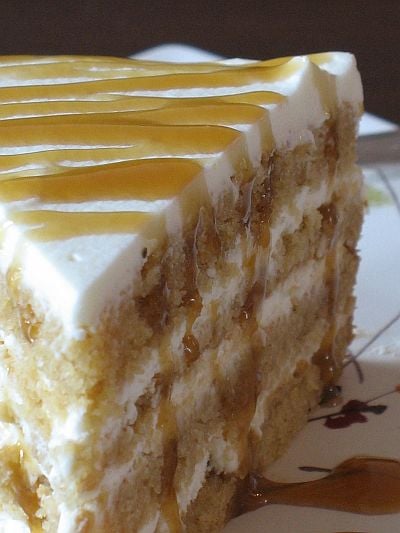
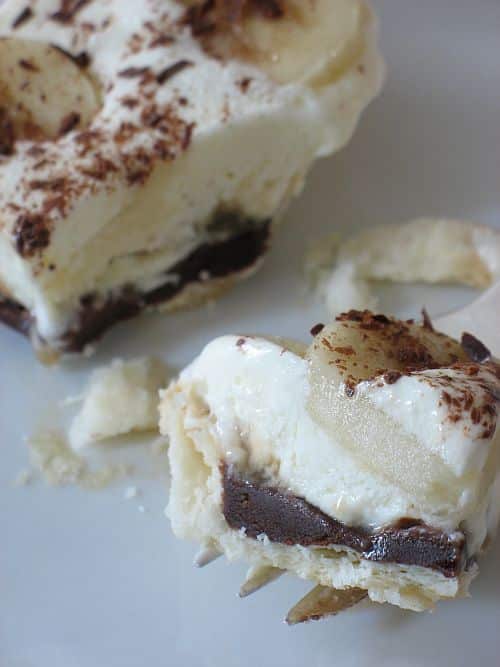
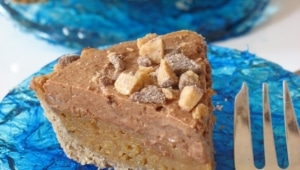
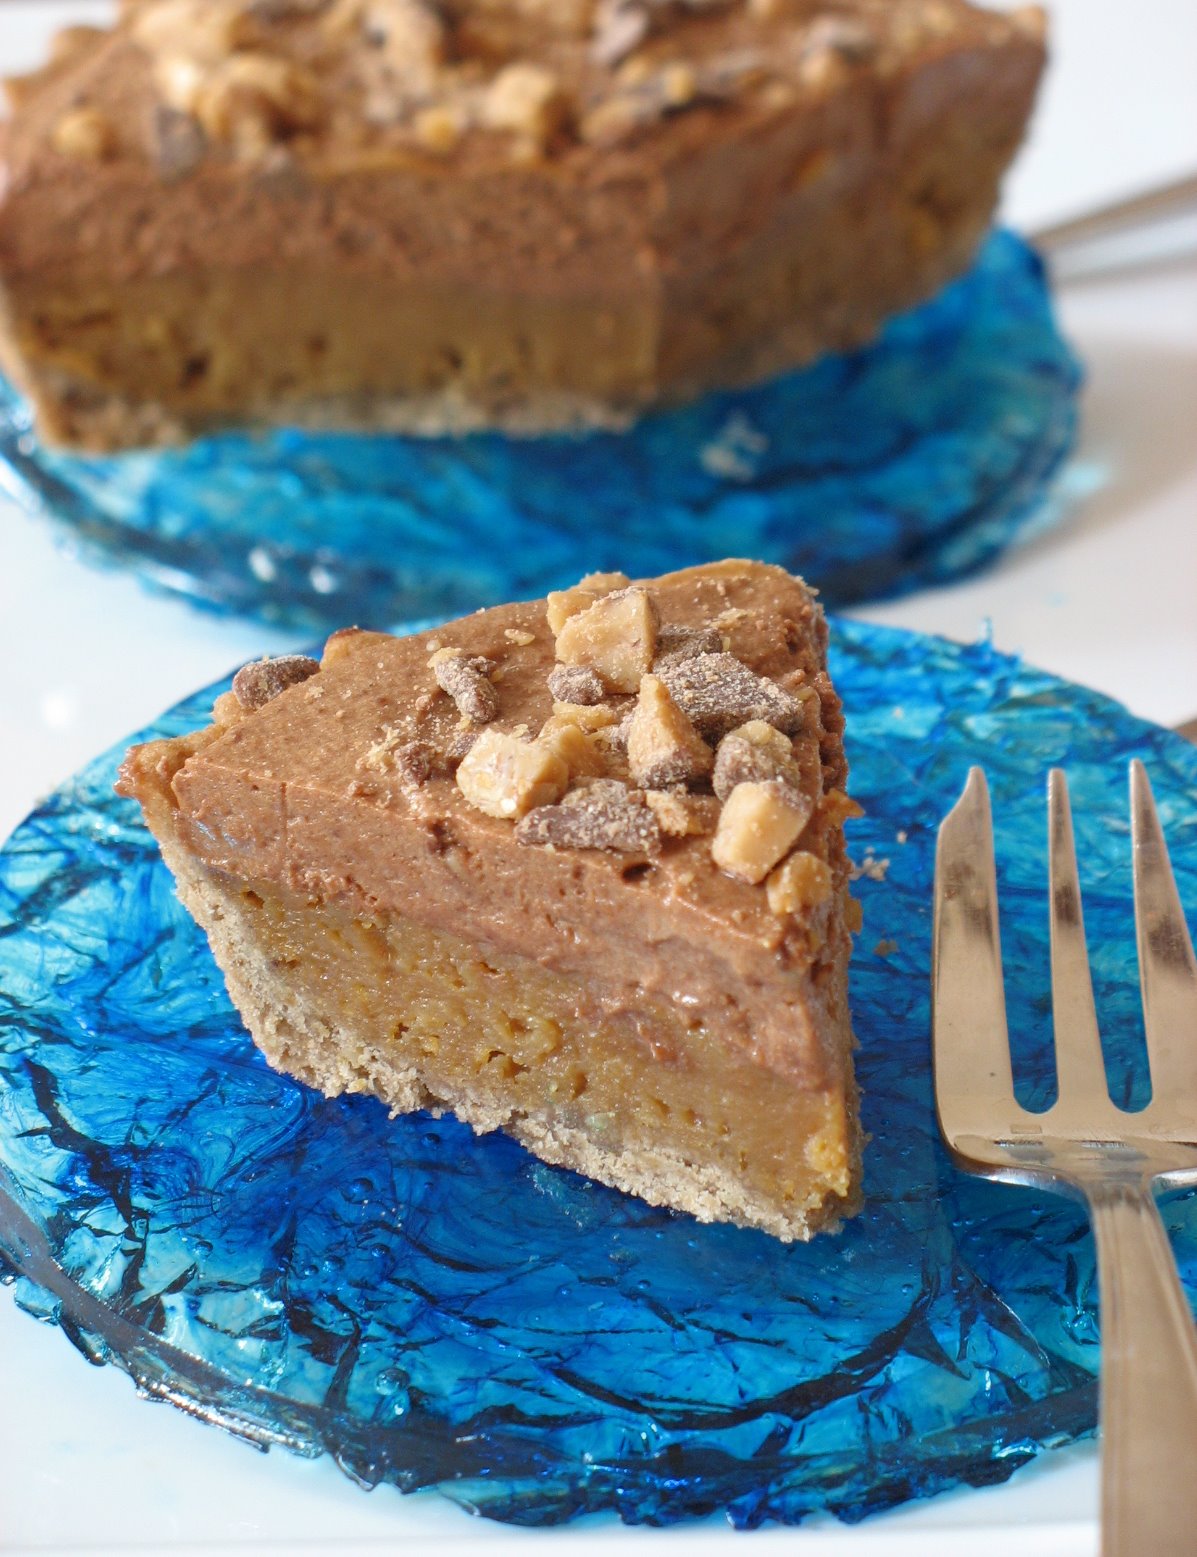
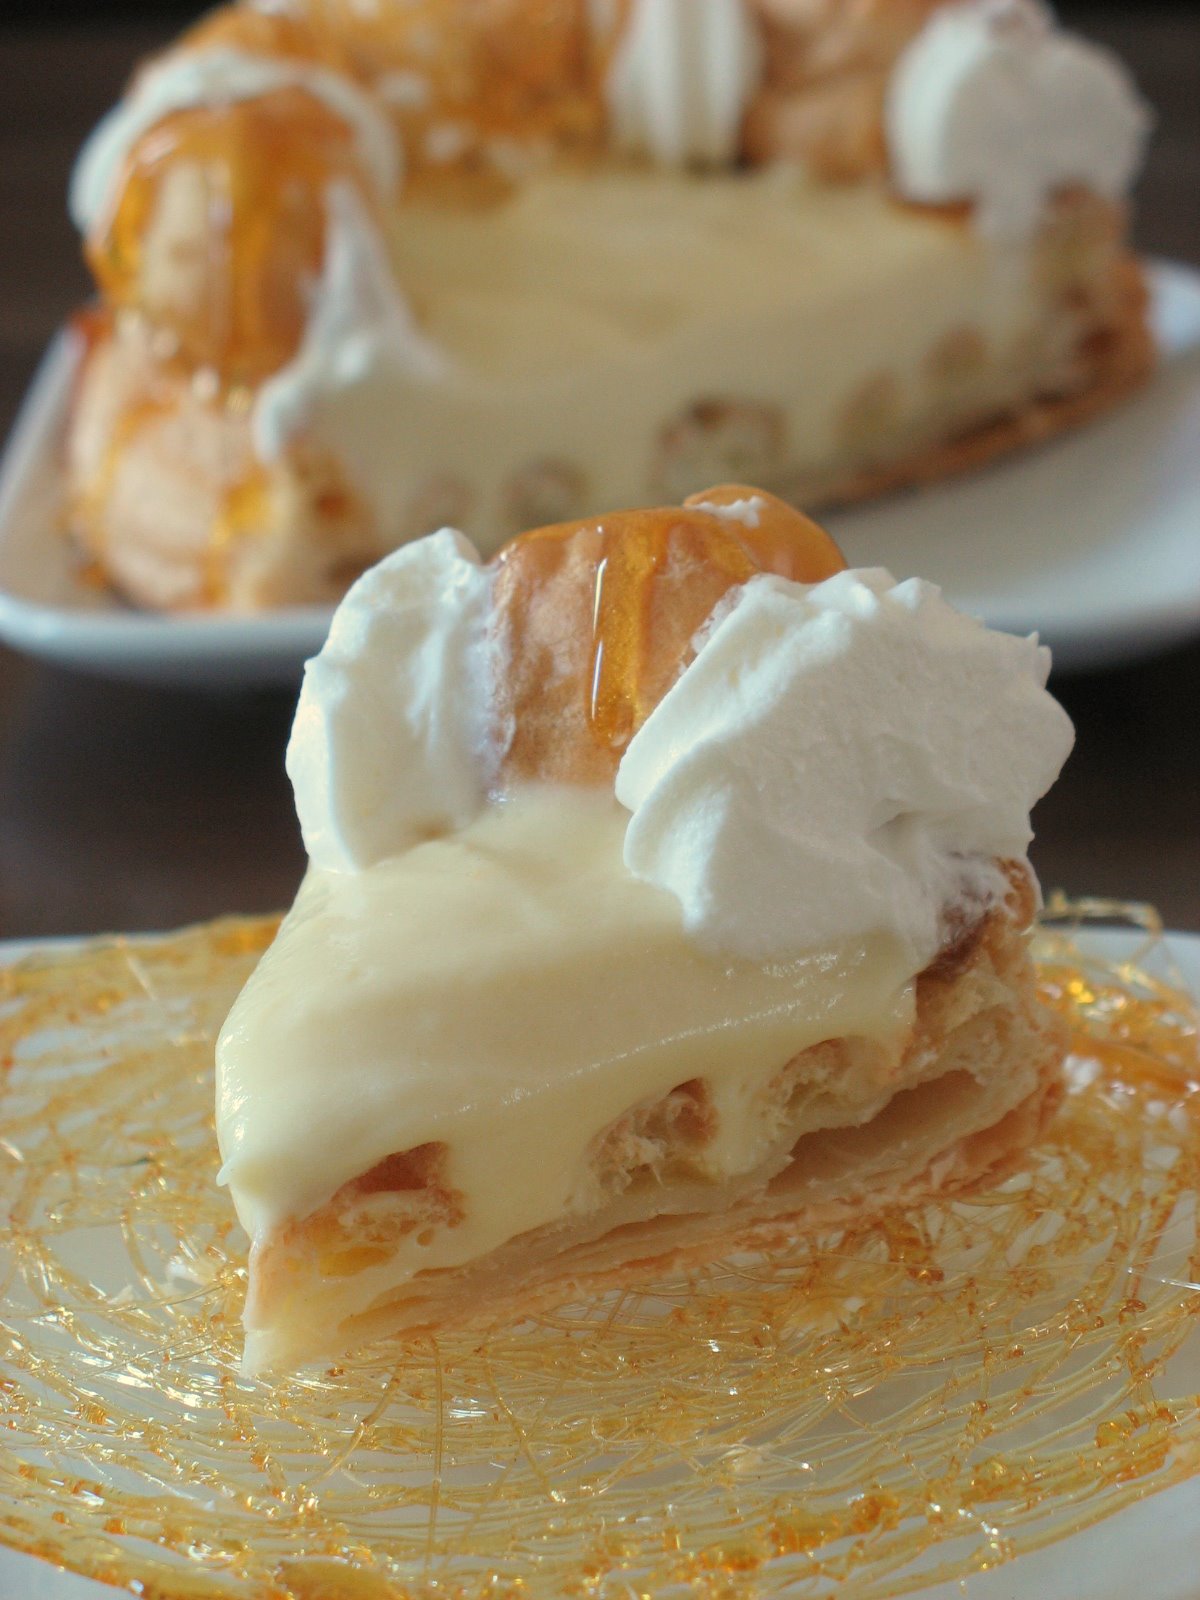
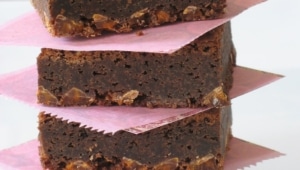
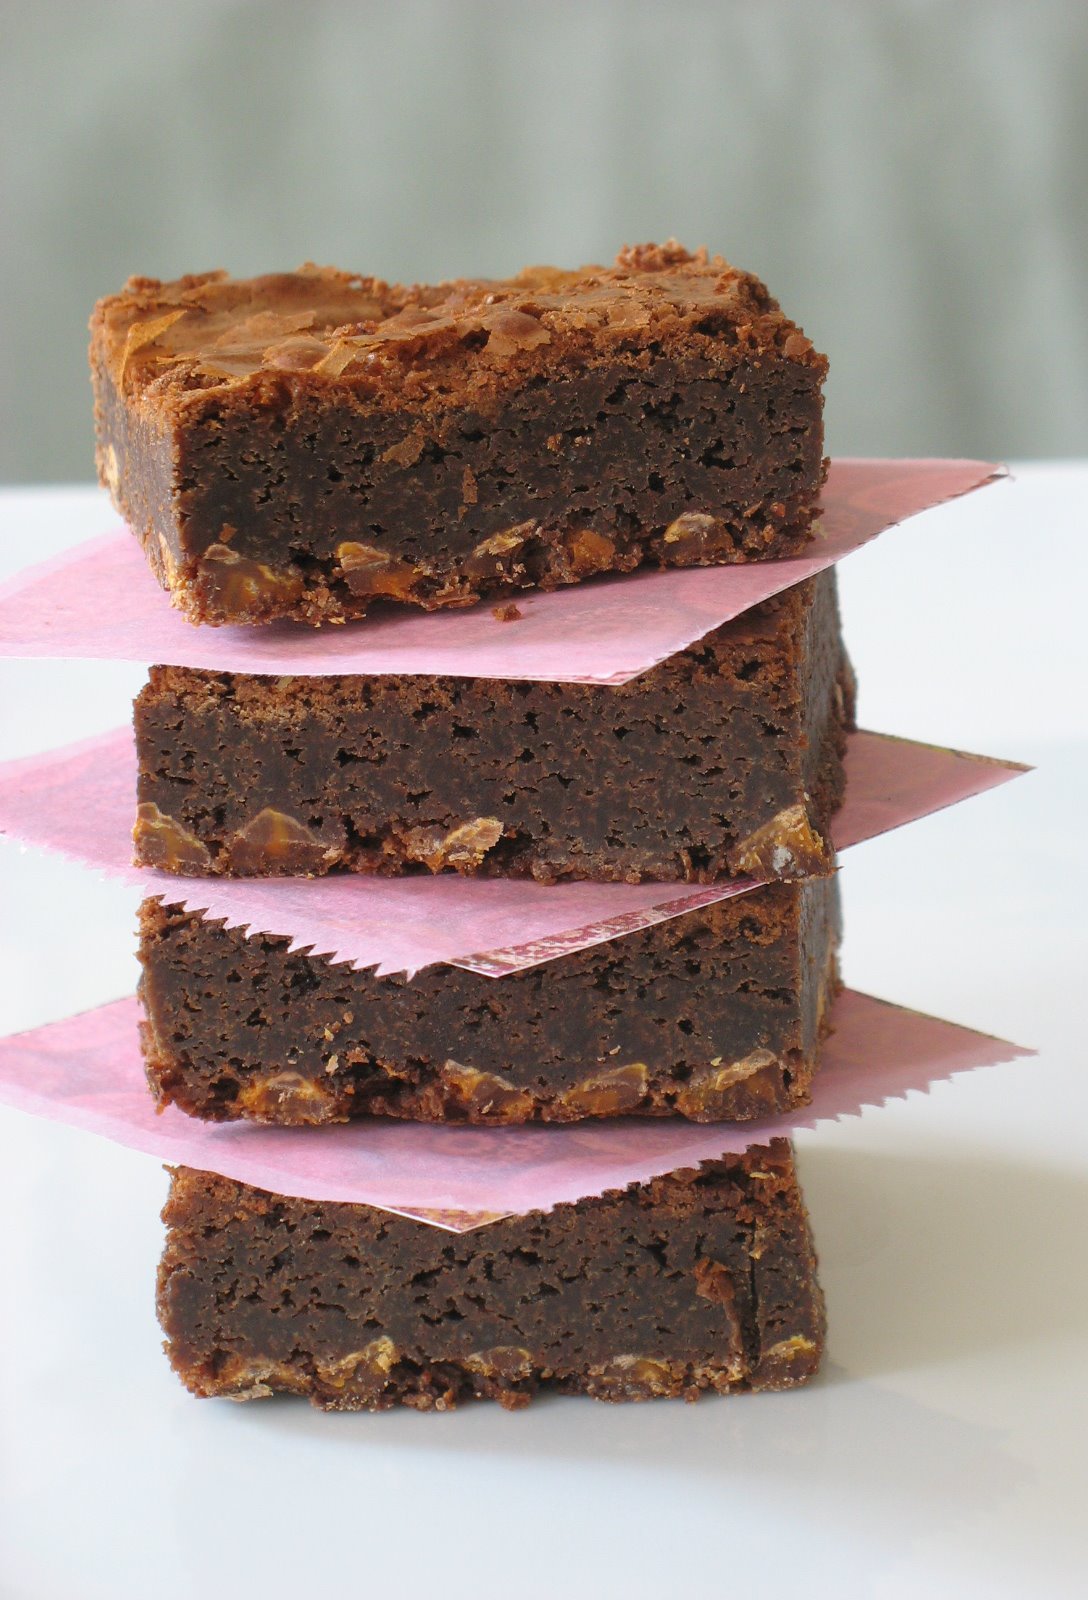
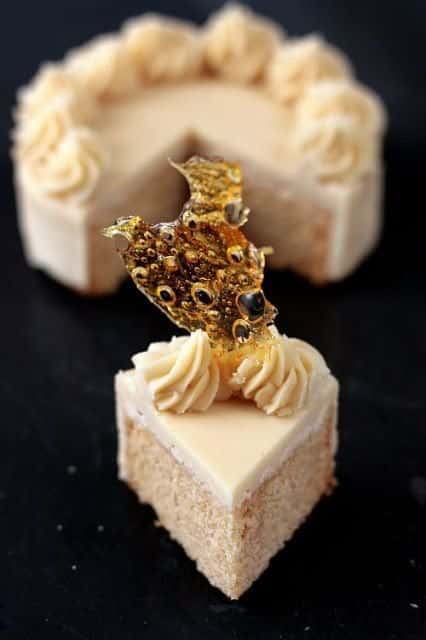
So yes…making Shuna’s Caramel Cake on the Daring Bakers' two year anniversary was one of those little details that mean a lot to me…like paying it forward in some way. And if you have been reading this blog for a little while you know how much I like playing with hot sugar (…blue caramel plate anyone?). Yep, I liked the idea from the get go, especially with a frosting that starts with browned butter. The smell in the house was enough to make you want someone would bottle it up in a perfume! The cake was easy to make and we all (us and the neighbors) loved its texture, and at first the frosting was a little too sweet to me but I did add some fleur de sel which really enhanced its flavor on the second day. Ah! The pleasure of biting into little salt crystals at the same time as biting into that sweet caramel frosting…hmmhmmhmm.

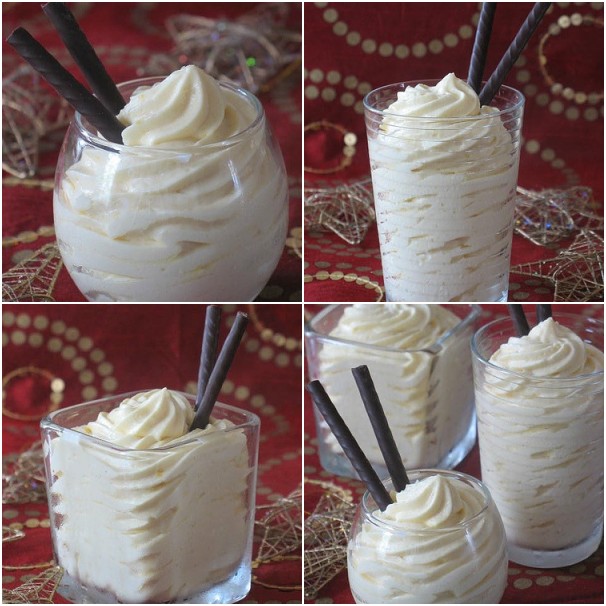
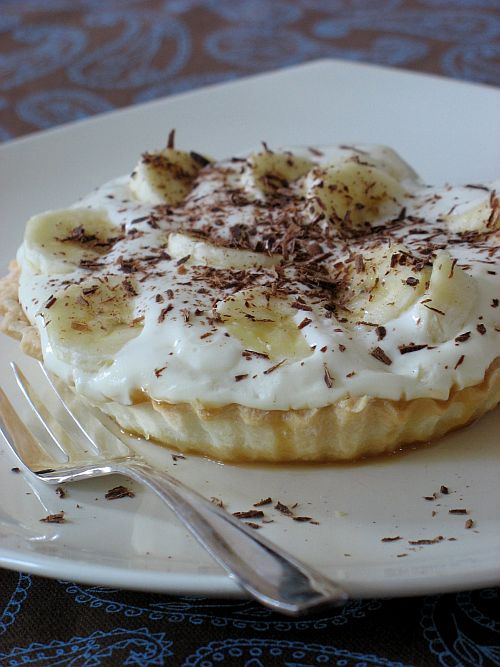
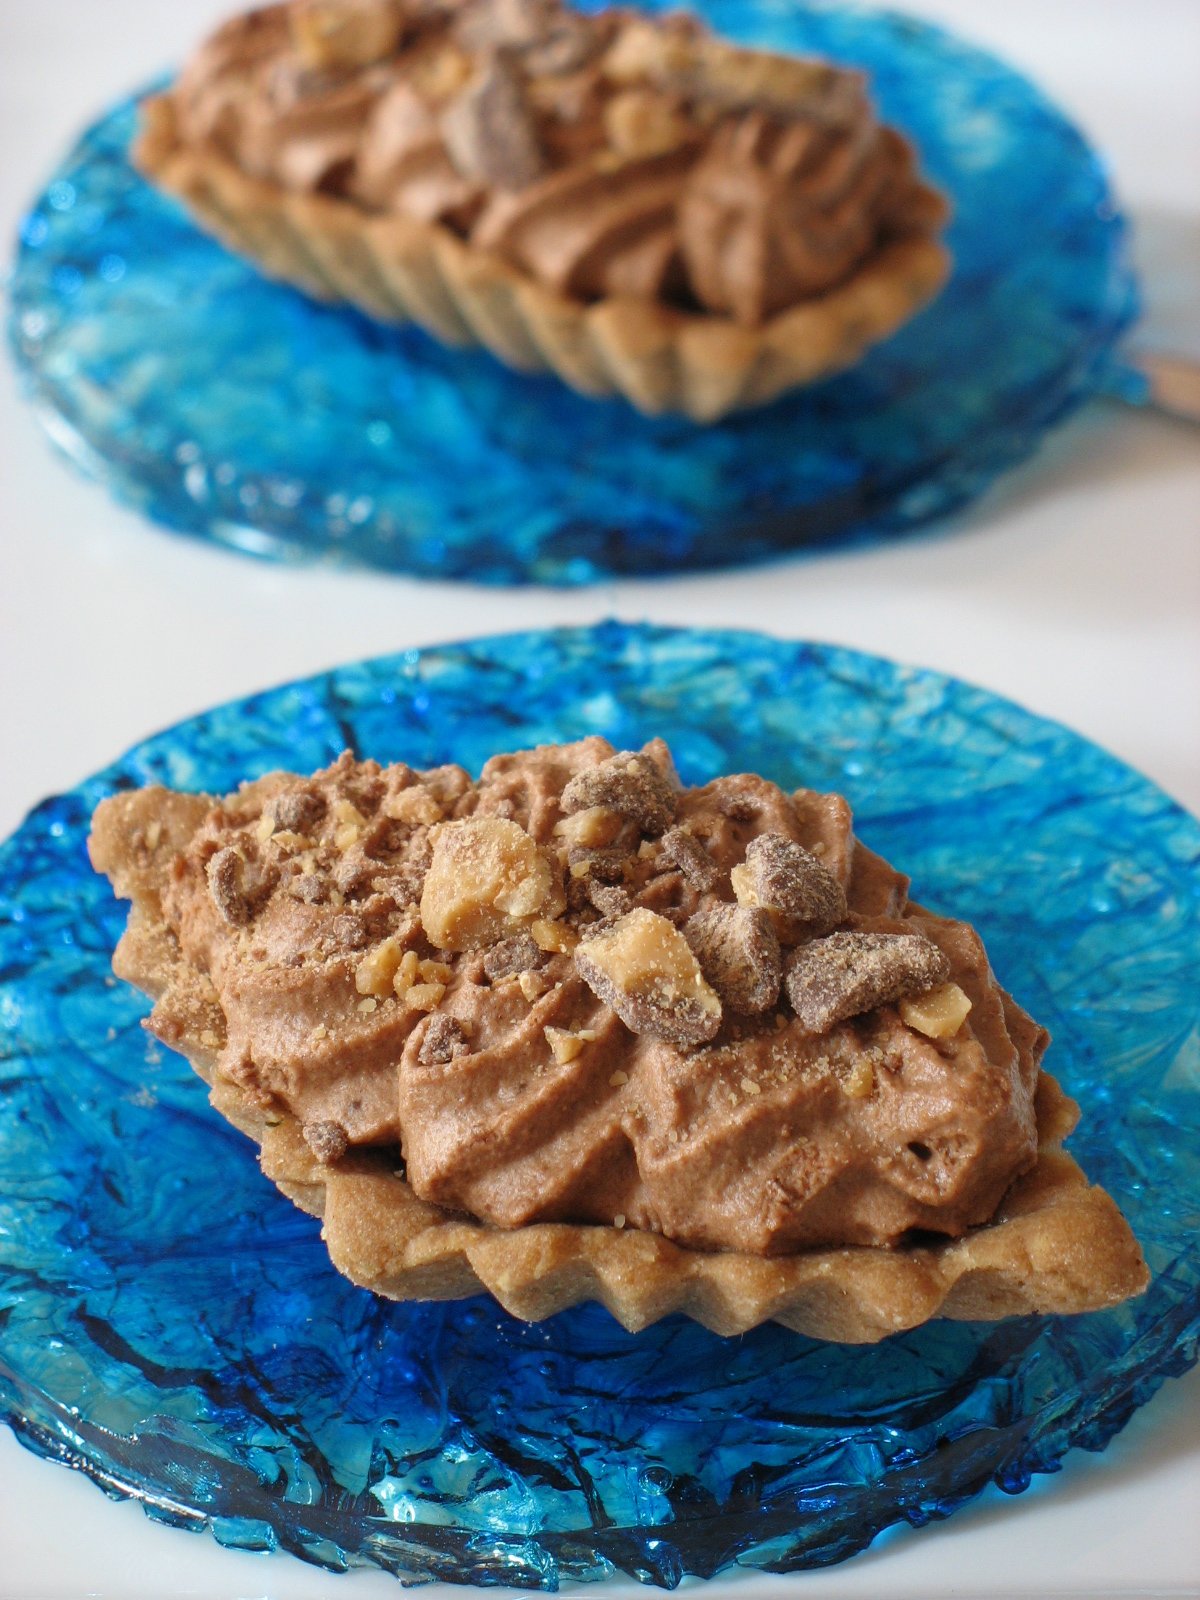
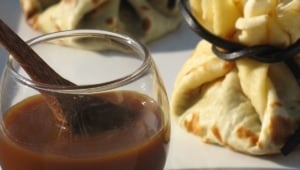
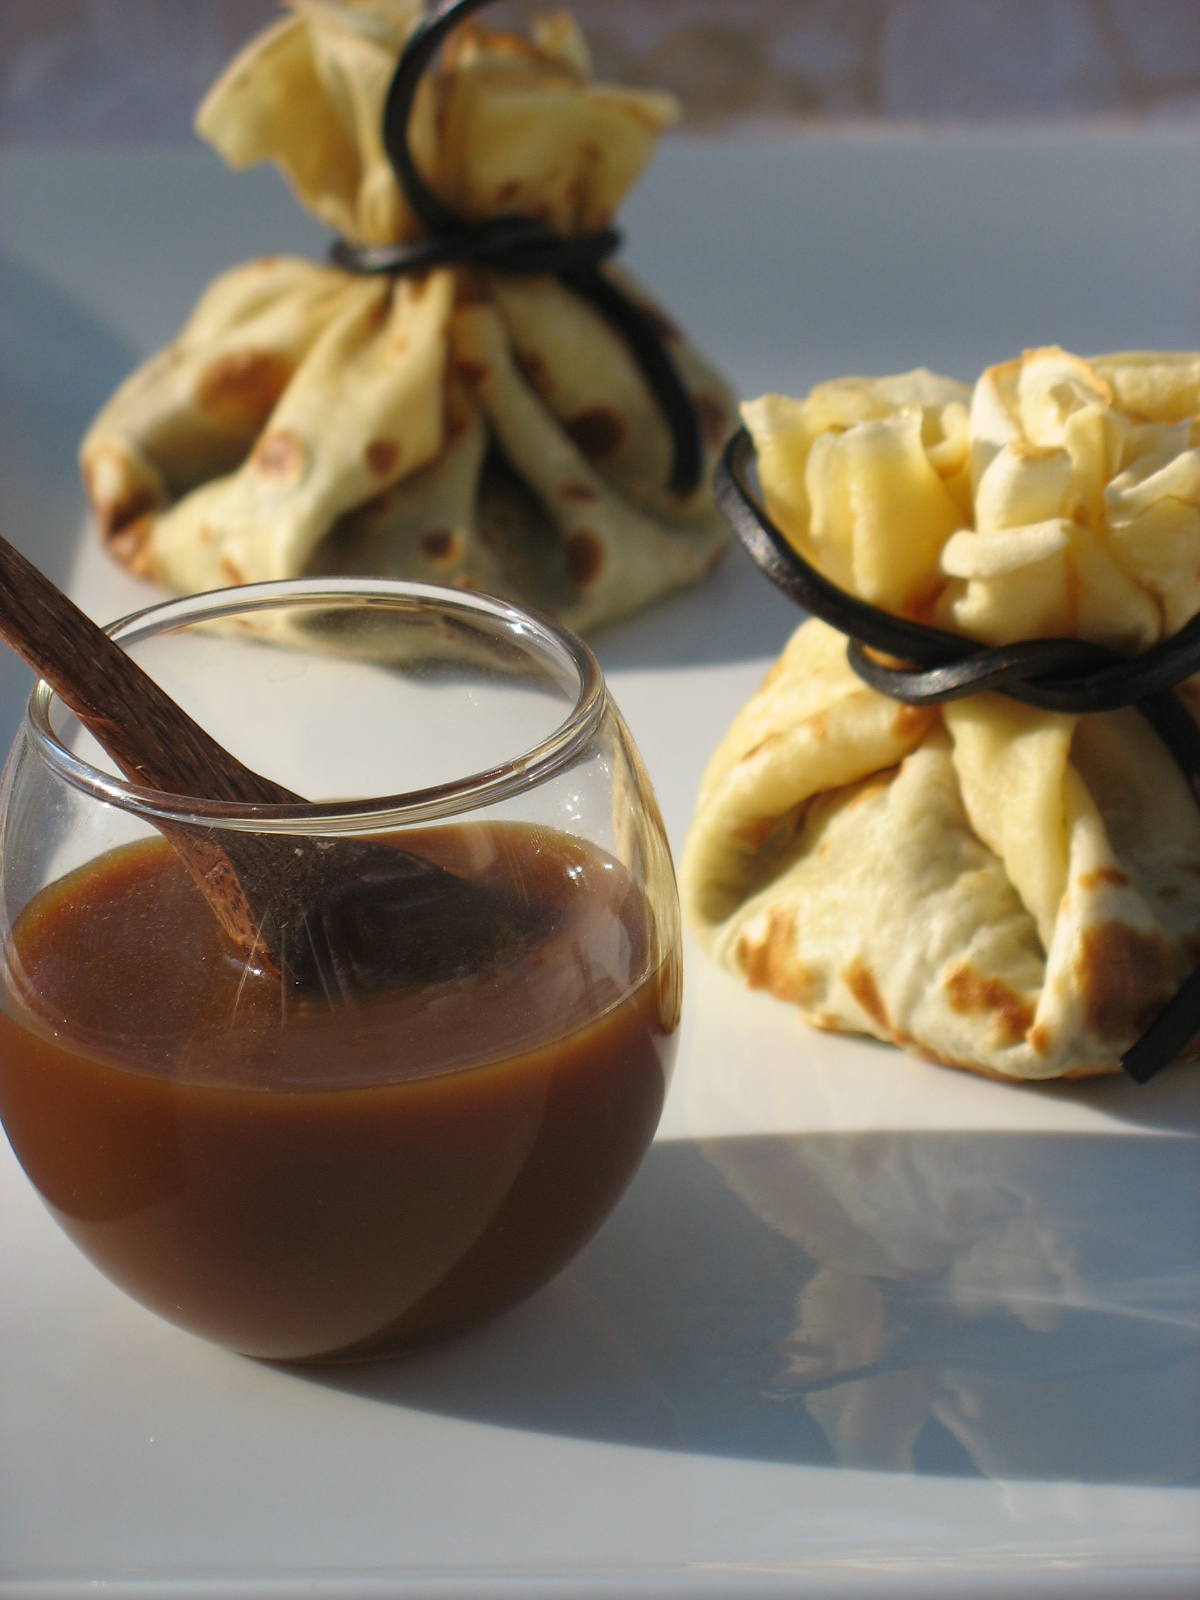
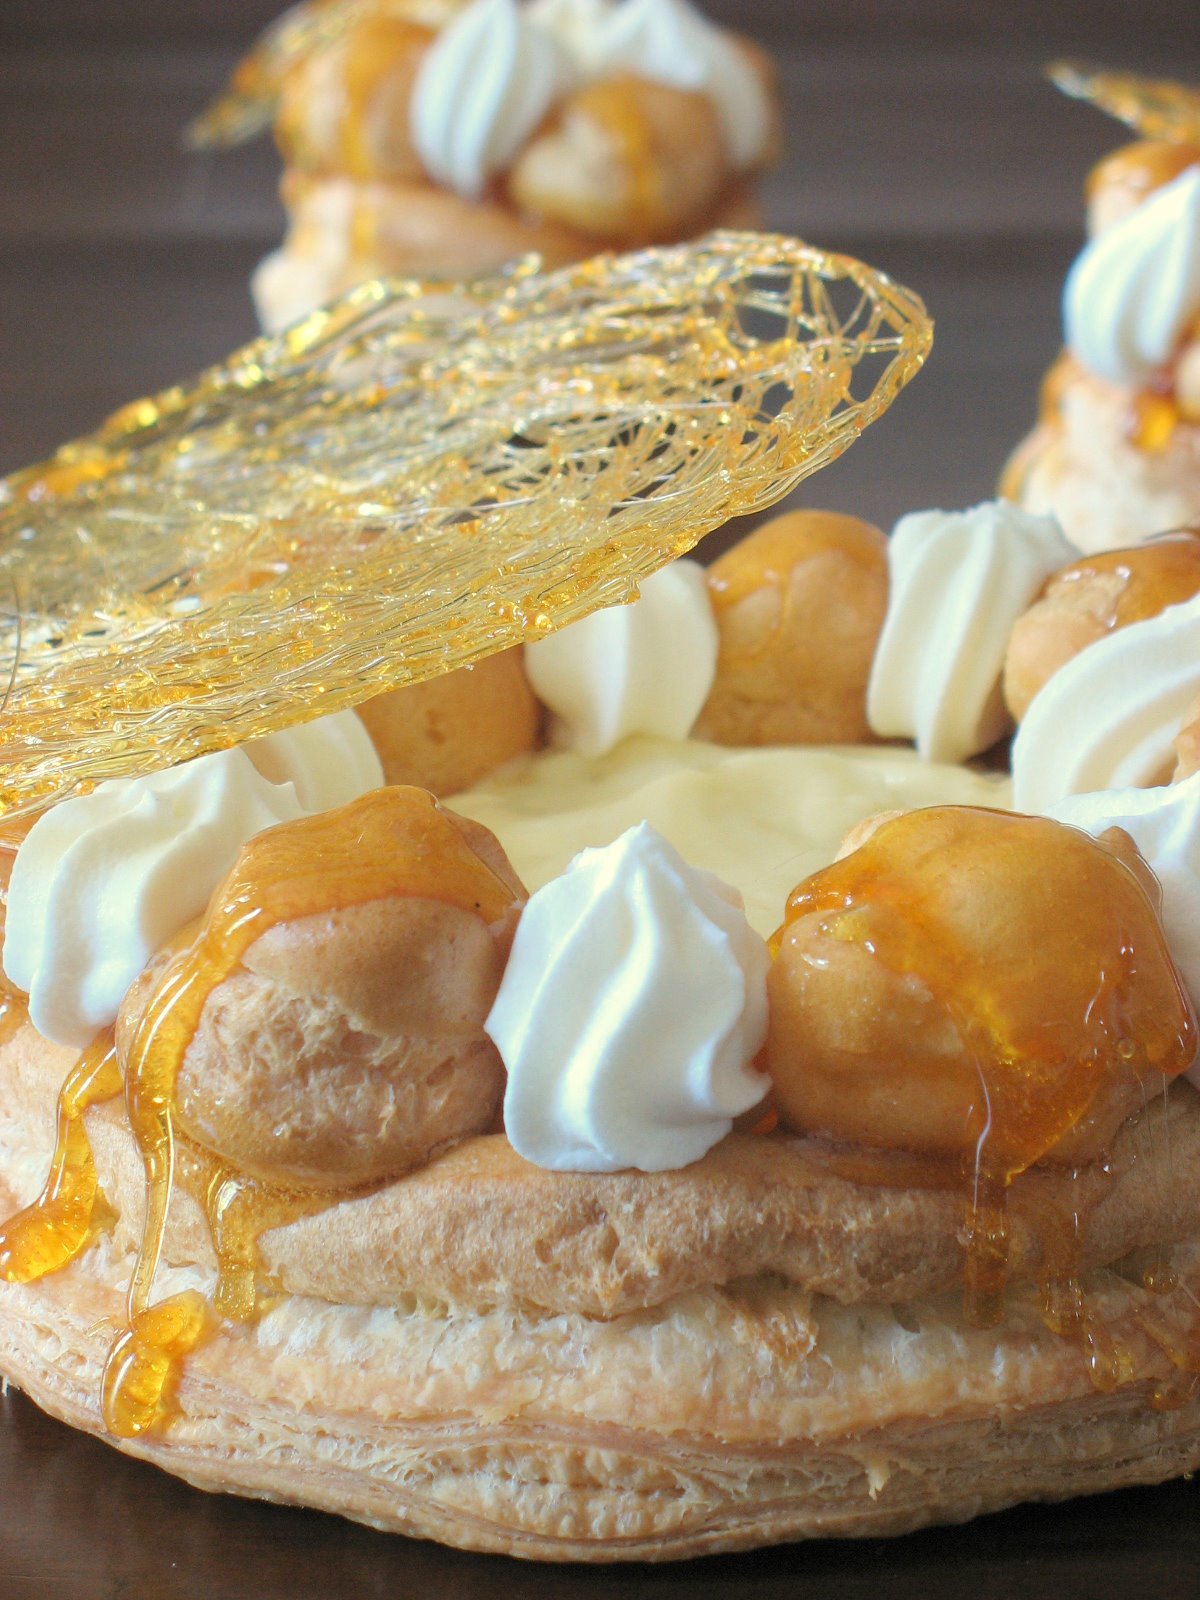
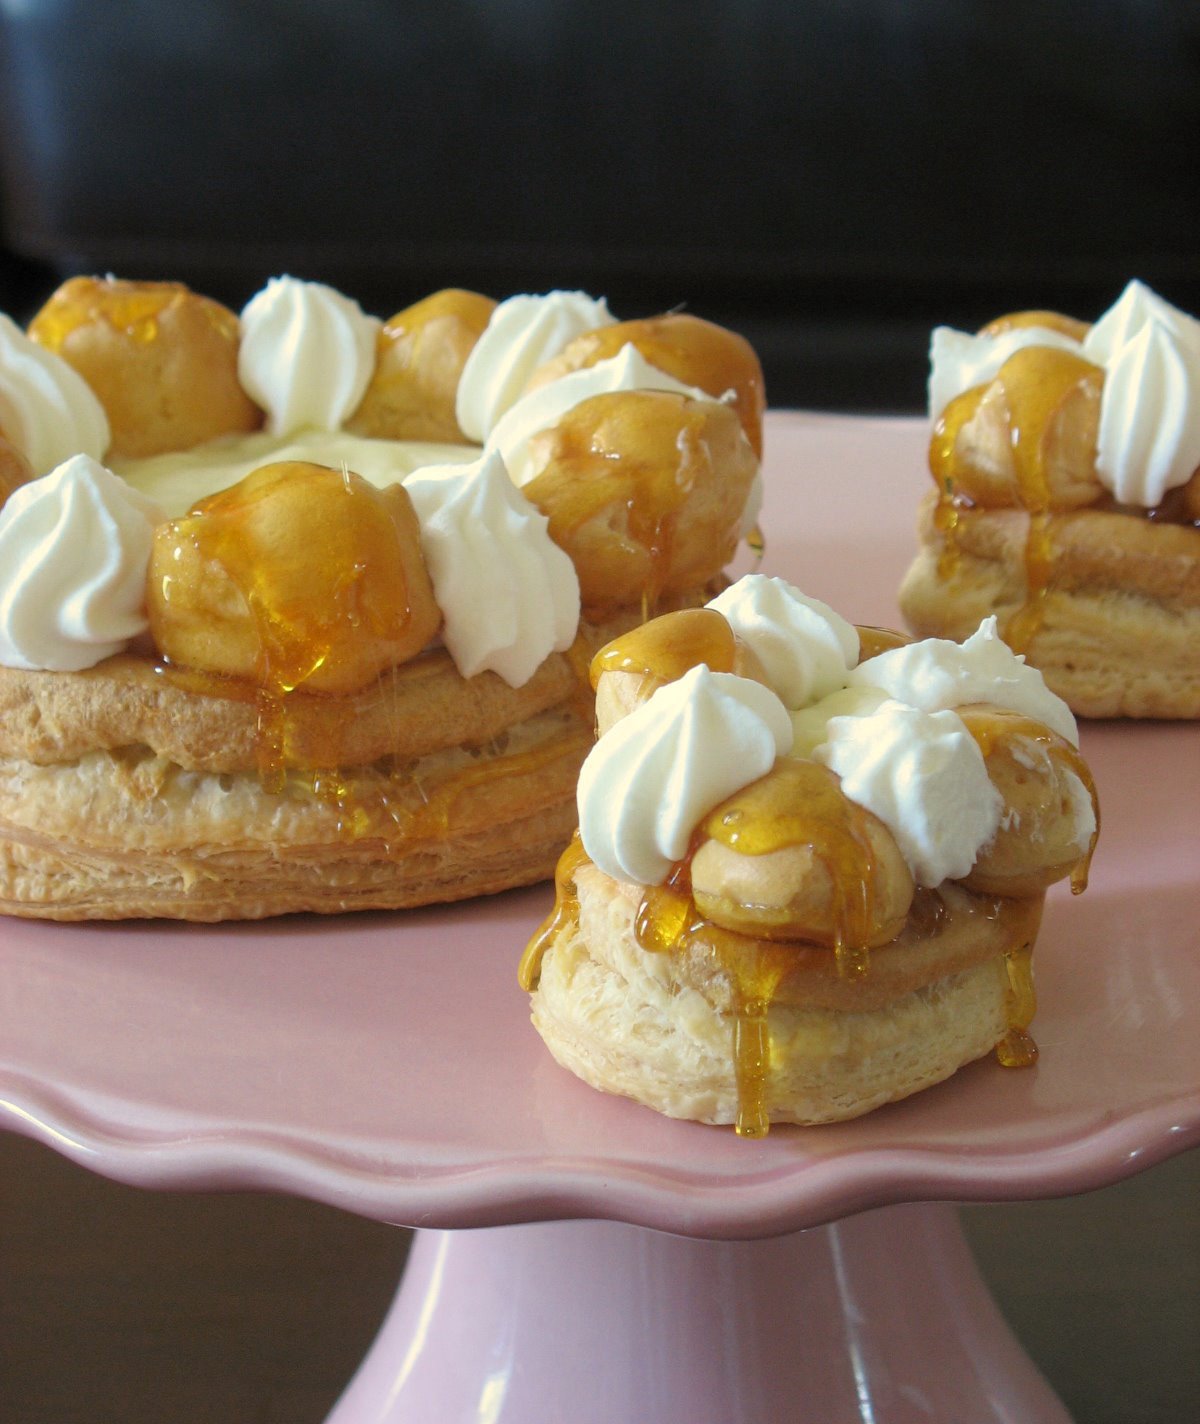
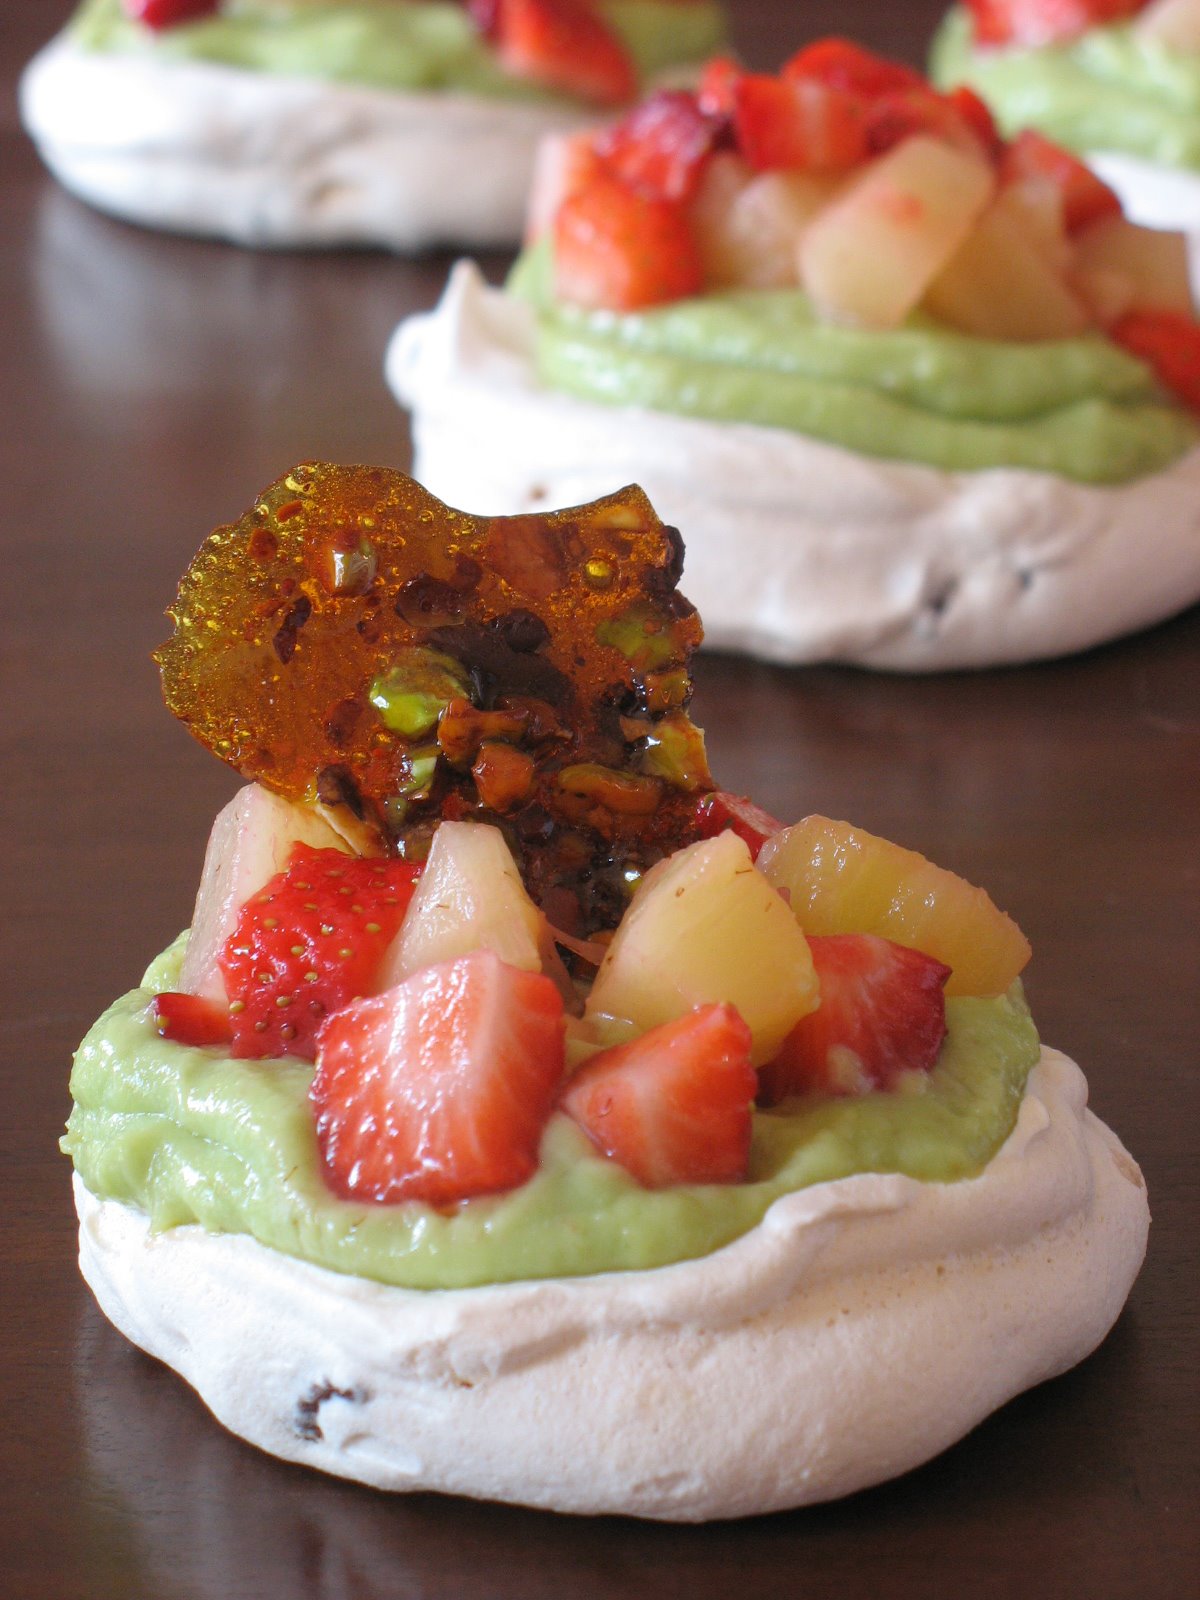
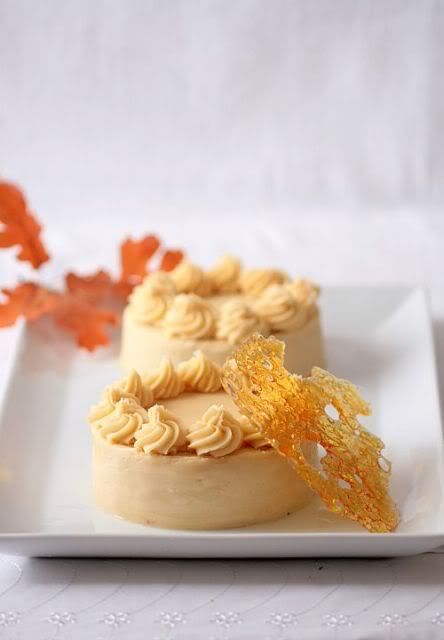
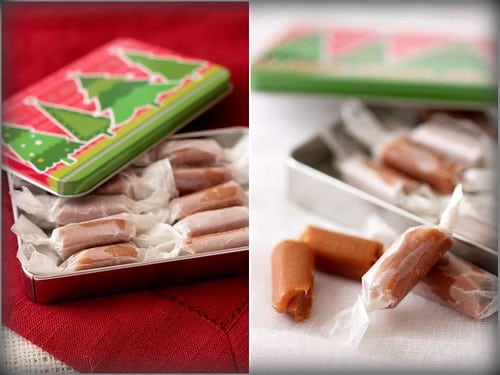
Given that we were given a lot of leeway in the making of the cake, I went ahead and made 4 small cakes instead of one. Granted I love caramel and salt but I also love caramel and citrus so I did add some grated lemon zest to the cake batter and as previously mentionned some fleur de sel to the frosting. I thought I would not have time to make the extra recipe for caramels but I needed to stand and move around after Thanksgiving dinner last night and I went ahead and did Grand Marnier caramels (citrus again) that I wrapped in waxed paper and boxed up in little Christmas tins for gift giving (except half of them are already gone…oops!). From turkey low to sugar high, I think we have all the compenents of a perfect holiday season!
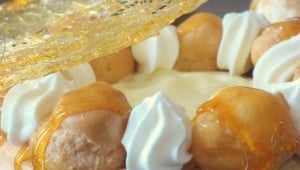
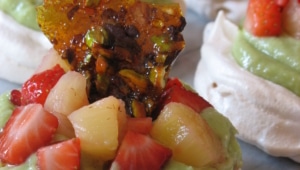
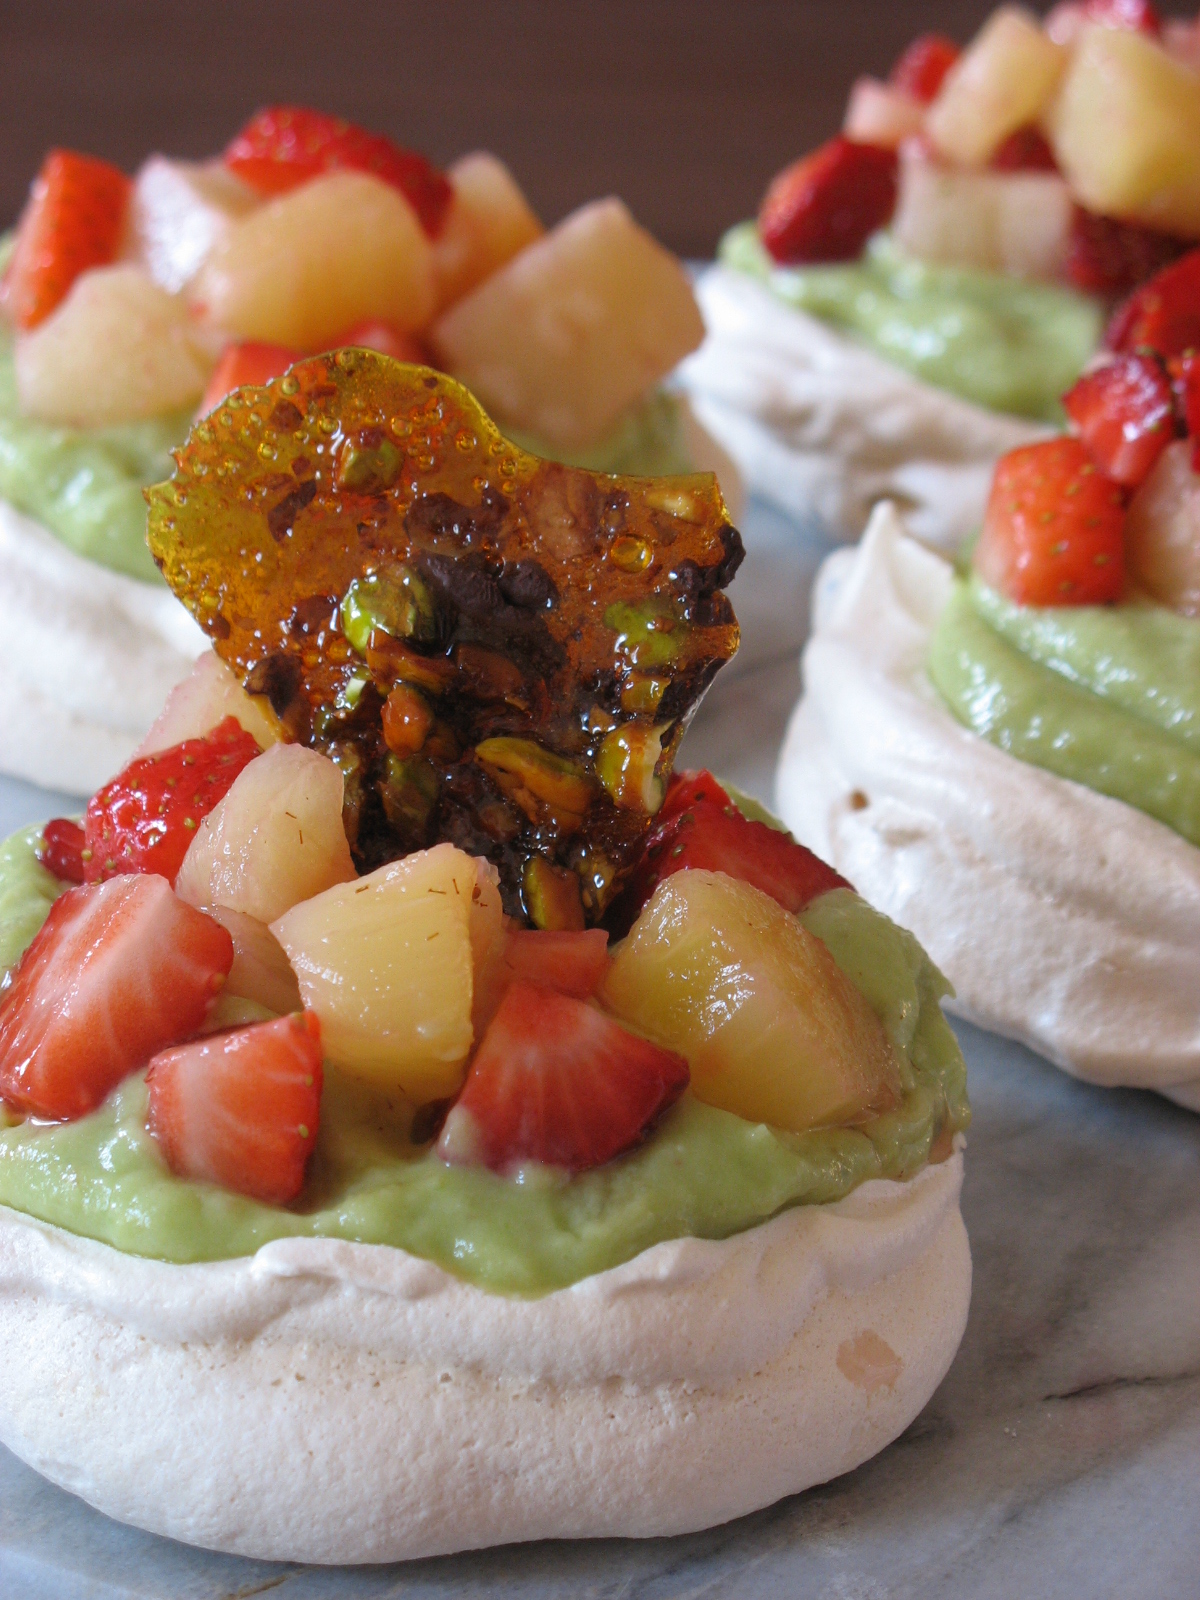
For the decoration, there was a bunch of kids eating with us so I kept it simple but did sneak in some "bubble caramel", a caramel technique that makes me giggle everytime I use it, (and the kids too) although be careful as you "play" with pouring hot sugar syrup over alcohol to create the bubble effect.

Thank you Lisa and Ivonne once more and our wonderful hostesses! Check out the rest of the Daring Bakers and their fantabulastic creations here.

Photobucket


Caramel Cake With Caramelized Butter Frosting, courtesy of Shuna:

10 Tablespoons unsalted butter at room temperature
1 1/4 Cups granulated sugar
1/2 teaspoon kosher salt
1/3 Cup Caramel Syrup (see recipe below)
2 each eggs, at room temperature
splash vanilla extract
2 Cups all-purpose flour
1/2 teaspoon baking powder
1 cup milk, at room temperature

Preheat oven to 350F. Butter one tall (2 – 2.5 inch deep) 9-inch cake pan.
In the bowl of a stand mixer fitted with a paddle attachment, cream butter until smooth. Add sugar and salt & cream until light and fluffy.
Slowly pour room temperature caramel syrup into bowl. Scrape down bowl and increase speed. Add eggs/vanilla extract a little at a time, mixing well after each addition. Scrape down bowl again, beat mixture until light and uniform.
Sift flour and baking powder. Turn mixer to lowest speed, and add one third of the dry ingredients. When incorporated, add half of the milk, a little at a time. Add another third of the dry ingredients, then the other half of the milk and finish with the dry ingredients. {This is called the dry, wet, dry, wet, dry method in cake making. It is often employed when there is a high proportion of liquid in the batter.}
Take off mixer and by hand, use a spatula to do a few last folds, making sure batter is uniform. Turn batter into prepared cake pan. Place cake pan on cookie sheet or 1/2 sheet pan. Set first timer for 30 minutes, rotate pan and set timer for another 15-20 minutes. Your own oven will set the pace. Bake until sides pull away from the pan and skewer inserted in middle comes out clean. Cool cake completely before icing it. Cake will keep for three days outside of the refrigerator.

Caramel Syrup:
2 cups sugar
1/2 cup water
1 cup water (for "stopping" the caramelization process)

In a small stainless steel saucepan, with tall sides, mix water and sugar until mixture feels like wet sand. Brush down any stray sugar crystals with wet pastry brush. Turn on heat to highest flame. Cook until smoking slightly: dark amber.
When color is achieved, very carefully pour in one cup of water. Caramel will jump and sputter about! It is very dangerous, so have long sleeves on and be prepared to step back.
Whisk over medium heat until it has reduced slightly and feels sticky between two fingers. {Obviously wait for it to cool on a spoon before touching it.}

Caramelized Butter Frosting:
12 tablespoons unsalted butter
1 pound confectioner’s sugar, sifted
4-6 tablespoons heavy cream
2 teaspoons vanilla extract
2-4 tablespoons caramel syrup
Kosher or sea salt to taste

Cook butter until brown. Pour through a fine meshed sieve into a heatproof bowl, set aside to cool.
Pour cooled brown butter into mixer bowl. In a stand mixer fitted with a paddle or whisk attachment, add confectioner’s sugar a little at a time. When mixture looks too chunky to take any more, add a bit of cream and or caramel syrup. Repeat until mixture looks smooth and all confectioner’s sugar has been incorporated. Add salt to taste.
Note: Caramelized butter frosting will keep in fridge for up to a month.To smooth out from cold, microwave a bit, then mix with paddle attachment until smooth and light.

Bubble Caramel:
1/2 cup (100gr) sugar
3 tablespoon (45 ml water)
1 tablespoon (15 gr) corn syrup
rubbing alcohol (I use a spray bottle)

Combine all the ingredients in a heavy saucepan and bring them to a boil. Monitor the temperature with a candy thermometer and bring the mixture to 300F. While the caramel is reaching its desired temperature, take a sheet of parchment paper and crinkle it between your hands then flatten it out a bit. This will help with the forming of the bubbles. Spray rubbing alcohol on the parchement paper right before the caramel reach its temperature (don’t do it ahead of time or it will be dry when you are ready to pour). When the caramel is ready, slowly pour it over the parchment paper and watch the bubble form. You can lift the paper carefully to spread it around the surface if needed but watch out! I do this over a large sheetpan so all is required for clean up is hot water. Let cool completely before breaking into shards. This is more a deco than an edible piece of caramel given the alcohol used. I guess one could use a high percentage clear alcohol (maybe my uncle’s moonshine that cleans the bottoms of coffee cups!) but I haven’t tried it that way yet.

Homemade Grand Marnier Caramels


Grand Marnier Caramels, adapted from Alice Medrich’s Pure Dessert.

Makes eighty-one 1-inch caramels
Note: the original recipe calls for Golden Syrup but I wanted to finish the corn syrup I had so I subsituted one invert sugar for another one without a problem.

1 cup corn syrup
2 cups sugar
3/8 teaspoon fine sea salt
2 cups heavy cream
1 tablespoon plus 1 teaspoon Grand Marnier
3 tablespoons unsalted butter, cut into chunks, softened

Line the bottom and sides of the baking pan with aluminum foil and grease the foil. Combine the corn syrup, sugar, and salt in a heavy 3-quart saucepan and cook over medium heat, stirring with a silicone spatula or wooden spoon, until the mixture begins to simmer around the edges. Wash the sugar and syrup from the sides of the pan with a pastry brush dipped in water. Cover and cook for about 3 minutes. (Meanwhile, rinse the spatula or spoon before using it again later.) Uncover the pan and wash down the sides once more. Attach the candy thermometer to the pan, without letting it touch the bottom of the pan, and cook, uncovered (without stirring) until the mixture reaches 305°F. Meanwhile, heat the cream in a small saucepan until tiny bubbles form around the edges of the pan. Turn off the heat and cover the pan to keep the cream hot.

When the sugar mixture reaches 305°F, turn off the heat and stir in the butter chunks. Gradually stir in the hot cream; it will bubble up and steam dramatically, so be careful. Turn the burner back on and adjust it so that the mixture boils energetically but not violently. Stir until any thickened syrup at the bottom of the pan is dissolved and the mixture is smooth. Continue to cook, stirring occasionally, to about 245°F. Then cook, stirring constantly, to 260°f for soft, chewy caramels or 265°F; for firmer chewy caramels.

Remove the pan from the heat and stir in the Grand Marnier extract. Pour the caramel into the lined pan. Let set for 4 to 5 hours, or overnight until firm.

Lift the pan liner from the pan and invert the sheet of caramel onto a sheet of parchment paper. Peel off the liner. Cut the caramels with an oiled knife. Wrap each caramel individually in wax paper or cellophane.

Chocolate Peanut Butter Banana Cake and Caramel Corkscrews


I call this cake "revisited" although it is not entirely exact, but I could not think of a better way to say it. I made this cake for the first time last year, posted this pretty picture and promised to write down the recipe on this blog and never did. I have received many requests for it over the past few weeks months so I finally got my act together and wrote it down. Sorry for those who emailed about it six months ago…I keep being distracted by more pastries and desserts every day! The cake is adapted from Marcel Desnaulniers, sinfully rich and absolutely decadent.

I have also received many requests to post the how-to’s of making the caramel corkscrews I used for the Espresso Chocolate Trios and the Chocolate Crepe Cake. I hope the explanations and drawing at the end of this post will unleash the caramel playing gene in you. Just take your time, be patient and the good thing is that even if you mess up, you can still it it!

Chocolate Peanut Butter Banana Cake, adapted from Marcel Desnaulniers

Cake:

2 stick unsalted butter, at room temperature
2 cups all purpose flour
1 tsp. baking powder
1 tsp. baking soda
1/2 tsp.salt
3-4 medium ripe banana,peeled and diced
1 cups sugar
2 large eggs
1/2 cup boiling water
1/2 cup dark rum
1 cup unsalted peanuts for the garnish (optional)

Chocolate Peanut Butter Icing:
1 3/4 cup smooth peanut butter
1/2 cup powdered sugar
4 oz semisweet chocolate, melted

Chocolate Ganache:
12 oz. semisweet chocolate
4 oz. unsweetened chocolate
2 cups heavy cream
2 Tb. sugar

Preheat the oven to 325F. Lightly butter 3 9 inch round pans and line them with parchment paper.
Sift together the flour, baking powder, baking soda and salt. Set aside.
Cream the butter and sugar together until light and fluffy. Add the eggs, one at a time, beating well after each addition. Add the banana pieces at medium speed, until just incorporated. Add the sifted dry ingredients, mix well. Add the boiling water on low speed. Once incorporated, add the rum, also on low speed. Run a rubber spatula around the side and bottom of the mixer to make sure that all the ingredients are well incorporated.
Divide the batter among the prepared pans and bake 25-30minutes, rotating the pans if necessary. Let them cool to room temperature. Invert the cakes and peel of the parchment paper.

In the bowl of a stand mixer, beat the peanut butter and powdered sugar together,and beat for about 4 minutes at high speed until very smooth. Add the melted chocolate and beat on medium high for about 1 minute. Leave at room temperature.

Spread 1/2 cup of the icing over one of the cake layers. Top with another cake layer ad another 1/2cup icing. Place the final cake layer on top. Spread the remaining icing on top of that last layer and down the side of the entire cake. Refrigerate for several hours or until the icing is firm to the touch.

Meanwhile,prepare the ganache: place both chocolates in a large bowl.Heat the cream with the sugar until boiling.Pour it over the chocolates,let stand for 2-5minutes, then stir with a whisk until completely smooth.

Remove the cake from the refrigerator,place the cake on a grid over a parchment paper line baking sheet. Ladle the ganache over the top of the iced cake. Use a cake spatula to spread a smooth coating of ganache over the top and sides of the cake. Refrigerate the cake 20-30minutes until the ganache is firm. Scrape the ganache that has fallen on the parchment paper and fill a pastry bag fitted with a star tip with it.
If you wish to decorated the cake with the peanuts, save about a dozen for the top of the cake, chop the rest coarsely and press them on the sides of the cake. Use the reserved ganache to pipe swirlies on top of the cake.

Caramel Corkscrews:

Picture taken from Bo Friberg, The Professional Pastry Chef

Start with a basic 2 step dry-method caramel:
Over medium high heat, melt 1/2 cup of sugar in a heavy bottom saucepan until golden brown. Immediately add another 1/2 cup of sugar and stir untill all the sugar mixes and melt and becomes dark golden brown. In this particular method,it is ok to stir the sugar,but with a wooden spoon and very slowly. It goes from a semi-liquid golden to a dark brown caramel. It will coagulate but becomes smoother as it melts. This method is very convenient for reheating as you need when your working caramel becomes too stiff, without adding any more color. Remove from the heat and let it cool to a consistency of thick glue. Too thin and it will make pretty strands, too thick and you can play with pulled sugar.

For the corkscrews, I lightly oiled a metal skewer, held it in my left hand (I am right handed),I dipped a wooden spoon into the hot caramel with the other hand and twirled the caramel around the metal skewer, starting from part closer to my wrist and twirled my way up the skewer. Let it dry a minute and let it slide off onto a lightly oiled parchment paper lined baking sheet. Make sure the caramel is thick enough to play with. One easy cooling method is to put your pan into a larger one filled with ice as soon as your caramel has taken on the right color on the stove. If it gets too thick, simply reheat on low for a minute. Oh, and have scissors near by in case those caramel strands start taking on a life of their own!


Last but not least, I want to share with you a cool event that Kristen from Dine and Dish started about a month ago. She asked for volunteers veteran bloggers to adopt new bloggers. I remembered how strange and weird it was to start blogging. Finding your voice, your style, deciding on how much of your privacy to give, getting comfortable. I needed help with the basic styling, the basic editing, the basic everything (but now I have a computer Guru!).
I read and read "blogging 101", scratched my forehead and pulled my hair….not really but close. I really found my groove last year and I thought that Kristen’s event was a great way to help new bloggers find their skin or to simply give them a virtual high five for pursuing their dreams.

So, after this long paragraph, let me introduce you to Dana who writes Proof Of The Pudding and Evelin who is the voice behind Bounteous Bites, and I could not be happier to adopt them.
I "met" Dana in November when I stumbled upon her wonderful pear cake that I have made so many times since then, changing the fruits, extracts,…. everybody should have a base cake like this one!
I discovered Evelin through her 2007 blogging recap and started reading through her archives days before Kristen mentioned not having enough veterans for a few bloggers. I volunteered to take adopt another one (what I would do for cake?!!) and when I read it was Evelin, I was tickled pink. Karma/Fate is pretty powerful wouldn’t you say?!…or Kristen has psychic powers to have matched me with Dana and Evelin!
Tonight I am actually wondering how to dunk Dana’s bagels into Evelin pear and fennel soup

Caramel Cardamom Mousse


Happy New Year! I hope you all had a wonderful holiday filled with family, friends, good times and laughter. We did, kind of mellow some days, kind of crazy some others…waiting for that cold weather to come our way so we could cozy up in front of the fireplace. Well, after temperatures in the 60s and the 70s, we finally have some cold weather. Of course it occurs on January 2nd, Mother Nature scoffing at us now that Santa is long gone and New Year’s Eve is simply but a page turned. But you know what? It does not really matter anymore as I did not need the fireplace to make me feel cosy this Christmas season. Nope. I had the warmth of looking at cards every morning upon waking up, looking at my really weird looking Norfolk pine tree. Some were too kind to tell me it looked good….I did not care for it, but it was a gift and it got "prettified" as one of neighbors kids said.

Anyways, I was also blessed one Christmas Eve morning when I received a box full of cookies and gifts for the house, (look Lisa! the stars are giving my dessert some spice), a cookbook, The Sweet Life by Kate Zuckerman (see Veronica! already put to good use), and the softest fleece robe courtesy of my mother in law. The correlation with Cardamom Caramel Mousse? Well, that Christmas morning I felt really blessed that I could eat one of my friend’s cookies, while reading the other friend’s cookbook, and all wrapped up in my surrogate mom’s gift….Really, it just dawned on me that very minute: "gosh, this is pretty special"…and as I was lost in all things metaphysical (ya’ll know I am kidding, right?!), my hand stopped the pages of the book from turning by pushing on page 106, where Kate Zuckerman wrote the Caramel Mousse.

I can see why her recipe is at the backbone of so many of her desserts and the applications and variations on it are almost endless. A hot caramel syrup is whipped into egg yolks to create a safe cream to which some gelatin and whipped cream is added. The end result sets rather quickly but the taste is out of this world and the texture…well…soft as a pillow…really. In her original recipe Kate uses cinnamon to spice up the taste, and although I have nothing against cinnamon, I will go for cardamom first if given the choice. I thought about infusing the caramel syrup for the mousse with some barely crushed open pods. I started looking at the variations given when I noticed that she had a cardamom one, but used just the pods in their original form. Granted they are fragrant on their own, but I feared that the flavor would get lost in the boiling syrup, (even with the 10 pods she uses) so I went for a tiny bit more complication (one day I might play with caramel in a simple way, maybe!). I opened the pods, let them boil with in the caramel, strained the caramel over a bowl and quickly added it to the egg mixture for the mousse. It won’t cool the caramel syrup long enough to weaken its emulsifying power for the mousse part.

Will I make the mousse again? You bet! The cardamom was such a good match for the caramel that it makes me want to experiment. The texture makes you believe it is light as air but if you’re here reading this you know better: cream, sugar, eggs…And tomorrow? Butter, flour, sugar and cream….My New Year resolutions: small quantities of lip smacking desserts because life is too short to have less than the best! I am not saying I never use a box or a can of anything once in a while, I’d be lying and non-human, but there is nothing like the real thing! The pictures in the book are so crisp and drool-inducing that I’ll probably feed off her concepts and try some other great associations she came up with. Now, how can see why Veronica and Anita kept pushing me to give it a look. If only we could share a Kate Z. baking session now!!!! Allright, on to the recipe:

Cardamom Caramel Mousse, adapted from the Sweet Life, by Kate Zuckerman:

Yields 5 cups

6 egg yolks
pinch of salt
1 packet unflavored gelatin
3/4 cup water, divided
1 cup sugar
5 cardamom pods, cracked open
2 cups heavy cream

In the bowl of a stand mixer, whisk the egg yolks and the salt. In a small bowl, sprinkle the gelatin over 1/4 cup water, and let it sit while you make the caramel.

Combine the sugar, cardamom pods and 1/4cup water in a heavy saucepan. Cover and bring to a rapid boil over medium high heat (prevents crystallization of the sugar on the side of the pan). Once boiling, uncover and cook the sugar until deep golden brown. Turn off the heat and carefully pour 1/4 cup water into the hot caramel. The syrup will bubble and spurt, so stand back.Make sure the water incorporates fully to the syrup. Return to the heat if you get caramel bits and stir until it is one smooth liquid.

Strain the pods and seeds in a container with a spout, it will be easier to add the to the yolks. Pour the caramel slowly and into a steady stream into the egg yolks with the machine running on medium high. Melt the gelatin in the microwave for 10 seconds or into the (now empty) saucepan until dissolved. Add it to the yolk mixture and continue to whisk on medium high until it triples in volume and cools to room temperature.

In a separate bowl, whip the heavy cream to soft peaks. Add it to the mousse base and fold the two gently together. Divide the mousse into cups, ramequins, dishes, etc…and let it set, covered in the refrigerator for at least 2 hours.

Waiter There Is Something In My…Butterscotch Mascarpone Cream Layer Cake!

It seems like an eternity since I have participated in a WTSIM event, and that is not for lack of ideas, recipes or just plain desire to get in the kitchen and cook, but pure and simple lack of time. Oh sure, there are lots of baking going on in the house, but with all the visitors we have had lately I rely on tried and true, easy to come together desserts, most of which have already been published here…except this one Butterscotch Mascarpone Cream Cake…..And it has been a long time coming believe me!

Let’s see if I can make a long story short about that one (can I do that?!)…When I first visited Lisa last July, she had received a an issue from the magazine Wicked, a special publication from The Australian Women’s Weekly dedicated to pastries and sweets. I remember looking at every recipe and drooling over them and the pictures. Her printer had a little malfunction that time, believe me it was all my fault, I just have to stare at anything plugged or battery operated for it to break down,….anyway, life took over and we both forgot about the pages I had marked in the magazine. This time around though, I went ahead and copied them by hand. I always do that, not that I don’t trust the machine, but over the years I have developed my own recipe writing pattern, especially if I am at someone’s house or the library and have minimal space to write them on. Back home this week, I quickly flipped my notebook to the Butterscotch Cake recipe..what’s not to love in caramel, mascarpone and tender flaky cake? Nothing, trust me!!

I thought it was also a tasty cake to add to Waiter There Is Something In My ….Layered Cakes, hosted this month by Andrew from Spittoon Extra


Butterscotch Mascarpone Cream Layer Cake:

Serves 10-12

For the Cake:
250 gr. butter, softened
1 cup packed dark brown sugar
2 eggs
1 Tb. honey
1 1/4 self rising flour (I used 1 1/4 cup all purpose flour and 1 1/2 tsp. baking powder)
1/2 cup milk

Cream together the butter and sugar. Beat in the eggs, one at time. Add the honey and flour. Add the milk slowly and mi until combined. Pour into 2 8-inch cake pans and bake at 350F for 45 minutes, or until a knife inserted in the middle comes out clean. Let cool and unmold. Cut each cake in half.

For the Mascarpone Cream:
250 gr. mascarpone, at room temperature
300 ml. heavy whipping cream
1/4 cup powdered sugar

Whip the heavy cream and sugar to soft peaks. Fold it into the mascarpone and spread 1/4 on one cake layer, repeat with all the cake layers, finishing with the cream on top.

For the Butterscotch Sauce:
60 gr. butter
1/4 cup dark brown sugar
1/4 cup milk
1 1/2 cups powdered sugar

Heat the butter, sugar and milk until dissolved. Remove from the heat and add the powdered sugar, stir until smooth.

Tartine’s Banana Cream Pie…With Caramel and Chocolate

Banana Cream Pie
I am nowhere close to Tartine Bakery in San Francisco and yet I get to have their Banana Cream Pie for dessert! Actually, it would be like going to Paris for a patisserie from my sugar daddy at that point! Except….one very generous blogger and friend, fellow Daring Baker, emailed Lisa and me one day saying she had an extra copy of Tartine and Balthazar and if we could decide which one we wanted she’d be happy to give them a new home. If I recall my email back was something along the line "I woul love the Tartine one, of it is okay with Lisa"…"please, please, please Lisa…." secretly crossing my fingers, hands and toes! As you can see I received the coveted one! Thank you Veronica…(and Lis!) I am enjoying it a lot and so is everyone else in the neighborhood!

It took me a while to decide what to make first. Really, all their pies look gorgeous, the cakes and cookies sound all so mouth watering and the pastries would make anybody drool (be right back, I forgot to wipe page 149 !).
Anyway, I had my in-laws over for dinner a couple of days ago and decided to end dinner with a very Southern treat, banana cream pie. I admit I am not a big fan of banana pudding, or pudding textures in general, except for my beloved pastry cream, but I wanted to make something that would show them my appreciation for all the wonderful things they have one for B. and me over the past 10 years. I looked online, I called my neighbor C., thinking that this good Southern girl would have a recipe for it somewhere…except that I had forgotten that C. is the one calling me for desserts so no luck there. I was started to think I would have to change my plan or come up with a botched up version of it, aka French banana cream pie – sacrilege!Nah! Can’t have that! I started daydreaming barely noticing I had my elbow propped up on Tartine. I looked down at the cover and saw the cutest pie…oh could it be?! Maybe they have a great non-pudding recipe for it! Sure they do, page 54: Banana Cream Pie, with caramel and chocolate…

Allright, so it’s not the speediest of pies to make, especially of you make individual ones, but you will be rewarded by a table of well fed, content, and well sugared guests. Just listen to this: flaky pie crust, layer of chocolate ganache, layer of caramel, pastry cream, bananas and if that was not enough a dollop of whipped cream! No pudding! No fake banana flavor!
I did change a couple of things (sorry, can’t help myself), that in my opinion only worked in its favor. Instead of the bakery’s caramel sauce, I used my beloved salted butter caramel sauce, and skipped the extra whipped cream on top as the pastry cream makes it rich enough and I think it would have masked the banana flavor. From what I can tell no one missed it…you know you did something right when there is pure sweet silence at the table!

Banana Cream Pie
Banana Cream Pie, with caramel and chocolate, adapted from Tartine.

Serves 8-12 (10 inch tart)

Flaky Pie Crust:
1 tsp / 5ml salt
2/3 cup/ 150ml very cold water
3 cups plus 2 tablespoons / 455 gr. flour
1 cup plus 5 tablespoons / 300 gr. chilled butter, cut into 1 inch cubes

In a small bowl, dissolve salt in water and keep cold.
To make dough with a food processor: put flour in the work bowl, scatter butter over flour, and pulse until the mixture forms large crumbs, but some of the butter is the size of peas. Add salted water and pulse for several seconds, until the dough comes together as a ball, but is not completely smooth (you should see some butter chunks).
On a floured surface, divide dough into two balls, shape into a 1-inch-thick disk, wrap in plastic wrap, and chill for at least 2 hours or up to overnight.
To fill a 10 inch tart pan, roll out one disk on a lightly floured surface to 1/8 inch thick, rolling from the center toward the edge in all directions, lifting and rotating the dough a quarter turn every few strokes. Cut out a circle 1½ inches larger than the tart pan and carefully transfer dough round to the pan (folding in half, if necessary), easing it into the bottom and sides and pressing into place, and trim the edge with a knife.Line with parchment paper and pie weights or dry beans.
Preheat oven to 375 F.
Bake until the surface looks dry with no opaque areas left, about 20 minutes. Remove from oven and remove parchment and weights or beans and return shell to oven for another few minutes. If the center starts to rise, gently pierce with a knife tip. Let cool completely.

Ganache Layer:
1 cup/ 250 ml heavy cream
3 oz/85 gr. bitter sweet chocolate

Set the chocolate into a bowl. Heat the heavy cream to boiling point and pour over the chocolate. Let stand a couple of minutes an gently stir until fully incorporated and glossy. Cool to room temperature. Pour over the cooled pastry shell and refrigerate.

Salted Butter Caramel Sauce:
240 gr. sugar
80 ml water
115 gr salted butter
150 ml heavy whipping cream

In a heavy saucepan set over low heat, combine the sugar and water and heat just until the sugar is dissolved. Add the butter. Let it come to a boil and cook until it reaches a golden caramel color. Remove from the heat and add the cream ( it will splatter and get crazy, but do not fear and trust the recipe). Whisk to combine and put back on the stove. Let it come to a boil again over low heat and cook 10-15 minutes until you reach a nice creamy consistency. Let cool to room temperature.Pour over the cooled chocolate ganache and refrigerate.

Pastry Cream:
2 cups/ 500ml whole milk
1/2 vanilla bean, cut open down the middle, seeded
1/4 tsp of salt
4 tablespoons of cornstarch
1/2 cup/ 110gr. sugar
2 large eggs
4 Tb/ 55 gr. butter, cut in small cubes

Heat the milk, vanilla seeds and salt in a pan and put over medium heat, and bring to a boil.
In a large mixing bowl, whisk the sugar, cornstarch and eggs until smooth. Slowly add 1/2 of the milk mixture into the egg and whisk constantly to temper them. Add the remaining milk and return the whole thing to the saucepan. Cook until you get a thick consistency, whisking non-stop. Remove from heat and pour into a bowl, let cool for 10 minutes and then incorporate the butter, one tablespoon at a time, until smooth . Cover the surface with plastic wrap, directly touching the cream, let cool completely.

Layer the pastry cream on top of the chocolate and caramel. Cut 2 ripe bananas in medium-thick slices (you know, not a mouthfull but not disintegrating when you pick it up), and arrange them over the cream, lightly pressing down. Decorate with chocolate shavings and if you really need it, some whipped cream.

Ok…there is something else that makes me beam with joy beside the pie: I will be wearing the 3rd Brownie Babe apron very soon! Go check Myriam's blogs for some seriously delicious brownies recipes. Wow! Just wow! There are so many incredible recipes I want to try soon, it is a great honor to be chosen among all these fine bakers. Ya’ll went all out! I have to thank Guillemette and Loukoum for this one, I stumbled onto the Marbled Ricotta Cheesecake Brownies one day by accident and decide that my friends on this side of the pond ought to have the recipe too!

Milk Chocolate And Caramel Tart: How To Be A Daring Godmother!

Milk Chocolate and Caramel Tart Tart on Clear Caramel Marbled Plates

How to combine a house guest, a Daring Baker challenge and a sunburn…just ask your crazy little Tartelette!
The challenge this month took on a complete different meaning for me. If you have been following my posts lately, you have noticed that they have been fewer and quite short in story telling, kind of drive by but not exactly. Well, you see, I had the very important job this month to be Godmother extraordinaire to a beautiful 18 year old soul named Sophie. My god child is a little storm of a woman and I bet you she will melt a thousand hearts before she meets the right guy. In the meantime, I wanted to melt hers and become the coolest godmother ever….and when Veronica and Patricia announced the Daring Bakers’ August challenge as a Milk Chocolate and Caramel Tart from Eric Kayser’s Sweet and Savory Tarts, I knew I had just the ticket….except we only got to it this past weekend!!
I was too busy taking her around town whenever I had a day or afternoon off , or even an hour to go shoe shopping (guys take a hint here for your daughters…works like a charm to fix “boys issues”). Her last days were just around the corner and still no tart….Oh believe me, we got quite busy in the kitchen, especially making sourdough bread every other day (those French and their bread!), making lasagna, pizza, Financiers, brownies, macarons…well, you get the picture.

Saturday night, we took her out to dinner at Middleton Place (watch The Patriot) and took the time to stroll the plantation’s gardens and ate a fabulous meal of seafood and pecan pies…and it was on a very satisfied stomach (read I ate my pie and finished hers) that I started on the tart. No way I was going to loose my crown of Coolest Godmother by not completing the challenge.

The tart is based on 3 components that you can spread out over several days if necessary plus a decoration element, which I took some liberty with by the look of my tarts (blue sugar plates). The recipe is very straightforward and the tart presents no major hurdle if you know some about sugar. The chocolate shortbread crust came together without a glitch but I had to omit the cinnamon (with Veronica’s approval) called for because Sophie does not like it (and remember I am Zee Coolest Godmother). I wish I had made some with though because it needed that extra kick in my opinion.

The caramel layer seemed to have given some trouble to other Daring Bakers. Lisa, I still don’t know why yours was so liquidy….and yes, people think I am officially crazy when I take your phone calls in the middle of grocery shopping! Anyways, I would love to say I know why mine set out just fine and not others, truth is that Sophie and B. were so involved in a game of Othello that I had to make sure she was saving the family’s honor and I completely forgot about the tart in the oven….I think I baked them for 25 instead of 15 minutes, and the explanation might be in the translation of the book and temperature conversions, not given appropriately in English. I made the caramel layer Sunday after a full day at the beach and a double dose of sunburn. I made the caramel using the dry method, as it is the one I am most familiar with. I understand it scared some Daring Bakers and some did actually ruin a few pots trying it, I have to admit that I had the luxury of burning a few restaurant saucepans and never my own learning it so I see why they would feel tempted to use the alternative given by Veronica to make a water/sugar/corn syrup caramel which takes longer but is somewhat foolproof. My word of advice for novices who are tempted by the dry method: low/medium heat is best and sugar clumps “declump” if you lower your heat and let the sugar melt at its own pace.

Monday during my lunch break, I came home to make the final part of the tart. I found Sophie and B. watching Donkey Skin. : “A fairy godmother helps a princess disguise herself so she won’t have to marry a man she doesn’t love”…(See where I am going with this?) Time to finish this baby and get my stripes!!
The mousse sent me back to my restaurant days big time. When I learned how to make mousse it was the old traditional way: melt chocolate, separate eggs, add yolks to chocolate, whip the whites to firm peaks and fold in the chocolate mass. In a large restaurant turning tables 2-3 times a night, this method can be quite costly and it’s not before long that you have to resort to the quicky approach of melted chocolate folded in whipped cream. Now you understand why my eyes popped and had to smirk when I read that even Eric Kayser used this method…the fraud…no just kidding….I don’t really like mousses like that, and I can’t say whether it is because I used to make it day in and day out or because I find too heavy. Egg whites mousse are really delicate and intense in flavors whereas the whipped cream ones are too dairy tasting. Just my thoughts people, don’t start coming at me with your spoon to bang me on the head….I just expressed an opinion, nothing else.

Milk Chocolate and Caramel Tart

Milk Chocolate and Caramel Tart:
Preparation time: 40 minutes
Baking Time: 30 minutes
Refrigeration time: 1 hour

½ lb (250 g) chocolate shortbread pastry (see recipe below)
1 ½ cups (300 g) granulated sugar
1 cup (250 g) heavy cream (30-40 percent butterfat) or crème fraiche
¼ cup (50 g) butter
2 whole eggs
1 egg yolk
2 ½ tablespoons (15 g) flour
1 ¼ cups (300 g) whipping cream
½ lb (250 g) milk chocolate

1. Preheat oven to 325 °F (160 °C).
2. Line the baking pan with the chocolate shortbread pastry and bake blind for 15 minutes.
3. In a saucepan, caramelize 1 cup (200 g) granulated sugar using the dry method until it turns a golden caramel color. Incorporate the heavy cream or crème fraiche and then add butter. Mix thoroughly. Set aside to cool.
4. In a mixing bowl, beat the whole eggs with the extra egg yolk, then incorporate the flour.
5. Pour this into the cream-caramel mixture and mix thoroughly.
6. Spread it out in the tart shell and bake for 15 minutes. Remove from oven and allow to cool.
7. Prepare the milk chocolate mousse: beat the whipping cream until stiff. Melt the milk chocolate in the microwave or in a bain-marie, and fold it gently into the whipped cream.
8. Pour the chocolate mousse over the cooled caramel mixture, smoothing it with a spatula. Chill for one hour in the refrigerator.

To decorate: melt ½ cup (100g) granulated sugar in a saucepan until it reaches an amber color. Pour it onto waxed paper laid out on a flat surface. Leave to cool. Break it into small fragments and stick them lightly into the top of the tart.

Chocolate Shortbread Pastry
Preparation time: 10 minutes
Refrigeration :overnight

1 cup (250g ) unsalted butter, softened
1 cup plus 2 tablespoons (150 g) confectioners’ sugar
½ cup (50 g) ground hazelnuts
2 level teaspoons (5 g) ground cinnamon
2 eggs4 ½ cups (400 g) cake flour
2 ½ teaspoons (10 g) baking powder
1 ½ tablespoons (10 g) cocoa powder

A day ahead
1. In a mixing bowl of a food processor, cream the butter.
2. Add the confectioners’ sugar, the ground hazelnuts, and the cinnamon, and mix together
3. Add the eggs, one by one, mixing constantly
4. Sift in the flour, the baking powder, and the cocoa powder, and mix well.
5. Form a ball with the dough, cover in plastic wrap, and chill overnight.

Alright, so we are now Monday night and it is time to finally taste the tarts. I made several sizes just to see what we could play with and I spooned it in a pastry bag fitted with a large start tip and swirled it around on top of the caramel.
I remembered I had some Milk Chocolate Toffee (think homemade Heath Bar) that I had made a couple of weeks prior and crushed the remainder on top of the tarts.
At first I thought I was not that inspired to dress them up a little for their beauty shots but you know what happens in those cases…my mind goes stir crazy and I decided to give them pretty little glass- marbled like plates made out of clear caramel and food coloring so completely edible if you ever should need more sugar! That part, Sophie did not see come together as I made them after I dropped her off at the airport today. The house was eerily quiet, suddenly too big and although I finally had all my kitchen space back to myself, I did not want it anymore….I wanted to share it with her again…I guess that’s why they put “mother” in godmother…Well, girl, I hope you like them and “non, ca ne pique pas”…!!

Milk Chocolate and Caramel Tart

Well, both Sophie and Bill loved it, or they lie very well….I was not so keen on it. I wish I had made half with cinnamon and half without because it really needed something to offset all that sugar. But I love milk chocolate, hazelnuts and caramel so I have to really thank Veronica and Patricia for choosing this recipe and the rest of the Daring Bakers for going along with it!

Salted Butter Caramel Sauce and Banana Chocolate Crepes

Salted Butter Caramel Sauce
Under other circumstances I would have started this post with the title "Banana Crepes and Salted Butter Caramel Sauce", but Andrew wanted sauces to be the center of attention in this month "Waiter There Is Something In My…" so my favorite caramel sauce took center stage.

There are very few things I love more than crepes in the desser category. Summer or winter I do not mind standing in front of the cooktop and flipping a batch. Oh yeah, I am a flipper! As soon as that crepe is pulling out from the side and loose from the bottom, I will flip it. There is enough batter for a couple to end up on the floor (makes the dog happy) or stuck to the ceiling (makes the husband worried). I like them sweet with a spritz of lemon juice and sugar or filled with my mother’s strawberry jam. That’s when I am being good….When I am being bad, I will load them up with Nutella, bananas, drizzle some caramel sauce, a good amount of whipped cream and some chopped nuts. Maybe just some chocolate, coconut sorbet and again that awesome sauce.

Allright there is obviously something that I love as equally as my sweet crepes and it is that heavenly and damned salted butter caramel sauce. It is heaven on a spoon, soft and good, it is evil on your thighs, especially if you eat it at the rate we do! Try it once and there is no going back!! I noticed I always have jar of it in the fridge and it is one of the first things I put in goodie baskets for friends and family. It was not always so and I can’t believe I have let such a long time pass by before making it! I was first introduced to it while reading one of my favorite blogs, Chocolate and Caetera. Guillemette makes the most tempting creations and when I read her post about the sauce, I was hooked. I am sure that caramel sauce also helped win HHDD #10 Cheesecakes.

Now that everybody has been introduced, let’s proceed with the fun. If you read French, head over to Marmiton where you will find the crepe recipe under (I translated) "the best crepe batter in the world". Now if you post such a title, you’d better have some back up or a strong faith in your recipe! Well….It became "the best" I had made so far after I added 1/2 cup light beer to the batter. See, to me there is no crepe without beer or cider. It helps the dough relax better, it helps it become airy and light without adding too much butter or oil to the batter.
The banana filling pretty much came together as I was going along….can’t mess up too much cooking nanners in butter, sugar and rum now can you?!! Once the crepes were flipped and filled I tied them up in little bundles with cut strings of licorice. The sauce served alongside really gave them another dimension. Can’t you tell we enjoyed dessert that evening?!

Salted Butter Caramel Sauce

240 gr. sugar
80 ml water
115 gr salted butter
150 ml heavy whipping cream

In a heavy saucepan set over low heat, combine the sugar and water and heat just until the sugar is dissolved. Add the butter. Let it come to a boil and cook until it reaches a golden caramel color. Remove from the heat and add the cream ( it will splatter and get crazy, but do not fear and trust the recipe). Whisk to combine and put back on the stove. Let it come to a boil again over low heat and cook 10-15 minutes until you reach a nice creamy consistency. Pour into a jar and try to refrain yourself from drinking it!

Crepe Batter

Makes 12 crepes

250 g flour
2 cups milk
3 eggs
1 Tb. oil
pinch of salt
1/2 cup light beer

In a blender or food processor, combine all the igredients and pulse until fully incorporated and no lumps remain.
If you decide to do it by hand: combine the flour and salt in a bowl. Make a well in the center and add the eggs, oil and a little bit of milk. Work the batter with a whisk, and slowly add the remaining milk, until the batter comes together and the lumps disappear. Add the beer.
No matter what method you used, strain the batter if necessary. Refrigerate, covered for an hour.
In a saute pan set over medium high heat, laddle 1/4 -1/3 cup batter (depending on the size of your pan) and cook 1-2 minutes on each side.

For the filling:
This is not a recipe per se because I only made enough for 4 crepes:
Cut 4 bananas into thin slices. In a pan, melt 4 Tb sugar with 4 TB butter, add 1/4 cup rum and cook until the sugar is melted. Add the bananas and cook them until soft. Remove them fom the pan. Let cool.
Melt 1/2 cup of dark chocolate with 1/4 cup heavy cream in the microwave.

To Assemble:
Fill each crepe with about 2 Tb. melted chocolate and 14 cup bananas. Gather the edges of the crepe together and tie up with a string of licorice. Serve with plenty of caramel sauce.

Gateau Saint Honore – We Dare You!

It’s time for the May installment of the Daring Bakers’ production, created by Ivonne and Lisa. It was my turn to pick a recipe and risk a minor stone throwing if it did not work out. After last month somewhat hair pulling Crepe Cake (and yes, Brilynn we still love you), I was really worried about presenting the recipe I had chosen: Gateau Saint Honore. I knew that some of us had previously made it either in their jobs or pastry school, some had baked parts of it for other recipes or had been tempted by makin some aspects of it without taking the plunge. There were several reasons behind my choice but primarily:
– Turns out that May 16th was Saint Honore (pronounced o-no-ray) Day, patron Saint of pastry chefs and bakers.
– It is the “must pass” element of pastry school students and it is a cake that includes several elements and techniques that bakers should try at least once: puff pastry, cream puff dough, caramel and pastry filling.
– We are Daring Bakers after all!

Since there is an ever growing number of Daring Bakers, I asked Anita to co-host with me and you will find half of the Daring Bakers’s links to their creation on this blog and half on hers. We will be updating the links as people post throughout the day. There are 48 of us this month, from various baking backgrounds and accomplishments, with various jobs and trades and we have our first male Daring Baker too! On to the nitty-griddy of the recipe:

There are many fillings as they are bakeries: chiboust cream, pastry cream, Bavarian cream (aka Diplomat cream). The cake building goes like this:- base of puff pastry- rings of cream dough baked on top (so that the cream sticks)- cream puffs set on the pastry filling or hooked to the base with hot caramel- cream filling to fill everything
I compiled recipes from Bo Friberg’s books “The Professional Pastry Chef” editions 3rd and 4th, and "The Advanced Pastry Chef". It is straightforward and very close to what you would find nowadays walking on the streets of Paris and popping into a bakery (close our eyes, you’re there). I realize it calls for time consuming puff pastry so you can use store bought, but if you have never made it why not try? It is just a long process, but the recipe given below makes more than you need so you can freeze it and use it later for something else. The recipe for the Saint Honore cream is flavored with rum and that may not appeal to you, so substitute an alcohol that you like more (Grand Marnier, White Godiva, Kirsch,…), or vanilla.


Gateau Saint Honore is built upon the followwing pastry items:

Puff pastry, Pate a Choux (Cream Puff Dough), Saint Honore Cream, caramel and whipped cream.

Pate a Choux – Cream Puffs Dough

4 ¾ oz. all purpose flour (135 gr)
1 cup water ( 240 ml)
2 oz unsalted butter (58 gr)
¼ tsp. salt (1 gr)
1 cup eggs (240 ml)

Sift the flour and set aside. Heat the water, butter and salt to a full rolling boil, so that the fat is not just floating on the top but is dispersed throughout the liquid. Stir the flour into the liquid with a heavy wooden spoon, adding it as fast as it can be absorbed. Avoid adding it all at once or it will form clumps. Cook, stirring constantly and breaking up the lumps if necessary, by pressing them against the side of the pan with the back of the spoon until the mixture comes away from the sides of the pan, about 2-3 minutes. Transfer the dough to a mixer bowl. Let the paste cool slightly so that the eggs will not cook when they are added. You can add and stir the eggs by hand but it requires some serious elbow grease.Mix in the eggs, one at a time, using the paddle attachment on low or medium speed. Do not add all the eggs at once. Check after a few, the dough should have the consistency of thick mayonnaise.Transfer the dough to a piping bag and use as desired.

Pate Feuillete – Puff Pastry:

Makes about 2 1/2 pounds.

3 cups all-purpose flour, plus more for work surface (420 gr)
3/4 cup cake flour (105 gr)
1 1/2 teaspoons salt (7 gr)
4 tablespoons unsalted butter, cut into 1/2-inch pieces, well chilled (60 gr)
1 1/4 cups cold water (295.5 ml)
1 tablespoon all-purpose flour (14 gr)
1 3/4 cups (3 1/2 sticks) unsalted butter, well-chilled (405 gr)

1/ Make the dough package: In a large mixing bowl, combine both flours with the salt. Scatter butter pieces over the flour mixture; using your fingers or a pastry cutter, incorporate butter until mixture resembles coarse meal.
2/ Form a well in center of mixture, and pour the water into well. Using your hands, gradually draw flour mixture over the water, covering and gathering until mixture is well blended and begins to come together. Gently knead mixture in the bowl just until it comes together to form a dough, about 15 seconds. Pat dough into a rough ball, and turn out onto a piece of plastic wrap. Wrap tightly, and place in refrigerator to chill 1 hour.
3/ Make the butter package: Sprinkle 1/2 tablespoon flour on a sheet of waxed or parchment paper. Place uncut sticks of butter on top, and sprinkle with remaining 1/2 tablespoon flour. Top with another sheet of paper; using a rolling pin, pound butter to soften and flatten to about 1/2 inch. Remove top sheet of paper, and fold butter package in half onto itself. Replace top sheet of paper, and pound again until butter is about A inch thick. Repeat process two or three times, or until butter becomes quite pliable. Using your hands, shape butter package into a 6-inch square. Wrap well in plastic wrap, and place in refrigerator until it is chilled but not hardened, no more than 10 minutes.
4/ Assemble and roll the dough: Remove dough package from refrigerator, and place on a lightly floured work surface. Using a rolling pin, gently roll dough into a 9-inch round. Remove butter package from refrigerator, and place it in the center of the dough round. Using a paring knife or bench scraper, lightly score the dough to outline the butter square; remove butter, and set it aside. Starting from each side of the center square, gently roll out dough with the rolling pin, forming four flaps, each 4 to 5 inches long; do not touch the raised square in the center of the dough. Replace butter package on the center square. Fold flaps of dough over the butter package so that it is completely enclosed. Press with your hands to seal.
5/ Using the rolling pin, press down on the dough at regular intervals, repeating and covering the entire surface area, until it is about 1 inch thick. Gently roll out the dough into a large rectangle, about 9 by 20 inches, with one of the short sides closest to you. Be careful not to press too hard around the edges, and keep the corners even as you roll out the dough by squaring them with the side of the rolling pin or your hands. Brush off any excess flour. Starting at the near end, fold the rectangle in thirds as you would a business letter; this completes the first single turn.Wrap in plastic wrap; place in refrigerator 45 to 60 minutes.
6/ Remove dough from refrigerator, and repeat process in step 5, giving it five more single turns.Always start with the flap opening on the right as if it were a book. Mark the dough with your knuckle each time you complete a turn to help you keep track. Chill 1 hour between each turn. After the sixth and final turn, wrap dough in plastic wrap; refrigerate at least 4 hours or overnight before using.

Saint Honore Cream (Rapid Chiboust or Diplomat Cream)

1 envelope unflavored gelatin (7 gr.)
1/4 cup cold water (60 ml)
1/2 cup + 2 Tablespoons sugar (130 gr)
½ cup all-purpose flour (70 gr)
1/4 teaspoon salt
5 egg yolks
2 cups whole milk (500ml)
1 Tb. rum
¼ cup whipping cream (57 gr)
3 egg whitesdash of salt
1/2 cup sugar (105 gr)

Soak the gelatin in the 1/4 cup of cold water.
Put the sugar, flour, and salt into a saucepan and stir together with a whisk. Add the yolks and enough milk to make a paste. Whisk in the remainder of the milk. Place over low heat and stirring constantly, cook until thick. Remove from heat and stir in the rum and the gelatin. Stir until the gelatin is completely dissolved.Stir in the whipping cream. Set the mixing bowl in cold water and stir until the cream is cool. Place the egg whites in a clean bowl and using clean beaters, whip them with the dash of salt. As soon as the whites begin to stiffen, gradually add the 1/2 cup of sugar and beat until they are very stiff. Fold the egg whites into the cooled cream.

Caramel:8 oz sugar (240 gr)Assembly:

Roll the puff pastry out to 1/8 inch (3 mm) thick, 12 inch square (30 cm). Place on a sheet pan lined with parchment paper. Refrigerate covered at least 20 minutes.While the puff pastry is resting, make the pate a choux and place it in a pastry bag with a # 4 (8mm) plain tip. Reserve.Leaving the puff pastry on the sheet pan, cut a 11 inch (27.5 cm) circle from the dough and remove the scraps. (An easy way to cut it is to use a 11inch tart pan as a “cookie cutter”). Prick the circles lightly with a fork. Pipe 4 concentric rings of Pate a Choux on the pastry circle. Pipe out 12 cream puffs the size of Bing cherries onto the paper around the cake. Bake the puff pastry circle and the cream puffs at 400F (205C) until the pate a choux has puffed, about 10 minutes. Reduce the heat to 375F (190C) and bake until everything is dry enough to hold its shape, about 35 minutes longer for the cake and 8 minutes longer for the cream puffs (just pick them up and take them out as they are done)Place about 4 oz (114 gr) of the Saint Honore Cream in a pastry bag with a #2 (4mm) plain tip. Use the pastry bag tip or the tip of a paring knife to make a small hole in the bottom of each cream puff. Pipe the cream into the cream puffs to fill them. Refrigerate.Spread the remaining cream filling on the cake. Refrigerate for at least 2 hours to set the cream.

Caramelize the 8 oz. of sugar:Fill a bowl that is large enough to hold the pan used for cooking the sugar with enough cold water to reach halfway up the sides of the pan. Set the bowl aside.Place the sugar in a heavy bottomed pan and cook until the sugar until it has caramelized to just a shade lighter than the desired color. Remove from the heat and immediately place the bottom of the pan in the bowl of cold water to stop the cooking process. Dip the cream puffs into the hot caramel, using 2 forks or tongues to avoid burning your fingers. Place them on a sheet pan. The caramel must be hot enough to go on in a thin layer. Reheat if necessary as you are dipping, stirring constantly to avoid darkening the caramel any more than necessary. Also, avoid any Saint Honore cream to leak out of the puffs and get mixed in with the caramel while dipping as the cream can cause the sugar to recrystalize.

Whip one cup of heavy cream and teaspoon of sugar to stiff peaks. Place the whipped cream in pastry bag fitted with a #5 (10mm) star tip. Pipe a border of whipped cream around the top of the cake. Arrange the cream puffs, evenly spaced, on top of the filling, next to the cream.

Option: Before filling the cake, take care of the cream puffs, dip them in more caramel, hook them up to the base. Fill with the cream filling and fill the holes with the whipped cream.


From the sneak previews and reports I got, it seems that the majority had a “good time” (it’s all relative with a lengthy recipe), and no major doozies, some had a runny pastry cream filling, some puffs had difficulty rising and we only had minor burnt fingers casualties.
In my love of all things mini I did not go quite as small as last month crepe cake but I made 2 6-inch cakes and 6 3- inches.
What I love about monthly challenges like these is to be able to take one recipe that we all follow and compare notes. 48 bakers means 48 ways to bake and 48 different experiences. I love it!

Check them out:

Cream Puffs in Venice – Ivonne : The Patron Saint of All Daring Bakers
La Mia Cucina – Lisa
: Happy Belated Saint Honore Cake
Culinary Concoctions by Peabody – Peabody : "Honore" Thy Fellow Baker
Jumbo Empanadas – Brilynn
: May Edition
All Things Edible – Quellia : Great Minds Think Alike
Veronica’s Test Kitchen – Veronica : It Huffed and It Puffed
Alpineberry – Mary : Gateau Saint Honore
Hester in Geneva – Hester : May Challenge

Desert Candy – Mercedes: Homework
My Kitchen In Half Cups – Tanna : Daring Challenge

Feeding My Enthusiasms – Elle : Saint Honore Gateau
Food Art and Random Thoughts – Morven
The Canadian Baker – Jen : Daring Bakers May Challenge
The Sour Dough – Breadchick Mary : Holy Puff Pastry Batman
Writing At The Kitchen Table – Freya : The Bakers Bite Back

Chronicles in Culinary Curiosity – Dolores : Covered in Cream Puffs

Columbus Foodie – Becke : Daring Bakers
Dessert First – Anita
: Daring Bakers' Challenge
Eat Drink Live – Laura : From Paris With Love
Humble Pie – Gilly : In Honour of Cake

I Like to Cook – Sara : Pour Some Sugar On Me

Trembon In English – Valentina

Head over to Anita’s blog for the other 24 Daring Bakers!

Outrageous Brownies Revisited

It 's not like I need a reason to make brownies, but Myriam's invitation to her Browniebabe of the Month event, prompted me to try my hand at a very much lusted after recipe: Ina Garten’s Outrageous Brownies.
The thing is that I make brownies every other day or so, if not they are definitely in th menu on sundays…why? They are easy to keep around of a friend stops by, if the neighbors' kids are outside playing , see me and run toward my shopping bags asking "are you baking us something?", and let’s be honest because B. and I have a huge sweet tooth when it comes to brownies.
After many years of brownie baking I have adapted and combined many different recipes to come up with one that turns plain chocolate into a square of deep dark fudge, and allows me to play with additions if flavors, liqueurs, nuts, dried fruits, etc….but to me the recipe is not original anymore as I make it so often. I will write it here someday but for the event I started dreaming about Ina’s brownies (allright, Lisa, get your mind out of the gutter…).

Why "revisited"? Well, for starters there was no way I was going to use 1 pound of butter! Why? There are ways to have outrageously good brownie without an artery blockage. But I still wanted an "outrageous" factor so I decided use diced salted butter chocolate caramels as an add-in and cut the recipe in half. If you don’t want to go through the troubles of making the caramels, you could use diced soft caramels or crushed hard ones.

Outrageous brownies with Salted Butter Caramels, adapted from Ina Garten:

Servings: depends on your gluttony

1/2 pound unsalted butter (8 oz)

8 oz plus 6 oz semisweet chocolate chips, divided

3 ounces unsweetened chocolate

3 large eggs

1 tablespoons instant coffee powder

1 tablespoons real vanilla extract

1 cup plus 2 Tbs sugar

1/2 cup plus 2 Tbs all-purpose flour, divided (1/2 cup for batter and 2 in the chips)

1/2 tablespoon baking powder

1/2 teaspoon kosher salt

1 1/2 cups diced salted butter caramels

Preheat oven to 350 degrees F. Grease and flour a 9 x13 baking pan.
Melt together the butter, 8 oz semisweet chocolate chips, and unsweetened chocolate in a saucepan over low heat. Cool slightly.

Stir together the eggs, instant coffee, vanilla and sugar. Stir in the warm chocolate mixture and cool to room temperature.
Stir together 1/2 cup of the flour, baking powder and salt. Add to cooled chocolate mixture. Toss the caramles and 6 ounces of chocolate chips with 2 Tbs. flour to coat. Then add to the chocolate batter. Pour into prepared pan.
Bake for about 30 minutes, or until tester just comes out clean. Halfway through the baking, rap the pan against the oven shelf to allow air to escape from between the pan and the brownie dough. Cool thoroughly, refrigerate well and cut into squares.

Want to know the truth? They are so good, they made me wish I had made the entire recipe…!

Fudgey, fudgey and again fudgey and they disappear faster then the neighbors' kids can "what did you bake today?"

So if you were ever tempted to make them , run to your kitchen and make a full batch! You won’t regret it.

Sugar High Friday 29: Cocoa Nibs Pavlovas

Well, there is more to these than just "pavlovas"…

I really thought I would have to sit this one out…The theme for this month’s Sugar High Friday was "Raw Chocolate" …. where am I going to find raw chocolate in my neck of the woods? There were the obvious choices like homemade chocolate including cocoa butter in the ingredient list, or cocoa nibs that I had successfully located a couple months back. I was feeling less than inspired. I kept looking at my pantry, at the cocoa nibs, at the fridge, and then inspiration came late friday night with these:

Cocoa Nib Pavlovas, Avocado Cream, Honeyed Strawberry and Pineapple, Cocoa Nib and Pistachio Praline….

Yep….just that…Really, I can’t be left alone… and before you turn your heads away, let me tell you that sweet avocado rocks! I wanted to keep up with the raw theme throughout this dessert so beside the cocoa nibs everything else is in its original form. I thought at first of filling the meringue disks with a citrus curd or a chocolate cream, but I wanted something soft and light that would let your mouth taste the cocoa nibs as well as the crunch of the praline.

I am not going to lie, I was a bit skeptical about having avocados on the sweet side, but I found tons of recipes out there for avocado dessert so it gave me the confidence to break away from my savory conceptions and get whipping. And you know what…it is amazingly good!

All the components can be made up to one day ahead. These were assembled and served saturday night for a dinner party. I did not tell people about the avocado part, everybody assumed it was pistachio custard until one guest asked me for the recipe and everybody stopped eating, raised their heads, looked at their dessert funny for a minute and digged in again to the sound of :"crunch…crunch…crunch…this is so surprising…this is so good…"

Cocoa Nibs Pavlovas, adapted from Eggbeater, via Simply Recipes:

Makes 12 shells, but I only used 6.

3 egg whites
3/4 cup sugar
2 1/4 tsp cornstarch
1/2 cup cocoa nibs

Preheat oven to 275.
Mix the sugar and corn starch and set aside. In a stand mixer fitted with the ballon whisk, start whipping the egg whites to soft peaks. Slowly add the sugar mixture in a slow steady stream, or one tablespoon at a time. Stop the mixer and with a spatula, fold in the cocoa nibs.
Line 2 sheet pans with parchment paper, and with a large spoon, mounds 12 meringue rounds. Bake at 275 for 40 minutes. Reduce heat to 250 and bake for another 20 minutes. At this point you can remove them from the oven, or turn the oven off and let them cool in the oven for a few hours. I let mine sit there overnight.

Avocado Cream, adapted from Avocado.org:

Serves 6

3 avocados, pitted, skin removed and cut into cubes
1/4 sugar, or to taste
1 cup heavy cream
juice of 1 lime

In a food processor, combine all the ingredients and puree until smooth. Refrigerate until ready to assemble.

Cocoa Nib and Pistachio Praline:

100 gr. sugar, divided
1/4 cocoa nib
1/4 shelled raw pistachios

Line a sheet pan with parchment paper and set aside.
In a heavy saucepan, melt 50 gr. sugar until light golden brown. Add the remaining 50 gr. sugar and stir until the sugar melt and the caramel is dark golden. Remove from the heat, quickly add the nuts and the nibs. Pour it onto the sheet pan and let cool completely. Break into pieces to decorate the meringues.

For the fruit I just cut up some strawberries and pineapple and drizzled them with some honey to taste.

Assemble the Pavlovas:
Do this just before serving.
Set one meringue disk on a plate. Scoop about 1/4 cup of the avocado cream. Spoon some fruit over the cream and add piece of praline to decorate.

This was perfect last night, as it was still over 80 degrees at 8pm, and it finished our dinner al fresco with style, simplicity and a very light feeling both in the stomach and the mouth.