Daring Bakers

Daring Bakers, Caramel Cake and Soft Grand Marnier Caramels

Photobucket


I can hardly believe that the Daring Bakers are already two years old and that next month will be my own two year anniversary with the group. I can hardly believe that it went from Lisa emailing me with "hey there are four of us making biscotti, are you interested?" to "hey should we have a name?" to a full blown multi national group of bakers of all ages and all levels. We may all see the challenges differently but it does not matter as long there is a good dose of butter, sugar, flour! I am learning so much about others, the way they approach recipes and ideas as well as their cultures. Cheers to two years Daring Bakers and to many more!

I love when things come full circle or half circle or when there is a little something somewhere, a little detail that makes sense to me or/and others. It did this month in the sweetest way (pun completely intended), when Dolores from Culinary Curiosity , along with Alex from Blondie and Brownie and Jenny of Foray into Food chose Shuna’s Caramel Cake as our November Challenge. When I first started reading food blogs, I tuned in to Shuna’s Eggbeater almost everyday. It took me forever and a day to leave a comment as every time I finished her last sentence I felt so inadequate posting a simple "Wonderful post". She has right the words to describe our industry, about being a chef, a woman, a human being wearing her heart upon her sleeve. I laugh, I cry, I shake my head "yes" and when she announced she was moving to London I was so thrilled for her…following what’s next and embracing all the unknowns that go with it.

Photobucket


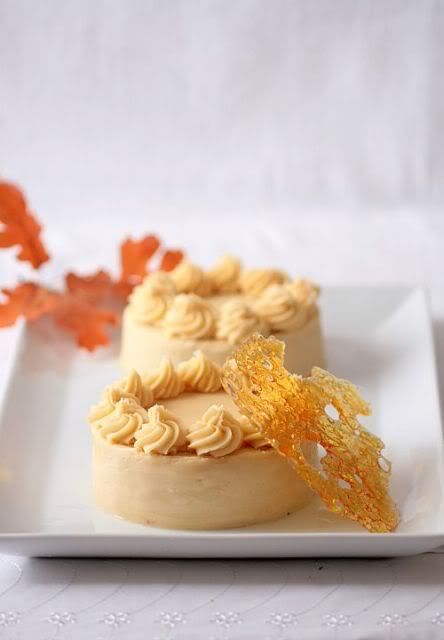
So yes…making Shuna’s Caramel Cake on the Daring Bakers' two year anniversary was one of those little details that mean a lot to me…like paying it forward in some way. And if you have been reading this blog for a little while you know how much I like playing with hot sugar (…blue caramel plate anyone?). Yep, I liked the idea from the get go, especially with a frosting that starts with browned butter. The smell in the house was enough to make you want someone would bottle it up in a perfume! The cake was easy to make and we all (us and the neighbors) loved its texture, and at first the frosting was a little too sweet to me but I did add some fleur de sel which really enhanced its flavor on the second day. Ah! The pleasure of biting into little salt crystals at the same time as biting into that sweet caramel frosting…hmmhmmhmm.

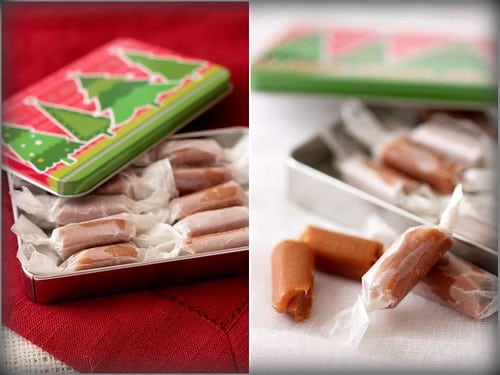
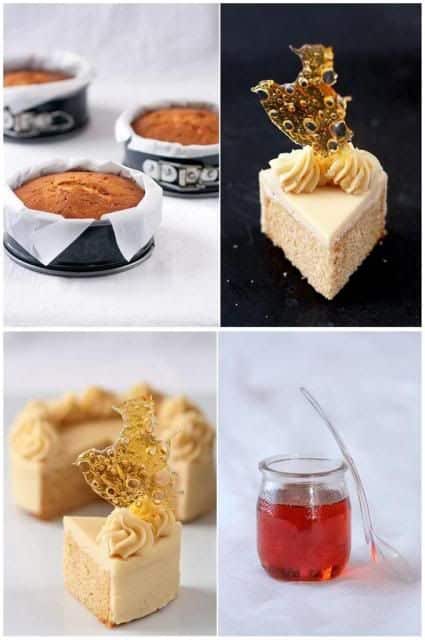
Given that we were given a lot of leeway in the making of the cake, I went ahead and made 4 small cakes instead of one. Granted I love caramel and salt but I also love caramel and citrus so I did add some grated lemon zest to the cake batter and as previously mentionned some fleur de sel to the frosting. I thought I would not have time to make the extra recipe for caramels but I needed to stand and move around after Thanksgiving dinner last night and I went ahead and did Grand Marnier caramels (citrus again) that I wrapped in waxed paper and boxed up in little Christmas tins for gift giving (except half of them are already gone…oops!). From turkey low to sugar high, I think we have all the compenents of a perfect holiday season!
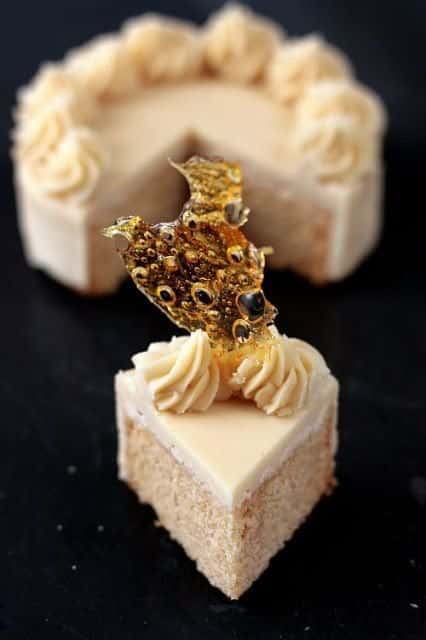
For the decoration, there was a bunch of kids eating with us so I kept it simple but did sneak in some "bubble caramel", a caramel technique that makes me giggle everytime I use it, (and the kids too) although be careful as you "play" with pouring hot sugar syrup over alcohol to create the bubble effect.

Thank you Lisa and Ivonne once more and our wonderful hostesses! Check out the rest of the Daring Bakers and their fantabulastic creations here.

Photobucket


Caramel Cake With Caramelized Butter Frosting, courtesy of Shuna:

10 Tablespoons unsalted butter at room temperature
1 1/4 Cups granulated sugar
1/2 teaspoon kosher salt
1/3 Cup Caramel Syrup (see recipe below)
2 each eggs, at room temperature
splash vanilla extract
2 Cups all-purpose flour
1/2 teaspoon baking powder
1 cup milk, at room temperature

Preheat oven to 350F. Butter one tall (2 – 2.5 inch deep) 9-inch cake pan.
In the bowl of a stand mixer fitted with a paddle attachment, cream butter until smooth. Add sugar and salt & cream until light and fluffy.
Slowly pour room temperature caramel syrup into bowl. Scrape down bowl and increase speed. Add eggs/vanilla extract a little at a time, mixing well after each addition. Scrape down bowl again, beat mixture until light and uniform.
Sift flour and baking powder. Turn mixer to lowest speed, and add one third of the dry ingredients. When incorporated, add half of the milk, a little at a time. Add another third of the dry ingredients, then the other half of the milk and finish with the dry ingredients. {This is called the dry, wet, dry, wet, dry method in cake making. It is often employed when there is a high proportion of liquid in the batter.}
Take off mixer and by hand, use a spatula to do a few last folds, making sure batter is uniform. Turn batter into prepared cake pan. Place cake pan on cookie sheet or 1/2 sheet pan. Set first timer for 30 minutes, rotate pan and set timer for another 15-20 minutes. Your own oven will set the pace. Bake until sides pull away from the pan and skewer inserted in middle comes out clean. Cool cake completely before icing it. Cake will keep for three days outside of the refrigerator.

Caramel Syrup:
2 cups sugar
1/2 cup water
1 cup water (for "stopping" the caramelization process)

In a small stainless steel saucepan, with tall sides, mix water and sugar until mixture feels like wet sand. Brush down any stray sugar crystals with wet pastry brush. Turn on heat to highest flame. Cook until smoking slightly: dark amber.
When color is achieved, very carefully pour in one cup of water. Caramel will jump and sputter about! It is very dangerous, so have long sleeves on and be prepared to step back.
Whisk over medium heat until it has reduced slightly and feels sticky between two fingers. {Obviously wait for it to cool on a spoon before touching it.}

Caramelized Butter Frosting:
12 tablespoons unsalted butter
1 pound confectioner’s sugar, sifted
4-6 tablespoons heavy cream
2 teaspoons vanilla extract
2-4 tablespoons caramel syrup
Kosher or sea salt to taste

Cook butter until brown. Pour through a fine meshed sieve into a heatproof bowl, set aside to cool.
Pour cooled brown butter into mixer bowl. In a stand mixer fitted with a paddle or whisk attachment, add confectioner’s sugar a little at a time. When mixture looks too chunky to take any more, add a bit of cream and or caramel syrup. Repeat until mixture looks smooth and all confectioner’s sugar has been incorporated. Add salt to taste.
Note: Caramelized butter frosting will keep in fridge for up to a month.To smooth out from cold, microwave a bit, then mix with paddle attachment until smooth and light.

Bubble Caramel:
1/2 cup (100gr) sugar
3 tablespoon (45 ml water)
1 tablespoon (15 gr) corn syrup
rubbing alcohol (I use a spray bottle)

Combine all the ingredients in a heavy saucepan and bring them to a boil. Monitor the temperature with a candy thermometer and bring the mixture to 300F. While the caramel is reaching its desired temperature, take a sheet of parchment paper and crinkle it between your hands then flatten it out a bit. This will help with the forming of the bubbles. Spray rubbing alcohol on the parchement paper right before the caramel reach its temperature (don’t do it ahead of time or it will be dry when you are ready to pour). When the caramel is ready, slowly pour it over the parchment paper and watch the bubble form. You can lift the paper carefully to spread it around the surface if needed but watch out! I do this over a large sheetpan so all is required for clean up is hot water. Let cool completely before breaking into shards. This is more a deco than an edible piece of caramel given the alcohol used. I guess one could use a high percentage clear alcohol (maybe my uncle’s moonshine that cleans the bottoms of coffee cups!) but I haven’t tried it that way yet.

Homemade Grand Marnier Caramels


Grand Marnier Caramels, adapted from Alice Medrich’s Pure Dessert.

Makes eighty-one 1-inch caramels
Note: the original recipe calls for Golden Syrup but I wanted to finish the corn syrup I had so I subsituted one invert sugar for another one without a problem.

1 cup corn syrup
2 cups sugar
3/8 teaspoon fine sea salt
2 cups heavy cream
1 tablespoon plus 1 teaspoon Grand Marnier
3 tablespoons unsalted butter, cut into chunks, softened

Line the bottom and sides of the baking pan with aluminum foil and grease the foil. Combine the corn syrup, sugar, and salt in a heavy 3-quart saucepan and cook over medium heat, stirring with a silicone spatula or wooden spoon, until the mixture begins to simmer around the edges. Wash the sugar and syrup from the sides of the pan with a pastry brush dipped in water. Cover and cook for about 3 minutes. (Meanwhile, rinse the spatula or spoon before using it again later.) Uncover the pan and wash down the sides once more. Attach the candy thermometer to the pan, without letting it touch the bottom of the pan, and cook, uncovered (without stirring) until the mixture reaches 305°F. Meanwhile, heat the cream in a small saucepan until tiny bubbles form around the edges of the pan. Turn off the heat and cover the pan to keep the cream hot.

When the sugar mixture reaches 305°F, turn off the heat and stir in the butter chunks. Gradually stir in the hot cream; it will bubble up and steam dramatically, so be careful. Turn the burner back on and adjust it so that the mixture boils energetically but not violently. Stir until any thickened syrup at the bottom of the pan is dissolved and the mixture is smooth. Continue to cook, stirring occasionally, to about 245°F. Then cook, stirring constantly, to 260°f for soft, chewy caramels or 265°F; for firmer chewy caramels.

Remove the pan from the heat and stir in the Grand Marnier extract. Pour the caramel into the lined pan. Let set for 4 to 5 hours, or overnight until firm.

Lift the pan liner from the pan and invert the sheet of caramel onto a sheet of parchment paper. Peel off the liner. Cut the caramels with an oiled knife. Wrap each caramel individually in wax paper or cellophane.
Tossing With The Daring Bakers: Plum Mascarpone and Streusel Pizza

Plum Mascarpone Streusel Pizza


This Daring Bakers' challenge almost did not come to be. Almost. It’s been a busy month, work, play, life…the usual. Multiply that by two or three. It took a dinner invitation and a little Halloween inspiration to make it happen.

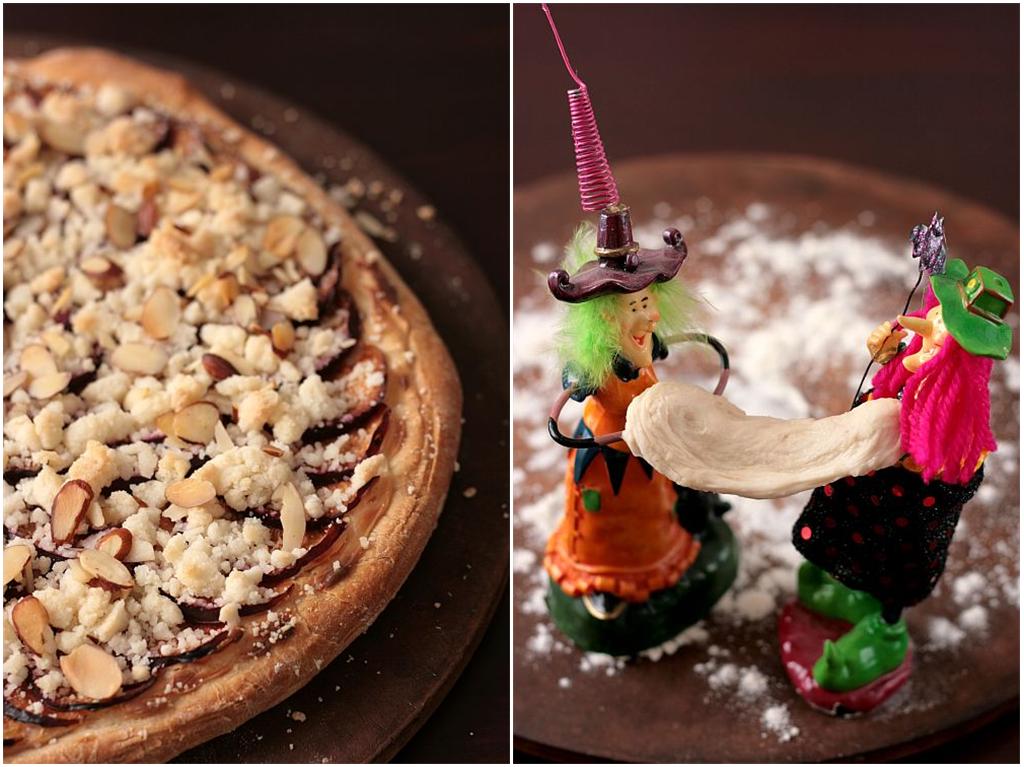
Our October hostess, Rosa from Rosa’s Yummy Yums chose pizza as our challenge and although excited about it right from the start (it’s got carbs…I am excited), I did not get to it until Monday morning. We had friends coming over yesterday for dinner and since it was going to be a late casual nibble around a game of Scrabble and some wine, I figured that pizza would be the perfect thing for that kind of get together. I made four small pizzas and kept three on the savory side and you guess it, one sweet for the blog. Turns out our guests arrived while I was still in traffic and helped themselves to the Plum Mascarpone and Streusel Pizza before Scrabble…my kind of peeps…dessert first!

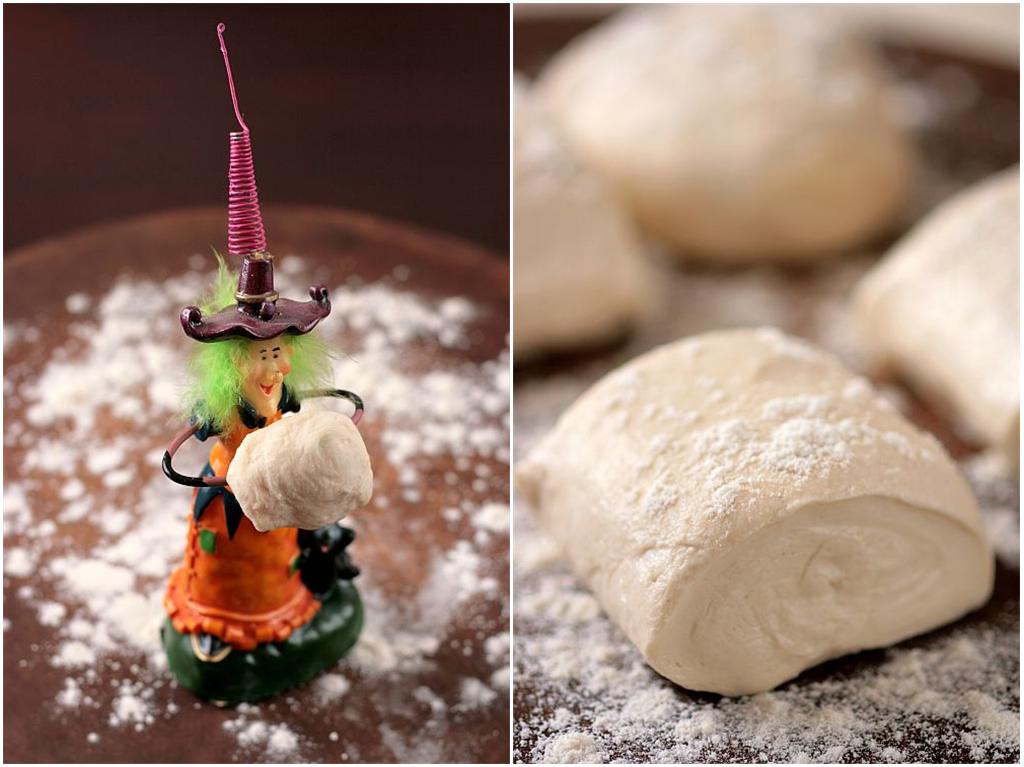
One of Rosa’s requests, although not mandatory was to take a picture of us tossing the dough. My schedule is completely opposite my husband’s these days so I knew it would be a hard thing to do, not having extra hands to hold the camera while I tossed, even with a remote control it was proving difficult. I kept having this nightmare: 2 in the morning and you toss your dough, click the remote button and then watch your pretty dough fall on a glass of water or pan full of cookies, catch the said glass or pan and takes them for a dive down to the floor and with a big sound of broken glass, baking sheet tumbling and loud cursing you end up waking up a puppy, an old dog and your mate. So you spend the next hour, cleaning, playing, calming and promising more cookies to ease the pain of a bing and a bang…Yep…as I said, I had to find a back up.

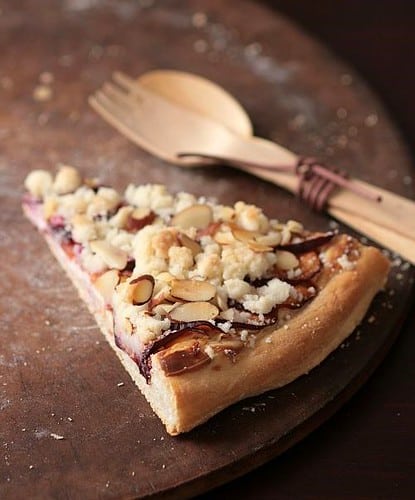
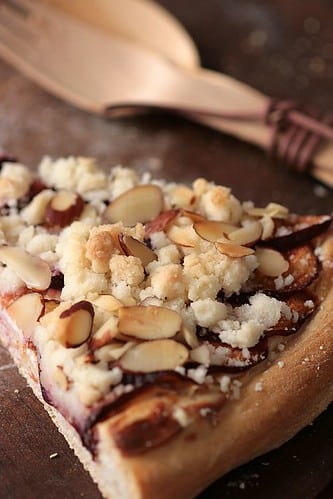
Late Sunday night, I went to the attic to get some Halloween decorations and I was sitting there in the middle of unlabeled boxes (grhhh!), I picked up my favorite Halloween witches, Greta and Hilda. Ha!Ha! They would do the tossing or stretching and I would photograph their tribulations!Greta started on her own while Hilda was getting her pretty pink hair fixed up a bit and the task was proving to be a little to much for one person so Hilda jumped right in like a good Daring Bakers. Once they were done tossing, stretching and playing with the dough I spread some mascarpone flavored with some vanilla on one pizza, arranged plum slices over it and topped the whole thing with some almond streusel. The end result was close to a rustic brioche tart and absolutely wonderful warm out of the oven.

Thank you Rosa for such a fun challenge and to you Lisa and Ivonne for coordinating things so well each month! I bet your quest for pizza toppings and variations will forever be answered by taking a look at all the other Daring Bakers' creations. Happy tossing!

Pizza Ingredients


BASIC PIZZA DOUGH

Adapted from “The Bread Baker’s Apprentice” by Peter Reinhart.
Makes 4-6 pizza crusts

For the dough:
4 1/2 Cups (20 1/4 ounces/607.5 g) all purpose flour, chilled
1 3/4 Tsp Salt
1 Tsp Instant yeast
1/4 Cup (2 ounces/60g) olive oil or vegetable oil
1 3/4 Cups (14 ounces/420g or 420ml) ice cold water, ice cold (40° F/4.5° C)
1 Tb sugar
Semolina/durum flour or cornmeal for dusting

Toppings:
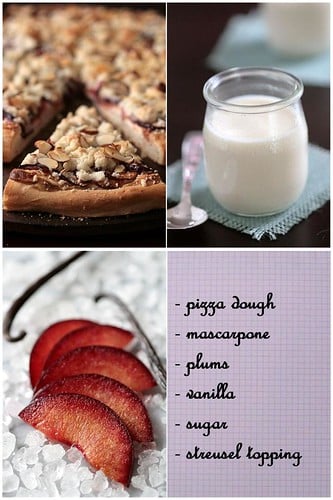
6 oz mascarpone, at room temperature
1 Tb sugar
1 vanilla bean
3 -4 plums, pitted and sliced
streusel topping (add 1/3 cup sliced almonds)

In a bowl combine the mascarpone, sugar and seeds from the vanilla bean and stir until smooth. Spread over the dough right before baking, arrange the plum slices around and topped with the streusel. Bake at 375 for 15 minutes (unlike for savory pizza, the streusel needs to bake a little longer and not burn).

DAY ONE
Mix together the flour, salt and instant yeast in a big bowl or stand mixer. Add the oil, sugar and cold water and mix well (spoon or paddle attachment) to form a sticky ball of dough. On a clean surface, knead for about 5-7 minutes, until the dough is smooth. If it is too wet, add a little flour and if it is too dry add 1 or 2 teaspoons extra water.
If you are using an electric mixer, switch to the dough hook and mix on medium speed for the same amount of time. The dough should clear the sides of the bowl but stick to the bottom of the bowl. If the dough is too wet, sprinkle in a little more flour. If it clears the bottom of the bowl, dribble in a teaspoon or two of cold water. The finished dough should be springy, elastic, and sticky, not just tacky, and register 50°-55° F/10°-13° C.
Flour a work surface or counter. Line a jelly pan with baking paper/parchment. Lightly oil the paper. Cut the dough into 4-6 equal pieces. Sprinkle some flour over the dough. Make sure your hands are dry and then flour them. Gently round each piece into a ball.
Transfer the dough balls to the lined jelly pan and mist them generously with spray oil and cover with plastic wrap. Put the pan into the refrigerator and let the dough rest overnight or for up to thee days.
NOTE: You can store the dough balls in a freezer bag if you want to save some of the dough for any future baking. In that case, pour some oil (a few tablespooons only) in a medium bowl and dip each dough ball into the oil, so that it is completely covered in oil. Then put each ball into a separate bag. Store the bags in the freezer for no longer than 3 months. The day before you plan to make pizza, remember to transfer the dough balls from the freezer to the refrigerator.

DAY TWO
On the day you plan to eat pizza, exactly 2 hours before you make it, remove the desired number of dough balls from the refrigerator. Dust the counter with flour and spray lightly with oil. Press the dough into disks about 1/2 inch/1.3 cm thick and 5 inches/12.7 cm in diameter. Sprinkle with flour and mist with oil. Loosely cover the dough rounds with plastic wrap and then allow to rest for 2 hours.
At least 45 minutes before making the pizza, place a baking stone on the lower third of the oven. Preheat the oven as hot as possible (500° F/260° C). If you do not have a baking stone, then use the back of a jelly pan. Do not preheat the pan.
Generously sprinkle the back of a jelly pan with semolina/durum flour or cornmeal. Take 1 piece and lay the dough across your fists in a very delicate way and carefully stretch it by bouncing it in a circular motion on your hands, and by giving it a little stretch with each bounce. Once the dough has expanded outward, move to a full toss.
Make only one pizza at a time. During the tossing process, if the dough tends to stick to your hands, lay it down on the floured counter and reflour your hands, then continue the tossing and shaping. In case you would be having trouble tossing the dough or if the dough never wants to expand and always springs back, let it rest for approximately 5-20 minutes in order for the gluten to relax fully,then try again.You can also resort to using a rolling pin.
When the dough has the shape you want, place it on the back of the jelly pan, making sure there is enough semolina/durum flour or cornmeal to allow it to slide and not stick to the pan. Lightly top it with sweet or savory toppings of your choice.
Slide the garnished pizza onto the stone in the oven or bake directly on the jelly pan. Close the door and bake for about 5-8 minutes.

Plum Mascarpone Streusel Pizza

Chocolate Eclair….Oh Pierre!!

Chocolate Eclairs


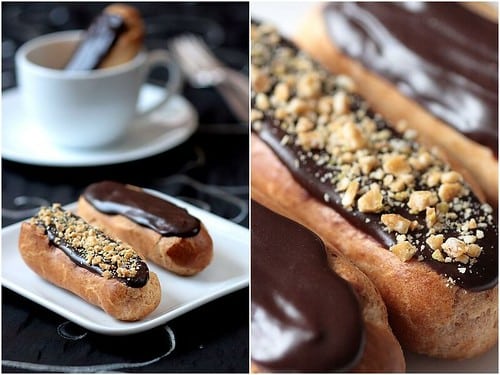
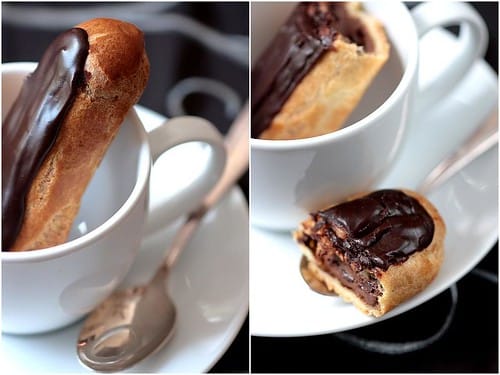
Eclairs With Chocolate Pastry Cream and Chocolate Glaze. Sprinkle of crushed Chikki (Indian Praline)

I wanted to write this post for our Daring Bakers challenge last night and started doing other stuff instead and I have just now gotten home from working a small party with Old Chef. I am exhausted and what happens when I am tired and need to focus is that I tend to make phrases and rhymes out of everything, like for our challenge this month, Pierre Herme’s Chocolate Eclairs: "Pierre, your eclairs, c’est du tonnerre. Soyons clairs, j’en suis fiere…" (does not sound that great translated but it basically reads that the eclairs were great!). I made the eclairs as written by our hosts but then played around a bit witht the eclairs and kept some of the pate a choux to make religieuses and cream puffs for a later post (without rhymes then, promise).

Indeed, Meeta and Tony made a great choice by going with Pierre Herme’s Chocolate Eclairs. Does PH really needs an introduction? I think not…He is pretty darn remarkable, not only by his creations but by his excellent timing and the excellence of the teams he puts together. I even But you see I have what the French call "un coeur d’artichaud", a heart like an artichoke…with many leaves for many people. So yes I like to look at and read Herme, but also Michalak, Aoki Bau, Glacier, Felder, and of course our favorite Zen Chef…And yes, B. knows and he is ok with it, except that PH had some serious shoes to fill regarding eclairs. Me? Never met an eclair I did not like so I was pretty happy to try a new recipe.

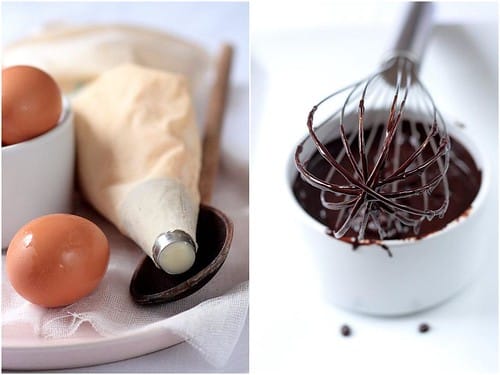
Eclairs Mise En Place

Pate a Choux for the eclairs – Chocolate sauce used in the chocolate glaze

Eclairs Mise En Place

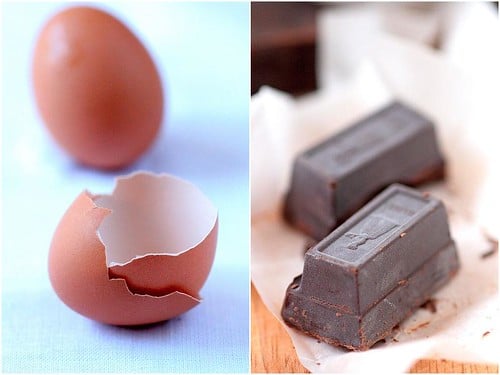
It often starts with the egg….and ends with chocolate… giving the American icon Baker’s chocolate a go and the result was surprisingly very good and smooth.

A little story there…real short this time (humhum): a couple of years ago when we went home to France to see my family for Christmas, we left the chaos of family fun for a little two-day escapade in downtown Paris. On our way back we stopped at La Maison Du Chocolat and selected some delicious pastries to share with my parents. B. could not wait for after dinner and bought one single dark chocolate eclairs to have on the train ride back. When we split that one eclair, the world around us magically evaporated. No noise, no rocking from the train against the tracks, no little lady telling her grandchild to please sit down 5 times every 2 minutes, no brouhaha from kids playing with their little Christmas toys. We looked at each other and exclaimed at the same time with our mouths full "oh my god…this is incredible…" We did not even feel the stares of the people on the train. When we noticed them, we looked as guilty as if we had been caught up in a passionate moment of affection!

I often promised B. I’d try to make them as good as that one from La Maison du Chocolat but I never did. I knew that no matter how close I’d come or even if I were to succeed, there would always be something missing: Christmas, Paris and a train ride…. However, Pierre Herme’s eclairs got pretty darn close…very close if you kept the recipe given by our hosts as written: eclair shells, bittersweet pastry cream and bitter sweet chocolate glaze. That is a lot of chocolate, eggs, sugar, cream, butter heavens all spread throughout the Daring Bakers world!

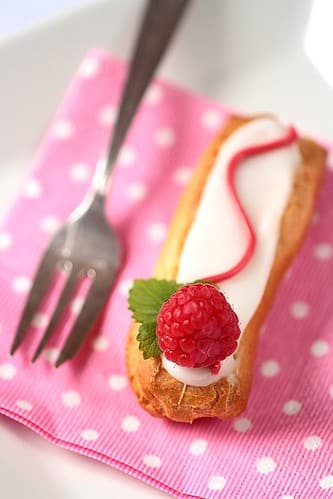
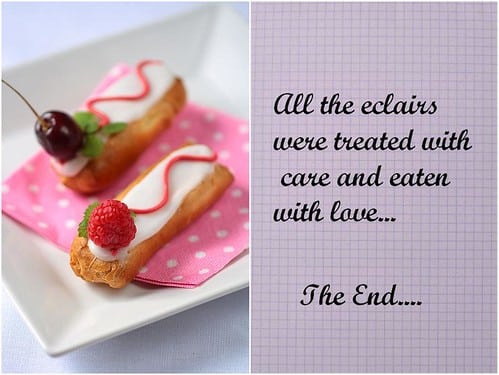
White Fondant Eclairs & Chocolate Rose Filling

Rose pastry cream, poured fondant and raspberry….add a lychee and it is a PH’s Ispahan eclair…

I did the full batch of doug but divided the pastry cream: half the pastry cream was chocolate trying to re-capture that elusive eclair described above. I did top some of the chocolate eclairs with some crushed Chikki (Hi Bina!). Inspired by PH’s Ispahan creations, I added rose water to the other half and made a poured fondant for the glaze. A poured fondant starts with a sugar syrup brought to high temperature then cooled dwon then whipped to a firm consistency. Once you have that block of fondant, you add some simple syrup and warm it up to pouring consistency. Why not do powdered sugar and water and call it a day? First, knowing your hot syrups is always a good thing…kidding (well, almost) but essentially this poured fondant is not as sweet as a simple glaze, goes on smooth and dries well, allowing you to stack, pack and transport those eclairs and pastries with ease….yes even if they only make it to your mouth! I borrowed The decoration for the second batch is inspired by Michalak and his book "C’est du gateau!" I love the picture in it and the smarts that went into it.

Allright…you need a recipe and I need sleep…

Chocolate Eclairs

Most mornings I only have coffee for breakfasts except last week! Eclairs instead!

Pierre Hermé’s Cream Puff Dough. All recipes below from Chocolate Desserts by Pierre Hermé
(makes 20-24 eclairs)
½ cup (125g) whole milk
½ cup (125g) water
1 stick (4 ounces; 115g) unsalted butter, cut into 8 pieces
¼ teaspoon sugar
¼ teaspoon salt
1 cup (140g) all-purpose flour
5 large eggs, at room temperature

In a heavy bottomed medium saucepan, bring the milk, water, butter, sugar and salt to theboil.Once the mixture is at a rolling boil, add all of the flour at once, reduce the heat to mediumand start to stir the mixture vigorously with a wooden spoon. The dough comes together very quickly. Do not worry if a slight crust forms at the bottom of the pan, it’s supposed to. You need to carry on stirring for a further 2-3 minutes to dry the dough. After this time the dough will be very soft and smooth. Transfer the dough into a bowl of a mixer fitted with the paddle attachment, or using your handmixer or if you still have the energy, continue by hand. Add the eggs one at a time,beating after each egg has been added to incorporate it into the dough.You will notice that after you have added the first egg, the dough will separate, once again do not worry. As you keep working the dough, it will come back all together again by the time youhave added the third egg. In the end the dough should be thick and shiny and when lifted itshould fall back into the bowl in a ribbon.The dough should be still warm. It is now ready to be used for the éclairs as directed above.
Notes: Once the dough is made you need to shape it immediately. You can pipe the dough and the freeze it. Simply pipe the dough onto parchment-lined bakingsheets and slide the sheets into the freezer. Once the dough is completely frozen, transfer the piped shapes into freezer bags. They can be kept in the freezer for up to a month.
Preheat your oven to 375 degrees F (190 degrees C), bake for 7 minutes. After the 7 minutes, slip the handle of a wooden spoon into the door to keep in ajar. When the éclairs have been in the oven for a total of 12 minutes, rotate the sheets top to bottom and front to back. Continue baking for a further 8 minutes or until the éclairs are puffed, golden and firm. The total baking time should be approximately 20 minutes.

Chocolate Pastry Cream
2 cups (500g) whole milk
4 large egg yolks
6 tbsp (75g) sugar
3 tablespoons cornstarch, sifted
7 oz (200g) bittersweet chocolate, preferably Velrhona Guanaja, melted
2½ tbsp (1¼ oz: 40g) unsalted butter, at room temperature

In a small saucepan, bring the milk to a boil. In the meantime, combine the yolks, sugar and cornstarch together and whisk in a heavy‐bottomed saucepan.
Once the milk has reached a boil, temper the yolks by whisking a couple spoonfuls of the hot milk into the yolk mixture.Continue whisking and slowly pour the rest of the milk into the tempered yolk mixture.
Strain the mixture back into the saucepan to remove any egg that may have scrambled. Place the pan over medium heat and whisk vigorously (without stop) until the mixture returns to a boil. Keep whisking vigorously for 1 to 2 more minutes (still over medium heat).Stir in the melted chocolate and then remove the pan from the heat.
Scrape the pastry cream into a small bowl and set it in an ice‐water bath to stop the cooking process. Make sure to continue stirring the mixture at this point so that it remains smooth.
Once the cream has reached a temperature of 140 F remove from the ice‐water bath and stir in the butter in three or four installments. Return the cream to the ice‐water bath to continue cooling, stirring occasionally, until it has completely cooled. The cream is now ready to use or store in the fridge.
Notes:The pastry cream can be made 2‐3 days in advance and stored in the refrigerator.
In order to avoid a skin forming on the pastry cream, cover with plastic wrap pressed onto the cream.Tempering the eggs raises the temperature of the eggs slowly so that they do not scramble.

Chocolate Glaze
(makes 1 cup or 300g)
1/3 cup (80g) heavy cream
3½ oz (100g) bittersweet chocolate, finely chopped
4 tsp (20 g) unsalted butter, cut into 4 pieces, at room temperature
7 tbsp (110 g) Chocolate Sauce (recipe below), warm or at room temperature

In a small saucepan, bring the heavy cream to a boil. Remove from the heat and slowly begin to add the chocolate, stirring with a wooden spoon or spatula.Stirring gently, stir in the butter, piece by piece followed by the chocolate sauce.
Notes: If the chocolate glaze is too cool (i.e. not liquid enough) you may heat it briefly
 in the microwave or over a double boiler. A double boiler is basically a bowl sitting over (not touching) simmering water.
It is best to glaze the eclairs after the glaze is made, but if you are pressed for time, you can make the glaze a couple days ahead of time, store it in the fridge and bring it up to the proper temperature (95 to 104 F) when ready to glaze.

Chocolate Sauce
(makes 1½ cups or 525 g)
4½ oz (130 g) bittersweet chocolate, finely chopped
1 cup (250 g) water
½ cup (125 g) crème fraîche, or heavy cream
1/3 cup (70 g) sugar

Place all the ingredients into a heavy‐bottomed saucepan and bring to a boil, making sure to stir constantly. Then reduce the heat to low and continue stirring with a wooden spoon until the sauce thickens.
It may take 10‐15 minutes for the sauce to thicken, but you will know when it is done when it coats the back of your spoon.
Notes: You can make this sauce ahead of time and store it in the refrigerator for two weeks. Reheat the sauce in a microwave oven or a double boiler before using.
This sauce is also great for cakes, ice-cream and tarts.

For a great poured fondant recipe with step by step pictures, check out this post.

The End.....

Daring Bakers' Nut and Chocolate Gateau

Cashew Praline Gateau-Copyright©Tartelette 2008 First I would like to start this post by dedicating it to Sher from What Did You Eat? and fellow Daring Baker who past away last week. This past Sunday, a lot of bloggers honored her memory by cooking something from her site. We were in celebratory birthday mode on Sunday for my husband so I never got around to it. I did look through her desserts archives and noticed that a lot of them were previous Daring Bakers' challenges…so here is to you Sher, because I know we almost did have the same thought that a chocolate bath can’t be such a bad thing after all! You are missed and loved all over the world. It is definitely strange without you around today, "reveal day", but I’ll just come and say hey anyway.

Our host this month was wild red headed Chris from Mele Cotte who chose a Filbert Gateau with Praline Buttercream from "Great Cakes" by Carol Walter. I had the pleasure of meeting Chris in the flesh this month after many months of chatting over the phone, so you could say we are "friends". That did not stop me from telling her last night that I approached this challenge not as enthusiastically as I usually do. It’s been around 100F (no kidding) and over almost everyday here, and very humid with thunderstorms almost every afternoons so making a cake while in the middle of another baking project did not make me jump up and down. Filberts (hazelnuts) are quite pricey here and the baking budget is pretty much well spent already. In July, I crave ice creams and fruits and I would probably not tackle a multi part "gateau' unless asked to. Oh wait! I was asked to, by Chris and B. needed a proper birthday cake too! The fact that Chris came to visit with a tote full of nuts (yeehaw) and other goodies also gave me another reason to roll up my sleeve and get down and dirty with this cake.

Cashew Praline Gateau-Copyright©Tartelette 2008
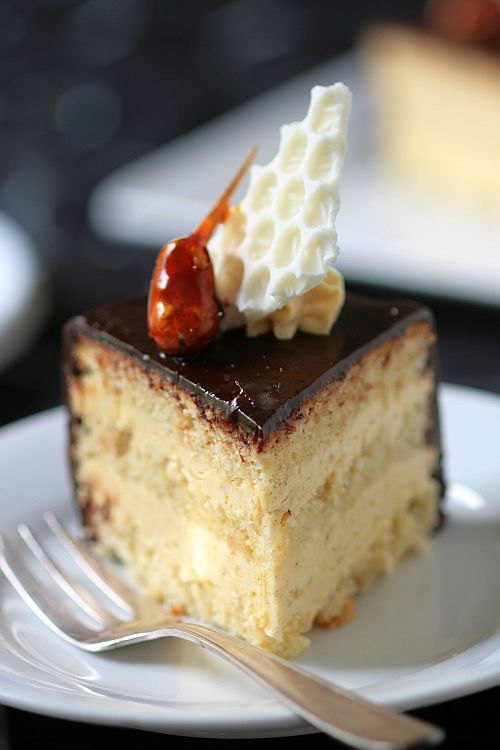
I am glad I did. The genoise part was light and flavorful, the praline buttercream perfectly balanced in sweetness and nuts and the chocolate ganache rich and delicious. I chose to go with cashews instead of hazelnuts in the cake, (although I prefer hazelnuts in all nutty things) did a cashew praline for the buttercream. One requisite was to use a layer of apricot glaze underneath the chocolate ganache but I am a very peculiar bird who does not like fruit messing with my chocolate (no dipped candied orange segments for me or chocolate-raspberry anything…can’t stand it, there I said it), so I did a salted butter caramel sauce instead. I was going to use mango jam I had just made but change my mind at the last minute.

Since I was essentially making it for B’s birthday and it was a small gathering, I baked and filled a 6 inch round cake and I still have a 8 inch cashew gateau ready to be used in the freezer (ah the possibilities!). I am glad Chris gave us many options to play around with because I used to the max to make a cake that everyone at the dinner table would enjoy. I left the liqueur out of the buttercream and used half a vanilla bean instead of extract. The soaking syrup for the cake was made with rum (per the recipe) with the addition of lime zest and lime juice. The chocolate glaze required corn syrup and I substituted honey instead to give a little flavor while I removed the alcohol part of it.

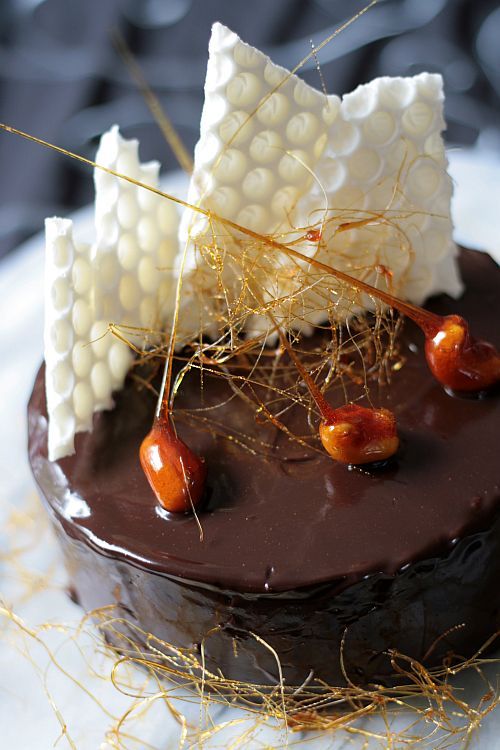
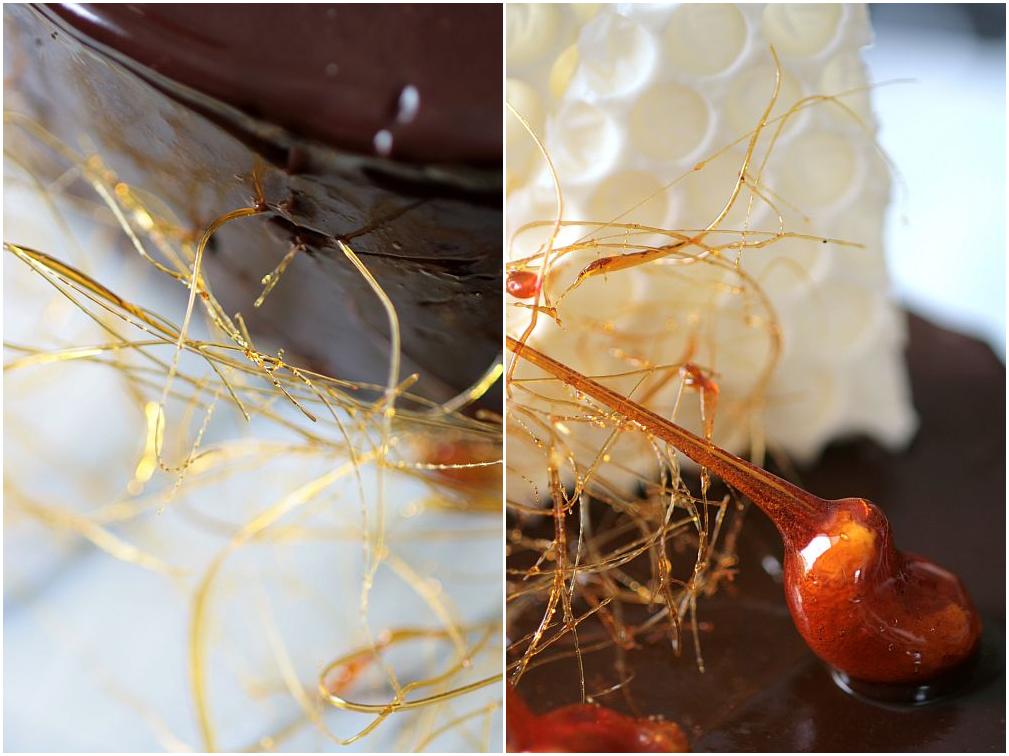
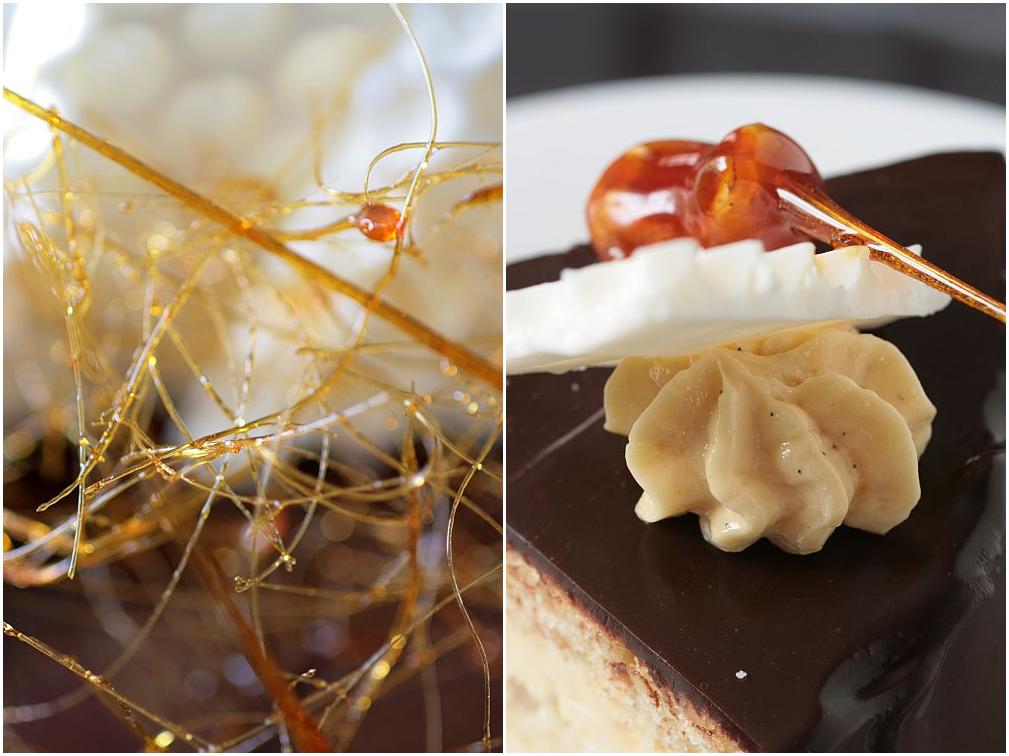
We did have to keep the cake round but decorations were left up to us as long as some of the buttercream made it "on" the cake. I almost read through that line without registering. As I was putting the decorations up on the cake, I stopped, "what was it again about the buttercream?" Gah…got to find its way on top somehow….Oh good, I just needed some "glue" to anchor the shards white chocolate bubble wrap! I dipped some cashews in caramel (dry sugar method) and played around with caramel strands too. I think everything "required" ended up in the cake, albeit modified since we could play around. Well, maybe not, I did skip the "clarified butter" and used just plain melted butter without an issue in my cake rising or changing in texture. Oh, oh…almost forgot, since we had the option of using of a layer of whipped cream with the buttercream, I prefered to opt out. There was just something rubbing me funny with whipped cream on buttercream on cake. I "love" buttercream you see so masking it with whipped cream would have been a shame in my opinion, especially with a praline buttercream.

This cake was like a little Christmas in July and I am glad there were outside forces helping me wrap my mind and time around making it. That’s what I like about being a Daring Baker, that "may the making force be with you" attitude that make us dive in into big pools of butter, flour, sugar and/or chocolate at any given month! Thank you Chris for choosing a tasty cake and thank you Ivonne and Lisa for all the tremendous work done to keep it organised and civilised. Bake on!

Cashew Praline Gateau-Copyright©Tartelette 2008 With the heat and humidity the caramel strands lasted about 2 minutes. See…there is buttercream sneaking its way on the gateau!

Cashew Gateau with Praline Buttercream, adapted from Great Cakes by Carol Walter

Cashew Genoise
1 ½ cups cashew, toasted/skinned
2/3 cup cake flour, unsifted
2 Tbsp. cornstarch
7 large egg yolks
1 cup sugar, divided ¼ & ¾ cups
1 tsp. vanilla extract
½ tsp. grated lemon rind
5 lg. egg whites
¼ cup melted butter, cooled

Position rack in the lower 3rd of the oven and preheat to 350 degrees. Grease and flour a 10” X 2” inch round cake pan. Using a food processor, process nuts, cake flour, and cornstarch for about 30 seconds. Then, pulse the mixture about 10 times to get a fine, powdery mixture. While you want to make sure there aren’t any large pieces, don’t over-process. Set aside. Put the yolks in the bowl of an electric mixer, with the paddle attachment, and beat until thick and light in color, about 3-4 minutes on med-high speed. Slowly, add ¾ cup of sugar. It is best to do so by adding a tablespoon at a time, taking about 3 minutes for this step. When finished, the mixture should be ribbony. Blend in the vanilla and grated lemon rind. Remove and set aside.
Place egg whites in a large, clean bowl of the electric mixer with the whisk attachment and beat on medium speed, until soft peaks. Increase to med-high speed and slowly add the remaining ¼ cup of sugar, over 15-20 seconds or so. Continue to beat for another ½ minute. Fold the yolk mixture to the whites. Pour the warm butter in a liquid measure cup (or a spouted container). Put the nut meal in a mesh strainer (or use your hand – working quickly) and sprinkle it in about 2 tablespoons at a time – folding it carefully. Be sure to exclude any large chunks/pieces of nuts. Again, work quickly and carefully as to not deflate the mixture. When all but about 2 Tbsp. of nut meal remain, quickly and steadily pour the warm butter over the batter. Then, with the remaining nut meal, fold the batter to incorporate. With a rubber spatula, transfer the batter into the prepared pan, smoothing the surface with the spatula or back of a spoon.
Tap the pan on the counter to remove air bubbles and bake in the preheated oven for 30-35 minutes. You’ll know the cake is done when it is springy to the touch and it separates itself from the side of the pan. Remove from oven and allow to stand for 5 minutes. Invert onto a cake rack sprayed with nonstick coating, removing the pan. Cool the cake completely.*If not using the cake right away, wrap thoroughly in plastic wrap, then in a plastic bag, then in the refrigerator for up to 3 days. If freezing, wrap in foil, then the bag and use within 2-3 months.

Sugar Syrup
1 cup water
¼ cup sugar
2 Tbsp. dark rum
zest and juice of one lime

In a small, yet heavy saucepan, bring the water and sugar to a boil and simmer for 5 minutes. Remove from heat, add the liqueur,lime zest and juice. Cool slightly before using on the cake.

Praline Buttercream
1 recipe Swiss Buttercream
1/3 cup praline paste

Blend ½ cup buttercream into the paste, then add to the remaining buttercream. Whip briefly on med-low speed to combine.
Swiss Buttercream
4 lg. egg whites
¾ cup sugar
1 ½ cups (3 sticks) unsalted butter, slightly firm
1/2 vanilla bean, cut open and grated

Place the egg whites in a large bowl of a electric mixer and beat with the whisk attachment until the whites are foamy and they begin to thicken (just before the soft peak stage). Set the bowl over a saucepan filled with about 2 inches of simmering water, making sure the bowl is not touching the water. Then, whisk in the sugar by adding 1-2 tablespoon of sugar at a time over a minutes time. Continue beating 2-3 minutes or until the whites are warm (about 120 degrees) and the sugar is dissolved. The mixture should look thick and like whipped marshmallows. Remove from pan and with the whisk attachment, beat the egg whites and sugar on med-high until its a thick, cool meringue – about 5-7 minutes. Set aside. Place the butter in a separate clean mixing bowl and, using the paddle attachment, cream the butter at medium speed for 40-60 seconds, or until smooth and creamy. Keep the butter around 65F. On med-low speed, blend the meringue into the butter, about 1-2 Tbsp. at a time, over 1 minute. Add the vanilla bean seeds and mix for 30-45 seconds longer, until thick and creamy.Refrigerate 10-15 minutes before using.
Praline Paste
1 cup (4 ½ oz.) cashews, toasted/skinless
2/3 cup sugar

Line a jelly roll pan with parchment and lightly butter. Put the sugar in a heavy 10-inch skillet. Heat on low flame for about 10-20 min until the sugar melts around the edges. Do not stir the sugar. Swirl the pan if necessary to prevent the melted sugar from burning. Brush the sides of the pan with water to remove sugar crystals. If the sugar in the center does not melt, stir briefly. When the sugar is completely melted and caramel in color, remove from heat. Stir in the nuts with a wooden spoon and separate the clusters. Return to low heat and stir to coat the nuts on all sides. Cook until the mixture starts to bubble. Then onto the parchment lined sheet and spread as evenly as possible. As it cools, it will harden into brittle. Break the candied nuts into pieces and place them in the food processor. Pulse into a medium-fine crunch or process until the brittle turns into a powder. To make paste, process for several minutes. Store in an airtight container and store in a cook dry place. Do not refrigerate.

Salted Butter Caramel Sauce
See here (I used about 2/3 of a cup)

Ganache Glaze
6 oz. (good) semisweet or bittersweet chocolate
6 oz. (¾ cup) heavy cream
1 tbsp honey
¾ tsp. vanilla
½ – 1 tsp. hot water, if needed

Break the chocolate into 1-inch pieces and place in the basket of a food processor and pulse until finely chopped. Transfer into a medium sized bowl and set aside. Heat the cream and honey in a saucepan, on low, until it reached a gentle boil. Once to the gently boil, immediately and carefully pour over the chocolate. Leave it alone for one minute, then slowly stir and mix the chocolate and cream together until the chocolate is melted and incorporated into the cream. Add the vanilla. If the surface seems oily, add ½ – 1 tsp hot water. The glaze will thicken, but should still be pourable. If it doesn’t thicken, refrigerate for about 5 minutes, but make sure it doesn’t get too cold!

Assembling Cake
Cut a cardboard disk slightly smaller than the cake. Divide the cake into 3 layers and place the first layer top-side down on the disk. Using a pastry brush, moisten the layer with 3-4 Tbsp. of warm sugar syrup. Measure out 1 cup of praline buttercream and set aside.
Spread the bottom layer with a ¼-inch thickness of the remaining buttercream. Place the middle layer over the first, brush with sugar syrup, spreading with buttercream. Moisten the cut side of the third layer with additional sugar syrup and place cut side down on the cake. Gently, press the sides of the cake to align the layers. Refrigerate to chill for at least 30 minutes. Brush the top and sides of the cake with cooled caramel sauce, sealing the cut areas completely. Chill while you prepare the ganache.Place a rack over a large shallow pan to catch the ganache drippings. Remove the gateau from the refrigerator and put it the rack. With a metal spatula in hand, and holding the saucepan about 10 inches above the cake, pour the ganache onto the cake’s center. Move the spatula over the top of the ganache about 4 times to get a smooth and mirror-like appearance. The ganache should cover the top and run down the sides of the cake. When the ganache has been poured and is coating the cake, lift one side of the rack and bang it once on the counter to help spread the ganache evenly and break any air bubbles. (Work fast before setting starts.) Patch any bare spots on the sides with a smaller spatula, but do not touch the top after the “bang”. Let the cake stand at least 15 minutes to set after glazing.

Cashew Praline Gateau-Copyright©Tartelette 2008 Hellooooo there little slice 🙂

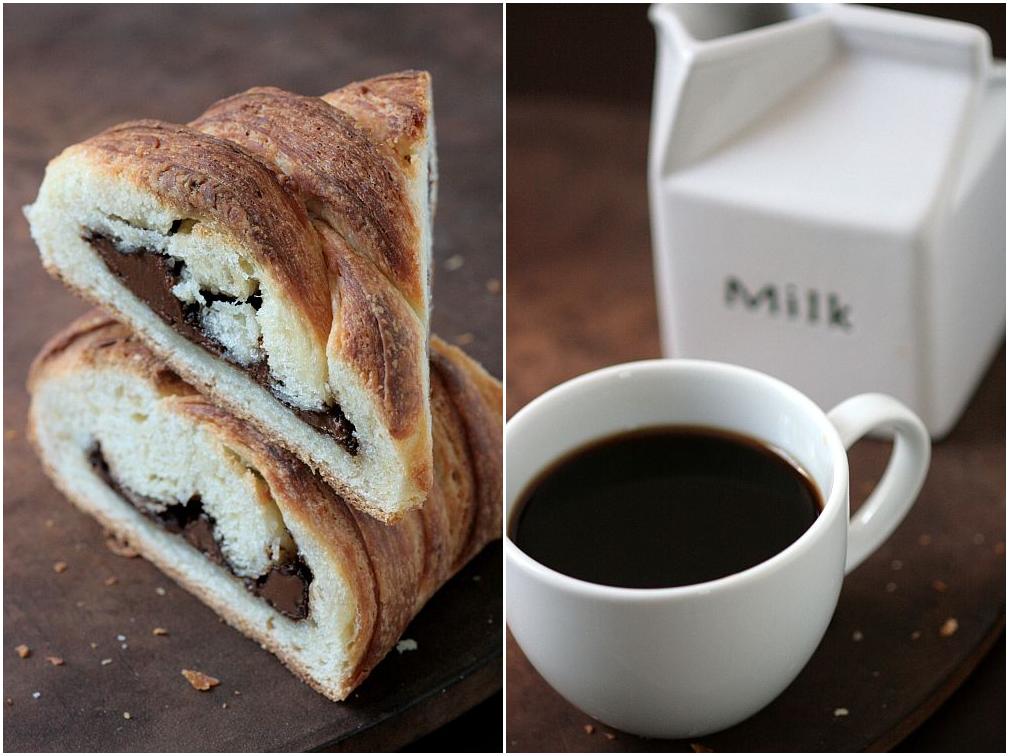
Nutella or Blackberry or Quince or Loquat Danish Braid With The Daring Bakers?

You know by the title of this post that there is a story coming up don’t you? Well, this time I have got to thank Kelly and Ben, our Daring Bakers' hosts this month for our house producing and eating danish braids and various other danishes all month long….for real. Not that I made a big batch of it and ate it throughout the month. No…to easy….I sat down yesterday actually counting the times I had made the recipe they provided for June: 1 full batch and 3 half batches. Hmmm…how did that happen?

Quickly after they posted the recipe inspired by Sherry Yard, The Secrets Of Baking, my mother-in-law was hosting her garden club and since I usually provide these ladies with some sort of baked goods, I thought of doing a half batch of the braid. Then a few days later, my Bakenistas and I met on Skype on Sunday morning and made a full batch. I had worked an overnight at the restaurant and I had started the dough there on my break. I arrived right on time to meet up with Lisa, Ivonne, Mary, Kelly, Ben, Chris and John. Same rowdy bunch, same coffee spillage laughing out loud. That batch was distributed around the neighborhood and B’s students. The weekend after that, he gave me a pity party for not having any left so I agreed to make another half batch. The last one? Yesterday…of all days…when I could not retrieve my Danish Braid picture folder and sent a screeching help email to whomever could help. Thank you John for the programs because they obviously work….and I can write this post eating a slice of Danish without freaking out or melting down.

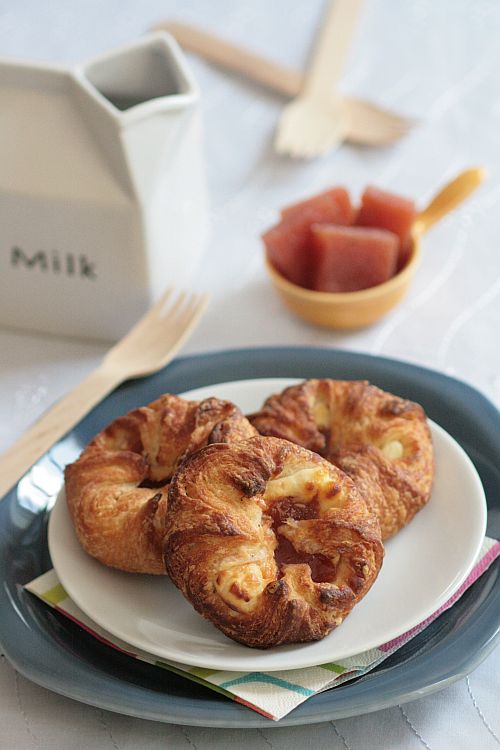
Summary? Well, we have one Nutella filled Danish Braid, one Blackberry Cream Cheese Braid with Almond Streudel Topping, a few Quince Danishes (thanks to Marcela who brought me a huge can of quince paste from Argentina, 2 pounds of it!), a few Loquat Jam filled Danishes.

Basically, I’d be lying if I told you that we did not enjoy it or that I did not find it a breeze to work with…even in the heat we are having and all the humidity. I do admit that I have a secret (well, not anymore) weapon when it comes to rolling laminated dough like danishes or puff pastry in the summer in South Carolina: a pastry board with ice pack inserts, which you can see see here.

For the filings I spooned Nutella right from the jar and the loquat jam was spread the same way, from the jar. For the blackberry filled braid, I simply cooked some berries with sugar and spooned 4 oz of cream cheese mixed with 2 Tb of sugar on the dough before the blackberries. For the quince paste, I did put a small spoonfull of mascarpone before the paste in the danish. No real recipes, just trying what I have on hand.Kelly and Ben provided a wonderful apple filling recipe for the braid but I had to make room in the fridge and not very much time to do it, but I have it bookmarked for this winter. One other thing: I skipped the egg wash and just sprayed the braids and danishes with some water before baking, to keep the layers light and crispy during baking.


Danish Braid, inspired by Sherry Yard, The Secrets of Baking:

Makes 2-1/2 pounds dough

For the dough (Detrempe)
1 ounce fresh yeast or 1 tablespoon active dry yeast
1/2 cup whole milk
1/3 cup sugar
Zest of 1 orange, finely grated
3/4 teaspoon ground cardamom
1-1/2 teaspoons vanilla extract
1/2 vanilla bean, split and scraped
2 large eggs, chilled
1/4 cup fresh orange juice
3-1/4 cups all-purpose flour
1 teaspoon salt

For the butter block (Beurrage)
1/2 pound (2 sticks) cold unsalted butter
1/4 cup all-purpose flour

Dough:Combine yeast and milk in the bowl of a mixer fitted with the paddle attachment and mix on low speed. Slowly add sugar, orange zest, cardamom, vanilla extract, vanilla seeds, eggs, and orange juice. Mix well. Change to the dough hook and add the salt with the flour, 1 cup at a time, increasing speed to medium as the flour is incorporated. Knead the dough for about 5 minutes, or until smooth. You may need to add a little more flour if it is sticky. Transfer dough to a lightly floured baking sheet and cover with plastic wrap. Refrigerate for 30 minutes.
Without a standing mixer: Combine yeast and milk in a bowl with a hand mixer on low speed or a whisk. Add sugar, orange zest, cardamom, vanilla extract, vanilla seeds, eggs, and orange juice and mix well. Sift flour and salt on your working surface and make a fountain. Make sure that the “walls” of your fountain are thick and even. Pour the liquid in the middle of the fountain. With your fingertips, mix the liquid and the flour starting from the middle of the fountain, slowly working towards the edges. When the ingredients have been incorporated start kneading the dough with the heel of your hands until it becomes smooth and easy to work with, around 5 to 7 minutes. You might need to add more flour if the dough is sticky.

Butter block: Combine butter and flour in the bowl of a mixer fitted with a paddle attachment and beat on medium speed for 1 minute. Scrape down the sides of the bowl and the paddle and then beat for 1 minute more, or until smooth and lump free. Set aside at room temperature.
– After the detrempe has chilled 30 minutes, turn it out onto a lightly floured surface. Roll the dough into a rectangle approximately 18 x 13 inches and ¼ inch thick. The dough may be sticky, so keep dusting it lightly with flour. Spread the butter evenly over the center and right thirds of the dough. Fold the left edge of the detrempe to the right, covering half of the butter. Fold the right third of the rectangle over the center third. The first turn has now been completed. Mark the dough by poking it with your finger to keep track of your turns, or use a sticky and keep a tally. Place the dough on a baking sheet, wrap it in plastic wrap, and refrigerate for 30 minutes. – Place the dough lengthwise on a floured work surface. The open ends should be to your right and left. Roll the dough into another approximately 13 x 18 inch, ¼-inch-thick rectangle. Again, fold the left third of the rectangle over the center third and the right third over the center third. No additional butter will be added as it is already in the dough. The second turn has now been completed. Refrigerate the dough for 30 minutes.
– Roll out, turn, and refrigerate the dough two more times, for a total of four single turns. Make sure you are keeping track of your turns. Refrigerate the dough after the final turn for at least 5 hours or overnight. The Danish dough is now ready to be used. If you will not be using the dough within 24 hours, freeze it. To do this, roll the dough out to about 1 inch in thickness, wrap tightly in plastic wrap, and freeze. Defrost the dough slowly in the refrigerator for easiest handling. Danish dough will keep in the freezer for up to 1 month.

Danish Braid:
Makes enough for 2 large braids
1 recipe Danish Dough
filling of your choice

– Line a baking sheet with a silicone mat or parchment paper. On a lightly floured surface, roll the Danish Dough into a 15 x 20-inch rectangle, ¼ inch thick. If the dough seems elastic and shrinks back when rolled, let it rest for a few minutes, then roll again. Place the dough on the baking sheet.
– Along one long side of the pastry make parallel, 5-inch-long cuts with a knife or rolling pastry wheel, each about 1 inch apart. Repeat on the opposite side, making sure to line up the cuts with those you’ve already made.
– Spoon the filling you’ve chosen to fill your braid down the center of the rectangle. Starting with the top and bottom “flaps”, fold the top flap down over the filling to cover. Next, fold the bottom “flap” up to cover filling. This helps keep the braid neat and helps to hold in the filling. Now begin folding the cut side strips of dough over the filling, alternating first left, then right, left, right, until finished. Trim any excess dough and tuck in the ends.

Proofing and Baking
– Spray cooking oil (Pam…) onto a piece of plastic wrap, and place over the braid. Proof at room temperature or, if possible, in a controlled 90 degree F environment for about 2 hours, or until doubled in volume and light to the touch.
– Near the end of proofing, preheat oven to 400 degrees F. Position a rack in the center of the oven.
– Bake for 10 minutes, then rotate the pan so that the side of the braid previously in the back of the oven is now in the front. Lower the oven temperature to 350 degrees F, and bake about 15-20 minutes more, or until golden brown. Cool and serve the braid either still warm from the oven or at room temperature. The cooled braid can be wrapped airtight and stored in the refrigerator for up to 2 days, or freeze for 1 month.

Check out all the other Daring Bakers' wonderful creations this month by heading over to the blogroll. Thank you all for visiting during these busy coming days and I will try my best to do the same. Scoring DMBLGIT is not a quick task so bear with me for the DB and the contest results which I plan on posting by Wednesday.

The Daring Bakers Sing An Opera: Honey And Lavender Opera

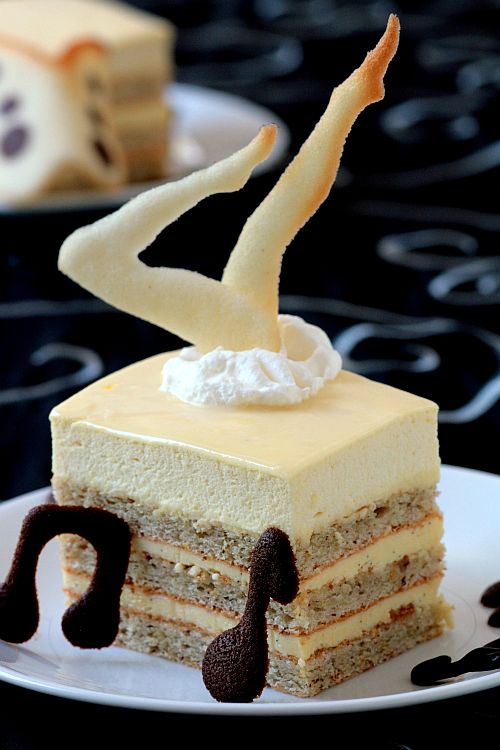
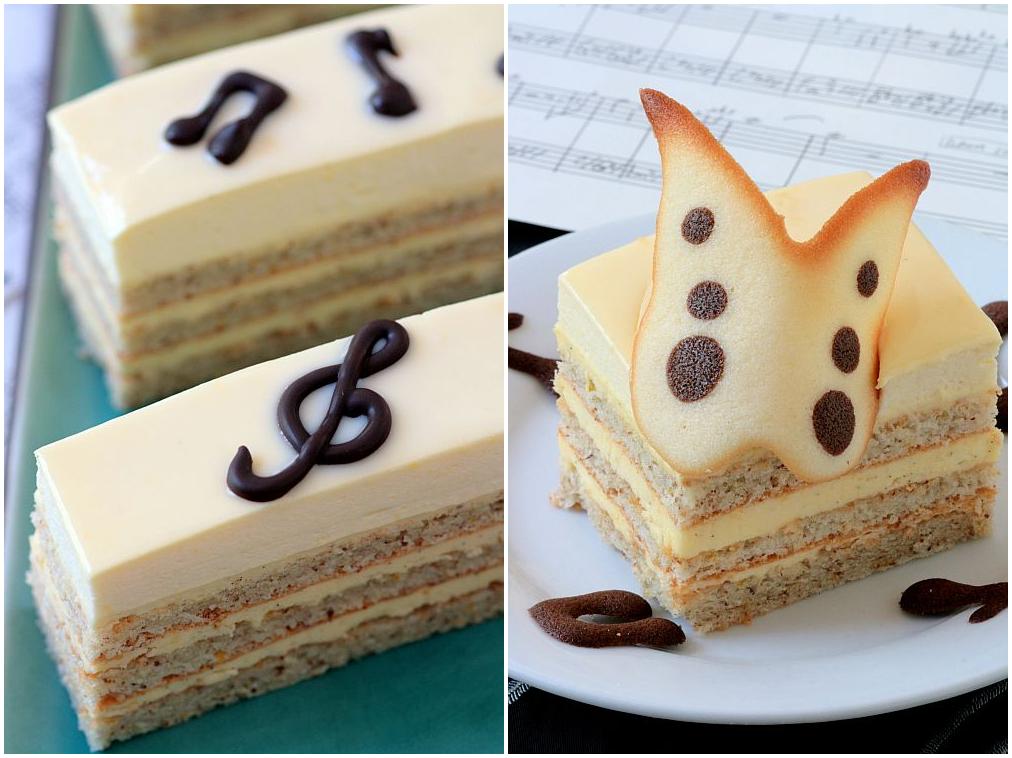
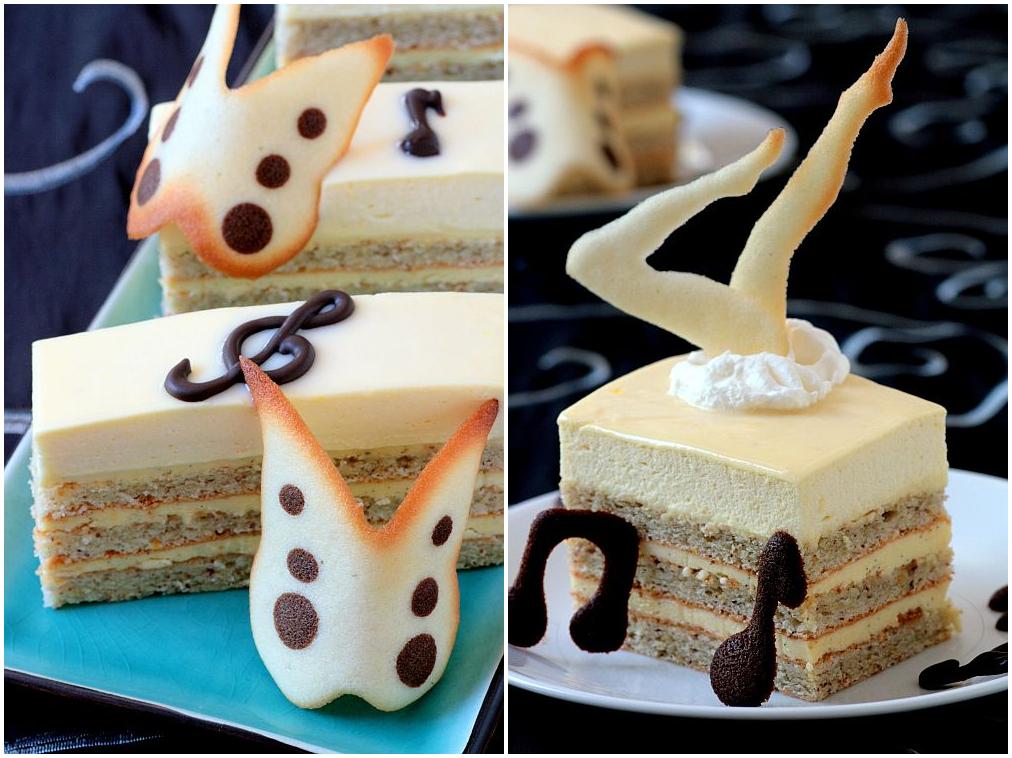
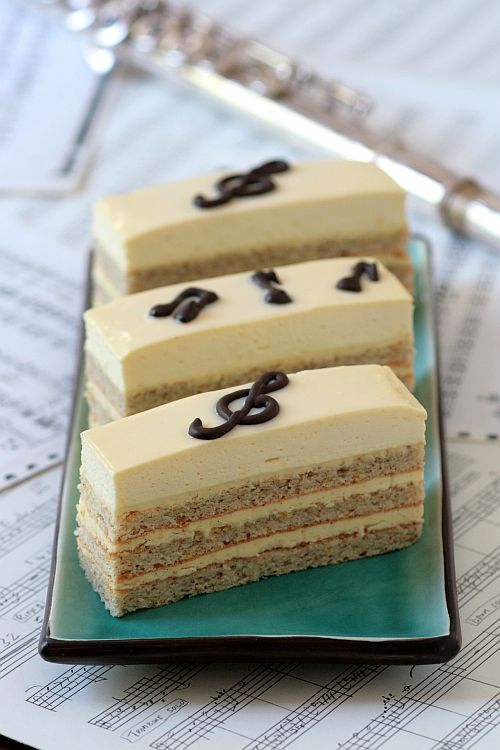
Lavender and Honey Opera-Copyright©Tartelette 2008….and I play the triangle….because I can’t carry a tune, which really is funny. No, no, really, I find it really funny that I can’t sing or barely remember three notes on a piano considering that thanks to Mr.Tartelette being a musician, I had no problem finding sheet music, a trombone, a flute, a guitar and a violin lying around the house making it easy to take pictures or get inspired when Ivonne and Lisa , along with Shea from Whiskful and Fran from Apple Peaches Pumpkin Pie announced that the Daring Bakers challenge for May was "The Opera". Early on, I started humming Madame Butterfly and Carmen which greatly influenced the decorations on the cake: lovely "tuile/tulip" butterflies for the former and shapely upside down legs in the cake. Mid-month I was not humming so much anymore as I was making the original Opera for hundreds at work. I was on a mission though…

The Daring Bakers' Opera this month is dedicated to Barbara of Winos And Foodies. Over the last couple of years, Barbara and I have become closer than just blogging acquaintances often sharing very private which each other. As Ivonne and Lisa put it "Barbara is the force behind the food blog event called A Taste of Yellow that supports the LiveSTRONG foundation started by Lance Armstrong. This year’s LiveStrong Day is in May so we decided that we could show our support by dedicating our respective challenge posts to Barbara." For that matter we were asked to keep our challenges yellow or white…my finished cake turned out both depending on the light but some of the ingredients were definitely yellow to start with. Thank you ladies for a brilliant challenge and idea! To check our wonderful Daring Bakers' creations, head over to the blogroll, you won’t be disappointed!

Barbara…I would love to sing you an Opera but if you knew how badly I sing you’d be much happier eating a bite of the one I made! This one is for you my dear dear friend! I am like you: "a cook who cannot sing who married a musician who cannot cook". If only I could give you a hug and thank you for the words of wisdom and comfort you have spoken in my ears since we "met" through Blogging By Mail… Remember I told you your dancing shoes picture was part of my screen saver mosaic? Well…I’d like to think these are the sexy legs that go along with them. You are a true inspiration of strength and compassion, humor and wit. Love you!

Honey and Lavender Opera-Copyright&copyTartelette 2008 I looked at the recipe provided by Ivonne and Lisa and the variations allowed (we could use different recipes as long as the outcome remained white or light colored) and let my mind sing me an Opera for a change…I got inspired by the flavors of my native Provence: orange, honey and lavender and incorporated those ingredients at different stages of the cake. I cannot take credit for the leg shaped tuiles as I had seen them done by a French blogger (original post here) 2 or 3 years ago but the funky idea stuck in my head thinking the right time would come along to play with it. I use tuile butterflies and other shapes a lot at work since it is easier to keep stable with the humidity here. Once I have the cookies and shapes made, I dry them off a bit in a low temperature oven to keep them crispy longer, much easier than blooming chocolate or limping caramel.

I did halve the recipe for the cake base, the Joconde, as there was just the two of us around in the neighborhood that weekend (really strange feeling by the way when you know our street) and added a good dose of orange zest. For the buttercream, I went with a Italian meringue based buttercream I had used in a Swiss Roll and replaced some of the sugar with honey and added some vanilla bean paste (thank you Holly!). I infused the syrup used to soak the cake to keep it moist and flavorful with lavender. We were given the option of adding a light colored mousse to the top of the cake before adding the glaze and here again I used a favorite recipe of mine, a soft and light (although rich) lavender infused mousse. I am a little weary of white chocolate as a glaze as I often find it cloyingly sweet so I made this one very very thin, just to brush the cake off with a nice sheen and slide off the sides.

Honey and Lavender Opera-Copyright©Tartelette 2008 Honey And Lavender Opera:

For the cake (Joconde)
6 large egg whites, at room temperature
2 tbsp. (30 grams) granulated sugar
2 cups (225 grams) ground blanched almonds
2 cups icing sugar, sifted
6 large eggs
½ cup (70 grams) all-purpose flour
2 Tb orange zest
3 tbsp. (1½ ounces; 45 grams) unsalted butter, melted and cooled

Divide the oven into thirds by positioning a rack in the upper third of the oven and the lower third of the oven. Preheat the oven to 425◦F. (220◦C). Line two 12½ x 15½- inch (31 x 39-cm) jelly-roll pans with parchment paper and brush with melted butter.
In the bowl of a stand mixer fitted with the whisk attachment (or using a handheld mixer), beat the egg whites until they form soft peaks. Add the granulated sugar and beat until the peaks are stiff and glossy. If you do not have another mixer bowl, gently scrape the meringue into another bowl and set aside. If you only have one bowl, wash it after removing the egg whites or if you have a second bowl, use that one. Attach the paddle attachment to the stand mixer (or using a handheld mixer again) and beat the almonds, icing sugar and eggs on medium speed until light and voluminous, about 3 minutes. Add the flour and orange zest and beat on low speed until the flour is just combined. Using a rubber spatula, gently fold the meringue into the almond mixture and then fold in the melted butter. Divide the batter between the pans and spread it evenly to cover the entire surface of each pan.
Bake the cake layers until they are lightly browned and just springy to the touch. This could take anywhere from 5 to 9 minutes depending on your oven. Place one jelly-roll pan in the middle of the oven and the second jelly-roll pan in the bottom third of the oven. Put the pans on a heatproof counter and run a sharp knife along the edges of the cake to loosen it from the pan. Cover each with a sheet of parchment or wax paper, turn the pans over, and unmold. Carefully peel away the parchment, then turn the parchment over and use it to cover the cakes. Let the cakes cool to room temperature.

For the syrup:
½ cup (125 grams) water
⅓ cup (65 grams) granulated sugar
1 to 2 tbsp. food grade lavender buds

Stir all the syrup ingredients together in the saucepan and bring to a boil.Remove from the heat and let cool to room temperature.

For the buttercream:
6 large egg yolks
1/2 cup sugar
1/2 cup honey
1/2 cup water
3 sticks of butter (Butter should be soft but nor mushy, around 65F)
1 Tb vanilla bean paste

In a stand mixer or with a hand held one, whip the egg yolks for a minute.
Boil water, honey and sugar until the temperature reaches 238F on a candy thermometer.
Slowly pour the hot sugar syrup over the egg yolks on a steady stream, continue beating the yolks until pale in color and cooled. Beat in the softened butter until the buttercream is smooth a
and together. Add the vanilla bean paste, beat a few extra seconds until incorporated.

Caramel Lavender Mousse:(makes 5 cups as written)
Note: have the cake cut and ready to be assembled before you make the mousse
6 egg yolks
pinch of salt
1 packet unflavored gelatin
3/4 cup water, divided
1 cup sugar
2 Tb food grade lavender buds
2 cups heavy cream

The day before of a few hours before you start: combine the lavender and heavy cream in a heavy saucepan and bring to a simmer. Remove from the heat and let the lavender infuse the cream. Let sit for 30 minutes. Strain the buds out and refrigerate the cream until completely cold.

In the bowl of a stand mixer, whisk the egg yolks and the salt. In a small bowl, sprinkle the gelatin over 1/4 cup water, and let it sit while you make the caramel.

Combine the sugar and 1/4 cup water in a heavy saucepan. Cover and bring to a rapid boil over medium high heat (prevents crystallization of the sugar on the side of the pan). Once boiling, uncover and cook the sugar until deep golden brown. Turn off the heat and carefully pour 1/4 cup water into the hot caramel. The syrup will bubble and spurt,so stand back. Make sure the water incorporates fully to the syrup. Return to the heat if you get caramel bits and stir until it is one smooth liquid.

Pour the caramel in a container with a spout, it will be easier to add the to the yolks. Pour the caramel slowly and into a steady stream into the egg yolks with the machine running on medium high. Melt the gelatin in the microwave for 10 seconds or into the (now empty) saucepan until dissolved. Add it to the yolk mixture and continue to whisk on medium high until it triples in volume and cools to room temperature.

In a separate bowl, whip the heavy cream to soft peaks. Add it to the mousse base and fold the two gently together. Use within 30 minutes or it will be too set to spread.

For the glaze:
10 ounces white chocolate, coarsely chopped
½ cup heavy cream (35% cream)

Melt the white chocolate with the heavy cream. Whisk the mixture gently until smooth. Let cool for 10 minutes and then pour over the chilled cake. Using a long metal cake spatula, smooth out into an even layer. Place the cake into the refrigerator for 30 minutes to set.

Assembling the Opéra Cake:
(Note: The finished cake should be served slightly chilled. It can be kept in the refrigerator for up to 1 day).

Line a baking sheet with parchment or wax paper.
Working with one sheet of cake at a time, cut and trim each sheet so that you have two pieces (from each cake so you’ll have four pieces in total): one 10-inch (25-cm) square and one 10 x 5-inch (25 x 12½-cm) rectangle.

Place one square of cake on the baking sheet and moisten it gently with the flavoured syrup.
Spread about three-quarters of the buttercream over this layer.
Top with the two rectangular pieces of cake, placing them side by side to form a square. Moisten these pieces with the flavoured syrup.
Spread the remaining buttercream on the cake and then top with the third square of joconde. Use the remaining syrup to wet the joconde and then refrigerate until very firm (at least half an hour).
Spread the mousse on the top of the last layer of the joconde. Refrigerate for at least two to three hours to give the ganache/mousse the opportunity to firm up.
Make the glaze and after it has cooled, pour/spread it over the top of the chilled cake. Refrigerate the cake again to set the glaze.
Serve the cake slightly chilled. This recipe will yield approximately 20 servings.

Honey and Lavender Opera-Copyright©Tartelette 2008 I apologize ahead of time if I am very slow making the rounds checking other DB’s operas but I am putting up a huge SHF round-up and trying to enjoy my family visiting from France for a while.

Cheesecake Pops – Dunking With The Daring Bakers

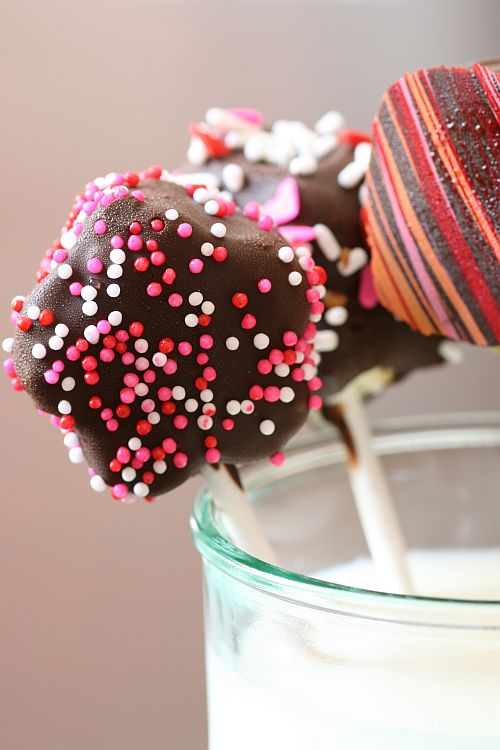
Cheesecake Pops-Copyright©Tartelette 2008 I get excited every month about posting the Daring Bakers challenges. Actually it is more like an act in three part. On reveal day, I check our site in my pajamas like a kid waiting to open her Christmas present. I give myself a week or so to think about how I want to go about the challenge, baking, cutting, plating and photographing. Then, I usually get them done the second week and then I tend to lose the mood until posting day. That’s when it hits me, why I love it so much: it’s the sense of community, knowing that there is a bunch of us out there loving the same thing…baking and sharing the fruits of our labor. It may be more or less challenging for some of us each time but it gives me the opportunity to share my love of baking and eating with you all. I just realized my first challenge was on December 2006 with Biscotti, right after Lisa and Ivonne introduced the concept of a group baking session. Time flies when you are having fun!!

Since I have been in the States for over 10 years, I can’t say that cheesecake is new to me, having churned about 2-3 a day at work back in the days and a few here on this site However turning a cheesecake into a lollipop was something I had never done before but always wanted to try, ever since I had watched a show on a restaurant dunking big slices of cheesecake in chocolate and serving them as ice cream pops. But you know…so many recipes, so little time! That’s until Deborah from Taste and Tell and Elle from Feeding My Enthusiasms chose these Cheesecake Pops from Sticky, Chewy, Messy, Gooey by Jill O’Connor. Thank you ladies I don’t know when I would have gotten around to making these bites but thanks to the Daring Bakers, now it was… (I know, not grammatically correct but you get it).

I made the pops for our weekly gathering with the neighbors and decided to make half the recipe. This turned out to be a little mistake since one of the couples present was celebrating their anniversary yesterday and he asked me if I could make some as party favors and a small box with heart sprinkles on them especially for her. I forgot about it until yesterday morning and I was still duking pops a few hours before the party a la Bridget Jones….read with curlers in my hair and a party dress on. I also almost walked into the reception room with one curler still on my head but that is another story!

Anyways….each half batch took about 40-45 minutes to bake which makes me think that the 55 minutes indicated for the full batch is very very conservative, and from what other Daring Bakers have reported throughout the month, it was more like over an hour of baking time. I went for the queen of flavors (just my opinion) for the cake, vanilla, scraping a whole bean into the batter and the cake tasted like vanilla ice cream. I thought about adding a blueberry or a raspberry into each pop but in the end I kept relatively simple. The result? Decadent pleasure…
I used good old store bought chocolate chips for the coating and it worked perfectly. The only problem with a recipe that calls for variance in temperatures like dunking the frozen pops into hot chocolate coating where I live is that within 20 minutes with the humidity and the heat around make the chocolate sweat. I notice that this morning when I was dunking the remaining bites and taking extra pictures. It was humid and hot in the room where I was and it made my pops go into thermal shock!! No big deal, they did not suffer long… Will I make them again? Probably but this time I want to cut bigger slices and put them on ice cream sticks, ahahaha!!!

Cheesecake Pops-Copyright©Tartelette 2008 Cheesecake Pops, (full recipe) adapted from Sticky, Chewy, Messy, Gooey by Jill O’Connor

Makes 30 – 40 Pops (or more if you make them small like I did)
Printable Recipe

5 8-oz. packages cream cheese at room temperature
2 cups sugar
¼ cup all-purpose flour
¼ teaspoon salt
5 large eggs (I used 3 eggs when I baked half the recipe without a problem)
2 egg yolks
1 vanilla bean, seeded
¼ cup heavy cream

Thirty to forty 8-inch lollipop sticks
1 pound chocolate, chopped or in chips
2 tablespoons vegetable shortening
(Note: White chocolate is harder to use this way, but not impossible)

Assorted decorations such as chopped nuts, colored jimmies, crushed peppermints, mini chocolate chips, sanding sugars, dragees) I also used cut chocolate transfer sheets.

Position oven rack in the middle of the oven and preheat to 325 degrees F. Set some water to boil.
In a large bowl, beat together the cream cheese, sugar, flour, and salt until smooth. If using a mixer, mix on low speed. Add the whole eggs and the egg yolks, one at a time, beating well (but still at low speed) after each addition. Beat in the vanilla and cream.
Grease a 10-inch cake pan (not a springform pan), and pour the batter into the cake pan. Place the pan in a larger roasting pan. Fill the roasting pan with the boiling water until it reaches halfway up the sides of the cake pan. Bake until the cheesecake is firm and slightly golden on top, 35 to 45 minutes.
Remove the cheesecake from the water bath and cool to room temperature. Cover the cheesecake with plastic wrap and refrigerate until very cold, at least 3 hours or up to overnight.
When the cheesecake is cold and very firm, scoop the cheesecake and place on a parchment paper-lined baking sheet. Carefully insert a lollipop stick into each cheesecake ball. Freeze the cheesecake pops, uncovered, until very hard, at least 1 to 2 hours.

When the cheesecake pops are frozen and ready for dipping, prepare the chocolate. In the top of a double boiler, set over simmering water, or in a heatproof bowl set over a pot of simmering water, heat half the chocolate and half the shortening, stirring often, until chocolate is melted and chocolate and shortening are combined. Stir until completely smooth. Do not heat the chocolate too much or your chocolate will lose it’s shine after it has dried. Save the rest of the chocolate and shortening for later dipping, or use another type of chocolate for variety.
Alternately, you can microwave the same amount of chocolate coating pieces on high at 30 second intervals, stirring until smooth.

Quickly dip a frozen cheesecake pop in the melted chocolate, swirling quickly to coat it completely. Shake off any excess into the melted chocolate. If you like, you can now roll the pops quickly in optional decorations. You can also drizzle them with a contrasting color of melted chocolate (dark chocolate drizzled over milk chocolate or white chocolate over dark chocolate, etc.) Place the pop on a clean parchment paperlined baking sheet to set. Repeat with remaining pops, melting more chocolate and shortening (or confectionary chocolate pieces) as needed.
Refrigerate the pops for up to 24 hours, until ready to serve.

Cheesecake Pops-Copyright©Tartelette 2008Don’t forget to check out the other Daring Bakers' creations here and again thanks Lisa and Ivonne for your hard work this month setting us up with a brand new forum!!

Perfect Party Cake: Dorie And The Daring Bakers

Party Cake-Copyright Tartelette 2008 It was bound to happen that one of these days the Daring Bakers would tackle a Dorie Greenspan recipe. Her last volume, Baking From My Home To Yours is filled with delightful, well written and fail proof desserts, pastries and treats. I had my share of baking from her book and I was delighted when Morven, our host for March announced that we would all be making her Perfect Party Cake. I have made it several times this year for different birthday parties and occasions and I have fallen in love with the textures and tastes of both the cake and the buttercream. I believe it has become the cake I use the most for building tiered cakes or "party cakes".

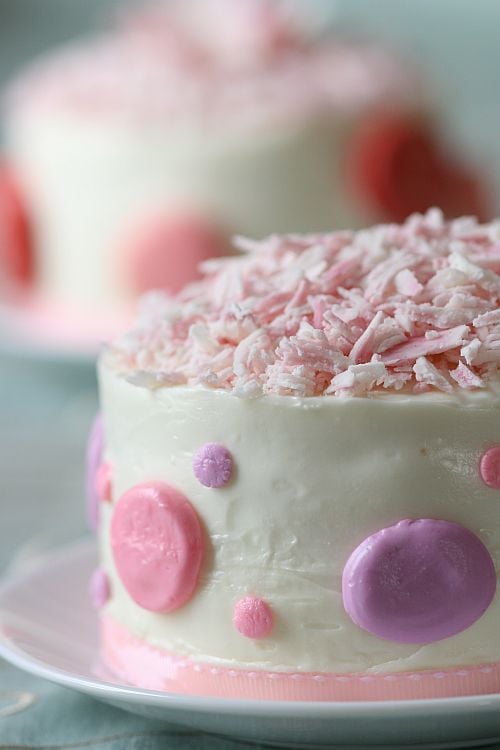
Since I always make it according to the person’s wishes when he/she orders, I rarely get the chance to play around with the decorations or flavors. Not this time! Boy, did I have a blast with this one! It’s been a while since I selfishly made a cake with all the ingredients that I like. I appreciate that we could take liberties from the original recipe and add our own touch with the fillings, shapes and decorations for this Perfect Party Cake.
There was no special occasion in sight when I made the cake at the beginning of the month, so I went for four 4 inches round ones rather than one large one. That became of a great advantage when my neighbor decided to host an impromptu birthday party for her twins' little friends, twins also this afternoon. All I had to do was thaw the filled cakes and the buttercream last night and decorate this morning. The two different cakes pictured in this post were made earlier this month but I kept the same decorating idea for the twin girls. Perfectly girly and yet different enough that they would each have their own. Worked like a charm!!

Party Cake-Copyright Tartelette 2008
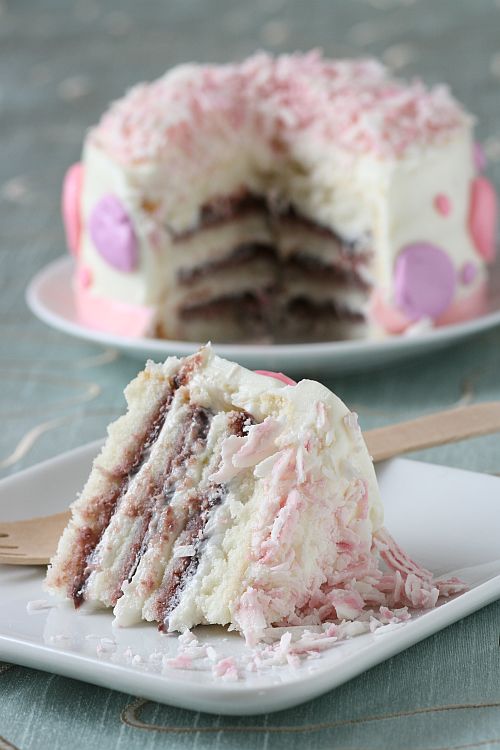
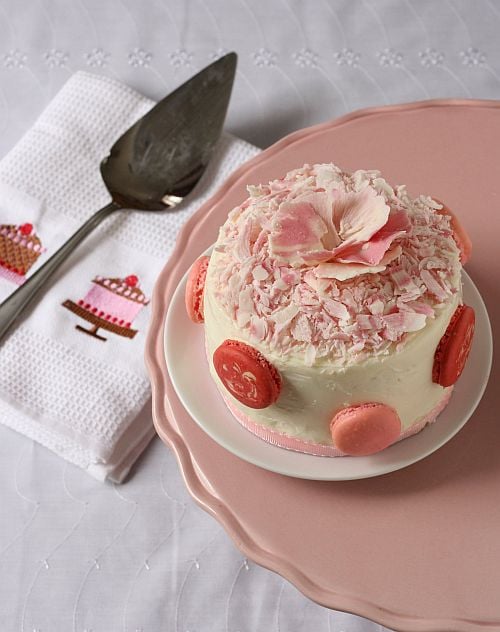
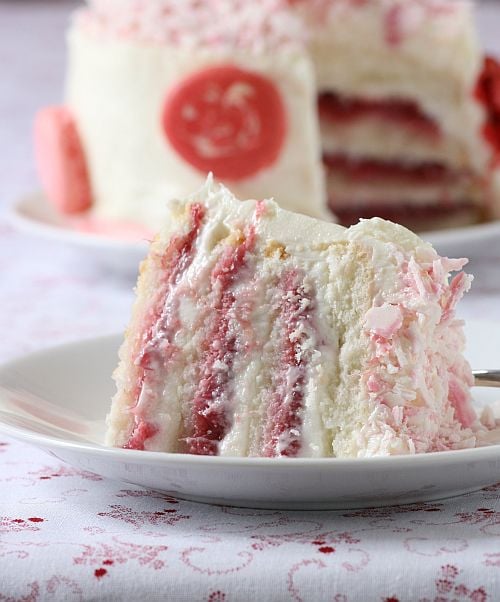
I love (small word) rhubarb and when I saw the perfect red stalks making an appearance on the market shelves earlier this month, I bought a whopping 10 pounds of them and made preserves to be used in different desserts throughout the year. The original recipe for the Perfect Party Cake uses raspberry as the filling in the cake layers but I could not resist using the fresh rhubarb jam I had just made. That was until B. got word of my plan and gave me the "I don’t like rhubarb" story all over again. Either he bit into a raw stalk one time or I just don’t get it….with plenty of sugar rhubarb is just heaven to me. Must be his aversion to shreds and strands, but I" go back to that later. I hesitated for a minute and then remembered the jar of Chocolate and Raspberry jam that Guillemette had sent me along with the pink praline and that I was saving for a special occasion. The Daring Bakers' monthly post is a special occasion so there you go! We had the perfect "His and Hers Perfect Party Cake"

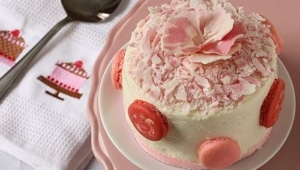
The other little flavor playing around that I did was to replace the lemon zest in the cake batter and the lemon juice in the cake buttercream with Meyer lemon zest and Meyer lemon juice. It was a nice and subtle citrus addition, milder than regular lemon enhancing the rhubarb and chocolate-raspberry without being bitter or harsh. For the tops of the cake, I parted from Dorie’s recipe once more as she uses grated coconut to decorate the cake and I live with an anti coconut husband. It is not so much the flavor but once again it is the consistency "all those shreds!"…ah well, honey you are in for a rude life with me….but once I got started with the chocolate I made enough for two cakes, so no coconut for me either (that gives me the excuse to make the cake again!). The chocolate shavings are white chocolate and pink tinted white chocolate melted and swirled together on a slab, left to cool and then scraped to obtain shavings.

Party Cake-Copyright Tartelette 2008
As you can see I love dots, polka dots, mini dots, big dots…more dots! I made a batch of small macarons, some pink, some red, some swirled for one cake and with the other I tinted the buttercream and used a large and a small plain tip to pipe dots. The macarons went on the rhubarb cake and the dots on the chocolate-raspberry one, happy happy!!! Now that I think about it I bet that a rose flavored buttercream would have been great with the rhubarb. Again, there is always next time!!
Thank you Lisa and Ivonne for the tremendous work you do each month to keep this group going! Thanks again Morven for a great time in the kitchen! Please check out all the other Daring Bakers' creations.

Party Cake-Copyright Tartelette 2008
Perfect Party Cake, adapted from Dorie Greenspan:

Printable Recipe

For the Cake:
2 1/4 cups cake flour (1 cup cake flour = 1 cup all purpose – 2 Tbs)
1 tablespoon baking powder
½ teaspoon salt
1 ¼ cups whole buttermilk
4 large egg whites
1 ½ cups sugar
2 teaspoons grated Meyer lemon zest
1 stick (8 tablespoons or 4 ounces) unsalted butter, at room temperature
½ teaspoon pure lemon extract

For the Buttercream:
1 cup sugar
4 large egg whites
3 sticks (12 ounces) unsalted butter, at room temperature
¼ cup fresh Meyer lemon juice

For Finishing:
1/2 cup seedless chocolate – raspberry preserves stirred vigorously or warmed gently until spreadable (for 2 cakes)
1/2 rhubarb preserves (for the other 2 cakes)
About 1 ½ cups white chocolate shavings
Macarons

Centre a rack in the oven and preheat the oven to 350 degrees F. Butter 4 4-inch round cake pans and line the bottom of each pan with a round of buttered parchment or wax paper. Put the pans on a baking sheet.
Sift together the flour, baking powder and salt.Whisk together the buttermilk and egg whites in a medium bowl.Put the sugar and lemon zest in a mixer bowl or another large bowl and rub them together with your fingers until the sugar is moist and fragrant. Add the butter and working with the paddle or whisk attachment, or with a hand mixer, beat at medium speed for a full 3 minutes, until the butter and sugar are very light.
Beat in the extract, then add one third of the flour mixture, still beating on medium speed. Beat in half of the buttermilk-egg mixture, then beat in half of the remaining dry ingredients until incorporated. Add the rest of the buttermilk and eggs beating until the batter is homogeneous, then add the last of the dry ingredients. Finally, give the batter a good 2- minute beating to ensure that it is thoroughly mixed and well aerated. Divide the batter between the four pans and smooth the tops with a rubber spatula.Bake for 30-35 minutes, or until the cakes are well risen and springy to the touch – a thin knife inserted into the centers should come out clean.
Transfer the cakes to cooling racks and cool for about 5 minutes, then run a knife around the sides of the cakes, unfold them and peel off the paper liners. Invert and cool to room temperature, right side up (the cooled cake layers can be wrapped airtight and stored at room temperature overnight or frozen for up to two months).

To Make the Buttercream:
Put the sugar and egg whites in a mixer bowl or another large heatproof bowl, fit the bowl over a plan of simmering water and whisk constantly, keeping the mixture over the heat, until it feels hot to the touch, about 3 minutes. The sugar should be dissolved, and the mixture will look like shiny marshmallow cream.
Remove the bowl from the heat. Working with the whisk attachment or with a hand mixer, beat the meringue on medium speed until it is cool, about 5 minutes. Switch to the paddle attachment if you have one, and add the butter a stick at a time, beating until smooth. Once all the butter is in, beat in the buttercream on medium-high speed until it is thick and very smooth, 6-10 minutes. During this time the buttercream may curdle or separate – just keep beating and it will come together again. On medium speed, gradually beat in the lemon juice, waiting until each addition is absorbed before adding more. You should have a shiny smooth, velvety, pristine white buttercream. Press a piece of plastic against the surface of the buttercream and set aside briefly.

To Assemble the Cakes: (directions for one, repeat for the other 3)
Using a sharp serrated knife and a gentle sawing motion, slice each layer horizontally in half. Put one layer cut side up on a cardboard cake round or a cake plate protected by strips of wax or parchment paper. Spread it with one third of the preserves. Cover the jam evenly with a layer of buttercream. Top with another layer, spread with preserves and buttercream and then do the same with a third layer. Place the last layer cut side down on top of the cake and use the remaining buttercream to frost the sides and top. Press the chocolate shavings into the frosting, patting it gently. Tint some remaining buttercream with your favorite colors and pipe large and small dots of different colors with plain decorating tips. You can also decorate with macarons (recipe here)

Serving:
The cake is ready to serve as soon as it is assembled, but it’s best to let it sit and set for a couple of hours in a cool room – not the refrigerator. Whether you wait or slice and enjoy it immediately, the cake should be served at room temperature; it loses all its subtlety when it’s cold. Depending on your audience you can serve the cake with just about anything from milk to sweet or bubbly wine.
Storing:
The cake is best the day it is made, but you can refrigerate it, well covered, for up to two days. Bring it to room temperature before serving. If you want to freeze the cake, slide it into the freezer to set, then wrap it really well – it will keep for up to 2 months in the freezer; defrost it, still wrapped overnight in the refrigerator.

Julia Child’s French Bread With A Plate Of Daring Bakers!

You got it…that’s what I did with the latest Daring Bakers' Challenge. I stuffed it with chocolate and ate it at 4 o’clock!….Why? Because it was French bread and because it was my favorite snack when I was a kid, that’s why, ahahah!

After the wonderful Tender Potato Bread a few months ago, Mary from The Sourdough and Sara from I Like To Cook bring us French Bread via Julia Child. We were given the challenge at the beginning of the month while my mom was visiting. I went for an enthusiastic "French bread by Julia Child?! Right on!", while mom went for a suspect "Julia Child? Who’s that?!" Ah yes….I had forgotten that Julia Child is to us what Maite and La Cuisine Des Mousquetaires is to you. Precisely: who? what?where? I had not heard or seen one of her shows,or reruns until I moved to the US. I fell in love with her style, her gusto, her love for good food. And yet, it took me until this challenge to ever make anything from her cookbooks. No particular reason really, just that 24 hour days are much too short for me and all the things I want to bake and cook!!

Well, with all the shopping and chatting that we did with my mom, we never got around to make the challenge bread together and it was kind of sad making it after she was gone but the neighbors were really happy when I brought the loot down to our quickly gathering! After a few years of being neighbors we know a whole lot of stuff about one another and they know I put Gertie and Bob, the crazy-going- starters, to good use on the weekend and have plenty of loaves to give extras away. The twins asked that same week when was I going to make French bread again. "Well, funny you ask…right now!" , "can we come and help?" Oh gosh what have I gotten myself into with my briliant ideas?! "Oh well, the house is a mess really, why don’t I call you in the middle and you tell me if you think the dough has risen enough?" That settled it as they love the come check on the small ball that keeps inflating, their favorite part beig the punching and slapping of the dough on the counter to knead it. In one of the later videos of Julia making French bread the chef who is baking with her slaps the dough 800+ times…golly! I usually go 10-15 minutes but I might try the counting method next time!

Anyways…back to the bread. I went for what B. calls the "Naked" approach and no he does not mean me…don’t start the 'eeewwws" before it’s time people! That means without any of the things that I would normally use to make my life easier when baking something. In that case that meant kneading by hand, no pretty and steady baker’s couche, no quarry tiles to simulate a baker’s oven and no steam injection oven like I have at work sometimes (that thing is the bomb!). That brought me back eons ago to my first bread baked in an oven and starring at the brick I pulled out that first time! Why did I tell B. I was going to "Naked challenge" this one ?!!Suddenly I started having visions of bricks coming out of the oven…But no, everything went well, and unlike Julia, I did not wait the recommended 2 hours to cut one loaf open. I love the bread when it is still warm, after about 1 hour or so of cooling time, the dough inside has finished its little extra baking business and you can start eating it up!


For the canvas or couche necessary for the baguettes to keep their shape during their final rise, I used a clean cotton sprayed with water and flour. I let it dry and it became as stiff as an overstarched shirt (but it’s not "real" starch that you would use while ironing). When it was time to move the baguettes on it, I sprinkle more flour and the creased remain in place quite easily like that. I sprayed the bread with water (99 cents sprayer at Wallie World) and baked the loaf and epi on a pizza stone sprinkled with cornmeal. I transferred the baguettes to regular baking sheet line with parchment paper. Both methods gave me the same nice crispy crust and bottom.

I dealt with the steam issue by placing an empty 9x9inch baking pan in the 450F oven, and when the loaves were in I added one cup of water, closed the door and let it get steamy, then I repeated the operation once after 5 minutes, which differs from the recipe slightly but there is an explanation. Past 450F, the heat from my oven sets the fire alarm on within 2 seconds of our opening the door (but you could smoke a brisket right underneath without the fumes setting it off…go figure!), so it was either have my ears bleed three times every 3 minutes or twice every 5 minutes. Don’t rely on my maths but that is one time less….heavenly silence in the neighborhood!!

I would have posted the recipe here but I am afraid to send Blogger to a black vault it is so long. However thanks to Mary and Sara, you can locate it here. And I am fully aware that my Epi is not figuratively "hot"…it did get a little too brown, but I was completely enthralled in an email conversation with Tanna (and not food related for once!!) and completely forgot about it. It was great the very same night, let’s just say it fed the seagulls the next day…

Will I make it again? I probably will but I will give it one less rise and I will reduce the salt by a teaspoon. It seems that we all had different degree of saltiness in our bread this month and it is not surprising given all the different varieties available. The directions may be long but they are there to teach, guide and help. A recipe is a tutorial in many circumstances, especially when dealing with the basics of bread baking as this one does. The active standing time in the kitchen is very small as the dough does not need you to rise away, but it does require patience and attention…give a little love and you’ll get plenty back….

Thank you Sara and Mary for fun challenge and to Ivonne, Lisa and Mary for all their hard work behind the scenes. Go check the other Daring Bakers on this month merry bread dance!

Lemon Meringue Pie

Or in my case Lemon Meringue Tartelettes…yep, can’t escape that nickname but to my defense Jen from The Canadian Baker and hostess for this month Daring Bakers' challenge had given us the option to make several tartelettes instead of one large pie. Be prepared to bathe in deliciously tart lemon curd and come out all sticky of meringue as 450 Daring Bakers got all sticky gooey once more just for you….and to overcome their fears, baking issues or just to have some fun!

Although this was not my first lemon meringue pie, it was fun to use someone else’s recipe for crust and curd and compare them with the ones I constantly use. No big challenge but I was so tired the day I made it that I really did not pay close attention and followed the recipe blindly. Hint to those DB who have to use violent threats to themselves to follow a recipe to a "t"…do it when you can barely stand on your feet from exhaustion, physical or mental. Mine was mental so I went ahead and dove in.

The crust turned out ok, not my favorite but very good. I like mine flaky with good ole Crisco. Since my mother in law gave me her recipe, I just think this is the best (and not too many worries for my arteries I use the non trans-fat one that came out a couple of years ago). This one did the trick, except that being on auto-drive that evening I added the whole measurement of cold water to the flour mixture instead of my usual a few tablespoons at a time until it comes together. Oopps…dough was wet…Wrapped it up, parked it in the fridge for an hour, with the absolutely faith (that means all digits crossed here) that the flour and butter would work their magic and tame their thirst with the extra moisture. Worked! People, never fondle your dough too much no matter how soft and shiny it is or you will pay the price of tough and too elastic a piece to work with! After that a familiar scene happened: roll the dough, cut rounds, fill tartelettes molds, cover with parchment paper, fill with dry beans, blind bake and let cool. Oven on, tired Tartelette…I almost forgot they were in when the neighbors gathering for drinks started to wonder what I was baking! I had forgotten we had planned a game of Scrabble.

On to the curd….now I had an audience…ahahahah!!!! Most likely they will be too invested in the game to notice if I mess up! It wa the first time I used a curd recipe that involved water and which method was slightly unsual (see the recipe below). I have been spoiled by the lemon curd in Alice Medrich’s book on low fat dessert and the fantabulous full fat lemon cream from Pierre Herme. But eh! I am always willing to try something new for my lovely Daring Bakers!! Everything went smoothly and the curd turned out smooth and tart, just like I love it. I remembered the good old advice from Harold McGee not to stir the cornstarch mixture too vigorously and not to cook it passed boiling or it will reverse its thickening properties…amazing given I was completely distracted by C. challenging B. about a word during our Scrabble game. Kids……!

The meringue part….delicious. Again, of where there is fluffy sugar topping there usually is a happy Tartelette. The recipe instructed us to use the oven for that part, but my oven was crowded with pizza when that part came up so I "had" to use the blowtorch (another excuse to play with fire) and for the kids to be convinced I had magical powers!! I first played with it on the tartelettes like I had done previously on lime meringue cupcakes and then I just used a plain tip and a large star tips and did the minis with them…and they kind of looked like cupcakes after all. I think I lost at Scrabble but I took the prize for eating the most of the mini lemon meringue pies in one sitting. What can I say…I love anything with lemons!

Will I make this particular lemon meringue pie again? Actually I did a couple of times for a friend and my mother in law and everybody enjoyed it. For us? Probably, not so much for the crust but the curd was really tart…which I love, so I will make sure to serve it to people who share the same fancy. The meringue was not overly, cloyingly sweet so it will be used again for other tarts.
Be sure to check my fellow Daring Bakers' posts popping out there everywhere and thanks Jen for a yummy recipe!

Lemon Meringue Pie: recipe courtesy of Wanda’s Pie in the Sky by Wanda Beaver, 2002

Makes one 10-inch (25 cm) pie. I made four 3.5-inch ones and twelve 2-inch minis.

For the Crust:

¾ cup (180 mL) cold butter; cut into ½-inch (1.2 cm) pieces
2 cups (475 mL) all-purpose flour
¼ cup (60 mL) granulated sugar
¼ tsp (1.2 mL) salt
⅓ cup (80 mL) ice water

For the Filling:

2 cups (475 mL) water
1 cup (240 mL) granulated sugar
½ cup (120 mL) cornstarch
5 egg yolks, beaten
¼ cup (60 mL) butter
¾ cup (180 mL) fresh lemon juice
1 tbsp (15 mL) lemon zest
1 tsp (5 mL) vanilla extract

For the Meringue:

5 egg whites, room temperature
½ tsp (2.5 mL) cream of tartar
¼ tsp (1.2 mL) salt
½ tsp (2.5 mL) vanilla extract
¾ cup (180 mL) granulated sugar

For the Crust:

Make sure all ingredients are as cold as possible. Using a food processor or pastry cutter and a large bowl, combine the butter, flour, sugar and salt. Process or cut in until the mixture resembles coarse meal and begins to clump together. Sprinkle with water, let rest 30 seconds and then either process very briefly or cut in with about 15 strokes of the pastry cutter, just until the dough begins to stick together and come away from the sides of the bowl. Turn onto a lightly floured work surface and press together to form a disk. Wrap in plastic and chill for at least 20 minutes.
Allow the dough to warm slightly to room temperature if it is too hard to roll. On a lightly floured board (or countertop) roll the disk to a thickness of ⅛ inch (.3 cm). Cut a circle about 2 inches (5 cm) larger than the pie plate and transfer the pastry into the plate by folding it in half or by rolling it onto the rolling pin. Turn the pastry under, leaving an edge that hangs over the plate about ½ inch (1.2 cm). Flute decoratively. Chill for 30 minutes.
Preheat oven to 350ºF (180ºC). Line the crust with foil and fill with metal pie weights or dried beans. Bake for 20 to 25 minutes. Carefully remove the foil and continue baking for 10 to 15 minutes, until golden. Cool completely before filling.

For the Filling:

Bring the water to a boil in a large, heavy saucepan. Remove from the heat and let rest 5 minutes. Whisk the sugar and cornstarch together. Add the mixture gradually to the hot water, whisking until completely incorporated.
Return to the heat and cook over medium heat, whisking constantly until the mixture comes to a boil. The mixture will be very thick. Add about 1 cup (240 mL) of the hot mixture to the beaten egg yolks, whisking until smooth. Whisking vigorously, add the warmed yolks to the pot and continue cooking, stirring constantly, until mixture comes to a boil. Remove from the heat and stir in butter until incorporated. Add the lemon juice, zest and vanilla, stirring until combined. Pour into the prepared crust. Cover with plastic wrap to prevent a skin from forming on the surface, and cool to room temperature.

For the Meringue:

Preheat the oven to 375ºF (190ºC). Using an electric mixer beat the egg whites with the cream of tartar, salt and vanilla extract until soft peaks form. Add the sugar gradually, beating until it forms stiff, glossy peaks. Pile onto the cooled pie, bringing the meringue all the way over to the edge of the crust to seal it completely. Bake for 15 to 20 minutes, or until golden. Cool on a rack. Serve within 6 hours to avoid a soggy crust.

And remember that you have until 4pm today to get the chance to get yourself a box of canneles!