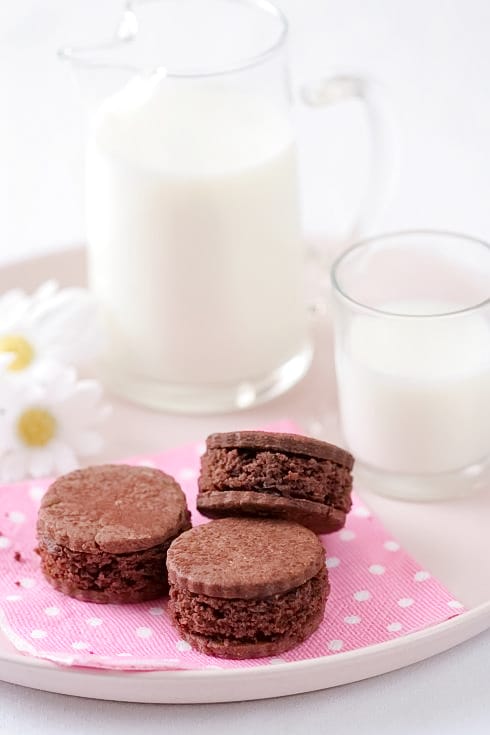
I can hardly believe my parents have been here a week already. Actually, I can notice it rather clearly: I only had time to make cookies this week! But these little bites of heaven were enough to keep us talking and eating for a few days! Imagine a chocolate cake with a hint of coffee sandwiched between two dark chocolate shortbread cookies and held together by a dab of chocolate ganache. The combination of textures is just perfect.
A good bit of time is spent around the dinner table catching up, making plans. It’s like being on vacation at home. The weather has been gorgeous and we have spent most afternoons out and about, sightseeing, catching the first flower blooms and enjoying the warm, already summer like temperatures. I hope I don’t sound like a broken record with my "parent stories" but it is one of the most important things on my agenda right now. I want to write it down and share so I can remember and be reminded. It’s a good break for them and a good break for me.
I know B. loves having them around too as he and my mom are like two peas in a pod and he loves catching up with the family "back home". He’s been so gracious in giving our "together time" for the next few weeks that I wanted to bake him something special. I know the man loves cookies. Small word if you saw his face when I asked what kind he would like. "Something fun!" he said.
Small cookies are always fun and since it was for him and I know he likes cakes as much as cookies. Mud cake cookie sandwiches fit the bill perfectly. It may sound odd, ok I admit it, it did sound really strange to my parents but trust me, it works. These are probably the best fun bites I have had in a while. Crunch, creamy and soft. They are great with a simple glass of milk but they are also perfect with homemade chocolate sorbet. Pure chocolate therapy.
Chocolate Mud Cake Cookie Sandwiches Recipe:
Makes 24
For the Chocolate Sable Cookies: 1 stick butter (113 grams) butter, at room temperature
¼ cup (50 grams) sugar
½ vanilla bean, seeded or 2 teaspoons pure vanilla extract or 2 teaspoons vanilla bean paste
2 egg yolks
1 ½ cups (190 grams) all purpose flour, minus 3 tablespoons
3 tablespoons (16gr) cocoa powder
Pinch of salt
1 to 2 tablespoons heavy cream (optional)
Preheat oven to 350F.
In a stand mixer fitted with the paddle attachment, whip the butter and sugar until light and creamy. Add vanilla, then the egg yolks, one at a time, scraping the bottom and side of the bowl in between each addition. Add the flour, cocoa powder and salt and beat until the dough just starts to come together. Add some heavy cream if the dough still looks very crumbly and dry. Gather the dough into a ball, flatten it a little to a small disk and wrap it well in plastic wrap. Refrigerate two hours before using.
Lightly flour your work area well and start rolling the dough from the center out, lifting it from the work area every 2-3 times you roll over it. With a 2 1/2-inch cookie cutter, cut out 48 rounds in the dough, gathering scraps and rerolling as you go (you might need to refrigerate the dough for 20 minutes if it becomes too soft to roll out easily).
Place the cookies on 2 parchment lined baking sheets and refrigerate 20 minutes. Bake for 10-12 minutes. Let cool.
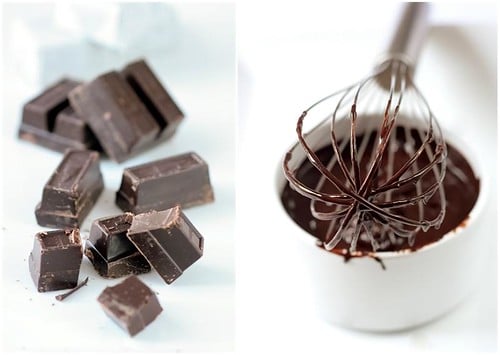
For the ganache: 6 oz (180gr) bittersweet chocolate, chopped
1/3 cup heavy cream
Place the chocolate in a medium size bowl and set aside.
In a small saucepan set over medium high heat, bring the cream to a boil. Remove from the heat and pour it over the chocolate. Let the mixture stand for 3 to 5 minutes. Slowly stir the chocolate and cream together until the ganache is completely smooth. Let cool to room temperature.
For the Mud Cake (adapted from Pamela Clark):
1 stick (113gr) butter, at room temperature
4 oz (120gr) dark chocolate, chopped
1 cup (200gr) sugar
1/2 cup (125ml) water
3 tablespoons (30gr) coffee liqueur
2 egg yolks
1 cup (125gr) all purpose flour
3 tablespoons (16gr) cocoa powder
Preheat oven to 350F. Slightly coat two 8-x12-inch pans with cooking spray and line them with a piece of parchment paper. Slightly coat the parchment paper with cooking spray or vegetable oil.
In a small pot set over low heat, combine the butter, chocolate, sugar and water and stir until everything is melted and smooth. Remove from the heat, add the coffee liqueur and let cool to room temperature. Whisk in the egg yolks, then the flour and cocoa powder. Divide the batter between the prepared pans and bake for 20 minutes. Let cool completely. Cut 24 rounds of the same size as the cookies.
To assemble the cookies: Spread a small amount of chocolate ganache under each cookie and sandwich a mud cake round in between two of them. Dust with cocoa powder if desired
"You sound like you are far away…there are lots of fuzzies on the line", my mom said earlier on the phone as I was standing on the edge of the water watching Bailey timidly dip his paws in the cold marsh.
"Well mom…I am far away…and outside and it’s really cold and rainy. That’s probably why".
"I know where you are, obviously but what on earth are you doing outside in the rain?"
"I am taking a taking a trip home"
"ugh?…"
"This is picture perfect January Parisian weather, mom. It’s cold, it’s damp, I can smell the leaves, the grass and I can hear the silence"
"hear the silence. Your grandma used to say that."
Well, I doubt it was bliss, peace of mind, or calm I experienced then as my feet were getting cold and the dog was looping around his leash from boredom but this moment spent outside did make me feel at home for a short while. Mom advised I got in and made myself some coffee, to which I enthusiastically agreed as I had the perfect slice of cake to go with it. Turned the coffee pot on and plated that one little cake I had saved and sat down in front of the fireplace. Then it felt cozy and warm…all the way down to my chilled bones. The temperatures have indeed dipped quite dramatically for the region and I may be the only crazy out there walking with a smile on my face, happy to bundle up in extra layers. It really put me in a mood for chocolate, coffee-ish and/or nutty desserts.
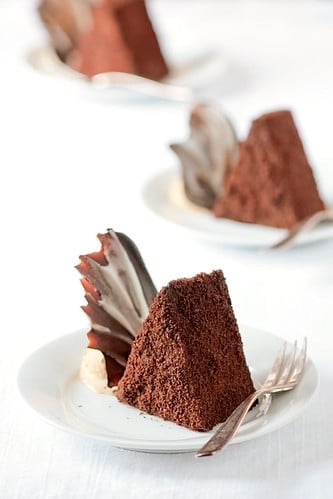
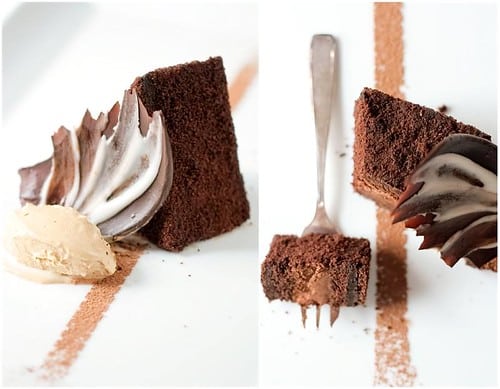
When a friend called asking if I could make a cake for a dinner party of 8 she was hosting, I don’t think I even asked her preference. I happily volunteered a moist chocolate cake filled with a silky and rich chocolate mousse with a touch of espresso. I also made a pint of latte ice cream for her to plate with it. A couple days later she called as I was putting the layers in the oven and inquired how the cakes were coming along. I drew a blank, my blood froze solid. "Cakes? How many do you need for 8?!!". She figured that since I like to make individual desserts that I would make petits cakes while I thought since she liked larger cakes that she was expecting one tall cake. Hmmm…since two 8-inch layers were already in the oven I said I’d make eight cakes out of that, somehow.
Instead of trying to cut 16 rounds, fit them into rings and fill with mousse, I went on with my original idea, only slightly modified. Once the layers were baked and cooled, I layered them with the mousse, refrigerated until set, cut the cake in 8 servings and cut off the round edge of each slice so they would stand straight on a plate. I decided to skip an icing of buttercream or ganache as the mousse was already rich. I used the trimmed tops of the cakes instead and I broke these into pieces, dried them in the oven, processed them to fine crumbs and coated each individual gateau with those.
One couple could not make it to the party. Their loss, our choco-espresso bliss…
Chocolate Espresso Mousse Cake Recipe:
Serves 8
For the cake:
1 stick (113gr) butter
1 cup (200gr) sugar
1/2 cup (45gr) natural cocoa powder
2 eggs
1 1/2 cups (185gr) all purpose flour
1 teaspoon (5gr) baking powder
1 teaspoon (5gr) espresso powder
1/2 teaspoon (2.5gr) baking soda
1 cup (250ml) warm water
Preheat oven to 325F. Butter two 8-inch round baking pans, sprinkle some flour into the pans, shake it around and tap the excess off. Line the bottoms with two 8 inch circles of parchment paper. Set aside.
In a mixer fitted with the paddle attachment, mix together the butter and sugar until light and creamy. On low speed, add the cocoa and mix until incorporated. Add the eggs, one at a time, beating well after each addition. Scrape the bowl with a spatula to make sure they are properly mixed in. Add the flour, baking powder, espresso powder and baking soda and mix on medium-low speed while slowly adding the warm water and mix until smooth. Divide the batter between the prepared pans and bake for 30 to 40 minutes or until a toothpick inserted in the middle comes out clean. Let cool to room temperature and unmold the cakes.
Lower the oven temperature to 300F. Level the cakes by trimming the tops off and break them in pieces. Place those on a baking sheet and bake for 15 minutes or until dried. Let cool completely and process them until smooth in food processor. Set the crumbs aside.
For the mousse:
6 oz semisweet chocolate, chopped
1/4 cup (62.5ml) whole milk
1 teaspoon espresso powder
1/2 stick (55gr) butter
1 egg yolk
1 cup (250ml) heavy cream, cold
In a bowl set over a pan of simmering water (make sure that the bowl fits snuggly over the pan and does not touch the water), melt together the chocolate, milk, espresso powder and butter. Remove from the heat and let cool to lukewarm. Whisk in the egg yolk. In a mixer, whip the cream to medium peaks and fold it into the chocolate mixture.
To assemble:
Place one cake layer in a springform pan, top with the mousse and place the second cake layer on top. Refrigerate until the mousse is firm, about one hour. Run a knife dipped in hot water around the edge of the cake and unmold. Use a long knife to cut the cake into 8 slices and make sure to dip it in hot water and wipe it clean each time to get clean cuts. Trim the ends of each slices to obtain triangles. Coat each piece with the reserved cake crumbs.
Serve with ice cream or some whipped cream if desired.
I can hardly believe that the Daring Bakers are already two years old and that next month will be my own two year anniversary with the group. I can hardly believe that it went from Lisa emailing me with "hey there are four of us making biscotti, are you interested?" to "hey should we have a name?" to a full blown multi national group of bakers of all ages and all levels. We may all see the challenges differently but it does not matter as long there is a good dose of butter, sugar, flour! I am learning so much about others, the way they approach recipes and ideas as well as their cultures. Cheers to two years Daring Bakers and to many more!
I love when things come full circle or half circle or when there is a little something somewhere, a little detail that makes sense to me or/and others. It did this month in the sweetest way (pun completely intended), when Dolores from Culinary Curiosity , along with Alex from Blondie and Brownie and Jenny of Foray into Food chose Shuna’s Caramel Cake as our November Challenge. When I first started reading food blogs, I tuned in to Shuna’s Eggbeater almost everyday. It took me forever and a day to leave a comment as every time I finished her last sentence I felt so inadequate posting a simple "Wonderful post". She has right the words to describe our industry, about being a chef, a woman, a human being wearing her heart upon her sleeve. I laugh, I cry, I shake my head "yes" and when she announced she was moving to London I was so thrilled for her…following what’s next and embracing all the unknowns that go with it.
So yes…making Shuna’s Caramel Cake on the Daring Bakers' two year anniversary was one of those little details that mean a lot to me…like paying it forward in some way. And if you have been reading this blog for a little while you know how much I like playing with hot sugar (…blue caramel plate anyone?). Yep, I liked the idea from the get go, especially with a frosting that starts with browned butter. The smell in the house was enough to make you want someone would bottle it up in a perfume! The cake was easy to make and we all (us and the neighbors) loved its texture, and at first the frosting was a little too sweet to me but I did add some fleur de sel which really enhanced its flavor on the second day. Ah! The pleasure of biting into little salt crystals at the same time as biting into that sweet caramel frosting…hmmhmmhmm.
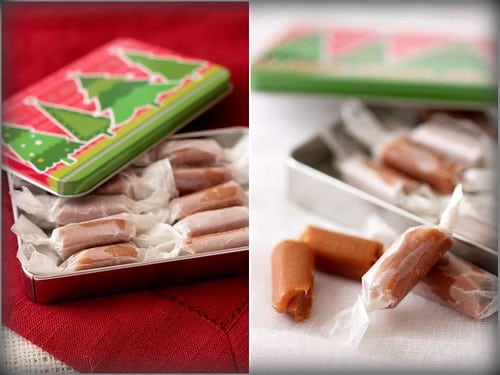
Given that we were given a lot of leeway in the making of the cake, I went ahead and made 4 small cakes instead of one. Granted I love caramel and salt but I also love caramel and citrus so I did add some grated lemon zest to the cake batter and as previously mentionned some fleur de sel to the frosting. I thought I would not have time to make the extra recipe for caramels but I needed to stand and move around after Thanksgiving dinner last night and I went ahead and did Grand Marnier caramels (citrus again) that I wrapped in waxed paper and boxed up in little Christmas tins for gift giving (except half of them are already gone…oops!). From turkey low to sugar high, I think we have all the compenents of a perfect holiday season!
For the decoration, there was a bunch of kids eating with us so I kept it simple but did sneak in some "bubble caramel", a caramel technique that makes me giggle everytime I use it, (and the kids too) although be careful as you "play" with pouring hot sugar syrup over alcohol to create the bubble effect.
Thank you Lisa and Ivonne once more and our wonderful hostesses! Check out the rest of the Daring Bakers and their fantabulastic creations here.
Caramel Cake With Caramelized Butter Frosting, courtesy of Shuna:
10 Tablespoons unsalted butter at room temperature
1 1/4 Cups granulated sugar
1/2 teaspoon kosher salt
1/3 Cup Caramel Syrup (see recipe below)
2 each eggs, at room temperature
splash vanilla extract
2 Cups all-purpose flour
1/2 teaspoon baking powder
1 cup milk, at room temperature
Preheat oven to 350F. Butter one tall (2 – 2.5 inch deep) 9-inch cake pan.
In the bowl of a stand mixer fitted with a paddle attachment, cream butter until smooth. Add sugar and salt & cream until light and fluffy.
Slowly pour room temperature caramel syrup into bowl. Scrape down bowl and increase speed. Add eggs/vanilla extract a little at a time, mixing well after each addition. Scrape down bowl again, beat mixture until light and uniform.
Sift flour and baking powder. Turn mixer to lowest speed, and add one third of the dry ingredients. When incorporated, add half of the milk, a little at a time. Add another third of the dry ingredients, then the other half of the milk and finish with the dry ingredients. {This is called the dry, wet, dry, wet, dry method in cake making. It is often employed when there is a high proportion of liquid in the batter.}
Take off mixer and by hand, use a spatula to do a few last folds, making sure batter is uniform. Turn batter into prepared cake pan. Place cake pan on cookie sheet or 1/2 sheet pan. Set first timer for 30 minutes, rotate pan and set timer for another 15-20 minutes. Your own oven will set the pace. Bake until sides pull away from the pan and skewer inserted in middle comes out clean. Cool cake completely before icing it. Cake will keep for three days outside of the refrigerator.
Caramel Syrup:
2 cups sugar
1/2 cup water
1 cup water (for "stopping" the caramelization process)
In a small stainless steel saucepan, with tall sides, mix water and sugar until mixture feels like wet sand. Brush down any stray sugar crystals with wet pastry brush. Turn on heat to highest flame. Cook until smoking slightly: dark amber.
When color is achieved, very carefully pour in one cup of water. Caramel will jump and sputter about! It is very dangerous, so have long sleeves on and be prepared to step back.
Whisk over medium heat until it has reduced slightly and feels sticky between two fingers. {Obviously wait for it to cool on a spoon before touching it.}
Caramelized Butter Frosting:
12 tablespoons unsalted butter
1 pound confectioner’s sugar, sifted
4-6 tablespoons heavy cream
2 teaspoons vanilla extract
2-4 tablespoons caramel syrup
Kosher or sea salt to taste
Cook butter until brown. Pour through a fine meshed sieve into a heatproof bowl, set aside to cool.
Pour cooled brown butter into mixer bowl. In a stand mixer fitted with a paddle or whisk attachment, add confectioner’s sugar a little at a time. When mixture looks too chunky to take any more, add a bit of cream and or caramel syrup. Repeat until mixture looks smooth and all confectioner’s sugar has been incorporated. Add salt to taste.
Note: Caramelized butter frosting will keep in fridge for up to a month.To smooth out from cold, microwave a bit, then mix with paddle attachment until smooth and light.
Bubble Caramel:
1/2 cup (100gr) sugar
3 tablespoon (45 ml water)
1 tablespoon (15 gr) corn syrup
rubbing alcohol (I use a spray bottle)
Combine all the ingredients in a heavy saucepan and bring them to a boil. Monitor the temperature with a candy thermometer and bring the mixture to 300F. While the caramel is reaching its desired temperature, take a sheet of parchment paper and crinkle it between your hands then flatten it out a bit. This will help with the forming of the bubbles. Spray rubbing alcohol on the parchement paper right before the caramel reach its temperature (don’t do it ahead of time or it will be dry when you are ready to pour). When the caramel is ready, slowly pour it over the parchment paper and watch the bubble form. You can lift the paper carefully to spread it around the surface if needed but watch out! I do this over a large sheetpan so all is required for clean up is hot water. Let cool completely before breaking into shards. This is more a deco than an edible piece of caramel given the alcohol used. I guess one could use a high percentage clear alcohol (maybe my uncle’s moonshine that cleans the bottoms of coffee cups!) but I haven’t tried it that way yet.
Grand Marnier Caramels, adapted from Alice Medrich’s Pure Dessert.
Makes eighty-one 1-inch caramels Note: the original recipe calls for Golden Syrup but I wanted to finish the corn syrup I had so I subsituted one invert sugar for another one without a problem.
1 cup corn syrup
2 cups sugar
3/8 teaspoon fine sea salt
2 cups heavy cream
1 tablespoon plus 1 teaspoon Grand Marnier
3 tablespoons unsalted butter, cut into chunks, softened
Line the bottom and sides of the baking pan with aluminum foil and grease the foil. Combine the corn syrup, sugar, and salt in a heavy 3-quart saucepan and cook over medium heat, stirring with a silicone spatula or wooden spoon, until the mixture begins to simmer around the edges. Wash the sugar and syrup from the sides of the pan with a pastry brush dipped in water. Cover and cook for about 3 minutes. (Meanwhile, rinse the spatula or spoon before using it again later.) Uncover the pan and wash down the sides once more. Attach the candy thermometer to the pan, without letting it touch the bottom of the pan, and cook, uncovered (without stirring) until the mixture reaches 305°F. Meanwhile, heat the cream in a small saucepan until tiny bubbles form around the edges of the pan. Turn off the heat and cover the pan to keep the cream hot.
When the sugar mixture reaches 305°F, turn off the heat and stir in the butter chunks. Gradually stir in the hot cream; it will bubble up and steam dramatically, so be careful. Turn the burner back on and adjust it so that the mixture boils energetically but not violently. Stir until any thickened syrup at the bottom of the pan is dissolved and the mixture is smooth. Continue to cook, stirring occasionally, to about 245°F. Then cook, stirring constantly, to 260°f for soft, chewy caramels or 265°F; for firmer chewy caramels.
Remove the pan from the heat and stir in the Grand Marnier extract. Pour the caramel into the lined pan. Let set for 4 to 5 hours, or overnight until firm.
Lift the pan liner from the pan and invert the sheet of caramel onto a sheet of parchment paper. Peel off the liner. Cut the caramels with an oiled knife. Wrap each caramel individually in wax paper or cellophane.
Never in my wildest thoughts would I have imagined forming such a strong relationship with somebody met online. Yet, over the past two and a half years, Lisa has become just that: my bestfriend. I would have done (almost) anything, even singing badly at the corner bar to pay for my fare. No way I was going to miss that. They had decided to cater their own wedding and we quickly started exchanging emails about the how’s and what’s of the project. She mentionned getting her wedding cake from a bakery she liked and my first thought was "Yeah! I get to be in the wedding instead of baking for it!". My second thought was "Geez! I could save them so much money if I did it myself!" It would be my wedding gift and yes, that’s how it all got started.
Since I was baking for a close friend, at her house, right there in the middle of 6 other women preparing all the food, I expected something to go wrong. And it did….to a small extent since nobody saw it, but it was staring me in the face everytime I was working on the layers. Hence my constant "spatulating"….to say that the cakes got enough "massage" time is an understatement. I remember Lisa’s friend Kim stopping her work to stare at me with that look of "OMG, you’re patience is without limit, you are kind of loopy though". Yes, I was loopy (wouldn’t you be after a few nights with a 5am bed time?) and yes, I have endless patience.
It all started just fine really. We had trouble finding the right pan size but that is nothing that can’t be fixed so instead of doing a 12 inch – 9inch – 6 inch tiered cake. We bought one 12 inch pan for the bottom, I used one of Lisa’s 8 inch square for the middle and trimmed another 8 inch into a 6 inch for the top. I started at 4pm on thursday and I turned the oven off at 2am…10 hours of oven time. Yeehaaww! While the cakes were baking, I was doing other things like the fillings, the buttercream, getting the next batches ready, making sure they would all stack to the same height, etc…. I made all the buttercream I needed that same night to free some room in the kitchen for Friday’s savory preps. Kelly, Lisa and I marveled how gorgeously silky and soft it was, pure white…I just wanted to kiss it!
By 10am the next day, I just wanted to kill it…well, not all of it….It got really humid and rainy that night and one batch of buttercream (and I am not talking 2 cups here…think industrial quantities!!!) was breaking, terribly, but I doctored it and moved on. Murphy’s Law: out of time, out of room and as I went to apply it to the middle tier, it broke on the cake…not as bad as in the mixing bowl and everybody was saying it looked fine….but if you have been in charge of a project you cared for deeply, you will understand why all the imperfections of that middle tier just kept staring me in the face (and it’s not like I don’t know my way with Mrs. Buttercream!), I had no option but to keep going. I proceeding with the decorations with a pinch in my heart…I hated it. It was not until I took it to the reception hall and started putting the ribbon and flowers around it that I got excited again. W. was there helping out and when he saw it coming together, he got all tiery eyed. I let out a big sigh of relief. Lisa had seen the baking and building but I was keeping the final decorations out of her sight, for the real moment of surprise later. I think it worked, she said it did. Except for the ribbon that started to bubble because of the humidity in the walk-in refrigerator where the cake was waiting next to a small water leak. Murphy’s Law….again!
Before I proceed with a little explanation of the picture below, let me recap the tiers for you and run down a fun list:
– bottom tier: carrot cake with cream cheese frosting
– middle tier: pumpkin cake with butterscoth filling – top tier: dark chocolate cake with vanilla buttercream
– the whole cake was covered with the same buttercream.
– ten hours of oven time, 7 pounds of butter, 11 pounds of sugar, 43 eggs, 16 cups of grated carrots, 3 batches of carrot cake, 3 batches of pumpkin cake, 5 batches of chocolate cake (2 of those were used to make chocolate cupcakes), 2 batches of cream cheese filling, 2 batches of butterscoth filling.
– Sleep on the plane back home: priceless….
Sorry if the quality of the pictures is touch and go but I borrowed from three different people what I needed to illustrate the "making of" the cake. No set ups…almost real life feed. I had brought minimal equipment and lenses and left my flash gear at home (doh!). I did have to doctor the cake picture by brushing off a garbage can that was right behind it, one arm and a couple of wires. Hopefully you get a good feel of how interesting those 5 days were at Casa Lisa!!
Once the layers are cut, the buttercream is applied in between each, then the cake is stacked and waiting for a little coating.
I am only showing you one tier and not all of them because it is just a matter of repeating the same steps for each layer. Tip: To prevent your cake from forming a dome and having to level each layer, lower your oven temperature. I baked all the cakes at 340F instead of 350F and did not have to level any of them (I did however cut a small layer off for Lisa to sample!). Tip: make sure to clean as you go and have plenty of cardboard to move your cakes around. Cut your cost like I did by recycling shipping boxes which work just as well as specialty made cake squares or rounds. I did however bought the final cake boards in the exact dimensions I needed as they are less thick and better looking for the finished product.
The cake gets a first "crumb coat", a thin layer of buttercream is applied all over then the cake gets refrigerated until the buttercream is hard. This prevents cake crumbs from mixing into your final buttercream coat. Simple 5 petal "flowers" are randomly piped on each side.
I don’t always crumb coat cakes but when it comes to wedding cakes or party cakes, I automatically do. It really traps all the crumbs from getting into your buttercream as you spread it on the cakes. Cover with a thin and relatively smooth layer but do not worry about it being even or perfect. It is going to get covered anyway. Tip: apply large dots of buttercream to the sides and play a connect the dots game to spread the buttercream evenly as you run your spatula over the sides and top. Tip: if you have uneven corners or edges, do not worry. Refrigerate the cake until the buttercream is hard and work with your spatula dipped in hot water and wiped dry to smooth things out.
The cake is all decorated with piped flowers then refrigerated until the buttercream gets hard so it will be easy to paint on the flowers later on. I trimmed one layer of the cake for a visual of what the final layer would look like. Also gave Lisa an idea of where on earth I was headed!!
Before piping the flowers, I ran the ribbon around the cake to mark its height and I stopped piping the flowers right above that line. Saves you time and assures you that the ribbon will stay nice and flat…usually (read above).
Lisa made me happy by choosing a very simple piping design since I had told her how much I disliked buttercream flowers and roses. I don’t dislike seeing them, I dislike making them…to each his/her own.
White pearl dust is mixed with small amount of clear vanilla extract to make a semi liquid paste, then each flower gets painted over with it to add a little shimmer to the final cake.
I used the same shimmer dust from Wilton I used to paint on the Poire D’Eve cake, but in pearl white which came out slightly lighter than silver and added the perfect accent to the cake. Tip: use clear vanilla or another clear alcohol (type vodka) to form a paint and add more as it dries as you paint..or talk.
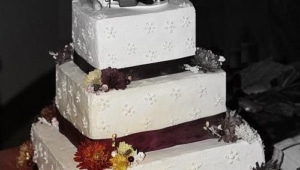
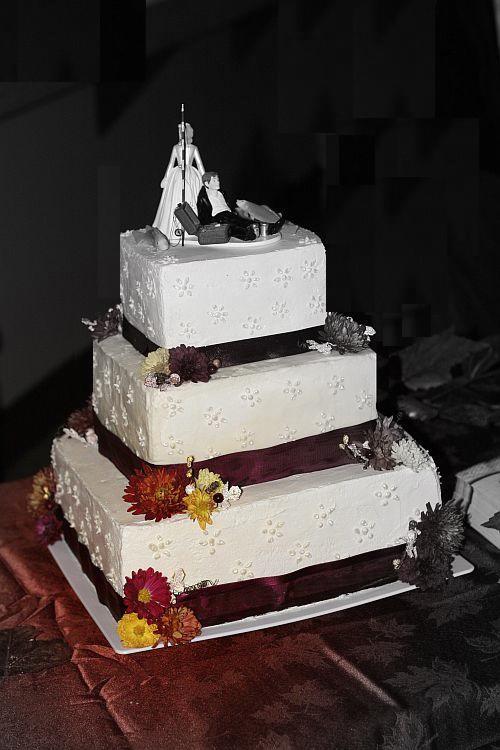
Each cake layer gets a trim with a purple ribbon (thinner at the top layer for optical effect), fresh mums and artificial frosted berries, twigs and leaves are applied at each corner. Finally the cake topper gets positionned on the cake and Helen lets out a deep breath.
Since the theme of the wedding was Fall Extravaganza, the hall and tables were decorated with fresh mums of the most beautiful shades and I had a lot to chose from the ones not used for the room. I accented the flowers with artificial frosted berries, twigs, etc…cut from a wreath bought at a craft store that I cut apart.Since the flowers were positioned just a couple of hours before serving I just soaked the stems in water to hydrate them well and clean them up. Tip: if you use fresh flowers on a cake that remains at room temperature for a long time in the middle of summer, use specialty made tubes that you fill with water and stick in the cake.
Homemade wedding cake topper: the bride dragging the groom was cute but plain, so Lisa had a friend glue on the "gone fishing" trunk, the beer cans and the fishes were just positionned on the buttercream. Fresh mum and berries details on the right.
The topper was flat so I just set it on the cake with a dab of buttercream on the bottom but that was not even necessary. Depending on what topper you chose, you can secure it with buttercream or toothpicks, extra flowers, etc… Do not be afraid to get crafty and make your own if you don’t find excatly what you need, like Lisa did.
As it is customary, the top layer was set aside for Lisa and Wayne’s first anniversary. Double and tripled wrapped in their freezer. Display of macarons sent by Veronica. Love those distressed cake stands!!
So, taking the top tier off may not be the cleanest or easiest job to do but it came off without a hitch (Murphy had to much to drink and left us alone!).
Veronica from Veronica’s Test Kitchen took time out of her busy baking and selling schedule (check out her online store!!) and sent Lisa 8 dozens macarons (I think, I lost track after the 5th box) to add to the dessert table and they were all gone (except for the bridal dozen) by the end of the evening. Who would not jump on passion fruit-milk chocolate, rose buttercream and salted butter caramel?!!!
16 cups of freshly grated carrots went in the cake…See, it was healthy after all..hmmhmm. My bridesmaid bouquet.
Not much to add there except that all the flowers and bouquets were exquisite and perfectly arranged for a Fall wedding.
I turned the cake pictures into black and white ones with a color focal point to minimize the glare from the flashes as about 20 people were taking the same pictures at the same time.
I know, I know…no pictures of Lisa’s wedding cake yet, at least not today….One reason is that I have been saving this wonderful Poire D’Eve cake for a week now and another reason is that I have hundreds of pictures to go through from the wedding and a few other attendees have graciously allowed me to use their shots too so I am working on a little montage. I actually started writing about it yesterday and this morning tons of little details came rushing to my mind so I need to "sit" on it a couple more days to do it justice.
I can’t tell you how much your visits and excitement over this past week have meant to me and I promise to tell you all about it. As ubber critical me, I did find faults until both Lisa and Wayne decided to smear some cake on their noses, but I guess that is normal when you bake for such a dear friend…under the watch of other foodies….Thank you Kelly and Lisa for staying up late, talking to me while I was "spatulating" (new word) the same corner over and over again. Thank you K. for not taking that same spatula and knocking me over the head with it although your look was screaming "put that thing down….Now!!"
Allright, I will give something away about this cake. It was a three tiered square cake which bottom layer was Lisa’s mom favorite carrot cake filled with cream cheese frosting, the middle layer was Lisa’s favorite pumpkin cake with butterscotch filling from Marcel Desaulniers, and the top layer that the two lovebirds have kept and froze was Lisa’s Mothership Chocolate Cake adapted from Orangette. The whole cake was covered in her favorite Italian meringue buttercream from Jacques Torres. I don’t know if it was the near freezing temperatures, the beverages flowing a plenty or just good appetites, but at the end of the night there was just about half the carrot cake left…and I had made the cake for more than the accounted number of guests….I like when people are not shy to eat cake 🙂 Now that your teeth are shattering and your stomach growling, I hope you can wait until the weekend for the recap!!
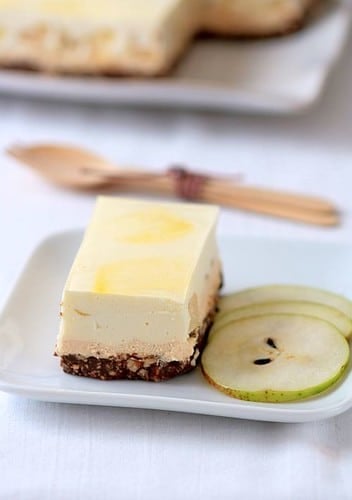
In the meantime, let’s share a slice of this pear cake, shall we? I forgot to mention the other day that the Chai Persimmon Tatin was inspired by one of my pastry heroes, Hidemi Sugino from his The Dessert Book that Inne graciously sent me last year and even though the recipes are translated, I tend to get inspired by the pictures and the dominant flavors and then change it around. This Poire D’Eve is also inspired by one of his creations, the Pomme D’Eve cake in his other book. Now, this one was given to me by a Japanes exchange student I met a couple of months ago and when we started talking about Japan, I mentioned Sugino and she had her mom send it to me….in Japanese. Needless to say, I once again looked at the picture of his mousse apple cake sandwich between sheets of caramel mousse, apple mousse, vanilla and chocolate genoise and decided to develop a recipe for its cousin, the Poire D’Eve.
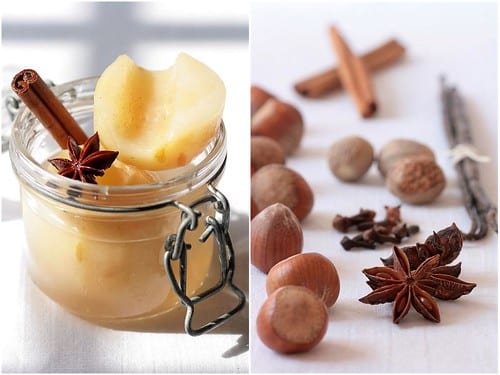
I know, Eve ate an apple, not a pear…but if she had had a Forellepear poached in spices such as star anise, cinnamon, cloves, vanilla and folded with a light bavarian cream, she might have changed her mind. I liked the original apple cake mixing apple, caramel, chocolate so I decided to use these flavors in different texture contrast and medium for this cake. Like Eve and her apple, Forelles are my guilty pleasure when it comes to pears. It is similar in size to a Seckel pear and grows mostly in the Pacific Northwest. When I saw them popping up at the grocery store, I immediately bought a case. They are the perfect snacking pear, both in size and flavor since they remain firm and not milly for a long time. They fit in your pocket, purse or pocket and have this absolute tantalizing fragrance. I bought the case right before my trip so I did poach a bunch of them and preserved them in their poaching syrup. For this recipe I used some I had poached that day so I wrote the recipe accordingly.
The base is a milk chocolate feuillantine topped with a salted butter caramel mousseand a vanilla bavarian cream with diced spiced poached pears throughout. Before applying a glaze made with the poaching syrup I gave the cake some brush strokes with some yellow pearl dust mixed with a bit of water. The finished cake got the two thumbs up from B. who is not that big of a pear fan and commented that the caramel and chocolate complimented the fruits very well. Trust me, he does not only say that because I cook him dinner….he is really my most severe critique!!
Do not be afraid at the term "feuillantine". It is a entremets or cake base usually made with crushed "crepes dentelle" cookies but I was out (ate too many with ice cream) so I substituted crushed corn flakes and added a bit of chopped hazelnuts to enhance the mousses and it worked like a charm. I used the same caramel mousse as the one used in The Translatique, minus the chocolate. The bavarian cream is as easy as 1-2-3 if you have a little patience since you start by making a creme anglaise, adding some gelatin and once cooled, folding in some whipped cream and the poached pears. The spices and strokes of gold dust were the touches that have me in full blown holiday mood right now!! As always, be reassured that you can prepare this step over a couple of days (my head is more scattered than ever these days so any "time" help is welcome)
Poire D’Eve
Serves 8-10
For the poached pears:
4 small pears, Forelles or Seckels, skinned, cored and left whole
3 cups of water
1/2 cup sugar
4 star anise
2 cinnamon sticks
one whole nutmeg
1/2 vanilla bean
4 cloves
Over high heat bring the pears, water, sugar and all the spices to a boil (leave the nutmeg whole). Reduce the heat to medium low heat and let the fruit simmer for 30 minutes or until just about fork tender. Remove the pears and put the liquid back on stove and let it reduce down to half its volume. Remove from the heat and strain all the spices. Reserve the liquid for the cake glaze.
For the Feuillantine:
5 oz (150 gr) milk chocolate
4 Tablespoons (55 gr) butter
1 cup (30 gr) corn flakes
2 oz (60 gr) toasted and skinned hazelnuts
Line a 8×8 square pan with aluminium foil and set aside (use a square pastry frame if you have one). Put the cornflakes and hazelnuts in a small freezer bag, close the seam and roll your rolling pin over it until finely crushed (do not run the mixture in the food processor, you want to keep some rough pieces). On top of a double boiler set over medium heat, melt together the chocolate and butter until they come together. Remove from the heat and stir in the cornflakes mixture. Immediately pat the mixture with your fingertips or the back of the spoon at the bottom of the line pan. Set aside while you prepare the mousses.
For the caramel mousse:
1/2 cup granulated sugar
2 Tb water
2 Tb salted butter, room temperature
1 cup heavy cream, divided
Measure 3/4 cup of cream and refrigerate, this portion will be used to make whipped cream so keep it well chilled. In a microwave or small saucepan, heat the 1/4 cup remaining until it is fairly hot. It will be added to the caramel and by being hot it will prevent the caramel from seizing on you and clumping up. In a heavy bottomed saucepan, add the sugar to the water over medium high heat and cook, without stirring until you get a dark brown caramel. Take the pan off the heat and add the butter and 1/4 cream. It will bubble like mad but it will not run over….if the butter and cream are not cold the bubbling will be minimal and short lived. Stir with a wooden spoon to smooth the caramel if necessary. Let it cool to room temperature Whip the remaining heavy cream to soft peaks in the bowl of a stand mixer fitted with the whisk attachment. Fold 1/3 of the whipped cream to the caramel to loosen it up and then add the remaining whipped cream. Spread over the feuillantine base and refrigerate until completely set.
For the Vanilla Pear Bavarian Cream:
4 poached pears (see above), chopped in small dices
4 egg yolks
1/4 cup (50 gr) sugar
1 cup (250 ml) whole milk
1/2 vanilla bean
1 Tb powdered gelatin, sprinkled over 3 Tb water
1 cup heavy cream
In a large bowl, whisk the egg yolks with the sugar until very pale. In the meantime, in a large saucepan set over medium heat, bring the milk and the vanilla bean (split open and scraped over the milk) to a boil. Slowly pour the milk over the yolks, whisking constantly. Pour the mixture back into the saucepan over medium low heat and cook until the cream coats the back of a spoon (as if making creme anglaise). Add the softened gelatin and stir until melted completely into the cream. Let cool to room temperature.
Whip the heavy cream to soft peaks and fold it into the cooled cream base. Fold in the pear dices. Pour the mixture over the caramel mousse until set.
At this point you can skip the painting and glaze but it makes it all the more festive.
For the paint, mix some gold dust with water to make a "paint" and brush in small strokes over the cake. Freeze the cake before applying the warm glaze, do so even if you skip the painting so your mousse won’t melt.
Pear Syrup Glaze:
1/2 cup reserved poaching syrup
1 1/2 teaspoon gelatin, sprinkled over 1 Tablespoon water
Bring the poaching syrup to a boil, add the gelatin and stir until completely dissolved. Let cool to room temperature (if the mixture gels, warm up over low heat until barely melted again). Pour it over the frozen cake and let set in the fridge.
Cut through the cake with a knife dipped in hot water to prevent breaking the glaze instead of slicing through it.
Note: I have terrible manners as I keep forgetting to thank Cenk from Cafe Fernando and the DMBLGIT judges for awarding the Toasted Coconut and Berries Charlottes the overall first place in last month event. I am truly honored and thrilled!
Thank you all for the very nice birthday wishes for my mother, she truly appreciated the thought. Funny story about birthdays in my family and birthdays phone calls especially: my grandmother had the habit to see whom of her children would call her first to wish her a happy birthday. When I called my mom on Tuesday, I immediately said "I know I am not the first but I am the furthest…that’s got to count!".
Anyways, back to today’s dessert… I can’t plan..Let me rephrase this: I can’t plan to have a distraction free day because we all know that concept never truly works. I had planned yesterday to be a writing day punctuated by a few walks with the dogs, a couple of play breaks with them and the neighbors' kids, no grocery shopping, no baking commitment, no visits, no errands…just me and my thoughts. Ha! I should have checked the weather channel because as soon as I woke up the rain had decided to fall hard and steady, which meant no walks with the dogs, no play time nextdoor. Thus I had two crazy monkeys on my hands who all of a sudden had decided to team up to tear the house apart when I was not looking. I am still laughing when I think about the tricks those two played on me!
It all started when I was sipping my coffee looking at the creek and the rain…and the high tide…tidal creek during high rain equals a big puddle in your yard and a creek boat (think small fishing tin there people….we’re not the yacht type) that threatens to float away. B. went outside to tighten the rope, the dogs followed and found the yard, sorry puddle…and all hell broke lose. They played fetch with each other for thirty minutes and all we could do was watch. Watch them turn from beige to black really…Two bathes and numerous towels later and everybody settled down…a little. By then I had lost my writing mojo and decided to bake instead. At least it was easier to stop their shenanigans with a whisk in my hand than a thought up in the air.
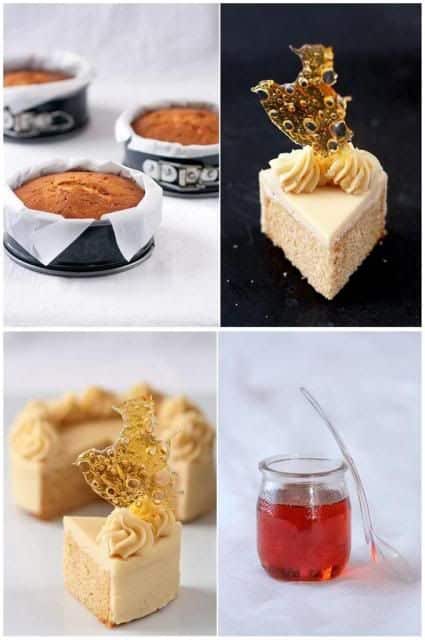
Baking did take place but not in the case of this cake. How can I make a cake without turning the oven on? Recycling….When we did the last Daring Bakers challenge I did the whole batter but baked a 6 inch cake for the challenge and a 8 inch cake that I froze, not really sure of what I would use it for. I got a call from a friend Tuesday morning and told her to come by meet the puppy later that day over coffee and cake. I thawed the cashew gateau and started working on a filling when she called to cancel: her best laid plans got also derailed that day. We reset for the day after (gosh I have never written anything with that much timeline involved!), which turned out great given the way my rainy day was shaping up.
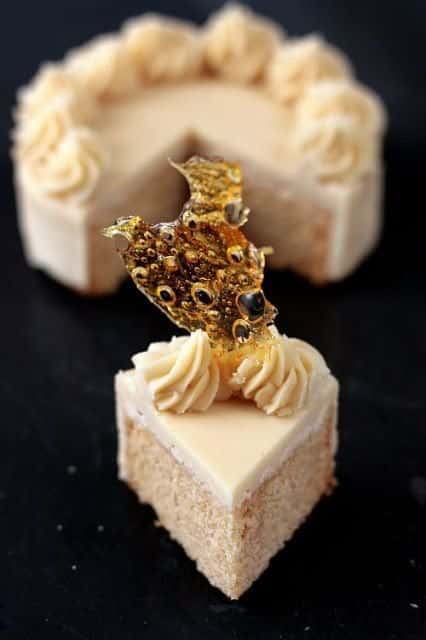
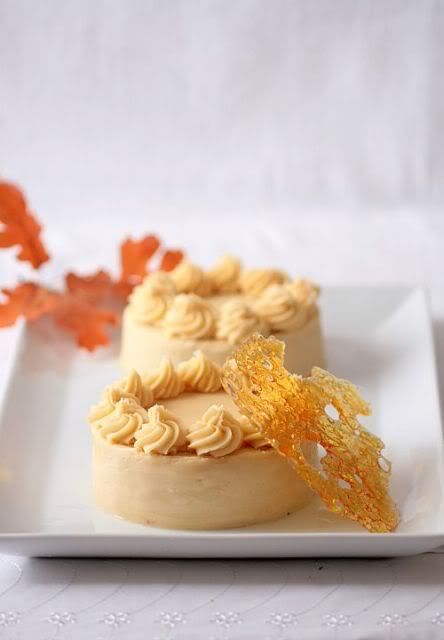
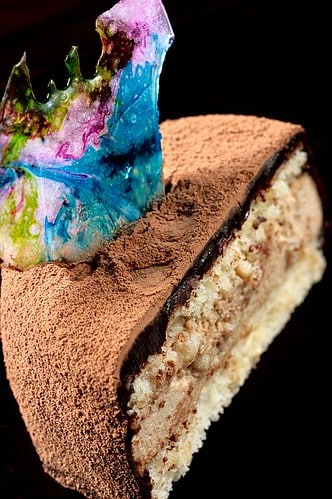
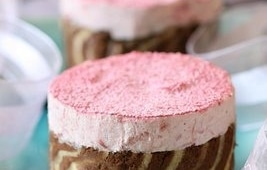
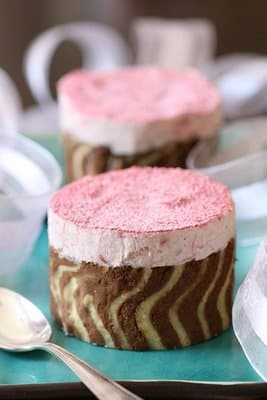
For the cake I used pastry rings to cut out 4 rounds into the cake and split those minis in half. I used one half at the bottom of each ring, topped them with a simple coffee and cardamom mousse, (you might have extra mousse in which case I recommend you divide it into glasses and eat as is. It is easier to make the full amount and have extra than the opposite. It is really good on its own), one more layer of cake and let them set in the fridge overnight. Wednesday morning I topped each mini cake with a dark chocolate ganache. The inspiration for the caramel stained "glass" panel comes from my grandmother (same one!) who used to say "I don’t care if it rains as long as there is some sun and some colors somewhere". I feel the exact same way but since there was no sun in sight I decided there would be colors then! I go a lucky break of 20 minutes to take some pictures and walk the crazy monkeys. Not too bad a day after all.
Cashew Gateau With Coffee Cardamom Mousse:
Serves 4
For the gateau: 3/4 cups cashew, toasted/skinned
1/3 cup cake flour, unsifted
1 Tbsp. cornstarch
3 large egg yolks
1/2 cup sugar, divided (2Tb & 6 Tb)
1/2 tsp. vanilla extract
½ tsp. grated lemon rind
2 lg. egg whites
2 Tb melted butter, cooled
Position rack in the lower 3rd of the oven and preheat to 350 degrees. Grease and flour a 8” X 4” inch round springform pan. Using a food processor, process nuts, cake flour, and cornstarch for about 30 seconds. Then, pulse the mixture about 10 times to get a fine, powdery mixture. While you want to make sure there aren’t any large pieces, don’t over-process. Set aside.
Put the yolks in the bowl of an electric mixer, with the paddle attachment, and beat until thick and light in color, about 3-4 minutes on med-high speed. Slowly, add 8 Tb of sugar. It is best to do so by adding a tablespoon at a time, taking about 3 minutes for this step. When finished, the mixture should be ribbony. Blend in the vanilla and grated lemon rind. Remove and set aside.
Place egg whites in a large, clean bowl of the electric mixer with the whisk attachment and beat on medium speed, until soft peaks. Increase to med-high speed and slowly add the remaining 2 Tb of sugar, over 15-20 seconds or so. Continue to beat for another ½ minute. Fold the yolk mixture to the whites. Pour the warm butter in a liquid measure cup (or a spouted container). Put the nut meal in a mesh strainer (or use your hand – working quickly) and sprinkle it in about 2 tablespoons at a time – folding it carefully. Be sure to exclude any large chunks/pieces of nuts. Again, work quickly and carefully as to not deflate the mixture. When all but about 2 Tbsp. of nut meal remain, quickly and steadily pour the warm butter over the batter. Then, with the remaining nut meal, fold the batter to incorporate. With a rubber spatula, transfer the batter into the prepared pan, smoothing the surface with the spatula or back of a spoon. Tap the pan on the counter to remove air bubbles and bake in the preheated oven for 30-35 minutes. You’ll know the cake is done when it is springy to the touch and it separates itself from the side of the pan. Remove from oven and allow to stand for 5 minutes. Invert onto a cake rack sprayed with nonstick coating, removing the pan. Cool the cake completely.
For the coffee cardamom mousse: 1/2 teaspoon ground cardamom
1/2 cup espresso or strong coffee
1/4 cup sugar
1 tsp powdered unflavored gelatin, softened in 1 tablespoon cold water
1 cup heavy cream, cold
In a mediu saucepan, bring the coffee, sugar and cardamom to a simmer. Remove from the heat and stir in the gelatin until it is completely dissolved. Let cool to room temperature. In the bowl of a stand mixer with the whisk attachment or with hand held beaters with balloon whisks, whipe the cream just until it holds stiff peaks, do not overbeat or it will become grainy and separate. Add a small amount first to the coffee mixture to loosen up the batter, slowly fold the rest of the whipped cream. Do not let it set completely before using it for the cake filling (have your cake baked, cooled, and cut before using)
For the chocolate ganache:
1/2 cup heavy cream
3/4 cup chopped chocolate or chocolate chips (about 6 oz or 180 gr)
In a medium saucepan, bring the cream to a simmer, remove from the heat and add the chocolate. Let it sit for 5 minutes so that the chocolate starts to melt then slowly stir the cream and chocolate until they come together to make the ganache. Let cool slightly before using it over the cakes.
To assemble: Cut 4 rounds out of the 8 inch cake and cut each round in half. Using 4 3 inch round pastry rings, place a cake round at the bottom of each ring, top with about 1/4 cup of coffee mousse, top with another cake round and let sit overnight. In the morning, make the ganache. Line a sheet pan with a sheet of parchment paper, position a cooling rack or a grid over it, position your cake over the grid and slowly pour the ganache over all the cakes to cover the completely. Rap the sheet over the counter top (be gentle, no jumping cakes allowed!), to let the ganache fall evenly. Let them set in the fridge for a couple of hours. You can dust them with a good coat of cocoa powder if desired like I did here.
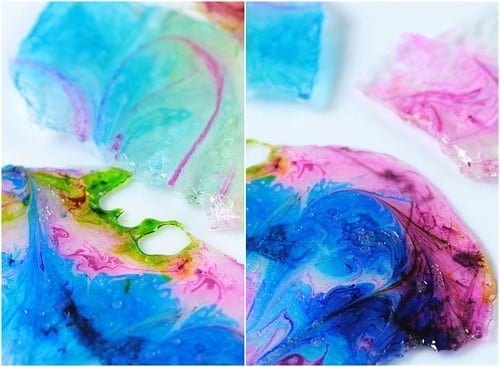
For the stained glass caramel windows:
250gr sugar (1 cup)
37.5 ml water (35 gr) (2 1/2 Tb)
various food colorings
Line a baking sheet with parchement paper. Drop a few drops of food coloring onto the paper. Do not touch them, sirl them or move them.
In a heavy saucepan, combine the sugar and water, do not stir and bring to a boil over high heat. Continue to boil until the caramel reaches the soft crack stage or 140C – 285F on a candy thermometer (do not let it turn color). Immediately pour over the parchment paper with the food coloring. Take the baking sheet with your hands and move it left to right, right to left to move and swirl the colors. Let set until completely cooled. Break pieces of your desired size to decorate the cakes with.
As promised, here is one of the desserts Chris and I tackled while she was visiting this past weekend, a Cassata Cake, as part of another Bakenista get together. I have to admit that I would have probably passed on this Bakenista shing-ding if Chris had not been in my kitchen. Not much time left for "fun baking-just because" these days and not much room left in the fridge for a big cake like this. We had not really planned to bake that early together again but it looks like the folks at King Arthur got word of our little Skype chats and got interested to check out how we were baking live while spread across the US. Halley, from the King Arthur Test Kitchens blended right in and seemed to enjoy the experience, and it seems that we were all trying to be on our best behaviour!!
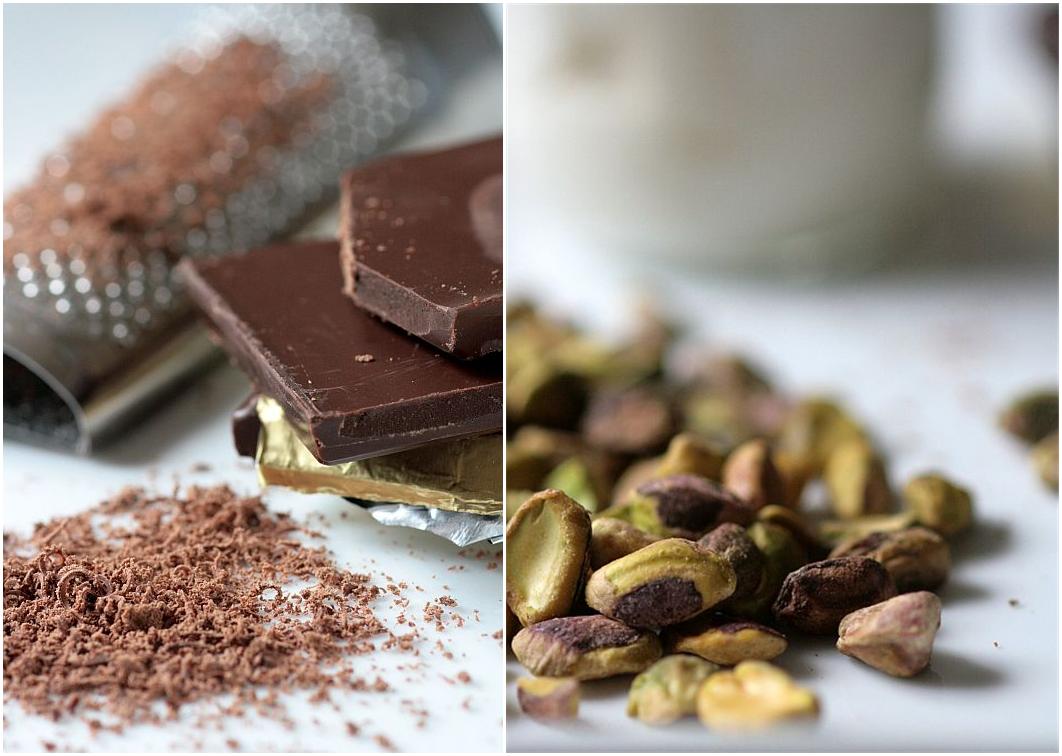
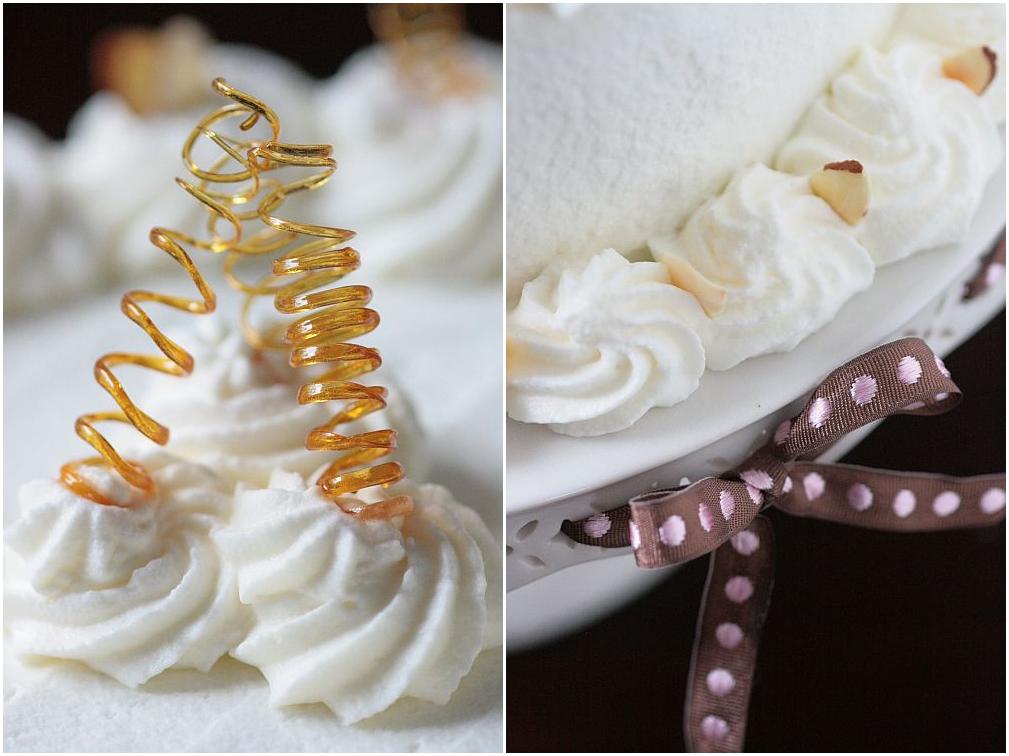
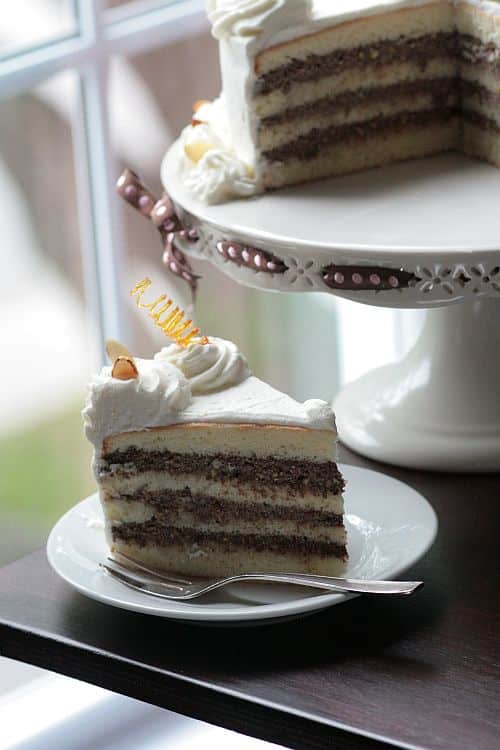
From my end, the experience was even better since I had another Bakenista in the kitchen and Italian to boot…how fitting when making an Italian classic, isn’t it?! I hope that Chris posts her step by step pictures of the cake making while I post the finished product. We started around 9am, a littler earlier than our scheduled Skype chat, but we were aligning ourselves on "puppy time" and Bailey was falling back asleep then. It was a wonderful morning of tag teaming making the cake and working the keyboard to chat with the others. I started with the cake batter, I think… not that I am getting old or anything but between lack of sleep, puppies, and a rum soaking syrup at 10 am, I somehow found myself scratching my head at 4pm that I was still in my jammies! Chris prepared the ricotta, pistachio, and chocolate filling and layered the cake with it while I was trying to pull Bailey away from Tippy’s tail. When we looked at the clock, it was already noon…Wow…time does fly when you are having fun!!
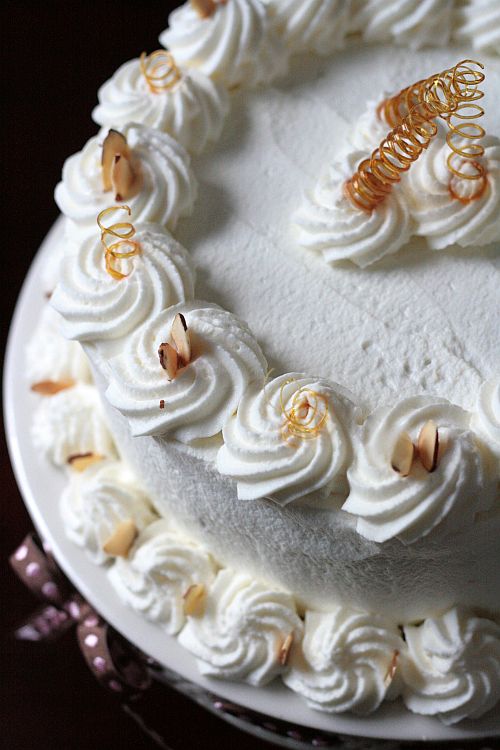
While Chris was here, she asked me to give her a couple of lessons on basic pastry methods, like making macarons (her firsts and a success!), cream puffs (not her first but a little recap), dry sugar caramel (her fear), etc…Showing her the different consistency of things as we went along was a lot of fun. In spite of the humidity I made some caramel corkscrews to decorate the cake and to show her the right consistency to play easily with caramel and they lasted about the time of the photo shoot it was so humid. Later in the afternoon, I covered the cake with a stabilized whipped cream frosting and decorated it wishing she were still around to share a slice with us, not to mention that she was a fantastic and very patient photo assistant all weekend and somehow taking pictures of the cake without her felt kind of empty. Stay tuned for other installment of our baking fest!
The recipe for this Cassata Alian Sicilian comes from Dolce Italiano by Gina De Palma and originally includes orange zest and almond extract which we skipped as the filling was flavorful as is, spread on rum soaked cake trimmings so we figured it might be overkill. The icing called for is a basic powdered sugar icing but somehow that seemed super sweet to us so we decided to go for a simple whipped cream frosting stabilized with some gelatin…crucial in high humidity settings if you do not serve the cake right away so you avoid the risk of ending with a pool of water on your cake plate. It seems like a really long recipe but it is very detailed…granted it is not a cake you start at 5pm for dinner at 8pm, but it is extremely complicated and comes together quickly.
Cassata Alian Sicilian:
makes one 9-inch cake, 10 servings
Sponge Cake Layers:
2 cups bleached cake flour, sifted
2 teaspoons baking powder
1 teaspoon salt, plus a pinch
8 large eggs, separated
1 1/2 cups granulated sugar
2 teaspoons pure vanilla extract
1/2 cup (1 stick/4 ounces) unsalted butter, melted and cooled
Rum Soaking Syrup:
2 cups granulated sugary
3/4 cup cold water
1/2 cup rum
Stabilized Whipped Cream Frosting:
2 cup heavy cream
1/4 cup powdered sugar
1 1/4 tsp powdered gelatin dissolved in 3 Tb. cold water
Preheat the oven to 350°F and position a rack in the center. Lightly grease two 9-by-2-inch round cake pans with butter or nonstick cooking spray, line them with parchment paper, then grease the parchment.
Sift together the cake flour, baking powder, and 1 teaspoon salt into a medium bowl and set aside.
In the bowl of an electric mixer fitted with the whisk attachment, beat the egg yolks and sugar on medium speed until very light and pale yellow in color and doubled in volume. Beat in the vanilla extract, followed by the melted butter. Transfer the egg mixture to a large, clean mixing bowl. Fold in the dry ingredient-quickly and lightly, stopping just before they are fully incorporated. Clean the whisk attachment and mixing bowl.
Place the egg whites and the pinch of salt in the cleaned bowl of the electric mixer. Using the whisk attachment on medium-high speed, beat the egg whites until firm peaks form. Fold the egg whites into the batter quickly and lightly, incorporate any streaks of dry ingredients that remain.
Evenly divide the batter between the prepared pans, rap the pans against the counter top to eliminate air bubbles. Bake for 35 to 40 minutes, or until they are golden brown, a cake tester inserted in the center comes out clean, and the cakes have begun to pull away from the sides of the pan. Allow the cakes to cool for 5 minutes in the pan, then carefully unmold and set them out to cool on a a wire rack.
While the cakes are cooling, prepare the rum syrup: In a medium saucepan, stir together the sugar, water, and rum. Place the saucepan over medium heat and bring the contents to a boil. Lower the heat and allow the syrup to simmer for 5 minutes. Remove from the heat and let it cool.
Filling: using a microplane or box grater, grate the chocolate into fine, feathery shreds. Using a sharp knife, finely chop the pistachios. Place the ricotta, confectioners' sugar, and cinnamon in the bowl of an electric mixer and, using the paddle attachment, beat until the ricotta is creamy and soft (it will remain slightly gritty due to its original consistency). Add the grated chocolate, chopped pistachios, and beat just until combined.
Assembling the cake: Have ready a 9-inch springform pan. Using a serrated knife, carefully split each cake layer in half horizontally to make four layers. Place one of the layers in the bottom of the pan and, using a pastry brush, moisten it generously and evenly with some of the rum syrup. Spread the cake layer evenly with one third of the ricotta mixture. Repeat twice with another cake layer, more of the rum syrup, and another third of the ricotta mixture. Place the final cake layer on top and generously brush with the rum syrup. Wrap the springform pan tightly in plastic wrap; this helps the layers fit snugly on top of each other. Chill the cake in the refrigerator for at least 4 hours or overnight.
Whipped Cream Frosting: In the bowl of a stand mixer fitted with the whisk attachment, whip the cream with the sugar until soft peaks. In the meantime, dissolve the gelatin in the microwave for 10 seconds. Mine broke so I set the cup where the gelatin was in a large saucepan filled with a couple of inches of water, brought the water to a simmer and waited for the gelatin to melt. Slowly pour the gelatin in one steady stream over the whipped cream and continue to whip until firm. If you add your gelatin a little cooled and before the whipped cream is still at soft peaks stage, it should not clump on you.
Decorate your cake with the whipped cream and return the cake to the refrigerator to chill until you are ready to serve it, at least 3 hours.
So, who else is left with a huge hunka chunka of Cassata? Well, that would be Lisa, John, Ivonne, Stephanie, Ben, Kelly,Marcela. Chris can only look at her work and my hips are not too happy about that! It can easily serves 12, needless to say that after we kept a couple of slices for a little afternoon break, I took the rest to the neighbors! It is a special occasion cake but having Chris around was special enough to make me turn the oven on in the morning on a very hot day!
Words about friendship, even ones formed over the internet never rang truer learning about the sudden passing of one Daring Bakers, Sher from What Did You Eat? I can’t say I "knew" her but I was a fervent reader and loved her recipes and wit. You will be missed Sher and always remembered.
Not that I like to dwell on the past, but after the baking whirlwind weekend I spent with Chris when she came to visit, I thought that a favorite from the archives might help me recover while I go through all the goodies she brought me (I got spoiled) and edit the pics of our baking ventures. I won’t post them all at once because it’d give you a headache!! I got to say, baking a multi layer cake with her was a tag team without word, priceless. More on that tomorrow…
First of all, let me start by saying that your comments and emails about the book were a wonderful balm for the soul. Ya’ll rock! It won’t be for a while that you’ll be able to put it on your shelves but I will make sure to keep the whole journey somewhat interactive. I am sure that in a couple of months, I will need some recipe testers….for the 3rd or 4th time I verify everything works.
Now, I hope you all had a great 4th of July with fireworks a plenty and good times with family and friends. We decided to gather the neighborhood at the dock and make a day of it. We caught crabs, grilled, took rides on the boat, and throughout the day we came and went as we pleased, refilling on sunscreen or beverages. I got to tell you, finishing with the fireworks over the water was quite a snapshot to engrave in one’s memory! B. made the joke that I should savour the moment since I won’t be having any of that next week for Bastille Day…ah yes…well, I am here now. And happy. And licking my fingers off the last piece of coconut cake I brought back from our little get together.
As often goes on the weekends here, I did not know until this morning how the day would unravel, I only knew that I was supposed to bring cake. They asked for an all American dessert, possibly cake, and please none of that Opera thing or Saint Honore wheel….Sheesh….Okay, okay…I get it already! I have been craving this good old American staple, Coconut Cake for ages but since B. hates the texture of coconut I always made a pass. Hmmm….since there will be a large group, I now had a reason and he could have brownies instead.
Now here are the funny parts of this story, well at least to me. Early in the afternoon his mom called needing his help in the yard, she asked about our plans and inquired about my dessert. I could taste the coconut on my lips as I was telling her about the cake only to hear her reply "But B. doesn’t like coconut!". I told her what I wrote above"he’ll have brownies instead". He got home couple of hours later with a freshly baked apple pie! His mom had also written "B.’s Pie" on it and he proudly carried it to the dock with that "Look what my mama made me" kind of step. Everytime someone asked for pie, I would hear "may I have some B.’s Pie?" "is there any of B.’s Pie left?"….and the man cannot bake!!
What seemed rather comical to everybody but me as I seem to have misplaced some of my head lately (if you find it, let me know) is that I intended to make a 4 layer cake only to realise when we cut into it that the 4th layer was still on the countertop back at the house…Oops! The worst being that I first walked all the way to the dock without the cake. Bigger oops! My excuse is that I was being distracted by this adorable creature.
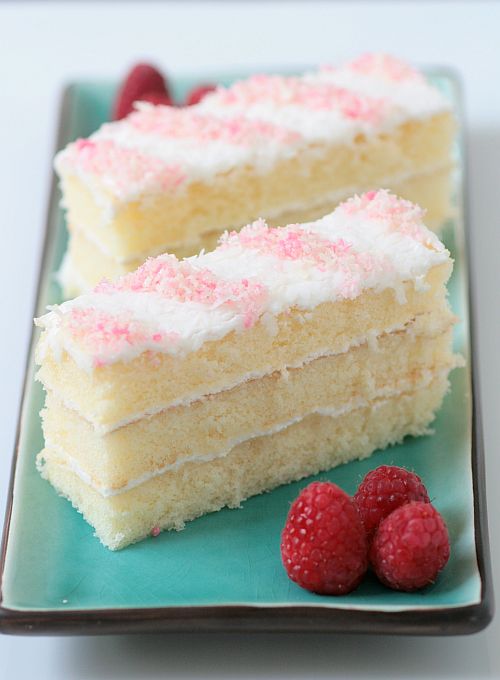
Allright…the cake. It is a pretty straightforward but super moist sponge cake flavored with coconut milk and the layers get a good dousing of coconut liqueur (I am giving you to conservative amount, feel free to add). For the buttercream, I could not decide between a plain buttercream or a cream cheese frosting so I changed things around and mixed softened cream cheese to an Italian meringue buttercream. And.Oh.My! Turned out deliciously smooth and rich without being cloyingly sweet. Loved it!
I need to mention that the pink topping is not sanding sugar but rather pink and white fairy floss that a reader, Sadiya, sent me all the way from Bahrain a few weeks ago, along with some wonderful local pastries and chocolate. With the heat and humidity here, the poor floss has become a big chunk of sugar so I took the mortar and pestle and crushed some up to top the cake with.
For the cake: 6 large eggs, separated
2 1/2 cups all purpose flour
2 teaspoons baking powder
1/2 teaspoon baking soda
1/4 teaspoon salt
3/4 cup butter, at room temperature
1 1/4 cups sugar, divided
1 teaspoon vanilla extract
1 cup buttermilk
1/2 cup coconut milk
1/2 cup coconut liqueur such as Malibu for soaking in the layers
Separate the egg whites from the yolks in 2 different (well cleaned) bowls.
Sift together the flour, baking powder, baking soda and salt in a separate bowl or over a piece of parchment paper that you can easily pick up when the time comes to add the flour to the batter in progress.
In the bowl of an electric mixer, cream 1 cup of the sugar and butter together until light and fluffy. Add the egg yolks, one at a time, beating well after each addition. Mix in the vanilla.
In a small bowl, or a measuring bowl with a spout (easier to pour), combine the buttermilk and the coconut milk. Set aside.
Turn the mixer to low speed and alternately add the flour mixture and the buttermilk mixture to the butter, in three additions, beginning and ending with the flour.
If you have only one KA bowl, pour this mixture into a large mixing bowl while you whip the egg whites.
In a clean bowl, whisk the egg whites until foamy. Add the remaining 1/4 cup of sugar until you get nice stiff peaks. Stop before the meringue becomes dry.
Gently fold the egg whites into the flour/butter mixture.
Pour the cake batter into 2 separate 9X9 square inch pans and bake for about 35 to 40 minutes at 350F or until a skewer inserted into the center of the cake comes out clean.
Place the cakes on a wire rack to cool, in their pans, for about 10 minutes. Invert onto a greased cooling rack and allow to cool completely before frosting.
Cream Cheese Buttercream:
3 sticks butter at room temperature
8 oz cream cheese, softened
5 egg whites
1 cup sugar divided
1/4 cup water
2 tsp. coconut extract
1 cup coconut flakes
In the bowl of stand mixer, whip 5 egg whites until they have soft peaks. Slowly add 1/4 cup of sugar until you get a glossy meringue. In the meantime, combine 1/4 cup water with 3/4 cup sugar to a boil in a heavy saucepan and bring the syrup to 250F. Slowly add the sugar syrup to the egg whites. If you use hand beaters, this is even easier and there is less hot syrup splatter on the side of your bowl and in the whisk attachment of the stand mixer. Continue to whip until the meringue is completely cooled. Slowly add the butter, one tablespoon at a time. The mass might curdle but no panic, continue to whip until it all comes together. Add the cream cheese, the same way, a little at a time until everything is smooth. Whisk in the vanilla extract.
Slice each cake square into 2 pieces horizontally. Brush the bottom layer with some coconut liqueur, spread 1/3 cup of the buttercream over and add another layer of cake and repeat the soaking and layering. Finish by frosting the entire surface of the cake and sprinkle coconut flakes all over…..and eat!
First of all I would like to thank all of you for leaving such kind comments and sending emails after my last post. I surely did not mean to bring your spirits down and I forwarded each piece of advice and kind notes to M. Like me, she is deeply touched by your thoughts and prayers and was truly amazed by the generosity of bloggers and anonymous alike. I tell you, you guys rock!!
Life goes on and she is fully committed to enjoy the time she has and do the things she has been postponing for too long like coming to Pilates with me or dragging me out of bed to go strawberry picking this morning…I know she enjoyed bugging me after the ab torture I made her go through yesterday!! We got caught by the rain, but like many times in May around our parts, it pours ocean for 5 minutes and then the sun shines through as if nothing happened. We picked about 10 pounds of juicy red strawberries, so flavorful I feel the urge to put my nose in the basket every couple of hours. The house has taken on the delicious smell of strawberry jam, strawberry-rhubarb cake and macerated strawberries.
Everybody who knows me a little knows that I do not have a green thumb, and that is putting it mildly since I even killed silk plants one year (a blow torch was involved, …don’t ask). However, I have been tending to mint and oregano with good results in the past month, growing stronger and bigger everytime I cut them down a bit. I am also growing salad, parsley and baby’s breath (thank you Barbara for the seeds) and we are passed the sprout stage. Yipee! Last week at the farmer’s market I picked up a lavender plant as I terribly miss the scent of my childhood in Provence, and also a lemon-thyme plant….my new addiction. I don’t know why this time around I seem to get it. B. thinks my nurturing instincts are kicking in at 30-something since we can’t have kids, and that I need to make something else grow and thrive. A little far fetched although there is truth to it. First there was Tippy the dog, then Elliot the fish…both doing very well, and now seeds, sprouts and plants.
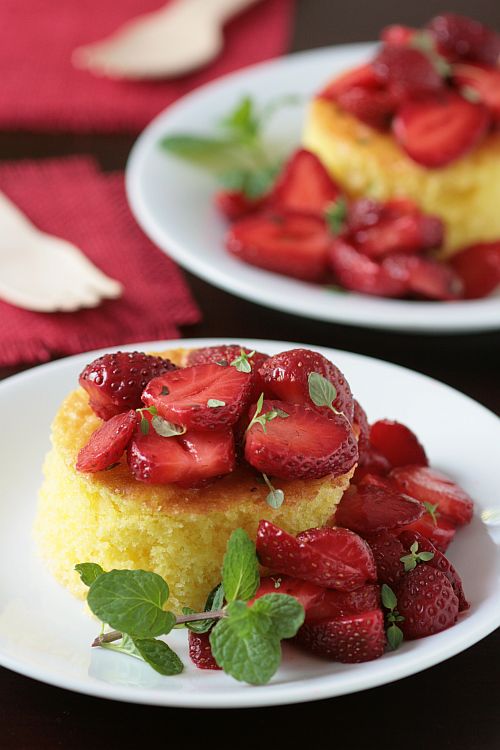
Back to the lemon-thyme, shall we?!! It looks like lemon and citrus are going to be frequent visitors to this site during May, and not only because of SHF. Lemon-thyme is a great complement to fresh fruit salad, simple cakes like pound cakes and yogurt ones. It is does not taste like thyme at all which is not unheard of in cakes but which would be a little harder to pass on when serving dessert, it is fragrant with lemon and lime tones at the same time. I made this dessert this afternoon to take to my neighbor C. for our usual get together on Friday afternoons for tea and dessert and talk about the plans for the weekend, although we realize there can’t be a plan with the husbands and the kids adding to the pot! We almost finished the bowl of lemon thyme strawberries, happily scooping with our spoons (forget plates), while noshing on the cake at the same time. Happy happy!! What a needed moment after the weird week we’ve had (I can’t say bad because I know some have it worse).
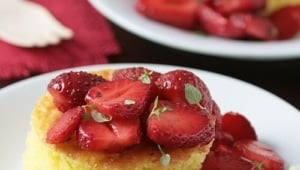
Ok, ok…I hear you…the recipe!!! Just a couple of words (yes, more!). The pound cake is my favorite ones this year, full of lemon, soaked in lemon and yet light on the palate. We eat it as a snack, I use cut slices for trifles or plated desserts, and some of you have emailed me lately that it is also one of your new favorites. I adapted it slightly from this book (from which I have been baking a lot from lately) and you can definitely halve the recipe if you don’t want to be stuck with a big cake around the house, keep it well wrapped in the fridge for a week, or freeze it for up to a month also well wrapped.
Ultimate Lemon Pound Cake With Lemon Thyme Strawberries:
For the Cake:
2 3/4 cups all purpose flour
1/2 tsp baking powder
1/4 tsp salt
3 sticks unsalted butter at room temperature
2 cups sugar
6 large eggs
1 cup milk
2 TB lemon zest
1/2 cup fresh lemon juice
Preheat oven to 300F. Butter and flour a 12 cup Bundt pan.
Sift the flour, baking powder and salt together.Cream the butter and 1 3/4 cups sugar until pale and fluffy. Add the eggs, one at a time, beating well after each addition. Reduce the speed and add the flour mixture, alternating with the milk, beginning and ending with the flour. Stir in the lemon zest.Pour the batter into the prepared pan and bake for 1 1/2 hours, or until a knife inserted in the middle comes out clean. Let cool in the pan for 15 minutes. Poke holes all over the cake with a wooden skewer.
Meanwhile, bring the lemon juice and remaining sugar to a boil over medium high heat in a small saucepan, stirring until the sugar is dissolved. Invert the cake onto a rack, positioned over a baking sheet and slowly pour the syrup over the cake, it will seep through the holes and into the cake. Let cool to room temp.
For the lemon thyme strawberries: 4 cups sliced strawberries
1/2 cup chopped lemon thyme
2 Tb lemon juice
2 Tb sugar (that is plenty to release the strawberry juices and the cake being sweet you don’t really need much more)
Mix all the ingredients together and let macerate at room temperature for 30 minutes. Refrigerate until ready to use. Bring back to room temp before serving.
Update on conversions:
1 stick of butter is about 112-115 gr.
For weight, volume, cups, etc…click here.
Fresh, clean, sweet but not overwhelming and no need for whipped cream!
I may not be around this weekend but wanted to wish all moms out there a very very Happy Mothers' Day! My mom will have to wait for May 25th (French date for Mothers' Day) to have a her own special post, but I wanted to tell you all celebrating on Sunday that I admire your love, dedication and energy. Have I told you lately you rocked?!! Well, you do!