
lemon

Snickerdoodle Lemon Ice Cream Sandwiches – Asheville Part III

Snickerdoodle Lemon Ice Cream Sandwiches


More on the CSA Cook-Off I mentioned in my last post: Diane and Todd of White On Rice Couple posted a wonderfully illustrated account of the experience. I just laughed my little derriere off all over again reading it!

I am going to be put to the task of interactive baking and cooking again starting tomorrow. A good friend and fellow food blogger is flying me to Richmond where I will be teaching her the ins and outs of a few pastry items and techniques. So forgive me if there are even less replies to your emails and comments until the end of the weekend. I hear we’ll even have time to take some margarita breaks, now that’s the cherry on the cake, wouldn’t you say?

I started this post on Monday night. It is now Thursday and I am finally done selecting my favorite pics to illustrate Part 3 of our adventures in Asheville. That was a tough job. Seriously. More tasty locally grown foods, more talented people and artisans. Colors and stories to awaken all your senses.

On the other hand, an easy thing to do was to work on today’s post while eating a couple of these Snickerdoodle Ice Cream Sandwiches inspired by the dessert we were served at lunch that day. I don’t have pictures for what happened half the day (camera battery spare in hotel room, classic) but hopefully some of my fellow food bloggers do(hint!).

If Tuesday ended with the King of all gourmet meals, Wednesday was all about the people who thought it through and made it happen. I am just as happy putting on a pretty dress and sit down to a 6 course meal as I am an apron and help milk some goats. I do know how to but I am glad they never asked. It’s been a while and it is nothing like riding a bicyle, trust me.

Sunny Point Cafe


Interestingly enough, we woke up Wednesday morning without major pains (sake does have magic powers), and the general consensus was definitely to try to pace ourselves given the day’s planned activities. Thought quickly abandoned upon sitting on the patio of Sunny Point Cafe and perusing the menu. Funny how a tall and super fresh Mimosa makes you wish for a nibble. I am not a breakfast person but I sacrificed my habit in the name of research again and devored a plate of peppery salad greens, popping under your teeth grape tomatoes, and smooth scrambled eggs. Oh yeah, still not liking breakfast unless I have this everyday!

Sunny Point Cafe


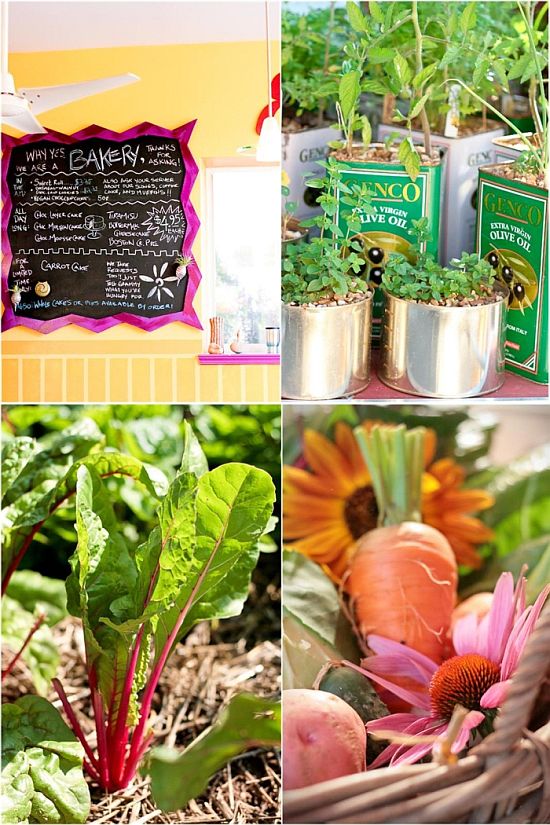
If you are cook, Sunny Point is the kind of place you want to work for no matter how hard the job. As a customer, you know you can meet up with friends, have a cosy moment with your moment, knowing that you will have the same consistent quality dishes after dishes (I did ask the locals sitted next to me!).

Sunny Point Cafe


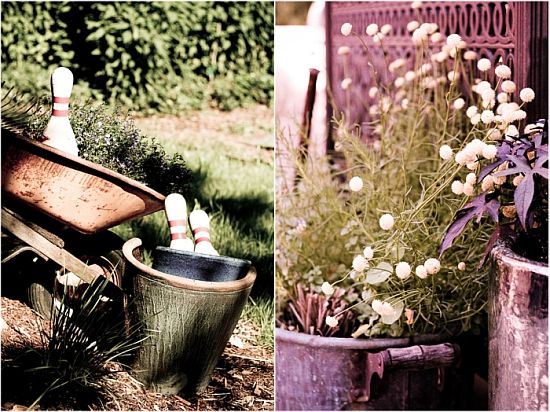
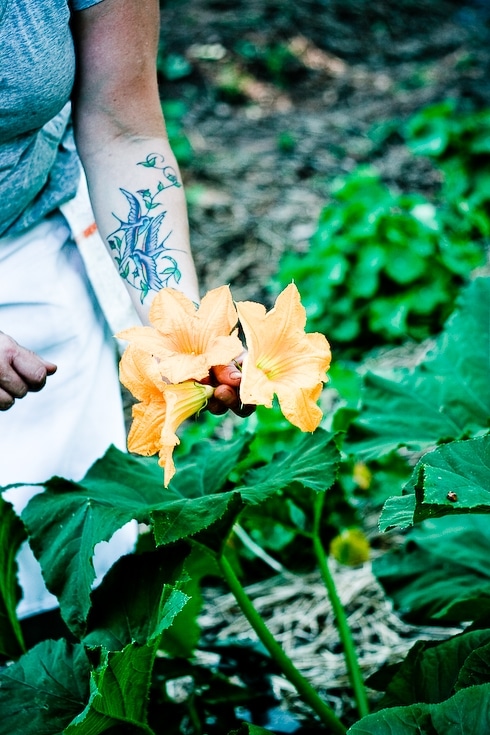
Why? When a bubbly, tatoo-bearing chef takes you to the garden and pulls out some squash blossom with a smile as big as the moon going down the list of possibilities for dinner, it just becomes contagious. You simply want to start pulling weed with the staff or rush home and water your potted herbs. Indeed, the vegetables on your plates are straight from the adjacent garden, cooked just right in the restaurant kitchen and perfectly matched with fresh homemade breads.

Artisan Bread


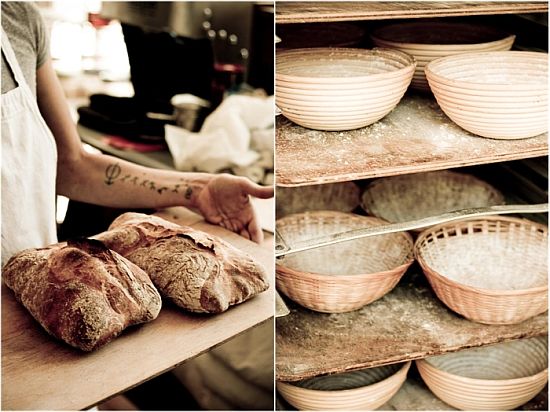
After a thorough tour of Sunny Point’s garden we headed to Wake Robin Farm, on the outskirts of Asheville. I know that meeting Steve Bardwell became a strong point of our trip. We quickly named him "Steve The Bread Man" and literaly drank the passionate words coming out of his mouth as he explained his baking process and ideas. Some of us even swooned. Or was it the tray of pastries brought over by David Bauer from Farm and Sparrow? Flaky croissants and danishes but I had to pass, entirely motivated by distand visions of antacid pills and Tylenol and the desire to enjoy the rest of the day food fest.

Steve The Bread Man


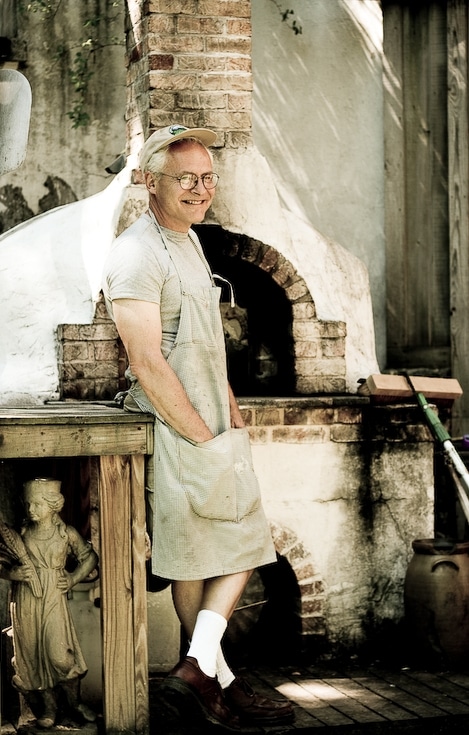
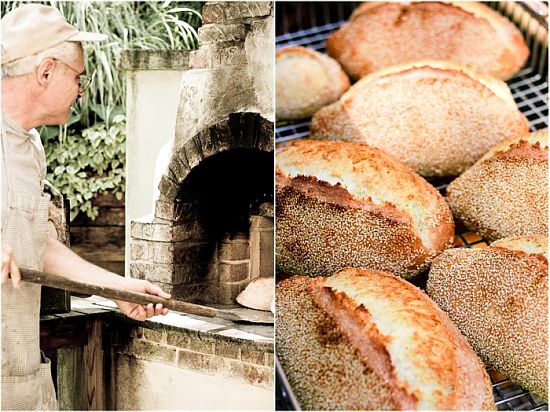
Steve loves his craft. He knows it. He understands what it takes to make good bread. Dedication, great ingredients and of course, a kick-ass oven like the one built right outside the house. I was checking out the pans, breads displayed and work flow of the bakers while Brian noticed a few details that escaped me that day. One thing for sure is that we all left wanting a wood burning oven just like his and some of us have already made it their summer project.

Wake Forest Farm Breads


The scenery at Wake Robin Farm Breads is absolutely gorgeous but Spinning Spider Creamery was next on our list and I was ready! I had tasted goat cheese from The Owen’s creamery on a previous visit to Asheville and was looking forward to meeting the people and structure behind it.

Spinning Spider Creamery


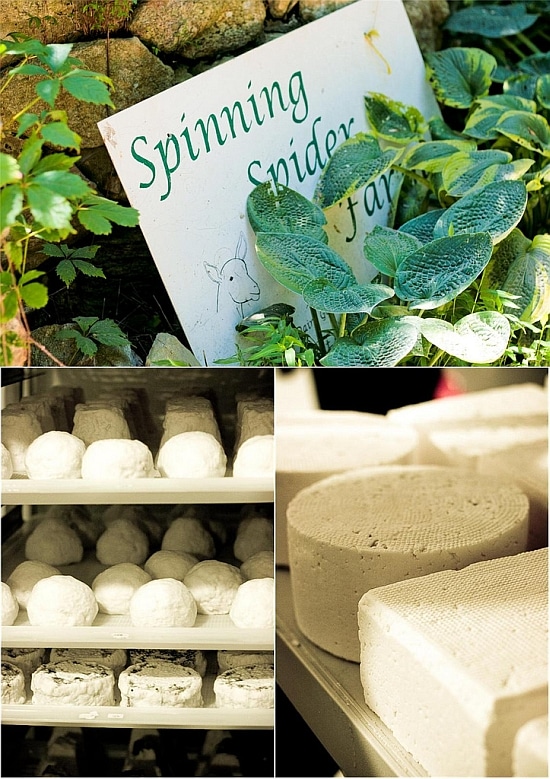
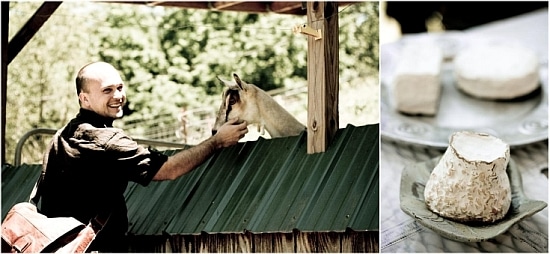
Goat cheeses are among my favorites and I am thrilled when friends discover that it goat cheese making goes far deeper than the fresh logs you find at the supermarket. My childhood favorites were hard rock little crottins that my grandmother would age on top of the fridge or the ash covered goat pyramid she would make me choose from the cheesemonger’s stand at the market. I could have listened to Chris, the cheesemaker for hours as she explained the creamery’s process and history. I want to thank her for taking the time to humor my questions about the ash covering process on the logs and pyramids. Maybe one day when I get a goat…

Spinning Spide Creamery


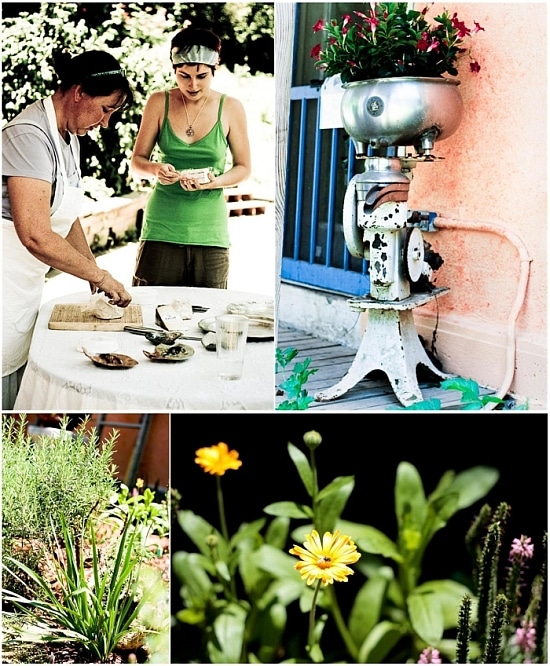
Happy goats, quality ingredients and obvious care. It really shone in the vast array of cheese we sampled (with Steve’s bread!), from fresh to hard goat cheese, mild or pungent. I think we all found our bit of happiness that day! One thing I did not expect was to meet a young lady I sort of knew through her writing. Standing in front of me, beautiful and serene in her green shirt and perfect porcelain skin was hard working Megan from The Importance Of Being Sentient. She loves the mountains and all that surrounds her as much as I loved the ones from Provence. Such a quiet person and yet you sense how much she wants to shout Carpe Diem out loud on all the rooftops of the world. Well go ahead girl and never ever stop!

Spinning Spider Creamery


We were deep into our cheese tasting that Dodie ushered us to meet Jamie Ager from Hickory Nut Gap Farm who purveys Asheville’s restaurant with some of the tastiest grass fed beef and pork I have tasted. And that’s when my battery gave out. Right as we were about to have another fine feast laid out for our tasting pleasure. Jamie is a riot. His sense of family and partnership extending to his cousin who provided the vegetables for lunch as well as his good friend from The Corner Kitchen who prepared the feast with his chef de cuisine.

You are just have to trust that the pork belly salad we started with was mighty fine with the perfect ratio of meat to fat, that the grass fed beef absolutely knocked my socks off, and that my truffled potato salad did not mean a drizzle of truffle oil but a giant slice of black truffle (I think I had a slice and a speck but I horded that one!). And when I thought I had no room left for dessert, I quickly changed my mind at the first bite.

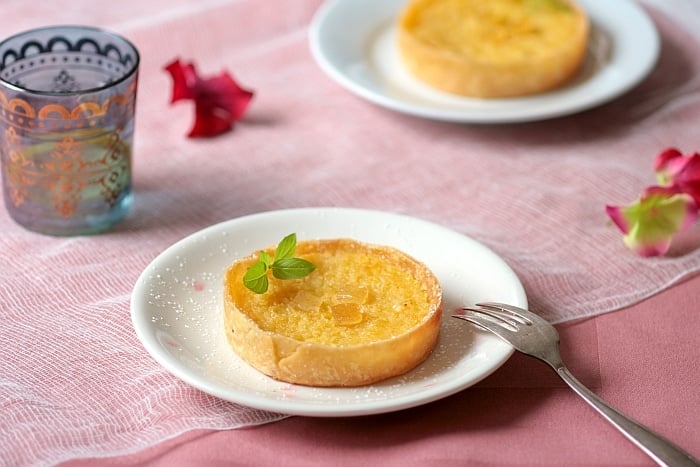
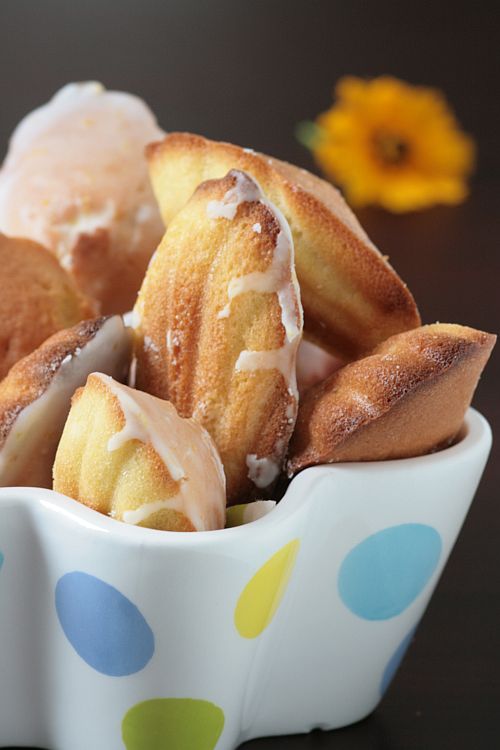
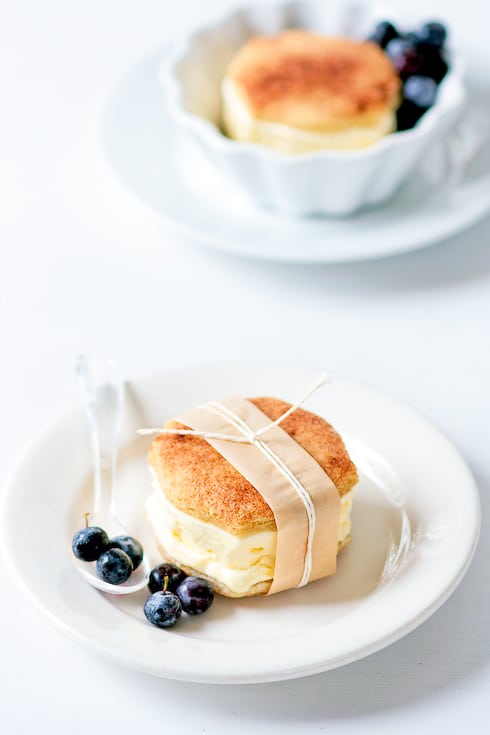
You would too if you had Lemon Ice Cream from Ultimate Ice Cream paired with The Corner Kitchen’s Snickerdoodles and a few blueberries for good measure. I could have had a vat of it and still wished for more. We did have quite a bit of ice cream on this trip but I will never be one to object. Quite perfect to end such strong meals. I begged (again…completely shameless when it comes to you and desserts!) and both Joe and Kevin kindly provided the recipes that have made Bill and I say "oooh this is so easy and good!" for the past 3 days. Thank you gentlemen.

Snickerdoodle Lemon Ice Cream Sandwiches


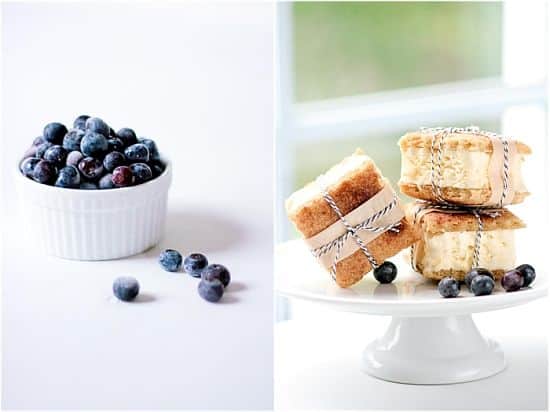
Snickerdoodle Lemon Ice Cream Sandwiches:

For the snickerdoodle cookies:
½ cup each butter and shortening, at room temperature
1 ½ cups sugar
2 eggs
1 ½ teaspoons cream of tartar
1 teaspoon baking soda
1/4 teaspoon salt
2 ¾ cups all-purpose flour

Beat butter, shortening, sugar and eggs together until creamy. Add cream
of tartar, baking soda and salt. Beat until smooth. Add flour and mix well.
Chilling overnight is preferred; otherwise at least two hours.

Topping:
3 tablespoons sugar
1 tablespoon cinnamon

Combine topping ingredients in small, shallow bowl. After chilling, roll out to 1/4-inch thick in between sheets of plastic wrap and cut out desired shapes. Place on ungreased baking sheets, sprinkle with cinnamon sugar and refrigerate 30 minutes.

Preheat oven to 375F and position a rack in the middle. Bake the cookies for 10 minutes or until golden brown. Let cool completely before filling them with the ice cream.

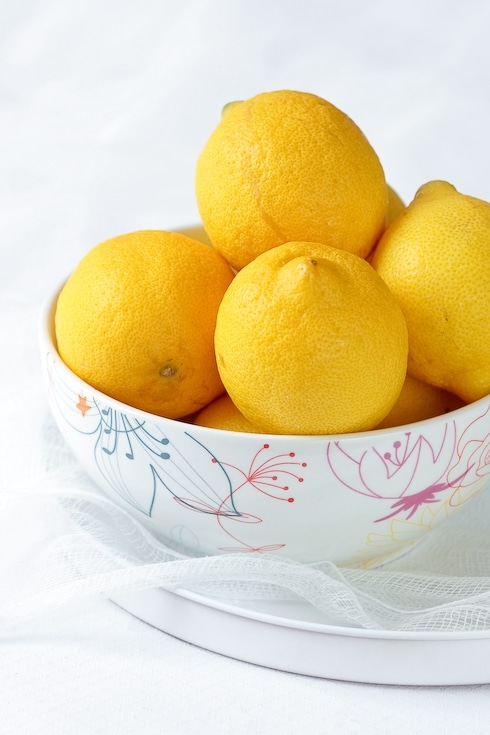
Ultimate Lemon Ice Cream:

Finely grated zest of 3 lemons
1/2 cup fresh lemon juice
3/4 cup sugar or 2/3 cup agave nectar
4 egg yolks
pinch of salt
1 cup milk
2 cups heavy cream

In a non-reactive bowl, mix the lemon zest, juice and sugar (or agave nectar). Refrigerate one to two hours to blend flavors
In a large bowl, slightly beat the egg yolks to break them up. Heat milk to a bare boil in a large heavy saucepan. Pour the milk over the eggs and return combined mixture to the saucepan and gently heat (do not boil) until the mixture coats the back of a spoon. Refrigerate for at least 2 hours. Combine milk mixture with heavy cream and lemon mixture. Spin in your ice cream maker according to the manufacturer’s directions

——————————————————————————-
I also want to extend a huge Thank You to Holly of Decor8 for featuring my pictures in her "8 Inspiring Photographers, post. I am blushing.

Peach Chamomille Mousse Cakes

Peach Chamomille Mousse Cakes


There are times in your life when you need to pull out all the stops, set up a special table, make an extraordinary tasty meal and just twirl some caramel strands around pretty mousse cakes. When crap hits the fan outside of my comprehension I just try to deal with it the best way I can: doing the things I know, doing them with dedication and focus. Yes, like twirling caramel strands around Peach and Chamomille Mousse Cakes.

Granted, my normalcy may not be yours but we all deal differently with stress and incredible circumstances. You might set out to clean your closet or reorganize your files. B. takes the house on a vaccum marathon. I usually go to the dock, take a huge breath in and go home to try to find some way to reconnect and it always ends up with the kitchen counter covered in sugar and flour. I also forge ahead in the photography and writing projects I have (portfolio is up!) happy not to have a minute to think too much about the telephone ringing. (I did previously established that I had a weird sense of logic, didn’t I?!)

Peach Chamomille Mousse Cake


I have been quite open here in the past, sharing painful sentiments and emotions, bringing you to share with me the positive in rather difficult moments. But there are circumstances that only a handful of people (if that many) have been made aware of and I wish to keep for ourselves for now. Sorry to tell you that things are not always as they seem without elaborating but not having to formulate yet again things into words here is such a relief.

All day long we make plans, rationalize, explain, and I find peace knowing that I can come here and just hint at stuff and then tell you in the lightest manner possible to go bake a cake because things are prettier all wrapped up in sugar. Thank you for allowing me to do that. Being here with you and sharing what I am passionate about whether it be pastry, baking, photography, ingredients is one of the best part of the day. Thank you.

Peach Chamomille Mousse Cake


One thing I am passionate about when Spring comes around is going down to the farmer’s market and get all my produce fresh and at ridiculously low prices. Egss, raw milk, vegetables and fruits galore. Happy, happy! I got so excited the other day when I got the first local peaches of the season. Velvet skin, rich colors and intoxicating scent. Happier, happier!

With peaches this fresh and juicy in my basket, I could only think about making ice creams and mousse. I wanted to create something soft and subtle, something that makes you want to close your eyes and focus on what it is you are eating and not only just eating it. I made a simple lemon and olive oil cake for the base, opting for a grassy flavored oil to play up with the peaches. The two different mousses start with the same base, a pate a bombe for which I flavored the sugar syrup with a good handful of dried chamomille buds (organic, usually by the bulk teas), and added pureed peaches to half of the mousse base. You can simply refrigerate the cakes until set and enjoy them chilled or freeze them and let them soften a bit for 10-15 minutes. We had them both ways and enjoyed them equally.

Peach Chamomille Mousse Cakes


One year ago: Snickers Macarons

Peach Chamomille Mousse Cakes:

Makes four 3-inch cakes
Notes: I build these cakes in 3-inch wide entremet or mousse cake rings but you could build one single cake in a 8-inch round or 8×8-inch cake pan. Only the look will be different. Instead of using rhodoid to line the rings, (nothing against it, just did not have any on hand), I used a much less expensive medium: plastic proctector sheets (yes the ones used around the office to protect documents) and cut them to fit the inside of the rings.
I did brush the cake base with Limoncello but you can skip this step if you wish.

For the lemon olive oil cakes:
1 1/2 cups (185gr) all purpose flour
1 cup (200gr) sugar
1 tablespoon (14gr) baking powder
1/4 (1.5gr) teaspoon salt
1/2 cup egg whites (about 3-4)
3/4 (175ml) cup milk
1/4 cup (62.5ml) lemon juice
grated zest of one lemon
6 tablespoons (80gr) olive oil

For the chamomille and peach mousses:

1.5 tablespoons powdered gelatin
7 Tablespoons (130gr water), divided
2 cups (500 ml) heavy cream
6 egg yolks
1/2 cup (100 gr) sugar
2 tablespoons dried organic chamomille buds
3/4 to 1 cup peach puree (I process 2-3 cut peaches until finely pureed)

For the caramel decorations, please read here and here. I just twirled the caramel around a large tin can instead of a wooden spoon.

Prepare the cakes:
Preheat oven to 300F and position a rack in the center.
In a bowl, stir together all the dry ingredients for the cake. Set aside.
In a separate medium bowl, whisk the egg whites and the milk. Make a well in the center of the flour mix and slowly add in the egg white mixture while stirring with a whisk. Add lemon juice, zest and the olive oil. Mix with a whisk until smooth. Line a quarter sheet pan with parchment paper, lightly spray with cooking spray and pour in the batter. Bake for 20 minutes or until a toothpick inserted in the center comes back clean. Let cool and cut out four 3-inch rounds to fit your cake rings (extra cakes freeze well for up to 3 months). Line 4 cake rings with rhodoid or plastic sheets cut to fit and place your cake bases at the bottom. Place the rings on a baking tray and set aside.

Prepare the mousses:
In a small bowl, sprinkle the gelatin over 2 tablespoons of water and let stand while you prepare the pate a bombe.
In the bowl of a stand mixer fitted with the whisk attachment (or hand held beaters), beat the cream until it holds soft peaks. Chill it while you prepare the mousse base. Wash your bowl and whisk attachment.
In a heavy saucepan, stir together 5 tablespoons of water, sugar and chamomille buds. Bring to a boil over medium heat. Since you are not making caramel, it is ok to stir occasionally until the sugar is dissolved. Let it boil and bring the mixture to 238°F on thermometer (soft-ball stage). Strain the syrup to remove the chamomille over a container with a spout (makes it easier to pour over the egg yolks)
In the clean bowl of your mixer, still using the whisk attachment, beat the yolks slightly to break them up. Increase the speed to medium high and slowly pour the hot syrup over the yolks. Go fast enough to prevent the eggs from scrambling but not so fast that you end up with most of the syrup on the wall of the bowl or the whisk. Dissolve the gelatin in the microwave for 10-12 seconds and quickly add it to the pate a bombe. Continue to whip until the mass is completely cold and airy.
Fold about one third of the pate a bombe base into the chilled whipped cream to loosen it up and make it easier to incorporate homogeneously. Fold in the remaining pate a bombe.

Assemble: Divide the mixture in half and carefully fold the peach puree into one part. Spoon or pipe the chamomille mousse over the cake base and do the same with the peach mousse. Refrigerate or freeze until set.

Berry Mousse and Lemon Poppy Seed Cake Verrines

Berry Mousse - Lemon Poppy Seed Cake Verrines

"Whatcha making?" Bill asked when he stepped into the kitchen area on Sunday. "My birthday cake" I replied, scraping the last bit of batter onto a sheetpan. He then pointed at the two bowls filled with strawberries and blackberries, the couple of lemon and the bottle of Limoncello. "Yes, yes, yes…all those for my cake". His eyes lit up in anticipation and he left the room uttering "hmmhmmhmm".

A few hours later, he tried to sneak a peak into the refrigerator to see the final product and opened and closed the refrigerator door a couple of times. "Where is it? Are you done yet? I can’t see it!". I pulled out a tray of glasses and handed him a spoon. "It’s not a cake! Wait…I am sorry. It’s your birthday, I should have known better…"

Lemon poppy seed cake brushed with straight Limoncello and layered with strawberry and blackberry mousse. There is cake, there is cream and there is enough space to stick a candle in it. I am ready to celebrate!

Berry mousse - Lemon Poppy Seed Cake Verrines


Yes, it’s my birthday and since I like to make myself something I really want, it is most often one of three things (and sometimes all at once): it usually contains lemons, it must be small and preferably in a verrine (glass). The sound of spoons digging that last bit of dessert in the bottom of a ramekin or glass is music to my ears. It doesn’t mean the end. It means everybody reached the bottom and "cling-cling" wishes for more. Happy sound.

With the abundance of local strawberries and the hot days we have been having, I started craving something light and refreshing. Everyday I’ve also been getting wild blackberries from the woods across the street and my mere one cup harvest grew to a whopping 1 pound on Sunday morning. I don’t think the new neighbors have realized yet the treasure laying at their feet just a few yards away. I am already scheming blackberry pies, cobblers, sorbet and secretly wish they don’t figure out what I am doing in the morning, reaching down into the bushes. I want it all….I promise to share the results of my baking though. Promise. Yes, really!!

As I was eating my (early) birthday treat, I started thinking about Bea, Anita and Jeannette, also celebrating another year this month and Kate to-day! There is also one tiny person who now can be added to the list of May babies and that is Kristin's newest addition, Leah Katherine, born on Monday night. This dessert is for you all!

Berry Mousse - Lemon Poppy Seed Cake Verrines


One year ago: Lemon Meringue Cake with Lemon Ice Cream.Two years ago: Birthday Girls and a chocolate cake.

Berry Mousse and Lemon Poppy Seed Cake Verrines:

Makes enough for ten to twelve 6 to 8 oz ramekins or glasses

For the cake:
1 1/2 cups (185gr) all purpose flour
1 cup (200gr) sugar
1 tablespoon (14gr) baking powder
1/4 (1.5gr) teaspoon salt
1/2 cup egg whites (about 3-4)
3/4 (175ml) cup milk
1/4 cup (62.5ml) lemon juice
grated zest of one lemon
1 tablespoon (9gr) poppy seeds
1 stick (113gr) unsalted butter, melted and cooled

For the strawberry mousse:
2 teaspoons powdered gelatin
1 tablespoon water
8 oz (210gr) strawberries, pureed
1/4 cup (50gr) sugar
1/2 teaspoon lemon zest
1 tablespoon lemon juice
3/4 cup (6oz – 190ml) heavy cream

For the blackberry mousse:
2 teaspoons powdered gelatin
1 tablespoon water
8 oz (210gr) blackberries, pureed
1/4 cup (50gr) sugar
1/2 teaspoon lemon zest
1 tablespoon lemon juice
3/4 cup (6oz – 190ml) heavy cream

Limoncello

Prepare the cake: preheat oven to 300F. In a large bowl, stir together all the dry ingredients for the cake. Set aside. In a separate medium bowl stir together the egg whites and the milk. Make a well in the center of the flour mixture and slowly add in the egg white mixture while stirring with a whisk. Stir in the lemon juice, zest, the poppy seeds and the melted butter. Mix with a whisk until smooth. Line a quarter sheet pan with parchment paper, lightly spray with cooking spray and pour in the batter. Bake for 20 minutes or until a toothpick inserted in the center comes out clean. Let cool completely and cut out as many disks as you need to fit inside your ramekins or glasses.

Prepare the strawberry mousse: sprinkle the gelatin over the water in a small bowl and set aside to bloom (soften).
In a medium saucepan set over medium heat, stir together the strawberries and sugar just until hot. Add the gelatin and stir until it is completely melted. Let cool to room temperature. In the meantime, whip the heavy cream to soft peaks. Once the strawberries are at the right temperature, carefully fold the whipped cream into the fruit base.

Prepare the blackberry mousse the same way.

Assemble the verrines: brush Limoncello on each of the cake pieces or rounds that are going to be used in the glasses. Place a cake round at the bottom of the glass, top with blackberry mousse, one cake round, strawberry mousse, one cake round, blackberry mousse. Finish with more wipped cream if desired (I added lemon zest to mine).

Lemon Basil Lemon Tartelettes

Lemon Tartelettes - Late Afternoon


I know I talk a lot about my family back home and the times, desserts and events shared over there but I also have a strong sense of my being and living here in the States, in the present moment. And I am always very aware of things coming up this fine weekend of May. It’s Mother’s Day. Except it does not phase my own mother much because that special day is not celebrated until the end of the month in France. However she enjoys the fact that with my being here and celebrating Bill’s mom, I can’t wait another two weeks to tell her anyway. And I realized while making these lemon-basil infused lemon tartelettes that there was a whole of "mothers" going into them.

My mother-in-law is "mama Ruth" to me. She welcomed me to the family like a daughter and she treats me as such and never refrains anything, the good, the bad and the ugly, just like a mom does. She also has what I call a very acute "pantry 6th sense". I can be thinking that I need sugar and Bill comes home with a bag courtesy from his mom (they live 10 minutes away). It’s downright freaky some days. Sometimes we shop in doubles like we did last week and I found myself with three big bags of lemons which is why you get one more strawberry free – not yet blackberry post. "Mother moment #1".


I started coming up with various recipes to use all these lemons and since I had some pate brisee left from another project, "tartes au citron" easily came to mind. I have a recipe typed up in my brain from the restaurant menu but I also like to try new ones and it was a good opportunity to flip through the pile of cookbook I own but rarely have time to open. I picked up Pierre Herme’s Larousse Des Desserts that my mom sent me last year, figuring that he, of all people would have what I needed. "Mother moment #2".

Lemons


I settled on a very simple and 100% lemon recipe for the tarts but changed a couple of things around nonetheless. PH uses a shorbread crust but I had pate brisee in the freezer and used it instead. I also wanted to had a little depth to the lemon filling by infusing the melted butter called for in the recipe with lemon basil. I almost wished I had added more than I did. It really gave the filling a lovely grassy quality. I had to refrain though as I am trying not to deplete too fast that lovely lemon-basil plant Mama Ruth picked out at the nursery for me. "Mother moment #3".

As I was baking, I started to think about all these "mother moments" and began to smile bigger and bigger with each step of the process. From prepping and baking to photographing. A lot of you send emails asking me about the props I use and the answer is almost always "mom". My mom. The best personal shopper a food stylist could ever dream of. Rolling pin, tart rings, microplane, pretty lemon bowl…Mom. Care packages with ingredients, tablecloth, napkins, jars, cups and spoons…Mom. She really gets a kick out of it and I am always floored by the cool stuff she finds in the most unexpected places.

So you see, even if I did not intend to make the lemon tarts for Mother’s Day, it became quite clear that they really ought to be blogged about this weekend. Thank you Mama Ruth and Maman for all the things you say and do. All the love and forgiveness. Happy Mother’s Day to all of you reading this and being celebrated this Sunday!

I also want to thank Suzanne from S.HopTalk for including one of my pictures in this amazing Why Moms Matter video. Pass it along to any mom you know! I hear an ebook is soon to follow…

Lemon Tart-2


One year ago: Lemon and Honey Tangerines Gratins.
Two years ago: Meet My Sugar Daddy.

Lemon Basil Tartelettes, adapted from Pierre Herme:

Makes six 4-inch tarts

For the pate brisee:

1 1/4 cups all purpose flour
1/4 tsp salt
5 tablespoons butter, cold and cut into small slices
3 to 4 tablespoons ice cold water

For the filling:
5 tablespoons (80gr) unsalted butter
1/4 cup lemon basil, chopped
3 eggs
1/2 cup (100gr) sugar
5 lemons, zested and juiced

Prepare the dough:
Mix together the flour and salt in a large mixing bowl. Cut in the butter with a pastry cutter or a fork until the mixture forms pea-sized pieces. Sprinkle 2 tablespoons of water over the flour mixture and toss with fork until moistened. Repeat with the remaining water, one tablespoon at a time and gather the dough into a ball with your hand. Do not handle the dough too long. Wrap into a sheet of plastic wrap and refrigerate for 30 minutes. This will allow the dough to relax and make it easier to roll, keeping it from becoming tough. Roll dough on a lightly floured surface, applying pressure from the center to the edges until it is about 1/4-inch thick. Cut out six 6- inch circles onto the dough and press them into the tartlet molds or rings (or one 9 inch pan if making a larger tart). Place the rings or molds on a baking sheet. Prick the dough with a fork, apply a piece of parchment paper inside the molds and fill with dry beans or pie weights. Refrigerate 30 minutes. Preheat oven to 350F and when ready, bake for 10-12 minutes. Let cool completely and remove the pie weights and paper. Keep the oven at 350F.

Prepare the filling:
In a small saucepan set over medium heat, cook the butter and lemon basil until the butter is just melted. Let cool and strain to remove the lemon basil. In a large bowl, whisk together the eggs, sugar, the juice and zest from the lemons and the melted butter. Divide evenly among the tarts and bake for 15 to 20 minutes. Serve room temperature.

At The Flower Shop

A Pavlova And A Guest

Pavlova5

It’s "Share Your Space Friday" here again!! I have never posted that much in a week and the fun part is that I only had to write an intro!!

I am loving having guest bloggers and not only because it gives me time to frolic in the sun (ugh…no not really…!) but mainly because it is like having a friend stop by and share with you a bit of their day, their personality, etc… And if personality had a name, it would be Kelly from Sass and Veracity. I knew from the first post that I’d be reading forever…I think it was her post on creme brulee and I found myself almost hugging the computer screen just staring at her stove. Meeting her last Fall was the icing on the cake….if only my mom and mother-in-law would let me be adopted by this sassy gal…sigh… She’s got verbage, she’s got class, she’s got ethics and an amazing sense of humor. Most of all, I don’t know better person to cheer anybody on in anything they venture doing.

I am thrilled to have Kelly pop by and share with you this amazingly refreshing pavlova. Read on for the recipe.
Now….doesn’t this look amazing for Spring! Happy Easter everyone!


I’m one of those cooks who is notorious for preparing recipes I’ve never tried before when there’s a special occasion looming. It doesn’t matter whether it’s for family, close friends, or a party for 40, I can guarantee that everything I make will be new to me. I’m sure that to some, I’m either grossly egotistic, or to others, a complete fool. I’d say adventuresome — or a glutton for punishment. The thrill of discovery during the planning process far exceeds any worry I could have about screwing something up. I love sifting through my magazines, cookbooks, and favorite web sites looking for the perfect recipe — especially if it’s something totally new.

So when Helen contacted me about doing this guest post, after initially grinning like a sap, I felt as if I’d been given permission to create the biggest planning mess I’ve made in a while. Cookbooks and magazines everywhere. A bookmarking frenzy on my Mac. Silly questions about "which recipe would be best" posed to my 16-year-old son who patiently indulged me with a more than one-syllable response. It was as if I’d been invited to a lovely party and then realized I didn’t have anything to wear. Even if I actually had a particular recipe in mind, and said recipe came out perfectly, I’d have to take photos.

Ah, the photos. I’ve all but swooned over Helen’s ethereal photos at one point or another. Light and airy, softly beckoning me to linger over what she has prepared, each photo taunts me with a "just you go ahead and try to make this, girlie!" And I think, in time — all in good time after kicking my procrastination skills into high gear. I met Helen last last Fall at the wedding of a mutual friend, and it took no time at all to learn just why her work is as flawless as it appears. She’s patiently persistent, works hard, is extremely focused, works hard, and has a seemingly bottomless reservoir of energy. Did I mention how hard she works? Meeting her was an absolute pleasure. Clearly, I had to make something that would have a chance of gracing the page, right?

Pavlova

Ironically, I came very close to baking a Paris Brest, something I’ve made before, but at the last minute, changed my mind. I’m sure it has nothing to do with the fact that the last time I made pate a choux, I was less than thrilled with the outcome. Instead, I’ll blame it on the photograph I saw in this month’s issue of Gourmet of the "Pavlova with Lemon Curd and Berries." Its imperfect, simple appearance reminded me of a galette and prodded me to reconsider the long standing issue I’ve had with meringue. Not the meringue on pies — meringue that’s baked. For some reason, I’ve always steered clear of it, not quite relishing the sensation it causes in my teeth when I bite into it. Or maybe it’s the near weightlessness of it. Surely something so light can’t have much substance. Excuses, excuses.

But I was mesmerized by the Pavlova, a dessert named after the famous Russian ballerina who, after touring Australia and New Zealand in the 1930’s, is said to have had this dessert named after her. Although it’s the "light and airy" aspect of her dancing that the dessert was created to mimic, I’m reminded more of a flouncy tutu, fluffed high with tuille. Just beautiful.

I’ve been savoring this dessert since yesterday, marveling over extreme contrasts in texture and flavor. The meringue crust, so delicate that touching it causes it to shatter, melts on my tongue. In the center, the meringue is a creamy, marshmallow treat, its sweetness tempered by the tartness of the lemon cream. The combination of the berries and grapes add a perfect crunch that brings it all together. Whimsical, unpredictable, and oh so delicious.

Here’s to you, Helen. You’re an inspiration to me in many ways and I’m quite honored to have done this for you.


Pavlova7

Pavlova with Lemon Cream, Berries, and Grapes

For the meringue…
1 cup superfine granulated sugar
1 tablespoon cornstarch
3 large eggs at room temperature 30 minutes
3 tablespoons cold water
1 teaspoon distilled white vinegar

For the filling…
2/3 cup granulated sugar
1 tablespoon cornstarch
1/8 teaspoon salt
1/3 cup fresh lemon juice
1/2 stick unsalted butter
3 large egg yolks, lightly beaten
2 teaspoons grated lemon zest
1 cup heavy cream
2 cups mixed berries
2 cups grapes

Preheat oven to 300ºF and position a rack in the center.
To prepare the lemon cream, stir sugar, cornstarch, and salt in a saucepan. Add the lemon juice and butter, bringing the mixture to a simmer over medium high heat. Continue to whisk at a simmer, about 1 minute. Whisk about 1/4 of the mixture into the beaten egg yolks, then transfer the egg yolk mixture back into the saucepan. Over low heat, continue to cook, but make sure not to boil, whisking constantly until the lemon curd is thick, about 2 minutes. Scrape into a shallow bowl, stir in the lemon zest, and place a piece of parchment over the surface. Refrigerate for about 1-1/2 hours.

To prepare the meringue, line a baking sheet with parchment and trace a circle about 7″ in diameter in the center. Turn the parchment over.
Whisk superfine sugar and cornstarch together in a small bowl. In the bowl of an electric mixer, beat whites with a pinch of salt at medium speed until soft peaks form. Add the water and beat until whites hold soft peaks once again.
On medium-high, beat in sugar mixture 1 Tbsp at a time. After all sugar has been added, beat 1 minute longer. Add vinegar, then beat at high speed until glossy and stiff peaks form, about 5 minutes (longer if using hand-held mixer). The meringue will be extremely thick.
Spread meringue carefully to cover the circle on the parchment, creating a cavity in the center (for the filling). Bake until meringue is pale golden and has a crust, about 45 minutes. Avoid opening the oven door! Turn oven off and prop door open slightly with a wooden spoon. Cool meringue in oven 1 hour. The exterior will be dry and possibly cracked, the inside more like the consistency of marshmallow.

To assemble the pavlova, beat the heavy cream just as it holds stiff peaks, then 1/4 cup at a time, whisk cream into the lemon curd. Check consistency each time before adding more cream. It should be able to mound. Spoon lemon cream into cooled meringue and mound fruit in the center. Serve with extra whipped cream if desired.


Lemon Raspberry Mille Feuilles

Lemon Raspberry Mille Feuilles


I know, I know, it is Fall…so why all the raspberries? And now the lemon? Store diplays, magazine covers and tv shows "fall season" premieres are doing a great job at convincing me it is Fall. Yet, one step outside in the middle of the afternoon keeps telling me otherwise, time and time again. Still wearing flip flops and shorts so I hope you will indulge me for a couple more raspberry posts. I promise the next one will have an autumnal twist.

We are enjoying quite a few dinners outside with the neighbors and the summer grill outs have finally given way to wonderful oyster roasts. It is hard to believe the way our street functions but if you spend one week here it’d be easy to see why I wish I could take the whole street with me if we ever move. It is not uncommon to harbor someone else’s dog while they help you run after your own, have about 3 strollers and 8 dogs walking alongside your own crazy little-big ones. A walk up to the dock usually turns into a crabbing or shrimping fest while 2 of the above mentionned dogs decide to go for a swim without giving you notice first.

These are the moments that my soul swell with life and good feelings, the ones that make you wish your arms were big enough to grab a hold of it all. So you let your heart do it. You let all the wonderful strangers in. There will be moves and departures, goodbyes and boxes of macarons dropped at the doorstep of new neigbors. Just let them in…because they never ask why and what.

Our little nucleus likes to gather on the front steps of C&H and the twins. It is much easier to monitor the pets, the kids and we literally can throw a head of lettuce in direction of the picnic table if someone forgot the greens. I have not tossed anything like cakes and desserts, although the twins are polishing their receivers' skills for that very purpose. This past weekend we celebrated A’s first time without training wheels, AJ’s first three teeth (all or nothing kind of baby!), a tiny peaceful newborn, a kittie and a new neighbor. Somebody rented the house next to ours for the next few months and C. and I started to joke around that she might run away scared after one weekend spent around here. Loud. Busy. Open doors. Skateboards. Loud. Treehouse. S’mores. Frisbees. Did I say loud? I was feeling bad for this poor lady but I remembered the phrase "baptism by fire"…

Saturday night, the steamer started going full blast, we dragged the long narrow table upfront and set out buckets, oyster knives, crackers, wine, cocktails, etc… The kids really wanted to meet this new neighbor and were wondering if she might ever come out and say hi. I laughed and said "don’t worry, she will…and fast I bet. If she comes down fast and smiling that means she is hungry and wants to meet you. If it is fast and fuming, run!!!" Within 20 minutes, L. was among us, glass of wine in one hand and my dog licking her other hand clean.

Lemon Raspberry Mille Feuilles


I am just in charge of desserts here. C. has a talent for making a yard or a driveway feel like the front steps of a magical kingdom. She laid down a huge and almost brand new rug she had found on the side of the street a couple days prior, a couple of newly painted red lawn chairs picked up from an army depot store and the kids were watching movies projected on a oversized curtain on the side of the house while the adults were seriously entertaining.

Since the mood was light and the temperatures still in the upper 80s, I decided to bring a summer-ish dessert to our picnic table. The children love to eat what the Pretending-To-Be-Grownups eat, preferably without plates or utensils, and the messier the better. While we delicately forked into our Lemon and Raspberry Mille Feuilles, sometimes separating layer for more of that flaky effect, they exercised perfect gluttony by eating these in two bites, flat. Good thing they were light and not too tangy and that I had made twice the amount necessary!

Light is the word. Mille Feuilles takes its name from the numerous layers puff pastry and although the traditional one, well, the one I grew up on, is filled with vanilla custard and topped with chocolate fondant, once you get the hang of it, the possibilities are endless. Puff pastry is not that difficult to do. No really, I am not just saying that. It requires patience and time, so yes, it best left for a day you are around the house doing other things. Make sure your kitchen is not blistering hot and that you let the dough rest the require amount of time in between each turn. Not only is it crucial to relax it but it also prevents the butter from turning to mush and running out of your dough while you roll.

What you see in the pictures is a quick puff pastry I have been working on and I am really excited of the way it turned out, but I can’t give you the recipe quite yet. I will however re-direct you to another one I absolutely love, from Martha Stewart. Works like a charm and make the most tender, flaky dough, and if you have to learn one basic, well hers is a great start. Each layer is filled with a lemon curd mousse and topped with rows of raspberries. Again, feel free to change the fruit as any would work great with lemon. There is plenty of chocolate coming up with the holidays so a little lemon-berry slice is a welcome lighter sight (that is if you forget all the butter in the dough!)

Lemon Raspberry Mille Feuilles


Lemon Raspberry Mille Feuilles:

Makes 6-8 depending on the size of your rectangles.

Kitchen Note: the dough makes more than you need but double wrap it in plastic film and freeze for a later use. You won’t regret it.

For the puff pastry:
Makes about 2 1/2 pounds.
3 cups all-purpose flour, plus more for work surface (420 gr)
3/4 cup cake flour (105 gr)
1 1/2 teaspoons salt (7 gr)
4 tablespoons unsalted butter, cut into 1/2-inch pieces, well chilled (60 gr)
1 1/4 cups cold water (295.5 ml)
1 tablespoon all-purpose flour (14 gr)
1 3/4 cups (3 1/2 sticks) unsalted butter, well-chilled (405 gr)

– Make the dough package: In a large mixing bowl, combine both flours with the salt. Scatter butter pieces over the flour mixture; using your fingers or a pastry cutter, mix in the butter until it resembles coarse meal.
-Form a well in center and pour in the water. Using your hands, gradually draw flour mixture over the water, covering and gathering until mixture is well blended and begins to come together. Gently knead mixture in the bowl just until it comes together to form a dough, about 15 seconds. Pat dough into a ball, and turn out onto a piece of plastic wrap. Wrap tightly, and refrigerate 1 hour.
– Make the butter package: sprinkle 1/2 tablespoon flour on a sheet of parchment paper. Place uncut sticks of butter on top, and sprinkle with remaining 1/2 tablespoon flour. Top with another sheet of paper; using a rolling pin, pound butter to soften and flatten to about 1/2 inch. Remove top sheet of paper, and fold butter package in half onto itself. Replace top sheet of paper, and pound again until butter is about 1 inch thick. Repeat process two or three times, or until butter becomes quite pliable. Using your hands, shape butter package into a 6-inch square. Wrap well in plastic wrap, and place in refrigerator until it is chilled but not hardened, no more than 10 minutes.
-Assemble and roll the dough: Remove dough package from refrigerator, and place on a lightly floured work surface. Roll dough into a 9-inch square. Remove butter package from refrigerator, and place it in the center of the dough square. Fold each corner of dough square over the butter package so that it is completely enclosed. Press with your hands to seal.
– Using the rolling pin, press down on the dough at regular intervals, repeating and covering the entire surface area, until it is about 1 inch thick. Gently roll out the dough into a large rectangle, about 9 by 20 inches, with one of the short sides closest to you. Be careful not to press too hard around the edges, and keep the corners even as you roll. Brush off any excess flour. Starting at the near end, fold the rectangle in thirds as you would a business letter. This completes the first single turn. Wrap in plastic wrap and refrigerate 45 to 60 minutes.
– Remove dough from refrigerator, and repeat the rolling and folding process, giving it five more single turns. Always start with the flap opening on the right as if it were a book. Mark the dough with your finger each time you complete a turn to help you keep track. Chill 1 hour between each turn. After the sixth and final turn, wrap dough in plastic wrap; refrigerate at least 4 hours or overnight before using.
-Divide the dough in half, double wrap one half with a sheet of parchment paper and plastic wrap and freeze for a later use. The dough can be frozen up to three months.
-Roll one half to a 1/8 inch (3 mm) thick 18×10 or so rectangle and cut out 4×2 rectangles and place them on a parchment paper lined baking sheet. Dock the dough with a fork to let the steam out while baking so your rectangles will be evenly puffed. Bake at 350F until golden brown. Let cool completely before filling with the mousse.

For the lemon mousse:
grated zest of 1 lemon
1 cup (250 ml) lemon juice
1/2 cup (100gr)sugar
2 eggs
1 cup (250 ml)heavy cream
2 pints fresh rapsberries (about 2 cups)

Combine the zest, sugar, juice in a saucepan, and bring to a simmer. In a small bowl, beat the eggs until light. Beat some of the lemon mixture into the eggs to temper. Scrape the mixture back into the saucepan and cook stirring constantly until it thickens up, about 5 minutes. Strain and let it cool to room temperature, covered with plastic wrap until ready to use.
In a stand mixer, whip the cream to medium stiff peaks. Incorporate the cooled lemon curd in three additions. Place in a piping bag and pipe (or spoon) onto the puff pastry rectangles. Top with raspberries and repeat to obtain two or three sheet stacks.

A Favorite From The Archives

Not that I like to dwell on the past, but after the baking whirlwind weekend I spent with Chris when she came to visit, I thought that a favorite from the archives might help me recover while I go through all the goodies she brought me (I got spoiled) and edit the pics of our baking ventures. I won’t post them all at once because it’d give you a headache!! I got to say, baking a multi layer cake with her was a tag team without word, priceless. More on that tomorrow…

In the meantime, I hope you enjoy this favorite of mine : Lemon Rhubarb Mousse Cake.

Lemon Madeleines – Sugar High Friday Continues…

Be warned, this is a loaded weekend post…

See how selfish I was coming up with the Citrus theme for Sugar High Friday?!…Gave me the "excuse" to make lemon desserts almost every other day…I know, I am evil! Not made your entry yet? That’s ok, you have until next Sunday (May 25th) to do it. One whole week….And remember, citrus does not only include lemon or lime and the entries I have received so far have been really creative in making different citrus fruits the stars of their creations or an accent to a dessert that takes the whole dish to another dimension. I know you would not mind a teaser…hmmm….No can’t do! But what I can do is to make you some Lemon Madeleines to ease the wait of the round up on the 30th.

Before I forget, because my brain is more scattered than the madeleine crumbs on the breakfast table right now: the "handmade with love" tag attached to that cool ribbon was actually part of a gift that one regular reader of this blog, Bina, sent me. She does not have a blog but emailed me a few months ago with a macaron question (with pics which was precious to help her out) and we have continued emailing even after she had "mac-success". Well, this little busy bee cross-stitched a couple of towels for me, one with lemons (!) and one with ice creams, and when I went to take the picture I had the tag in my pocket so it ended up on the plate…which also has a story: it made a long trip from Inne’s home to mine but it was just the perfect size for the madeleines. She was sending me a much coveted book and "hid" the fact that there was china and chocolate in it. Spoiled, I tell you…I am spoiled…Thank you both from the bottom of my heart.

Madeleines were almost always part of the cookie tray my grandmother would put together for our daily afternoon tea. Since there is only one house between my parents' and theirs, the ritual was to go over there around 4pm and sit down together for tea and cookies and talk about the upcoming weekend gatherings, dinner, birthday parties, communions, etc….With a big family like ours, it seemed like there was always something to celebrate and get together for. It was fairly common to buy madeleines instead of making them and with a great bakery in the village it was easy to pop a dozen in the basket while getting bread in the morning. I loved their distinct bakery-orange blossom flavor, their dense almost pound cake like texture, their sticky exterior, and most particularly their giant dome on top…or back…depending on which way you hold it.

Really, I would sit there for minutes on end just holding one, staring at this big, puffed round of cookie wondering how on earth such a classy scalloped treat could end up looking like Quasimodo. And then, I would eat it, forgetting about my questions until the next time we would gather for tea. While others were pondering over e=mc2, I did spend a great deal of my childhood wondering about the dome of madeleine, which probably surely explains what I do nowadays for a living. I think it is more about reminiscing about home that I like seeing my madeleines puff up in the oven since the taste is the same whatever the shape they end up taking!

One of our favorite things to nibble on during the weekends is madeleines. Not very original for a cookie but I know that Patricia, whom I rename the Queen of Madeleines, will agree that they are not only very cute, they are too darn good and versatile to pass up. I make a big batch on Friday nights and keep the bowl out, and they are usually gone by Sunday afternoon. I made these last night too and there is half of one left…I guess I am not the only one on a lemon binge! I think the twins ate half the bowl when we bribed them to come down from the pecan tree but still…

When I inherited grandma’s recipe box after she passed away, I was really surprised to find a handful of madeleines recipes since she never made a single one for us while she was still alive! Not a cultural thing to make them back them, maybe too much fuss to get the pans which would have probably required a day trip to Paris back then and I don’t see my grandfather going with her to get some baking equipment so she could make them since Mr. Baker next door was generously providing us with a fresh daily supply. I bet you that if she had been blogging back then, she would have taken that train or emailed a buddy to get what she needed! Like me, grandma loved anything citrusy so I was not surprised to find 4 different recipes for lemon madeleines in that box. I chose the one that was the most lemony of all: zest in the batter, squirt of lemon right out of the oven and lemon glaze to finish. Verdict? Well, let’s just say that I plan on making another batch this afternoon and hiding it….

Lemon Madeleines :

Printable Recipe

Makes 16

2 eggs
80 gr all purpose flour
1 tsp baking powder
80 gr granulated sugar
80 gr unsalted butter, melted and cooled
pinch of salt
3 Tb lemon juice
zest of one lemon
1/2 lemon (for squirting after they are baked)

Glaze:
2 cups powdered sugar
3Tb lemon juice
1 tsp lemon zest

Preheat your oven to 400F.
In a large bowl, mix together the flour, baking powder, sugar, pinch of salt. Separate the egg whites from the yolks, and whisk in the yolk to the flour mixture. The mixture will appear quite thick, do not feel like you have to whisk in all in thoroughly. In a separate bowl whisk the egg whites until foamy, and add a small amount first them to the egg yolk/flour mixture and whisk vigourously with a whisk to break the flour/yolk lumpy mass. Fold in the rest of the whites with a spatula. Add the lemon juice, zest, and butter. Whisk the batter until everything is incorporated and smooth. Drop one tablespoon or so into the madeleine molds, depending on their size. Do not fill them to the rim though.
Bake for 8 minutes or until golden brown. As soon as they come out of the oven, squirt the half lemon over the madeleines and let cool completely before proceeding with the glaze.
For the glaze: mix the powdered sugar, lemon juice and zest together until you get semi thick consistency. Add more lemon juice if needed. Dip each madeleine in the glaze and set them on a wire rack over a baking sheet lined with parchment paper.

For madeleine pans and molds, check here for metal and silicone.


These flowers are my way to say thank you to the judges that Barbara gathered during the Taste of Yellow food photography contest. I was surprised, moved, happy, speechless when she told me that my macarons and yellow wristband picture had been selected as the winner. Big thank you again, it was an honor to participate 🙂

Mint Pana Cottas With Blackberry Coulis

Pana Cottas-Copyright©Tartelette 2008 Thank you, thank you to all of you who visited Kate and myself and leaving wonderful birthday wishes. Wow! You do know how to party!! For your comments, the dancing and singing ecards to the thoughtful emails: thank you.

We ended up gathering the usual troops, a.k.a the neighbors and the kids and grilled, drank had a fire and s’mores…and of course cake, which the twins had to adorn with those not so great never ending magical candles…argh!!! To say that my head was heavy this morning at work was an understatement but I could not get out of those appointments. However, I had planned on taking the afternoon off and take a nap, go to the beach, be productive…You know….While resting my head on the couch pillows I started to remember a conversation with our neighbor C. about pana cottas. Was there that much vodka involved that I can’t remember if I did or did not volunteer to teach her pana cottas? Ouch! That was going to be a long day… I felt a pinch and a tuck on a my brain "Hello Tartelette Smackelette! Remember! What exactly did you say? What time? How many? What flavor?" C. called and asked if I needed something from the store since she was going that way:

Me: "Painkillers?"…
C: "Oh you don’t remember do you, that’s ok we can reschedule"
{I hate rescheduling…do it now while the spirit of the moment is there. Problem.}
Me: "You know what? Whatever I said we’d do, let’s do it….it was legal right?"
{Cross fingers, take a deep breath, pray you did not volunteer yourself for another impromptu dinner for 20}
C: "Ok, now you are scaring me…You said Pana Cottas were easy and now I am freaking out!"
{My blood pressure just got back to normal, hers is now through the roof. Well done Helen!}
Me: "no no no…easy peasy….promise. Here’s the list of stuff to get. I’ll go behind the house and get blackberries."

That was just part one of the adventures. I did try to get the blackberries, I did, I promise….but looking and bending down trying to pick out the ripe ones proved to be a rather painful adventures, my head, my stomach and the vodka from the night before all colliding at the same moment. That’s when my best guys arrived and saved the day! Indeed, C’s twins came armed with baskets and in 20 minutes had blue hands, blue tongues, blue shirts and about 2 cups worth of blackberries. In the meantime I played with the computer a little, as I am trying to put a page up and a map to keep you abreast of the Traveling Eggs adventures, but bear with me on that one, time is not on my side (as if we all did not have that issue, right?!). Allright enough about our little village whereabouts and on with the pana cottas….I am not always that talkative (shshh mom), it must be old age!!

Pana Cottas-Copyright Tartelette 2008 Pana Cotta is probably one of my favorite desserts. It is rich and yet seemingly light to the palate, versatile so you can flavor or top it anyway you like. Refreshing with fruits or comforting with caramel, the possibilities are endless. Since the mint is growing like crazy (does getting old give one a greener thumb?), I infused the cream and the milk with a good handful of it and cooked down the blackberries to a puree with some sugar and lemon. We did not have quite enough for 4 glasses so I used some leftover curd from the birthday cake for one of them. Guess who got that one 🙂

Mint Pana Cotta With Blackberry Coulis:

Serves 4

1 cup milk
1 cup heavy cream
1/2 cup sugar
1/4 cup chopped fresh mint
2 teaspoons powdered gelatin bloomed in 2 Tb water (means to pour the water over the gelatin and let it sit while you prepare the pana cotta)

Combine all the ingredients, except the gelatin, in a saucepan over medium high heat and bring to a boil. Remove from the heat and let the cream to steep for 20 minutes. Pass the mixture through a sieve or a chinois, heat the gelatin in the microwave for 8 seconds and quickly stir it in the cream mixture. Divide it evenly among small dishes, glasses, etc…Let set in the refrigerator for at least 3 hours.

Blackberry Coulis:
2 cups blackberries
1/2 cup sugar
1 Tb lemon zest

Bring all the ingredients to a simmer on medium high heat and cook until the blackberries are soft. Process to a puree with a hand held blender or in a food processor. Pass the mixture through a fine mesh sieve and strain the seeds out, discard those. Let cool completely before you divide the coulis on top of the pana cottas. Refrigerate until ready to eat.

Pana Cotta-Copyright©Tartelette 2008
Because its calcium rich components like cream, milk, blackberries and lemons, I am sending these to a favorite blogger of mine, Susan from Food Blogga , who is hosting a great event to raise awareness about osteoporosis entitled Beautiful Bones. Thank you for opening up to us and organizing this Susan!

Birthday Girls: Sharing A Lemon Meringue Ice Cream Cake

Lemon Meringue Ice Cream Cake -Copyright©Tartelette 2008 Happy Birthday to you…Happy Birthday to you…Happy Birthday to you Kate !

Happy Birthday to you…Happy Birthday to you…Happy Birthday to you Tartelette !

Yes, Kate from Aaplemint and I are doing it again! Last year we found out through back and forth banters and emails that we shared the same birthday and decided to bake each other a surprise cake. I just checked Kate’s site and she made me Apricot Financiers, and she did not even know they were among my favorites!! Yipee! We decided to make it tradition, which I hope we last as long as we are both blogging, and here we are again! So my dear Kajal/Kate, here is to you a delicious Lemon Meringue Ice Cream Cake.

The cake is composed of layer of meringue with a hint of lemon zest, lemon curd and homemade lemon ice cream inspired from one in my favorite all lemon book. I actually changed propotions, removed some ingredients, and used my usual curd recipe. I liked the idea not necessarily all of what she did. Except the ice cream….Just make that if you can!! You can make one large one or 4 (4 inches round) small ones like I did. It is best to start the meringue and the ice cream the day before you plan on serving it, assemble in the morning and keep frozen until you serve. We have had a serious bout of humidity this weekend so I made the meringue Friday night and left them to dry in the oven. I assembled the cakes about 4 hours before serving so they would still have a good crunch. I shared one with my mother in law Sunday for Mother’s Day after many excuses for a cold snack these past couple of days, there is still one left for me later today….just me, hands off Mr.Tartelette! This cake is so lemon through and through that it finally satisfied the perfect lemon dessert I have been looking for these last few weeks. Yeah baby!! is what I say!!

Lemon Meringue Ice Cream Cake-Copyright©Tartelette 2008
Lemon Meringue Ice Cream Cake:

Serves 12 (instructions provided for a 8 inch round cake, I just used the same concept for 4 small cakes)

Printable Recipe

1 1/2 cups sugar
1 Tb cornstarch
2 tsp lemon zest
6 large egg whites
pinch of salt
Lemon Custard Ice Cream (recipe follows)
1 cup lemon curd (recipe follows)

For the Meringues:
Preheat the oven to 250F. Trace 2 8-inch circles on each 2 sheets of parchment paper. You need 4 circles total for the 4 meringue layers (you can do these free handed which I did since I knew I would have to trim them a bit before assembling). Invert the paper on the baking sheet.
Whisk 1/2 cup of sugar with the cornstarch and lemon zest and set aside. Beat the egg whites with the salt until they are foamy. Increase the speed and slowly add in the rest of the sugar, one tablespoon at a time until you get a firm and glossy meringue. Carefully fold in the sugar/cornstarch mixture.
With with the back of a spoon (or with a piping bag fitted with a plain tip and filled with the meringue), fill in the circles on the parchment paper. Smooth the tops. Bake the meringues for 1 hour. Turn the oven off and let them dry in the oven overnight.

For the Lemon Ice Cream:
2 cups heavy cream
2 cups half and half
1 cup sugar
1/4 cup finely grated lemon zest
6 large egg yolks
3/4 cup fresh lemon juice

In a heavy bottomed saucepan set over medium high heat, bring the cream, 1/2 cup of sugar, zest and the half and half almost to a boil.
In a separate bowl, whisk the egg whites ad the remaining sugar until they are pale and silky. Slowly add the hot cream mixture over the egg yolks, whisking as you do so to prevent the eggs from curdling. Return the mixture to the saucepan and cook, stirring constantly until the custard coats the back of a wooden spoon, as if you were making creme anglaise. Do not let it boil.
Pour the custard into a container and let cool to room temperature. Refrigerate until completely cold, stir in the lemon juice and freeze according to your ice cream machine instructions. If you do not have one, freeze until firm, whisk it with a hand held mixer or stand mixer and freeze again. Repeat a couple more times.

For the Lemon Curd:
grated zest of 1 lemon
1 cup strained lemon juice
1/2 cup sugar
2 eggs
1 Tb butter, at room temperature

Combine the zest, sugar, juice in a saucepan, and bring to a simmer.
In a small bowl, beat the eggs until light.
Beat some of the lemon mixture into the eggs to temper. Scrape the mixture back into the saucepan and cook stirring constantly until it thickens up, about 5 minutes.
Strain and refrigerate, covered with plastic wrap until ready to use.

Assemble the cake:
Remove the ice cream from the freezer 10 minutes before you start the assembly so it will be easier to spread on the meringue disks.
Remove the meringues from the parchment paper and set aside the least attractive one for the garnish. Put a large piece of plastic wrap at the bottom (going also up the sides) of an 8 inch round springform pan. Fit one meringue disk at the bottom, cover it with about 1 1/2 cups of Lemon Ice Cream, top with about 1/3 cup of Lemon Curd. Top with another meringue, another 1 1/2 cup of ice cream, another 1/3 cup of lemon curd. Repeat one more time. Crumble the reserved meringue disk and sprinkle it on top of the cake. Wrap the cake and freeze for at least 4 hours or overnight.
Let the cake soften in the fridge 15 minutes before you serve it.

~~~~~~~~~~~~~~~~~~~~~~~~~~~~~~~~~~~~~~~~~~~~~~~~~~~~~~~~~~~~~~~~~~~~~~~~~~~~~~~~~~~~
I leave you with a picture of my mom and me taken in 1977. I was already trying to make people eat and my first client was my stuffed rabbit Pipou (which now sit on my dresser…yep…still).

Thank you mom for not giving up on me 30 something years ago on May 13th (the delivery story is rather a long one, not so fit for a food blog) . I love you!

Mom and Helen-Copyright©Tartelette 2008
Finally, I got an early birthday present from Barbara this morning when she posted the round ups to her Taste of Yellow event, click on One and Two to get there. Thank you Barbara for such an amazing job!