
Jahresarchive: 2009

Chocolate Truffle Tarts

Chocolate Trufle Tarts


Hanging out on Twitter late at night when I can’t seem to figure out where sleep went has very very good outcomes. I get to talk to my favorite people as if they were just a few feet away and beside geeking out with Jen, ZenChef and Mark, I also get to talk gluten free with Shauna of Gluten Free Girl . I love the way she is gently coaxing me to push my own boundaries. These Chocolate Truffle Tarts for example are the pure result of an idea that Shauna unkowingly planted in my head one late night.

When we are having large gatherings of friends and family like this weekend, I always try to accomodate everyone’s needs, especially when it comes to gluten free and low salt recipes since they directly affect me too. After weeks spent reading about my diagnosis last year and ways to eleviate the symptoms, I realized that a gluten free diet could help a lot with genetic diseases and there was not much around as far as treatments were concerned. Our diet is 90% gf to start with except when it comes to pastries. Even there, I take a small portion and ship the rest to the neighbors, family or friends.

I admit, beside the obvious desserts like macarons, ice creams, panna cottas and financiers, I rarely practice my gluten free flours to the most of their ability. I should, I know it. I clearly see a difference when I keep the salt and gluten under wrap. The attacks are far less and few in between, the strength a bit less violent and I recover faster from feeling on a rollercoaster for a couple of hours. Trust me, it’s not only "not fun", it’s rather debilitating when you are in the middle of work. And who likes to feel like they are on a plane 24/7 from the ringing and pressure?

Chocolate Trufle Tarts


Thus, hanging out on Twitter and chatting with people like Shauna gives me the necessary push to try making more gluten free desserts. I have played with gf mixes in the past and often ended up with a brick to cut or cement to chew. I knew it was my lack of practice, and time to persue the issue because there are millions (the gf Daring Bakers for a start) eating gf pastries that not only look good but taste great. I mean, just give a look at this pie!

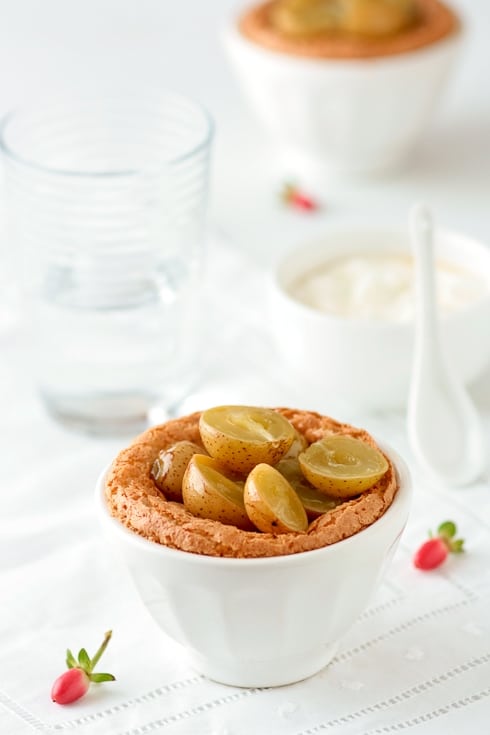
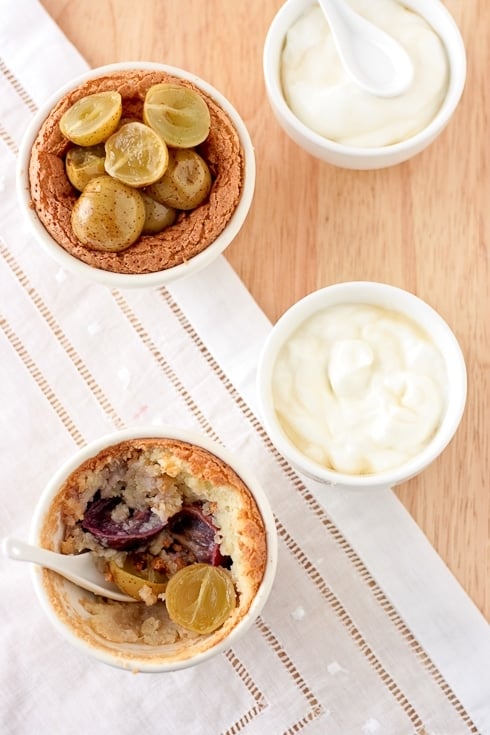
I had the perfect oppportunity this weekend to tackle a gluten free dessert once again. There are full blown celiacs in our family and then there’s me, who does not have the usual stomach reactions but who could benefit from a little tightening of the regimen here and there. I had just the ticket with Chocolate Truffle Tarts and since the filling is already gf, the only thing I’d have to work on was the chocolate crust. I put one of Shauna’s recipes side by side with mine and went about tweaking.

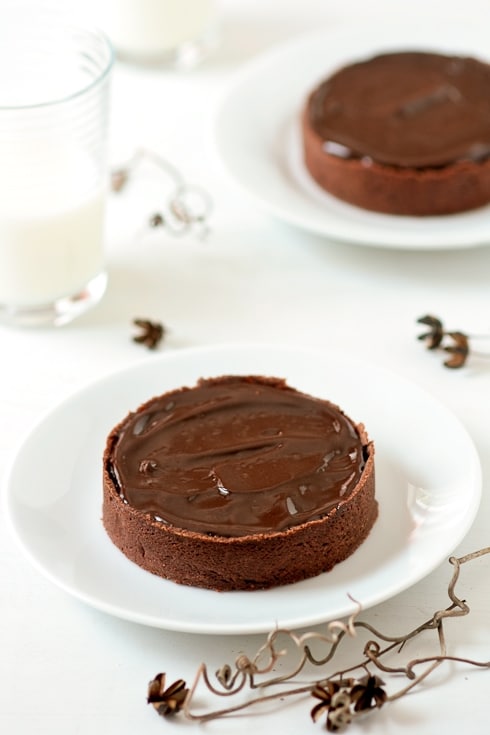
Oh happy happy me! The result was exactly like the original. A crisp, deep chocolate flavored crust, filled with an amazing truffle like chocolate filling and topped with a rich chocolate ganache. If I had been looking for my chocolate cravings to be back all these weeks, well….I was surely not looking anymore with these. Decadent and rich without being heavy or coyingly sweet. My kind of chocolate heaven!

Chocolate Trufle Tarts


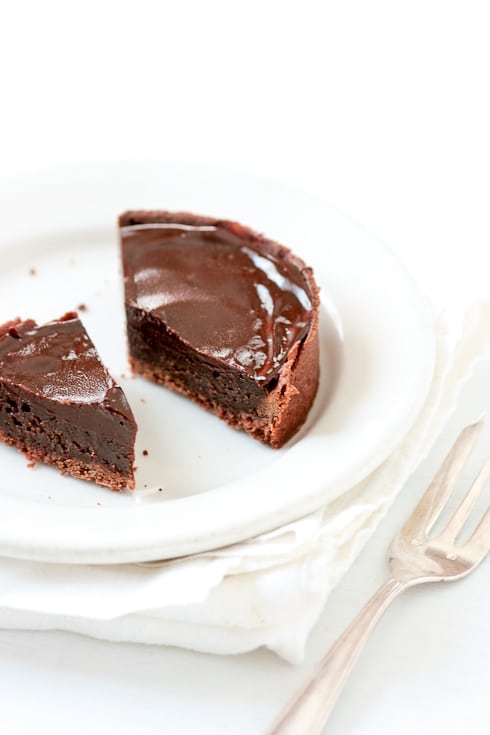
While I don’t think about turning this blog into a complete gluten free one, and developing the gf recipes I want to make demands more than I can handle right now, I am looking forward to finding the right balance for you readers and us here at home. I can cheat about 10% and feel fine but I know I am also tempting my symptoms and playing with the good days. These tarts were the perfect place to start. Not a crumb was left on anybody’s plates.

Chocolate Truffle Tarts:

Makes eight 4-inch tarts

Note: There are many gluten free flours out there that would work with this crust and I just used what I had available in the pantry. Here is a list of gluten free flours from which you can get inspired to try your own concoctions. For a non gf crust, use 1 1/4 cup all purpose flour instead of the 3 gf flours

For the chocolate crust: (adapted from Shauna’s pie crust recipe)
1 stick (113gr) unsalted butter, at room temperature
1/2 cup (60gr) unsifted powdered sugar
3 egg yolks
pinch of salt
1 cup (160gr) white rice flour
1/4 cup (30gr) amaranth flour (you could use sorghum flour)
1/4 (40gr) potato starch
1/4 cup (20gr) unsweetened cocoa powder

For the chocolate truffle filling:
8 ounces (240gr) bittersweet chocolate
12 tablespoons (170gr) unsalted butter, at room temperature
1/4 (50gr)cup sugar
1/4 cup (60ml) strong brewed coffee
4 large eggs

For the chocolate ganache:
4 ounces (120gr) bittersweet chocolate
1/3 cup heavy whipping cream
2 tablespoons unsalted butter, at room temperature
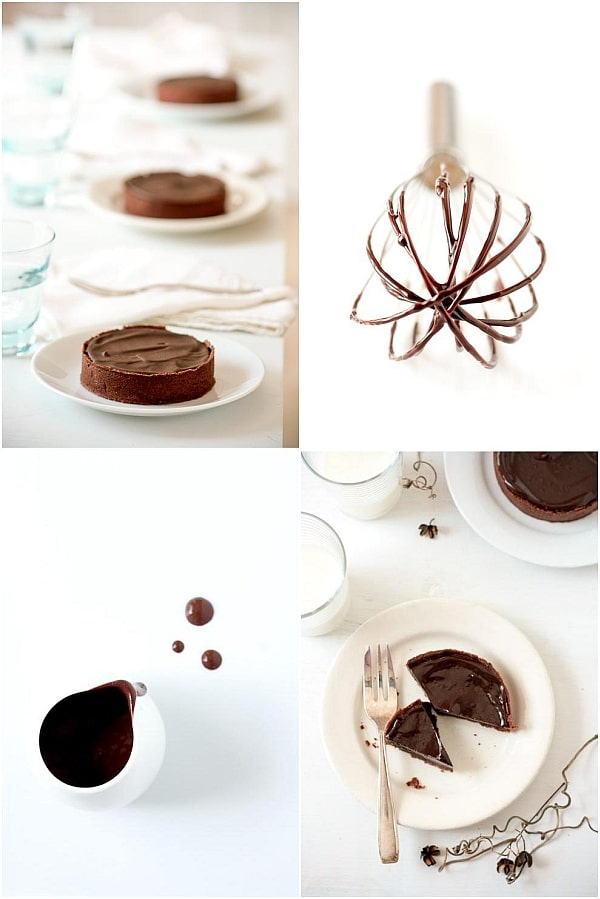
Prepare the crust:
In a mixer, whip together the butter and sugar together until light and fluffy. Add the egg yolks and pinch of salt and mix until incorporated. Add the three different flours and cocoa pwder and mix briefly. Dump the whole mixture onto a lightly floured (use more rice flour) board and gather the dough into a smooth ball. Do not work the dough while in the mixer or it will toughen it up. Flatten the dough into a disk, wrap it in plastic wrap and refrigerate for an hour.
Preheat oven to 350F and position a rack in the center. Place eight tart rings on a parchment lined baking sheet and set aside.
When the dough is nice and cold, roll it out on a lightly floured board or in between two sheets of plastic. Cut out eight 6-inch-rounds into the dough and fit them into eight 4-inch tart rings. If the dough tears while you roll or/and transfer into the rings, just patch it with your fingertips. Line the dough with pieces of parchment paper, fill with pie weights or dy beans and par bake for 10 minutes. Remove the weights and parchment paper. Keep the oven at 350F.

Prepare the filling:
Place the chocolate in a medium bowland set aside. In a medium saucepan set over medium heat, bring the butter, sugar, and coffee together to a boil over medium. Pour the mixture over the chocolate and leave it undisturbed for 2-3 minutes. Gently whisk until smooth. Add the eggs, one at a time whisking quickly until the mixture is smooth. Divide the batter evenly among the tart shells and bake for 10 minutes.
Let cool completely.

Prepare the chocolate ganache:
Place the chocolate in a medium bowl and set aside. In a medium saucepan set over medium heat, bring the heavy cream to a gentle boil. Pour it over the chocolate and let sit for 2-3 minutes. Whisk until smooth and incorporate the butter at the same time until the ganache is completely smooth. Divide evenly on top of the tarts and snooth out with an offset spatula. Refrigerate until ready to eat.

Matcha And Peach Pate de Fruit Macarons

Matcha & Peach Pate de Fruit Macarons


When Spring and Summer roll around, I think in shades of pinks and reds. When Fall and Winter point their nose, I am all about the blues and the purples. Greens are oranges are not my colors. Nope. And yet, the first thing I thought about with the first sign of cooler mornings and breezy nights were Matcha and Peach Pate de Fruits Macarons. Enjoying the last bit of summer produce while cozying up to the subtle taste of matcha tea.

Lately, the mere mention of tea evocates long talks on the porch and a light chill on a late night walk. You can feel the air changing. I can finally feel some coolness under my feet when I let the dogs out early in the morning. I can almost hear the grass crisp up as we come down, ready for us. These first few days of September have really been quite Fall-ish and are probably temporary due a hurricane being just around the corner. Nevertheless, every time this lovely Fall breeze enters the house, we just stop whatever we are doing and enjoy for a few seconds. Even if it is short lived it is worth those few seconds in the day.

Matcha & Peach Pate de Fruit Macarons


When I went to teach Veronica a three dayPastry Bootcamp, she not only gifted me with her hospitality and friendship, but with also a few stashes of vanilla beans, some saffron and a brand new can of the matcha she preferred to use in her macarons. I can see why. From the can to the finish product I could taste and smell the wonderful grassy properties of matcha. If you have never had it before, you might go "wow! what is that?" but trust me it grows on you real fast. It’s unpretentious and absolutely delicious in pastry.

I know that our Southern peaches are near their end and I have been stocking, preserving and canning as many of them as I could. This season has been particularly prolific and tasty and as much as it pains me to say goodbye to stone fruits I am happily getting my taste buds ready for pears, pomegranates, apples and pumpkins. Each season is a new palette. Even if it makes me paint in greens and orange which I am so-so about! One thing I have made a couple of times recently is peach pate de fruits. It keeps well, makes great little gifts for my students and is just plain good when the fruits are ripe.

So…in my usual ways, peach in one hand and matcha macarons in the other, I decided to marry the two together in one little perfect bite, mending the bridge between Summer leaving and Fall approaching. Alright, so I was helped by a little mascarpone and vanilla cream in the middle. I had no idea that peach and matcha would be that delicious together. They are. I am making more this weekend!

Peaches


On a side note, I know that Caitlin and Y are going to be disappointed that I did not do a talking picture post as we joked about while Twittering one night. I was starting to crack up looking at some of the shots and started playing around with captions. Here are some of the outakes for the macarons "beauty" shoot.

One more little thing though before the recipe. There are people you want to meet and there are people you want to meet, eat and laugh with and learn from. For me, Tish Boyle is one of those people. I remember the morning I opened my emails and found one with her name as the sender. I did not click for a few seconds. Really. I turned to Bill and said "if this is not a joke, she emailed me" pointing at one book I love and that she co-authored, Chocolate Passion. I carefully clicked and held my breath. I turned to Bill with the biggest smile ever and said "Tish Boyle wants me!". And we both laughed. Or I snorted my coffee. I can’t quite remember. She wanted an interview for the print magazine Desserts Professional, alongside David Lebovitz and Michael Laiskonis. Without hesitation, I emailed back "Yes!" before adding "I love your work". When she responded "I’m honored you even know who I am", I fell in love with her even more, if that was possible. Ugh, hello! I am supposed to say that! Thank you Tish, I am honored beyond belief to be in such good company in a wonderful magazine. You can check the article in their August issue.

Matcha And Peach Pate de Fruits Macarons:

Notes:
Use eggs that have been preferably aged 3-5 days in the fridge. Pierre Herme uses eggs that are aged until they are almost like water, about 5 days. If it’s good for Pierre, it’d good for me! The humidity, folding, aging of the eggs (the macs here were made with fresh whites) will affect the outcome. It’s all a balancing act of chemistry and action.

For the shells:
90 gr egg whites (30 gr granulated sugar
200 gr powdered sugar
110 gr almonds
1 tablespoon matcha powder

For the pate de fruits:
Notes: I use Certo liquid pectin so I can’t vouch for how others might behave. I use a large stainless steel pot so the evaporation and cooking could happen faster.
For a superb pectin free recipe, follow this recipe posted by the awesome Anita from Married with Dinner.

13 oz (380gr) peach puree (weight after you remove skin, pits and processed)
1 tablespoon lemon juice
2 cups (400gr) sugar, divided
3-4 tablespoons liquid pectin

For the mascarpone – vanilla cream:
8 oz (210gr) mascarpone, at room temperature (or substitute cream cheese)
2-3 tablespoons sugar
1 teaspoon vanilla bean paste
or 1/2 vanilla bean, seeded
2 tablespoons heavy cream

Prepare the macarons:
In a stand mixer fitted with the whisk attachment, whip the egg whites to a foam, (think bubble bath foam) gradually add the sugar until you obtain a glossy meringue (think shaving cream). Do not overbeat your meringue or it will be too dry. Place the powdered sugar, almonds and matcha in a food processor and give them a good pulse until the nuts are finely ground. Add them to the meringue along with some food coloring if using, give it a quick fold to break some of the air and then fold the mass carefully until you obtain a batter that falls back on itself after counting to 10. Give quick strokes at first to break the mass and slow down. The whole process should not take more than 50 strokes. Test a small amount on a plate: if the tops flattens on its own you are good to go. If there is a small beak, give the batter a couple of turns.
Fill a pastry bag fitted with a plain tip (Ateco #807 or #809) with the batter and pipe small rounds (1.5 inches in diameter) onto parchment paper or silicone mats lined baking sheets. Let the macarons sit out for 30 minutes to an hour to harden their shells a bit. In the meantime, preheat the oven to 280F. When ready, bake for 15 to 20 minutes, depending on their size. Let cool. If you have trouble removing the shells, pour a couple of drops of water under the parchment paper while the sheet is still a bit warm and the macarons will lift up more easily do to the moisture. Don’t let them sit there in it too long or they will become soggy. Once baked and if you are not using them right away, store them in an airtight container out of the fridge for a couple of days or in the freezer.

Prepare the pate de fruits:
Line a 8×8-inch pan with parchment paper and set aside.
Plce the peach puree in a heavy saucepan and add the lemon juice. Stir in 1/2 cup (100gr) saugar and bring the mixture to a boil over medium heat and cook until its temperature register 113F, stirring constantly. Add the remaining 1.5 cups (300gr) sugar and the pectin to the pot and slowly bring the mixture to 200F, still over medium high heat while stirring constantly. Turn the heat down a bit and keep the mixture at 200F for 2 to 3 minutes. Turn the heat back up and slowly bring the mixture to 223F. Keep it there for an additional 2-3 minutes (turn the heat down if necessary to do so). Remove from the heat and immediately pour the mixture into your pan lined with parchment paper. Let set for a couple of hours. Cut shapes with a sharp knife and roll the pieces of pate de fruit in sugar. Refrigerate if not eating all of them at once.

Prepare the mascarpone-vanille cream:
In a large bowl, whisk together the mascarpone and sugar until smooth. Add the vanilla and the heavy cream and whisk until all the ingredients are incoporated. Place the mixture in a piping bag fitted with a plain tip and pipe a dollop of cream onto half of the macarons. Top with a square of pate de fruits and another macaron shell.

Muscadine Grape Frangipane Clafoutis

Almond Frangipane and Muscadine Grapes


There is rarely a post without a story around here. I know I had a story for today. Had to have one. As my dad would say "I did not say it was good, I just said there was one". Simple and straight to the fact, which is not how these Muscadine Grapes Frangipane Clafoutis came to be but the result with our friends at dinner last night was actually just that. Simple and straight up good. Oh wait! They are the story. The dessert, the grapes.

A friend wanted me to teach her and her husband how to make souffles. We immediately turned this opportunity to see them into a dinner with a larger group. In return I asked that she helped me out with the huge cross stiching I’ve been working on for years. Yes, I decided one day to cross stich one famous Charleston street filled with gorgeous ante-bellum houses, and it feels like I have been at it for an eternity! After the first tray of souffles went in the oven, she gave one look at my cross stiching and exclaimed "Well, looks like you have a problem staying within the lines". I gave her the biggest smile and said "Doh! It’s me we’re talking about. Of course I can’t stay within the lines!" She quickly fixed my issues and we proceeded to round two of the souffles lesson.

After the third tray, I could see they both had the hang of it and we moved on to other things. We had made small batches all along and realized we would not have enough desserts for everyone, especially after all the sampling and testing we had done as the lesson progressed. I quickly glanced at the pantry and fridge and decided to assemble another dessert. I was in the mood for clafoutis, Bill was in the mood for something with frangipane. I had bought some really juicy red and green muscadine grapes, the firsts of the season, and decided to add some to my clafoutis-frangipane mix.

Muscadine Grapes


Muscadine grapes are big grapes with somewhat of a thick skin which makes them happily snap and pop when you eat them. Just like with kumquats, it’s best to take the time to seed them but luckyly there are little of them inside and they are pretty easy to discard. The season is usually September through October but it looks like our crops here have already started to be bountiful. Happy me! Much like kumquats I just love to pop them in my mouth for a snack but I discovered by pan searing them in honey that they are absolutely wonderful warm on vanilla ice cream. Happier me!

As we were fixing dinner, setting the table, getting drinks and nibbles ready I realized I was not paying attention very well and had completely forgotten to add the green grapes in there and we were munching on the reds I had saved to top the clafoutis-flan-whatever-we were-going to call-this. Improvise, devise. Quick! Alright, so we would bake the dessert and quickly pan sear the green muscadine grapes in honey and top the frangipane clafoutis with those. Ok, that would work. Reds inside, greens outside. Guests in the driveway!

Here is what we were not expecting: when I took the tray out of the oven all the frangipane clafoutis ressembled souffles. It was like the never ending souffle making oven! We gathered around the island and started counting, absolutely sure they would deflate within seconds. One, two, three…ten, thirty. Nothing moved. The beautiful golden crust on top remained puffy and upright.

Almond Frangipane and Muscadine Grapes


Hmmm…where to put those pan seared green grapes now? Bill took the back of a spoon, smashed the tops down as the rest of us looked horrified and spooned the green and saucy grapes in the middle. He looked at me all happy and said "That works! See I can do stuff in the kitchen!"

He was absolutely right! It worked perfectly, except we had no idea how to call what I had just baked so for now it’s just Muscadine Grape Frangipane Clafoutis. I am leaving the souffles part aside because I have no idea if the effect will reproduce itself if I make these again or if you decide to try this recipe. I knew the method would make them rise, I did not know ours would never fall!

Almond Frangipane and Muscadine Grapes


One year ago: Lemon Balm Infused Berries with Almond Tuiles.

Muscadine Grape Frangipane Clafoutis:

Serves 4

For the clafoutis:
1/2 cup (100gr) sugar
1 oz (30gr) unsalted butter, at room temperature
2 eggs, separated
1/2 cup heavy cream
1/2 cup (50gr)ground almonds
2 tablespoons (15gr)all purpose flour
pinch of salt
a dozen red Muscadine grapes, halved and seeded

For the pan seared grapes:
1-2 teaspoons unsalted butter
1 cup green Muscadine grapes, halves and seeded
3 tablespoons of honey (or to taste)

Prepare the frangipane clafoutis:
Preheat the oven to 340F and position a rack in the center. Lightly coat 4 ramekins with cooking spray or a dab of butter and place them on a baking tray. Set aside.
In a large bowl whisk together the sugar, butter and the egg yolks until the mixture is a smooth paste. Add the heavy cream little by little. In a separate bowl, stir together the almonds, flour and salt, add this to the egg yolk mixture and whisk until well blended. In a very clean bowl, whip the egg whites until stiff and gently fold them into the almond mixture. Divide evenly among your ramekins (make sure to fill them only 3/4 of the way up) and place 3-4 grape halves on top of the batter. Bake for about 25-30 minutes. Top with the pan seared green grapes.

Prepare the pan seared grapes:
In a large skillet melt the butter over medium high heat. Add the grapes and sear them for about 5 minutes or until they just start to soften. Deglaze the pan with the honey and remove from the heat.

Raspberry And Vanilla Dobos Torte With The Daring Bakers

Summer Dobos Torte


I realized as I was starting to write down the recipe for this post that it was actually my 550th post. Wow…That made me a little proud and left me slightly amazed at the same time! I think I even said "oh la vache!" (holy cow!). That’s a whole lot of stories, words, laughs, tears and just as much sugar, butter, flour and eggs! What could be more fitting to celebrate post #550 than a Daring Bakers Challenge? A very sweet and very rich one: a Dobos Torte.

I wrote last time that I hadn’t had an ounce of craving for chocolate lately and when I set out to make this challenge, things turned out just about the same. I looked at the recipe and could not chase the images of sweet sugared berries floating in my head. Or was it sugar made saber equipped raspberries fighting off little chocolate critters? Hmmmm…Still, not an ounce of chocolate was calling my name yet. Too hot, too humid and a fridge full of raspberries thanks to my mother – in – law who always buys for 8 when there are just the 2 of them.

Spatulating...


A Dobos Torte is traditionally a rich layer sponge cake layered with chocolate buttercream and topped with caramel pieces. I respected all the components of the challenge while changing things around a bit for a few reasons: the season, the plentitude of raspberries and mascarpone I had (mother – in – law again) and the weather.

I baked the sponge layers in a sheet pan, cut out disks in the cake to form several 3-inch cakes in dessert rings. I layered the disks with a super light (but rich) mascarpone mousse and fresh raspberries. For the buttercream, I kept a similar method as the one given by the hostesses and made vanilla bean Swiss meringue buttercream where the egg whites are heated on the stove prior to being whipped. On a side note, the specks you notice on the cakes are neither caused by a problem with your vision or your computer screen. It’s not dirt either as my 5 year-old neighbor thought earlier. It’s the pure goodness of a vanilla bean.

Summer Dobos Torte


I thought about that caramel topping long and hard and knew it was just not going to happen as it was written given our heat and humidity. I made pulled sugar ribbons because I could make just what I needed for the cake before they’d disintegrate in sugar puddles. Going back on previous posts, I realized there had been bubble caramel, caramel circles, caramel strands, caramel corkscrews, caramel window panes, caramel plates but never good old pulled sugar. Ah! No more! Here it is!

Before you say you will never ever do it because it’s caramel-and-oh-my-god-it’s-just-too-hard-because-it’s-caramel let me tell you why you could make it tomorrow and neither glue your entire kitchen nor burn all your pots and pans trying to get it to "the proper shade of amber". First, there is a high enough ratio of water to sugar for the liquid not to turn to caramel before you reach the desired temperature for pulled sugar. Then, your mission is NOT to let it turn color. You boil, add coloring or not, take it to a certain temperature, pour it off, let it cool a bit and start playing.

Summer Dobos Torte


See? One more cool pastry thing to try one quiet evening. Do not fear the sugar!

We loved this version and I have already bookmarked the original one given by our hostesses to make this Fall and Winter. Thank you ladies for hosting and to Lisa and Ivonne for being such incredible Daring Bakers Founders! There are plenty more Dobos Torte to be seen from around the globe here.

The August 2009 Daring Bakers' challenge was hosted by Angela of A Spoonful
of Sugar
and Lorraine of Not Quite Nigella. They chose the spectacular Dobos
Torte based on a recipe from Rick Rodgers' cookbook Kaffeehaus: Exquisite
Desserts from the Classic Caffés of Vienna, Budapest, and Prague.

Summer Dobos Torte

One year ago: Chocolate Eclairs with the Daring Bakers
Raspberry And Vanilla Dobos Torte:

Makes eight 3 – inch cakes

For the sponge cake layers
6 large eggs, separated, at room temperature
1 1/3 cups (162g) confectioner’s (icing) sugar, divided
1 teaspoon (5ml) vanilla extract
1 cup plus 2 tablespoons (112g) sifted cake flour
pinch of salt

For the mascarpone mousse:
For the mousse:
3 egg yolks
1/2 tablespoon powdered gelatin
1/2 cup (125ml) honey
3 oz (90gr) mascarpone, at room temperature
1 cup (250ml) heavy cream

For the buttercream:
1 cup (200gr) sugar
4 large egg whites
3 sticks (340gr) unsalted butter, at room temperature

Prepare the cake layers:
Position the racks in the top and centre thirds of the oven and heat to 400F (200C). Line a half sheet pan with parchment paper and spray lightly with cooking spray. Set aside.
Beat the egg yolks, 2/3 cup (81g) of the confectioner’s (icing) sugar, and the vanilla in a medium bowl with a mixer on high speed until the mixture is thick, pale yellow and forms a thick ribbon when the beaters are lifted a few inches above the batter, about 3 minutes. (You can do this step with a balloon whisk if you don’t have a mixer). In another bowl, using clean beaters, beat the egg whites until soft peaks form. Gradually beat in the remaining 2/3 cup (81g) of confectioner’s (icing)sugar until the whites form stiff, shiny peaks. Using a large rubber spatula, stir about 1/4 of the beaten whites into the egg yolk mixture, then fold in the remainder, leaving a few wisps of white visible. Combine the flour and salt. Sift half the flour over the eggs, and fold in; repeat with the remaining flour. Pour the batter into the prepared half sheet pan and bake for 8 to 10 minutes or until slightly brown.

Prepare the mousse:
Whisk the egg yolks to break them up in the bowl of stand mixer (or with hand held beaters).
Sprinkle the gelatin over 2 Tb of cold water in a small cup and let it bloom.
In a heavy saucepan set over medium high heat, bring the honey to a boil and cook until it reaches 240F. Remove the pan from the stove and pour it carefully into a cup with a spout (easier to pour) .
Dissolve the gelatin in the microwave for 10 seconds, or in a bowl set over a pan of simmering water.
While still whipping the yolks, slowly pour in the hot honey, being careful to temper them and not cook them. Pour the gelatin over the egg/honey and whip together for a few seconds and add the mascarpone, one tablespoon at a time. Whip until cooled to room temperature and has tripled in volume
In another bowl, whip the cream to soft peaks or if you are using a stand mixer, pour the mousse into a large bowl and clean the mixer bowl thoroughly, or use another mixer bowl if you have one. Gently fold the whipped cream into the mousse trying to deflate the whole thing as little as possible. Use immediately.

Prepare the buttercream:
Place the sugar and egg whites in a large heatproof bowl over a saucepan of simmering water and whisk constantly, keeping the mixture over the heat, until it feels hot to the touch, about 3 minutes. The sugar should be dissolved, and the mixture will look like marshmallow cream (temperature should be about 235-238F). Pour the mixture into the bowl of a stand mixer fitted with the whisk attachment and beat the meringue on medium speed until it cools and forms a thick shiny meringue, about 5 minutes. Switch to the paddle attachment and add the butter, one tablespoon at a time, beating until smooth. Once all the butter is in, beat in the buttercream on medium-high speed until it is thick and very smooth, 6-8 minutes. Proceed per recipe or store for up to a week in the fridge or 3 months (well wrapped in the freezer).

Assemble the cakes: like eight cake rings with rhodoid or plastic protector sleeves cut to fit (yes, like the ones in the office)and place them on a baking sheet. Place a cake round at the bottom, place a layer of raspberries on the outside, fill with mousse to the top of the raspberries, top with one round of cake, more mousse and a final round of cake. Place in the refrigerator and let set 2 hours or overnight. When the mousse is set, cover with the buttercream and refrigerate.

For the pulled sugar ribbons:
1 1/4 cup (250gr) sugar
100 ml water
1 teaspoon lemon juice
5-8 drops red food coloring

In a heavy saucepan set over high heat, bring the sugar and water to a boil (do not let it turn into caramel). Once it is boiling, add the lemon juice and coloring. Bring the syrup to 298F on a candy thermometer. Immediately pour the caramel onto a silicone mat. You might want to wear some pastry gloves at this point because the caramel is extremely hot. Little tip: I have found myself with not one glove in the tool box so I used a new pair of dishwashing gloves instead.
Let it harden until it is pliable and carefully start folding the mat back and forth onto itself to work the sugar mass a bit. Take small pieces of the mass and start pulling, twirling or even make rose petals and other flowers with it. Beware that pulled sugar cools as fast as it gets hot so if it becomes harder and harder to work with you have different options available. If you have a heat lamp, place the pulled sugar underneath until pliable again. If you are like me (sans heat lamp) you can either place the pulled sugar on the silicone mat on a baking sheet directly on the stove on low heat until pliable or in a low heated oven. Be careful and watch it carefully: it can turn into "real" caramel very fast this way so do not walk away while you reheat.

Peach Mousse & Strawberry Verrines

Peach Mousse - Strawberry Jelly


We’ve been drowning under peaches over here. Fresh, juicy local peaches. They were good starting in June but they are just tremendous right now. They got plenty more rain and sunshine to get even better. If that was even possible. Bu they did. The stalls at the farmers' market bear the same jovial velvet dresses of oranges, yellows and terra cotta. Makes me long for the fresh markets of Provence where I grew up. So colorful, so hot, so happy.

Thursday seemed to start with a peach sessions: roasting, jamming, cutting and peeling a bunch to freeze and enjoy during Fall. Lunch was the perfect time to make plans about their use. When dinner came, we enjoyed sweet concoctions like these Peach Mousse & Strawberry Verrines.

Friday started the same way but ended up with a batch of peach jam, peach pate de fruit and matcha macarons for wedding favors. By Saturday morning, first thing I twittered was "peach pate de fruit and matcha macarons I love you". I am telling you…summer makes my head twirl and spin. Bill did hide both from me or there wouldn’t have been any left for the wedding at the rate I was going. Sorry….

Strawberries


He’s been playing the same trick with the berries, the peaches, the tomatoes, and these verrines. I made six before he left to play music and when he came back there were 4.5 gone. Ooops! I just can’t get enough of the bounties of summer. I admit I have had such little desire for chocolate this summer that I have decided that no, nothing was wrong with me and that yes, I will enjoy these fine summer rituals until the end.

It’s still too hot to lose myself in chocolate yet. Well, that’s not entirely true. My friend Sarah came for dinner one evening with a pan of her famous brownies and I happily devoured my share (and that of my imaginary friend I hear!). For us lately it’s been fruit all the time, all the way. With peaches as good as these, it’d be a shame not to.

I have no idea how I came up with these verrines. I just started to think about the best way to use peaches in their "natural" state, as unaltered as possible. I know I am not the only one to think that with fruits this good it’d be a shame to start messing around too much. Yep, Jen’s crisp is next on the list.

Baking Feels Just Like Velvet


The base of the verrine is simply some peach puree with lime juice, sugar and a bit of gelatin to help support the peach mousse. I started thinking about doing an Italian meringue based mousse but I was kneed deep in meringue for macarons and a bit tired of washing dishes. Instead, I opted for a simpler fruit mousse base, whipped cream and that worked perfectly as the peaches were already full of natural sugar. The top was leaving me pondering and thinking until I spotted a bag of strawberries I had frozen last May when they were in full season. Score!

And then it was like a little piece of white sand on crowded beach. Nothing else mattered…

Peach Mousse - Strawberry Jelly


Peach Mousse Verrines:

Serves 4

For the peach puree:
1 teaspoon powdered gelatin
1 tablespoon cold water
1 cup (200gr) peaches, peeled and pitted diced small
juice and zest of a lime
2 tablespoons (25gr) sugar

For the peach mousse:
1/2 tablespoon gelatin
2 tablespoons water
3/4 cup (130gr) peaches, peeled and pitted, diced small
2 tablespoons (25gr) sugar
1/2 cup (125ml) heavy cream, cold

For the strawberry topping:
1/2 teaspoon gelatin
2 teaspoons water
3/4 cup (115gr) fresh strawberries, halved
1 tablespoon of sugar (or to taste)
splash of lemon juice

Prepare the peach puree layer:
Sprinkle the gelatin over the water and reserve. Process the peach dices with the lime juice and zest and the sugar until completely processed. Heat the mixture in a medium saucepan set over medium heat until it starts to bubble. Add the gelatin and stir until it is completely melted. Remove from the heat and let cool to room temperature. Divide evenly among 4 glasses. Refrigerate until set.

Prepare the peach mousse:

Sprinkle the gelatin over the water and reserve. In the bowl of a food processor, puree the peaches until completely smooth. Place the puree and the sugar in a medium saucepan set over medium heat and heat until it bubbles. Add the gelatin and stir until completely dissolved. Let cool to room temperature. When the mixture starts to set, whip the heavy cream to soft peaks and gently fold it in the fruit mixture. Divide evenly among the glasses. Refrigerate until set.

Prepare the strawberry puree:

Sprinkle the gelatin over the water and reserve. In the bowl of a food processor puree the strawberries with the sugar and splash of lemon juice until completely smooth. Heat that mixture in a small pan set over medium high heat and cook until it bubbles. Stir in the gelatin and stir until it dissolves. Remove from the heat and let cool to room temperature. Divide it on top of the peach mousse and refrigerate until set.

Plum Watermelon Soup With Lemon Balm Ice Cream and Toasted Blueberry Pound Cake

Plum Watermelon Soup With Lemon Balm Ice Cream and Toasted Blueberry Pound Cake


I must start this post with shout out to my dad that has nothing to do with the recipe and story below. A couple of weeks ago, my awesome Papa took pity of my completely DIY portfolio page created a few months back and asked if I could please shop around for a professional hosting site and he’d help. After pouring over countless forums, domains, templates, I decided to go with Photobiz (and no they are not paying me to say how great they are). They’re affordable and super pro. Once I had uploaded my pictures, the revamped portfolio was up and running almost overnight! Thanks dad!

It never fails. Every summer here, I want to be there. I know I have been in South Carolina long enough to handle the scorching summers but I really think that unless you are born and bred here like Bill, there is a "heat acceptance gene" missing in most of us. Actually, the humidity is the bigger problem. It wilts you the minute you step out the door and it looks like I do not have the "A/C acceptance" gene either.

What to do to keep fresh and refreshed? Eat a serving or two of this Plum and Watermelon Soup with a scoop of Lemon Balm Ice Cream and a couple slices of Toasted Blueberry Pound Cake. I am a soup kind of gal. Hot, cold, room temperature…I just love soups but I admit I would have never tried to make this if it had not been for Asheville, and our dinner at Zambra.

Watermelon


We were full to the brim and when dessert arrived we all thought "I can’t anymore". Then came chef Adam’s rhubarb – watermelon soup and basil ice cream. The only thing heard at the table was the rattling of our spoon against the bowls. What I could not get enough of was the side of toasted black sesame pound cake he served the soup with. What a brilliant addition! I put it all in the dessert memory bank hoping to make it for us one hot summer day.

This day came with Bill’s birthday and I figured it would be a perfect ending to his "birthday dessert feast" of lemon donuts, goat cheese tarts, chocolate covered marshmallows and cupcakes. I took full advantage of all the wonderful summer produce around here and used watermelon and tart plums (to mimic the tartness of the rhubarb), lemon balm from our garden to infuse a simple vanilla bean ice cream. Bill’s mom often goes blueberry picking in the wee hours of the morning and loves to give us a few buckets full. They were put to good use in a pound cake that Bill loves all year round.

When it gets passed 95F, I have no desire to turn the oven on and if I must, you can bet it better be quick and for something as good as blueberry pound cake or apricot financiers! But I could not resist the idea of thin slices of pound cake slowly toasted in the oven to be served with the soup. You don’t even need to make soup to fall in love with the idea or the taste. It’s just plain fun! We had leftover soup after the party and we had the remainder as cold shots one hot afternoon. Perfect!

Toasted Blueberry Pound Cake - Plums


One year ago: The Transatlantic – Chocolate and Salted Butter Caramel
Plum – Watermelon Soup With Lemon Balm Ice Cream And Toasted Blueberry Pound Cake:

For the soup:
1 cup (150gr) watermelon, seeded and cut into 1-inch pieces
1 cup ripe plums (160gr) (about 3-4 depending on size), cut into 1-inch pieces
zest and juice of a lemon (about 3 tablespoons)
2 tablespoons (25gr) sugar

For the ice cream:
4 egg yolks
1 cup (100gr) + 2 tablespoons (25gr) sugar
1 cup (250ml) whole milk
1 cup (250ml) heavy cream
1/2 vanilla bean, split open and seeded
1/3 cup chopped fresh lemon balm (can use lemon verbena, basil, mint, etc..)

For the cake:
1 stick (113gr) unsalted butter, at room temperature
1 cup (120gr) powdered sugar, unsifted
3 eggs
1 1/4 cup (155gr) flour
1 tsp baking powder
pinch of salt
1/4 cup (60ml) buttermilk (or whole milk)
1 cup (145gr) blueberries

Prepare the soup:
Place all the ingredients in the bowl of a food processor and puree until very smooth. Refrigerate until very cold. (how hard was that?!)

Prepare the ice cream:
In a large bowl, whisk the egg yolks and one cup of sugar until pale and thick. In a saucepan set over medium heat, bring the milk, heavy cream, vanilla bean and lemon balm to a simmer, without letting it come to a full boil. Slowly pour the hot cream over the egg yolks mixture while whisking to temper the egg yolks. Pour the whole mixture back into the saucepan and cook over low heat, stirring constantly, until the cream coats the back of spoon. At this point you have made a custard sauce, also known as "creme anglaise". Let cool completely and refrigerate until cold.
Once the custard is cold, strain the vanilla bean and lemon balm and process the base according to your ice cream maker manufacturer’s instructions.

Prepare the cake:
Preheat the oven to 350F and position a rack in the center. Slightly coat a loaf pan with cooking spray, place it on a baking sheet and set aside.
In the bowl of a mixer fitted with the paddle attachment, mix the butter and powdered sugar on low speed until creamy, about 2 minutes. On medium speed, add the eggs, one at a time and beating well after each addition. Reduce the speed to low and add the flour, baking powder and salt. Add the buttermilk and mix well until combined. Turn the mixer off and fold in the blueberries by hand. Pour the batter into the prepared pan and bake for 30 to 45 minutes (tend with foil midway if the top seems to brown faster than the cakes bake). Let cool completely and cut very thin slices of cake. Place them on a parchment paper line baking sheet and toast in the oven until golden brown.

Apricot And Lavender Brown Butter Tea Cakes

Apricot Lavender Brown Butter Tea Cakes


It’s always a bit of a gamble with apricots. Their intoxicating sweet floral fragrance. Their soft velvet skin. I’m tempted. They look good, smell good and alas they have little to make me swoon. I did get lucky last week when I picked some right off a friend’s tree on the island and made these Apricot and Lavender Brown Butter Tea Cakes. They sent me right back to our garden in Provence. Right back to all the great memories of my brother Thierry.

One year ago I wrote this. Nine years have gone by since I have told him anything. I’d rather write about him. Peace finds its way into my soul a lot more as the years go by. Each time speaking a little louder about the good times. If I listen carefully, each year I remember another story. I usually end up gazing outside the window exclaiming "I can’t believe you made me do that!" And I smile.

Baking With Lavender


Calm and quiet. That’s how I plan to spend the day. A little bit like in the picture above. Life. I am in it with a good laugh and I am with it in a good cry. Today I know I am going to have both although the scale is tipping in favor of remembering good times.

One afternoon we were in the front yard, he made me believe that eating apricots before they were ripe was the best thing in the world. And I believed him. I climbed up the tree with my best friend Natalie and we sat, perched up there picking out the greenest apricots we could find. I bet you can imagine what happened next. Within a few hours we were both in bed with a stomach ache.

I know he felt as bad as I did that evening but years later I still laugh outloud everytime I see apricots. I did just that while I was picking them off the tree the other day. Sighing and smiling at the same time. Mostly smiling. I ate quite many right on the spot. They were fully ripe this time! I brought plenty home and decided to make us some financiers and a good cup of tea. Bill and I sat on the porch and he patiently listened to a couple more memories I wanted to share of Thierry.

Apricots


Financiers are essentially brown butter tea cakes (and vice versa) with the addition of ground nuts, flour, sugar and egg whites. I wanted to share some with the friend with the apricot tree as a thank you for an afternoon well spent and since she is celiac, I replaced the cake flour with rice flour to make them gluten free and added some sliced apricots on top before baking. I added some lavender to infuse the brown butter with for the simple reason that apricot reminds me of home, Provence, and lavender fields.

I ended up making three batches of those the same evening. One for us right then (gourmands!), one for her and one more for us and the neighbors later. The soft smell of lavender, the nuttiness coming from the brown butter….It was enough to make us stare at the oven, impatient for the batch to be ready! Biting into the ripe slighly baked apricots was the ultimate reward. Bliss. Calm and quiet.

Apricot Lavender Brown Butter Tea Cakes


Apricot and Lavender Brown Butter Tea Cakes
Makes 12

1 stick (115g) unsalted butter
1 tablespoon edible lavender
1 cup (100gr) unsifted powdered sugar
1/2 cup (60gr) ground almonds
1/4 cup (30gr) rice flour
pinch of salt
4 large egg whites
6 apricots, halved and thinly sliced

Preheat your oven to 375F and position a rack in the center. Lightly the inside of 12 financiers molds or muffin tins with cooking spray and place them on a baking sheet. Set aside.
In a medium saucepan set over medium high heat, melt the butter until it turns to a rich hazelnut brown color. Remove from the heat, add the lavender and let it cool for 5 minutes. Strain and reserve.
Mix together the powdered sugar, flour, ground almonds and salt in the bowl of a stand mixer fitted with the paddle attachment. Add the egg whites and mix on low speed until all the ingredients are coming together. Add the brown butter, increase the speed to medium and beat until smooth.
Divide the batter among your molds, add apricot slices on top and bake for about 15 minutes or until golden brown. Let cool, if you can, before eating.

Things Sure Look Different Around Here!

Apricots


Life is like a basket of apricots…you never know what you are going to get.

For the past year, I felt as though I kept being handed the same rotten box of apricots when I signed up with a designer to have my blog redesigned and kept being shuffled from promises to promises and nothing to show for them. Oh yes, a larger hole in my pocket book, that’s about it.

But then, thanks to the magic of Twitter and my good friend Garrett showing a fresh new and attractive template, I found Ellie. And I felt like the sun was finally shining again. Professional, smart, witty and hard working, Ellie operates Rainy Day Templates like a Master chef his/her kitchen. She started working on my design shortly after our initial contact and working together via email we had this site redesigned and re-outfitted in three days. Three days! And look how purty she made it look!

All kudos go to her because beside choosing a design and adjusting a few things here and there. I just sat on the other end of her screen going "can we do that instead?" "can you move this up?" "can you expand this?" And trust me, I hate to ask. Love the color scheme she picked instead of the original one. Her instincts are right on. A pro. I had tweaked my previous template beyond recognition, but could never get exactly where I wanted on my own. I wish I could personally deliver some of the gluten free apricot financiers I made over the weekend (recipes and pictures soon!) to thank her.

Humor me for a second to point out really cool features:
The welcome bar on the right hand side will be used to highlight everything and anything pertaining to food and blogging that I may come across. Recipes, bloggers, articles, events, etc…
And look at those pretty social buttons! From Google to Twitter…Woot!! Oh! and that search bar…believe it or not *I* find it useful when I write a post and try to reference another!!
One very cool detail she added was the bakers' twine detail around the header and at the bottom of every post. I know, it’s a girl thing, but it’s nice an subtle. Love it!

It’s always a bit nerve wracking to change layouts but I hope you like the space and find it as cozy as I do. Thanks for indulging me in this shout out to her design and work. After one year of rotten apricots, it feels special.

Ellie received some bad news over the weekend and I wish to send her a special hug. This girl is a gem, both personally and professionally.

For My Birthday Girls: A Raspberry Rose Vanilla Cream Cake

Raspberry Rose Vanilla Birthday Cake


Two people I love are having a birthday this week and as much as I wanted to make something special for each of them, work decided to get in the way big time. Not complaining, just saying, and that’s why I am so late updating this week. Thus, I find myself asking them to share this Raspberry Rose Vanilla Cream Cake. I know they won’t mind because they already share so much. One is my wonderful mother and the other one is my (now) three year-old beautiful niece. Joyeux Anniversaire les filles!

It bugs me to say that I don’t see enough of my niece but a trip to France has not been quite feasible in the past couple of years. I do get to hear a lot about her and her personality through my mom’s reports and pictures my brother sends me. Her sister is just like me and she seems to be more like her dad. Oy! If they keep the ressemblance going, teenage years are going to suck for him big time because we were anything but pleasant to each other!!

Raspberry Rose Vanilla Birthday Cake


While I did make a batch of saffron macarons for my mother, (which we devoured for her, eheheh!) I wanted to find something they could both enjoy, albeit virtually. Not sure little C. is ready for saffron yet, although given how talented a cook my brother is, I would not be surprised!

My mother makes me think of apricots and lavender and she is as soft and delicious as a raspberry mousse tarts (Yes, my mom is delicious). My baby niece on the other hand makes me think of cream and vanilla. Soft as a rose too. A Raspberry Rose and Vanilla Bavarian Cream Cake!

The cake is composed of almond dacquoise slightly enhanced with a bit of rose water and layered with layers of jelled raspberry puree and vanilla bean scented bavarian cream. I added a simple lemon glaze on top to bring forth all the flavors. While it may look complicated and time consuming it is not, I assure you. I made the dacquoise and the raspberry layers one evening and the bavarian cream and assembly the next day. The only difficult part would be to resist the bavarian cream before it actually makes it into the cake!

Raspberry Rose Vanilla Birthday Cake


A year ago: Cashew Gateau With Coffee Cardamom Mousse

Raspberry Rose Vanilla Bavarian Cream Cake:

Serves 8 to 10


For the almond rose dacquoise:

1 1 /2 cups (160gr) almonds
1 cup (100gr) powdered sugar, unsifted
1/4 cup (30gr) all-purpose flour
6 egg whites
1/2 cup (100gr) granulated sugar
2 teaspoons rose water

For the raspberry layers:
2 tablespoons powdered gelatin
1/4 cup cold water
4 cups frozen raspberries
1/2 cup sugar

For the vanilla bavarian cream:
8 egg yolks
1/2 cup (100 gr) sugar
2 cups (500 ml) whole milk
1 vanilla bean
2 tablespoons powdered gelatin, sprinkled over 1/4 cup water
2 cups (500ml) heavy cream

Lemon glaze: (prepare once the cake is set)
1/4 cup (60ml) lemon juice
2 tablespoons (15gr) water
2 tablespoons (25gr) sugar
1 teaspoon powdered gelatin sprinkled over 2 teaspoons water

Prepare the dacquoise:

Preheat the oven to 350F and position a rack in the oven.
In a food processor, pulse the almonds and the powdered sugar together until finely ground. Sift the flour over the mix and reserve. In a stand mixer fitted with the whisk attachment, beat the eggs whites on medium speed until foamy. Gradually add the sugar while whipping the egg whites on high speed until stiff. Add the almond-flour mixture to the egg whites and fold gently with a spatula. Halfway through the process, add the rose water and continue to fold until smooth. Try to keep as much air as possible.
Line two quarter sheet pans with parchment paper, coast slightly with cooking spray and divide the batter among both pans and bake for 12 to 15 minutes, or until golden. Let cool. Inver the pans onto a cutting board and slowly peel off the parchment paper.

Prepare the raspberry layers:
Line two quarter sheet pans with parchment paper.
Sprinkle the gelatin over the cold water and reserve.
In a large saucepan set over medium low heat, bring the raspberrries and sugar to a simmer and cook until the berries are completely thawed and reduced to a puree (smash them down with a spoon if necessary) and the sugar is dissolved. Remove from the heat and add the gelatin, stirring until it completely dissoved in the raspberries. Pour over the prepared sheet pans. Let cool to room temperature and then freeze until firm.

Prepare the Bavarian cream:
In a large bowl, whisk the egg yolks with the sugar until very pale. In the meantime, in a large saucepan set over medium heat, bring the milk and the vanilla bean (split open and scraped over the milk) to a boil. Slowly pour the milk over the yolks, whisking constantly. Pour the mixture back into the saucepan over medium low heat and cook until the cream coats the back of a spoon (as if making creme anglaise). Remove the vanilla bean. Add the softened gelatin and stir until melted completely into the cream. Let cool to room temperature.
Whip the heavy cream to soft peaks and fold it into the cooled cream base. Use immediately.

Prepare the lemon glaze:
In a small saucepan set over medium high heat, bring the lemon juice, water and sugar to a simmer and cook until the sugar is dissolved and the liquid is hot. Remove from the heat and add the softened gelatin. Stir until it is completely dissolved. Let cool to room temperature.

To assemble:
Line a 8×8 or 9×9-inch sqaure baking pan with enough plastic wrap to have about 2 inches overhanging on all sides (easier to pick up to unmold once the cake is set). By all means, use a square frame if you have one instead and build your cake directly in the frame set on a sheet pan.
Cut one of the dacquoise to fit inside the cake pan and place it at the bottom. Remove the raspberry jelly from the freezer and cut a piece to fit inside the cake pan also. Place it on top of the dacquoise layer. Pour a little less than half of the bavarian cream on top of the raspberry layer (you want to keep a little bavarian for the very top layer). Repeat with a layer of dacquoise, a layer of raspberry jelly, a little less than the other half of the bavarian cream. Use the remaining cake cut outs to form a final layer of dacquoise. Smooth the remaining bavarian cream in one thin layer on top. Refrigerate the cake until completely set, about 2 to 4 hours or overnight. Once it is firm, spread the lemon glaze on top. Place the cake back in the fridge and let it set for about 30 minutes. Keep refrigerated until ready to serve. To plate, remove the cake from the pan by lifting all four corners of the plastic wrap and trim the edges.

Goat Cheese And Fresh Berries Tarts

Fresh Berries Tartelettes


Bill says that he is over the whole "birthday week" idea and that he’s been feeling that way since his last 30th birthday. Good thing I am not because as it gives me the opportunity to post about these Goat Cheese and Berries Tarts that were part of his dessert table a couple of weeks ago. Actually, I made these on three separate occasions prior to his birthday. Each time they disappeared as fast as the donuts.

They are good. They are pretty. They are a breeze to make. Simple pleasure. Sexy too. Indeed, as soon as I put these on the table the other day, our dear friend T. exclaimed "sexy tarts for SPOC!" And this is where I have to backtrack a little and explained why the entire room bursted out laughing, except Bill.

A couple of years ago, my dear husband was voted "SPOC", short for Sexiest Professor On Campus, by the College newspaper. (makes me wonder if the writers of Star Trek had something else in mind). That evening, Bill walked through the door furiously waving the paper in the air, red as a carp and exclaiming "I am SPOC! I am SPOC! I am ruined!"

Berries Before The Rain


I picked up the paper from his hand and started reading, half smiling, half laughing the whole way through. Actually, I thought it was pretty darn cool! I was married to the Sexiest Professor On Campus! Hello?!! Mine is what younger women refer to as "seasoned gentleman", you see. Told him I totally agreed with their hotness rating and that it was just a light topic to read during exams. No one said it was international news they were writing about. I could not figure why he was so upset.

"People voted for my looks and not my academic capabilities. How will I ever be taken seriously by my peers now? Looks over content! That’s terrible!" (notice the drama bit here). He went on and on like that for a couple of minutes until I broke his rant by saying "Is that all? You don’t find it demeaning? You don’t feel cheated, cheap?" He looked at me completely surprised by my last comment, adding "well, geez! Thanks! You sure know how to make me feel better!"

I called him over to the kitchen, handed him a slice of cake and said "Dude! First, by looking at the other professors in the running, they would have been out of their minds not to pick you! Second, it’s all meant in good fun. Third, well, shiz Bill, you are sexy so shut up and eat! Dang you make it really hard to pay you a compliment!"

Goat Cheese And Berries Tarts


I thought we were done with this mini crisis (Oy! My girlfriends' seem easy all of a sudden!) until his bestfriend T. put his hands on a copy of the paper, circled SPOC in red, framed the article and presented it to Bill for his 50th birthday that same week. We knew it was meant as a joke but I could hear Bill sigh as he tore open the wrapping paper. I quickly brought over a piece of cake, said "shushh and eat up! You sexy thing" and made a popping "SPOC" sound with my hand and my mouth. He did not find funny. At all.

To this day, whether we want to brush his ego or push his button, depending on the mood and occasion, we all insert SPOC anywhere we can in the conversation and make popping SPOC sounds whenever we can throughout the day. And most often we like to add "shushh and eat up!" And you know what, even after a gazillion desserts, Bill still retains his sexy figure. Men…Not fair!

One thing he asks me to make about every other week is these tarts, filled with a mild goat cheese mousse and topped with berries during the Spring and Summer or caramelized apple during the winter (they would be great with roasted quince too, come to think of it). We love goat cheese and berries together, especially goat cheese ice cream and cherries so we tend to use medium bodied cheese but if you are hesitant regarding the final taste, try with a mild one first. I have tried all sorts of different pastry doughs for these but I always go back to a short crust. It tends to stay crisper longer while filled with moist cheese or mousses.

Goat Cheese And Berries Tarts


Two years ago: Marbled Ricotta Cheesecake Brownies

Goat Cheese And Berries Tarts.

Makes 4

For the pate sablee:
2 tablespoons (20gr) slivered almonds
1/4 cup (50gr) cup sugar, divided
1/2 stick (56.5gr) unsalted butter, at room temperature
pinch of salt
3/4 cup (90gr) all-purpose flour
1 egg yolk
1/2 teaspoon vanilla extract

For the goat cheese mousse:
200 ml heavy cream, cold
4 oz (120gr) goat cheese, at room temperature
2 tablespoons (25gr) to 1/4 cup (50gr) sugar, depending on your preference
juice and zest of half a lemon

2 cups assorted berries such as raspberries, red currants, blueberries, etc…

Prepare the pate sablee:
Preheat oven to 350F.
Place almonds and 2 tablespoons (25gr) sugar in a food processor. Pulse until the nuts are finely ground. In bowl of electric mixer fitted with paddle attachment, cream butter, vanilla bean seeds, ground nuts and salt on medium speed until well-combined. Slowly add remaining 2 tablespoons of sugar and flour and mix well. Add the egg yolk and vanilla extract and mix until incorporated. Shape the dough into a ball and flatten into a disc. Wrap with plastic wrap and refrigerate for two hours or overnight.
Place the dough in between two sheets of plastic wrap or parchment paper and roll it out to about 1/8-inch thick. Cut out four 6- inch rounds and fit them inside four 4- inch tartlet rings, patting the dough in with your fingertips if it breaks on you as you transfer the rounds. Gather the scraps and set aside.
Prick the dough with a fork and refrigerate 30 minutes.
Preheat the oven to 350F. Place a piece of parchment paper inside the tart shells, fill with beans or pie weights. Bake the shells for 12 to 15 minutes. Let cool completely on wire racks and remove the pie weights.

Prepare the goat cheese mousse:
In the bowl of a stand mixer fitted with the whisk attachment, whip the cream to medium stiff peaks and reserve it in the refrigerator while you prepare the mousse.
In a medium bowl, whisk together the goat cheese and sugar with a spatula (if the goat cheese is soft enough there is no need to put your mixer to use on that one). Add the lemon zest and juice and mix thoroughly until incorporated.
Carefully fold the reserved whipped cream into the goat cheese base by placing your spatula in the center of the bowl, scooping the bottom over the top. Give your bowl a 45 degree turn and repeat until the batter is smooth. Fill a pastry bag with the mousse and divide it evenly among all tart cooled tart shells.

Divide the berries evenly over the mousse and refrigerate the tarts until ready to serve.