
Jahresarchive: 2009

Asian Pear Frozen Yogurt

Asian Pear Frozen Yogurt


Before I tell you about this Asian Pear Frozen Yogurt, I want to thank everyone who stopped by to enter Ree’s cookbook giveaway. The woman is well loved, that’s for sure! My random number generator this time was my friend Tami with whom I went to the National Gingerbread House Competition™ and to be fair, I didn’t take into account the entries coming in past the deadline. Congratulations to Patricia in Texas, a., and Jelli Bean. Email me your snail mail addresses at mytartelette[at]gmail[dot]com and I’ll pass the info on to Ree.

I have been back from Asheville for a couple of days yet and I am not done processing pictures from the weekend. We did a lot, ate a lot and well, drank a lot too! Instead of throwing down a few comments and a few photos here and there, I want to make the competition, competitors and judges justice (Ha!) so that will be in an upcoming post. I was part of an amazing group of people who tackled each house one by one and evaluated every square each of every display, no tasting though. I think I behaved…

Fall

Fall-iage in Asheville, NC.

That part lasted from 9.30am until 4.30pm. Yep. Tami who was not on jury duty booked a nice and lengthy massage at the spa, (another kind of heaven!) and there was a brief moment I wished I was there with her but I had a serious task at hand. Gingerbread houses at The Grove Park Inn is serious business folks! As in every competition, some of my chosen picks did not win Grand Prize or first place in some categories but that’s ok, it’s part of the maths behind it all.

Driving the 250 miles to Asheville gave me my fix of gorgeous Fall colors and foliage. I did stop a couple of times along the way to take it all in. I called B. and yapped about the reds and the golds I was seeing while he was racking brown dried leaves in the yard under a hot sun and no wind. He asked if there was some Asian Pear Frozen Yogurt he could have afterwards and lucky for him, I had not completely eaten the batch I had made from Jaden’s cookbook!

Asian Pear Frozen Yogurt


Trust me, I am not kidding when I say I almost ate the entire batch. That frozen yogurt is seriously addicting. I was hoping B. would focus on all the other dishes I had prepared in anticipation of my weekend away but no, he had to ask about the frozen yogurt! My fro-yo, how dare he?! Eh, that’s alright, I was feeling bad he was stuck at home with work while I was gallivanting working hard with Tami in the mountains of North Carolina.

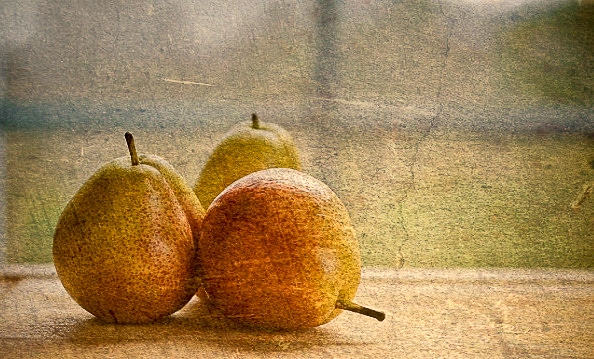
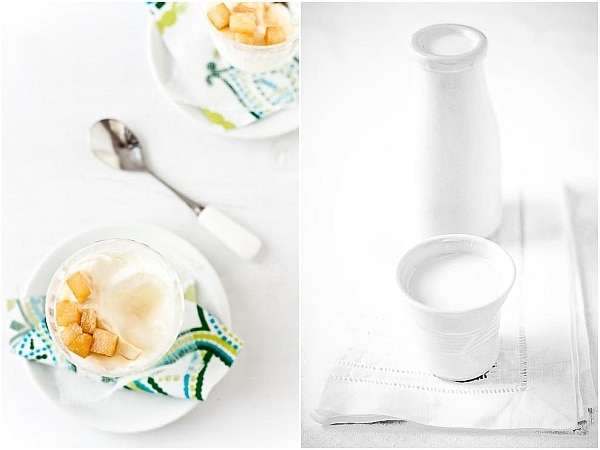
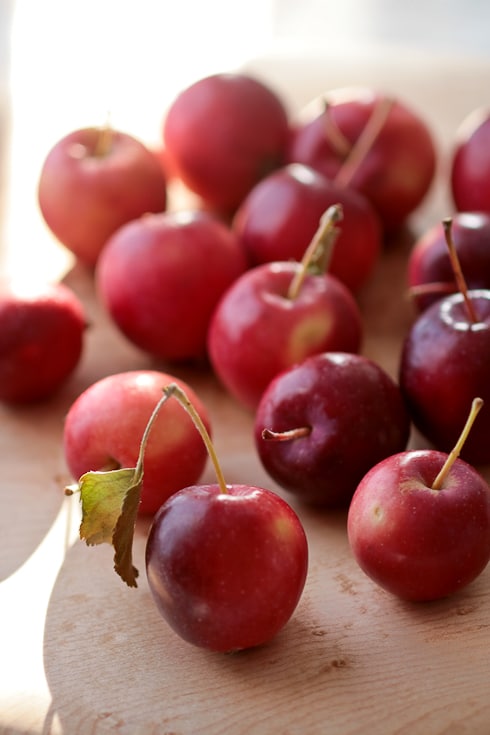
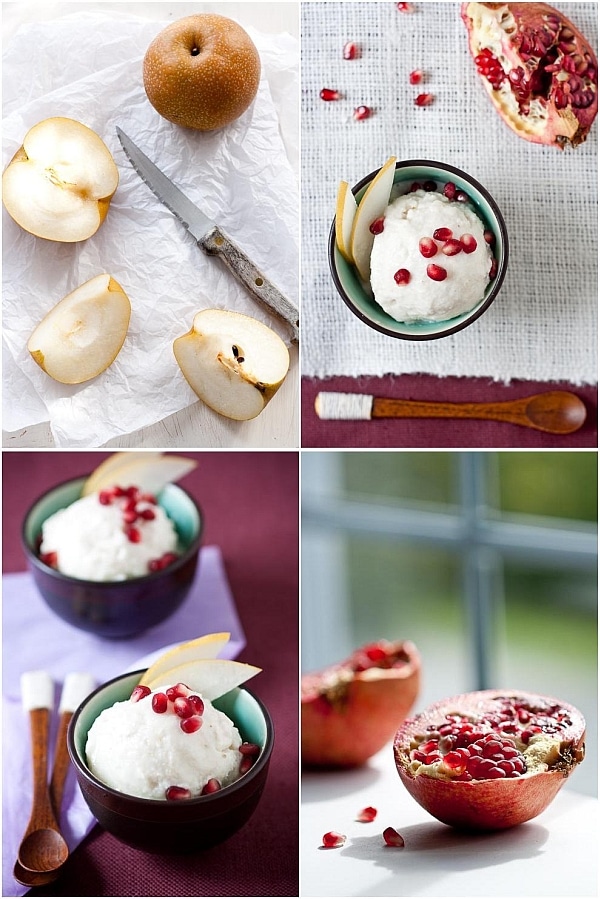
I discovered Asian peasr for the first time when I moved to the US where almost every week I would be faced with a new item, either typically Southern or completely exotic as was the case with these pears (as well as prickly pears, dragon fruit, jicama, okra, etc…). I was intrigued. It was juicy, firm, sweet but the flavor was completely unique. You can easily find your share of bland ones, but if you pick the small ones, they will be packed with flavor and juice.

Asian Pear Frozen Yogurt


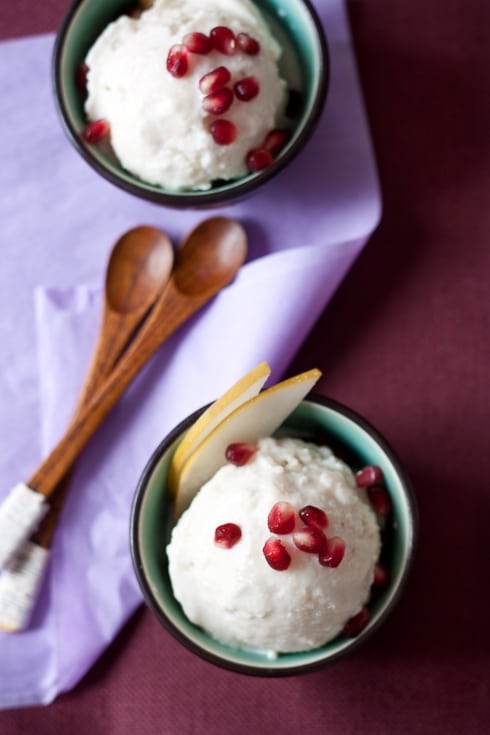
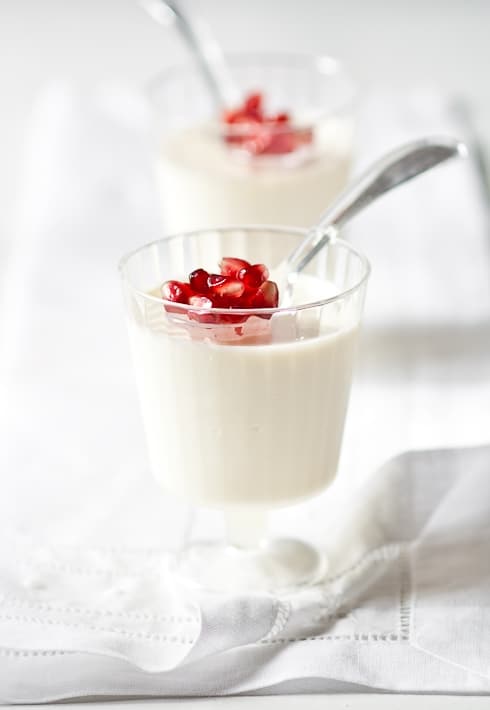
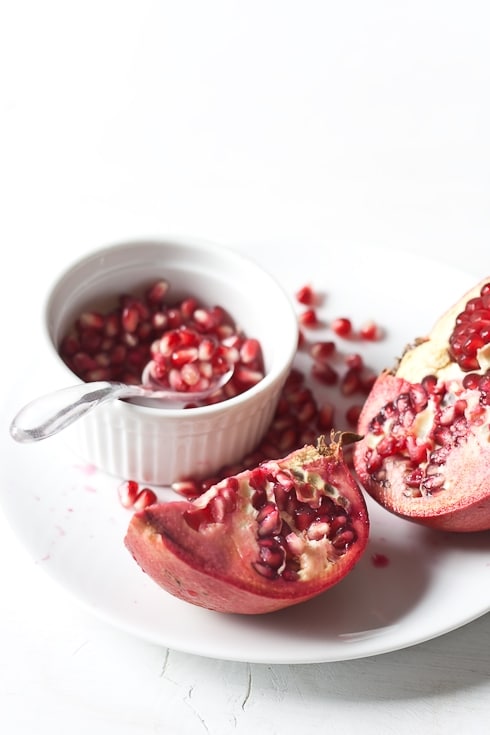
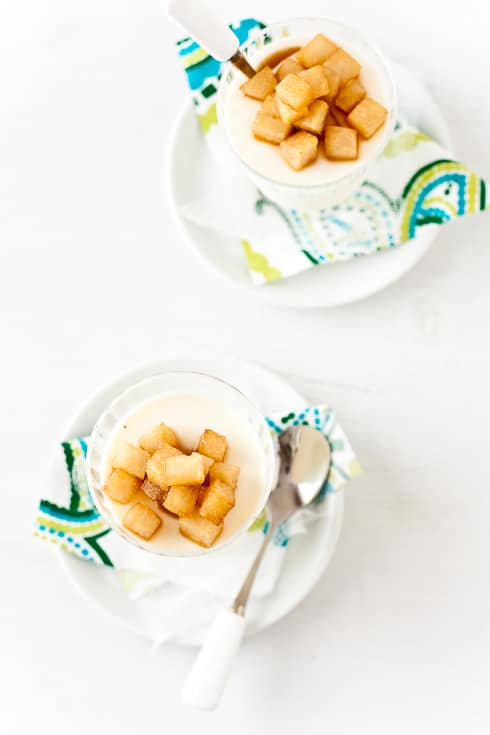
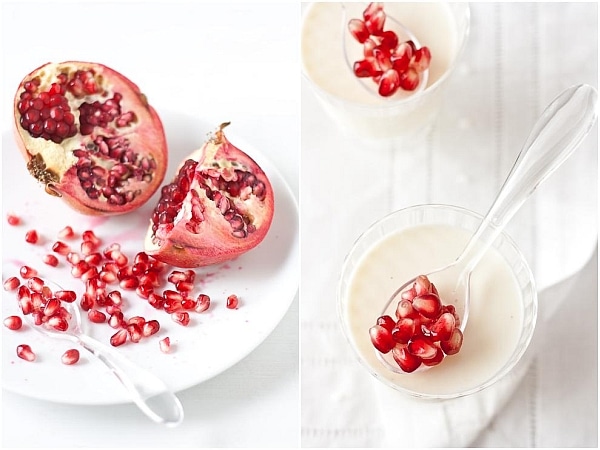
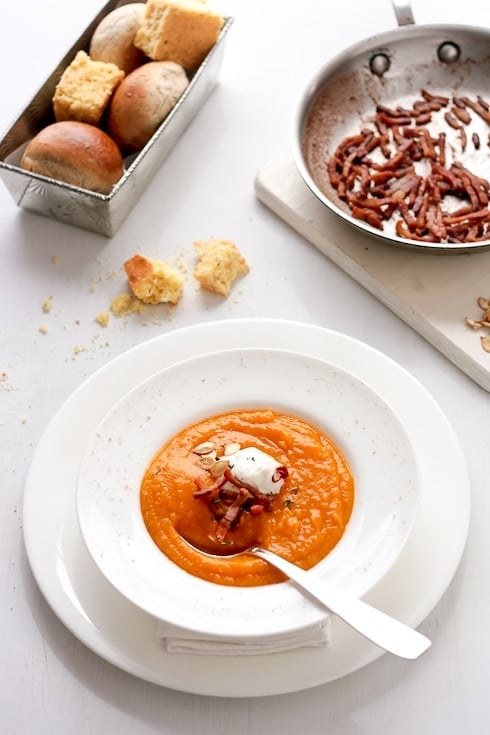
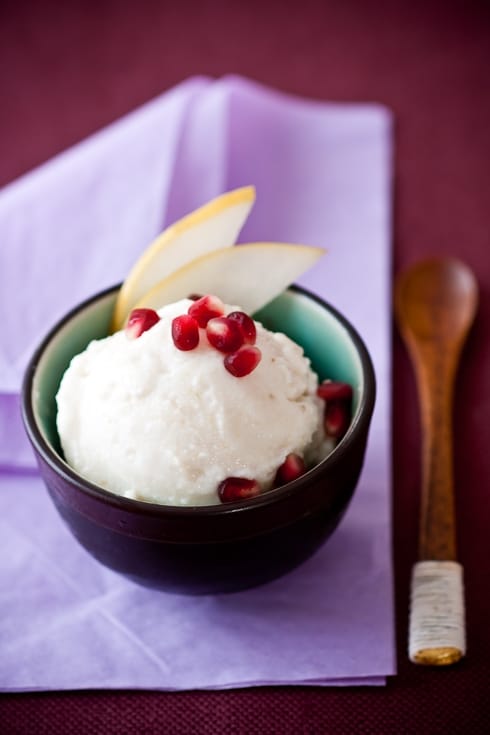
Jaden’s frozen yogurt recipe couldn’t be any simpler: pears, sugar, ginger, sugar and Greek yogurt. Chop, process, churn. And eat. She tops hers with some crushed pink peppercorns for a little sweet kick but I was out and particularly pressed for time to get more. Instead I topped ours with pomegranate seeds which gave the frozen yogurt a nice tart note.

Asian Pear Frozen Yogurt, adapted from and with permission of Jaden Hair:

Makes 1 1/2 pints

2 large Asian Pears
1/4 teaspoon freshly squeezed lemon juice (I used lime)
1 tablespoon finely grated fresh ginger
1 1/2 cups (375gr) Greek yogurt
1/2 cup (100gr) sugar
generous pinch of fine sea salt
1 tablespoons pink peppercorns (crushed) (I used pomegranate seeds)

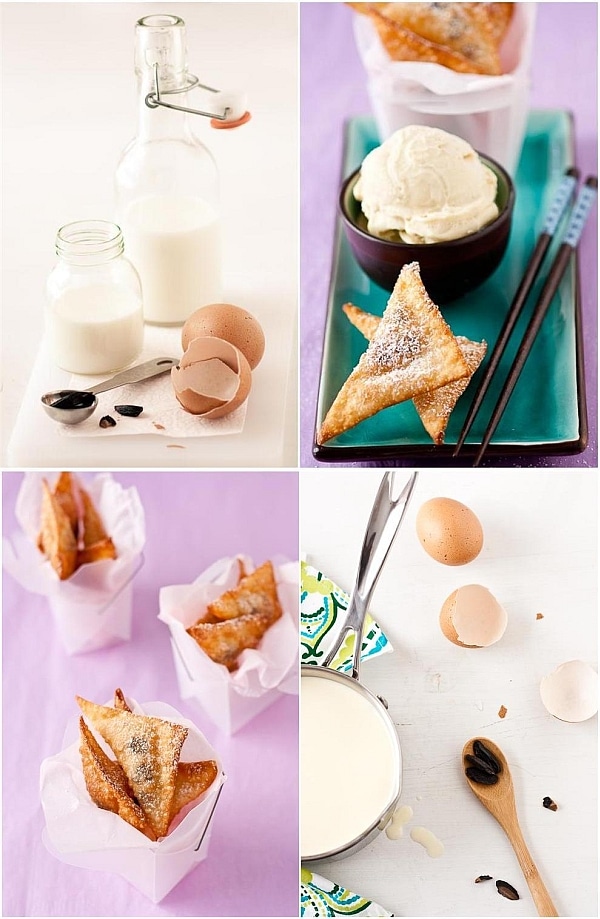
Peel and chop the pears into small 1/2-inch chunks. Toass them with the lemon juice to prevent oxidizing. In a blender, combine the pears and ginger and puree until smooth. Use 1-2 tablespoons of water if this is difficult to puree.
In a large bowl, combine the pear puree with the yogurt, sugar and salt. Refrigerate for an hour.
Note: I skipped this step by refrigerating the pears for a couple of hours before.
Churn the mixture in your ice cream amker according to manufacturer’s directions.
Once churned, freeze until firm. Serve topped with the pink peppercorns.

Potato Leek Pizza and A Giveaway

Potato - Leek Pizza


When I ask my father what vegetables he wants with dinner, his response is often "potatoes" to which I reply "Dad! We already have a starch. What vegetable would you like?" He then looks me with an obvious smirk and repeats "potatoes". I am very much my father’s daughter in that regard. Love them. And noodles. I hope I never have to chose between the two. As much as I am a potato gal, I never thought of putting them on pizza, until last week that is. This Potato-Leek Pizza from The Pioneer Woman has surely changed my mind. "More!" I say!

I remember very distincly the first post I read on Ree’s site. I was on the phone with a friend back home who wanted to know how to make cinnamon rolls. We may have many a delicious pastry back home but I think we sorely miss out in the cinnamon rolls department. As a very occasional baker, she needed visuals. I searched step-by-steps online and stumbled on Ree’s site. Bingo! My friend had an official teacher, willing to take her by the hand through the whole process. I had found a treasure trove of All American classics that my husband grew up on. He never says so but it’s good to split my cooking between my French and his American. Makes for a fun relationship. Much like potatoes and pizza actually.

Ree lives on a ranch in the middle of vast great lands. I live in a house on stilts in the middle of marsh land. She has four 2-legged offsprings, I have two 4-legged companions. She married a cowboy who herds cows for a living. I married a man of the last frontier, history teaching. In her cooking, Ree makes do of what is available in her neck of the woods. I had to learn quickly what is Lowcountry cooking. Her cookbook is #1 in the New York Times Best Sellers list. Mine is still being edited (more on that later, promise) See…completely the same. Ahah!

Pizza Ingredients

Don’t these fancy baby leeks look like glorified green onions?

I don’t know Ree. Sure I have met her at BlogHer Food in San Francisco and exchanged a few words but that’s about it. Yet, and I don’t know how she does it, she is one of the most kind hearted ladies, taking time in her incredibly busy schedule and many roles to make you feel like what you say did not get lost in the big emptiness of the internet. I can guess it has got to be mind boggling for her how life has changed for her family in the last few years. It would make people feel uneasy, others would get the big head. Yet, Ree remains her natural, super nice, dorky self. I do need to say that she made me blush bright red when she put me in the same sentence a Matt Armendariz at BlogHer. Ugh!

Ree’s cookbook reads like a novel. There is food and there is life on the ranch, life with the kids, daily thoughts and aspirations. The one most excited about getting the book was my husband however. He can relate to the recipes, they were part of his mom’s stapples. He thought that whereas I fought the generation gap with his mother and the can of Ro-Tel, I would relate to Ree’s fresh approach to life and cooking as she was trying to adapt to her new territory. He was right. Copies of my mother-in-law’s Little League cookbooks are collecting dust but The Pioneer Woman Cooks is being earmarked by the both of us. He seldoms cooks so he loves the step by step pictures while I skip those for the stories. I like stories.

Ree’s book does not need another review, yet I can tell you that B. is extremely excited to eat "Pioneer Woman" this weekend while I am away. I have been invited by the great folks of The Grove Park Inn in Asheville to be a judge in their annual National Gingerbread House Competition. I am not only extremely honored but thrilled to be in a group comprising Colette Peters and Chef Lodge to name a couple. I thought that B. would be able to accompany me but he’s stuck with gigs this weekend. Instead, gal pal Tami from Running With Tweezers is coming up from Atlanta to share some of the fun and mountain air. In preparation of the trip, I made a few things that Bill loved and that he could easily reheat at night. One of them was this potato-leek pizza except it was devoured the moment it came out of the oven (well, after a few pictures).

Potato - Leek Pizza


I felt a bit pioneer-ish shopping for the ingredients when the only leeks I could find were fancy baby ones (did not have time to get to another store). Despite the double price tag, they looked a lot like green onions to me and I think I even aggravated the store clerck when I said so. I hate to aggravate them because they do order fancy stuff for me when I ask them. They are indeed green onions and they did taste like leeks however so all’s well. The combination of potatoes, leeks, bacon ang goat cheese made me think of Frenchified loaded American baked potatoes meeting their Italian cousin on a bed of mozarella and tender pizza crust. Awesome…and I am packing two slices for the road.

I hate to tell you I’m going to frolic in gingerbread goodness in a paradise like retreat while some of you have to work, play hard or are stuck sick at home. That’s why I am psyched that Ree generously offered to giveaway THREE copies of her book to three readers. If you want a chance to win, here is what to do:
– leave a comment on this post
– ONE entry per person – if you don’t see your comment right away, give me a few hours before re-posting as I have the moderator on.
– Enter until Wednesday November 18th at midnight, US eastern time.

Have a great weekend!

Potato - Leek Pizza

Potato Leek Pizza, with permission of Ree Drummond:

6 slices thick bacon, cut into 1-in pieces
3 leeks, sliced thinly
Extra virgin olive oil
5 small red or Yukon Gold potatoes, sliced paper thin
16 ounces fresh mozzarella cheese, sliced thinly
4 oz crumbled goat cheese (I used twice that much:))
Parmesan cheese, grated
Kosher salt
Freshly ground black pepper
Unbaked pizza crust

Preheat oven to 500 degrees
Begin by frying bacon pieces in a skillet over medium heat until cooked but not crisp. Remove bacon from pan and pour off most of the grease. Set bacon aside.
Return skillet to stove and turn heat to medium-low.
Slice leeks very thinly. A sharp knife helps.
Add leeks to the same pan and sauté over medium-low heat until soft, about 3 minutes. Remove from heat and set aside.
Using a sharp knife or mandoline, slice potatoes very thin.
Prepare pizza crust according to directions, and drizzle lightly with olive oil. Sprinkle lightly with salt. Arrange potatoes in a single layer all over crust, slightly overlapping edges. Sprinkle potatoes lightly with salt, then lay mozzarella slices in a single layer over the top of the potatoes.
Place sautéed leeks over the top of the cheese.
Next, sprinkle the fried bacon pieces over the top, followed by a generous addition of crumbled goat cheese.
Finally, sprinkle with freshly ground black pepper.
Bake pizza for 8 to 11 minutes, or until edges of crust are golden brown and cheese is melted and bubbly. Cut into wedges or squares and serve immediately.

Pizza Crust
Makes two pizza crusts
1 ½ cups warm water
1 teaspoon active dry yeast
4 cups all-purpose flour
1/3 cup extra virgin olive oil
1 teaspoon kosher salt
Extra olive oil for drizzling

Pour warm water into a mixing bowl. Sprinkle yeast over the water.
Stir together flour, olive oil, and salt in a large mixing bowl. Add water/yeast mixture and stir together until just combined. Dough will be very sticky.
Drizzle a little olive oil into a clean mixing bowl. Toss the ball of dough in the bowl and turn over to coat in oil. Cover bowl and place in a warm place for 1 to 2 hours, or cover in plastic wrap and store in the fridge for up to 2 days.

Pomegranate and Caramelized Pear Panna Cotta

Pomegranate Panna Cotta


I appreciate this time of year when night falls so much earlier. It makes me want to rush home and cozy up with loved ones, a book or a good project. Unlike summer when things are so bright up in my face, I love that Fall and Winter are seasons of shadows and angles with night and day playing cat and mouse so well. So many holidays around the corner. So many friends dropping by, parties hosted and kitchens in full roar. Time to connect and reconnect with people and things. Time to lose half your brain too if you don’t pay attention!

When things get plenty busy, it’s always good to have a few staples in your kitchen repertoire that are not only show stoppers but easy to prepare and make ahead, almost ensuring your guests will ask for more. My holiday staples almost always include cremes brulees, pots de creme, and panna cottas. Among the variations I like on this traditional Italian favorite, these Pomegranate and Caramelized Pear Panna Cottas have come to rank high on the list.

Pomegranate


Panna Cotta is said to have originated in the northern region of Italy where dairy is one of the main agricultural productions but spread out to the entire nation and the rest of the world throughout the years. Variations of panna cotta exist in almost every country as it is a very convenient way to use up extra dairy like cream, milk and yogurt. I grew up on Blanc Manger for example which is a close cousin to the creamy silky no-bake Italian custard.

There are many, many reasons to start putting panna cottas on your list of "reliable-good-things-to-make-for-people-I-love." For starters, what is really fun about panna cotta (beside listening to an Italian saying it outloud) is that you can add flavors and ingredients inside, outside, above and below. You can also mix up the choice of dairy to be used as long as you make sure to balance the acidity and fats of each appropriately. You can prepare them up to 48 hours in advance and keep them snuggled up in the refrigerator until ready to eat. You can top them with whatever strikes your fancy that day or what is available during the season. And…they are gluten free!

Pears


November is synonymous with pears and pomegranate to me. Where my mother-in-law tries to find the biggest Comice and Bosc pears for cooking, I tend to favor Seckel and Forelles, my absolute smaller favorites. Where she feels like she hit the jackpot with the biggest pomegranate on the shelf, I always dig for the tinier ones. Yes, I like small and tiny anything but for a reason. Almost everything here is bigger than where I am from. Bigger roads, bigger houses, bigger stores and bigger produce which unfortunately doesn’t always mean bigger on taste. I often find that smaller fruits and veggies pack so much more flavor and I’d rather have a small anything full of aroma any day like small servings of creamy and silky Panna Cotta.

Can I say out loud how much I love caramel? If you know me a tiny bit, you know that the mere idea of caramelizing anything gets me moving. When I made these panna cottas for a catered event earlier this week, I kept the base relatively simple with just a touch of vanilla bean and focused more on the toppings. I caramelized some seasonal Forelle pears with just a touch of butter and brown sugar and kept them at room temperature until the guests were ready for dessert. However, when it comes to pomegranate, nothing beats eating them straight out in their natural form. I just love the tart pop that comes with biting into pomegranate seeds. They were just the perfect texture and color contrast to the richness of the panna cottas.

Caramelized Pear Panna Cotta


One thing that you can play with and never reach the end of your playtime when it comes to Panna Cottas (beside the flavors) is the combination of dairy you use. Most recipes give you a combination of heavy cream and milk, some add buttermilk or/and yogurt to the mix. All are good, all work…in the proper ratios. If you use more acidic dairy like buttermilk and yogurt (even full fat) make sure to keep twice the amount of heavy cream in the mix. The more acidity is mixed in, the greater risk you run of the base separating into one part cream, one part whey. Nothing to do at this point but to start from scratch. Live and learn. If I can save you a major "Oh no!" and an extra trip to the store, then I’ve done my job!

If you are vegetarian or vegan, panna cottas can still be well within your dessert favorites. You can substitute any of the dairy for their vegetarian or vegan equivalent such as soy, almond, oat, hemp milks or vegetarian cream as long as they are the full fat kind. Panna cottas rely on the addition of gelatin which is a no-no if you are not a carnivore but kosher gelatin is often vegetarian and agar agar and carrageen are often used as substitutes. I am not proficient with any of these but you can find more information in this article on their nature and preparation.

Panna Cotta


Panna Cottas are pretty much a bottomless well for your tastebuds and imagination.

Panna Cotta


Pomegranate and Caramelized Pear Panna Cottas:

Notes: I make my own yogurt and used a freshly made batch in this recipe but you can substitute with store bought plain full fat yogurt, just don’t use light, pretty please.
If you are not used to working with gelatin, in all its various forms, I recommend this article written by David Lebovitz. Gelatin won’t be a mystery anymore!

Serves 8

For the panna cottas:
2 tablespoons cold water (more if using sheet gelatin)
2 teaspoons (5gr) unflavored powdered gelatin (1.5 sheets to 2 sheets gelatin)
2 cups (500ml) heavy cream
1/3 cup (70gr) sugar
1/2 vanilla bean, split lenghtwise and seeded
1 cup (250ml) plain whole milk yogurt

For the caramelized pear topping:
1 tablespoon (15gr) unsalted butter at room temperature
2 tablespoons (30gr) light brown sugar, packed
2 Forelle or Seckel pears or one Bosc pear, peeled, cored and cut in small dices

One pomegranate, seeded

Prepare the panna cottas:
Place the water in small bowl and sprinkle the gelatin over it. Reserve.
In a large heavy bottomed saucepan placed over medium heat, bring the heavy cream, sugar and vanilla bean seeds to a simmer. When the cream is hot, remove from the heat and whisk in the reserved gelatin until it is completely dissolved. Add the yogurt and whisk until well blended.
Divide the mixture among 8 glasses or ramekins. Let stand at room temperature for 20 minutes and then refrigerate for at least 4 hours before serving to let the cream set properly.

Prepare the caramelized pears:
In a heavy sautee pan set over medium heat, melt the butter and sugar together. When the mixture starts to sizzle, add the pear dices and sautee them until they start to become translucid and a little soft to the touch, about 2 minutes. If you cook them too long, you will end up with pear compote which is good too, but does not have the same biting contrast as barely sauteed pears.
Remove from the heat and let cool to room temperature.

To serve:
Top the panna cottas with some caramelized pears or pomegranate seeds as desired.

Chocolate Wontons And Tonka Bean Ice Cream

Chocolate Wontons


If I were to wait for the proper weather to bake certain desserts, I’d never get to turn the oven on or fry some donuts and the ice cream machine would be churning year round. Take Halloween day, it was near 90F pretty much all day long and yet I wanted to bake some fun goodies for the neighbors. We spent the day in short sleeves, going about the neighborhood with the kids steaming in their costumes. More than one of them thought ill of their parents for dressing them up as a furry teddy bear or a heavy padded alligator. I know these feelings disappeared when I brought down these hot Chocolate Wontons and a batch of Tonka Bean Ice Cream that we had with glasses of apple cider…on ice.

Years ago we used to have a different chocolate special everyday at the restaurant and certain mornings proved difficult to come up with a bright idea at 5am when I was hand deep into kneading baguettes. I remember opening Chocolate Passion by Timothy Moriarty and Tish Boyle with the assurance that I’d have a winner and often recommended it to patrons asking me for a recipe. When I stumbled upon Maury Rubin’s Book Of Tarts, I think I baked just about every one of them they were so creative.

Sometimes it’s a technique or a subject that makes me delve in a cookbook. Sometimes it’s the story behind its coming to life, an anedocte, the writing. Sometimes it’s the author and her/his journey. In short, something that moves me beyond the recipes (I have quite a head full of those already) which is the case with Jaden’s first cookbook, The Steamy Kitchen Cookbook, from which I made the chocolate wontons. Having shared a plane, meals, drinks, and a panel with her, I can tell you that Jaden is good people and I am extremely proud of her. I knew her book would be one I could open at any page and cook something new, delicious and fresh. All four recipes I have made so far were a hit with us and our friends.

Chocolate Wontons and Tonka Bean Ice Cream


If you were to come to my house you’d think I spend all my spare change on cookbooks. If you looked a little closer, you would see a fine print on most reading "preview copy", "press release copy", etc… About twice a week, the mailman makes the hike up to the front door and drops a new box on the porch. He also leaves a couple of doggie treats for the pupps. They know it, they go crazy until I get to the door. What do I do? I open the box, I flip through the book and get the post-its out. "This one will be great for friend S." or "This is one for R." and so forth.

I am very appreciative of this situation, believe me and I am under no obligation to review or pimp them out on this site. I know that a friend would benefit from a crockpot recipe book more than I will since I don’t own such a beast, or my baking-challenged friend S. might enjoy a basic dessert cookbook more than I will. But there are books I hoard, read, cook and bake from, hoard again, read some more and cook from until the hinges get worn out. Jaden’s book will be one of them.

I must give Jaden kuddos for the dessert section though she said it was tough to write. Her approach to dessert is very much what we like throughout the week: fresh fruits, easy to prepare frozen treats and the occasional splurge like the chocolate wontons. The headnotes say they will make little girls squeals and little boys break out into a disco dance (I am paraphrasing) and the neighbors' kids did just that on Halloween when I handed them out! I think I even saw a couple of adults shake their bootie in delight too!

Fried Chocolate Wontons


These are so easy to make and if you get an extra set of hands to help out, you can make a double batch in a flash. Plan on that as they disappear very fast! There is no need for a deep fryer and if you keep the oil at a steady 350F you end up with perfectly crisp, never oily wontons which chocolate center oozes out as you bite into them. I had planned to serve them with her Asian Pear Frozen Yogurt but we devoured that one too fast so I went with my own tonka bean ice cream instead. The almond and vanilla flavor of the tonka paired really well with the chocolate once again. (see recipe notes)

Chocolate Wontons, from The Steamy Kitchen Cookbook, with permission of Jaden Hair

Makes 12

1 egg
1 tablespoon water
12 wonton wrappers
12 pieces of chocolates (I used about 4 chocolate chips per wonton)
high heat oil for frying (I used canola)
Powdered sugar for dusting

In a small bowl, make an egg wash by whisking together the egg and the water.
On a clean, dry surface, place a wrapper down with a point facing you. Place a piece of chocolate or chocolate chips near the top end of the wrapper. Brush a thin lauer of egg wash on the edges of the warpper. Fold the bottom corner up to create a triangle and press down at the edges to remove as much air from the middle as possible. Make sure the wrapper is sealed completely. Repeat with the remaining wrappers and chocolate pieces. Keep the prepared wontons covered with a piece of plastic wrap or a damp towel to prevent them from drying.
In a wok or medium pot (I used a 9-inch cast iron pan), heat about 2 inches of oil to 350F and gently slide a few wontons into the hot oil. Do not crowd the pan as the oil temperature would lower too much and you would end up with grease-soggy wontons.
Fry 1 to 1 1/3 minutes on each side until both sides are golden crisp.
Drain on paper towels and sprinkle with powdered sugar

Tonka Bean Ice Cream:

Notes: Yes, tonka beans are banned from import in the US by the FDA, yet they are used by many countries in food preparation and desserts in particular. Consumed in large quantities, they can be toxic as they contain an anticoagulant which many blood thinning medications are based on, courmarin. So, it’s banned, but its main agent is used in meds here and you can purchase tonka beans on ebay. UGH?!! Gotta love the FDA and large medical companies politics. Since I use 2-3 beans a year in recipes that feed no less than 8 people each time, I know we are ok but research and educate yourself before cooking with tonka beans if you are interested.

By the way, if you have vanilla extract from South America in your pantry and wonder why it smells like a vanilla bean got too close to an almond one night, that’s probably because tonka beans were used instead of real vanilla or diluted with it to make it cheaper to sell. Nothing wrong with that if you are aware of all the facts.

Tonka beans smell like a cross between vanilla and almond extracts and if you can’t find or do not wish to use tonka beans, substitute with each extract in the ice cream recipe and you will get close to the actual flavor.

6 egg yolks
1 cup (100gr)
2 cups whole milk
1 cup heavy cream
1 tonka bean (or 1 teaspoon vanilla + 1/2 teaspoon almond extracts)

In a large bowl, whisk the egg yolks and the sugar until pale and thick. In a saucepan set over medium heat, bring the milk, cream to a simmer, without letting it come to a full boil. With a microplane, grate the tonka bean right over the milk and cream simmering (I add the little knob left for extra flavor). Slowly pour the hot cream over the egg yolks mixture while whisking to temper the egg yolks. Pour the whole mixture back into the saucepan and cook over low heat, stirring constantly, until the cream coats the back of spoon. It should register 170F on a candy thermometer. At this point you have made a custard sauce, also known as "creme anglaise". Let cool completely, strain and refrigerate until cold, preferably overnight.
Once and the custard is cold, process according to your ice cream maker manufacturer’s instructions.

Mom’s "Tupp" Apple Cardamom Cake

Apple Cardamom  Cake


Let’s talk winning tickets, shall we? First, my dear human random number generator, B., picked Brandy from Nutmeg Nanny to receive Nicole’s The Baking Bites Cookbook. Congrats! Send me a quick email and I’ll pass the info along. Now on to this cake…

I know I am going to jinx it. I just know it. Maybe if I whisper it very softly: It finally feels like Fall around here. Mostly in the wee hours of the morning when I can finally feel a chill in the air and a dry breeze through the marsh. Actually, not having a free day on the schedule until April means that the season has indeed changed. Drastic times call for drastic measures and I often turn the comfort of my mom’s apple cake during the Fall and holiday season. The one cake that earned her the affectionate name of Maman Tupp and the one we know as "Gateau Aux Pommes Tupp".

Apple Cake


I am pretty sure that most French people reading are familiar with the "Gateau aux Pommes 5-4-3-2-1" that the brand Tupperware® introduced during home demonstrations of their products. A very simple, very unassuming and particularly delicious appple cake, soft and moist all the way through. It was especially known for its creamy butter and sugar topping forming a tempting thin crust while baking. For years, I thought that was my favorite part of the cake. Now I know. Two slices with some creme fraiche is my favorite part!

When you are 5 or 6, saying that you would like the "Gateau 5-4-3-2-1" for "gouter" (4pm snack) is not only long but it does sound silly. However, it made it very easy to start baking with mom at an early age since the recipe went something like "5 spoons of flour, 4 spoons of sugar, 3 spoons of milk"…and so on. One bowl, one spoon, dry before wet, one apple, whip it all and bake.

Apple Cardamom Cakes


We made it so often in my family that it became much easier for everyone to call it the "Gateau Aux Pommes Tupp" (Tupp Apple Cake) and over the years to make it even shorter with a simple "Gateau Tupp". See, it works so much better to beg mom for it this way. This simple gateau became the one we would gather around during tea time on a cold and rainy day, the one that made any bad school day be forgotten in a few whisks of sugar. It solved a few arguments and mended broken hearts too.

Yes, my mom was a Tupperware® lady back in the 80s. She never played the sales game, but she loved to host parties for friends getting in the biz. That was her thing, the hosting. And the baking, the cooking, and passing around trays of items made with the brand’s products. Let’s face it mom, you also loved getting new stuff for the kitchen. To this day she is still very well stocked in containers, molds and measuring instruments of all sorts from the big T company.

Apples


It was very fortunate that my parents in law dropped off a basket full of apples from a recent visit to an orchard in North Carolina and I made a big dent in it baking a few of these cakes. In the end, the cakes are nothing like the original recipe. I made ours a tad less sweet and gluten free which is perfect here to keep the cakes moist, thus not following the original "5-4-3-2-1" formula. Then, there was the matter of the spoon measure called for in the original version. I don’t own such an instrument but I figured that since the company was American, a large spoon such as the one mom used had to be close to 1/4 cup. Yes, in this cake, precision to the gram has very little importance and that’s just what I need when swamped.

Now, if you’ll excuse me, it’s time for my daily slice…Or mini cake.

Apple Cake


Mom’s Tupp Apple Cake:

Notes: if you do not intend to make a gluten free cake, replace all the gluten free flours (rice, tapioca, sorghum) with 1 1/4 cups all purpose flour.
The cake bakes in two separate times: first for 10 minutes, the remove it from the oven to add the cream topping and bake for an additional 20 minutes.
I added cardamom just because it reminds me even more of my mom but you can skip that part or add cinnamon instead.

For the cake:
1/2 cup (80gr) sweet brown rice flour
1/4 cup (30gr) tapioca flour
1/2 cup (65gr) sorghum flour
1/2 cup (100gr) sugar
1 teaspoon ground cardamom
pinch of salt
1 teaspoon (5gr) baking powder
3/4 cup (190ml) whole milk
1/3 cup (80ml) oil
1 egg
2 apples, peeled, cored and thinly sliced (I like Granny Smith but any kind will do here)

For the topping:
5 1/2 tablespoons(80gr) unsalted butter, at room temperature
1/2 cup (100gr) sugar
1 egg
1 teaspoon vanilla extract

Prepare the cake:
Preheat the oven to 350F. Spray or butter the inside of a 9-inch round baking pan or several 3 to 4-inch baking pans if you want smaller cakes. Place them on a baking sheet and set aside.
In large mixing bowl, whisk together the flour, sugar, cardamom, salt and baking powder. Reserve. In another large bowl, whisk together the milk, oil and egg until just blended.
Slowly pour the liquids over the dry ingredients, whisking well to make sure that everything is well incorporated, about 40 to 50 strokes.
Pour the batter into the prepared pan(s) and arrange the apple slices on top in a circular pattern.

Prepare the topping:
In a medium bowl, whisk together the butter and sugar until fluffy. Add the egg and the vanilla extract and whisk until smooth. Reserve

Bake the cake(s) in the oven for 10 minutes. Remove the cake(s) from the oven and spread the creamy butter topping over the top(s). Bake an additional 20 minutes or until a skewer inserted near the center comes out clean.

Chai Coffee Cake And A Giveaway

Chai Coffee Cake


It won’t be a surprise to say that there is always cake at the ready in the house. Whether it be for B. as a late night snack after a music job, friends dropping by on a late saturday afternoon, or simply as a quick snack as we pass by the kitchen. It’s usually a variation of my grandma’s yogurt cake. Always good. Always comforting. One cake I never make enough is coffee cake. You know, the kind with the lovely strudel top that is both crunchy and soft as you bite into it. But then Nicole’s Chai Spiced Coffee Cake entered my life. Twice in one week. Three times a day, once.

I did not make it twice just for us and just because. You see, a couple of weeks ago, I received an email from a high school senior here in town, Haley, whose senior project was to recreate the Julie-Julia project but with David Lebovitz' Room For Dessert book. Haley asked if I would have a bit of time to give her some tips about running her blog chronicling the project, photography, writing, etc… I said yes. I remember when I started blogging that I was often looking up to my seniors for pointers (I still do at times) so I thought it was a great opportunity to give back to the blogging community. I am no expert but I have been at this blogging thing for a while now, eheheh.

And I love when life on the screen brings about wonderful little happenings like this!

Chai Spices


Anyway, I thought we’d have some cake and tea and get right into the nitty nifty gritty of blogging and pictures. Well, schedules got out of hands and I never got to make that Chai Coffee Cake for Haley. We did meet this week and spent a great afternoon. I hope I answered her questions, at least until next time we meet. I gave her tips on how to operate her point and shoot camera to the best of its capacity, tips on light, focus, etc…and let her play with my props. Hopefully, there will be cake next time we do this!

I love this cake on so many levels but first and foremost because it is one of the recipes that Nicole included in her newly released first cookbook, "The Baking Bites Cookbook". Nicole’s Blog, Baking Bites is one of the handful of blogs I started reading prior to starting my own. We were "blog friends from afar" until we finally met at BlogHer Food in San Francisco. Nicole is as delightful and true as she is on her blog. I am so proud that she achieved one of her lifelong dreams by writing this book.

Chai Coffee Cake


I bluntly asked her if I could feature one of her recipes and introduce some of you to her blog if you did not read it already and to her "baby", The Baking Bites Cookbook. She agreed. I bluntly added "hey! Would you be ok to give a copy to one reader?" and she said yes. So here you go: there is one free copy of this delicious book up for grabs. All you have to do is leave a comment on this post. The giveaway runs until Monday November 2nd, midnight US Eastern time and a reader will be chosen at random to receive a copy.

Given how good the Chai Coffee Cake was, I can’t wait to bake more from Nicole’s book!

Chai Coffee Cake

Chai-Spiced Crumb Coffee Cake, from The Baking Bites Cookbook with permission of Nicole Weston:

Cinnamon is the standard spice for topping a crumb coffee cake. This coffee cake keeps the crumb topping and spices it up a little more by using some of the same flavors that are found in chai, including cinnamon, ginger, cardamom and allspice. These spices really help to make the coffee cake memorable – and they also make you want to come back for a second slice.

Note: the only change I made to the recipe was to fill my baking pan with half the batter, sprinkle some of the topping and add the remaining batter and topping.

Topping:
1/3 cup sugar
1/3 cup brown sugar
1 teaspoon ground cinnamon
1/2 teaspoon ground ginger
1/2 teaspoon ground cardamom
1/2 teaspoon ground allspice
1/4 teaspoon salt
1 1/2 cups all purpose flour
1/2 cup butter, melted and cooled slightly

Cake:
1 3/4 cups all purpose flour
3/4 teaspoon baking powder
1/2 teaspoon baking soda
1/4 teaspoon salt
2/3 cup butter, room temperature
1 cup sugar
2 large eggs
1 1/2 tsp vanilla extract
2/3 cup sour cream, full or low fat

Preheat oven to 350F. Line a 9-inch square baking pan with parchment paper or lightly greased aluminum foil.

Make the Topping:
In a medium bowl, combine all topping ingredients except butter. Whisk to blend.
Gradually stir in the melted butter, using a large fork or spatula to mix. When all the butter has been incorporated and the mixture looks like wet sand, squeeze small clumps together to make large crumbs ranging in size from that of a pea to that of a grape. Set aside.

Make the Cake:
In another medium bowl, whisk together flour, baking powder, baking soda and salt.
In a large bowl, cream butter and sugar together until light. Beat in eggs, one at a time, followed by vanilla extract. With the mixer set on a low speed (or by hand), alternately add in flour and sour cream in two or three additions. When no streaks of flour remain, pour into prepared pan. Top evenly with crumb mixture.
Bake at 350F for about 45 minutes, or until a toothpick inserted into the center comes out clean.
Cool on a wire rack before slicing.
Serves 9-12

It Takes All Sorts Of Macarons To Make The World Go Round

Peanut Butter & Jelly Macarons


I love, like, enjoy, many people and many things in this life but if there is one thing that I live for on the weekends is when B. comes home from playing music and we sit on the bed and geek out for hours about all sorts of topics. Photography, films, history, and often times, food. Before we know, it’s three o’clock in the morning (not his bedtime at all) and we go to sleep with growling stomachs and visions of sugar plums. Especially when we geek out about macarons. Especially when they are Peanut Butter and Jelly, Lemon Meringue Pie and Banana Caramel Macarons.

We were recently putting together a care package for a friend in town and we started brainstorming about what to include. Macarons, are always first on the list for some reason, eheh! I was looking for flavors I had not done before and he was looking to recreate some of his favorites. In the end, our friend S. received 2/3 of the Daring Bakers challenge delivered right to her front steps. From the look on her face, I knew I’d be repeating these flavors over again.

Bill’s go-to breakfast is a bagel with peanut butter and jelly and turning this into a macaron was very easy. I used half almond and half peanuts for the shells and filled those with a teaspoon each of peanut butter and homemade raspberry jelly.

Lemon Meringue Pie Macarons


One of my favorite desserts is lemon meringue pie and after coniving on the best way to make this into a macaron, I finally settled on keeping the shells all almonds and adding the zest of one lemon to the batter. I filled the insides with homemade lemon curd and a teaspoon of freshly made Swiss meringue.

One of my husband’d favorite snacks when he comes home from playing music is to cut up a banana and drizzle it with Salidou, the homemade salted butter caramel sauce that I always keep handy in the fridge. For the macarons I simply mashed a whole banana and mixed it with the leftover from the Taffy Apples I posted yesterday. Once cooled and naturally thickened a bit, it was easy to pipe on the macarons shells and sandwich them.

I’ve known about this month challenge since this summer when Amy emailed with concerns about doing macarons for the Daring Bakers. We covered all types of questions from aging the egg whites, drying the macs before baking to food coloring and how to best incorporate flavors. I volunteered a phone macaron making session and guided her over the phone while she baked my tried and true recipe. In the end she felt most comfortable with the version she knew best, Claudia Flemming’s, which brought on my most common comment about macarons: if you find a recipe that works for you, stick to it, no matter whose it is, especially if you are new to macarons and don’t make them that often.

Banana Caramel Macarons


Amy, thank you for the fun phone macaron making session and it was a pleasure helping out with some of your questions!

I’m glad I tried a new recipe for macarons and did not have any problems with it, probably because I’ve been making them for 15 years so I know what to expect. I will however stick to the recipe I use all the time, for no other reason that it is engrained in my DNA right now!

The 2009 October Daring Bakers’ challenge was brought to us by Ami S. She chose macarons from Claudia Fleming’s The Last Course: The Desserts of Gramercy Tavern as the challenge recipe.

Macarons


Macarons, from Claudia Flemming' The Last Course: The Desserts Of Gramercy Tavern.

Confectioners’ (Icing) sugar: 2 ¼ cups (225 g, 8 oz.)
Almond flour: 2 cups (190 g, 6.7 oz.)
Granulated sugar: 2 tablespoons (25 g , .88 oz.)
Egg whites: 5 (Have at room temperature)

Preheat the oven to 200°F (93°C). Combine the confectioners’ sugar and almond flour in a medium bowl. If grinding your own nuts, combine nuts and a cup of confectioners’ sugar in the bowl of a food processor and grind until nuts are very fine and powdery.
Beat the egg whites in the clean dry bowl of a stand mixer until they hold soft peaks. Slowly add the granulated sugar and beat until the mixture holds stiff peaks.
Sift a third of the almond flour mixture into the meringue and fold gently to combine. If you are planning on adding zest or other flavorings to the batter, now is the time. Sift in the remaining almond flour in two batches. Be gentle! Don’t overfold, but fully incorporate your ingredients.
Spoon the mixture into a pastry bag fitted with a plain half-inch tip (Ateco #806). You can also use a Ziploc bag with a corner cut off. It’s easiest to fill your bag if you stand it up in a tall glass and fold the top down before spooning in the batter.
Pipe one-inch-sized (2.5 cm) mounds of batter onto baking sheets lined with nonstick liners (or parchment paper).
Bake the macaroon for 5 minutes. Remove the pan from the oven and raise the temperature to 375°F (190°C). Once the oven is up to temperature, put the pans back in the oven and bake for an additional 7 to 8 minutes, or lightly colored.
Cool on a rack before filling.

For the PB&J Macarons:– Replace half the amount of almonds with finely ground unsalted roasted peanuts.
– Once cooled, fill the shells with a dollop of peanut butter (either smooth or crunchy) and jam.

For the Lemon Meringue Macarons:
– Fill the shells with a teaspoon or so of freshly made lemon curd
– Add a teaspoon or so of Swiss meringue. (I made half the recipe)

For the Caramel Banana Macarons:
– Mixed one smashed banana with half the quantity of toffee sauce I made for the dipped crabapples.

Trick or TrEat Taffy Crabapples

Taffy Crabapples


I am always amazed when stores start displaying Halloween merchandise in August. A part of me grunts "don’t rush it people! Enjoy the rest of the summer!" while I secretly start to giggle at the prospect of gobblins and witches knocking at the door on Halloween night. Halloween is not part of our rituals where I am from. We honor the departed the day after, usually with a trip to church and a visit to the cemetary. That’s heavy when you’re a kid. Even if kids here only think of dressing up, I am much too happy to oblige in their "Trick Or Treat". I am even happier to make a couple of inspired Halloween treats for us, like these Taffy Crabapples.

Crabapples


Ever since Bill welcomed me home with a basket of crabapples upon returning from San Francisco, I have had it in my head to make little taffy crabapples. When I got an email from Brooke from Tongue And Cheeky asking me if I wanted to be part of her Trick or TrEat project, I jumped on the occasion. Not that I need an excuse to make up for Halloweens past and I certainly don’t need an excuse to play with caramel.

What is Trick or TrEat? Well, today, nine favorite food, craft and lifestyle bloggers await behind nine haunted houses with an array of holiday treats created just for you. At the end of this post, you will find two of these mystery houses. To join in the holiday fun, simply click on one of the buttons and you’ll be linked to the next home on the block. You can also discover all of the Trick-Or-TrEat contributors and find direct links to their posts on the Trick Or TrEat website.

Taffy Crabapples


We did get a bonus Halloween moment the day after I made these. The humidity and heat in South Carolina caused the taffy to bubble up, giving the crabapples an unflattering pustular look. I thought that was pretty hilarious and decided to tuck at one just to see how the taffy coating would react. It opened up like a pretty wrapper and revealed the crabapple inside giving me the perfect photo op. Who would have thought? I guess that’s Halloween: you never know what is really around the corner!

Will I be nice witch or a wicked one on Halloween night? Ahahahah! Happy Halloween!

Whose houses are next to visit on the block? Check after the jump!

Taffy Crabapples


This is a great recipe to get the kids involved in the kitchen with you. Do prepare the taffy coating yourself (there is hot caramel and bubbling action there) but let them dip the apples and play with shaking them to let the extra caramel coating drip off. If the stems of the apples are too short or too flimsy, stab a lollipop stick right at the stem and dip. I left the taffy crabapples plain, but you can certainly roll them in chopped nuts, chopped chocolate, nonpareils, etc…

Taffy Crabapples:

Makes about 16 coated mini apples.

12 lady apples

1 cup (200gr) granulated sugar
1 1/2 tablespoons unsalted butter, at room temperature
1/4 cup (60ml) heavy cream
pinch of salt
16 crabapples
wooden skewers or thin lollipop sticks to hold (optional)

Line a bkaing sheet with either some slightly greased parchment paper or a silpat. Set aside.
Place the sugar in a heavy bottom saucepan set over medium high heat. Slowly let the sugar melt and turn into caramel. This method is called a dry caramel and can be a bit tricky. If you are not comfortable with it, add up to 1/4 cup water to your saucepan and slowly bring the sugar to caramel color.
Standing back a bit, carefully add the butter, heavy cream and salt. Do not worry, it will bubble like mad. When the bubbling slows down, stir the mixture until smooth.
Carefully dip the crabapples into the hot taffy and twirl them above the pan to let the excess drip off. Place the dipped apples onto your prepared baking sheet and let set.

To see what other Trick-Or-TrEat hosts have cooked up for your viewing pleasure, click on the links at the bottom of the house drawings, not the houses themselves.

Halloween


Right: Jaime at Sophistimom. Left: Megan at Not Martha.


Butternut And Acorn Squash Soup

Butternut and Acorn Squash Soup


Thank you all so much participating in the Macy’s giveaway! Through emails, I know that some of you held dinner parties this week to raise money to fight hunger. That makes me so happy! We held our own last night in a very impromptu sort of way when my mother-in-law dropped by with a standing rib roast, all ready to be devoured. I quickly gathered the neighbors to our table. As a thank you, they made donations to the local food bank. As my way to thank them, I sent everyone with some of this Butternut and Acorn Squash Soup we have been enjoying lately.

My random number generator (Bill) went to bed before midnight so I quickly emailed Jen and asked her to pick two winners. Her answer was: "48 & 119, based on time interval between kaweah’s twitches in her sleep times random number." Don’t you love this scientifically proven method? Ah! Congratulations to Mani and Cindy. Please send me your mailing address so I can forward them to Macy’s (mytartelette[at]gmail[dot]com).

Dang things are busy around here and I am liking it very much! I get to do and see, work lots of fun stuff. Indeed, if you are in the Charleston area, drop by the first annual recipe and cook-off contest which I’ll be photographing for Charleston Magazine. Come support some budding cooking and baking talent!

Butternut and Acorn Squash Soup


Obviously, all that buzzing about is good and getting home, plopping exhausted on the sofa makes me feel like I have contributed to the twirling world around me. I know my mom hates it because I end up calling home (France) at the oddest hours and often times while I am eating a late lunch of soup or salad while they’re already in bed. Sorry. Every time I would talk to my mom last week, she’d ask me what I was eating, and my answer always was "butternut and acorn squash soup, side of petits lardons and creme fraiche".

It got to the point that she started worrying immensely. "Do you need me to send you some money?" she asked one day. In her mind, if we were eating that much soup that could only mean we were ut of ka-ching. I started laughing uncontrollably. "No mom! It’s our soup kick of the month and it so good I keep making it every other day!". The timid colder days did not have anything to do with it but tempting displays of seasonal squash got the best of me and I caved in.

This soup could not be any simpler to make with fresh butternut and acorn squash, some chicken stock (homemade if possible), garlic and thyme. To serve, we like a little (or a big) dollop of creme fraiche and some "lardons" (thick cut bacon or salted cured pork). One day this week we added some thinly sliced dried Thai chilies and sauteed butternut squash seeds. We voted this version as the best so far but feel free to improvise!

Butternut and Acorn Squash Soup


And before I forget: Please join me on Monday, October 26, when I join forces with nine of the webs best food and lifestyle bloggers for the delightfully frightful Halloween collaboration, Trick-Or-Eat. Nine haunted houses have been trimmed and tricked out on your behalf. Which of your favorite bloggers awaits behind each haunted home? Whatever have the ghostand hostesses prepared for your visit? Be sure to stop by for this ultimate Holiday Block Party, presented blog style!

Butternut And Acorn Squash Soup:

Serves 4 hungry poeple

1 tablespoon olive oil
1 small butternut squash, peeled and diced into 1-inch cubes (seeds scooped out & saved)
1 small acorn squash, peeled and diced into 1-inch cubes
3 cloves or garlic, peeled and smashed (don’t worry about mincing)
4 cups chicken stock
1 to 2 teaspoons fresh thyme (or less if desired. You can also use some sage)
water
salt and pepper

Optional accompaniements:
chopped Tai chilies
creme fraiche (or sour cream)
sauteed thick cut bacon or salted and cured pork, sliced thin
seeds from one of the squashes (sautee in the bacon fat for maximum flavor, and drained on paper towels)

In a large stock pot, heat the oil over medium heat. Add the cubed squashes and sautee for 2-3 minutes or until they start to get some caramelizing color. Add the garlic and sautee one minute, stirring often to prevent it from burning (or it will become bitter). Add the chicken stock and thyme and bring to a boil. Lower the heat and cook, covered for about 30 minutes or until the squash is tender. With an immersion blender, puree the soup in the pot until smooth. If usig a food processor or blender, let the soup cool a bit before processing. Adjust the consistency to your liking with extra water. Salt and pepper to taste.
Garnish as desired.

Bananas Foster Tartelettes & A Giveaway

Bananas Foster Tartelettes


I like to think I am fairly organized. I mean, there is logic to whatever battle is taking place on my desk. Or in my head. Like most of us, I get pretty psyched about being a step ahead and I was darn happy for having posts in drafts right before I left for BlogHer food in San Francisco. David says he has 40 stories or so in drafts at all times. I giggle when I have one ahead of the game. I am however excited when “the” one is these Bananas Foster Tartelettes. Things got busy then and things got busier this week but these were too good to wait any longer to post.

Whenever I travel, I try to leave a few easy things for B. to reheat for dinner knowing too well he’d end up eating at his parents or be invited here and there. He tends to skip meals when there is no one to call him to the table. I know he can boil water for pasta. I’ve seen it. I even happen to know he can make awesome steamed clams.

This time was no different as I labeled containers of food and even took him on a guided tour of the fridge and pantry. It’s just not his thing. I was tempted to post-it the entire house but refrained. However, as previously mentioned, his eyes got stuck on all the desserts left on top shelf from my zealous attempt at getting prepared. This is his thing.

Caramel


After describing what the tarts were made of, he exclaimed “oh! Kind of like bananas foster without the fire flambéing action!” Precisely. We tend to have a surplus of bananas in the house, and after making banana donuts last month, I still had plenty to use up, hence the tarts (and a few loaves of banana nut bread).

The tarts start with a crispy shortbread base and are filled with a hazelnut and almond frangipane before being topped with fresh banana slices and a (generous) drizzle of salted butter caramel sauce. I am all over banana and nuts and I am all over salted butter anything, so the combination was pretty much a no brainer. However, it all came together out of the necessity to use all the tidbits ingredients in the fridge, pantry and freezer.

I had leftover shortbread dough in the freezer from a previous tart making day as well as a jar of salted butter caramel sauce, a handful each almonds and hazelnuts in the pantry, a knob of butter and a tiny bit of cream in the fridge. And of course a good many banana giving me the sweet eye.

As I have said before, I hate waste. Having worked in a restaurant kitchen for many year, I pretty much nailed down the recycling issue. If you don’t recycle, re-use or force yourself to use items bought on a whim, you are likely to drive your place to the pits. I have the same mentality when it comes to the kitchen. Being on a tight budget, I can’t allow us to waste, even less impulse buy certain items. Everything these days is budgeted, accounted for and used to the max. More than ever before I am aware of what I have. Time, the ability to cook, develop recipes, a wonderful mother- in -law who unexpectedly drops by with supplies, etc…

Bananas Foster Tartelettes


Some of us are not that lucky. I do my best but some can’t. In that spirit, I really like what Macy is doing in their campaign Come Together to fight hunger to raise awareness and money to feed 10 million of people suffering from hunger, and they will match donation dollar for dollar.
When Macy’s got in touch to spread the word last week, I immediately agreed. There are 3 different ways you can get involved in this great campaign:

1) You can host dinner parties and ask that instead of bringing traditional host gifts, guests make a donation to Feeding America.

2) You can donate $1 directly at any Macy’s register, one dollar provides dinner for seven.

3) You can shop at any Macy’s and get special savings in-store on October 17 (today). A portion of the $5 in-store ticket sales will benefit Feeding America.

Macy’s also provided me with two $25 gift certificates to give to my readers. All you have to do is leave a comment (multiple entry will automatically be deleted) before Tuesday october 20th midnight eastern time, for a chance to win. My better half will select the winners at random from the comments left on this post. Even if Macy’s does not ship internationally nor has stores outside the US, everyone can enter. You can always use the gift certificate to do your Christmas shopping for friends or family here and continue to spread some good spirit.

Good luck!

Bananas Foster Tartelettes:

Serves 8

Sable Dough:
1 stick (113 gr) butter, at room temperature
3/4 cup (95 gr) powdered sugar (unsifted)
1 large egg
1 1 /2 cups (190gr) all purpose flour
2 tablespoons (20 gr) cornstarch
pinch of salt

For the almond-hazelnut frangipane filling:
1 stick (115 gr) butter, softened
½ cup (100 gr) granulated sugar
½ cup (50 gr) ground almonds
½ cup (50gr) ground hazelnuts
seeds from half a vanilla bean or 2 teaspoons vanilla paste or extract
2 eggs
1/4 cup (60gr) heavy cream

Remaining ingredients:
3-4 bananas, thinly sliced
Salted butter Caramel sauce
Vanilla Ice Cream

Prepare the shortbread rounds:
In a stand mixer fitted with the paddle attachment, whip the butter and sugar together until light and fluffy on medium speed, 2-3 minutes. Add the egg and mix until combined. Add the flour, cornstarch and salt and mix briefly to incorporate. Dump the whole mixture onto a lightly floured board and gather the dough into a smooth ball. Do not work the dough while in the mixer or it will toughen up. Flatten the dough into a disk, wrap it in plastic wrap and refrigerate for an hour.
You will need half the amount of dough to make the tartelettes. The other half can be kept in the fridge for up to 5 days or frozen, well wrapped for up to 3 months.
Preheat the oven to 350F and position a rack in the middle. Line a baking sheet with parchment paper. Set aside.
When the dough is nice and cold, roll it out on a lightly floured board or in between sheets of plastic wrap to about ¼ -inch thick. Cut out eight 3-inch rounds with a pastry ring or cookie cutter. Place them on the prepared baking sheet and bake for 8-10 minutes. Let cool.

Prepare the filling:
Place the butter, sugar, ground nuts, vanilla bean seeds and the eggs in a large bowl and whisk until smooth (can also be done in a food processor). Add the cream but stir in it instead of whisking to prevent emulsifying it or it will rise while baking. Refrigerate for 30 minutes. Place 8 baked rounds of dough in 8 pastry rings of the same dimension, divide the cream evenly among the rings and bake 20 minutes at 350F. Let cool. Once cooled, remove the tarts from the rings and arrange the banana slices decoratively on top, drizzle the caramel sauce on top. Serve with vanilla ice cream if desired.