
streusel

Ginger Fig Streusel Tarts With Honey Lavender Ice Cream

FigTart4-2


Thank you guys for toasting Barbara with us in my last post. I know it meant a lot to her and it did to me. (And yes, those were my feet!). It’s been a tough journey for her and I often told Bill I’d give my last shirt to get on a plane and try to be of some help (laundry, groceries, you know the drill), crack up some stupid joke or just hold someone’s hand. He understands. He also adds that he doesn’t like when I travel, saying that I always prepare some good dinners for him to eat while I am gone, I rarely leave dessert. Wrong. Cookies, I always make cookies.

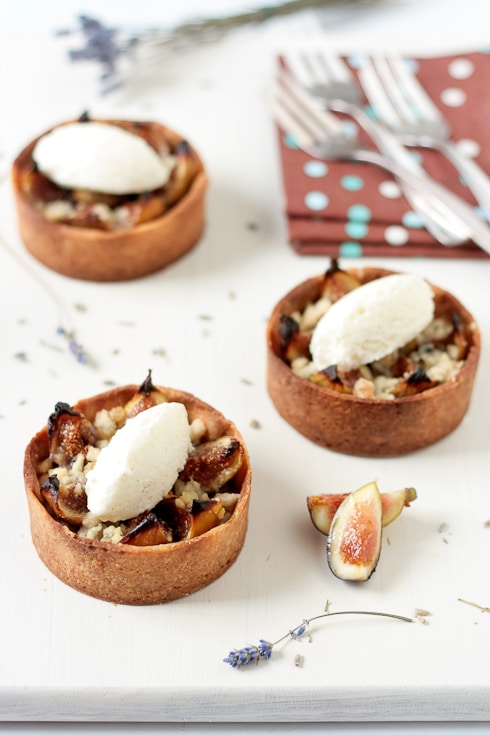
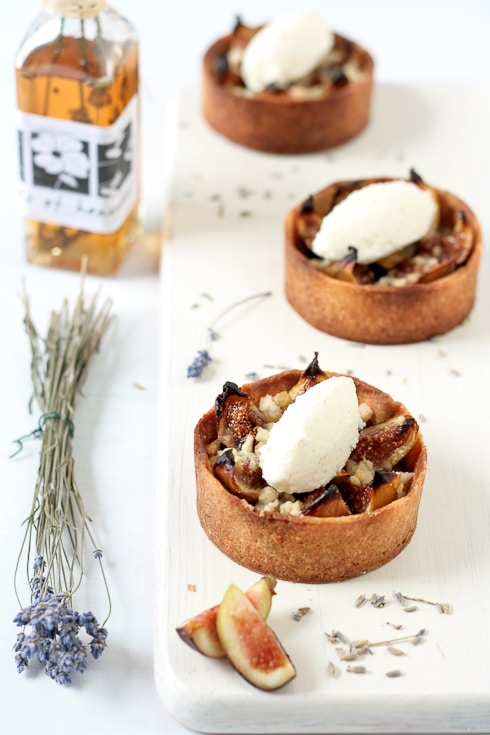
This past weekend however, when I went to Veronica’s in Virginia to teach what we now call a Pastry Bootcamp (a nice one), leaving four of these Ginger Fig Streusel Tarts with some Lavender Honey Ice Cream. He ate the coffee-chicory macarons. Go figure. He actually did it (unknowingly) right as we had plenty of the tarts to celebrate our 11th anniversary. Still feels like we are within the first 5 years. Very much loving having such a fantastic partner. Very much digging this whole marriage thing. Very much looking forward to the next 11 by his side.

Teaching Veronica was great fun and even if there was a lot of information shared in a short amount of time, she knows that the pastry course comes with a lifetime warranty and free upgrade to the baking 101 hotline! I am very glad to have a couple tarts left still as it makes catching up with laundry a whole lot easier. Not to mention getting caught up with work a whole lot sweeter!! How can one’s inbox get so full in 4 days away?! Even the puppies seem to have grown!

Figs and Lavender


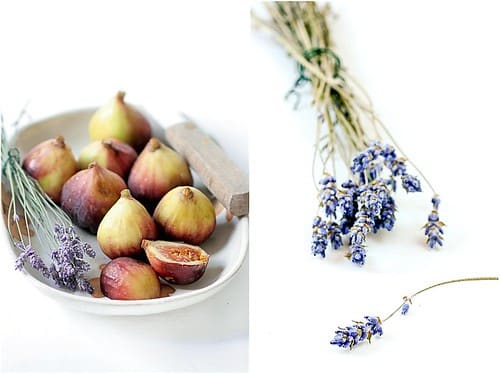
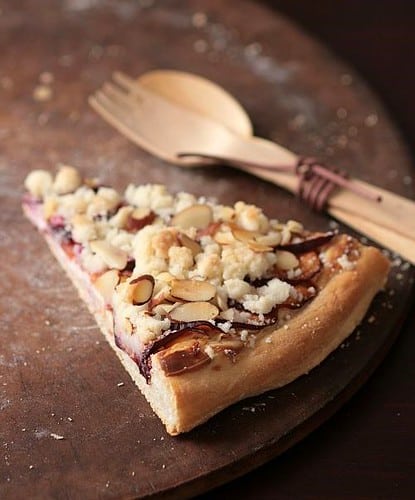
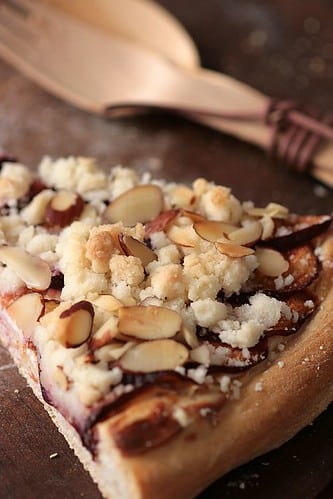
The tarts were inspired from the last dessert we had in Asheville a few weeks ago before getting on the plane. The original was an apricot ginger tart served with a scoop of honey lavender ice cream. I changed it around a bit as apricots here are not fully seasonal and a bit on the bland side and a friend had just dropped figs from her tree. I love figs…It’s a childhood thing. It’s a childhood story actually but I’d need another three paragraphs so I’ll wait for that one!

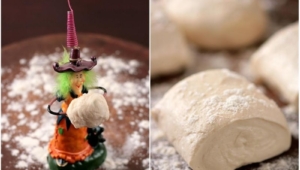
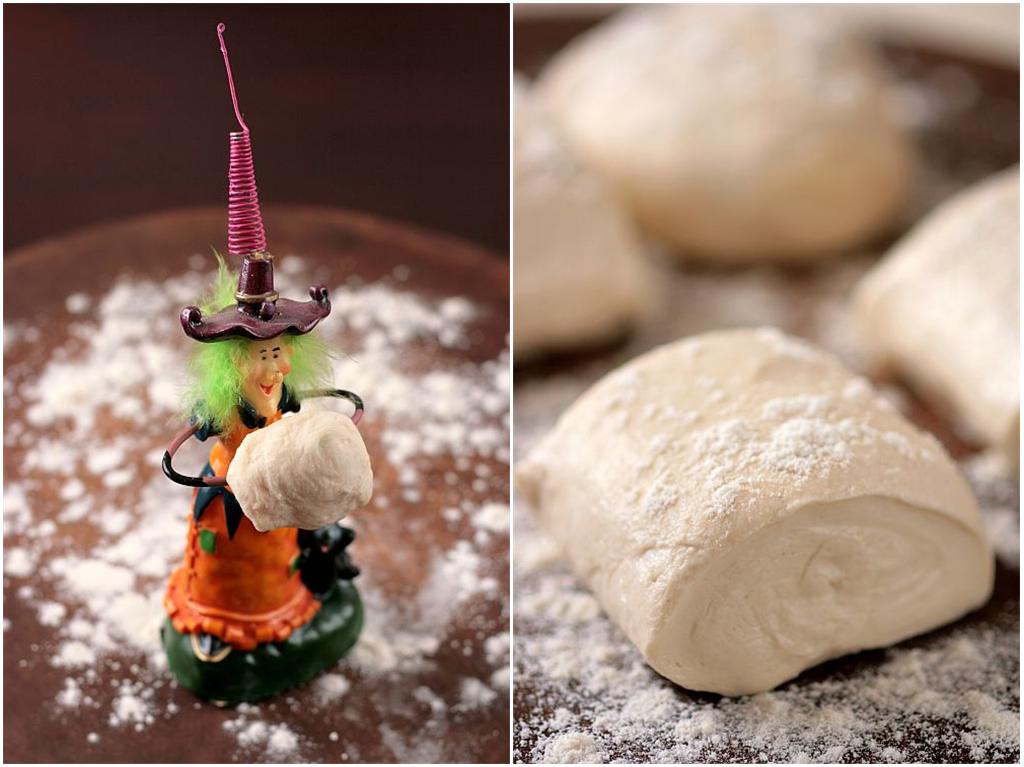
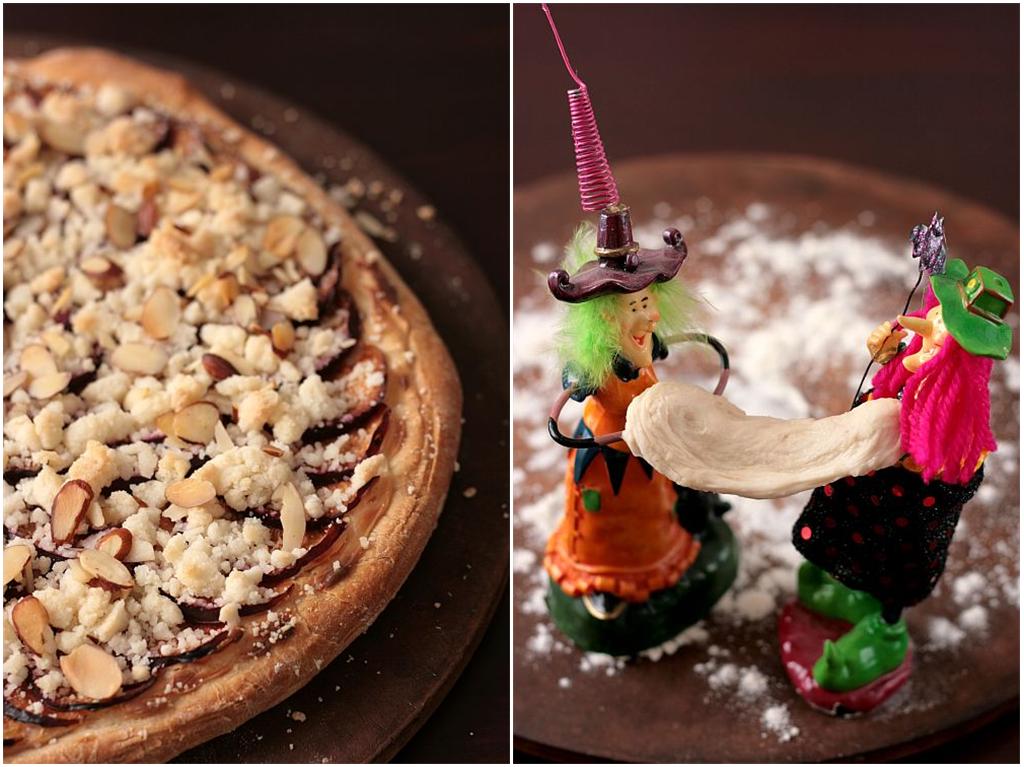
I could wax poetic about figs for hours (no surprise there) but let’s get to the essentials. The crust is a simple pate sablee with a little vanilla bean seed for extra flavor. I know vanilla beans are not cheap and I am lucky to get supplied by my mother but I have to tell you that even 1/4 bean makes a huge difference in a recipe. When it comes to figs, I like them grilled, roasted or fresh so I pretty much left them as they were and layered them with some streusel spiked with crystallized ginger, added a drizzle of honey and hop! in the oven they went. The honey ice cream is just the perfect hint of sweetness and bonus flavor to bring the tarts together. As Bill put it: it’s Provence in a tart!

Before I leave you with the recipe, I just want to thank my friends Todd and Diane from White On Rice Couple for kicking off their new feature series, Portrait of A Gourmand by starting with me. I am honored. Gourmande I am that’s for sure!

FigTart3


One year ago: Berries and Cream for Bastille Day.

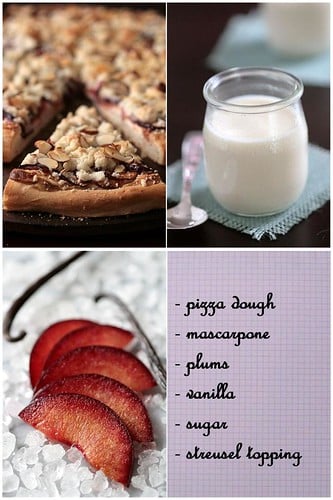
Ginger Fig Streusel Tarts With Lavender Honey Ice Cream:

Makes four 3-inch tarts

For the lavender honey ice cream:
1/2 cup (125ml) lavender honey
4 egg yolks
pinch of salt
1 1/2 cups (375ml) milk
1 1/2 cups (375ml) heavy cream

For the pate sablee:
2 tablespoons (20gr) slivered almonds
1/2 (60gr) cup powdered sugar, unsifted, divided
1/2 stick (56.5gr) unsalted butter, at room temperature
1/4 vanilla bean, seeded
pinch of salt
3/4 cup (90gr) all-purpose flour
1 egg yolk

For the filling:

2 oz (60gr) all purpose flour
2 oz (60gr) sugar
2 oz (60gr) very cold butter, cut into 1/4 inch pieces
2 tablespoons chopped crystallized ginger
12 fresh figs, quartered
4 tablespoons lavender honey (or the one you prefer)

Prepare the ice cream:
In a large bowl, beat the honey and egg yolks until light in color. Heat the milk and cream to a bare boil in a large heavy saucepan. Pour the mixture over the eggs and return the mixture to the saucepan and gently heat (do not boil) until the mixture coats the back of a spoon. Refrigerate for at least 2 hours. Process in your ice cream maker according to the manufacturer’s directions

Prepare the pate sablee:
Preheat oven to 350F.
Place almonds and 1 tablespoon powdered sugar in a food processor. Pulse until the nuts are finely ground. In bowl of electric mixer fitted with paddle attachment, cream butter, vanilla bean seeds, ground nuts and salt on medium speed until well-combined. Slowly add remaining powdered sugar and flour and mix well. Add the egg yolk and mix until incorporated. Shape dough into a ball and flatten into a disc. Wrap with plastic wrap and refrigerate for two hours or overnight.
Place the dough in between two sheets of plastic wrap or parchment paper and roll it out to about 1/8-inch thick. Cut out four 5- inch rounds and fit them inside four 3- inch tartlet molds, patting the dough in with your fingertips if it breaks on you as you transfer the rounds. Gather the scraps and set aside.
Prick the dough with a fork and refrigerate 30 minutes.
Preheat the oven to 350F. Place a piece of parchment paper inside the tart shells, fill with beans or pie weights. Bake the shells for 12 to 15 minutes. Let cool on wire racks. Keep the oven running at 350F.

Prepare the filling:
In a large bowl, mix together the flour and sugar. Add the butter and ginger and quickly mix with your fingertips until you get pea sized pieces. Layer 3/4 of the streusel at the bottom of each tart shell. Divide and arrange the quartered figs evenly on top and top with the remaining streusel. Drizzle with the honey and bake an additional 20 minutes or until the streusel is baked and the figs are slightly roasted. Serve with the ice cream.

Tossing With The Daring Bakers: Plum Mascarpone and Streusel Pizza

Plum Mascarpone Streusel Pizza


This Daring Bakers' challenge almost did not come to be. Almost. It’s been a busy month, work, play, life…the usual. Multiply that by two or three. It took a dinner invitation and a little Halloween inspiration to make it happen.

Our October hostess, Rosa from Rosa’s Yummy Yums chose pizza as our challenge and although excited about it right from the start (it’s got carbs…I am excited), I did not get to it until Monday morning. We had friends coming over yesterday for dinner and since it was going to be a late casual nibble around a game of Scrabble and some wine, I figured that pizza would be the perfect thing for that kind of get together. I made four small pizzas and kept three on the savory side and you guess it, one sweet for the blog. Turns out our guests arrived while I was still in traffic and helped themselves to the Plum Mascarpone and Streusel Pizza before Scrabble…my kind of peeps…dessert first!

One of Rosa’s requests, although not mandatory was to take a picture of us tossing the dough. My schedule is completely opposite my husband’s these days so I knew it would be a hard thing to do, not having extra hands to hold the camera while I tossed, even with a remote control it was proving difficult. I kept having this nightmare: 2 in the morning and you toss your dough, click the remote button and then watch your pretty dough fall on a glass of water or pan full of cookies, catch the said glass or pan and takes them for a dive down to the floor and with a big sound of broken glass, baking sheet tumbling and loud cursing you end up waking up a puppy, an old dog and your mate. So you spend the next hour, cleaning, playing, calming and promising more cookies to ease the pain of a bing and a bang…Yep…as I said, I had to find a back up.

Late Sunday night, I went to the attic to get some Halloween decorations and I was sitting there in the middle of unlabeled boxes (grhhh!), I picked up my favorite Halloween witches, Greta and Hilda. Ha!Ha! They would do the tossing or stretching and I would photograph their tribulations!Greta started on her own while Hilda was getting her pretty pink hair fixed up a bit and the task was proving to be a little to much for one person so Hilda jumped right in like a good Daring Bakers. Once they were done tossing, stretching and playing with the dough I spread some mascarpone flavored with some vanilla on one pizza, arranged plum slices over it and topped the whole thing with some almond streusel. The end result was close to a rustic brioche tart and absolutely wonderful warm out of the oven.

Thank you Rosa for such a fun challenge and to you Lisa and Ivonne for coordinating things so well each month! I bet your quest for pizza toppings and variations will forever be answered by taking a look at all the other Daring Bakers' creations. Happy tossing!

Pizza Ingredients


BASIC PIZZA DOUGH

Adapted from “The Bread Baker’s Apprentice” by Peter Reinhart.
Makes 4-6 pizza crusts

For the dough:
4 1/2 Cups (20 1/4 ounces/607.5 g) all purpose flour, chilled
1 3/4 Tsp Salt
1 Tsp Instant yeast
1/4 Cup (2 ounces/60g) olive oil or vegetable oil
1 3/4 Cups (14 ounces/420g or 420ml) ice cold water, ice cold (40° F/4.5° C)
1 Tb sugar
Semolina/durum flour or cornmeal for dusting

Toppings:
6 oz mascarpone, at room temperature
1 Tb sugar
1 vanilla bean
3 -4 plums, pitted and sliced
streusel topping (add 1/3 cup sliced almonds)

In a bowl combine the mascarpone, sugar and seeds from the vanilla bean and stir until smooth. Spread over the dough right before baking, arrange the plum slices around and topped with the streusel. Bake at 375 for 15 minutes (unlike for savory pizza, the streusel needs to bake a little longer and not burn).

DAY ONE
Mix together the flour, salt and instant yeast in a big bowl or stand mixer. Add the oil, sugar and cold water and mix well (spoon or paddle attachment) to form a sticky ball of dough. On a clean surface, knead for about 5-7 minutes, until the dough is smooth. If it is too wet, add a little flour and if it is too dry add 1 or 2 teaspoons extra water.
If you are using an electric mixer, switch to the dough hook and mix on medium speed for the same amount of time. The dough should clear the sides of the bowl but stick to the bottom of the bowl. If the dough is too wet, sprinkle in a little more flour. If it clears the bottom of the bowl, dribble in a teaspoon or two of cold water. The finished dough should be springy, elastic, and sticky, not just tacky, and register 50°-55° F/10°-13° C.
Flour a work surface or counter. Line a jelly pan with baking paper/parchment. Lightly oil the paper. Cut the dough into 4-6 equal pieces. Sprinkle some flour over the dough. Make sure your hands are dry and then flour them. Gently round each piece into a ball.
Transfer the dough balls to the lined jelly pan and mist them generously with spray oil and cover with plastic wrap. Put the pan into the refrigerator and let the dough rest overnight or for up to thee days.
NOTE: You can store the dough balls in a freezer bag if you want to save some of the dough for any future baking. In that case, pour some oil (a few tablespooons only) in a medium bowl and dip each dough ball into the oil, so that it is completely covered in oil. Then put each ball into a separate bag. Store the bags in the freezer for no longer than 3 months. The day before you plan to make pizza, remember to transfer the dough balls from the freezer to the refrigerator.

DAY TWO
On the day you plan to eat pizza, exactly 2 hours before you make it, remove the desired number of dough balls from the refrigerator. Dust the counter with flour and spray lightly with oil. Press the dough into disks about 1/2 inch/1.3 cm thick and 5 inches/12.7 cm in diameter. Sprinkle with flour and mist with oil. Loosely cover the dough rounds with plastic wrap and then allow to rest for 2 hours.
At least 45 minutes before making the pizza, place a baking stone on the lower third of the oven. Preheat the oven as hot as possible (500° F/260° C). If you do not have a baking stone, then use the back of a jelly pan. Do not preheat the pan.
Generously sprinkle the back of a jelly pan with semolina/durum flour or cornmeal. Take 1 piece and lay the dough across your fists in a very delicate way and carefully stretch it by bouncing it in a circular motion on your hands, and by giving it a little stretch with each bounce. Once the dough has expanded outward, move to a full toss.
Make only one pizza at a time. During the tossing process, if the dough tends to stick to your hands, lay it down on the floured counter and reflour your hands, then continue the tossing and shaping. In case you would be having trouble tossing the dough or if the dough never wants to expand and always springs back, let it rest for approximately 5-20 minutes in order for the gluten to relax fully,then try again.You can also resort to using a rolling pin.
When the dough has the shape you want, place it on the back of the jelly pan, making sure there is enough semolina/durum flour or cornmeal to allow it to slide and not stick to the pan. Lightly top it with sweet or savory toppings of your choice.
Slide the garnished pizza onto the stone in the oven or bake directly on the jelly pan. Close the door and bake for about 5-8 minutes.

Plum Mascarpone Streusel Pizza