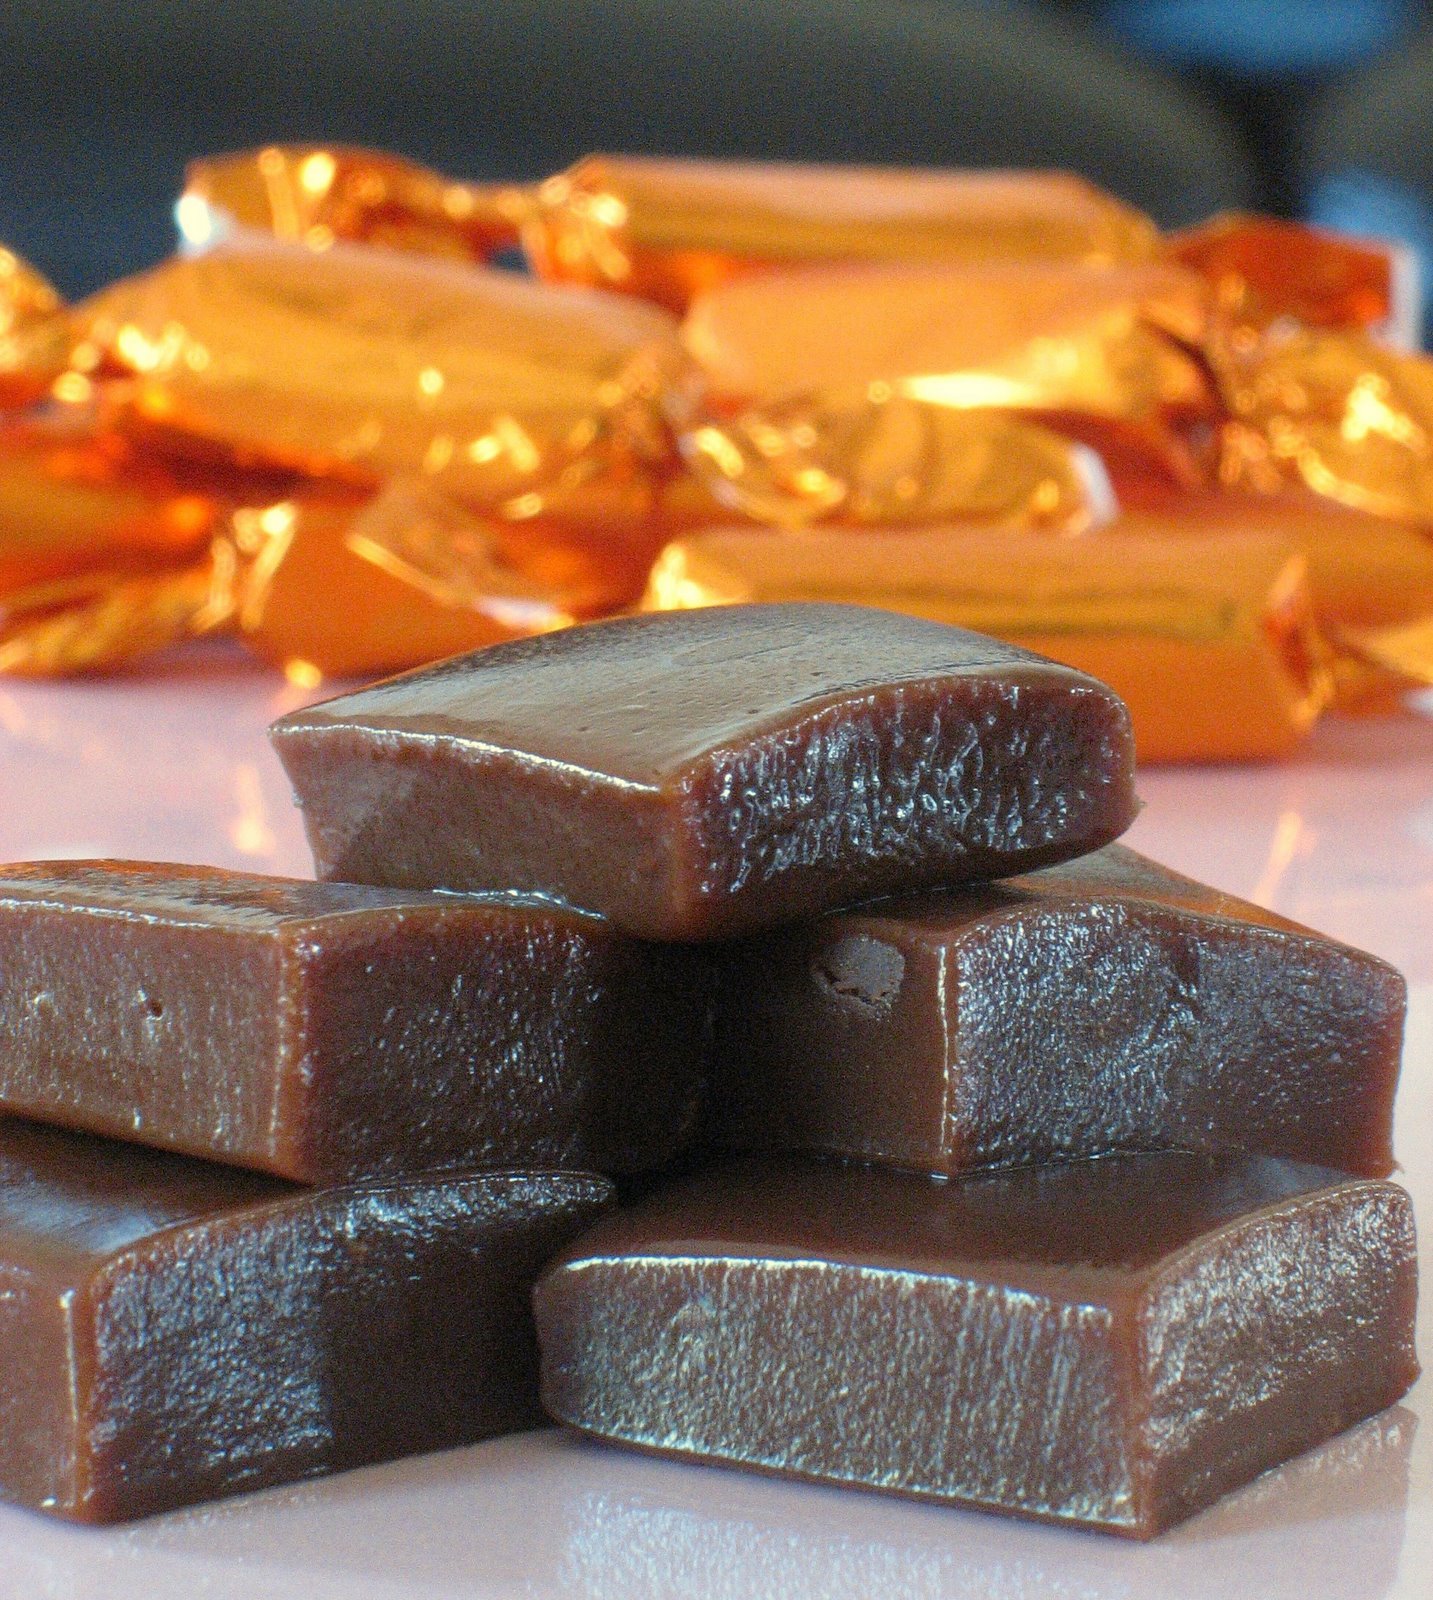
salted butter

Gluten Free And Vegan Daring Bakers' Challenge

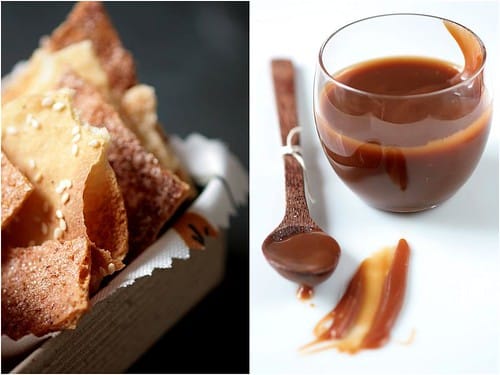
Gluten Free Crackers and Salted Butter Caramel Sauce


It is indeed a first in the history of the Daring Bakers, a gluten free and vegan challenge! Since being a Daring Baker in December 2006, I have seen the group grow by leaps and bounds, with members from all walks of life partaking in our monthly bake-offs. I know it is daunting at times for some Daring Bakers to adapt recipes to fit their dietary lifestyles and I always marvel at how creative and resourceful gluten free and vegan members are. I was really excited to see that our hostesses this month, Natalie from Gluten A Go Go, and co-host Shelly, of Musings From the Fishbowl, chose Lavash Crackers from Peter Reinhart’s The Bread Baker’s Apprentice: Mastering The Art of Extraordinary Bread.

Natalie being a gluten free baker asked us to challenge ourselves and make the crackers gluten free while Shel asked us to come up with vegan dips and spreads to go along. Being a ubber cool group, we still had the choice to make them with regular flour if gluten free baking did not appeal to us. I welcomed both challenges with open arms! Indeed, there are quite a few gluten free eaters among our friends and family members and I can always stretch my gf baking repertoire. Coming up with vegan dips and spreads was a good opportunity to try a couple of different ingredients, but furthermore really understand and appreciate many people put behind being vegan.

Lavash Crackers and Toppings


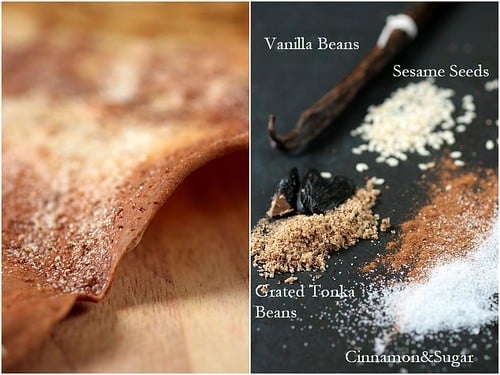
The past month has been quite busy and full of twists and turns and I did not get to make the dough until Wednesday afternoon. I used a gluten free baking mix by Bob…..and realised after the first rise that had forgotten to add xanthan gum to the dough which acts like gluten in baked goods and helps stretch and relax the dough. I did not even bother rolling that one out, waited until Thursday to go buy some xanthan gum and started again. The quantities are so small here that I mixed the dough by hand and left it to rise, rolled it paper thin, baked and then broke it to shards. I rolled the dough into one large baking sheet and topped 1/4 with sesame seeds, 1/4 with grated Tonka Beans, 1/4 with cinnamon sugar and the last quarter was brushed with agave syrup and half a vanilla bean, seeded. The smells that were invading the house made it hard to resist not breaking into it as soon as it came out of the oven!!

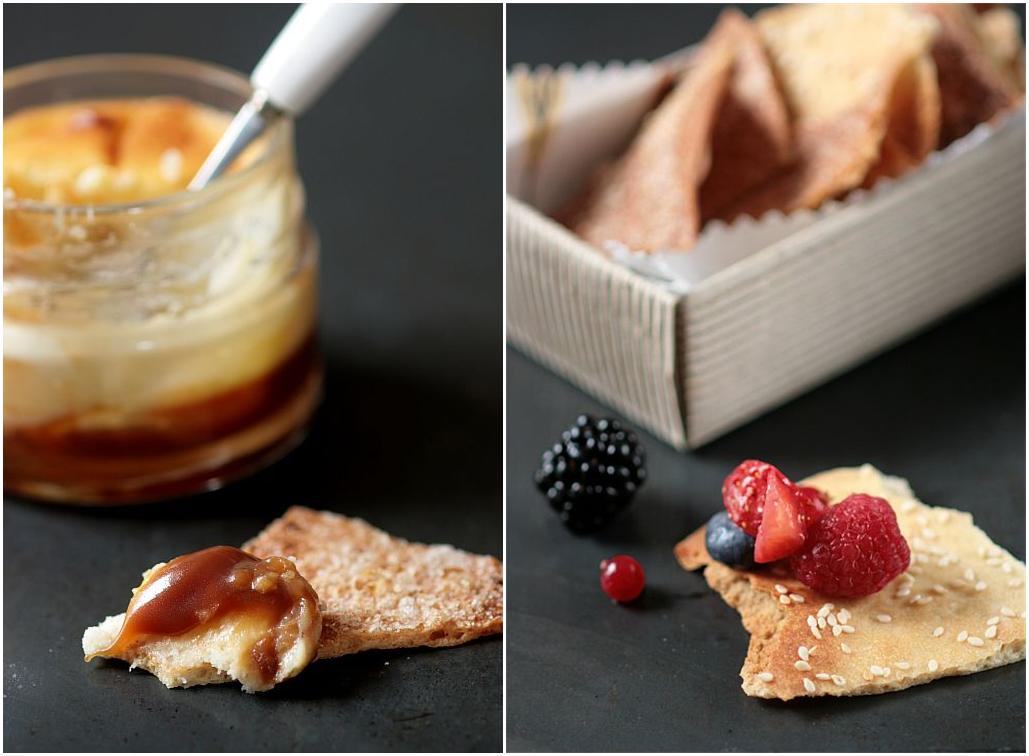
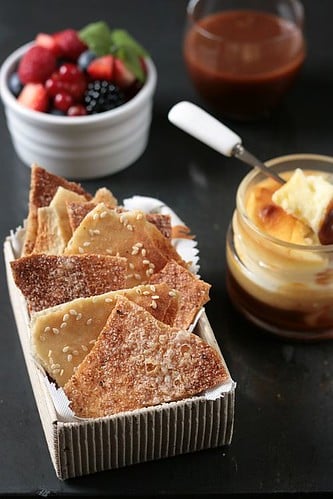
For the toppings, our hostesses gave us complete freedom with only one rule: it had to be vegan. I was really interested to see how some of my favorites would turn if made vegan and with the tremendous array of choices and progress made in vegan foods, I was able to serve the crackers with a vegan salted butter caramel sauce, a vegan caramel cheesecake in a jar spread and my now favorite lemon balm infused berry salad. I love salted butter caramel anything, not being a fashion victim but I grew up on that stuff!
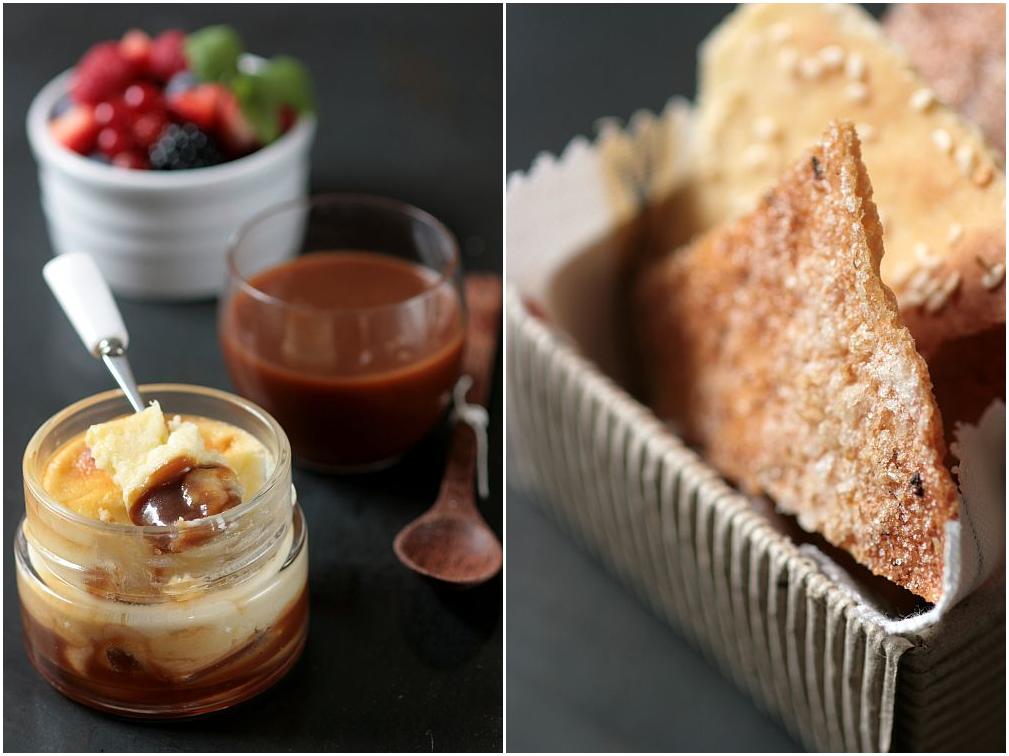
The salted butter caramel sauce is an adaptation of my favorite sauce and the only problem encountered was that it took a longer time for the butter and sugar to come to a caramel color and consistency but the rest was the same. I used Earth Balance butter and soy creamer instead of their regular counterparts and added some Fleur de Sel for the salty factor. I could taste a difference from the original, sure can’t say it’s the "real thing" but it came out pretty darn close and what mattered is that I was able to make one of my vegan neighbors very very happy!!

The vegan caramel cheesecake is also an adaptation and was easy to make using Ener-G Egg Replacer and vegan cream cheese (Tofutti brand). I divided the batter between four jam/jelly jars and added some salted butter caramel sauce at the bottom. I have to say that B. thought it was "different but worth eating" and I loved it.

The berry salad is nothing new but since I made this lemon balm berry salad, it has been on rotation at the house and for dinner parties with the neighbors. It works just like a savory salsa with the crackers and is great for a little 4 o’clock pick me up with a cup of tea.

Thank you Natalie an Shelly for this opportunity to bake gluten free and vegan! It was a blast! Check out the others' creations here.


Gluten Free Lavash Crackers:

Makes one sheet pan:

1 1/2 cups (6.75 oz) unbleached bread flour or gluten free flour blend (If you use a blend without xanthan gum, add 1 tsp xanthan or guar gum to the recipe)
1/2 tsp (.13 oz) salt
1/2 tsp (.055 oz) instant yeast
1 Tb (.75 oz) agave syrup or sugar
1 Tb (.5 oz) vegetable oil
1/3 to 1/2 cup + 2 Tb (3 to 4 oz) water, at room temperature
Poppy seeds, sesame seeds, paprika, cumin seeds, caraway seeds, or kosher salt for toppings

In a mixing bowl, stir together the flour, salt yeast, agave, oil, and just enough water to bring everything together into a ball. You may not need the full 1/2 cup + 2 Tb of water, but be prepared to use it all if needed.
For Non Gluten Free Cracker Dough: Sprinkle some flour on the counter and transfer the dough to the counter. Knead for about 10 minutes, or until the ingredients are evenly distributed. The dough should be firmer than French bread dough, but not quite as firm as bagel dough (what I call medium-firm dough), satiny to the touch, not tacky, and supple enough to stretch when pulled. Lightly oil a bowl and transfer the dough to the bowl, rolling it around to coat it with oil. Cover the bowl with plastic wrap.
For Gluten Free Cracker Dough: The dough should be firmer than French bread dough, but not quite as firm as bagel dough (what I call medium-firm dough), and slightly tacky. Lightly oil a bowl and transfer the dough to the bowl, rolling it around to coat it with oil. Cover the bowl with plastic wrap.
Ferment at room temperature for 90 minutes, or until the dough doubles in size. (You can also retard the dough overnight in the refrigerator immediately after kneading or mixing).
For Non Gluten Free Cracker Dough: Mist the counter lightly with spray oil and transfer the dough to the counter. Press the dough into a square with your hand and dust the top of the dough lightly with flour. Roll it out with a rolling pin into a paper thin sheet about 15 inches by 12 inches. You may have to stop from time to time so that the gluten can relax. At these times, lift the dough from the counter and wave it a little, and then lay it back down. Cover it with a towel or plastic wrap while it relaxes. When it is the desired thinness, let the dough relax for 5 minutes. Line a sheet pan with baking parchment. Carefully lift the sheet of dough and lay it on the parchment. If it overlaps the edge of the pan, snip off the excess with scissors.
For Gluten Free Cracker Dough: Lay out two sheets of parchment paper. Divide the cracker dough in half and then sandwich the dough between the two sheets of parchment. Roll out the dough until it is a paper thin sheet about 15 inches by 12 inches. Slowly peel away the top layer of parchment paper. Then set the bottom layer of parchment paper with the cracker dough on it onto a baking sheet.
Preheat the oven to 350 degrees Fahrenheit with the oven rack on the middle shelf. Mist the top of the dough with water and sprinkle a covering of seeds or spices on the dough (such as alternating rows of poppy seeds, sesame seeds, paprika, cumin seeds, caraway seeds, kosher or pretzel salt, etc.) Be careful with spices and salt – a little goes a long way. If you want to precut the cracker, use a pizza cutter (rolling blade) and cut diamonds or rectangles in the dough. You do not need to separate the pieces, as they will snap apart after baking. If you want to make shards, bake the sheet of dough without cutting it first.
Bake for 15 to 20 minutes, or until the crackers begin to brown evenly across the top (the time will depend on how thinly and evenly you rolled the dough).
When the crackers are baked, remove the pan from the oven and let them cool in the pan for about 10 minutes. You can then snap them apart or snap off shards and serve.

Vegan Salted Butter Caramel Sauce:
240 gr. sugar (1 1/4 cups)
80 ml water
115 gr vegan butter (1 stick)
150 ml vegan creamer
1 1/2 tsp Fleur de sel

In a heavy saucepan set over low heat, combine the sugar and water and heat just until the sugar is dissolved. Add the butter. Let it come to a boil and cook until it reaches a golden caramel color (takes between 25-35 minutes), stirring occasionally. Remove from the heat and add the creamer ( it will splatter and get crazy, but do not fear and trust the recipe). Whisk to combine and put back on the stove. Let it come to a boil again over low heat and cook 10-15 minutes until you reach a nice creamy consistency. Remove from the heat, add the salt and stir until melted. Keeps for about 2 weeks.

Vegan Caramel Cheesecake In a Jar:
1/2 cup salted butter caramel sauce
8 oz vegan cream cheese, at room temperature
1 Tb. vegan butter
1/2 cup sugar
3 Tb. Egg-Replacer mixed with 1/4 cup water

Divide the caramel sauce between 4 small jam jars. Set aside.
In a large bowl, with the electric mixer or by hand , mix the cream cheese, butter and sugar. Add the egg replacer mixture and beat until well incorporated.
Divide the batter among the 4 jars. Set them in a roasting pan and fill with water until it reaches halfway up the sides of the jars. Bake at 300F for 20-30 minutes. Let cool completely before refrigerating or serving.

Lemon Balm Infused Berry Salad:
Click here for the recipe.
Gluten Free Lavash Crackers And Vegan Spreads

Two Chocolates, Some Salted Butter Caramel Mousse And A Smile On My Face!

Two Chocolates and Salted Butter Caramel Mousse


As you know from my last post, Monday was a pretty rough day, ups and downs, high and lows, laughing at the most ridiculous things and crying over the simplest ones, but I have to thank you for cheering me up and on throughout the day with your words both here and privately. This little giant group of bloggers sure knows how to laugh, cry, send hugs and cheer up and cheer on. Thank you. I wish I could say that to each of you individually but I can’t. Instead I am bringing you a little dessert that is sure to heal a bad case of the blues or just make you feel better after a bad day. Problem is….I could not come up with a name for it and I am hoping that you can. What’s in it for you? Well, I have two copies of Tartine and only one being read so it is up for grabs…skip to the end of the post for details.

It was about 4 o’clock when I finally sat down on the front steps of C’s house, after a day filled with tons of little errands. You know, the ones you keep putting off but suddenly on a bad day they are the perfect thing to do to keep your mind busy and thought free. We started chatting about the kids going back to school, philosophising about the summer and that it had been a pretty rough one for everybody around us for different reasons. Just to think that a couple of months ago they were thinking about moving…I don’t think the neighborhood would be the same kindred one without them and the twins. We did not notice our husbands were doing the same thing but on our front steps until the wind started to carry their voices closer to us. We leaned over and asked what the heck they could be complaining about that we did not already know…"women, kids, pms, mortgages…what about you?", we pushed a united "same here, different gender!" and we all busted out laughing!!

I stood up and exclaimed "Well, I think the situation calls for chocolate and caramel…and a little grill-out with a good bottle of wine!" I asked the gentlemen to please tend to the grilling part that us women are so clueless about and that we would be back with dessert. I had an idea of what I wanted the final taste to be and a vague idea about the process and elements. That’s kind of the way I work with pastry I have noticed. I think of tastes I like together, close my eyes and try to imagine the texture, what flavor comes through first, which one is the last I want to keep. Then I think of the building process, kind of like playing Tetris with ingredients and ratio…sometimes it all fits together, sometimes the Tetris-like pieces catch up with me before I get right and I have got to start over. If you play Tetris, do you still see the pieces go down when you close your eyes after a game? I do…makes me laugh….

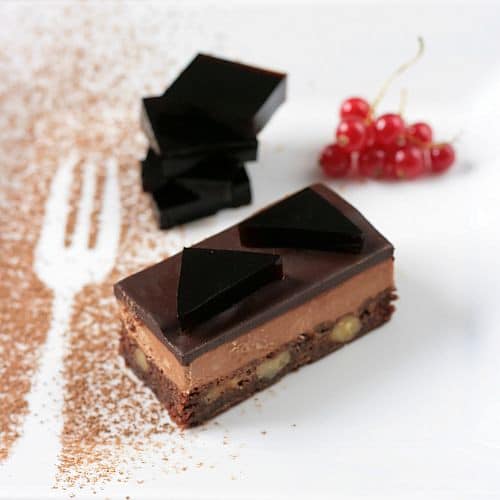
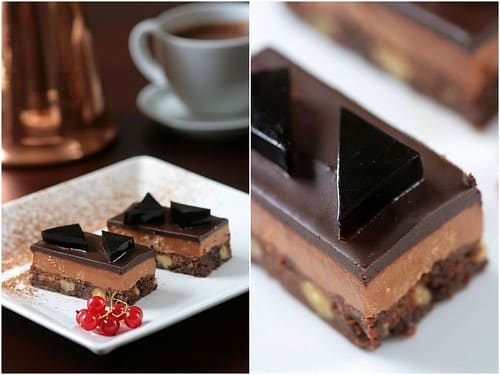
I had rearranged the pantry a couple of days prior to this story and had found an unexpected bar of dark chocolate, one of milk chocolate and a bag of salted butter caramel from Normandy…I had a square of chocolate followed by salted butter caramel (I did drop the pms word earlier, remember?!) and thought to myself that these three fellas needed to end up together in a dessert somehow. By Monday evening I had a plan: a dark chocolate and walnut fudgy brownie, a milk chocolate and salted butter caramel mousse, topped with chocolate ganache. Yes, I know there is one more element in the pictures, the little cut out triangles and squares are actually coffee jelly pieces but they did not turn like I wanted so it will be re-worked and blogged another time. I could not resist making some hot chocolate to go with it and it turned out to be very fitting to the windy and rainy evening we ended up having.

Two Chocolates and Salted Butter Caramel Mousse


And this is where I need you, I turned this in my head in every which way possible and I can’t come up with one name that makes me say "that’s it! I want it!"…and I really hope you can. All you have to do is leave a comment between Thursday August 21st and Saturday August 23rd at midnight eastern time and I will submit each title to the group who shared those with me and let them pick the one they like best. Think about it as playing Tetris with the chance to add a fantastic cookbook to your collection!

Something chocolate and caramel:

Makes 16 servings (you can even cut the bars tinier if you want)

Dark Chocolate Walnut Brownie base:

6 tablespoons unsalted butter
6 ounces bittersweet chocolate
3/4 cup all-purpose flour
1/4 teaspoon baking powder
1/8 teaspoon salt
2 large eggs
3/4 cup sugar
2 teaspoons pure vanilla extract
1/2 cup chopped walnuts

Preheat oven to 350°. Line an 9×13 inch baking dish with parchment paper or foil, leaving a 2 inch overhang on to sides (you pick). Coat with cooking spray or a dab of butter.
Melt together butter and chocolate in a heatproof bowl set over a pot of simmering water. Remove the bowl from heat and stir until smooth. Let the chocolate mixture cool slightly.
Whisk together the flour, baking powder, and salt in a medium bowl and set aside.
In the bowl of an electric mixer fitted with the paddle attachment, beat the eggs with the sugar and vanilla until pale and thick, about 3 minutes. Beat in the chocolate mixture. Add the flour mix and beat until just incorporated, scraping down the sides of the bowl as needed. Fold in the walnuts with a spatula.
Transfer the batter to the prepared pan, and smooth top with an spatula. Bake until a cake tester inserted into brownie between edge and center comes out with a few crumbs, 30 to 35 minutes, depending on your oven (Do not overbake.) Let cool 15 minutes; lift out of pan, and transfer to a wire rack. Let cool completely. Line a 9×9 inch square pan with parchment paper or plastic wrap. Cut your brownie base to fit inside the square pan, and set it down as your first layering component. Munch on the leftover or cut in little bites and cover with ganache for instant petits fours. Proceed to the rest of the recipe.

Milk Chocolate and Salted Butter Caramel Mousse Layer:

1/2 cup granulated sugar
2 Tb water
2 Tb salted butter, room temperature
1 cup heavy cream, divided
6 oz (3/4 cup) milk chocolate

Measure 3/4 cup of cream and refrigerate, this portion will be used to make whipped cream so keep it well chilled. In a microwave or small saucepan, heat the 1/4 cup remaining until it is fairly hot. It will be added to the caramel and by being hot it will prevent the caramel from seizing on you and clumping up.
Melt the chocolate in the microwave or in an heatproof bowl set over a pot of simmering water (make sure the bottom of the bowl does not touch the water). Set aside.
In a heavy bottomed saucepan, add the sugar to the water over medium high heat and cook, without stirring until you get a dark brown caramel. Take the pan off the heat and add the butter and 1/4 cream. It will bubble like mad but it will not run over….if the butter and cream are not cold the bubbling will be minimal and short lived. Stir with a wooden spoon to smooth the caramel if necessary. Let it cool to lukewarm. Add the caramel to the chocolate and stir until smooth.
Whip the remaining heavy cream to soft peaks in the bowl of a stand mixer fitted with the whisk attachment. Fold 1/3 of the whipped cream to the chocolate/caramel to loosen it up and then add the remaining whipped cream. Spread over the brownie base and refrigerate until completely set.

Dark Chocolate Ganache:
1/2 cup heavy cream
3/4 cup dark chocolate

In a medium saucepan, bring the cream to a simmer, remove from the heat. Add the chocolate to the cream and let sit for 5 minutes. Slowly stir the heavy cream and chocolate until they come together and form a shiny ganache. Let cool. You want the ganache to still be pourable but not too warm that it will melt the mousse.
Spread it over the caramel mousse and refrigerate until set.

To serve: lift the dessert out of the pan and trim the sides with a sharp knife (heated under hot water and wiped dry works great too), cut into the desired number of servings and enjoy.

Hot Chocolate And Some Caramels

Daring Bakers' Nut and Chocolate Gateau

Cashew Praline Gateau-Copyright©Tartelette 2008 First I would like to start this post by dedicating it to Sher from What Did You Eat? and fellow Daring Baker who past away last week. This past Sunday, a lot of bloggers honored her memory by cooking something from her site. We were in celebratory birthday mode on Sunday for my husband so I never got around to it. I did look through her desserts archives and noticed that a lot of them were previous Daring Bakers' challenges…so here is to you Sher, because I know we almost did have the same thought that a chocolate bath can’t be such a bad thing after all! You are missed and loved all over the world. It is definitely strange without you around today, "reveal day", but I’ll just come and say hey anyway.

Our host this month was wild red headed Chris from Mele Cotte who chose a Filbert Gateau with Praline Buttercream from "Great Cakes" by Carol Walter. I had the pleasure of meeting Chris in the flesh this month after many months of chatting over the phone, so you could say we are "friends". That did not stop me from telling her last night that I approached this challenge not as enthusiastically as I usually do. It’s been around 100F (no kidding) and over almost everyday here, and very humid with thunderstorms almost every afternoons so making a cake while in the middle of another baking project did not make me jump up and down. Filberts (hazelnuts) are quite pricey here and the baking budget is pretty much well spent already. In July, I crave ice creams and fruits and I would probably not tackle a multi part "gateau' unless asked to. Oh wait! I was asked to, by Chris and B. needed a proper birthday cake too! The fact that Chris came to visit with a tote full of nuts (yeehaw) and other goodies also gave me another reason to roll up my sleeve and get down and dirty with this cake.

Cashew Praline Gateau-Copyright©Tartelette 2008
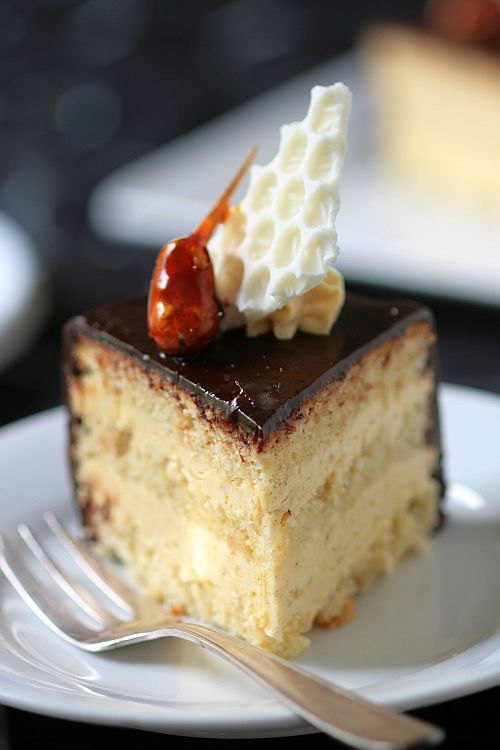
I am glad I did. The genoise part was light and flavorful, the praline buttercream perfectly balanced in sweetness and nuts and the chocolate ganache rich and delicious. I chose to go with cashews instead of hazelnuts in the cake, (although I prefer hazelnuts in all nutty things) did a cashew praline for the buttercream. One requisite was to use a layer of apricot glaze underneath the chocolate ganache but I am a very peculiar bird who does not like fruit messing with my chocolate (no dipped candied orange segments for me or chocolate-raspberry anything…can’t stand it, there I said it), so I did a salted butter caramel sauce instead. I was going to use mango jam I had just made but change my mind at the last minute.

Since I was essentially making it for B’s birthday and it was a small gathering, I baked and filled a 6 inch round cake and I still have a 8 inch cashew gateau ready to be used in the freezer (ah the possibilities!). I am glad Chris gave us many options to play around with because I used to the max to make a cake that everyone at the dinner table would enjoy. I left the liqueur out of the buttercream and used half a vanilla bean instead of extract. The soaking syrup for the cake was made with rum (per the recipe) with the addition of lime zest and lime juice. The chocolate glaze required corn syrup and I substituted honey instead to give a little flavor while I removed the alcohol part of it.

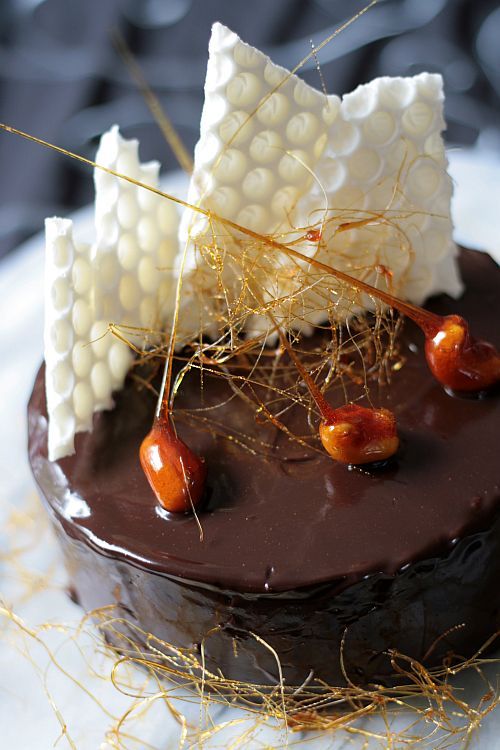
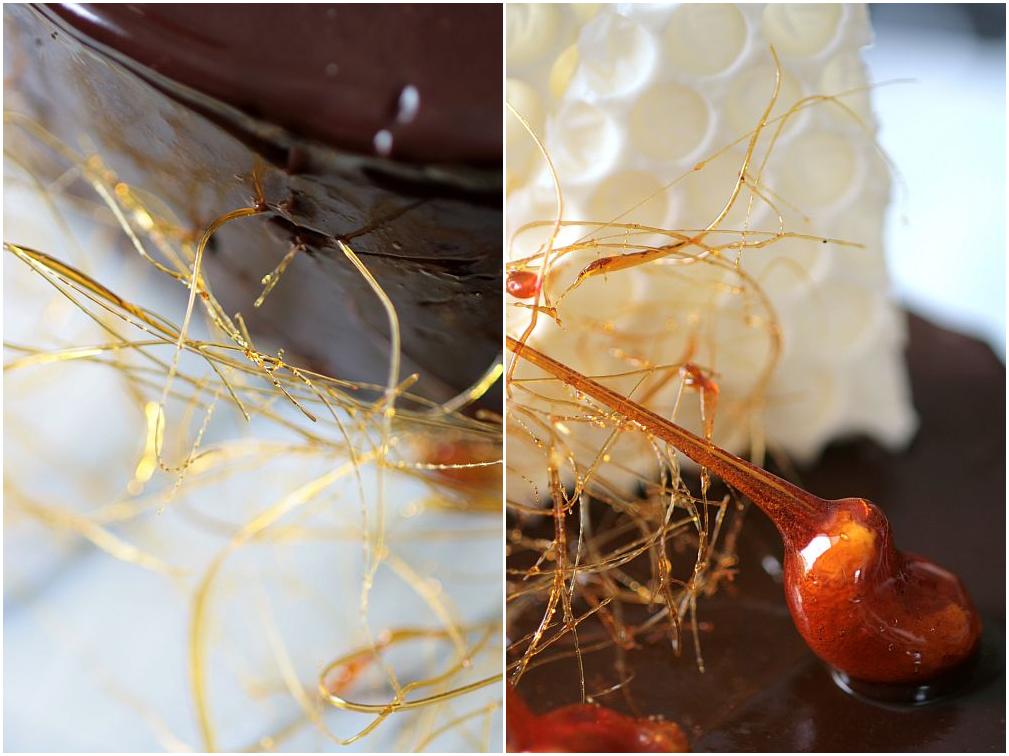
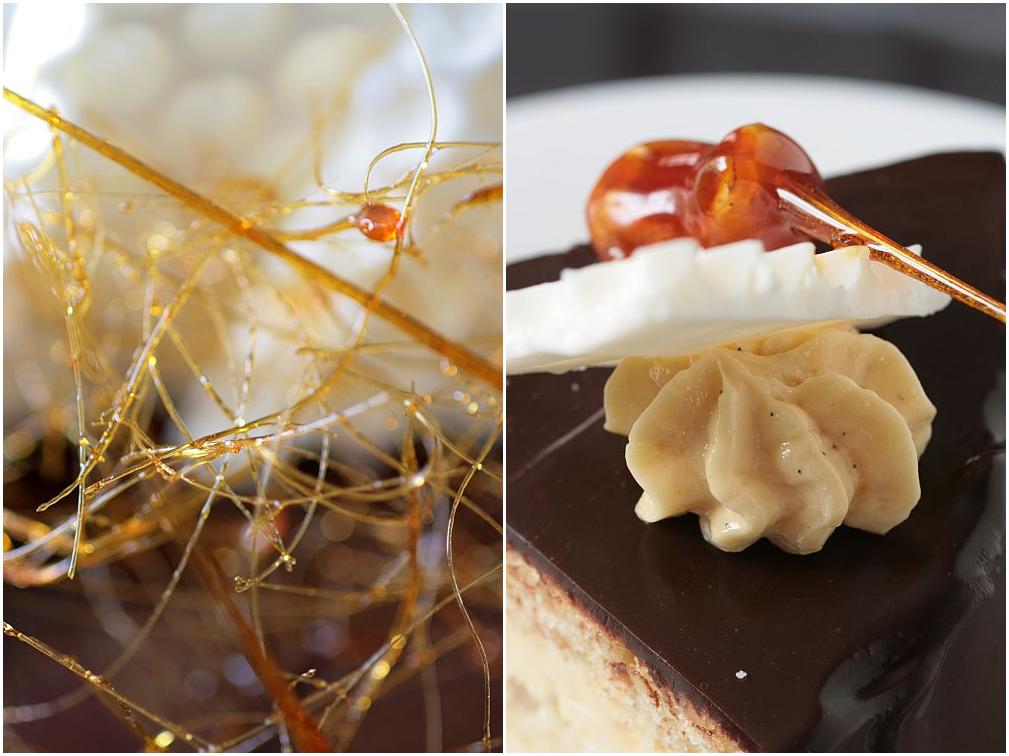
We did have to keep the cake round but decorations were left up to us as long as some of the buttercream made it "on" the cake. I almost read through that line without registering. As I was putting the decorations up on the cake, I stopped, "what was it again about the buttercream?" Gah…got to find its way on top somehow….Oh good, I just needed some "glue" to anchor the shards white chocolate bubble wrap! I dipped some cashews in caramel (dry sugar method) and played around with caramel strands too. I think everything "required" ended up in the cake, albeit modified since we could play around. Well, maybe not, I did skip the "clarified butter" and used just plain melted butter without an issue in my cake rising or changing in texture. Oh, oh…almost forgot, since we had the option of using of a layer of whipped cream with the buttercream, I prefered to opt out. There was just something rubbing me funny with whipped cream on buttercream on cake. I "love" buttercream you see so masking it with whipped cream would have been a shame in my opinion, especially with a praline buttercream.

This cake was like a little Christmas in July and I am glad there were outside forces helping me wrap my mind and time around making it. That’s what I like about being a Daring Baker, that "may the making force be with you" attitude that make us dive in into big pools of butter, flour, sugar and/or chocolate at any given month! Thank you Chris for choosing a tasty cake and thank you Ivonne and Lisa for all the tremendous work done to keep it organised and civilised. Bake on!

Cashew Praline Gateau-Copyright©Tartelette 2008 With the heat and humidity the caramel strands lasted about 2 minutes. See…there is buttercream sneaking its way on the gateau!

Cashew Gateau with Praline Buttercream, adapted from Great Cakes by Carol Walter

Cashew Genoise
1 ½ cups cashew, toasted/skinned
2/3 cup cake flour, unsifted
2 Tbsp. cornstarch
7 large egg yolks
1 cup sugar, divided ¼ & ¾ cups
1 tsp. vanilla extract
½ tsp. grated lemon rind
5 lg. egg whites
¼ cup melted butter, cooled

Position rack in the lower 3rd of the oven and preheat to 350 degrees. Grease and flour a 10” X 2” inch round cake pan. Using a food processor, process nuts, cake flour, and cornstarch for about 30 seconds. Then, pulse the mixture about 10 times to get a fine, powdery mixture. While you want to make sure there aren’t any large pieces, don’t over-process. Set aside. Put the yolks in the bowl of an electric mixer, with the paddle attachment, and beat until thick and light in color, about 3-4 minutes on med-high speed. Slowly, add ¾ cup of sugar. It is best to do so by adding a tablespoon at a time, taking about 3 minutes for this step. When finished, the mixture should be ribbony. Blend in the vanilla and grated lemon rind. Remove and set aside.
Place egg whites in a large, clean bowl of the electric mixer with the whisk attachment and beat on medium speed, until soft peaks. Increase to med-high speed and slowly add the remaining ¼ cup of sugar, over 15-20 seconds or so. Continue to beat for another ½ minute. Fold the yolk mixture to the whites. Pour the warm butter in a liquid measure cup (or a spouted container). Put the nut meal in a mesh strainer (or use your hand – working quickly) and sprinkle it in about 2 tablespoons at a time – folding it carefully. Be sure to exclude any large chunks/pieces of nuts. Again, work quickly and carefully as to not deflate the mixture. When all but about 2 Tbsp. of nut meal remain, quickly and steadily pour the warm butter over the batter. Then, with the remaining nut meal, fold the batter to incorporate. With a rubber spatula, transfer the batter into the prepared pan, smoothing the surface with the spatula or back of a spoon.
Tap the pan on the counter to remove air bubbles and bake in the preheated oven for 30-35 minutes. You’ll know the cake is done when it is springy to the touch and it separates itself from the side of the pan. Remove from oven and allow to stand for 5 minutes. Invert onto a cake rack sprayed with nonstick coating, removing the pan. Cool the cake completely.*If not using the cake right away, wrap thoroughly in plastic wrap, then in a plastic bag, then in the refrigerator for up to 3 days. If freezing, wrap in foil, then the bag and use within 2-3 months.

Sugar Syrup
1 cup water
¼ cup sugar
2 Tbsp. dark rum
zest and juice of one lime

In a small, yet heavy saucepan, bring the water and sugar to a boil and simmer for 5 minutes. Remove from heat, add the liqueur,lime zest and juice. Cool slightly before using on the cake.

Praline Buttercream
1 recipe Swiss Buttercream
1/3 cup praline paste

Blend ½ cup buttercream into the paste, then add to the remaining buttercream. Whip briefly on med-low speed to combine.

Swiss Buttercream
4 lg. egg whites
¾ cup sugar
1 ½ cups (3 sticks) unsalted butter, slightly firm
1/2 vanilla bean, cut open and grated

Place the egg whites in a large bowl of a electric mixer and beat with the whisk attachment until the whites are foamy and they begin to thicken (just before the soft peak stage). Set the bowl over a saucepan filled with about 2 inches of simmering water, making sure the bowl is not touching the water. Then, whisk in the sugar by adding 1-2 tablespoon of sugar at a time over a minutes time. Continue beating 2-3 minutes or until the whites are warm (about 120 degrees) and the sugar is dissolved. The mixture should look thick and like whipped marshmallows. Remove from pan and with the whisk attachment, beat the egg whites and sugar on med-high until its a thick, cool meringue – about 5-7 minutes. Set aside. Place the butter in a separate clean mixing bowl and, using the paddle attachment, cream the butter at medium speed for 40-60 seconds, or until smooth and creamy. Keep the butter around 65F. On med-low speed, blend the meringue into the butter, about 1-2 Tbsp. at a time, over 1 minute. Add the vanilla bean seeds and mix for 30-45 seconds longer, until thick and creamy.Refrigerate 10-15 minutes before using.

Praline Paste
1 cup (4 ½ oz.) cashews, toasted/skinless
2/3 cup sugar

Line a jelly roll pan with parchment and lightly butter. Put the sugar in a heavy 10-inch skillet. Heat on low flame for about 10-20 min until the sugar melts around the edges. Do not stir the sugar. Swirl the pan if necessary to prevent the melted sugar from burning. Brush the sides of the pan with water to remove sugar crystals. If the sugar in the center does not melt, stir briefly. When the sugar is completely melted and caramel in color, remove from heat. Stir in the nuts with a wooden spoon and separate the clusters. Return to low heat and stir to coat the nuts on all sides. Cook until the mixture starts to bubble. Then onto the parchment lined sheet and spread as evenly as possible. As it cools, it will harden into brittle. Break the candied nuts into pieces and place them in the food processor. Pulse into a medium-fine crunch or process until the brittle turns into a powder. To make paste, process for several minutes. Store in an airtight container and store in a cook dry place. Do not refrigerate.

Salted Butter Caramel Sauce
See here (I used about 2/3 of a cup)

Ganache Glaze
6 oz. (good) semisweet or bittersweet chocolate
6 oz. (¾ cup) heavy cream
1 tbsp honey
¾ tsp. vanilla
½ – 1 tsp. hot water, if needed

Break the chocolate into 1-inch pieces and place in the basket of a food processor and pulse until finely chopped. Transfer into a medium sized bowl and set aside. Heat the cream and honey in a saucepan, on low, until it reached a gentle boil. Once to the gently boil, immediately and carefully pour over the chocolate. Leave it alone for one minute, then slowly stir and mix the chocolate and cream together until the chocolate is melted and incorporated into the cream. Add the vanilla. If the surface seems oily, add ½ – 1 tsp hot water. The glaze will thicken, but should still be pourable. If it doesn’t thicken, refrigerate for about 5 minutes, but make sure it doesn’t get too cold!

Assembling Cake
Cut a cardboard disk slightly smaller than the cake. Divide the cake into 3 layers and place the first layer top-side down on the disk. Using a pastry brush, moisten the layer with 3-4 Tbsp. of warm sugar syrup. Measure out 1 cup of praline buttercream and set aside.
Spread the bottom layer with a ¼-inch thickness of the remaining buttercream. Place the middle layer over the first, brush with sugar syrup, spreading with buttercream. Moisten the cut side of the third layer with additional sugar syrup and place cut side down on the cake. Gently, press the sides of the cake to align the layers. Refrigerate to chill for at least 30 minutes. Brush the top and sides of the cake with cooled caramel sauce, sealing the cut areas completely. Chill while you prepare the ganache.Place a rack over a large shallow pan to catch the ganache drippings. Remove the gateau from the refrigerator and put it the rack. With a metal spatula in hand, and holding the saucepan about 10 inches above the cake, pour the ganache onto the cake’s center. Move the spatula over the top of the ganache about 4 times to get a smooth and mirror-like appearance. The ganache should cover the top and run down the sides of the cake. When the ganache has been poured and is coating the cake, lift one side of the rack and bang it once on the counter to help spread the ganache evenly and break any air bubbles. (Work fast before setting starts.) Patch any bare spots on the sides with a smaller spatula, but do not touch the top after the “bang”. Let the cake stand at least 15 minutes to set after glazing.

Cashew Praline Gateau-Copyright©Tartelette 2008 Hellooooo there little slice 🙂

Salted Butter and Chocolate Caramels

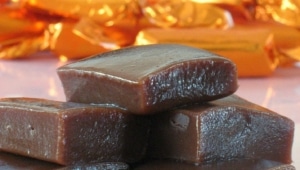
These are soft, chocolatey homemade butter caramels with a hint of salt linguering on my tongue…and I admit it without guilt or shame that I have been eating way too many of them..the ones in the picture were gone in one minute… oops…

I admit that I am a bit of a caramel, cooked sugar, freak and it is not uncommon that I play with it for fun or to enhance a dessert. I am particularly fond of salted butter caramel anything and I was in heaven when we visited Normandy and Brittany because caramels are everywhere (region’s specialty) Unfortunately, B. and I are out…we finished the last one a couple of weeks ago and we are starting to show some signs of "salted butter caramels deprivation"…and it got me thinking that there must be a tried and true recipe out there that I can cook up to save us.

I started searching familiar cooking sites and pondered on this one from Epicurious, but the 70/30 rate of success and disaster made me discard it (and there were some pretty awful reviews)… After some more research I found myself on Guillemette's blog again, staring at these several times a day.

Even if you are a novice baker/cook, I encourage you to try your hand at these, especially following the recipe below as it is simple and straightforward. Making homemade caramels is not complicated but some steps are important to follow:
– just like with any other confections or desserts, only use the best quality ingredients available
-always undercook your caramel, meaning do not let it get dark golden, because it will continue to cook once removed from the heat
– buy a candy thermometer, it is cheap and will make your life so much easier
-be patient. Depending on the humidity or heat in your house, your caramel might take longer to cook than what the recipe says…but always read your thermometer and don’t try to outsmart burning sugar…

Salted Butter and Chocolate Caramels, adapted from Guillemette:

100 gr. salted butter
3 gr. sea salt
50 gr. bitter sweet dark chocolate
20 ml. water
100 gr. light corn syrup
250 gr. sugar
200 ml. heavy cream

Melt the chocolate in the microwave or over hot water bath and set aside. Heat the cream to lukewarm in the microwave also, and set aside.
In a heavy saucepan, set over medium heat, combine the water and corn syrup. Add the sugar and let it caramelize until it reaches a light golden brown.
Remove from the heat and slowly add the cream to the caramel. It will bubble like made but do not worry…it will not bubble over and things come down eventually.
Return the pan to the heat and add the butter and the salt. Let the mixture cook until a thermometer registers 118 C ( about 245 F). Remove from the heat, add the chocolate and stir until completely smooth.
Pour into a parchment lined 8X8 inch baking dish. Let sit overnight.
Unmold and cut squares the next day. Wrap them in parchment paper or candy foil if they last long enough to be packed up for guests.

Here are the converted measurements, thanks to Lisa from La Mia Cucina:

½ c. salted butter
½ tsp. sea salt
2 oz. bitter sweet dark chocolate
2 Tb water
1/3 c. light corn syrup
1 ¼ c. sugar
3/4 cup heavy cream