
recipe

Food Blog Forum Orlando & A Sangria Recipe!

Food Blog Forum Orlando


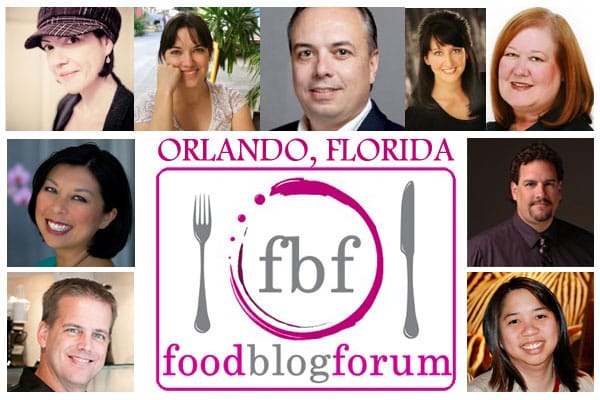
Hard to believe that just last weekend I was in lovely Florida teaching a hands-on photography workshop to a great bunch of bloggers or food enthusiasts. That Sunday was just the icing on the cake actually of an already darn good time in Orlando where I had come to speak at Food Blog Forum (FBF).

When Jaden asked if I wanted to be part of FBF Orlando for the photo sessions, I did not hesitate long. Jaden’s energy, kindness and genuine interest in people know no boundaries. She’s always been great of great counsel to me and I always feel relaxed and smiling after a few hours in her presence. After the intense rhythm of the past 6 months I needed to relax. Mapping out the next six months made me realize it was now or never to give myself a mandatory break.

Food Blog Forum Orlando

With Jaden and Julie.

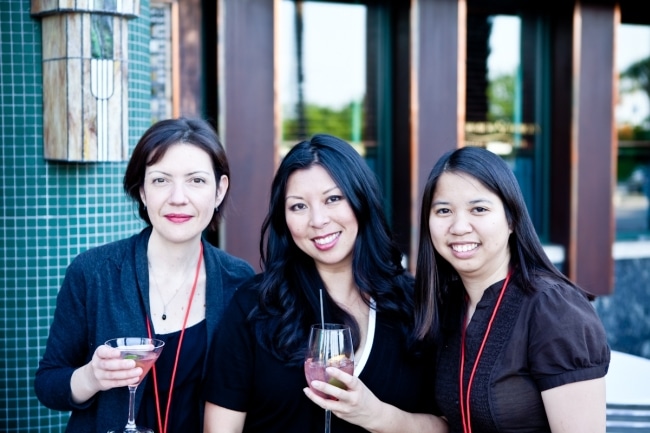
I was thrilled to see Julie again and let me tell you, she deserves a long line of kuddos, and "thank yous" for organizing the event so successfully. Not only did she organize the main event on Saturday but she also helped put together an extra hands-on worshop on Sunday for people who wanted to practice more or could not make it to FBF the day before. Thank you Julie!

It does sound cliche but I was thrilled to see familiar faces as well as finally meet the people behind my weekly reads. I love this community. Food bloggers are the best! The generosity of the food community in Florida is awesome. It made me even more excited to be back that way later in the summer and I am looking forward to seeing those wonderful peeps again.

Food Blog Forum Orlando


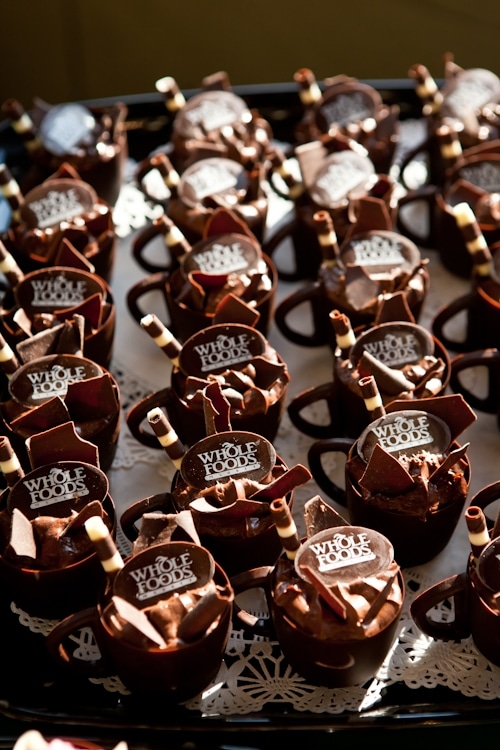
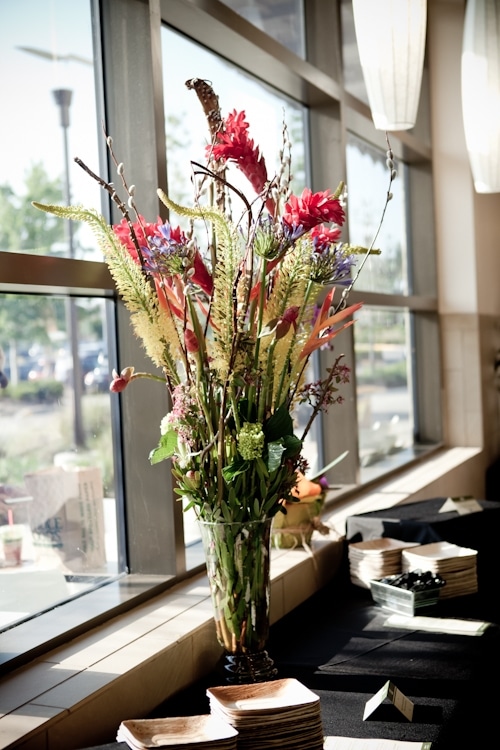
The weekend kicked off with a little mixer/get together at Whole Foods where we were showered with attention, food and wine. Everything from small savory bites, chocolate mousse in chocolate cups to live cooking demos. Every one had the chance to mingle and introduce themselves as well as get all revved up for the next day’s events.

Indeed, Saturday was packed. I love events such as these because there is always something to learn, something to contribute and something to walk away with whether you are a speaker or an attendee. It was like a grand big talk where everyone was at ease to speak, listen and as questions.

classroom_jdeily

Picture courtesy of Julie at The Little Kitchen.

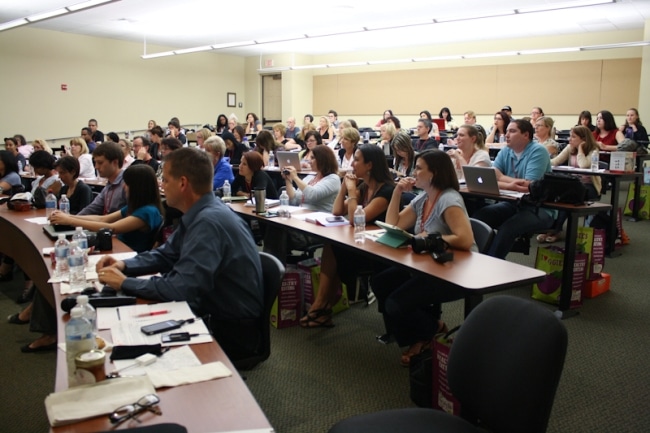
It was a treat listening to Jaden and Scott, Jeff Houck from the Tampa Tribune, Heather McPherson from the Orlando Sentinel, Peter Scott from Izea, Lindsay Landis from Purrdesign and Dawn Viola from Wicked Good Dinner. Tons of topics were covered so that everyone could find something that pertained to where they were in their blogging journey. Branding, working with newspapers, working with brands, SEO, blog design, and photography and styling.

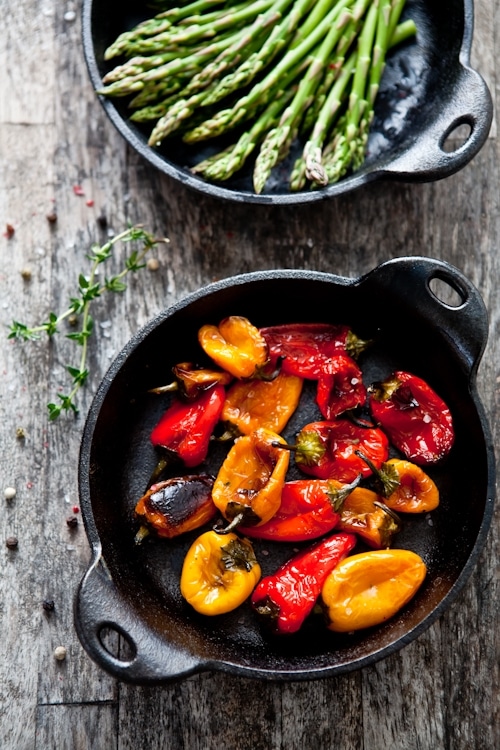
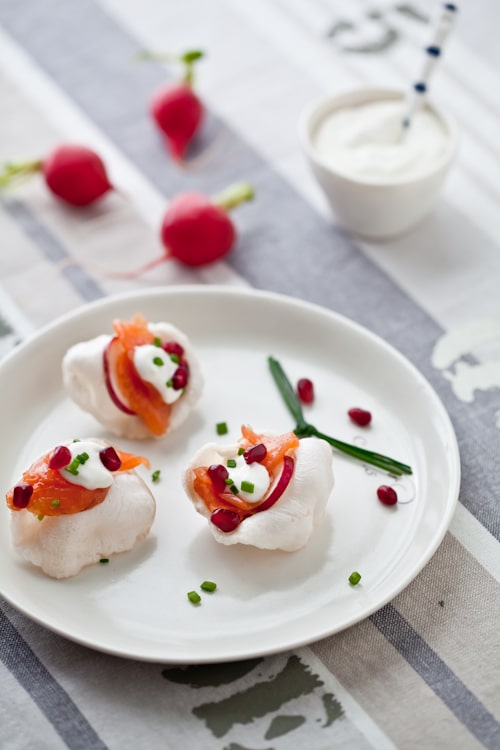
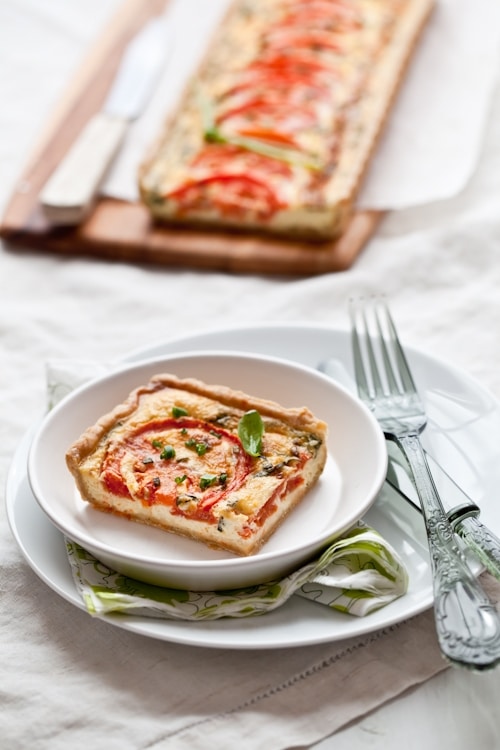
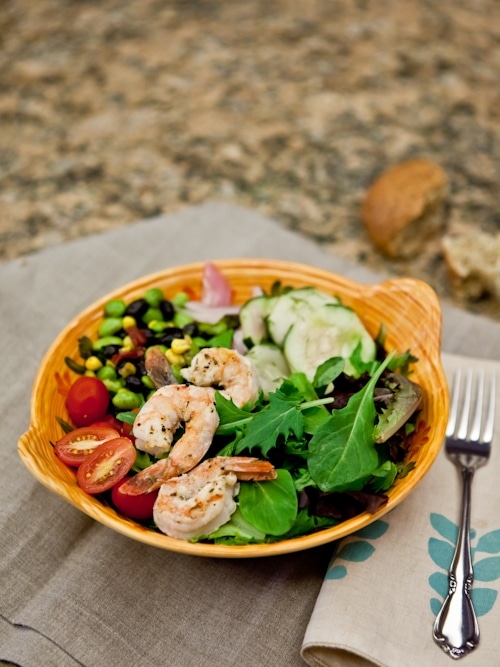
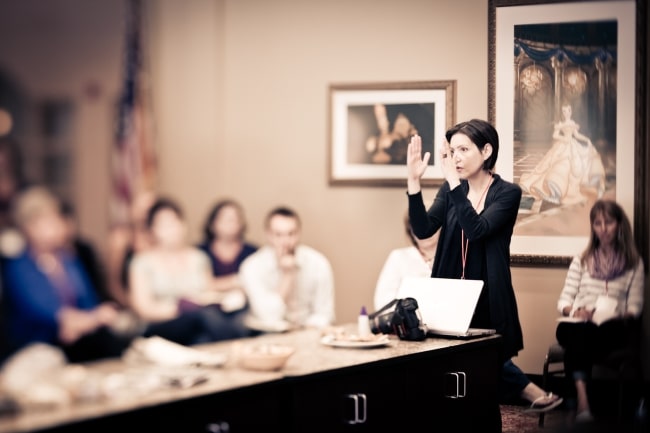
My presentation was broken in two parts with the first one covering basics of camera modes, natural and artificial light while the second part was a live composition and styling demo. I focused the demo on two items, one was a pretty and colorful mixed salad and the other a goopy brown scoop of sun dried tomato and white bean spread. I took the group through my thought process for composing my shot and styling the food just as if I were at home working blog or in the studio with a client.

Food Blog Forum Orlando


Here is a recap of the styling photo composition session. Bear in mind that these were just decisions I took on that specific occasion. I am in no way saying that these are the decisive steps to style salads or dips. Every time I style salads and spreads I find myself doing it in a myriad of other ways:
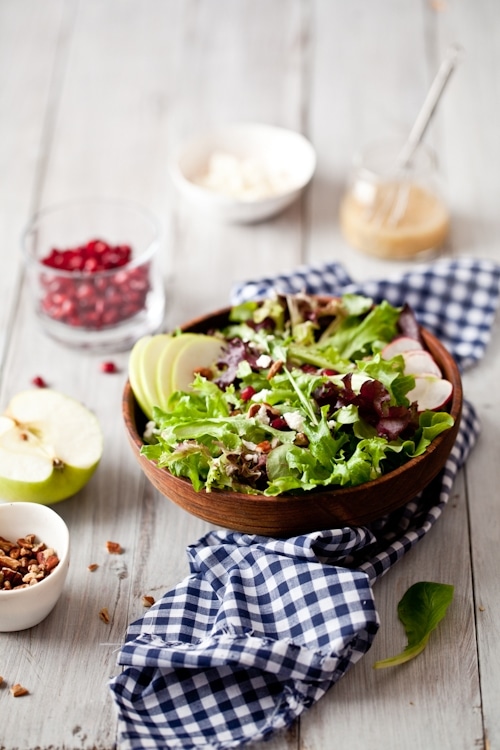
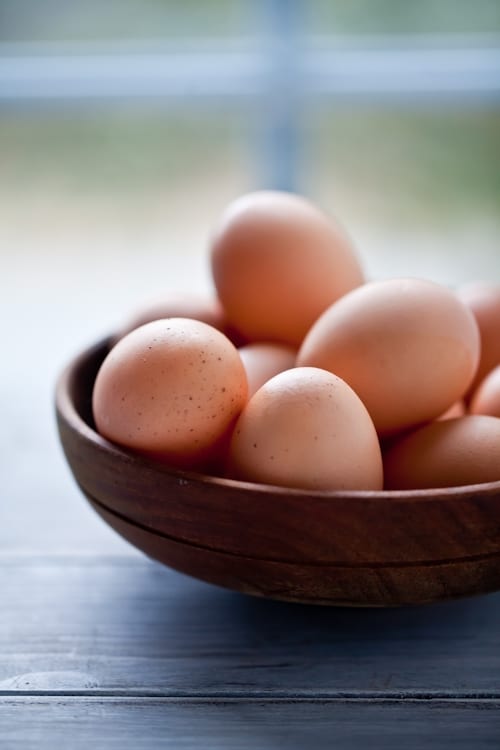
– The salad was to be composed of mixed greens, mixed bean salad, cucumber salad, grilled shrimp and grape tomatoes.
– I decided not to scatter the ingredients all over the salad because they would get lost and would make it hard for the viewer to tell what was what.
– Instead I created small clusters of each component and placed them on the outside so that the bulk of the greens would still be visible and indicate it was a salad indeed.
– I cut a couple of the tomatoes open to add visual interest with a different angle and cut.
– I did not have vinaigrette for the salad but if I’d had some, I would have waited until the last minute to use it on the salad to keep the greens as fresh as possible.
– there were only white plates or rustic yellow bowls available as props (I had brought linens and my styling kit).
– I picked the yellow bowl to play with the all the colors of the salad components and it complemented the linens and surface I was working on.
– kept a 3/4 camera point of view so that I could show the bowl in its entirety without any weird angle and without being too "in your face" which is not helpful when you are trying to see the bigger picture.
– I picked and a medium depth of field, not too shallow that you could not tell the ingredients apart and not too deep that they were all in focus. It helped hide the fact that the cucumber was a bit passed its prime too.

Food Blog Forum Orlando


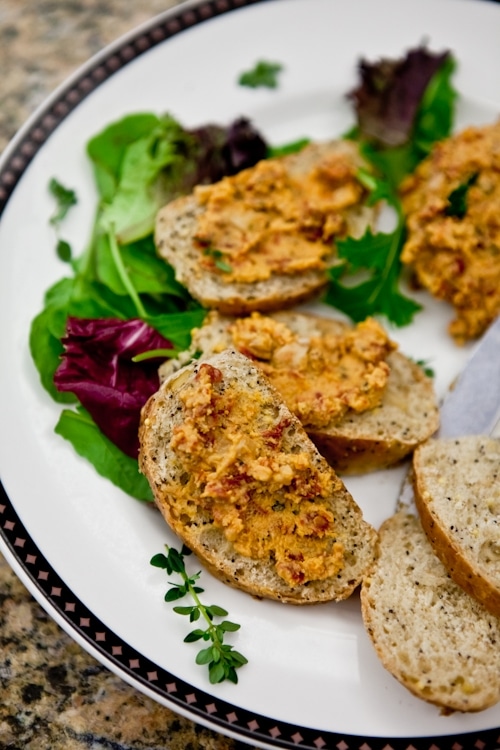
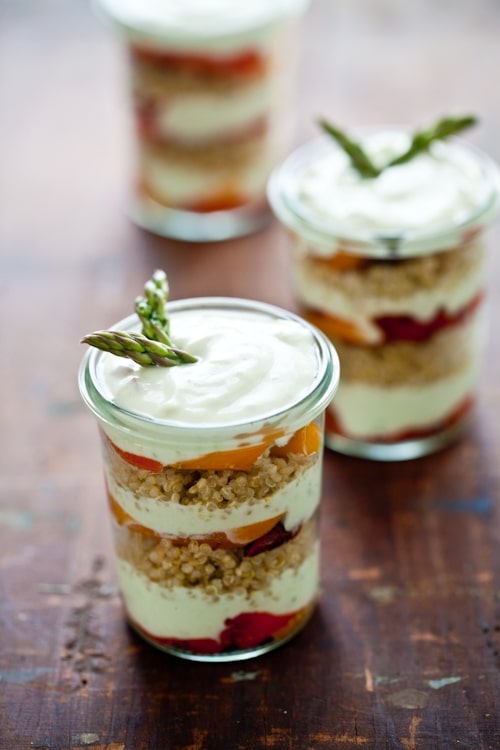
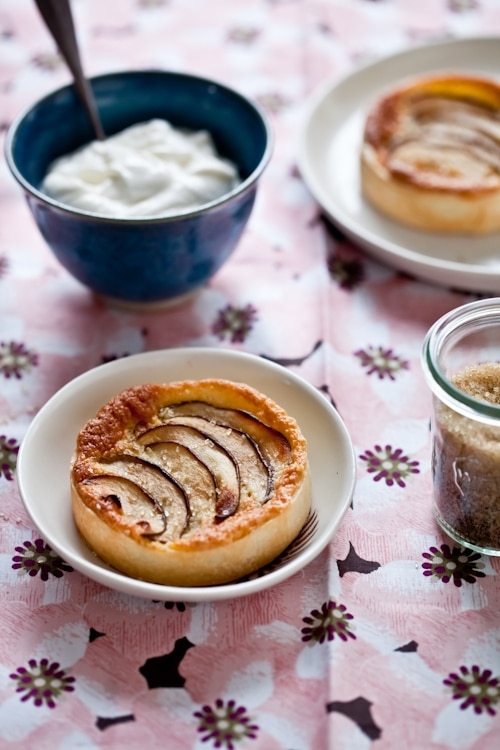
The spread came from a standard grocery store plastic container which I decided not to keep for aesthetics reason and instead decided to show what one can do with a "goopey mess".
– Instead of plating a mound of spread, surrounded by bread slices and a few salad leaves for garnish, I decided to show a progression and use the spread in action so to speak.
– it allows one to play with shapes and angles and not be restricted by just one direction and composition.
– Spreads and dips are less difficult to style and more interesting to shoot if you make them do something.
– I placed a large spoonful of the spread on the side as to show my starting point
– I cut out some slices of bread and spread some of the dip on half the slices, leaving the remaining half without to show that there were still plenty to be used.
– I left the knife on the plate to reinforce this idea of movement from the starting scoop of dip to using the bread to eat it with, etc…
– I used a spring of thyme as it was part of the herbs listed in the ingredient list and it added a nice touch to the plate. I could have scattered more around but it was not really necessary with the view point I wanted to try for taking the shot.
– I went with a closer/tighter camera angle and viewpoint than the salad because there was no reason to show more of the spread/dip than necessary. It was not pretty in its natural state so it was best to focus on the best toast with dip on it.
– I chose a shallow depth of field to keep the background element of more spread and bread which were not that visually interested out of focus but still part of the plate.

Food Blog Forum Orlando

Picture courtesy of Christian Stella.

Beside picking out the ingredients to style, I did not think a whole lot about what I would do until it was time to do the demo. I wanted to keep things as spontaneous as possible and talk participants through issues or decisions as I was encountering them myself. It also showed them that there is no trick or scientific formulas behind all this. The magic one creates is nothing but a series of decisions and attempts. I also stressed out that this is what I went for that specific day but I could have gone many different ways on many different days depending on light, props, ingredients, time, mood and feel I wanted to portray. There is no wrong or right. Just do what feels sincere to you.

That was the focus of the Sunday workshop which took place independently from FBF. I pretty much let the group lose at Whole Foods (!) to pick a few items to style and we went more in details about camera modes and angles, natural light and how to use its different sources for different purpose, diffusing, bouncing, speedlight and studio light for those who have to shoot late at night. After that everyone styled and composed a shot and I went around giving tips and techniques they could also use.

Food Blog Forum Orlando

Adam and Joanne from Inspired Taste with Jaden. After the Sunday worshop, they surprised me by asking if I’d mentor them in photography. I said "of course!"…of course!

My goal was to give them as many tools as possible whether they decide to use one or ten. Knowledge is power. So is coming up with your own visual identity. I was thrilled to have 12 participants come up with 12 different ways to view their relationship with the camera. What a breath of fresh air! It was the best 4 hours spent before an airplane ride back to Charleston.

Thank you to all the people who attended FBF! If a Food Blog Forum comes close to you one day, hurry to be part of it. You won’t regret it. You can read more opinions, recaps, thoughts and takeaways on the event at the bottom of the Food Blog Forum Orlando page, here.

Food Blog Forum Orlando


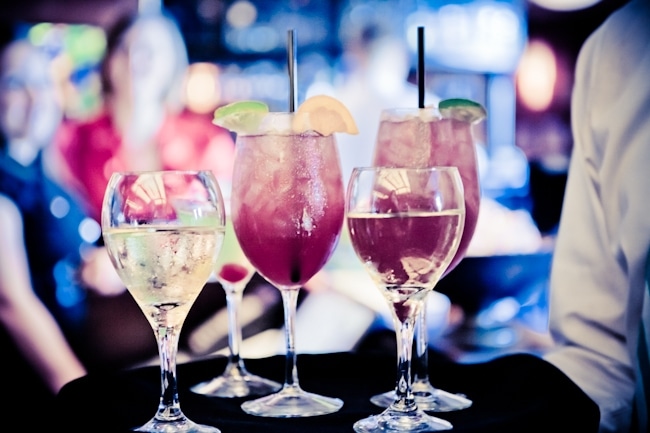
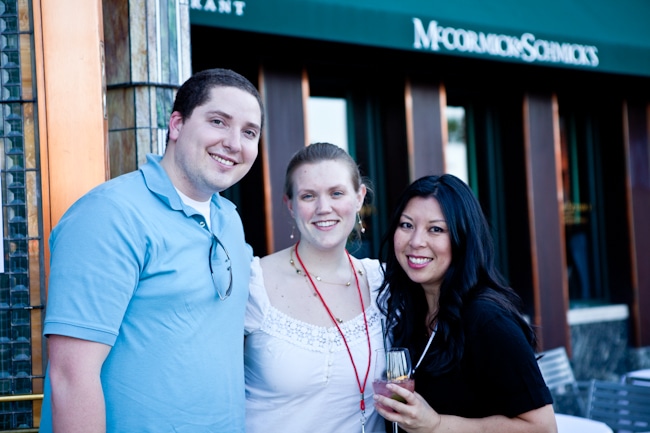
It’s another packed Sunday here with friends as well as scheduling work and we are all in the kitchen making Sangria, one of the drinks served at the FBF Saturday reception held at McCormick & Schmick’s. I was so busy playing that I forgot to ask them for the recipe but I knew that my buddy Taylor had a scrumptious one on his blog. Head after the jump to read more about it.

Happy Sunday!

The winners of Super Natural Everyday by Heidi Swanson are: Avery at Love Veggies and Yoga and Janna from Knitting Relaxes Me. Email me your mailing addresses at mytartelette [at] gmail [dot] com so I can pass them on to the publisher. Congrats!

Blood Orange & Blackberry Sangria,reprinted with permission of Taylor Mathis:

3 blood oranges
1 cup blackberries
1.5 liter of good red wine
1/4 cup honey
1/2 cup Grand Marnier

Save one of the blood oranges for garnish. Squeeze the juices from the remaining oranges and combine with the blackberries, wine, honey, Grand Marnier into a large pitcher or punch bowl. Stir the mixture until everything is combined.
Chill the sangria over night. Right before serving, cut the blood orange into thin slices and add them to the pitcher or punch bowl. Serve cold.

Quinoa, Mixed Peppers and Avocado Cream Verrines

Quinoa, Mixed Peppers and Avocado Cream Verrines


Living with food allergies sucks. Living with food intolerances also sucks. Don’t ask me which one is less sucky. It all depends on the person and how they see the sun shine when they get up. I can only talk about personal experiences and of those around me.

Lauren at Celiac Teen for example is allergic to gluten. I am gluten intolerant. While she will get really strong physical reactions within hours, mine will build over days. Hers will manifest after one speck of gluten ingested by taking her digestive track for a spin, making her brain as cottony as the pillow she’ll use to sleep it off. It will take several days of glutenized meals for me to get vertigo, tinnitus, aura fullness where I’ll have to lie down and hope it stops soon so I can get back to work again.

Roasted Mixed Baby Peppers


Instant. Over days. Stomach. Ears. Brain fogged up. Lying down. It just sucks. And as far as I can tell, we’re not wearing a line on our foreheads that reads "gluten can’t pass these lips." We just deal with it. So when my friends, family or anyone coming to eat at my table says "I am allergic to this or that." I don’t question. I accommodate.

I get terribly aggravated when I have to explain I am gluten intolerant and can’t have "regular" flour and I can tell the first thought in some people’s mind is "here’s another low card fad freak." Ugh no. I can have carbs. I can have truckloads of carbs. I can swim in carbs if I wanted to. They just should not contain gluten. That kind of thoughtless reaction bugs the heck out of me. If I were to say "I am allergic to dairy" I’d probably get a sympathetic "Oh you poor thing!". How can they tell that I am not using that as an excuse to avoid calorie ladden ice creams sundaes (just an example. I love sundaes. There)

Quinoa, Mixed Peppers and Avocado Cream Verrines


Somehow, some people make these kinds of decisions in their mind about what is an ok allergy and what just looks like a fad. That’s sad. And wrong. It can create a whole lot of discomfort for someone you don’t know and who places a part of humanity upon you. Trust. I was raised by a father who used to say "if someone says they don’t like this, don’t ask them why. Don’t put them on the spot and don’t make them feel uncomfortable. Trust that they know what they need."

When Flo Makanai sent me a copy of her book "Les Intolerances Alimentaires", it took on a whole level of compassion with me. Flo’s daughters have a lot of different food allergies they must deal with on a daily basis. And in France no less where allergy awareness is still in baby steps. Flo’s book is the best thing that could happen to keep on educating people on food allergies and intolerances. I love my peeps but when I hear things "oh yes, the grilled veggies with camembert sandwich is dairy free." I just get very, very worried.

Making Guacamole


I truly feel for her young daughters going through trial and error of finding what they can and cannot eat. No to mention the reactions from others at times must be hard to bear for such young souls. I love how fierce a fighter Flo is for her daughters. I am not a mom but I know that’s what mothers do. I know I would not let go until I’d see my daughter smile again.

Flo did it. She then wrote it all down in such a detailed and simple, precise and researched way that I can’t recommend her book strongly enough to anyone who reads/speak French. I know, here I am recommending a book in another language that only some of you will be able to read. For those who can’t read or understand French as well (or at all), I only hope I was able to transmit the notion that food allergies are real, and we should keep on getting educated about them. In whatever language you speak.

Homemade Goat's Milk Yogurt


When friends came over for dinner, one of them gave me a call the day before saying that he was bringing a guest who was allergic to cow’s milk. Dairy was ok. Just not from a cow. No problem I was wasn’t planning on serving any dairy….oh wait! Duh! I was. One of the dishes I wanted to do, (inspired by Flo’s quinoa and green lentil dish, was a verrine of layered quinoa, roasted peppers and avocado cream and it did contain yogurt. Zut alors! (yikes!) That was by far the easiest allergen orientated change one could have to make. I used goat’s milk yogurt instead.

I know some people who because they don’t think these things are "real" would have said, "oh well, the recipe calls for just 1/4 cup. That’s nothing! That can’t possibly hurt her." Yes it can. It will. Changing a recipe to help someone enjoy the evening and the hours afterwards can be a learning curve but it can also lead to very tasty discoveries in the kitchen. It sure did for me in this recipe. The goat’s milk yogurt gave more of a cheesy creamy bite than cow’s milk yogurt did in previous occasions. I don’t think I’ll change the recipe again after this, actually!

Hope you enjoy this as a refreshing appetizer or light side dish. Everyone at our table was able to partake. That’s what matters.

Quinoa, Mixed Peppers and Avocado Cream Verrines


Quinoa, Mixed Peppers and Avocado Cream Verrines:

Makes 6 to 8

For the quinoa:
1 cup raw quinoa
1.5 cups water
pinch of salt

For the mixed peppers:
1/2 red pepper
1/2 yellow pepper
or one 10 oz box of mixed baby peppers
olive oil
salt and pepper

For the avocado cream:
1/2 avocado
juice of half a lime
1 tablespoon finely chopped cilantro
1 green onion, finely chopped (or 1 tablespoon red onion, chopped)
1/4 cup yogurt (your choice)

Prepare the quinos:
In a medium saucepan, combine the quinoa, water and salt and bring to a boil over high heat. Reduce the heat to a simmer and cook 15 to 20 minutes until the quinoa feels tender. Remove from the heat and let cool to room temperature.

For the mixed peppers:
preheat the oven to 400F. Place the peppers on a baking sheet and drizzle with a splash of olive oil. Season with salt and pepper and roast until the peppers start to blister (20 minutes). Remove from the oven and let cool to room temperature. Cut the peppers in half, remove the seeds and set the peppers aside.

For the avocado cream:
In a large non reactive bowl, mash the avocado with the rest of the ingredients until smooth with the back of a fork or a potato masher.

Start layering the verrine with some a layer of peppers, a layer of avocado cream, a layer of quinoa, repeat once or twice depending on the size of your glasses and finish with some of the cream on top. Add a couple of blanched asparagus tips if desired for garnish.

Simplicity: Grilled Red Snapper With Roasted Mixed Peppers and Asparagus

Asparagus


Growing up, many a family dinners were spent around a big plate of freshly blanched asparagus during Spring. When I saw the first asparagus at Boone Hall Farms, I could not resist. We’re eating lots of them! In salads with a lemon honey vinaigrette. In soups with a dab of creme fraiche. Charred with a sprinkle of sea salt and oregano. The farm also had the first strawberries of the season which is a good thing because I suspect a rabbit is eating the wild strawberries I planted last year.

I love Spring. Everything and everyone takes on a new attitude. It’s a rebirth. Since submitting the final book files to the printers last Monday, I have been experiencing my own rebirth so to speak. In a little over 5 weeks, four months of hard work will be coming together in a lovely binded package. So surreal. I gave it, I gave you my all. I have worked with the most wonderful team of editors and designers. So many emotions.

Red Snapper


Elated, calm, sleepy. I gave myself an entire day of doing stuff. Walking downtown with the dogs, taking B. out for dinner. Just stuff. Then it was back to shoots and new clients. Normalcy in craziness suits me fine it seems. Just as Heidi very mentioned in a post, after the work day is over, I crave repetition to keep me grounded. By the way, her new cookbook is stunning! I can’t wait to start cooking from it!

Simple things. On repeat. Favorite songs. Baking cookies. Eating asparagus and grilling fish almost daily. Simple things are essential to my inner peace. Living on the water, going to the dock to check on our crab traps or to the marina to get freshly caught fish is one of my little pleasures. When the fish guy showed up with freshly caught red snapper, you can bet I put a couple in my basket!

Mixed Mini Peppers


Our evening ritual now that the days are longer and the temperatures appropriate for shorts and t-shirts is to sit on the back deck with a cold drink while we grill and make small plates of salads, grilled bread with tomatoes and garlic, crunchy carrots and aioli. Grilled snapper with oregano served with roasted baby mixed peppers and asparagus. This is a typical dinner for us. Nothing grand but everything fresh and accompanied by simple preparations.

If only around dinner time, we can enjoy time slow down a bit. I certainly hope you will be able to crank the grill soon and enjoy simple and fresh flavors such as these.

Ah! I keep forgetting an important update: the book title has changed from "Foodography" to "Plate To Pixel. Digital Food Photography and Styling" the cover has been redesigned a little (see here) but it’s taking some time for booksellers to update their data base. The book will be available online worldwide through your country’s amazon page around late April and on bookstores shelves early May. Yep. It’s coming up soon!

Grilled Red Snapper


Grilled Red Snapper With Roasted Mixed Peppers and Asparagus:

serves 2

two small fresh red snappers
1 tablespoon chopped fresh oregano
olive oil
salt and pepper to taste
1-2 cups mixed baby peppers left whole (or 1 small red and 1 small yellow peppers sliced lengthwise)
1 pound asparagus

Prepare the fish:
Preheat the grill to medium high.
Brush the red snappers with olive oil and sprinkle them with the oregano and salt and pepper to taste. Place on the grill racks and cook 4-5 minutes on each side.

In the meantime, preheat the oven to 375F (you can prepare the veggies on the grill too). Wash the asparagus. Break the bottom stems off and discard. Toss the asparagus spears and peppers in some olive oil, then place them on a parchment paper or Silpat lined baking sheet. Season with salt and pepper. Roast the vegetables for 12-14 minutes, or until tender and cooked through.

Macadamia, Milk Jam & Chocolate Ganache Tarts

Macadamia, Chocolate and Milk Jam Tarts


I smiled when I made these tarts. The enticing smell wrapping up the entire house. I smiled when I photographed them. The anticipation of tasting one slowly building up. I smiled when we finally shared one. My toes curling up with happiness. All we needed that day was a bit of dark chocolate and milk jam nestled in macadamia goodness. That day was Valentine’s day folks.

Talk about posting behind schedule! The past three weeks have been a complete blur of editing and reviewing the manuscript for Foodography. Now is ultimate crunch time before going to print in a couple of weeks. I confess I got butterflies in my stomach when the first chapters came out from the designer all laid out and ready for us to comb through, dot our i’s and cross our t’s one more time.

Milk Jam and Macadamias


Since this past November that I started writing, B. has been nothing but even more amazing than he already is. We’re not into anything V-Day related but this time I wanted to do something extra special for him. He’s been my rock throughout this whole project. He held me, both literally and figuratively, whether the words were coming in floods or whether I pondered over the same sentence for 30 minutes. So I wanted to make something special.

I remembered a decadent macadamia tart in an issue Elle a Table that I had brought back after my last trip home. I smiled realizing I had no problem finding a magazine but it’s been weeks since I have been able to match a couple pairs of socks. Obvious discombobulated sense or priorities on my part, ehehe!

Macadamia, Chocolate and Milk Jam Tarts


The base of the tarts is a lovely crust with ground macadamia nuts in it that gets filled with a sweet layer of milk jam and topped with a smooth layer of bittersweet chocolate ganache. Milk jam is very similar in taste to a slow simmered cream and caramel sauce and is super easy to make. It’s simply whole milk, sugar and a pinch of baking soda simmered on the stove until they are reduces to a thick caramel sauce.

The process is as enjoyable and addicting as the end result. It fills the air around you with one of the nicest aromas. It is a specialty of the Normandy region of France, but one so good that it’s been adopted throughout the country. Thank goodness! Being from Provence, I like to add a sprinkle of lavender buds or a little lemon zest once in a while to spice things up a bit. Just like romance…

Macademia, Milk Jam & Chocolate Tart


After sharing one with him, I put the rest in the freezer and in the whirlwind of a shoot I completely forgot about them until one late night last week. We split one, not entirely thawed and he explained it tasted like a really cold ice cream sundae topping. I could definitely see how some pieces of that tart thrown in some vanilla ice cream would be absolutely delicious. And absolutely decadent. Something to share with your honey

Macadamia, Milk Jam and Chocolate Tarts:

Makes six 4-inch tartelettes or one 9-inch tart

For the crust:
5 tablespoons (70gr) unsalted butter, at room temperature
3 egg yolks
pinch salt
1/2 cup (80gr) superfine rice flour
1/2 cup (60gr) millet flour
1/2 cup (45gr) ground macadamia nuts
2 tablespoons to 1/4 cup cold water or milk

For the milk jam:
2 cups whole milk
1/2 cup sugar
1/4 teaspoon baking soda

For the chocolate ganache:
5 oz bittersweet chocolate (chips or chopped)
pinch of salt
1/2 cup heavy cream

Prepare the crust:
In a mixer, whip the butter on medium speed until light and airy. Add the egg yolks, one at a time and beating well after each addition. Mix until incorporated. Add the salt, and all the rice and millet flours, the ground nuts and mix briefly. Add some water or milk, one tablespoon at a time if the dough feels too dry. Dump the whole mixture onto a lightly floured (use more rice flour) board and gather the dough into a smooth ball. Flatten the dough into a disk, wrap it in plastic wrap and refrigerate for an hour.
Preheat oven to 350F and position a rack in the center.
When the dough is nice and cold, roll it out on a lightly floured board or in between two sheets of plastic to fit your prefered pie pan or six 4-inch tart rings. If the dough tears while you roll or/and transfer into the pan, just patch it with your fingertips. Line the dough with a piece of parchment paper, fill with pie weights or dy beans and par bake for 15 minutes until golden brown and completely baked. Remove the weights and parchment paper. At this point you can refrigerate the baked crust for up to 5 days before using. Let cool while you prepare the filling.

Prepare the milk jam:
Place the milk, sugar and baking soda in a heavy bottom saucepan and bring to a boil over high heat. When the mixture is boiling, turn the heat down to medium-low and simmer until thick as jam, about 45 minutes to 1 hour. The time will differ depending on the diameter of your pot, (the wider, the less time it will take) and the heat you use (electric stove set on medium low can present some differences).

Prepare the chocolate ganache:
Place the chocolate and salt in a non reactive bowl and set aside. In a heavy bottom saucepan set over high heat, bring the cream to almost boiling (really hot basically!). When hot, pour it over the chocolate and salt. Let stand for 5 minutes before slowly whisking the mixture to bring it together to a smooth and silky ganache. If it’s not completely smooth, return to very low heat for a few seconds to melt the chocolate some more. Brands vary so this step may be necessary if the chocolate is not completely melted.

To assemble:
Pour 2 tablespoons of milk jam at the bottom of each tartlet. Refrigerate for about 30 minutes. Spoon some chocolate ganache over the milk jam until you reach close to the top. Refrigerate a couple of hours before serving to let the ganache and milk jam set.

Gluten Free Blueberry Waffles & Getting Back On The Road!

Sundays are good for waffles...


Sunday mornings are good for waffles and eggs. Any mornings really. But yesterday was so absolutely gorgeous that we had all the windows open, shorts and t-shirts on. I knew I had a mile long work to do but I just needed to put all this aside and do something familiar.

Cracking an egg. Popping a few blueberries in my mouth. Making waffles. Hearing the whisk against the mixing bowl. Smelling the scent of freshly squeezed oranges. Doing things that require time and attention, away from the work list. It’s not procrastinating but recharging my internal batteries.

Eggs


We sat down on the back deck with our waffles and our hot coffee and talked. I listened actually. Writing feels like talking at times. And right then, I was out of words. We made a pact to have more Sunday mornings as cozy as this one. We usually don’t need a reminder to take a break but just thinking about our schedule from now throughout the Summer made me appreciate some chilling time even more.

Yep. Looks like I am back on the road teaching workshops here and there. And talk about awesome workshops…All are located in gorgeous venues allowing one’s creative juices to really get going!

Go Savor


In a couple of weeks I’ll be heading down to Savannah, Georgia to be part of the firstGo Savor Culinary Retreats. Since it’s so close to home, it’s the perfect opportunity to relax, share, be with good friends and meet new faces. We are also looking forward to the time away.

We decided to team up and do a workshop on artificial light during the Go Savor retreat, targeted to the bloggers who can only shoot at night or when the quantity of light outside is not enough. B. used to operate his own portrait and wedding studio for over 10 years (in a life way before us) so it came as natural as buttering my toast to ask him to team up. He’ll be doing an hands on demo on speedlights and I’ll be doing one on a studio light kit.

Since natural light is definitely more my grove, there will be another workshop that weekend. One of my favorite peeps, Tami from Running With Tweezers is also coming to Go Savor and we will be doing natural light, composition and styling the next day. We aim to please and we aim to share as much as people want to take in or leave out. We’ve attended events together, we’ve worked together but we’ve never done workshop together and I am very much looking forward to it.

Check out the Go Savor site for updates on registration and great giveways.

food-blog-forum-orlando-2011


In April I’ll be doing a food photography workshop as part of Food Blog Forum Orlando, April 9th. I don’t have my full schedule set out for April yet, but when Jaden emailed and asked if I wanted to be part of this awesome one day event dedicated to sharing information in a fun and relaxed atmosphere. Just good peeps passing on what they know and are passionate about.

Jaden is good people…When Jaden asks, you say yes. I am really glad that Julie from
The Little Kitchen persuaded her to make it happen and I am really thrilled to be able to participate and give back.

For more info on the line up and registration, follow the (hot) link here. See you there I hope!

Ace Cam Workshop Sante Fe, May 2011


Moving on to May and going a bit further out West….all the way to Sante Fe, New Mexico to teach an awesome workshop May 6th – May 9th. Luxury of time, creativity of location, great workshop topics! Oh yeah…

When Angela Ritchie emailed last year asking me if I wanted to be one of the workshop instructors, I think I read the email 5 times before answering "yes please!". I was already familiar with Angela’s workshops and how interactive, creative and completely hands on they were. Think of them as a complete retreats. I had promised myself I would do one in 2011, I had no idea I would be teaching one! I picked Sante Fe as the location because of all its earthy and colorful gorgeousness. I can’t wait!

If you want to get more info about this amazing opportunity to spend a complete weekend learning food photography, head over to the site here. I can’t wait to be there and share, practice, show and discover new things from hanging out with different people for a few days.

Hope to see you there!

Ace Cam Workshop Sante Fe, May 2011


An now on to the recipe and some darn good Blueberry Waffles…!

Gluten Free Blueberry Waffles

Makes 6-8

1 3/4 cups warm water
1/2 cup finely ground flaxseed
1/2 cup potato flour
2 cups superfine rice flour
2 teaspoons baking powder
1 teaspoon baking soda
pinch salt
1 3/4 cups coconut milk
2 tablespoons honey
1 cup fresh blueberries
syrup

Mix the ground flax seed with the warm water in a large bowl, and let the mixture sit for 5 minutes.
Whisk together the potato flour, rice flour, baking powder, baking soda, and salt in a medium bowl. Reserve.
Blend the coconut milk with the honey and then add to the flax seeds mixture.
Dump the dry ingredients into the wet ingredients and mix until the batter looses the bulk of its bumps. Add the blueberries and fold them in gently with a spatula
Grease both sides of the waffle iron with a little vegetable oil or butter and pour some of the batter (1/3 cup) into the center of the iron. Close the top and cook until brown or according to the manufacturer’s directions. Serve with syrup if desired.

A Handful Of Chocolate Chip Cookies & A Glass Of Milk

Chocolate Chip Cookies


Do you have those days when you could just use a cookie and a glass of milk? When being six sounds just about as good as winning the lottery? Nothing has to be terribly wrong or terribly right. No. Just good enough to feel like having a cookie.

A warm embrace. A love note. A familiar face. A couple of cookies and a glass of milk. Same difference.

With work and life moving at a million happy miles an hour, all I wanted to do the other day was just to put my pen down and make cookies. And I did just that. The simple act of taking a tray out of the even and getting that first whiff of freshly baked cookies was just the ticket.

Chocolate Chip Cookies


I think I got a bit carried away though because I ended up making 3 dozens! I have a difficult time with happy mediums apparently. I am all or nothing. Even while baking. I was on a baking high and well, procrastinating on everything else for an hour made me feel like a kid skipping homework. Everything would be ok, there were cookies.

I grabbed a few and a glass of milk and I started going through all your comments about your food styling struggles or photography in general. You’ll be happy to know that your questions on camera modes, settings, lighting, composition are covered in depth. As far as styling goes, I was thrilled to see that so many of your issues were topics I had chosen to use as examples. But I did see a couple of interesting ones which I must keep under wrap until the whole project is complete.

Chocolate Chips Cookies


There has been a lot brown foods made and eaten here the last few days, as well as soups, steaks, pasta, purees, pizza, etc… Lots more than we can eat in one day just the two of us! So with a box of cookies in one hand and a container of chili in the other, I knocked on the neighbors' doors ever so gently and left them at the door. They just had a baby you see. I bet everyone was happily getting some shut eye for a while.

It won’t make everything get better but I figured that if a couple of cookies and a glass of milk made me alright with the world well, maybe the same could happen for them. On a side note, I still have to make the old pup stop howling everytime he hears the baby cries. It’s not helping, ehehe!

Cookie Break


One more thing before I end this post. Like everyone else, we are glued to the news regarding the events in Egypt and as someone with friends deeply tied in with the country, I just want to tell all you who are affected by these events that we are keeping you close to our hearts.

Chocolate Chip Cookies, adapted from David Leite of Leite Culinaria.

Notes: I used half coconut oil and half butter for the fat in these cookies. If you do the same, make sure the coconut oil is soft still but not liquid. Coconut butter would work too. You can of course use the same amount in butter which would bring the butter amount to a total of 10 tablespoons.
I used ground flax seeds soaked in a little water to act as a binding agent to mimic the gluten or xanthan gum (I was out of it).
B. finds that flaxseed has a taste so I add just a pinch of cocoa powder to the batter to tone down the flax seed taste.

1/2 cup sorghum flour
1/2 cup millet flour
1/2 cup corn starch (you can sub tapioca starch)
1/2 cup potato starch
3/4 teaspoon baking soda
1 teaspoon baking powder
1/2 teaspoon kosher salt
5 tablespoons unsalted butter, at room temperature
5 tablespoons coconut oil (centrifuged, extra virgin)
1/2 cup brown sugar
1/2 cup granulated sugar
2 teaspoons ground flaxseed soaked in 1/2 tablespoon water for 10 minutes
a pinch cocoa powder
1 large egg, at room temperature
1 teaspoon vanilla extract
1 cups chocolate chips or chocolate chunks

In a large bowl, whisk together each of the flours and "starches" along with the baking soda and baking powder.
In the bowl of an electric mixer fitted with the paddle attachment, beat together the butter and the sugars on medium speed for a couple of minutes, then mix for 1 minute more. Reduce the speed to slow and ddd the flaxseed and cocoa powder, the egg, beating well and scraping the sides of your mixer bowl if necessary. Add the vanilla extract and beat 30 seconds longer.

Add the flour mixture into the batter, mixing just until the dry ingredients are coming together. Add the chocolate chips and mix briefly to incorporate.
Cover the dough with plastic wrap and refrigerate 1-2 hours.

When ready to bake, preheat the oven to 350°F, position a rack in the middle of the oven and line baking sheets with parchment paper or a non-stick baking mat.
Scoop your preferred size of dough balls onto your baking sheet, 2 inches apart from each other.

Bake the cookies about 12-15 minutes, depending on the size or until golden brown. Let them cool 10 minutes on the baking sheets before transferring to cooling racks.

Homemade Gravlax & Prawn Crackers Appetizer

Smoked Salmon on Prawn Crackers


Sometimes I get this crazy notions that I have a lot of time on my hand to do whatever. I know. Crazy right?! I mean, as the years go by I realize that "it will only take five minutes" will never be an accurate statement. It takes Bailey a mere 30 seconds to hide my shoe and I end up spending the next hour looking for it (what do you mean you have more than one pair of shoes?!!). However I relish recipes that allow me to marinate, brine or cure. Recipes that let time do its thing. Not in five minutes and surely not in thirty seconds.

There is virtue in meals quickly put together. My better half is eating a lot of leftovers with a poached egg on top as I work my way through several book projects at once. That really takes ten minutes and it’s just fine most nights. There are however days when I want to take more time with food. So I make ravioli and enjoy rolling dough to relieve stress and I release a few expletives in the process. I let my pan of ratatouille go on for hours until perfectly caramelized. I relish in the long simmering process of onion soup.

Smoked Salmon on Prawn Crackers


And then entered gravlax…The last time I had made gravlax was over 10 years ago. On a whim. After watching The Galloping Gourmet on T.V. I remember it distinctly because France had not been exposed to many cooking shows before and something about the concept was brilliant. The experience was so easy that I really can’t figure out why I waited this long to make it again.

It is so simple and you can literally put the cure together in less than 10 minutes and two days later have the most delicious gravlax. Bill loves it on his bagels in the morning and could not stop asking me "ready yet?" "are you sure it’s not ready yet?" I kept repeating like a stubborn mule "Thirty six hours dear. Be patient". Patience is key. The gravlax is buttery, sweet and salty and fragrant of dill and juniper berries all at the same time.

Light & Healthy


Some of us belonging to the Martha Stewart Circle were gifted with quite many pounds of fresh Norwegian Salmon as part of a campaign they were running. I love salmon but living on the waters of South Carolina, it is not a fish I buy often since it does not fish in the waters around here and I try to support local fishermen as much as possible. If I get salmon, I get Pacific wild salmon but I was intrigued by the claims of sustainability and ethically ocean-farmed raised salmon.

I got in touch with my favorite source on everything seafood, Becky from Chef Reinvented whose first cookbook, aptly entitled Good Fish is coming out in the Spring. What came out of our exchange, and without knowing lots of specifics about this company, is that not all ocean farmed salmon is equal and that some Norwegian farms are better than other farms, do not use antibiotics and monitor the growth and feeding of the salmon carefully. We both agree that even though it could be raised in better conditions than other farms in the world, it still does not compared to wild caught salmon. We also determined that it would be a waste of darn good fish not to cook with the one I had received!

Smoked Salmon on Prawn Crackers


I started with making Thai Coconut Salmon Soup actually and posted a preview on Flickr a couple of weeks ago but did not get around to post yet. The second one was this appetizer made with homemade gravlax and I could not help but make a quiche. No fear, everything will be up on the site at some point! Nothing could be easier than this appetizer. Well once the gravlax is done of course… I pan fried some dried prawn crackers (also named chips depending on the brand) and topped each with a slice of radish, some gravlax, a dollop of creme fraiche and sprinkled everything with chopped chives and pomegranate seeds. The combination of sea, sweet and salty was pure joy on the tastebuds.

Oh dear… we ate the entire thing that evening with some bubbly and shared it all with good friends.

Homemade Gravlax And Prawn Crackers Appetizer:

Serves 12

For the gravlax, adapted from The Minimalist.

Time: 10 minutes, plus 24 to 36 hours' refrigeration

1 cup salt
2 cups sugar
1 bunch dill, stems and all, chopped
2 tablespoons cracked juniper berries
1 2- to 3-pound fillet of salmon, pin bones removed.

Mix together the salt, sugar, dill and juniper berries. Place the salmon, skin side down, on a large sheet of plastic wrap. Cover the flesh side of the salmon with the salt mixture, making sure to coat it completely. (There will be lots of salt mix; just pile it on.)
Wrap the fish well. If the temperature is below 70 degrees, and it is not too inconvenient, let it rest outside the refrigerator for about 6 hours, then refrigerate for 18 to 24 hours more. Otherwise, refrigerate immediately for about 36 hours.
Unwrap the salmon, and rinse off the cure. Dry, then slice on the bias (see illustration). Serve plain or with lemon wedges, creme fraiche, sour cream or a light vinaigrette.

For the rest of the ingredients:
freshly fried prawn crackers/chips or already made ones – just make sure they are fresh! (available at most Asian grocery store)
12 thin slices of radish
1/3 cup creme fraiche or sour cream mixed in with some salt and pepper to taste
2 tablespoons chopped chives
1/4 cup pomegranate seeds

Make the gravlax according to the recipe directions. Fry the prawn chips according to package instructions or use already fried ones (available at Asian grocery stores) Layer slices of radishes, slices of salmon, top with dollops of sour cream, some chives and pomegranate seeds.

Use as little or as much as you want…just be prepared. The combination is seriously addicting!!

Pecan Coconut Cherry Granola and A Deliciously Organic Giveaway

Pecan Cherry Granola


*** Per the instructions in this post, the giveaway ended on Sunday night, 01/23/2011.***
It’s not often that I cook from a cookbook from beginning to end. It’s not often that I do it twice. Three times. And it’s not often that a cookbook becomes like the postcard of a very dear friend. Something you read over and over for fun, to learn, because it touched you somehow. That’s how I feel about Carrie’s book, Deliciously Organic. That’s how I feel about Carrie.

A year ago, I had no idea who Carrie Vitt was. I had no idea I would be privileged to bring her recipes, her family and her words to photographs. I had no idea, just a faint and distant skip in my heart, that we would become friends. When work allows you to connect beyond the image, to understand someone’s journey and decisions, you can’t be anything but grateful.

Granola


I know, I know. I am biased. Of course I am! Not only was I given a tremendous "first" cookbook to shoot, her first to write, but all the hard work and the hours spent dissecting recipes and looking over hundreds of images really paid off. Huge thanks to IFP, her publisher, for putting the highest quality demands on both of us. And to the amazing crew of people working on it.

We ate well for the two weeks I worked on her book. We ate very well. Carrie came during the shoot and her recipes took on an even greater dimension. We talked about her reasons for going organic and non processed. We discussed and commented. We established a dialogue and an area of mutual quiet respect. Through food. As it should be.

Tomato Chive Quiche


If you are looking for organic, unprocessed, wholesome ingredients, Carrie’s recipes are simply put just pure gourmandise whether you are making Sour Cream and Lemon Pancakes with Blueberry Puree, Grandma’s Crawfish Etouffee, Roasted Red Onion and Pear Salad, or the Pecan Coconut And Cherry Granola and the Tomato Basil Quiche in the pictures here. (click on continue for recipes at the bottom to get the granola recipe.)

If you are puzzled with the what/why/where of going organic, Carrie’s story and subsequent journey and discoveries will provide some pointers and ways to explore. Carrie’s tone is never preachy or condescending. It can’t be. You realize that when you meet her in real life, trust me. So you listen or read. And you learn. And you share.

Of course I want her to do well! I loved photographing this book! I can’t wait to start on her second! I loved the work but first and foremost it’s not everyday that you first cookbook shoot turns out to be one you handle from ingredient shopping to post processing all by yourself and still leave you elated and rubbing your belly for more good food.

Tomato Chive Quiche


Every dish in this book was photographed, then eaten. That chicken on the back cover? Man…it came out hot from the oven, we set it down on my table, photos were taken and we ate it but a big salad simply dressed of lemon juice and olive oil. I have dreams about that chicken. Yep, I planned every work day around a set menu: one breakfast, one entree, two sides, one dessert. Oh yes…

Again. We ate well. Very well.

And we still do. And now you can too! In honor of Carrie’s book release, I have one copy to giveaway to a lucky reader among you! All you have to do is leave a comment on this post and a winner will be picked at random on Sunday night 01/23/2011, midnight eastern time. One entry per person, no anonymous please. I will ship anywhere in the world.

Carrie….I am so flipping proud of you! Virtual flowers and Champagne to celebrate!

Wishing...


Notes: I know…where’s the quiche recipe, right? In the book….we can’t give you all that’s inside the book but I urge you to try it as you as you can. That recipe alone will make for better Sunday mornings…trust me!

Pecan, Coconut and Cherry Granola, printed with permission of Carrie Vitt.

Makes about 8 cups
1 cup (185gr) whole cane sugar or sucanat
¾ cup (180ml) organic maple syrup
4 cups (440gr) rolled oats
1 ½ cups (130gr) coconut, unsweetened
1 ½ cups (150gr) dehydrated whole pecans, or pecan halves
1 cup (160gr) dried cherries, lightly chopped

Preheat your oven to 350º and adjust the top rack to the middle of the oven.
Whisk sugar and maple syrup in a small saucepan over medium heat until almost smooth. Pour the oats, coconut, pecans into a large bowl and then pour the syrup over them. Stir gently until the syrup coats everything. Spread mixture onto a large baking tray lined with parchment paper. Bake for twenty minutes. Remove from oven and cool completely. Break into pieces and add the dried cherries. Add dried fruit after you break up the granola into loose bits and large pieces. Sore in an airtight container.

French Onion Soup

Onion Soup


Days go by lately and they pretty much look the same. Write write write. Camera camera camera. Write write write. It’s pretty intense. It’s very insane and I would not change it for the world. Writing this book is the toughest thing I have ever done. Finding my authoring voice as well as my "manual-guideline" writing voice, as well as analyzing hundreds of my own pictures to make sure they are the best in the category they will be used for. I wondered the other day is 5pm was a decent time to finally brush my hair…

I am learning tons. About the world of editing and publishing, myself, others. About having someone busting your chop and being always one step ahead. I thought I did not sleep much, I think my editor got me beat. I often wonder if I am slow or it’s just the subject matter that makes me slow down and double triple check how I put it down on paper. I have never pondered words and dissected pictures as much as I have been doing the past couple of months. And there is so much still left to do and so little time to do it in.

Onion Soup


I do believe I’d feel different if I did not have to work my regular job at the same time. Yep. The bills still have to be paid, regardless of how long my behind is glued to the office chair or my eyes to the computer. This is by far the most challenging thing I have ever done in my career but it’s looking to be a dance of two or three of anything at least until July. And for some insane reasons, it’s not stressing me out one bit. It’s gotta be because I am doing a job that makes me smile every morning I get up.

I equated it to kitchen work the other day to Bill as we were looking over the schedules. Last time I felt such a high and peace of mind all jumbled together was when I was working in a restaurant kitchen.

Winter Salad


Talking about restaurant kitchens…I am starting the photography for Virginia Willis’s cookbook this weekend and I am looking forward to working with a dedicated crew of women, from cook to food stylist to yours truly behind the camera. We have a packed schedule the coming 3 days so you won’t see me pop around here much. Once the shoot is over for the day it’s back to writing and editing my own material. Lots of recipes to be covered for her and we have for mission to find the cover! Ah…no pressure!!

I am ready! With the intensity of the last few weeks, it would be easy to forget proper nourishment. Except I am not one to forget to eat. When time is of the essence, soups and salads are my true staples. It’s usually the same lentil or split pea soup but since my buddy Chris posted his French Onion Soup, I have been obsessed to make a big batch of it. Paired with my favorite salad of the moment and I am set. Perfect bite of comfort and TLC during quiet and studious days.

I am hoping to get plenty of "behind the scenes" shots for you guys. So stay tuned!

Onion Soup & Winter Salad


French Onion Soup: Click here for the recipe.
I’d never trust just anyone to make good onion soup like my mother used to make but his…wow! Make the time to put a batch on the stove. You won’t regret it. Use gluten free bread and you are good to go!

For the salad, lately it’s been rotating around these ingredients:
greens, granny Smith apples, feta, pomegranate seeds, vinaigrette.

Perfect lunch…

Pear & Almond Frangipane Tartelettes

Pear & Almond Frangipane Tarts


It’s been a week of catching up here since New Year. Catching up on family, catching up on friends, emails, snail mail, thank you notes, love notes. The holidays have been so busy and wonderful that every bit of everyday is truly dedicated to organizing. At the end of the day, feeling both mentally spent and elated, we welcome a little break and a treat.

It does not have to be anything fancy or sweet. Sometimes it’s just a slice of bread and some honey, a couple of cookies, a piece of bread and a cracker, etc… Sometimes, it’s a treat I made specifically for a tea break. Sometimes, like the other day, it was pulling ends and pieces together to make something utterly scrumptious: Pear and Almond Frangipane Tartelettes.

Pears


On New Year’s day I made all the traditional Southern foods since my in-laws were coming over such as ham, black eyed peas, collard greens, biscuits, etc..I also added one of my family’s traditions by making a galette des rois with gluten free puff pastry. I know I was a few days early, but that’s how it goes in my family because of everyone’s travel and work schedule during the holidays. At least, we make time to gather, eat a piece of galette and have a glass of Champagne to toast the new year.

This NY Day, I made more frangipane than I actually used in the galette so I parked it the fridge. I did consider eating it with a spoon as it was if you must know. There is something about frangipane that is just creamy enough and rich enough to make me forget reason…

Eggs


It took a couple of extra days and I had all the elements necessary to make proper (read dignified) use of the frangipane. Some very ripe pears, some pastry dough saved over from making quiche and these little tartelettes were born. We barely waited until they were cool enough to share one during a little mandatory work break.

I am just very sad we are both starring at the last one right now! Have a great weekend!

Pear & Almond Frangipane Tarts


Pear and Almond Frangipane Tartelettes:

Makes six to eight 3.5-inch tartelettes or one 9-inch tart

For the crust:
5 tablespoons (70gr) unsalted butter, at room temperature
3 egg yolks
pinch salt
1/2 cup (80gr) superfine rice flour
1/2 cup (60gr) millet flour
1/4 cup (30gr) sorghum flour
1/4 cup (40gr) corn starch (or tapioca flour)
2 tablespoons to 1/4 cup cold water or milk

For the frangipane:
1 stick (115 gr) butter, softened
1/3 cup (115gr) honey
1 cup (100 gr) ground almonds (blanched, slivered, whole, your call)
2 eggs
1/4 cup (60gr) heavy cream
1/4 teaspoon cardamom

3 medium pears, cored, halved and thinly sliced (I left the skin on but feel free to peel them before hand)

Prepare the crust:
In a mixer, whip the butter on medium speed until light and airy. Add the egg yolks, one at a time and beating well after each addition. Mix until incorporated. Add the salt, and all the different flours, and mix briefly. Add some water or milk, one tablespoon at a time if the dough feels too dry. Dump the whole mixture onto a lightly floured (use more rice flour) board and gather the dough into a smooth ball. Flatten the dough into a disk, wrap it in plastic wrap and refrigerate for an hour.
Preheat oven to 350F and position a rack in the center.
When the dough is nice and cold, roll it out on a lightly floured board or in between two sheets of plastic to fit your prefered pie pan or eight 3.5-inch tart rings. If the dough tears while you roll or/and transfer into the pan, just patch it with your fingertips. Line the dough with a piece of parchment paper, fill with pie weights or dy beans and par bake for 10 minutes until almost partially baked. Remove the weights and parchment paper. At this point you can refrigerate the baked crust for up to 5 days before using. Let cool while you prepare the filling.

Prepare the frangipane:
Place the butter, honey, ground almonds, and the eggs in a large bowl and whisk until smooth (can also be done in a food processor). Add the cream and cardamom but stir in it instead of whisking not to emulsify it or it will rise while baking.

Assemble and bake:
Divide the frangipane among each tart rings, add a few slices of pears right on top (no need to push them through) and bake for about 20-25 minutes until golden brown.

We like ours with creme fraiche and a bit of vanilla sugar.