Today is Nutella Day. And that, folks, makes me very very happy. That means I can dig my spoon with reckless abandon in the jar of Nutella. Oh wait…I think I have had Nutella day for 2 weeks straight now. Oops..
It’s been years since I have participated to a Nutella Day, an event created by my good friend Sara from Ms. Adventures in Italy and Michelle from Bleeding Espresso but given the amount of Nutella I have consumed to keep the writing and shooting going lately, I felt I needed to honor the delicious chocolate hazelnut spread.
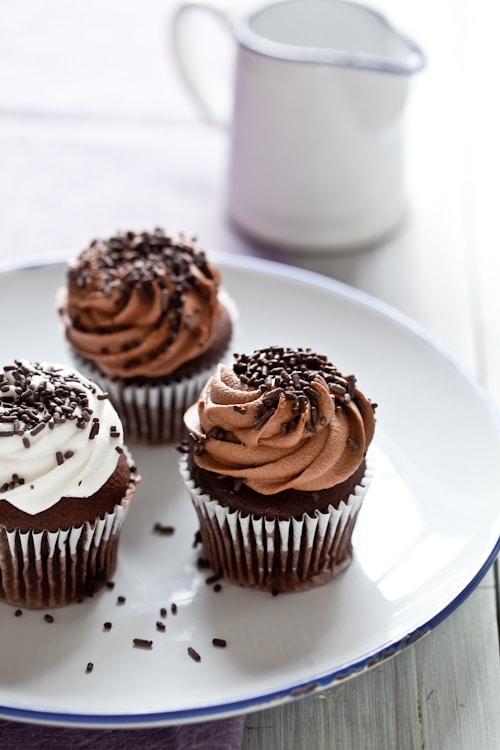
These cupcakes hit the spot. I wanted nothing more than to share a couple of these right away with B. but he was already gone for work. I waited patiently. Then I waited anxiously. My resistance was fading. And when he got home that afternoon, a couple were already gone. I had a cupcake with frosting. Then a cupcake without frosting. Then just frosting. One week from manuscript deadline, I think I am allowed a little lot of Nutella. And coffee.
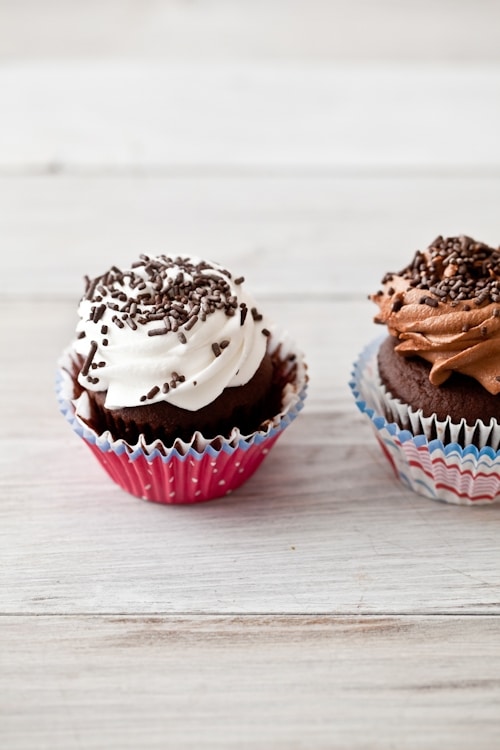
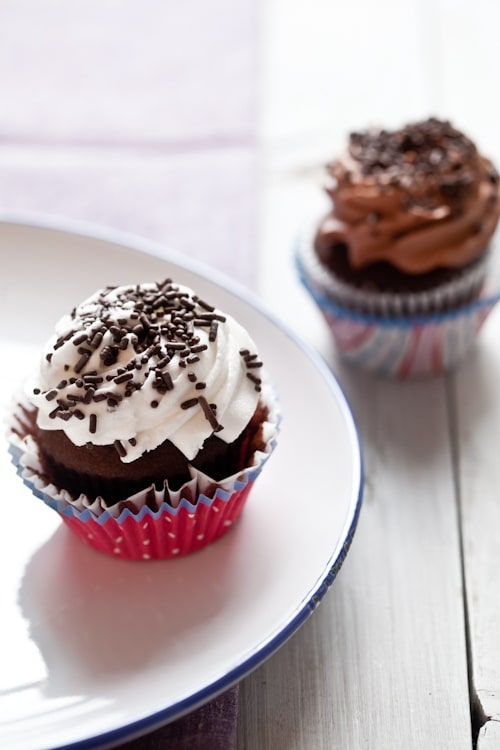
Ok, so I got a bit carried away with the frosting. But that’s ok. It reminded B. of the bakery cupcakes he’s always lusting after. Good! Gluten free Nutella Cupcakes and Nutella cream cheese frosting or plain cream cheese frosting. Who can blame me? For once the ratio of cake to frosting satisfied me completely!
Have a great Nutella Day and a wonderful weekend! Nutella Cupcakes (adapted from this recipe) and Nutella Cream Cheese Frosting:
Note: I double lined the cupcakes just to be on the safe side but you don’t have to.
The colored liners are from Bake It Pretty by the way.
Use 200gr all purpose flour to replace the sweet rice and millet flours and the corn starch if desired.
Makes 12
For the cupcakes:
For the cupcakes:
125g unsalted butter, at room temperature
1/3 cup (110gr)honey or light brown sugar
1 tablespoon ground coffee
2 tablespoons milk
1/4 cup Nutella
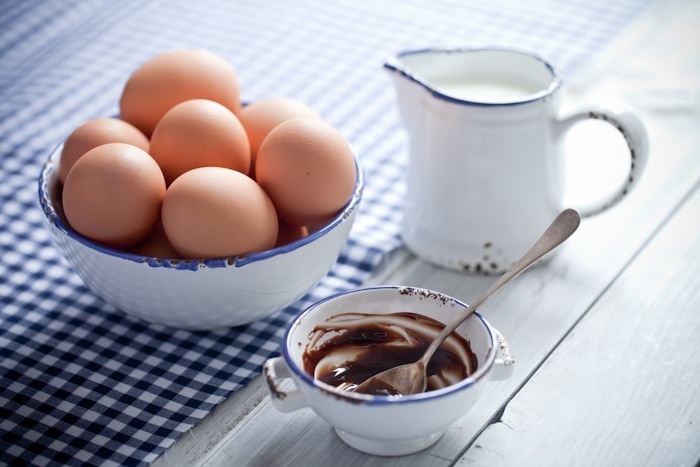
2 large eggs
1/2 cup plus 2 tablespoons (100 gr) superfine sweet rice flour
1/4 cup (50 gr) millet flour
1/4 cup (50 gr) cornstarch (or use tapioca flour)
1 teaspoon baking soda
pinch of salt
Prepare the cupcakes:
Preheat the oven to 350F. Place 12 muffin liners inside a muffin pan and lightly brush with melted butter (or cooking spray).
In an electric mixer, whip the butter and honey until fluffy at medium speed, 2-3 minutes. Reduce the speed to low and add the coffee, milk and Nutella. Still on low, add the eggs, one at time and scraping the bowl after each addition. In a separate bowl, mix together the flours, cornstarch, baking soda and salt and slowly fold this in with the butter – Nutella mixture until the mixture is smooth. Divide evenly among the muffin liners and bake 20-25 minutes. Let cool completely before frosting or enjoy warm without.
Nutella Cream Cheese Frosting:
8 oz cream cheese at room temperature
2 tablespoons unsalted butter at room temperature
1/4 cup powdered sugar
2 oz Nutella
In the bowl of an electric mixer, whisk together the cream cheese and butter until smooth. Sift the powdered sugar over the bowl and whisk for a few seconds. Add the Nutella and mix until completely incorporated. That is plenty for 12 cupcakes by the way. Halve the recipe if you plan to do some Nutella and some plain.
For plain cream cheese frosting:
remove the Nutella and add 2 tablespoons butter to make it 1/4 cup total and 1/4 cup powdered sugar to make it 1/2 cup total. Same process.
I’m in Utah folks! Got in Salt Lake City yesterday afternoon and I’m heading to The Canyons Resort in Park City Utah where the Evo 10 Conference is held this year. To say that I am honored and stoked is putting it mildly. Yesterday as I was watching my inbox implode in between two planes, I just smiled and thought "breathe – take the travel time as a time out". I am looking forward to this week, complete with the workshop in Boulder. Work does pile up when you can’t look! It’s fine though. It’s actually better than fine. It’s impossible to complain when mixing work and play in such beautiful scenery as the mountains of Utah and Colorado.
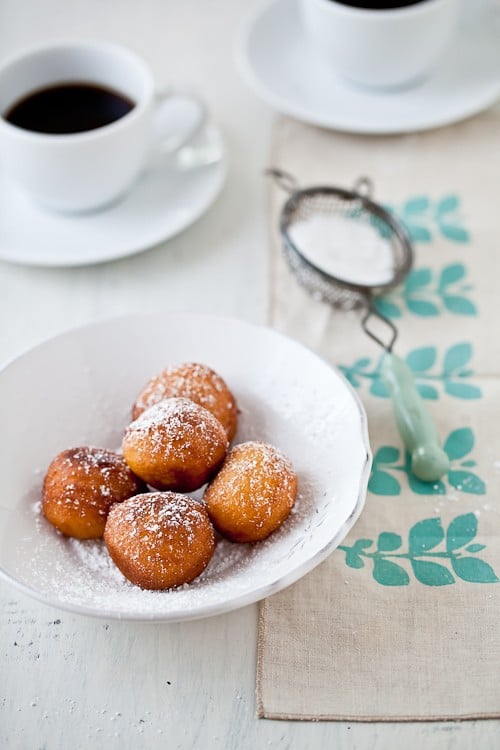
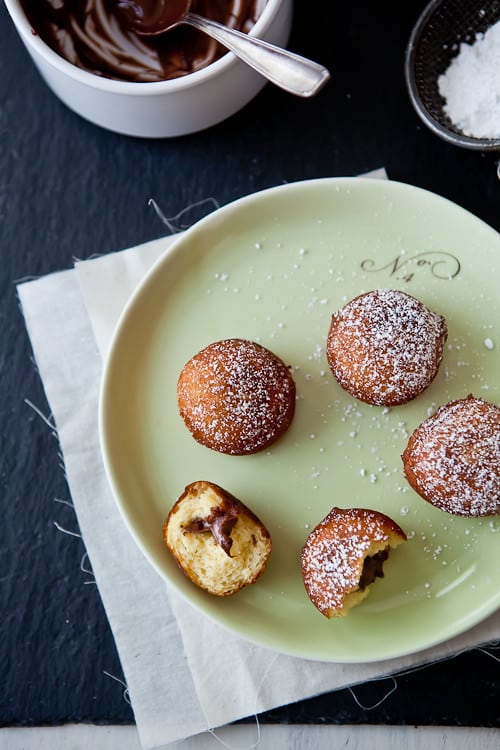
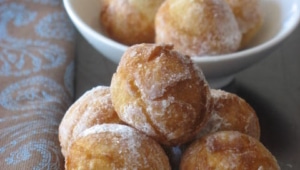
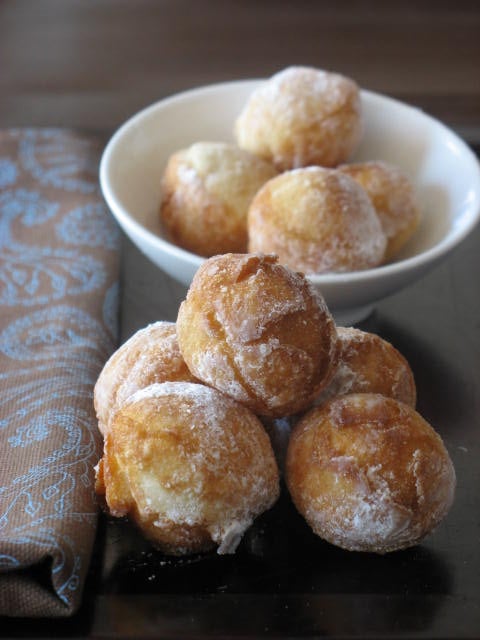
Before I left I treated B. to a couple of special treats and of course stocked the fridge and freezer. When I made these Nutella Doughnuts from Lorna’s cookbook, The Newlywed Kitchen, they almost ended up being dinner. We just could not stop eating them. Pop. Pop. Pop. Oops… Tender, moist, tangy and filled with Nutella….the one thing we truly fight over in the kitchen. If you finish the jar and do not replace it, be ready to face a mini temper tantrum. And not necessarily from me…!
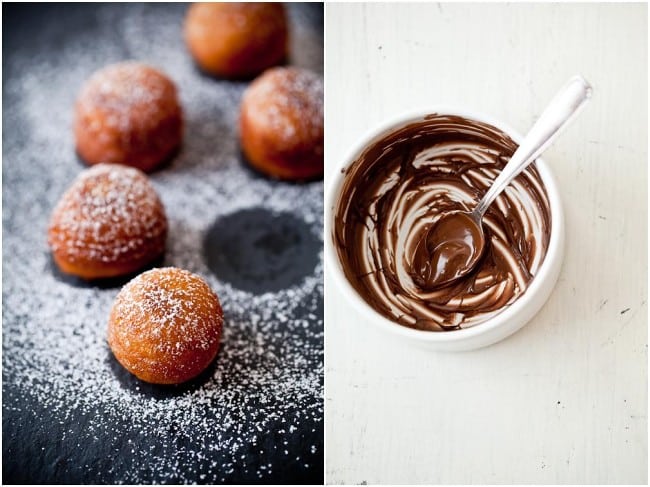
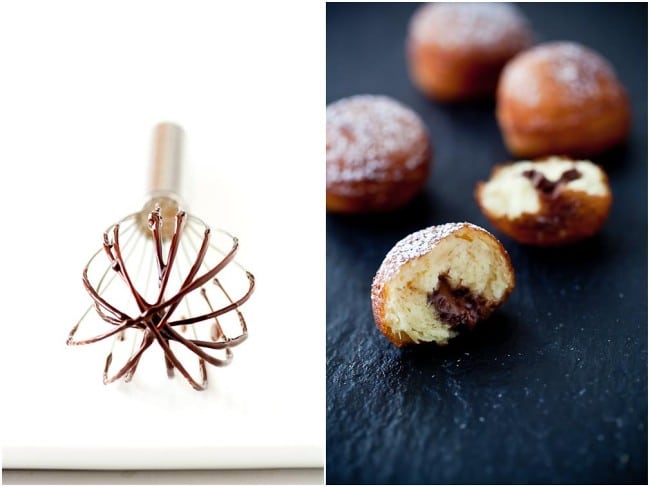
Last week I raved about the simplicity of the Parmesan Roasted Asparagus Tomatoes and Eggs I made from her cookbook. Well, let me raved about how spending a little bit of time in front of the stove to fry these babies up was worth it. Ten times that even. The recipe comes together in no time and the size of the doughnuts makes them the perfect little bite to have after dinner or as a treat (but you won’t stop at one, let me tell you that!). The oozing Nutella in the center? Literally the proverbial icing on the cake. Per-fect.
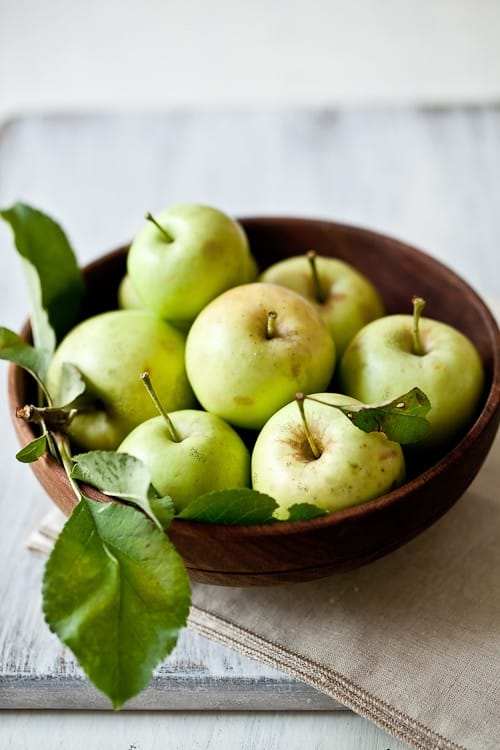
I love drop doughnuts and the simplicity of Lorna’s recipe makes them so easy to adapt gluten free. If you are afraid of deep drying. Fear no more. The temperature given for the oil is right on for these. They turn into perfect airy pockets with a slight tang coming from the ricotta and lemon zest. Love how the Nutella plays so well with the lemon zest. Just the right touch of it too. They are so good plain too. Filled with some strawberry jam I made last month. I even filled some with compote I made after the neighbors gifted me with a basket full of sour apples.
Another successful bite from Lorna’s book! And guess what? Today is your chance to get your hands on a copy to see and taste what I am talking about! That’s right! Lorna is graciously giving away a copy of her book to one of you. All you have to do is leave a comment on this post (anonymous please sign a name) – between today Thursday June 24th and Sunday June 27th, midnight Easter time. A winner will be picked at random from the comment pool by my better half.
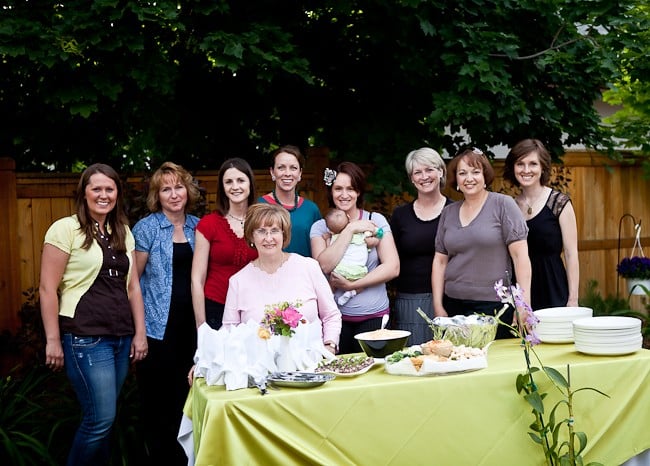
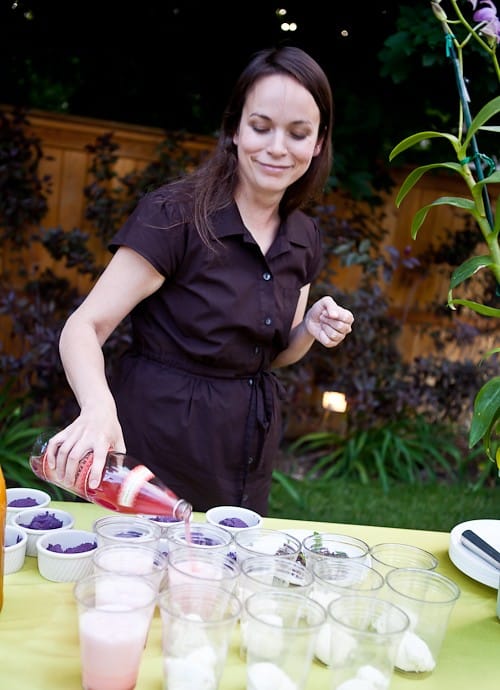
While in Salt Lake City I stayed with Maria and Josh, the team behind Two Peas And Their Pod and we are heading together to the conference, meeting up with Kristen, Katie, Amy and a whole bunch of people I’m thrilled to meet for the first time. Since this morning is pretty much the most quiet time I foresee for the rest of the week, I thought I’d post some snapshots of our "Bloggers Meet Up". I’ll try to post snapshots of the conference, attendees and speakers as I go along.
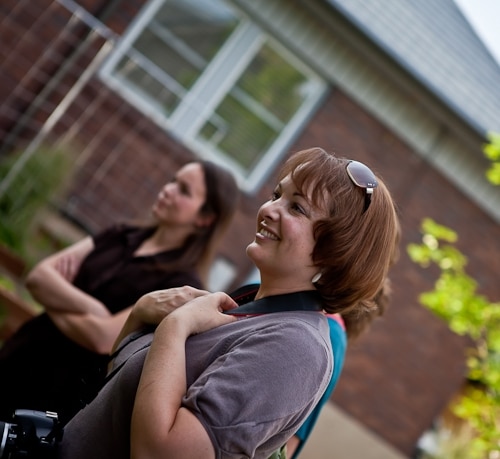
Maria and Christie.
Maria organized a little get together for me and Christie from The Table Runner graciously hosted it at her beautiful home. We spent hours talking about life, blogging, food, kids and so much more. Made me go to bed with a full heart and a skip in my step. Thank you ladies for your generosity!
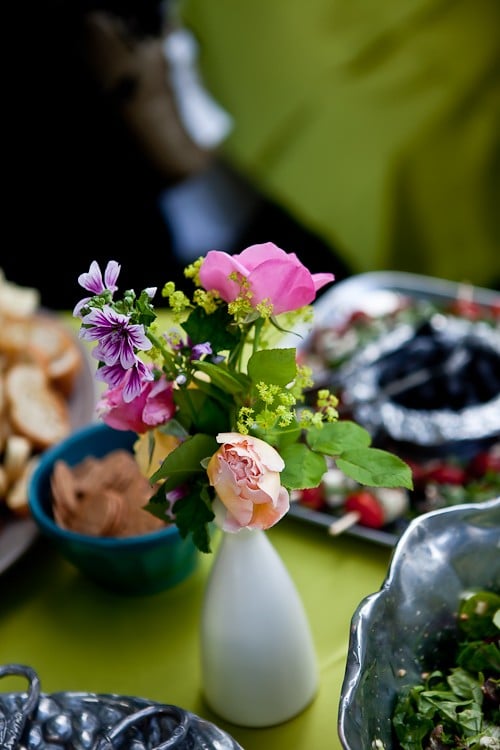
Jaime from Sophistimom makes the best Italian sodas….
Good luck in Lorna’s cookbook giveaway!
Nutella Doughnuts, courtesy and copyright Lorna Yee from "The Newlywed Kitchen" cookbook.
Makes about 14 doughnuts
Note: to adapt these gluten free, I replace the flour with 1/2 cup superfine sweet rice flour, 1/4 millet, 1/4 cup sorghum flour, and added 1/4 teaspoon xanthan gum for a smooth dough.
3 large eggs
1/4 cup sugar
8 ounces whole-milk ricotta
1/2 teaspoon kosher salt
1 teaspoon vanilla extract
1 cup all-purpose flour
2 teaspoons baking powder
Canola, vegetable, or peanut oil for frying
Powdered sugar for dusting doughnuts
1 cup Nutella
In a large mixing bowl, stir together the eggs, sugar, ricotta, salt, and vanilla extract. Add the flour and baking powder, and mix until just combined.
Heat 3 inches of the oil in a deep pot until it registers 375 degrees F on a deep-fat thermometer. Drop a tablespoon of batter into the oil and cook for about 3 minutes on one side, and 2 minutes on the other side. (Do not make the doughnuts much bigger, as the outside will brown too quickly and they won’t cook through.) Don’t overcrowd the pot–you will probably need to fry the doughnuts in three batches. Cut one doughnut open to make sure it’s cooked through before removing the rest of the batch from the oil. When the doughnuts are cooked, scoop them out and allow them to drain on paper towels. Repeat with remaining batter.
Dust the doughnuts with powdered sugar and pipe Nutella into the center of each one. These doughnuts are meant to be devoured warm out of the fryer, so make them just before you’re both ready to eat them.
Variation: Add 1 1/2 teaspoons grated lemon or orange zest to the dough and fill the doughnuts with your favorite jelly or lemon curd.
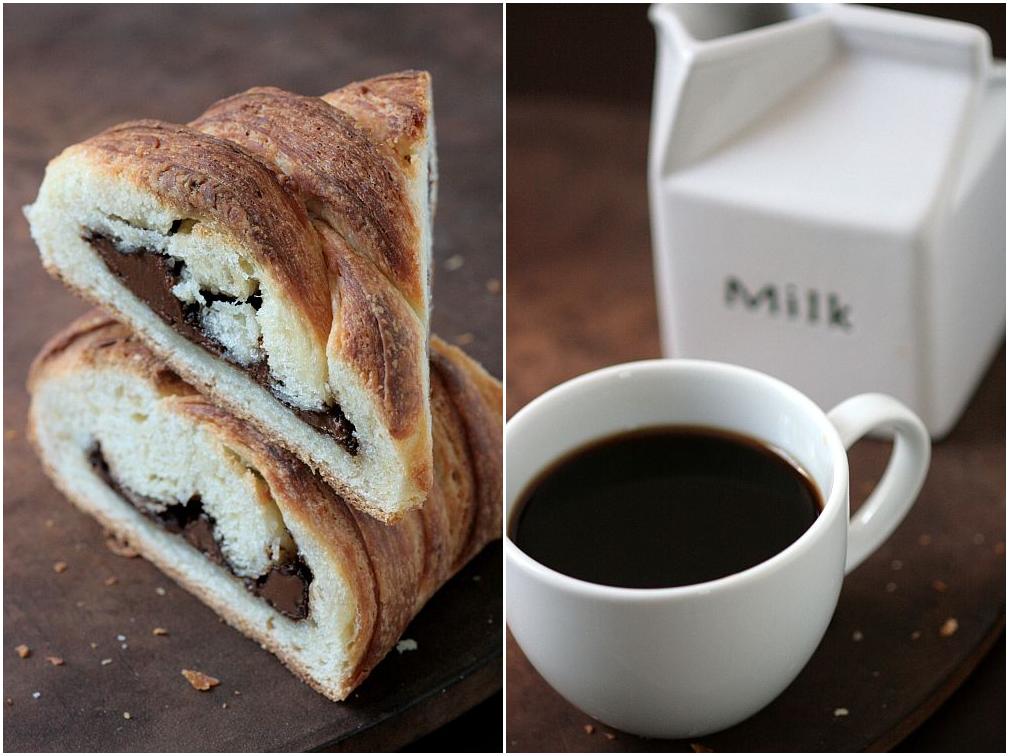
You know by the title of this post that there is a story coming up don’t you? Well, this time I have got to thank Kelly and Ben, our Daring Bakers' hosts this month for our house producing and eating danish braids and various other danishes all month long….for real. Not that I made a big batch of it and ate it throughout the month. No…to easy….I sat down yesterday actually counting the times I had made the recipe they provided for June: 1 full batch and 3 half batches. Hmmm…how did that happen?
Quickly after they posted the recipe inspired by Sherry Yard, The Secrets Of Baking, my mother-in-law was hosting her garden club and since I usually provide these ladies with some sort of baked goods, I thought of doing a half batch of the braid. Then a few days later, my Bakenistas and I met on Skype on Sunday morning and made a full batch. I had worked an overnight at the restaurant and I had started the dough there on my break. I arrived right on time to meet up with Lisa, Ivonne,Mary, Kelly, Ben, Chris and John. Same rowdy bunch, same coffee spillage laughing out loud. That batch was distributed around the neighborhood and B’s students. The weekend after that, he gave me a pity party for not having any left so I agreed to make another half batch. The last one? Yesterday…of all days…when I could not retrieve my Danish Braid picture folder and sent a screeching help email to whomever could help. Thank you John for the programs because they obviously work….and I can write this post eating a slice of Danish without freaking out or melting down.
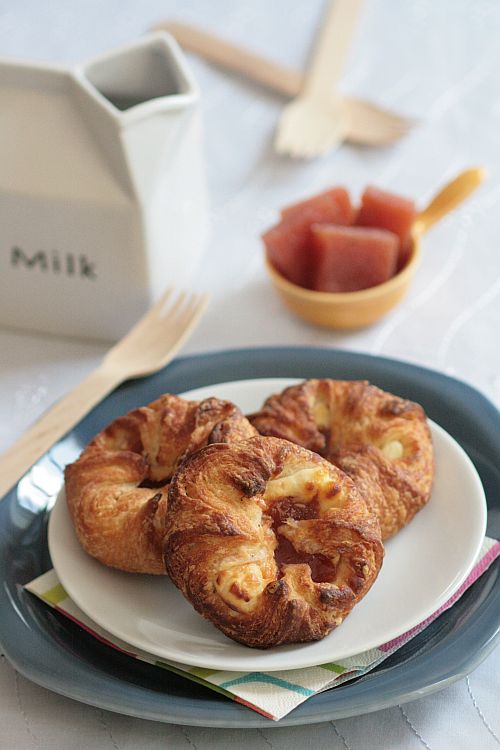
Summary? Well, we have one Nutella filled Danish Braid, one Blackberry Cream Cheese Braid with Almond Streudel Topping, a few Quince Danishes (thanks to Marcela who brought me a huge can of quince paste from Argentina, 2 pounds of it!), a few Loquat Jam filled Danishes.
Basically, I’d be lying if I told you that we did not enjoy it or that I did not find it a breeze to work with…even in the heat we are having and all the humidity. I do admit that I have a secret (well, not anymore) weapon when it comes to rolling laminated dough like danishes or puff pastry in the summer in South Carolina: a pastry board with ice pack inserts, which you can see see here.
For the filings I spooned Nutella right from the jar and the loquat jam was spread the same way, from the jar. For the blackberry filled braid, I simply cooked some berries with sugar and spooned 4 oz of cream cheese mixed with 2 Tb of sugar on the dough before the blackberries. For the quince paste, I did put a small spoonfull of mascarpone before the paste in the danish. No real recipes, just trying what I have on hand.Kelly and Ben provided a wonderful apple filling recipe for the braid but I had to make room in the fridge and not very much time to do it, but I have it bookmarked for this winter. One other thing: I skipped the egg wash and just sprayed the braids and danishes with some water before baking, to keep the layers light and crispy during baking.
Danish Braid, inspired by Sherry Yard, The Secrets of Baking:
Makes 2-1/2 pounds dough
For the dough (Detrempe)
1 ounce fresh yeast or 1 tablespoon active dry yeast
1/2 cup whole milk
1/3 cup sugar
Zest of 1 orange, finely grated
3/4 teaspoon ground cardamom
1-1/2 teaspoons vanilla extract
1/2 vanilla bean, split and scraped
2 large eggs, chilled
1/4 cup fresh orange juice
3-1/4 cups all-purpose flour
1 teaspoon salt
For the butter block (Beurrage)
1/2 pound (2 sticks) cold unsalted butter
1/4 cup all-purpose flour
Dough:Combine yeast and milk in the bowl of a mixer fitted with the paddle attachment and mix on low speed. Slowly add sugar, orange zest, cardamom, vanilla extract, vanilla seeds, eggs, and orange juice. Mix well. Change to the dough hook and add the salt with the flour, 1 cup at a time, increasing speed to medium as the flour is incorporated. Knead the dough for about 5 minutes, or until smooth. You may need to add a little more flour if it is sticky. Transfer dough to a lightly floured baking sheet and cover with plastic wrap. Refrigerate for 30 minutes.
Without a standing mixer: Combine yeast and milk in a bowl with a hand mixer on low speed or a whisk. Add sugar, orange zest, cardamom, vanilla extract, vanilla seeds, eggs, and orange juice and mix well. Sift flour and salt on your working surface and make a fountain. Make sure that the “walls” of your fountain are thick and even. Pour the liquid in the middle of the fountain. With your fingertips, mix the liquid and the flour starting from the middle of the fountain, slowly working towards the edges. When the ingredients have been incorporated start kneading the dough with the heel of your hands until it becomes smooth and easy to work with, around 5 to 7 minutes. You might need to add more flour if the dough is sticky.
Butter block: Combine butter and flour in the bowl of a mixer fitted with a paddle attachment and beat on medium speed for 1 minute. Scrape down the sides of the bowl and the paddle and then beat for 1 minute more, or until smooth and lump free. Set aside at room temperature.
– After the detrempe has chilled 30 minutes, turn it out onto a lightly floured surface. Roll the dough into a rectangle approximately 18 x 13 inches and ¼ inch thick. The dough may be sticky, so keep dusting it lightly with flour. Spread the butter evenly over the center and right thirds of the dough. Fold the left edge of the detrempe to the right, covering half of the butter. Fold the right third of the rectangle over the center third. The first turn has now been completed. Mark the dough by poking it with your finger to keep track of your turns, or use a sticky and keep a tally. Place the dough on a baking sheet, wrap it in plastic wrap, and refrigerate for 30 minutes. – Place the dough lengthwise on a floured work surface. The open ends should be to your right and left. Roll the dough into another approximately 13 x 18 inch, ¼-inch-thick rectangle. Again, fold the left third of the rectangle over the center third and the right third over the center third. No additional butter will be added as it is already in the dough. The second turn has now been completed. Refrigerate the dough for 30 minutes.
– Roll out, turn, and refrigerate the dough two more times, for a total of four single turns. Make sure you are keeping track of your turns. Refrigerate the dough after the final turn for at least 5 hours or overnight. The Danish dough is now ready to be used. If you will not be using the dough within 24 hours, freeze it. To do this, roll the dough out to about 1 inch in thickness, wrap tightly in plastic wrap, and freeze. Defrost the dough slowly in the refrigerator for easiest handling. Danish dough will keep in the freezer for up to 1 month.
Danish Braid:
Makes enough for 2 large braids
1 recipe Danish Dough
filling of your choice
– Line a baking sheet with a silicone mat or parchment paper. On a lightly floured surface, roll the Danish Dough into a 15 x 20-inch rectangle, ¼ inch thick. If the dough seems elastic and shrinks back when rolled, let it rest for a few minutes, then roll again. Place the dough on the baking sheet.
– Along one long side of the pastry make parallel, 5-inch-long cuts with a knife or rolling pastry wheel, each about 1 inch apart. Repeat on the opposite side, making sure to line up the cuts with those you’ve already made.
– Spoon the filling you’ve chosen to fill your braid down the center of the rectangle. Starting with the top and bottom “flaps”, fold the top flap down over the filling to cover. Next, fold the bottom “flap” up to cover filling. This helps keep the braid neat and helps to hold in the filling. Now begin folding the cut side strips of dough over the filling, alternating first left, then right, left, right, until finished. Trim any excess dough and tuck in the ends.
Proofing and Baking
– Spray cooking oil (Pam…) onto a piece of plastic wrap, and place over the braid. Proof at room temperature or, if possible, in a controlled 90 degree F environment for about 2 hours, or until doubled in volume and light to the touch.
– Near the end of proofing, preheat oven to 400 degrees F. Position a rack in the center of the oven.
– Bake for 10 minutes, then rotate the pan so that the side of the braid previously in the back of the oven is now in the front. Lower the oven temperature to 350 degrees F, and bake about 15-20 minutes more, or until golden brown. Cool and serve the braid either still warm from the oven or at room temperature. The cooled braid can be wrapped airtight and stored in the refrigerator for up to 2 days, or freeze for 1 month.
Check out all the other Daring Bakers' wonderful creations this month by heading over to the blogroll. Thank you all for visiting during these busy coming days and I will try my best to do the same. Scoring DMBLGIT is not a quick task so bear with me for the DB and the contest results which I plan on posting by Wednesday.
I feel a little bit strange coming here and telling you that I, too, have entered the Death by Chocolate Contest held by the great folks from Culinate. I feel even stranger asking people to vote for me or give me their approval but posting about chocolate is an offer I can’t refuse! With time being a precious commodity while my mother is visiting I am really thankful that the rules allow bloggers to post past entries.
I was excited to enter just for the theme….and then they told us the prizes on hand if we won: one food blogger and one reader will be sent on a trip for two to Napa Valley and will attend the Copia Center’s annual Death by Chocolate Festival on Feburary 23, 2008. Talk about generosity! The winner among readers will be chosen at random from all entries. Readers will vote for their favorite blog posts, and the winning food blogger will be selected by a panel of judges from the top 10 reader favorites. The entries I have seen so far are absolutely mouth watering.
Why would I love to win? Well, the only thing that comes to my mind this close to Valentine’s Day is that my husband and I will celebrate our 10th anniverary this year and we have never gone on a honeymoon…No sunny beaches, no exotic trip…He was tied home badly sick and he still feels terrible about it. I keep telling him that I don’t need a honeymoon to make me love him more and I think that rewarding him with a nice trip to Napa would prove that come hail or high water, I am his girl.
So…..if you feel like this Nutella Cream and Chocolate Macarons post is deserving of your vote, you can do on by clicking on the picture below. Voting start today an ends February 8th. Many many many thanks!
I am busy playing in the kitchen with my mother but I wanted to remind everybody out there that Peabody and I are hosting a doughnut fest on February 15th and invite you all to send us your entries by February 12th if you wish to participate. The ones we have received so far are fabulous, lip-smacking good looking! You will find all the info needed here: Time To Make The Doughnuts.
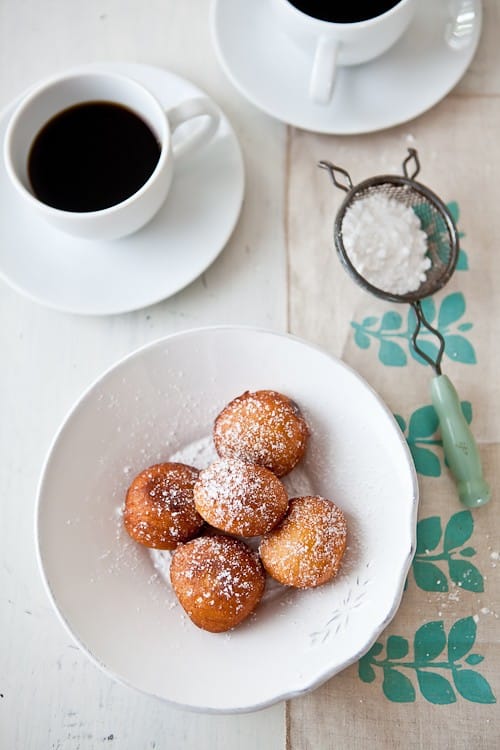
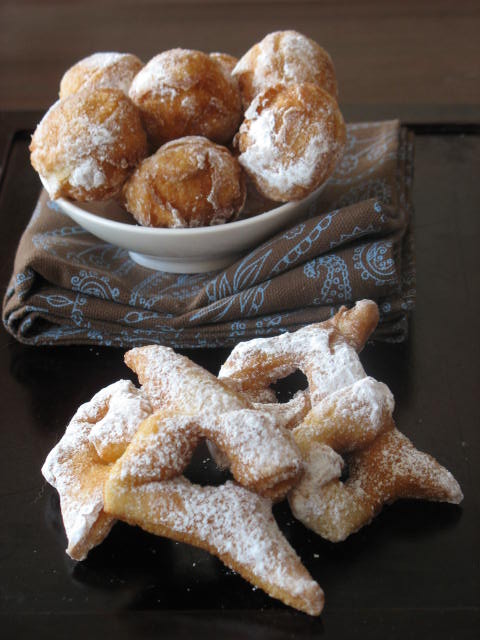
No long post from me tonight, no strange looking creation or mad scientist tip…just a recipe for beignets and a little plea (continue to read below the beignets) that my mom brought with her for Mardis Gras and that I have not made in years. You can make the round, shape them or fill them if you so desire. Excuse me while I go eat some more chocolate and give her a hug (she always smells like vanilla!).
Beignets:
1 teaspoon active dry yeast
3/4 cup water,lukewarm
1 egg
2 1/2 cups all-purpose flour
1/2 teaspoon salt
1 Tb orange blossom flower water
Sprinkle the yeast over the water. Let stand for 10 minutes or until it foams. With a stand mixer fitted with the paddle attachement add the egg, salt, orange water and the flour. Beat until smooth. Transfer the dough to a bowl coated with cooking pray and let stand in a warm place until doubled in bulk. Roll the dough on a lightly floured board and cut out round, shapes,… Heat up 2 inches of oil in pan (I use a 9 inch cast iron) to 350F and fry the doughnuts in everal batches. When browned on one side, turn and brown on other side. Drain them on paper towel and sprinkle with powdered sugar.