meringue

Chocolate & Hazelnut Meringue Cake

Birthday Cake Preparations


Thank you guys so much for playing the game the other day and giving me great suggestions for B’s birthday cake. He was a bit shocked I did not have any of my own – the truth is I had too many and after staring at them for a few days, none seemed that fun anymore! And, I really like when we can all share, communicate, participate.

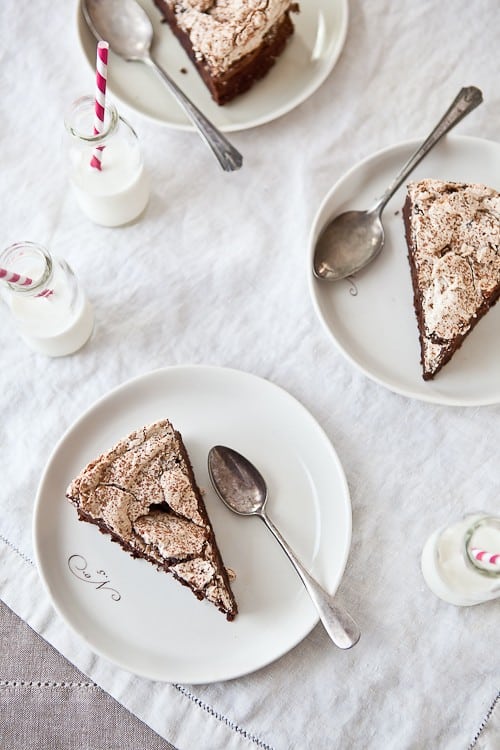
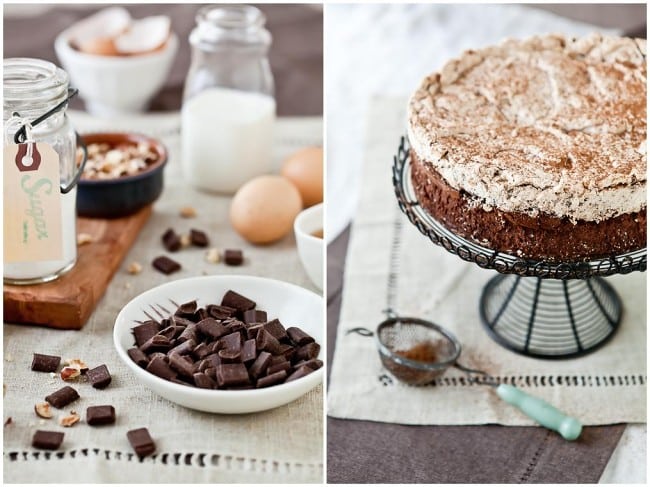
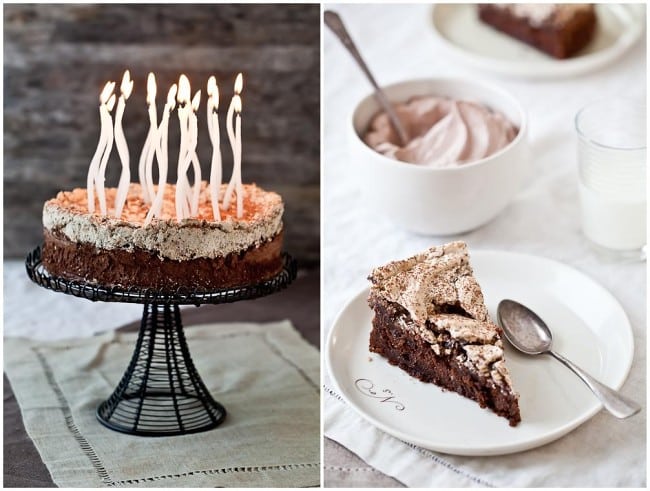
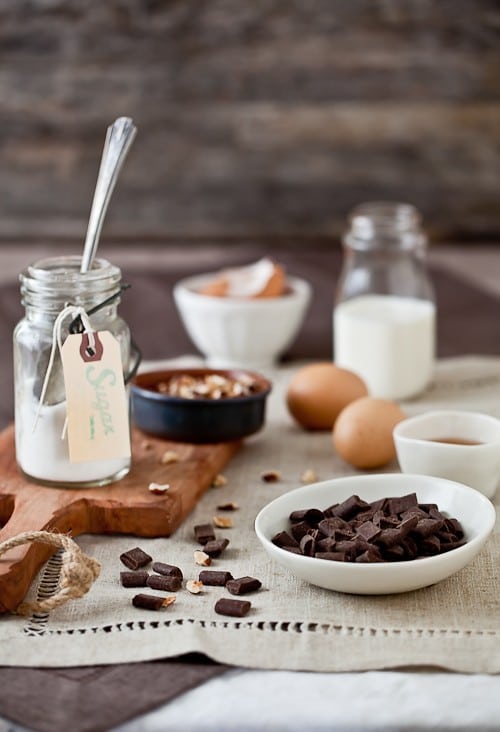
As you can guess, B’s cake had plenty of chocolate, eggs, sugar and nuts…Which one did I/we pick? EP’s Chocolate and Hazelnut Meringue Cake from Martha Stewart ended up stealing the show. Congratulations on winning the "Artisan Breads At Home". You are going to love this book!

Chocolate & Hazelnut Meringue Cake


How did I pick? Actually I ended involving B. a little in the process as I noticed after 50 or so comments that I was slightly putting in the "maybe" or "no sure" columns flavors, desserts, ideas that he could picked if given the chance. It was his birthday after all. And I have known in the 13 years we have been together that I should never expect anything if only be surprised.

We sat down and I asked him for key words that would help me narrow down the winning suggestion. Here were his specs: chocolate, nuts, crunchy – creamy, gluten free so I would not have to worry about adapting (go ahead, insert "awwww" right here!). I read everyone of your comments and put a star next to the ones that fit his criteria then I went back and had him look them over, one by one and pick his top three.

Chocolate & Hazelnut Meringue Cake


You guessed it, I didn’t want to spoil the element of surprise completely. Yes. It turned out into a day 100% tuned into him and I am happy for it. This year has been nothing but tranquil for us and he deserves every bit of "you you you you you" that I could give him. And I am glad you indulged me in this rather fun and chocolatey quest.

Chocolate & Hazelnut Meringue Cake


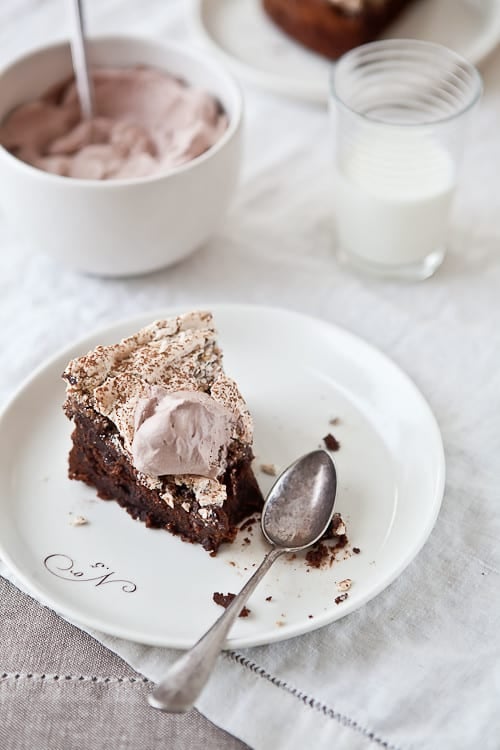
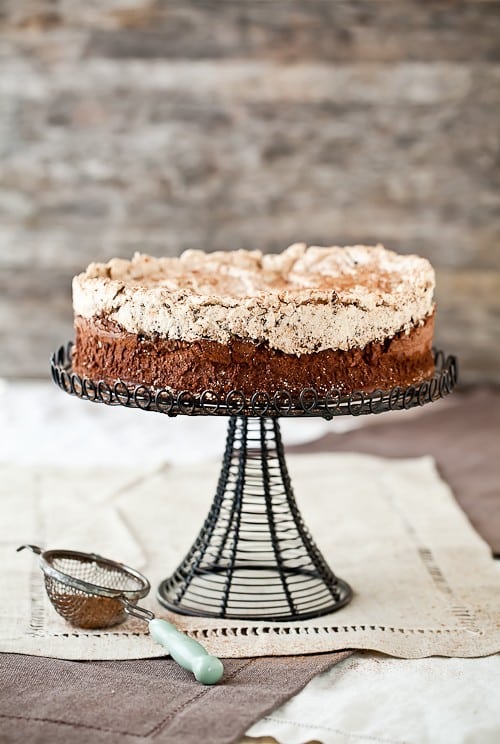
That cake is sublime! flourless, creamy, complex and yet not so rich that you have to stop after one bite – more like control yourself not to want it for dessert at every meal! Granted we invited plenty of friends to share with us so the slices were small but I have to say, sneaking in the kitchen passed midnight and sharing a slice with a cold glass of milk after everyone had gone home was pretty much the "ahhhhhh" moment of the day.

Chocolate & Hazelnut Meringue Cake


The combination of the deep flavors of the cake (I added espresso to the batter instead of vanilla extract) with the meringue was exactly what he asked for. Because we have been heat indexes hovering around the 115F-120F and high humidity, I cooked the meringue topping longer than what the recipe called for to make sure it would not end up in complete puddle of goo when the time to serve it came about. It worked perfectly and yielded the right amount of crunch and softness after standing for a few hours. Like macarons, this cake only tastes better after 24 hours.

Speaking about cake and chocolate, how about doing a little French Word A Week on chocolate cake while we are at it? So, here it is: click on Gateau Au Chocolat to hear its pronunciation.

Thanks everyone for playing along! Have a great weekend everyone!

Chocolate & Hazelnut Meringue Cake


Chocolate and Hazelnut Meringue Cake, adapted from Martha Stewart.

Makes one 9-inch cake

Notes:
– Now is not the time to use the cheap-o chocolate. Get the best quality bittersweet chocolate you can find as it is the star of the recipe. (Guittard, Callebaut, Valrhona, El Rey, Scharffen Berger, etc…)
– To toast the hazelnuts, preheat oven to 350F and spread the nuts in a single layer on a baking sheet. Bake 10 to 15 minutes until golden brown.
– To skin the nuts without driving yourself crazy, place them in a mesh bag (like a recycled orange or lemon bag) and rub the nuts between your hand over the sink. The skins will fall and only the "naked" nuts will remain in your bag.
– The cake at room temperature is excellent but served really cold, it becomes even fudgier and the meringue gives slightly under your tooth like a soft pavlova. Brilliant!

For the cake:
10 tablespoons unsalted butter, plus more for pan
3/4 cup firmly packed light-brown sugar
6 large whole eggs, separated
12 ounces bittersweet chocolate, melted and cooled
1 1/2 tablespoons espresso (or vanilla)
1 1/2 tablespoons rum (optional)(not with us!)
1/4 teaspoon salt

For the meringue:
4 ounces bittersweet chocolate, roughly chopped (1 cup)
1 cup hazelnuts (about 4 ounces), toasted and skinned (see notes)and roughly chopped
1 tablespoon cornstarch
4 large egg whites
3/4 cup sugar

Prepare the cake:
Preheat oven to 350 degrees. Butter a 9-by-3-inch springform pan. Line bottom with parchment paper. Butter parchment and set aside.
In the bowl of an electric mixer fitted with the paddle attachment, whip the butter and brown sugar until pale and smooth at medium speed, about 3 minutes. Add egg yolks, one at a time, beating well after each addition and scraping the bottom and sides of your bowl if necessary. Add the melted chocolate, espresso (or vanilla), rum, if using, and salt. Beat until combined. Transfer to a clean bowl and wash your mixing bowl thoroughly.
In a clean mixer bowl fitted the whisk attachment, beat the 6 egg whites on high speed until soft peaks form, about 2 minutes. Fold one-third of the egg whites into chocolate mixture. Fold in remaining egg whites and pour batter into prepared pan, and bake 25 minutes.

Prepare the meringue:
Combine the chopped chocolate, nuts and cornstarch in a small bowl, and set aside. Place remaining 4 egg whites in a clean mixer bowl fitted with the whisk attachment, beat on high speed until frothy. With the mixer running, slowly add the sugar and continue beating until stiff peaks form, about 8 minutes. Fold in hazelnut mixture.

Assemble and Finish:
Remove cake from oven. Using a large offset spatula, spread meringue mixture on top of cake using as little strokes as possible not to deflate the meringue, and return to oven. Bake until meringue is lightly browned and crisp, 25 to 30 minutes. Transfer pan to a wire rack; let stand 10 minutes. Run a knife around the edge of the cake to loosen, and release sides of pan. Let cool, about 30 minutes, before slicing and serving.

————————————————————————————
Some inquiring minds asked so here is a short prop list.
– Plates: the ever fabulous Asya from Gleena.
– glasses and little bottles (they are bud vases actually): Wal-Mart.
– paper straws from Bake It Pretty.
– silverware, glass jar and linens: vintage from a little shop in town.
– candles: gift from my friend Jen from Use Real Butter (I think she got them at Peppercorn in downtown Boulder).
– wire cake stand and green handled strainer from etsy.
A Pavlova And A Guest

Pavlova5

It’s "Share Your Space Friday" here again!! I have never posted that much in a week and the fun part is that I only had to write an intro!!

I am loving having guest bloggers and not only because it gives me time to frolic in the sun (ugh…no not really…!) but mainly because it is like having a friend stop by and share with you a bit of their day, their personality, etc… And if personality had a name, it would be Kelly from Sass and Veracity. I knew from the first post that I’d be reading forever…I think it was her post on creme brulee and I found myself almost hugging the computer screen just staring at her stove. Meeting her last Fall was the icing on the cake….if only my mom and mother-in-law would let me be adopted by this sassy gal…sigh… She’s got verbage, she’s got class, she’s got ethics and an amazing sense of humor. Most of all, I don’t know better person to cheer anybody on in anything they venture doing.

I am thrilled to have Kelly pop by and share with you this amazingly refreshing pavlova. Read on for the recipe.
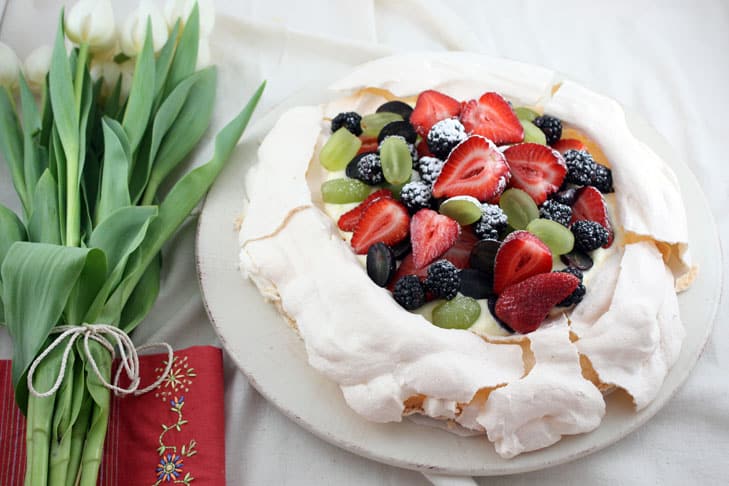
Now….doesn’t this look amazing for Spring! Happy Easter everyone!


I’m one of those cooks who is notorious for preparing recipes I’ve never tried before when there’s a special occasion looming. It doesn’t matter whether it’s for family, close friends, or a party for 40, I can guarantee that everything I make will be new to me. I’m sure that to some, I’m either grossly egotistic, or to others, a complete fool. I’d say adventuresome — or a glutton for punishment. The thrill of discovery during the planning process far exceeds any worry I could have about screwing something up. I love sifting through my magazines, cookbooks, and favorite web sites looking for the perfect recipe — especially if it’s something totally new.

So when Helen contacted me about doing this guest post, after initially grinning like a sap, I felt as if I’d been given permission to create the biggest planning mess I’ve made in a while. Cookbooks and magazines everywhere. A bookmarking frenzy on my Mac. Silly questions about "which recipe would be best" posed to my 16-year-old son who patiently indulged me with a more than one-syllable response. It was as if I’d been invited to a lovely party and then realized I didn’t have anything to wear. Even if I actually had a particular recipe in mind, and said recipe came out perfectly, I’d have to take photos.

Ah, the photos. I’ve all but swooned over Helen’s ethereal photos at one point or another. Light and airy, softly beckoning me to linger over what she has prepared, each photo taunts me with a "just you go ahead and try to make this, girlie!" And I think, in time — all in good time after kicking my procrastination skills into high gear. I met Helen last last Fall at the wedding of a mutual friend, and it took no time at all to learn just why her work is as flawless as it appears. She’s patiently persistent, works hard, is extremely focused, works hard, and has a seemingly bottomless reservoir of energy. Did I mention how hard she works? Meeting her was an absolute pleasure. Clearly, I had to make something that would have a chance of gracing the page, right?

Pavlova

Ironically, I came very close to baking a Paris Brest, something I’ve made before, but at the last minute, changed my mind. I’m sure it has nothing to do with the fact that the last time I made pate a choux, I was less than thrilled with the outcome. Instead, I’ll blame it on the photograph I saw in this month’s issue of Gourmet of the "Pavlova with Lemon Curd and Berries." Its imperfect, simple appearance reminded me of a galette and prodded me to reconsider the long standing issue I’ve had with meringue. Not the meringue on pies — meringue that’s baked. For some reason, I’ve always steered clear of it, not quite relishing the sensation it causes in my teeth when I bite into it. Or maybe it’s the near weightlessness of it. Surely something so light can’t have much substance. Excuses, excuses.

But I was mesmerized by the Pavlova, a dessert named after the famous Russian ballerina who, after touring Australia and New Zealand in the 1930’s, is said to have had this dessert named after her. Although it’s the "light and airy" aspect of her dancing that the dessert was created to mimic, I’m reminded more of a flouncy tutu, fluffed high with tuille. Just beautiful.

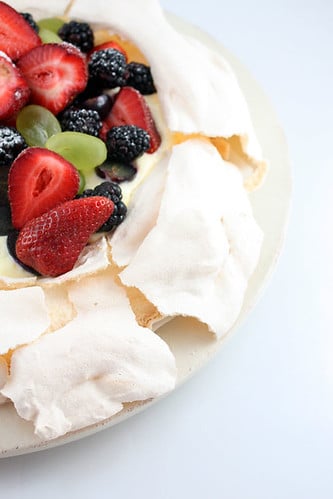
I’ve been savoring this dessert since yesterday, marveling over extreme contrasts in texture and flavor. The meringue crust, so delicate that touching it causes it to shatter, melts on my tongue. In the center, the meringue is a creamy, marshmallow treat, its sweetness tempered by the tartness of the lemon cream. The combination of the berries and grapes add a perfect crunch that brings it all together. Whimsical, unpredictable, and oh so delicious.

Here’s to you, Helen. You’re an inspiration to me in many ways and I’m quite honored to have done this for you.


Pavlova7

Pavlova with Lemon Cream, Berries, and Grapes

For the meringue…
1 cup superfine granulated sugar
1 tablespoon cornstarch
3 large eggs at room temperature 30 minutes
3 tablespoons cold water
1 teaspoon distilled white vinegar

For the filling…
2/3 cup granulated sugar
1 tablespoon cornstarch
1/8 teaspoon salt
1/3 cup fresh lemon juice
1/2 stick unsalted butter
3 large egg yolks, lightly beaten
2 teaspoons grated lemon zest
1 cup heavy cream
2 cups mixed berries
2 cups grapes

Preheat oven to 300ºF and position a rack in the center.
To prepare the lemon cream, stir sugar, cornstarch, and salt in a saucepan. Add the lemon juice and butter, bringing the mixture to a simmer over medium high heat. Continue to whisk at a simmer, about 1 minute. Whisk about 1/4 of the mixture into the beaten egg yolks, then transfer the egg yolk mixture back into the saucepan. Over low heat, continue to cook, but make sure not to boil, whisking constantly until the lemon curd is thick, about 2 minutes. Scrape into a shallow bowl, stir in the lemon zest, and place a piece of parchment over the surface. Refrigerate for about 1-1/2 hours.

To prepare the meringue, line a baking sheet with parchment and trace a circle about 7″ in diameter in the center. Turn the parchment over.
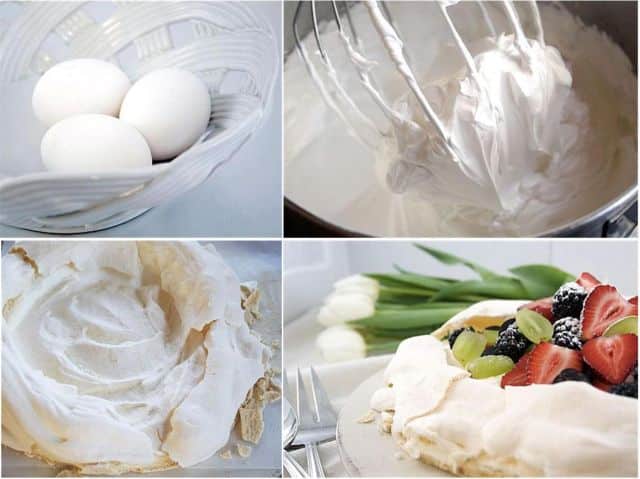
Whisk superfine sugar and cornstarch together in a small bowl. In the bowl of an electric mixer, beat whites with a pinch of salt at medium speed until soft peaks form. Add the water and beat until whites hold soft peaks once again.
On medium-high, beat in sugar mixture 1 Tbsp at a time. After all sugar has been added, beat 1 minute longer. Add vinegar, then beat at high speed until glossy and stiff peaks form, about 5 minutes (longer if using hand-held mixer). The meringue will be extremely thick.
Spread meringue carefully to cover the circle on the parchment, creating a cavity in the center (for the filling). Bake until meringue is pale golden and has a crust, about 45 minutes. Avoid opening the oven door! Turn oven off and prop door open slightly with a wooden spoon. Cool meringue in oven 1 hour. The exterior will be dry and possibly cracked, the inside more like the consistency of marshmallow.

To assemble the pavlova, beat the heavy cream just as it holds stiff peaks, then 1/4 cup at a time, whisk cream into the lemon curd. Check consistency each time before adding more cream. It should be able to mound. Spoon lemon cream into cooled meringue and mound fruit in the center. Serve with extra whipped cream if desired.


Pumpkin Meringue Tartelettes

Pumpkin Meringue Tartelettes


With the holidays just upon us, I hope you won’t mind a little pre-Thanksgiving dessert and have to let you in on a little secret: I won’t be cooking or baking this Thanksgiving. Argh!!! Horror!!! Truth is, I never cook or bake that day as I am reminded each year that it is not "my" holiday. Well yes, French people did not have Pilmgrims and Native Americans (we had Romans and Vikings but that’s another story), but Thanksgiving is important to my American. I know that Thanksgiving is more than that, the viking-pilgrim thing is just a joke between us when people ask me what the French do for T-Day. What is important to B. is important to me. In his family dynamics however, I get to sit this one out.

I love entertaining, holiday cooking and baking, having a bunch of friends and dear ones around. Planning, making the menus…I miss this greatly being so far away from my family most holidays. Comes Thanksgiving and my head is spinning with recipes, both sweet and savory and I get to relax. Horror!! I am serious here, I know a lot of you super master entertainers and foodies can relate!! By Christmas I am so terribly homesick that we elope to the mountains and regroup while B. lets me reminisce about my Christmases by home.

If anything, I live for my family dinners as his family is way smaller and calmer. There are no less than 20-30 people at my parents' house gathering around the table for Christmas Eve and just about the same number on Christmas day. There are kids everywhere, toys all over the place, bottles behind curtains (remind me to tell you about that when we get closer to Christmas). There is virtually no room to move around, the garage is the same temperature as the refrigerator so my parents' car is transformed into a cheese and dessert shelf. There is noise, loud noise, jokes, laughters, discussions, disagreements. We eat and chat for hours. B. will say that he needs to train a couple of weeks in advance to match the 6 hour festivities of eating and drinking two days in a row. We do take our time and talk a lot in between courses. One year we tried to rush so that my grandparents would get to bed at a decent hour but they got mad and stayed up with us until 2am….we did not tell them we kept at it until 4am!

Photobucket


One of the things I learned early on about my husband is his love for two Thanksgiving classics: pecan and pumpkin pies. Pecan pie was an easy one to get used to when I moved to the US as it was very close to our "tarte aux noix" that we have in the North. The concept of pumpkin pie was new to me yet completely fascinating. When I exclaimed "pumpkin? In a pie?", he was quick to say "you guys preserve all chestnuts in sugar syrup and then glaze them with more sugar syrup…and you eat them…just like that!!" Ah yes, the Marron Glace! I could see his point, it’s an acquired taste. However, a taste for a cold slice of pumpkin pie is ve-ry easy to acquire!!

Even if we don’t get to have the family over on that special Thursday, we created our own tradition years ago by hosting a pre-Thanksgiving dinner the week before with a few of our close friends. We gather early around in the kitchen and dining area and we cook and bake together wile chatting and sipping wine. Each person has his or her favorite thing to make and eat and early on I started combining my heritage and B’s by combining ingredients I’d find here in dishes I would make back home.

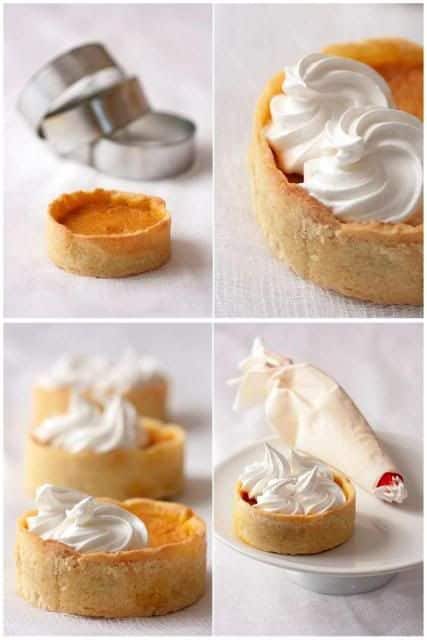
One thing I love in the world of sweet things is meringue. I can eat meringue all day and never reach the bottom of the cookie jar. When time came bring dessert to our gatherings the first thing that came to my mind was to make a Pumpkin Meringue Pie, combining two of our childhood favorites. I like to use a sable base instead of the traditional pate brisee crust and once the filling is baked, I pipe rosettes of Italian meringue on top and use the blow torch to finish it off. We have had this way for the past ten years so I guess you could say we now have our own tradition for Thanksgiving albeit a week early!!

Pumpkin Meringue Tartelettes


Pumpkin Meringue Tartelettes:

Makes 8 small tartelettes (3 inches diameter) or one 9 inch round pie

Sable Dough:
1 stick (115 gr) butter, at room temperature
3/4 cup (93 gr) powdered sugar
1 large egg
1 1 /2 cups (188gr) flour
2 tablespoons (20 gr) cornstarch (makes for a lighter crumb)pinch of salt

In a mixer, cream the butter and sugar together until light and fluffy. Add the egg and mix until combined. Add the flour, cornstarch and salt and mix briefly to incorporate. Dump the whole mixture onto a lightly floured board and gather the dough into a smooth ball. Do not work the dough while in the mixer or it will toughen up. Flatten the dough into a disk, wrap it in plastic wrap and refrigerate for an hour. When the dough is nice and cold, roll it out on a lightly floured board or in between the sheets of plastic. You will have extra dough that you can save for another use in the fridge for up to 5 days or frozen, well wrapped for up to 3 months. Cut out 8 rounds two inches larger than your pastry rings. Fit the dough inside the rings with your fingertips and trim the edges with a sharp knife. Line the rings with small squares of parchment paper and fill with pie weights or dry beans. Place them on a baking sheet lined with parchment paper and bake at 350F for 10-12 minutes. Let cool.

For the Pumpkin Filling:
1/2 cup sugar
1 egg
1 cup canned pumpkin (not the whole can but 8 oz)
1/4 teaspoon ground cinnamon
1/4 teaspoon ground cardamom
1/4 teaspoon ground ginger
1/8 teaspoon ground nutmeg
pinch of salt
2/3 cup whole milk

In a large bowl, beat the egg and sugar until pale. Add the pumpkin, spices and salt and mix until just incorporated. Add the milk and slowly and mix well. Divide the batter among the cooled tart rings and bake for 20-30 minutes at 350F until the batter looks like it is just set, don’t overcook or it will crack on you. Remove from the oven and let cool completely before proceeding with the meringue topping.

For the Italian Meringue:
2 egg whites (60 grams)
1/2 cup (100gr) sugar
2 tablespoons water

In a heavy bottom saucepan, bring the sugar and water to a boil and cook the mixture until it reaches 245-248F on a candy thermometer. In the meantime, start beating the egg whites firm peaks but not stiff or dry. When the sugar syrup has reached the proper temperature, slowly add it to the egg whites with the mixer on low-medium speed. Once all the sugar has been poured in, turn the speed to high and beat until the meringue has cooled. Place it in a piping bag fitted with a large star tip and pipe rosettes of meringue on top of the tartelettes. Use a blowtorch to slightly caramelize the tops or place them under the broiler in your oven but make sure to keep a close eye on them.

Pumpkin Meringue Tartelettes

Berry Pavlovas: Crunchy Colorful Sweet Birthday Bites

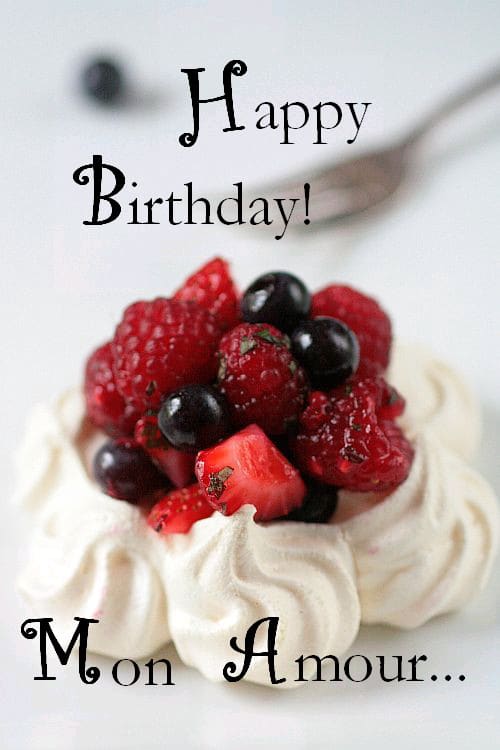
Berry Pavlovas-Copyright©Tartelette 2008Today is B’s birthday and while in the middle of cleaning the house, preparing a little get together for him and speed training a puppy, I realised that I always wish my parents a happy birthday or mother’s day, father’s day, etc…on this blog but I rarely wish B. a happy birthday. Without wanting to make a big deal about it, I think he is a big deal, but a crunchy, colorful and sweet one.

He is very instrumental to my being here doing the things I do and sharing things with you. He happily ventures his spoon in dishes and desserts I set out in front of him. He knows to always take his cell phone with him while running an errand for me at the grocery store. He has quickly come up with associations to remember who is so and so that I keep talking about, and stopped asking me if I have the hiccups when I giggle at the screen chatting online at night. He looks forward to other bloggers' visits as he has an excuse to use all the attachments on the vacuum cleaner (he is so going to yell at me for telling you this!). But more importantly he has more than accepted my bizarre schedule as of late and for that he deserves extra kudos and a public "I Love You – You Rock – Happy Birthday!"

There will be cake for him and a few guests for dinner tonight but this morning he will have some pavlovas filled with fresh blueberries, raspberries and strawberries. Boy do I love summer lately! I can’t get enough of the gorgeous fruits at the market lately and berries have been either my breakfast or my lunch a couple lots of times this week . I can’t say he chose to have this has a birthday breakfast but it’s been a juggling of egg yolks and egg whites lately in the fridge and some room had to be made. Knowing him, I know he’ll have more than one!

I made the shells when Chris was here and kept them in an airtight container at room temperature so they would still be crunchy today. There were just a touch softer in the middle but with the heat and humidity of South Carolina, that was to be expected. To fix that, I turned the oven on to 350F last night before going to bed, put the meringue shells in it and turned the oven off. It helps give them some of that crisp back so I can still hear him say "so-crunch-what is-crunch-for dinner-crunch-tonight- crunch crunch ?"…I love that sound!

Berry Pavlovas-Copyright©Tartelette 2008Pavlovas With Fresh Berries:

Makes 8-12 shells depending on size

3 egg whites
3/4 cup sugar
1 1/2 tsp cornstarch

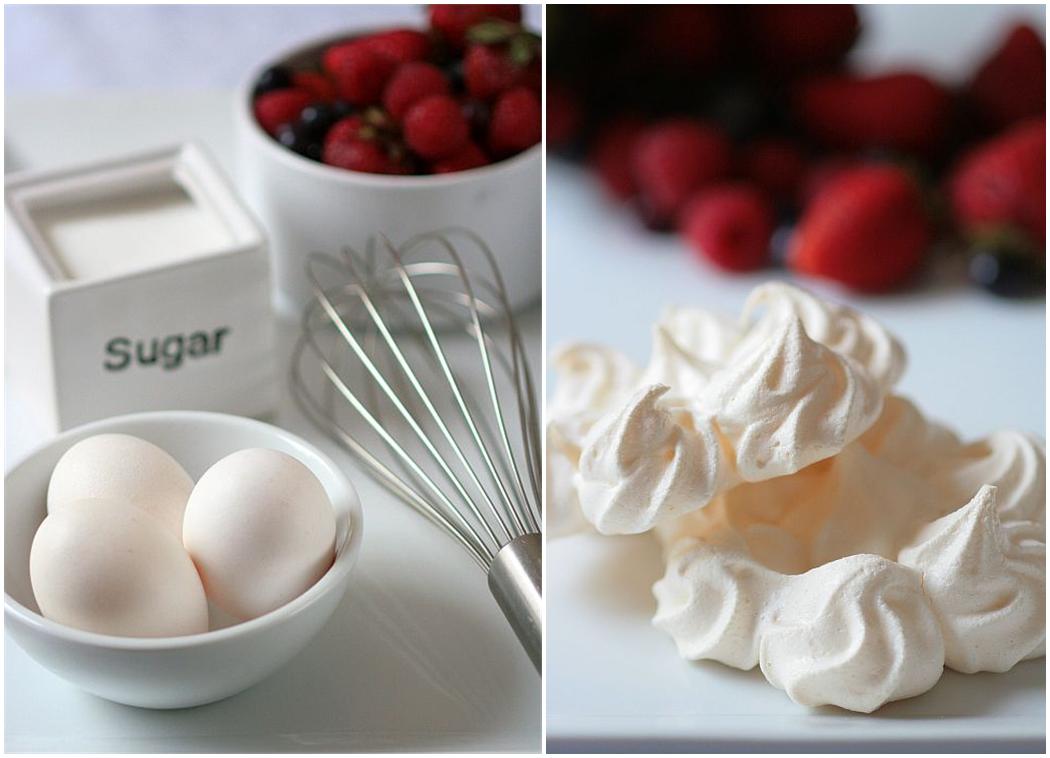
Preheat oven to 275F. In small bowl, mix the sugar and corn starch together and set aside. In a stand mixer fitted with the balloon whisk, start whipping the egg whites to soft peaks. Start with the machine on low speed to break them a bit and get them "shaking" then increase to speed to medium high. Slowly add the sugar mixture in a slow steady stream, or one tablespoon at a time. At this point you can either spoon the meringue, making 12 circles on 2 parchment paper lined baking sheets or fill a pastry bag fitted with a star tip and pipe the shells onto them. Bake at 275 for 30 minutes and reduce your oven to 250F and continue baking them for another 30 minutes.

For the berries: I did not measure how much of each berry I was mixing in, I went with a couple of handfull of each, sprinkled some sugar on top and chopped fresh mint and let it macerate for a couple of hours.

Birthday Girls: Sharing A Lemon Meringue Ice Cream Cake

Lemon Meringue Ice Cream Cake -Copyright©Tartelette 2008 Happy Birthday to you…Happy Birthday to you…Happy Birthday to you Kate !

Happy Birthday to you…Happy Birthday to you…Happy Birthday to you Tartelette !

Yes, Kate from Aaplemint and I are doing it again! Last year we found out through back and forth banters and emails that we shared the same birthday and decided to bake each other a surprise cake. I just checked Kate’s site and she made me Apricot Financiers, and she did not even know they were among my favorites!! Yipee! We decided to make it tradition, which I hope we last as long as we are both blogging, and here we are again! So my dear Kajal/Kate, here is to you a delicious Lemon Meringue Ice Cream Cake.

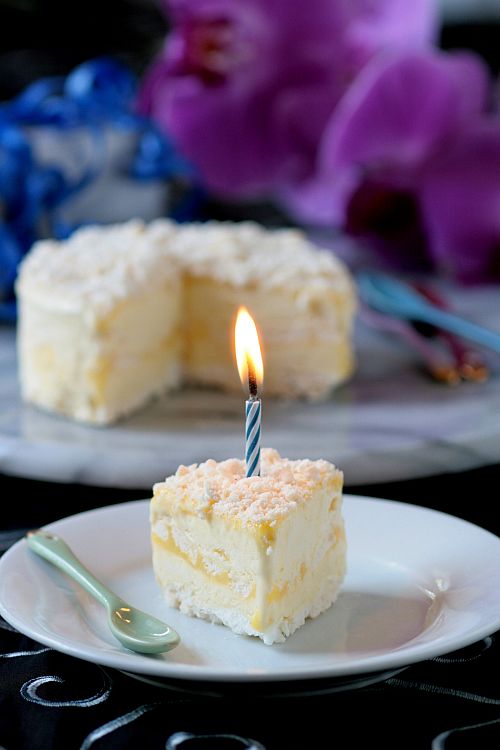
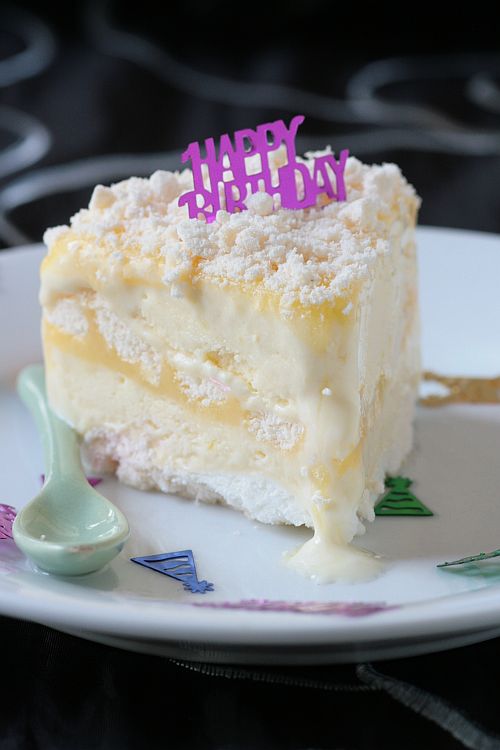
The cake is composed of layer of meringue with a hint of lemon zest, lemon curd and homemade lemon ice cream inspired from one in my favorite all lemon book. I actually changed propotions, removed some ingredients, and used my usual curd recipe. I liked the idea not necessarily all of what she did. Except the ice cream….Just make that if you can!! You can make one large one or 4 (4 inches round) small ones like I did. It is best to start the meringue and the ice cream the day before you plan on serving it, assemble in the morning and keep frozen until you serve. We have had a serious bout of humidity this weekend so I made the meringue Friday night and left them to dry in the oven. I assembled the cakes about 4 hours before serving so they would still have a good crunch. I shared one with my mother in law Sunday for Mother’s Day after many excuses for a cold snack these past couple of days, there is still one left for me later today….just me, hands off Mr.Tartelette! This cake is so lemon through and through that it finally satisfied the perfect lemon dessert I have been looking for these last few weeks. Yeah baby!! is what I say!!

Lemon Meringue Ice Cream Cake-Copyright©Tartelette 2008
Lemon Meringue Ice Cream Cake:

Serves 12 (instructions provided for a 8 inch round cake, I just used the same concept for 4 small cakes)

Printable Recipe

1 1/2 cups sugar
1 Tb cornstarch
2 tsp lemon zest
6 large egg whites
pinch of salt
Lemon Custard Ice Cream (recipe follows)
1 cup lemon curd (recipe follows)

For the Meringues:
Preheat the oven to 250F. Trace 2 8-inch circles on each 2 sheets of parchment paper. You need 4 circles total for the 4 meringue layers (you can do these free handed which I did since I knew I would have to trim them a bit before assembling). Invert the paper on the baking sheet.
Whisk 1/2 cup of sugar with the cornstarch and lemon zest and set aside. Beat the egg whites with the salt until they are foamy. Increase the speed and slowly add in the rest of the sugar, one tablespoon at a time until you get a firm and glossy meringue. Carefully fold in the sugar/cornstarch mixture.
With with the back of a spoon (or with a piping bag fitted with a plain tip and filled with the meringue), fill in the circles on the parchment paper. Smooth the tops. Bake the meringues for 1 hour. Turn the oven off and let them dry in the oven overnight.

For the Lemon Ice Cream:
2 cups heavy cream
2 cups half and half
1 cup sugar
1/4 cup finely grated lemon zest
6 large egg yolks
3/4 cup fresh lemon juice

In a heavy bottomed saucepan set over medium high heat, bring the cream, 1/2 cup of sugar, zest and the half and half almost to a boil.
In a separate bowl, whisk the egg whites ad the remaining sugar until they are pale and silky. Slowly add the hot cream mixture over the egg yolks, whisking as you do so to prevent the eggs from curdling. Return the mixture to the saucepan and cook, stirring constantly until the custard coats the back of a wooden spoon, as if you were making creme anglaise. Do not let it boil.
Pour the custard into a container and let cool to room temperature. Refrigerate until completely cold, stir in the lemon juice and freeze according to your ice cream machine instructions. If you do not have one, freeze until firm, whisk it with a hand held mixer or stand mixer and freeze again. Repeat a couple more times.

For the Lemon Curd:
grated zest of 1 lemon
1 cup strained lemon juice
1/2 cup sugar
2 eggs
1 Tb butter, at room temperature

Combine the zest, sugar, juice in a saucepan, and bring to a simmer.
In a small bowl, beat the eggs until light.
Beat some of the lemon mixture into the eggs to temper. Scrape the mixture back into the saucepan and cook stirring constantly until it thickens up, about 5 minutes.
Strain and refrigerate, covered with plastic wrap until ready to use.

Assemble the cake:
Remove the ice cream from the freezer 10 minutes before you start the assembly so it will be easier to spread on the meringue disks.
Remove the meringues from the parchment paper and set aside the least attractive one for the garnish. Put a large piece of plastic wrap at the bottom (going also up the sides) of an 8 inch round springform pan. Fit one meringue disk at the bottom, cover it with about 1 1/2 cups of Lemon Ice Cream, top with about 1/3 cup of Lemon Curd. Top with another meringue, another 1 1/2 cup of ice cream, another 1/3 cup of lemon curd. Repeat one more time. Crumble the reserved meringue disk and sprinkle it on top of the cake. Wrap the cake and freeze for at least 4 hours or overnight.
Let the cake soften in the fridge 15 minutes before you serve it.

~~~~~~~~~~~~~~~~~~~~~~~~~~~~~~~~~~~~~~~~~~~~~~~~~~~~~~~~~~~~~~~~~~~~~~~~~~~~~~~~~~~~
I leave you with a picture of my mom and me taken in 1977. I was already trying to make people eat and my first client was my stuffed rabbit Pipou (which now sit on my dresser…yep…still).

Thank you mom for not giving up on me 30 something years ago on May 13th (the delivery story is rather a long one, not so fit for a food blog) . I love you!

Mom and Helen-Copyright©Tartelette 2008
Finally, I got an early birthday present from Barbara this morning when she posted the round ups to her Taste of Yellow event, click on One and Two to get there. Thank you Barbara for such an amazing job!

Lemon Meringue Pie

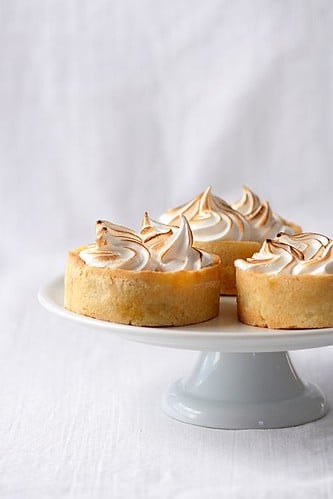
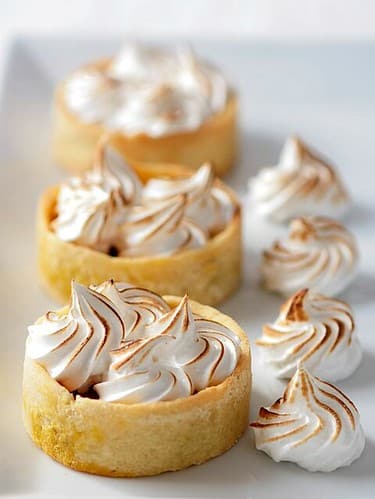
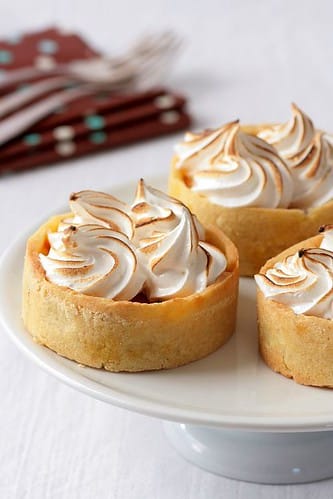
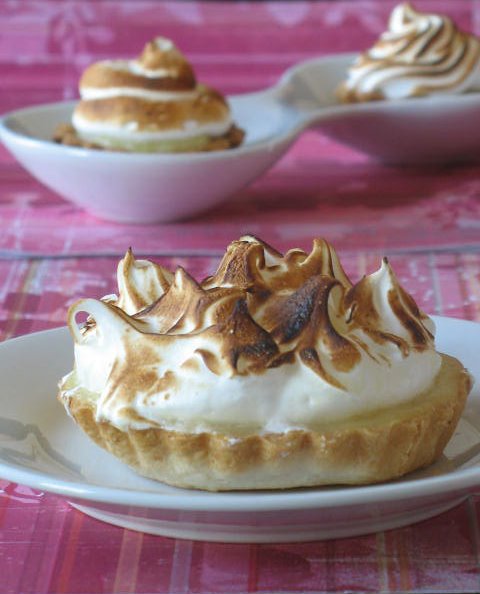
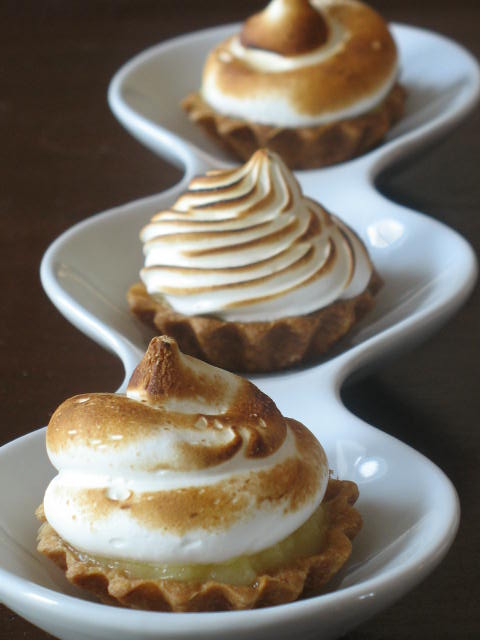
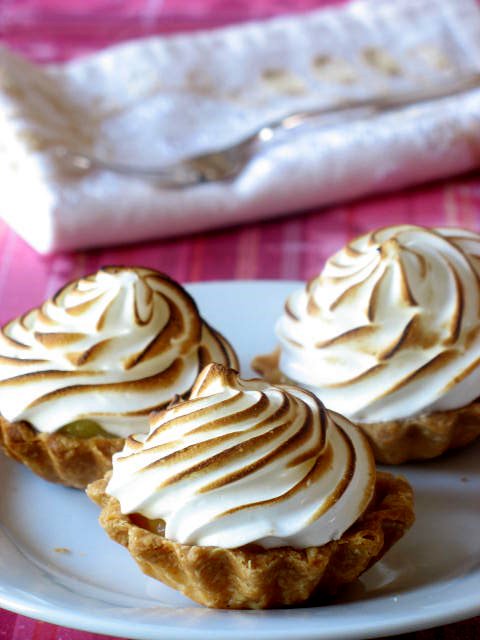
Or in my case Lemon Meringue Tartelettes…yep, can’t escape that nickname but to my defense Jen from The Canadian Baker and hostess for this month Daring Bakers' challenge had given us the option to make several tartelettes instead of one large pie. Be prepared to bathe in deliciously tart lemon curd and come out all sticky of meringue as 450 Daring Bakers got all sticky gooey once more just for you….and to overcome their fears, baking issues or just to have some fun!

Although this was not my first lemon meringue pie, it was fun to use someone else’s recipe for crust and curd and compare them with the ones I constantly use. No big challenge but I was so tired the day I made it that I really did not pay close attention and followed the recipe blindly. Hint to those DB who have to use violent threats to themselves to follow a recipe to a "t"…do it when you can barely stand on your feet from exhaustion, physical or mental. Mine was mental so I went ahead and dove in.

The crust turned out ok, not my favorite but very good. I like mine flaky with good ole Crisco. Since my mother in law gave me her recipe, I just think this is the best (and not too many worries for my arteries I use the non trans-fat one that came out a couple of years ago). This one did the trick, except that being on auto-drive that evening I added the whole measurement of cold water to the flour mixture instead of my usual a few tablespoons at a time until it comes together. Oopps…dough was wet…Wrapped it up, parked it in the fridge for an hour, with the absolutely faith (that means all digits crossed here) that the flour and butter would work their magic and tame their thirst with the extra moisture. Worked! People, never fondle your dough too much no matter how soft and shiny it is or you will pay the price of tough and too elastic a piece to work with! After that a familiar scene happened: roll the dough, cut rounds, fill tartelettes molds, cover with parchment paper, fill with dry beans, blind bake and let cool. Oven on, tired Tartelette…I almost forgot they were in when the neighbors gathering for drinks started to wonder what I was baking! I had forgotten we had planned a game of Scrabble.

On to the curd….now I had an audience…ahahahah!!!! Most likely they will be too invested in the game to notice if I mess up! It wa the first time I used a curd recipe that involved water and which method was slightly unsual (see the recipe below). I have been spoiled by the lemon curd in Alice Medrich’s book on low fat dessert and the fantabulous full fat lemon cream from Pierre Herme. But eh! I am always willing to try something new for my lovely Daring Bakers!! Everything went smoothly and the curd turned out smooth and tart, just like I love it. I remembered the good old advice from Harold McGee not to stir the cornstarch mixture too vigorously and not to cook it passed boiling or it will reverse its thickening properties…amazing given I was completely distracted by C. challenging B. about a word during our Scrabble game. Kids……!

The meringue part….delicious. Again, of where there is fluffy sugar topping there usually is a happy Tartelette. The recipe instructed us to use the oven for that part, but my oven was crowded with pizza when that part came up so I "had" to use the blowtorch (another excuse to play with fire) and for the kids to be convinced I had magical powers!! I first played with it on the tartelettes like I had done previously on lime meringue cupcakes and then I just used a plain tip and a large star tips and did the minis with them…and they kind of looked like cupcakes after all. I think I lost at Scrabble but I took the prize for eating the most of the mini lemon meringue pies in one sitting. What can I say…I love anything with lemons!

Will I make this particular lemon meringue pie again? Actually I did a couple of times for a friend and my mother in law and everybody enjoyed it. For us? Probably, not so much for the crust but the curd was really tart…which I love, so I will make sure to serve it to people who share the same fancy. The meringue was not overly, cloyingly sweet so it will be used again for other tarts.
Be sure to check my fellow Daring Bakers' posts popping out there everywhere and thanks Jen for a yummy recipe!

Lemon Meringue Pie: recipe courtesy of Wanda’s Pie in the Sky by Wanda Beaver, 2002

Makes one 10-inch (25 cm) pie. I made four 3.5-inch ones and twelve 2-inch minis.

For the Crust:

¾ cup (180 mL) cold butter; cut into ½-inch (1.2 cm) pieces
2 cups (475 mL) all-purpose flour
¼ cup (60 mL) granulated sugar
¼ tsp (1.2 mL) salt
⅓ cup (80 mL) ice water

For the Filling:

2 cups (475 mL) water
1 cup (240 mL) granulated sugar
½ cup (120 mL) cornstarch
5 egg yolks, beaten
¼ cup (60 mL) butter
¾ cup (180 mL) fresh lemon juice
1 tbsp (15 mL) lemon zest
1 tsp (5 mL) vanilla extract

For the Meringue:

5 egg whites, room temperature
½ tsp (2.5 mL) cream of tartar
¼ tsp (1.2 mL) salt
½ tsp (2.5 mL) vanilla extract
¾ cup (180 mL) granulated sugar

For the Crust:

Make sure all ingredients are as cold as possible. Using a food processor or pastry cutter and a large bowl, combine the butter, flour, sugar and salt. Process or cut in until the mixture resembles coarse meal and begins to clump together. Sprinkle with water, let rest 30 seconds and then either process very briefly or cut in with about 15 strokes of the pastry cutter, just until the dough begins to stick together and come away from the sides of the bowl. Turn onto a lightly floured work surface and press together to form a disk. Wrap in plastic and chill for at least 20 minutes.
Allow the dough to warm slightly to room temperature if it is too hard to roll. On a lightly floured board (or countertop) roll the disk to a thickness of ⅛ inch (.3 cm). Cut a circle about 2 inches (5 cm) larger than the pie plate and transfer the pastry into the plate by folding it in half or by rolling it onto the rolling pin. Turn the pastry under, leaving an edge that hangs over the plate about ½ inch (1.2 cm). Flute decoratively. Chill for 30 minutes.
Preheat oven to 350ºF (180ºC). Line the crust with foil and fill with metal pie weights or dried beans. Bake for 20 to 25 minutes. Carefully remove the foil and continue baking for 10 to 15 minutes, until golden. Cool completely before filling.

For the Filling:

Bring the water to a boil in a large, heavy saucepan. Remove from the heat and let rest 5 minutes. Whisk the sugar and cornstarch together. Add the mixture gradually to the hot water, whisking until completely incorporated.
Return to the heat and cook over medium heat, whisking constantly until the mixture comes to a boil. The mixture will be very thick. Add about 1 cup (240 mL) of the hot mixture to the beaten egg yolks, whisking until smooth. Whisking vigorously, add the warmed yolks to the pot and continue cooking, stirring constantly, until mixture comes to a boil. Remove from the heat and stir in butter until incorporated. Add the lemon juice, zest and vanilla, stirring until combined. Pour into the prepared crust. Cover with plastic wrap to prevent a skin from forming on the surface, and cool to room temperature.

For the Meringue:

Preheat the oven to 375ºF (190ºC). Using an electric mixer beat the egg whites with the cream of tartar, salt and vanilla extract until soft peaks form. Add the sugar gradually, beating until it forms stiff, glossy peaks. Pile onto the cooled pie, bringing the meringue all the way over to the edge of the crust to seal it completely. Bake for 15 to 20 minutes, or until golden. Cool on a rack. Serve within 6 hours to avoid a soggy crust.

And remember that you have until 4pm today to get the chance to get yourself a box of canneles!

Floating Islands – Sugar High Friday 31

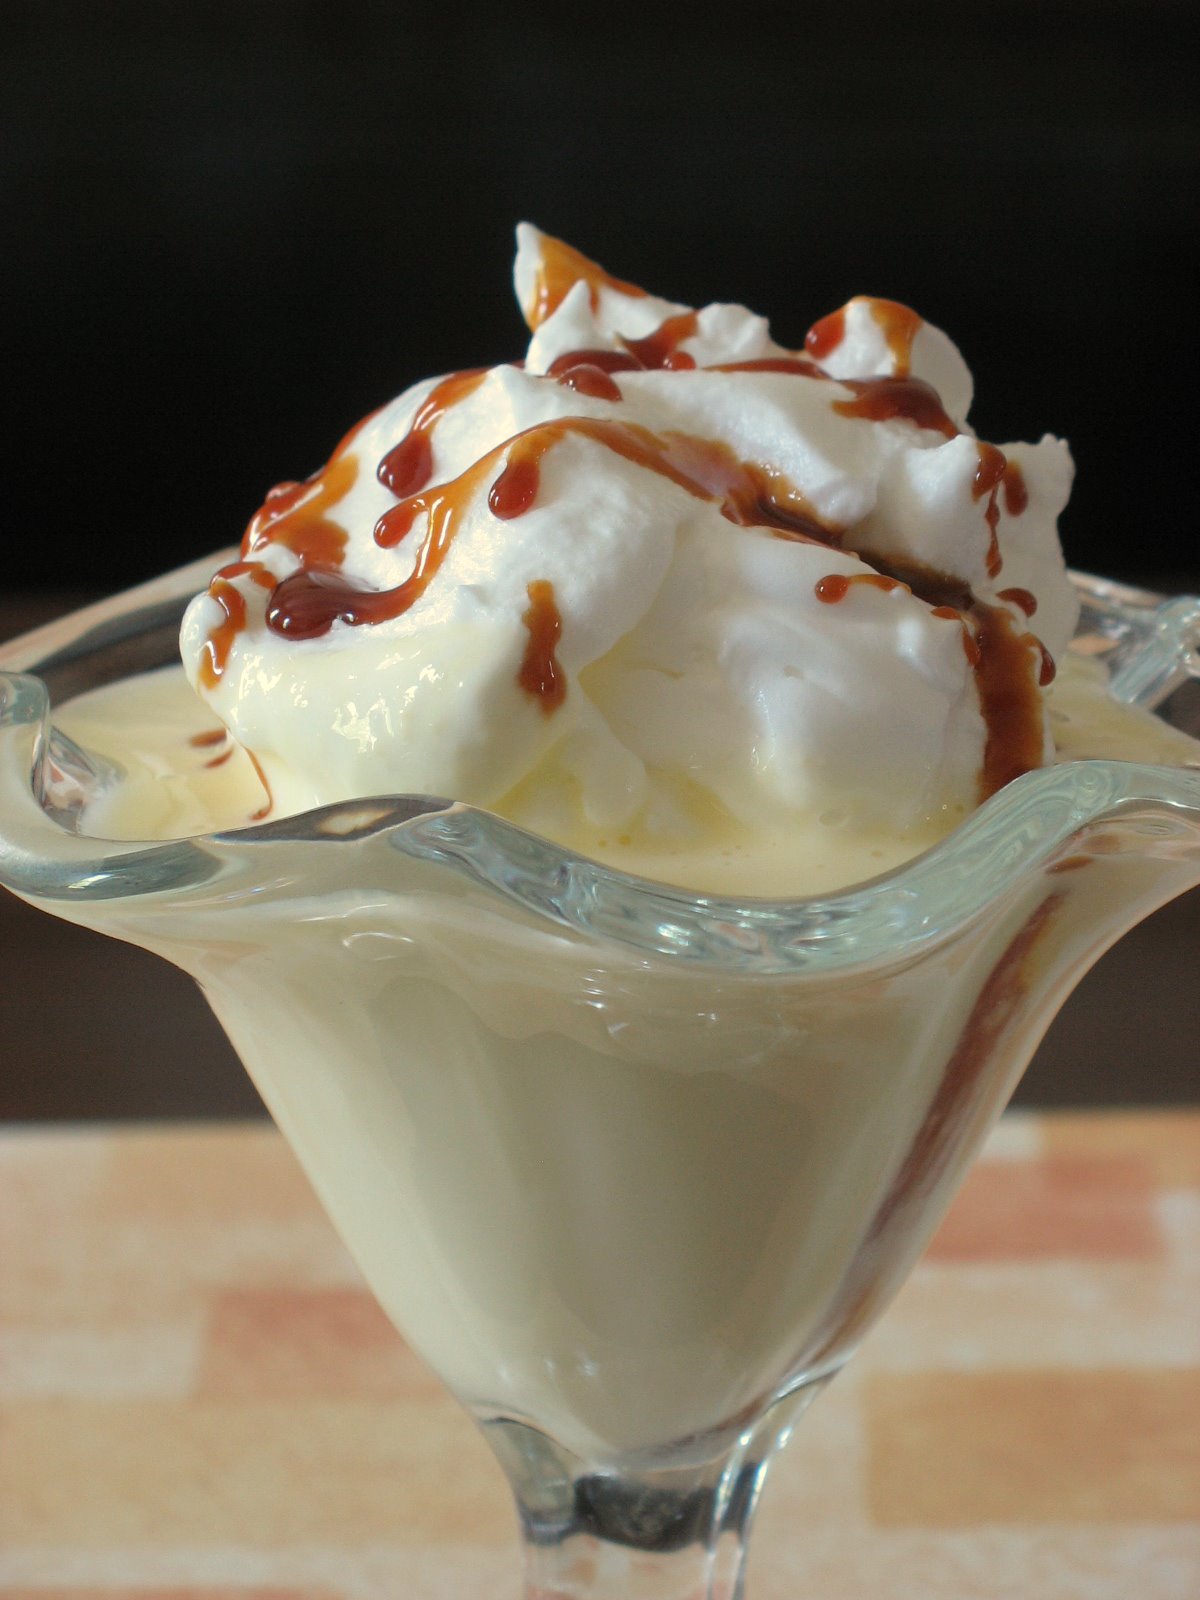
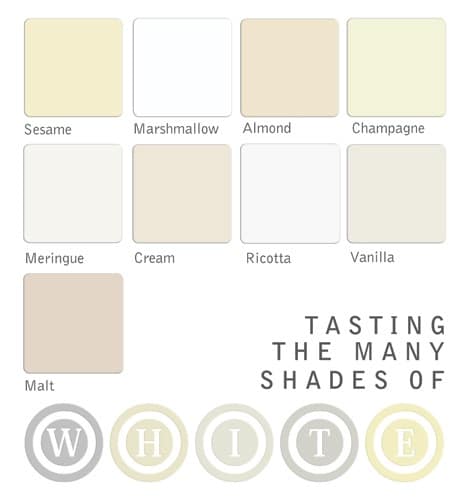
The first dessert that came to my mind when Tara of Seven Spoons announced the Sugar High Friday 31 theme Shades of White was this quintessential French bistro dessert: Iles Flottantes or Floating Islands.

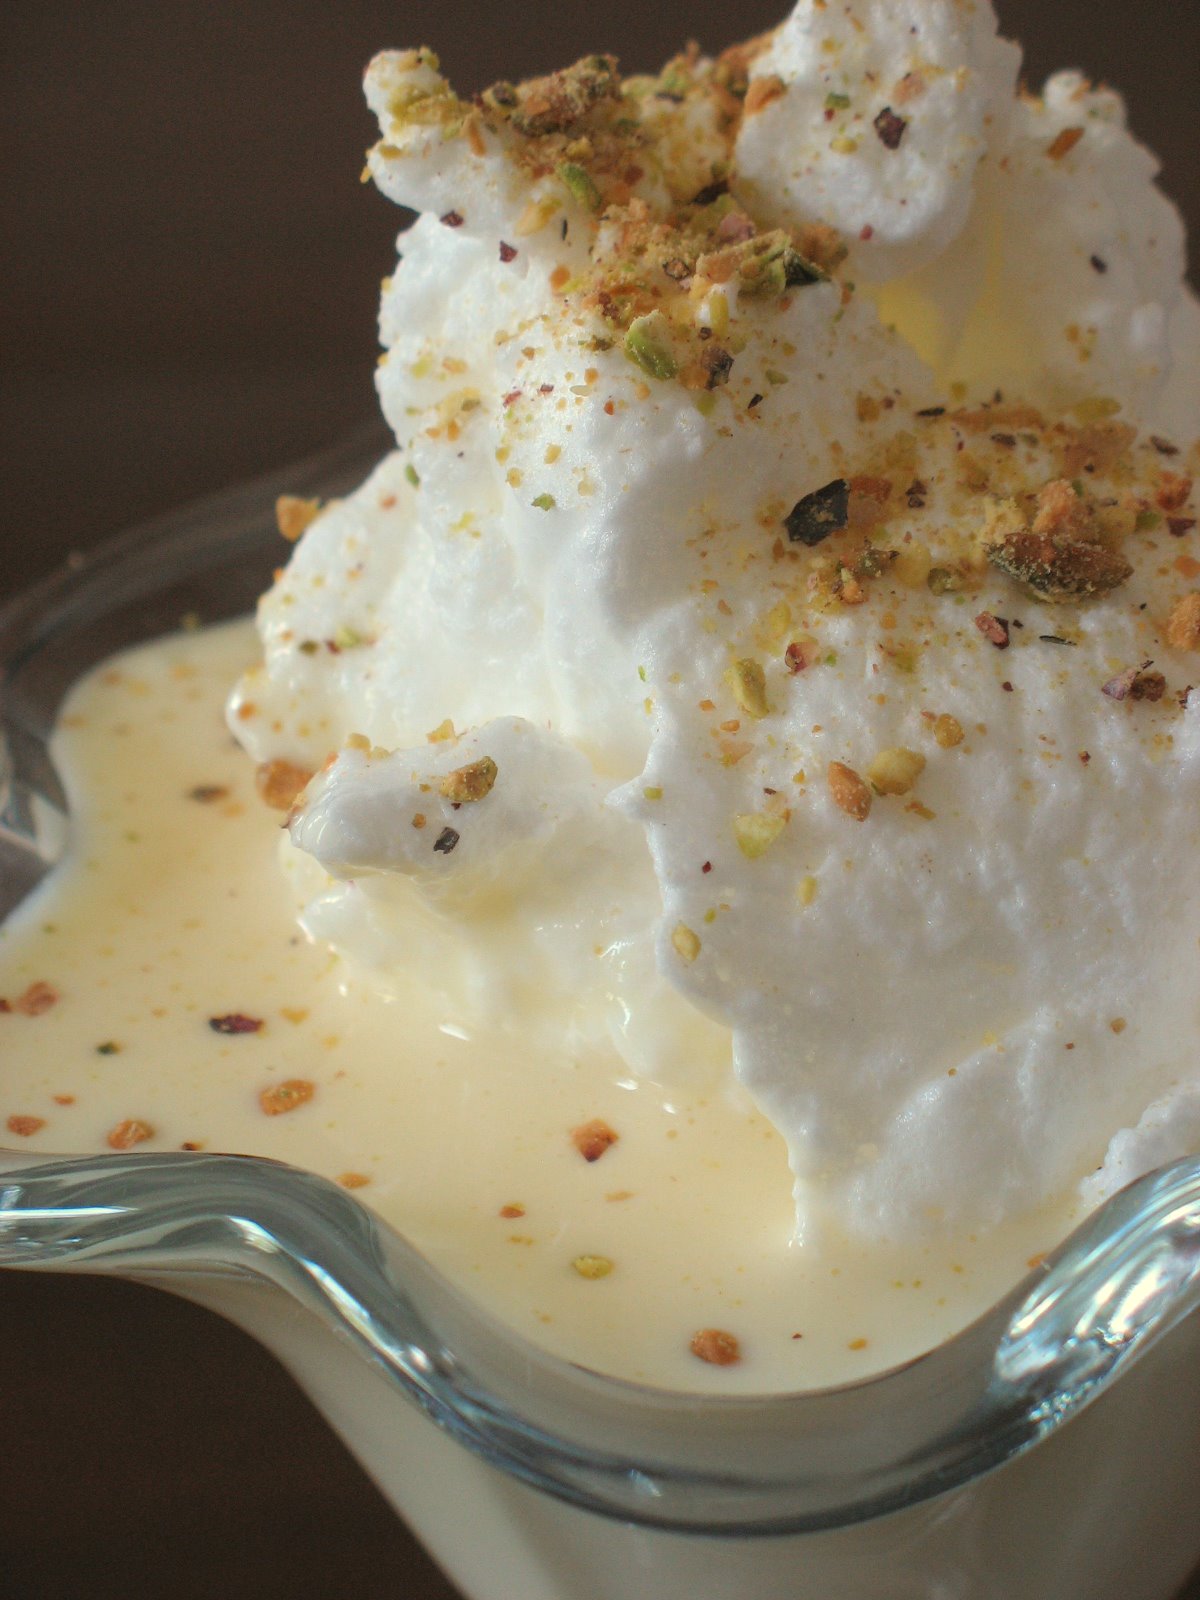
The choice was obvious for me on many levels. The dessert itself is composed of pillowy soft white meringue set on a pool of soft almond cream colored vanilla bean speckled custard sauce, also known as creme anglaise.

The main reason however spuns from a conversation I had many years ago with my grandmother, Paulette. The village where my parents and grandparents reside now is the traditional French village where the church sits prominent in the middle of the town center, surrounded by local artisan shops, pastry shops, a couple of cafes and in our case located close to the "chateau". I disgress…
We are neighbors (literally) so one day we were going to get bread at the bakery we passed the church while a wedding was taking place. The bride and groom were just coming out and my grandmother reacted the way she always did in that case, she frowned and mumbled…She was a modern woman in many ways and was aware that most brides knew pre-marital sex, but as a true product of her generation it was inconceivable that the bride would wear white. Wedding white or pure white as she would say was a badge of honor (slightly tinted with envy I think) for women her age.
That particular day, I did not feel like letting her get in a bad mood over this so I decided to play with her and indulge her sweet tooth: "If not white, and definitely not red, then what shades of white would be allright to wear for a wedding dress?" We kept on walking while describing shades of pale almond creme anglaise taffeta, caramel speckled meringue petticoat, nutty beige creme dacquoise undergarnment (she surprised me with this one), soft pink marshmallow lipstick, champagne veil and vanilla creme shoes. Gosh, did we make ourselves hungry while getting to the shop! She stopped right in front of the bakery and exclaimed: "Iles Flottantes is a dessert fit for a bride, in all its shades of white and soft meringue!"

Floating Islands are indeed a staple dessert in French households and bistros/cafes. They are easy to make, do not require a whole lot of time and make for a show stopping presentation. They are so light and airy that it makes them the perfect dessert choice during the warmer months or at the end of multi-course dinner. The meringue is almost always drizzled with caramel, and out of respect for the traditional I give you the steps to do so, but when you don’t feel like messing around with hot sugar syrup, a simple topping of toasted nuts (I used pistachios) is perfectly fine. The meringues are poached into hot milk, which helps preserve their texture and form while you put everything together.

Floating Islands – "Iles Flottantes":

Serves 6

For the creme anglaise:

2 cups milk
1/2 cup sugar
4 egg yolks
1 whole vanilla bean, split or 1 1/2 tsp. vanilla extract

Heat the milk with the vanilla bean to boiling point. In the meantime, in a bowl whisk the sugar and egg yolks until thick and pale. Slowly pour in some milk to temper the yolks, whisk and pour the remaining milk. Stir. Pour the whole batter back in the saucepan and cook over medium-low heat until it coats the back of a wooden spoon.
Remove from heat, let cool to room temperature, cover with plastic wrap and refrigerate.

For the meringue islands:

2 cups milk
4 egg whites
1/4 sugar

Spread a clean kitchen towel on your counter near the stove and have a large slotted spoon nearby.
In a large saucepan, heat the milk to a simmer over low heat in a large saucepan.
Whip the egg whites to a soft meringue and slowlt incorporate the sugar, one tablespoon at a time until you get a stiff , satin like and glossy meringue.
Using an ice cream scoop ar a large spoon, form rounds of meringue. Gently lower them down into the milk, without overcrowding the pan. Poach the meringues one minute on each side. With the slotted spoon, remove them from the milk and lay them down on the kitchen towel.
When all are poached. Put them on sheet pan lined with baking paper and refrigerate one hour.

To assemble:

Divide the creme anglaise among 6 dishes, top with the meringue islands and drizzle some caramel on top or sprinkle with toasted nuts.

For the caramel: (optional and right before serving)

1/2 cup sugar
1/3 cup water

In a heavy saucepan, stir the sugar and water together and cook over medium heat until the sugar dissolves. Increase the heat and cook until the caramel gets golden brown. Remove from the pan and let it cool a little. Spoon over the meringues.