I can hardly believe that the Daring Bakers are already two years old and that next month will be my own two year anniversary with the group. I can hardly believe that it went from Lisa emailing me with "hey there are four of us making biscotti, are you interested?" to "hey should we have a name?" to a full blown multi national group of bakers of all ages and all levels. We may all see the challenges differently but it does not matter as long there is a good dose of butter, sugar, flour! I am learning so much about others, the way they approach recipes and ideas as well as their cultures. Cheers to two years Daring Bakers and to many more!
I love when things come full circle or half circle or when there is a little something somewhere, a little detail that makes sense to me or/and others. It did this month in the sweetest way (pun completely intended), when Dolores from Culinary Curiosity , along with Alex from Blondie and Brownie and Jenny of Foray into Food chose Shuna’s Caramel Cake as our November Challenge. When I first started reading food blogs, I tuned in to Shuna’s Eggbeater almost everyday. It took me forever and a day to leave a comment as every time I finished her last sentence I felt so inadequate posting a simple "Wonderful post". She has right the words to describe our industry, about being a chef, a woman, a human being wearing her heart upon her sleeve. I laugh, I cry, I shake my head "yes" and when she announced she was moving to London I was so thrilled for her…following what’s next and embracing all the unknowns that go with it.
So yes…making Shuna’s Caramel Cake on the Daring Bakers' two year anniversary was one of those little details that mean a lot to me…like paying it forward in some way. And if you have been reading this blog for a little while you know how much I like playing with hot sugar (…blue caramel plate anyone?). Yep, I liked the idea from the get go, especially with a frosting that starts with browned butter. The smell in the house was enough to make you want someone would bottle it up in a perfume! The cake was easy to make and we all (us and the neighbors) loved its texture, and at first the frosting was a little too sweet to me but I did add some fleur de sel which really enhanced its flavor on the second day. Ah! The pleasure of biting into little salt crystals at the same time as biting into that sweet caramel frosting…hmmhmmhmm.
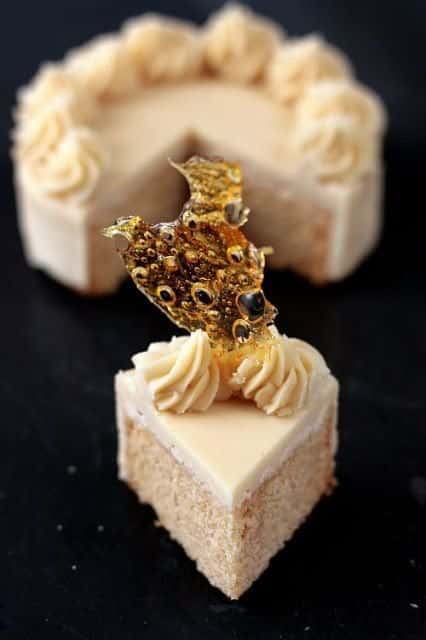
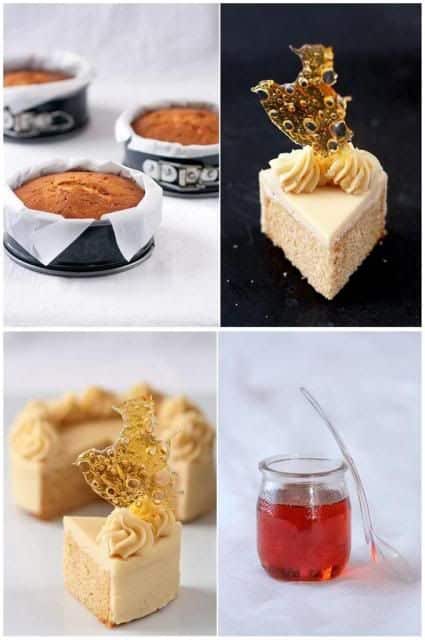
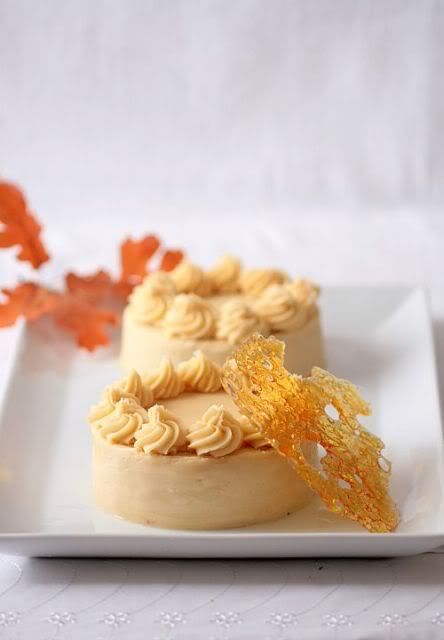
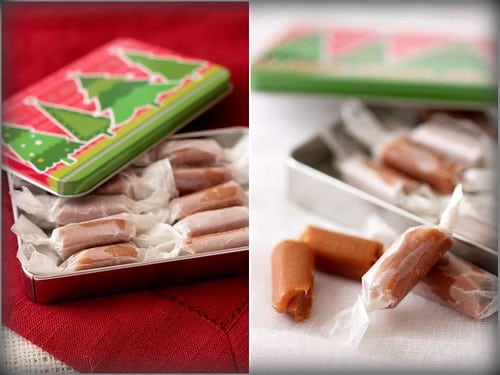
Given that we were given a lot of leeway in the making of the cake, I went ahead and made 4 small cakes instead of one. Granted I love caramel and salt but I also love caramel and citrus so I did add some grated lemon zest to the cake batter and as previously mentionned some fleur de sel to the frosting. I thought I would not have time to make the extra recipe for caramels but I needed to stand and move around after Thanksgiving dinner last night and I went ahead and did Grand Marnier caramels (citrus again) that I wrapped in waxed paper and boxed up in little Christmas tins for gift giving (except half of them are already gone…oops!). From turkey low to sugar high, I think we have all the compenents of a perfect holiday season!
For the decoration, there was a bunch of kids eating with us so I kept it simple but did sneak in some "bubble caramel", a caramel technique that makes me giggle everytime I use it, (and the kids too) although be careful as you "play" with pouring hot sugar syrup over alcohol to create the bubble effect.
Thank you Lisa and Ivonne once more and our wonderful hostesses! Check out the rest of the Daring Bakers and their fantabulastic creations here.
Caramel Cake With Caramelized Butter Frosting, courtesy of Shuna:
10 Tablespoons unsalted butter at room temperature
1 1/4 Cups granulated sugar
1/2 teaspoon kosher salt
1/3 Cup Caramel Syrup (see recipe below)
2 each eggs, at room temperature
splash vanilla extract
2 Cups all-purpose flour
1/2 teaspoon baking powder
1 cup milk, at room temperature
Preheat oven to 350F. Butter one tall (2 – 2.5 inch deep) 9-inch cake pan.
In the bowl of a stand mixer fitted with a paddle attachment, cream butter until smooth. Add sugar and salt & cream until light and fluffy.
Slowly pour room temperature caramel syrup into bowl. Scrape down bowl and increase speed. Add eggs/vanilla extract a little at a time, mixing well after each addition. Scrape down bowl again, beat mixture until light and uniform.
Sift flour and baking powder. Turn mixer to lowest speed, and add one third of the dry ingredients. When incorporated, add half of the milk, a little at a time. Add another third of the dry ingredients, then the other half of the milk and finish with the dry ingredients. {This is called the dry, wet, dry, wet, dry method in cake making. It is often employed when there is a high proportion of liquid in the batter.}
Take off mixer and by hand, use a spatula to do a few last folds, making sure batter is uniform. Turn batter into prepared cake pan. Place cake pan on cookie sheet or 1/2 sheet pan. Set first timer for 30 minutes, rotate pan and set timer for another 15-20 minutes. Your own oven will set the pace. Bake until sides pull away from the pan and skewer inserted in middle comes out clean. Cool cake completely before icing it. Cake will keep for three days outside of the refrigerator.
Caramel Syrup:
2 cups sugar
1/2 cup water
1 cup water (for "stopping" the caramelization process)
In a small stainless steel saucepan, with tall sides, mix water and sugar until mixture feels like wet sand. Brush down any stray sugar crystals with wet pastry brush. Turn on heat to highest flame. Cook until smoking slightly: dark amber.
When color is achieved, very carefully pour in one cup of water. Caramel will jump and sputter about! It is very dangerous, so have long sleeves on and be prepared to step back.
Whisk over medium heat until it has reduced slightly and feels sticky between two fingers. {Obviously wait for it to cool on a spoon before touching it.}
Caramelized Butter Frosting:
12 tablespoons unsalted butter
1 pound confectioner’s sugar, sifted
4-6 tablespoons heavy cream
2 teaspoons vanilla extract
2-4 tablespoons caramel syrup
Kosher or sea salt to taste
Cook butter until brown. Pour through a fine meshed sieve into a heatproof bowl, set aside to cool.
Pour cooled brown butter into mixer bowl. In a stand mixer fitted with a paddle or whisk attachment, add confectioner’s sugar a little at a time. When mixture looks too chunky to take any more, add a bit of cream and or caramel syrup. Repeat until mixture looks smooth and all confectioner’s sugar has been incorporated. Add salt to taste.
Note: Caramelized butter frosting will keep in fridge for up to a month.To smooth out from cold, microwave a bit, then mix with paddle attachment until smooth and light.
Bubble Caramel:
1/2 cup (100gr) sugar
3 tablespoon (45 ml water)
1 tablespoon (15 gr) corn syrup
rubbing alcohol (I use a spray bottle)
Combine all the ingredients in a heavy saucepan and bring them to a boil. Monitor the temperature with a candy thermometer and bring the mixture to 300F. While the caramel is reaching its desired temperature, take a sheet of parchment paper and crinkle it between your hands then flatten it out a bit. This will help with the forming of the bubbles. Spray rubbing alcohol on the parchement paper right before the caramel reach its temperature (don’t do it ahead of time or it will be dry when you are ready to pour). When the caramel is ready, slowly pour it over the parchment paper and watch the bubble form. You can lift the paper carefully to spread it around the surface if needed but watch out! I do this over a large sheetpan so all is required for clean up is hot water. Let cool completely before breaking into shards. This is more a deco than an edible piece of caramel given the alcohol used. I guess one could use a high percentage clear alcohol (maybe my uncle’s moonshine that cleans the bottoms of coffee cups!) but I haven’t tried it that way yet.
Grand Marnier Caramels, adapted from Alice Medrich’s Pure Dessert.
Makes eighty-one 1-inch caramels
Note: the original recipe calls for Golden Syrup but I wanted to finish the corn syrup I had so I subsituted one invert sugar for another one without a problem.
1 cup corn syrup
2 cups sugar
3/8 teaspoon fine sea salt
2 cups heavy cream
1 tablespoon plus 1 teaspoon Grand Marnier
3 tablespoons unsalted butter, cut into chunks, softened
Line the bottom and sides of the baking pan with aluminum foil and grease the foil. Combine the corn syrup, sugar, and salt in a heavy 3-quart saucepan and cook over medium heat, stirring with a silicone spatula or wooden spoon, until the mixture begins to simmer around the edges. Wash the sugar and syrup from the sides of the pan with a pastry brush dipped in water. Cover and cook for about 3 minutes. (Meanwhile, rinse the spatula or spoon before using it again later.) Uncover the pan and wash down the sides once more. Attach the candy thermometer to the pan, without letting it touch the bottom of the pan, and cook, uncovered (without stirring) until the mixture reaches 305°F. Meanwhile, heat the cream in a small saucepan until tiny bubbles form around the edges of the pan. Turn off the heat and cover the pan to keep the cream hot.
When the sugar mixture reaches 305°F, turn off the heat and stir in the butter chunks. Gradually stir in the hot cream; it will bubble up and steam dramatically, so be careful. Turn the burner back on and adjust it so that the mixture boils energetically but not violently. Stir until any thickened syrup at the bottom of the pan is dissolved and the mixture is smooth. Continue to cook, stirring occasionally, to about 245°F. Then cook, stirring constantly, to 260°f for soft, chewy caramels or 265°F; for firmer chewy caramels.
Remove the pan from the heat and stir in the Grand Marnier extract. Pour the caramel into the lined pan. Let set for 4 to 5 hours, or overnight until firm.
Lift the pan liner from the pan and invert the sheet of caramel onto a sheet of parchment paper. Peel off the liner. Cut the caramels with an oiled knife. Wrap each caramel individually in wax paper or cellophane.
