
ginger

Plum Crumbles & Ginger Ice Cream

Plum Crumble


Summer is looking to find Fall around here it seems. Today for example is what I like to call "une journee formidable" – a glorious day. And as corny as it sounds, (I like corny, there) I’ve been humming this old song all day. Bright sunshine, mild temperature and a nice breeze. I turned the A/C off and opened up all the windows.

Plum Crumble


And breathed. I have put myself on mandatory time outs at 11 and 3 o’clock every day and go outside, do a funky shake down – move about in the house or just play with the pups. Days are intense, yes, but absolutely gratifying. I was just thinking the other day that I may have a lot of projects in the works but all have a wonderful personal relationship attached to them. Everyday I am given the chance to help someone’s vision come true. That is a privilege.

Plums


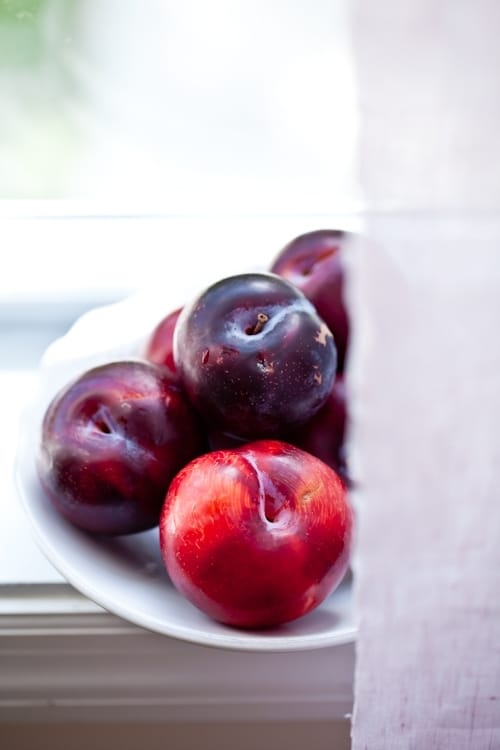
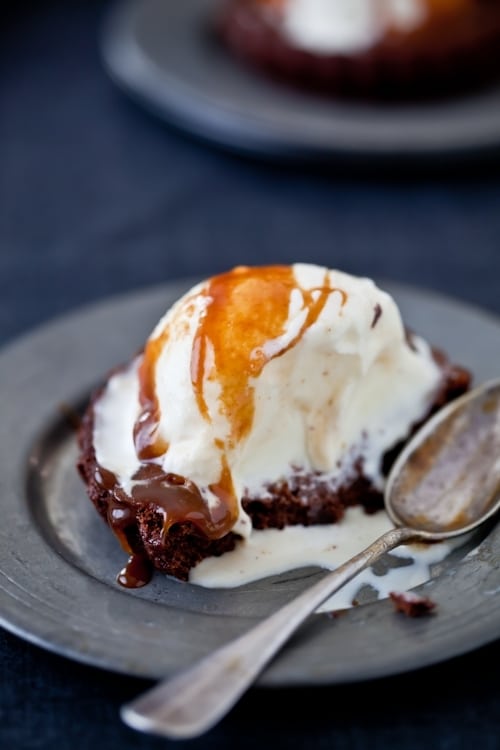
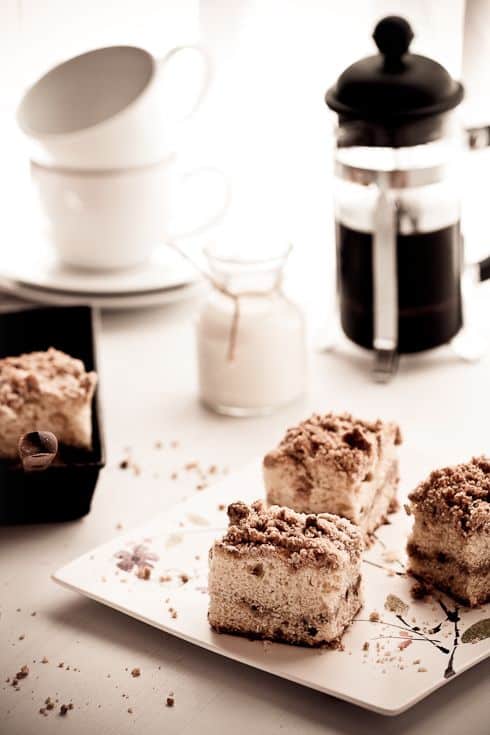
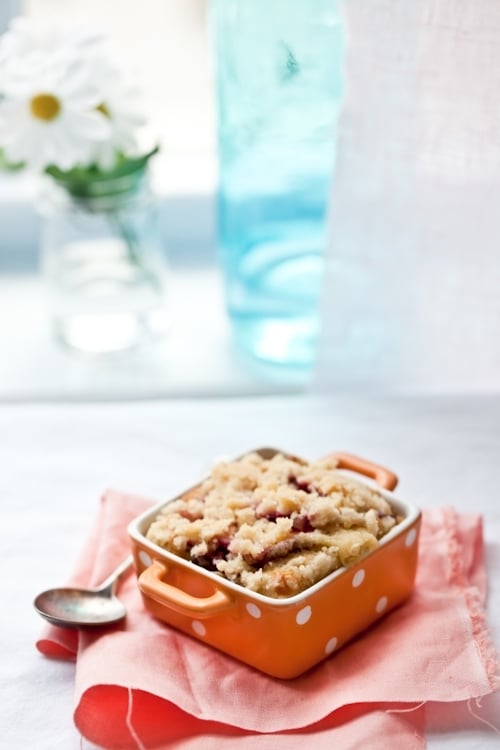
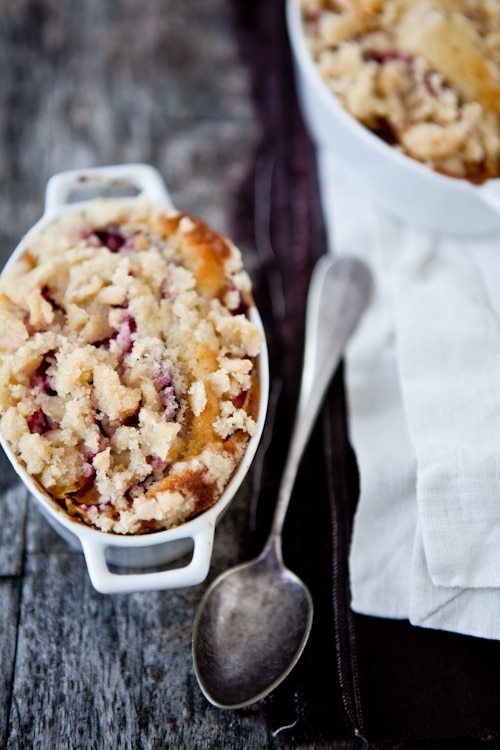
When Holly and I decided to celebrate our working together on her cookbook, she graciously invited us to her house and I volunteered to bring dessert. I was not going to bring tarts, that’s for sure…! I took advantage of the farmers market bounty one weekend and bought tons of fresh dark and juicy plums.

Ginger Ice Cream


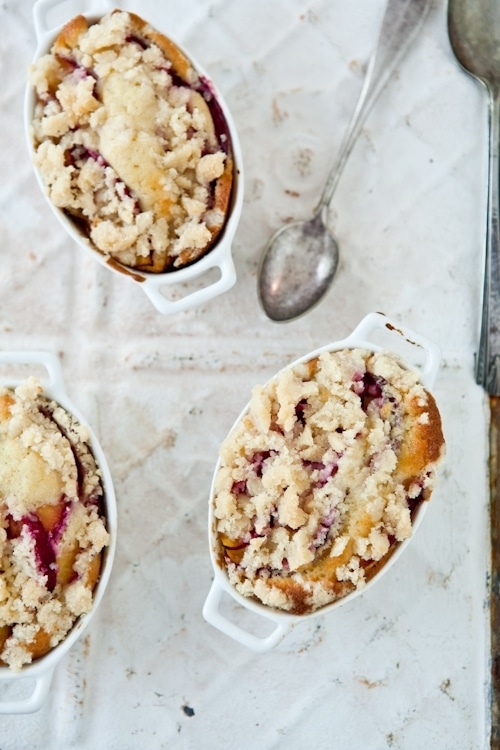
I needed something that could go on a little ride around the block and still make it in presentable form. I was, indeed, going to have dinner with a Cordon Bleu graduate, eheheh! As usual at our farmers market, I bought a little more than what I needed so I made one 8×8 crumble to take to dinner and a few smaller ones for us to enjoy again later.

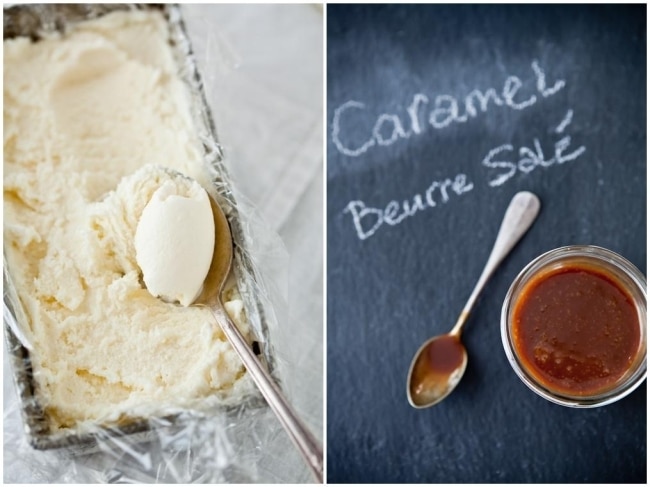
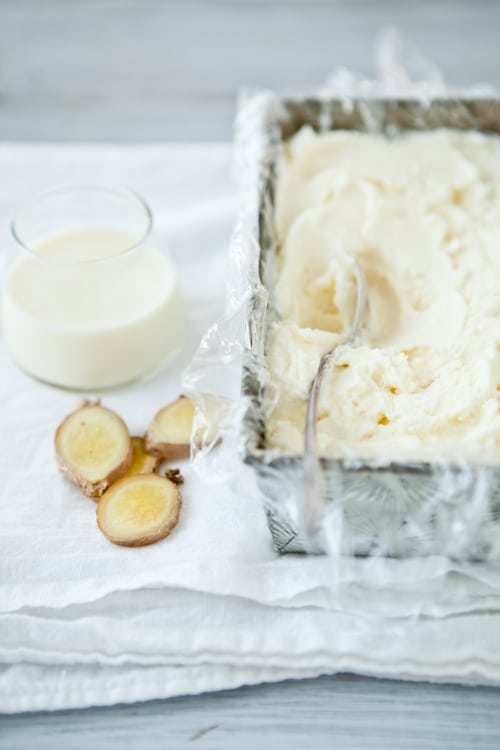
With travels, work and just "being" (friends, weeekends, parties,…), I did forget they were there, all by their lonesome self in the freezer. Yep. I know. Sad. Well only for a brief moment when I realized they had been hanging out with a full container of ginger ice cream I had just made for a party. I took the crumbles out one evening and selfishly kept some of the ginger ice cream for us too.

Indeed, Summer was calling on Fall that night. And quite perfectly so…

Plum Crumbles


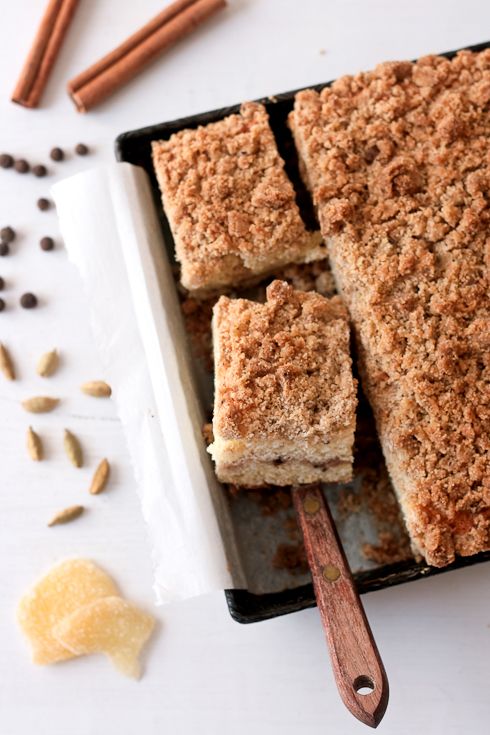
Plum Crumbles With Ginger Ice Cream:

Serves 4 to 6

Notes: you can replace the gluten free flours and the cornstarch with the same amounts (for each) in all purpose flour.

For the plums:
4 plums, pitted and thinly sliced (skin on)
1/4 cup sugar (I used sucanat – a non refined sugar)(use regular sugar if needed)
zest of one lemon
2 Tb lemon juice
2 Tb cornstarch

For the crumble topping:
For the topping:
3/4 cup (90gr) millet flour
3/4 cup (120gr) brown rice flour
1/2 cup (65gr) cornstarch
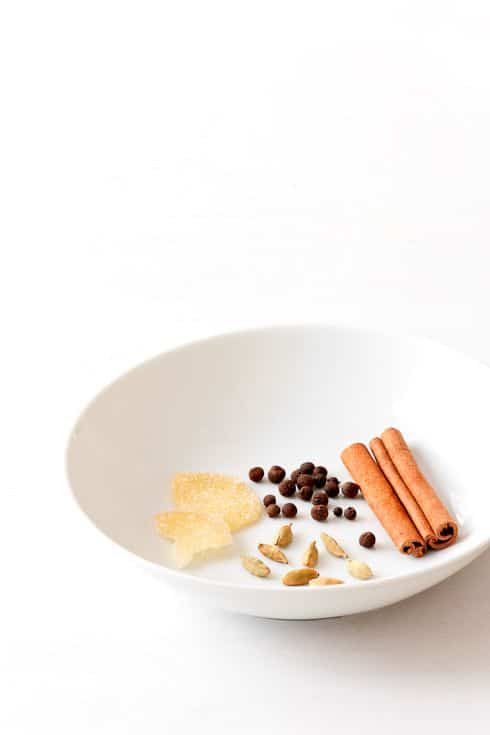
1/4 teaspoon ground cardamom
pinch of salt
6 tablespoons (80gr) unsalted butter, cold, in small pieces
1/4 cup sucanat (or sugar)

Prepare the crumble topping:
In a large bowl, stir together all the flours and cornstarch, cardamom and pinch of salt. Add the butter and sucanat and start mixing everything together with your fingertips. You want to form a few large clusters of dough. It will be easier to grate once cold. Freeze the mixture while you prepare the fruits.

Preheat the oven at 350F and position a rack in the middle.

Prepare the plums:
In a large mixing bowl, combine the plums and the rest of the ingredients. Toss well. Divide between 4 -6 ramekins and place them on a baking sheet as the fruits are most likely to release their juice, causing a spill. When ready to bake, grate the crumble over the ramekins (use a box grates) and bake for 30-35 minutes.

For the ginger ice cream:
See this post.

Dark Chocolate Brownies, Ginger Ice Cream & Salted Butter Caramel Sauce

Dark Chocolate Brownies, Ginger Ice Cream & Salted Butter Caramel Sauce


For the first few years I moved away to the US, my family would always ask me to bake brownies when I’d come back to visit. There is a little of an unspoken love affair for that simple square of dark chocolate, sometimes studded with nuts, sometimes often adorned with a scoop of ice cream. Almost always with a short cup of espresso.

I can’t even recall where I found my first recipe for brownies and I admit I go through what B. dubbed my “brownie baking frenzy phases”. I have been known to bake quite a few batches in the span of a few days just to keep finding the elusive “perfect” one. I know I am not the only one with that problem.

Dark Chocolate Brownies, Ginger Ice Cream & Salted Butter Caramel Sauce


Just as with anything in life, and after hundreds of batches tested and enjoyed by our friends and neighbors, I do believe there is no perfect recipe for us – just the one we like then. Consistently different and yet every time just right

However, there is one I have favored a bit more over the years, probably because I memorized it easily and it has never failed so far to produce the same deep dark squares of chocolate brownies, smooth and rich as velvet. The thing is, I am pretty sure I have never baked this one for my family here. I’m hoping to have enough time to do so and leave a batch on the kitchen countertop before I head back home to the US.

Dark Chocolate Brownies, Ginger Ice Cream & Salted Butter Caramel Sauce


When Caitlin and her fiancé came to visit this past month so I could shoot their engagement session, I had just worked on a savory food feature and the fridge was fairly void of anything sweet. One evening that we had planned to grill and just chill on the patio, I figured Caitlin and I could tackle a batch of brownies as we went about the kitchen getting dinner together.

Who better than an “engineer baker” to share the kitchen with? Well, all my blogging friends actually but the dogs would go insane from excitement!! As we were baking, I threw in the idea of vanilla ice cream and caramel sauce. Salted butter caramel sauce to be exact. All of sudden I had 3 pairs of eyes staring at me with such intensity that I knew I could not get around that one and take my words back. You cannot take back “salted butter caramel sauce”…Period.

Dark Chocolate Brownies, Ginger Ice Cream & Salted Butter Caramel Sauce


Before I left for France I made B. a double batch and tucked one in the freezer labeled "in case of an emergency – ice cream to your right". After only one week away, he said that batch is about gone. His schedule has been a frenzy of work and rehearsals for Hairspray (he plays trombone) afterwards and he has had no energy to cook afterwards. We are traveling in the Alps and Provence as you read this (the magic of scheduled posting) and I sure hope I don’t get a text "come home now – brownies all gone!"…ehehe!

Vanilla ice cream worked perfectly with the brownies but I got to tell you that the ginger ice cream I made a couple of days after that weekend was so much better. It highlighted the intensity of the chocolate and contrasted with the sweet/salty caramel in such a way that it took us great self control not to polish a couple of more servings.

Dark Chocolate Brownies, Ginger Ice Cream & Salted Butter Caramel Sauce


I made the same batch of brownies, ginger ice cream and salted butter caramel sauce three times that week. And if you find yourself with extra of either or and nothing to go with it, just a spoon will do. Trust me.

Dark Chocolate Brownies, Ginger Ice Cream & Salted Butter Caramel Sauce


Dark Chocolate Brownies, Ginger Ice Cream & Salted Butter Caramel Sauce:

For the brownies (adapted from Martha Stewart):

Notes: you can replace the gluten free flours with 3/4 cup all purpose flour if not gluten sensitive.

6 tablespoons unsalted butter, at room temperature
6 ounces semisweet chocolate
1/4 cup best-quality unsweetened Dutch-process cocoa powder
1/4 cup superfine sweet rice flour
1/4 cup cornstarch
1/4 cup millet
1/4 teaspoon baking powder
1/4 teaspoon salt
2 large eggs
1 cup sugar
2 teaspoons pure vanilla extract
1/4 cup Kahlua or strong coffee

Preheat oven to 350°F and position a rack in the center. Line an 8-inch square baking dish with parchment paper, leaving a 2-inch overhang on 2 sides. Butter the paper and set aside.
In a heatproof bowl set over a pan of simmering water, melt together the butter, chocolate, and cocoa. Remove from the heat and stir until smooth; let cool slightly.
In a medium bowl, whisk together the rice flour, cornstarch, millet, baking powder, and salt. Set aside. In the bowl of an electric mixer fitted with the whisk attachment, whip the eggs, sugar, and vanilla until pale on medium high speed, about 4 minutes. Beat in chocolate mixture. Add kahlua or coffee. Add flour mixture and beat until just combined, scraping down sides of bowl as needed.
Pour the batter into your prepared pan and bake 30 to 35 minutes until a knife inserted near the center comes out clean. Let cool 15 minutes, lift out of pan, and transfer to a wire rack. Let cool completely. (check at 15-20 minutes if using smaller molds). Cut into 8 rectangles. Brownies can be stored in an airtight container at room temperature up to 3 days.

For the ginger ice cream:
2 cups (500ml) heavy cream
1 cup (250ml) whole milk
1 cup (200gr) granulated sugar
2 tablespoons freshly and very finely grated ginger

In a large saucepan, stir together the cream, milk, sugar and ginger. Bring the mixture to a simmer over medium low heat, stirring occasionally to dissolve the sugar. Remove from the heat and let steep as it cools to room temperature. Refrigerate, preferably overnight. Strain if desired.
Process the mixture into your ice cream maker according to the manufacturer’s intructions.

For the salted butter caramel sauce:
1 1/4 cup (250 gr) granulated sugar
80 ml water
1 stick (115gr) salted butter at room temperature, cut into small pieces
150 ml heavy whipping cream

In a heavy saucepan set over low heat, combine the sugar and water. Cook just until the sugar is dissolved. Add the butter. Let it come to a boil and cook until it reaches a golden caramel color. Remove from the heat and add the cream ( it will splatter and get crazy). Whisk to combine and put back on the stove. Let it come to a boil again over low heat and cook 25-35 minutes until you reach a creamy consistency. Pour into a jar and try to refrain yourself from drinking it!

Chai Coffee Cake And A Giveaway

Chai Coffee Cake


It won’t be a surprise to say that there is always cake at the ready in the house. Whether it be for B. as a late night snack after a music job, friends dropping by on a late saturday afternoon, or simply as a quick snack as we pass by the kitchen. It’s usually a variation of my grandma’s yogurt cake. Always good. Always comforting. One cake I never make enough is coffee cake. You know, the kind with the lovely strudel top that is both crunchy and soft as you bite into it. But then Nicole’s Chai Spiced Coffee Cake entered my life. Twice in one week. Three times a day, once.

I did not make it twice just for us and just because. You see, a couple of weeks ago, I received an email from a high school senior here in town, Haley, whose senior project was to recreate the Julie-Julia project but with David Lebovitz' Room For Dessert book. Haley asked if I would have a bit of time to give her some tips about running her blog chronicling the project, photography, writing, etc… I said yes. I remember when I started blogging that I was often looking up to my seniors for pointers (I still do at times) so I thought it was a great opportunity to give back to the blogging community. I am no expert but I have been at this blogging thing for a while now, eheheh.

And I love when life on the screen brings about wonderful little happenings like this!

Chai Spices


Anyway, I thought we’d have some cake and tea and get right into the nitty nifty gritty of blogging and pictures. Well, schedules got out of hands and I never got to make that Chai Coffee Cake for Haley. We did meet this week and spent a great afternoon. I hope I answered her questions, at least until next time we meet. I gave her tips on how to operate her point and shoot camera to the best of its capacity, tips on light, focus, etc…and let her play with my props. Hopefully, there will be cake next time we do this!

I love this cake on so many levels but first and foremost because it is one of the recipes that Nicole included in her newly released first cookbook, "The Baking Bites Cookbook". Nicole’s Blog, Baking Bites is one of the handful of blogs I started reading prior to starting my own. We were "blog friends from afar" until we finally met at BlogHer Food in San Francisco. Nicole is as delightful and true as she is on her blog. I am so proud that she achieved one of her lifelong dreams by writing this book.

Chai Coffee Cake


I bluntly asked her if I could feature one of her recipes and introduce some of you to her blog if you did not read it already and to her "baby", The Baking Bites Cookbook. She agreed. I bluntly added "hey! Would you be ok to give a copy to one reader?" and she said yes. So here you go: there is one free copy of this delicious book up for grabs. All you have to do is leave a comment on this post. The giveaway runs until Monday November 2nd, midnight US Eastern time and a reader will be chosen at random to receive a copy.

Given how good the Chai Coffee Cake was, I can’t wait to bake more from Nicole’s book!

Chai Coffee Cake

Chai-Spiced Crumb Coffee Cake, from The Baking Bites Cookbook with permission of Nicole Weston:

Cinnamon is the standard spice for topping a crumb coffee cake. This coffee cake keeps the crumb topping and spices it up a little more by using some of the same flavors that are found in chai, including cinnamon, ginger, cardamom and allspice. These spices really help to make the coffee cake memorable – and they also make you want to come back for a second slice.

Note: the only change I made to the recipe was to fill my baking pan with half the batter, sprinkle some of the topping and add the remaining batter and topping.

Topping:
1/3 cup sugar
1/3 cup brown sugar
1 teaspoon ground cinnamon
1/2 teaspoon ground ginger
1/2 teaspoon ground cardamom
1/2 teaspoon ground allspice
1/4 teaspoon salt
1 1/2 cups all purpose flour
1/2 cup butter, melted and cooled slightly

Cake:
1 3/4 cups all purpose flour
3/4 teaspoon baking powder
1/2 teaspoon baking soda
1/4 teaspoon salt
2/3 cup butter, room temperature
1 cup sugar
2 large eggs
1 1/2 tsp vanilla extract
2/3 cup sour cream, full or low fat

Preheat oven to 350F. Line a 9-inch square baking pan with parchment paper or lightly greased aluminum foil.

Make the Topping:
In a medium bowl, combine all topping ingredients except butter. Whisk to blend.
Gradually stir in the melted butter, using a large fork or spatula to mix. When all the butter has been incorporated and the mixture looks like wet sand, squeeze small clumps together to make large crumbs ranging in size from that of a pea to that of a grape. Set aside.

Make the Cake:
In another medium bowl, whisk together flour, baking powder, baking soda and salt.
In a large bowl, cream butter and sugar together until light. Beat in eggs, one at a time, followed by vanilla extract. With the mixer set on a low speed (or by hand), alternately add in flour and sour cream in two or three additions. When no streaks of flour remain, pour into prepared pan. Top evenly with crumb mixture.
Bake at 350F for about 45 minutes, or until a toothpick inserted into the center comes out clean.
Cool on a wire rack before slicing.
Serves 9-12

Gingered Peanut Macarons


"Hein! Des macarons aux cacahuetes..?! Ca va pas la tete Tartelette?! C’est pas des vrais comme Pierre!"
"What? Peanut macarons? Did you lose your head Tartelette?! There are no the real thing like Pierre’s!"

Yes well, who said that macarons had to be 100% almond based? Not the pastry shops selling pistachio ones! Necessity is the mother of invention and that proved to be especially true last weekend when these little peanut macarons with a cream cheese buttercream and crystallized ginger center came out of my kitchen.

I had just finished an order for deep red and deep green holiday inspired macarons with traditional fillings and almond shells when I found an extra bowl of buttercream in the fridge, and plenty of ripe egg whites. Since I was on the macaron making train, I decided to make one more batch for us and the neighbors. When I went to weigh the almonds, I had half of what I needed…darn…out of pistachios too and the walnuts were going in cookies…but eh! Peanuts were sitting quiet and pretty on the pantry shelf so why not?! What do I have to lose? Flat macarons, sticky macarons, cracked macarons? Not a problem! They could always find their destiny in ice cream!

Really, what would be the big deal by replacing half the almonds with half peanuts? Peanuts are more oily than almonds but there would only be half the amount in the batter, not enough to make a big difference. I should be ok…and might as well pray too. A conversation with Veronica reinforced my belief things could get pretty tasty. I don’t want to be stuck with eating macaron shells. Remember I am the one who loves making them but not that much eating them. Now is my time to fess up: I have already had six. That little surprise of ginger inside combined with the peanut taste and not too sweet filling is just sinful.

Another issue that afternoon was that I was running out of powdered red color so I knew these would not be as red as Christmas inspired ones. Oh well, there will just be as tasty, especially with the cream cheese buttercream filling, which is nothing more than a basic cream cheese frosting but a little less sweet. The crystallized ginger piece in the middle is completely borrowed from Karen’s fabulous macarons creations which you can go admire on her blog Mad Baker. Go check them out, I’ll wait….

You’re back? Then let me give you the recipe for these:

Gingered Peanut Macarons:

For the shells: (Makes 35 halves)

225 gr powdered sugar
60 gr almonds
65 gr unsalted roasted peanuts
3 egg whites (about 100gr)
red food coloring (powdered is better)
25 gr granulated sugar
small pieces of crystallized ginger

In a food processor, run the nuts and powdered sugar until the nuts are finely ground. Run through a sieve if needed.
Whip the egg whites until foamy, slowly add the granulated sugar, until they are glossy. Add the red food coloring.
Slowly fold the nut/sugar mixture into the whites with a wide spatula. The mixture should remain shiny and flow easily.
Fill a pastry bag with the batter and pipe small rounds onto parchment lined baking sheets.
Let the macarons rest for 20 minutes.
Preheat the oven to 315 and when they are ready, bake them for 12-15 minutes.
Let cool, remove from the paper and fill with the buttercream, add a piece of ginger and top with another macaron shell.

Cream Cheese Buttercream:

8 oz cream cheese, at room temperature
1/2 stick butter (55 gr), at room temperature
1/2 cup powdered sugar

With a stand mixer and the paddle attachment, beat the cream cheese and butter until fluffy. Add the powdered sugar, give it one more whirl to incorporate everything. Fill a pastry bag with the mixture and fill the macaron shells.

Ginger Cheesecakes With Yuzu Glaze

Ginger Cheesecakes with Yuzu

It is 1.35am here and I am wide awake….and I just half of one of these babies. For some of you it is the middle of the night, for others, mid-morning, or later somewhere somehow…so enjoy the pictures while I slowly slip into bed. Recipe later on today…
————————————————————————————————

Looking at your comments I can tell that cheesecakes stimulate your appetites. I also feel the need to explain that I bake "constantly": sometimes for us or the neighbors, and a lot for special orders. I "rescued" the cheesecake in the picture from a larger order for a friend’s dinner party with her in-laws. I bake at odd times, whenever I get the chance, and I have a whole shelf of the fridge reserved for prep work full batters, baked sheet cakes, genoises, dacquoise, egg whites, creams and all the tralalas…There is no telling when Old Chef is going to call me or when stangers email me for cakes. My job at the gym is only part time so I can keep practicing my first job. This said back to the cheesecakes…

My friend C. has her in-laws visiting and they love cheesecakes and she loves mini-everything. She has a whole array of molds, pans, serving dishes ready to satisfy the most avid baker and yet, she hates anything that has to do with putting on an apron and spending time in the kitchen. She usually calls me to the rescue and I always love to oblige. A visit to her house is always a treat as she is the most perfect host, Martha has nothing on her, believe me, and I spend quite a bit of time admiring her designer’s eye an skills at the same time I deliver my baked goods.
Her requests for the cheesecake flavors were minimal: light an airy, no chocolate, maybe some citrus…needs to go well with vodka cocktails an margaritas….Hmmm…I think I can manage that!
I did not have to look deep into the pantry or the fridge for what I wanted the cheesecakes to be. While visiting Lisa a couple of weeks ago, I begged her to take me to Trader Joes (why we don’t have one here is beyond my understanding!) and picked up a jar of their ginger spread (like a thick ginger jam) as well as a jar of Yuzu marmelade.

After a successful first run with Yuzu curd, I knew C. would love a thin glaze of the marmelade on the cheesecakes. I made a couple of extras the day before her dinner so that we could try them out….you know…for safety purposes!!! Before I could get my spoon into one of them, she had already made her way through 3/4 of it, so I packed one up to share with B. later on. Well, later on was last night and he went to bed as soon as he got home from a music gig. I, on the other hand was all revved up from chatting with a friend….And why oh why was this cheesecake strategically positioned in the fridge that everytime I’d open the door for water, there it was, sending me subliminal messages. After a 30 minutes dance between my fork and the water, the fork won and I sat outside with half of it. Needless to say, I fell asleep like a baby!!!

Ginger Cheesecakes With Yuzu Glaze:

Makes 2 41/2 inch cheesecakes

8 oz cream cheese, at room temperature
1 Tb. butter
1/2 cup sugar
2 eggs
1 tsp. vanilla extract
2 Tb ginger spread (you can sub 1 Tb fresh grated ginger)
1/2 cup graham cracker crumbs
2 Tb melted butter
1/2 cup yuzu marmelade ( you can sub. lemon curd or orange marmelade)

Preheat oven to 350F.
In a medium side bowl, combine the graham cracker crumbs and the melted butter. Divide among 2 4 1/2 inch mini springform pans and pat with your fingers until evenly distributed. Bake 10 minutes. Lower temperature to 325.
In a large bowl, with the electric mixer or by hand , mix the cream cheese, butter and sugar. Add the eggs, one at a time until well incorporated. Add the vanilla and ginger spread. Divide betwee the springform pans. Wrap each pan with heavy duty foil. Set them in a roasting pan, fill with water and bake at 325 for about 40 minutes, or until they wiggle just a tiny bit in the middle. They will set more after an overnight trip in the fridge. Remove the foil, let cool, and refrigerate.
When ready to serve, run a hot knife on the inside of the pan and release the cheesecakes. Heat up the marmelade in the microwave until of spreadable consistency and spoon on top of each cake….you are ready to go!

Ginger Cheesecake with Yuzu