I sort of took last week off from blogging, writing, commenting, etc… It does not mean I took the week off from cooking or shooting but I had to focus on prepping the coming months. We celebrated a friend’s birthday, enjoyed the fireworks for the 4th of July while I already started shooting Fall and Thanksgiving features for a couple of magazines.
I thought shooting pumpkin pies and plump turkeys would make me crave the cooler weather of Fall but nope…did not happen. At the hand of a day spent in the heat of a covered porch or a well lit studio, all I wanted was to dive in some ice cream, grill a little and just put my feet up while sipping a gin & tonic.
I also made a commitment to be gentle of myself last week. A way to protect my time with friends and family before the chaos of the next few months. When I going over my schedule with my mother-in-law, she exclaimed in the sweetest Southern drawl "Da’lin…you made my head spin. Let me fix you some iced tea". Iced tea fixes everything. I am about 95% convinced of this by now.
Starting this week, it will be a few months of "crayzeeeee" until the Christmas holidays. Kicking things off when I head out to Alabama today for a real tasty two day shoot. Then it’s Scotland and Ireland, Washington D.C, Seattle, Canada, New Hampshire, more Canada and home for more shoots. There is time enough in between two planes for an anniversary, his birthday, a load of laundry and a few good meals with friends.
A good mix of workshops and photo shoots. I was asked to submit a couple of bids for photography on cookbooks (which got accepted) and while I must wait a little longer to give you all the deeds on them, I am very grateful for the opportunities they provide. One takes me out of the country while the other lets me create a team with stylist and assistants I am friends with but also trust with my eyes closed. And the fun part? I won’t have to pay them in lollipops! All legit!! Ahahah!! Feels stupendous to be able to spread the love and create a team that inspires you and has the same need to create.
If only I did not have to have to crunch numbers, prepare bids and tally invoices. Always feel like it’s taking me away from creating, heading in the kitchen on a whim and just unplug and bake and write and blog. It’s a balancing act I am still trying to figure out. Everything I have done so far was to lead me to what I am doing now so it’s my responsibility to find the balance, the happy medium.
And thank goodness for pies! Galettes, tarts, tartelettes… you name it. Where there is a crust and a filling, there is me, generally baking one or trailing not too far behind a piping hot generously filled pie.
They bring balance into my life. Or more precisely, the act of making a galette or tart forces me to stop. The action of rubbing flour and butter together gives me those five crucial minutes I needed to just take a moment. Rolling pie crust is incredibly good for stress relief. The moment you take a pie out of the oven. That wonderful "ahhhh…" that follows a sigh. Happy sigh.
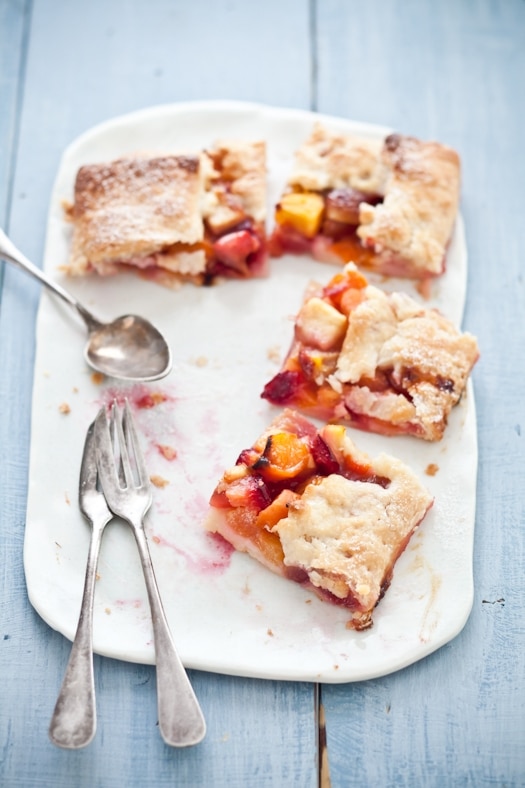
Then comes the wait. The ever so long twenty minutes to let that wonderful pie cool so you can go right ahead, grab a fork and dig in. If it’s for dinner with friends, it’s even harder to wait. But the rewards are well worth it. The smiles on other people’s face as you hand out a slice of pie. As long as I have served pies, I haven’t seen any furrowed brows yet…
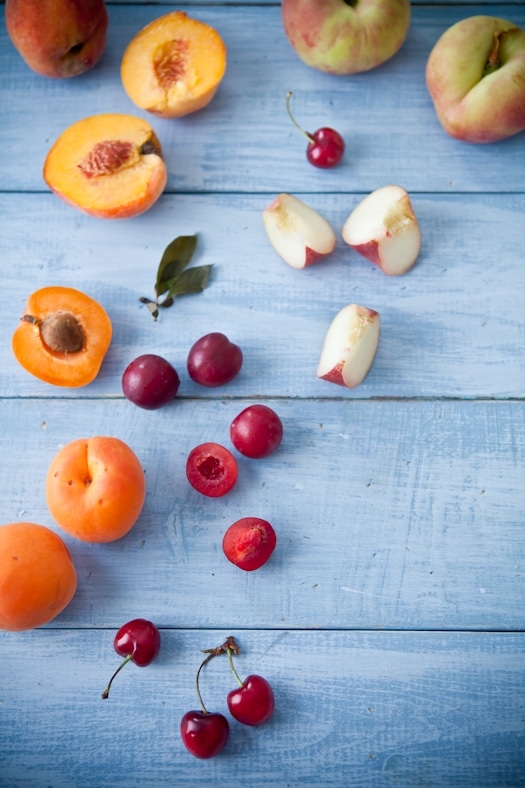
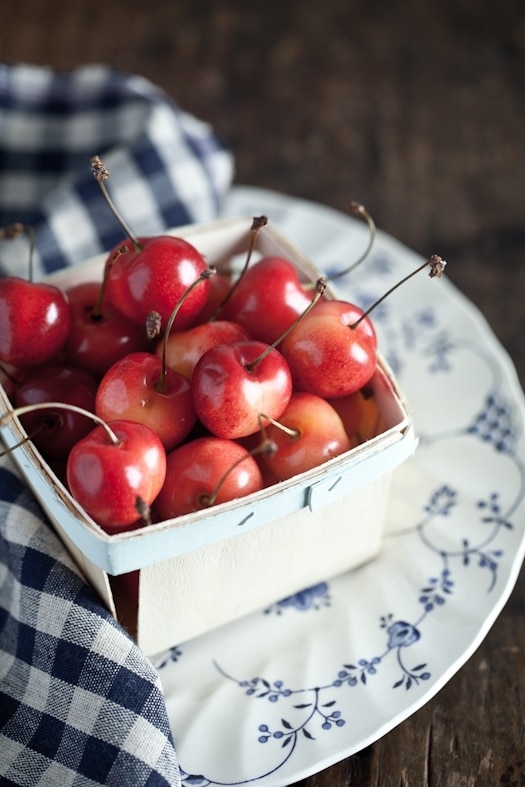
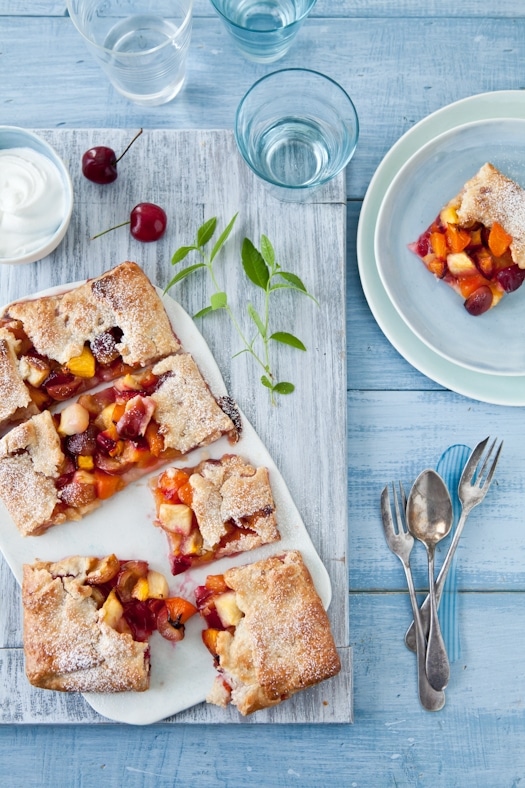
Right in the middle of Summer, it would be criminal not to fill such a galette with all the stone fruits well abundant around at the market. Apricot, velvet apricots, peaches, cherries, nectarines, etc…Stupendously delicious. My new favorite word combination.
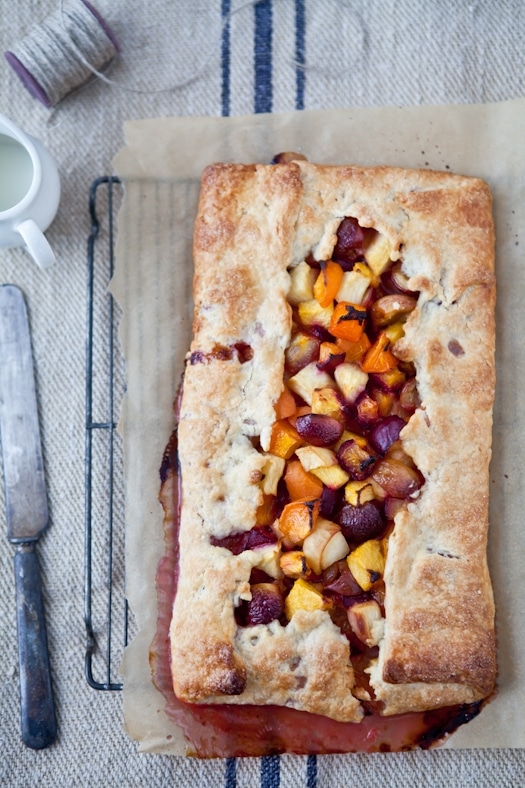
I love the simplicity of free formed galettes once in a while. It’s relaxing not to have walls and edges, trims and pie shells. Make dough, roll a rectangle, a square or a circle and fill. Pull the edges together and bake. Then dig in.
I am leaving some of that stone fruit galette in the fridge as I head out of town but you can be sure I am fixing myself a little slice for the plane ride. Or breakfast. It’s all about finding balance.
I hope the months ahead provide you with the same feelings of exhilaration, accomplishment, necessary adrenaline rush and relaxation. Hopefully with pie…
Ingredients:
2 peaches, skinned, pitted and cut into 1-inch pieces
2 apricots, skinned, pitted and cut into 1-inch pieces
2 velvet apricots (or 2 large plums), skinned, pitted and cut into 1-inch pieces
2 Saturn peaches, skinned, pitted and cut into 1-inch pieces
3/4 cup cherries, pitted and halved
juice and zest of one lemon
2 tablespoons honey
2 tablespoons milk
1 tablespoon granulated sugar
Your favorite pie crust. Or this one which I love.
Directions:
Preheat the oven to 350F.
In a large bowl, toss all the prepared fruits with the lemon zest, juice and the honey. Mix well with a wooden spoon.
On a silpat or piece of parchment paper, roll the dough into a 10×15 rectangle (approximate). spoon the fruits right in the center, leaving about a 2-inch border on all edges. Fold the edges of the two short edges over the fruit, do the same for the long edges as if you were closing up a package but not quite closed all the way in the middle.
Brush the milk over the crust with a pastry brush. Sprinkle with the sugar and bake for about 30 to 40 minutes until golden brown.
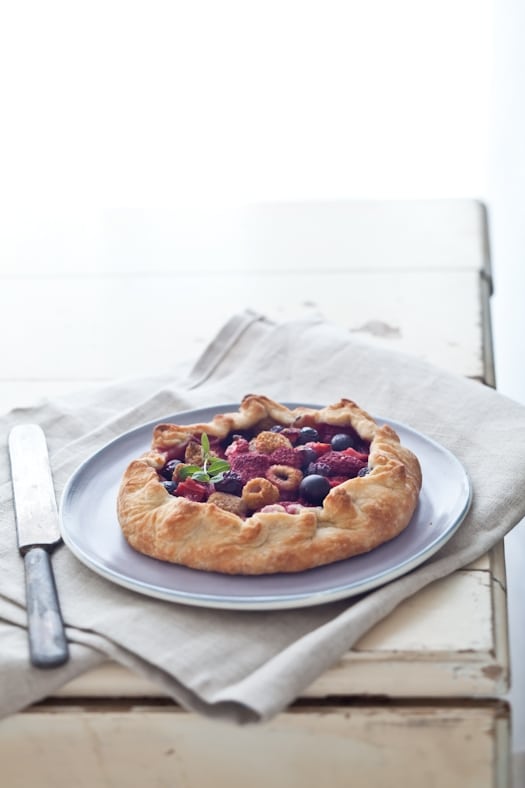
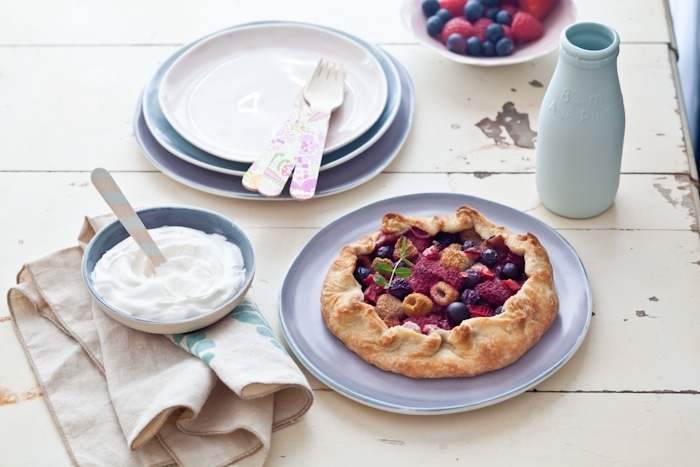
This mixed berries galette has all the attributes that often make me weak in the knees when I think about an uncomplicated Summer dessert. One that is not perfect, a little tart and puckerish, refreshing and vibrant with colors. One that does not require lots of heating and whisking over a hot stove when the temperatures are already blistering outside. One that takes the best of the season and wraps in a buttery blanket of homemade pastry crust.
We are right at the prime time for peaches, plums and lots of stone fruits. Even with strawberry season coming to an end, blueberries are now in full swing, along with raspberries. While I can find all these at the farmers market, I did not expect to find golden raspberries at our neighborhood (read tiny – last minute shop stop) store.
Red currants and golden raspberries can’t ever be local, I have been told. Too hot down here apparently but I admit, I could not resist getting a couple of pints of the raspberries. It’s so rare to see them around and after sneaking in a taste, I tried to come with desserts where their sweet and mild flavor would used to their advantage. Well, beside finding their way directly into my mouth…
I am still a hard core fan of raspberries and Chantilly for dessert. Nothing else. Nothing less. Nothing more. But…I think I am the only at the house who does that. My dear husband would rather have a little crust to go along with all that berry goodness. Something to tame the pucker-up factor which I so love.
Making any kind of pastry dough is a way to relax for me. The mixing, kneading, rolling. All focused and intentional steps to have something good to share with loved one for dessert. Finding the right balance of fruits, sugar. The right amount being mounded onto a buttery crust before being enclosed, free form. The smell filling up the entire house as the berries release their juices and aromas.
There is always a feeling of accomplishment and satisfaction when I pull a galette out of the oven. I can’t describe it really. A peaceful second where I feel and understand years and years of family cooking and cultural belonging. It is a fleeting second, indeed. But one that anchors me in the moment and the moments to follow where we will cut right through that galette and smile.
Finding peace and balance has never been as important to me as it is now. I’ve never felt the need to actively seek them. There are always in me. However, the family events of the last five months have made me dive head down into my work and not allow myself to feel negative emotions. I am aware that I need to voice things out, write them down, and scream out loud if need be.
Nurturing comes from within oneself first. For me, it has been as simple as baking. Late at night when I let myself get sad and angry. Making jam. Cutting fruits. Anything that makes me feel close to the ones I love. When we had a problem in my family, we would make a cake. Did not matter if one person or twelve would come eat it. The intent to create was a simple human attempt at conjuring the absence.
So I made a galette. And another one. One morning, B. woke up to a dozen cupcakes, a banana loaf and another galette. One night, we almost had apricot tart for dinner. It’s winding down…thank goodness. It’s actually been great practice for the workshops I am teaching at Squam this week. I am also looking forward to the scenery of New Hampshire. A bit of wet weather and colder temperatures.
I am also looking forward to sharing with other students the personal reward that is to create, to make something by hand and to tell its story. To leave a trace and to find a spark within oneself. For some it is painting, knitting. For others like me, it is baking, kneading, whisking and taking a photograph. Journaling the process. Leaving a trace. A thought. An emotion or a connection.
If you are heading to Squam this weekend, come say hello!. I will make sure we have a slice of pie to share together!
Mixed Berries Galettes:
Makes three 6-inch galettes (enough for 6 to 8 people depending on size)
Notes: the crust is taken (and slightly adapted) from Holly Herrick’s book Tart Love which I recommend to everyone who has issues with making pie crust. Techniques, tips and troubleshooting ideas are well explained by Holly and the recipes are creative and delicious. And I can safely vouch for them since I also happen to have made and photograph 45 of them for the book…No plug intended… I just love that book…
Ingredients:
For the crust:
1 1/2 cup Jeanne’s all purpose gluten free flour mix (or regular all purpose flour if not gluten free such as While Lilly)
1/2 teaspoon salt
1/4 cup sugar
110 gr cold butter (1 stick)
1/4 cup cold milk beaten with 1 egg yolk
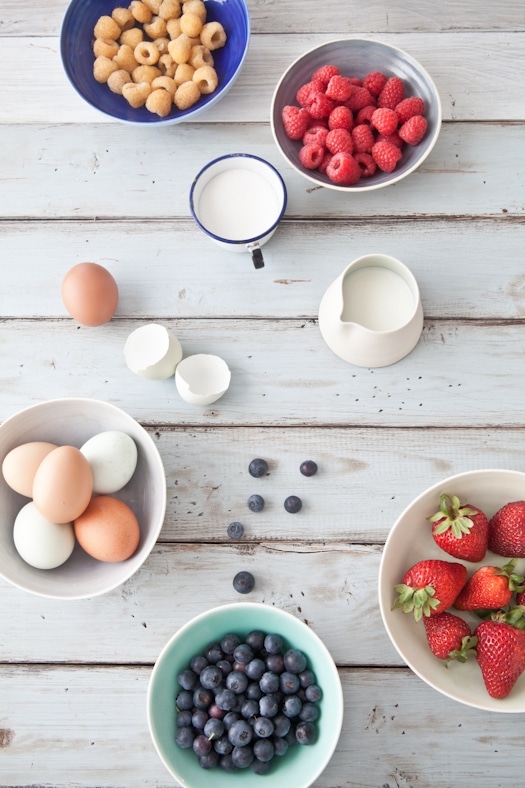
For the filling:
1 cup each raspberries, golden raspberries, strawberries (hulled and cut small), blueberries
juice and zest of one lemon
1 tablespoon cornstarch or arrowroot
1/4 cup honey
Directions: Prepare the crust:
In the bowl of a food processor, (or follow the same instructions if doing by hand), pulse together the flour, salt and sugar until incorporated. Add the butter and pulse until the butter resembles small peas and is evenly incorporated. Gradually, stream in the cold mil & egg yolk mixture until the flour just comes together. Turn the mixture out onto your work surface and form into a 2-inch thick, round disk. Wrap with plastic wrap and refrigerate at least 30 minutes (or overnight) before rolling out.
Preheat the oven to 350F and position a rack in the center.
Prepare the filling:
In a large bowl, combine all the berries with the lemon zest and juice, cornstarch (or arrowroot) and honey. Fold gently until everything is incorporated. Let stand while you roll the crust.
On a large surface area, well floured, roll out the pastry dough to 1/8-inch thick and cut out three 8-inch circles from it. Transfer right away to a baking sheet lined with parchment paper. Mound half the fruit filling on one circle and repeat with the other one going close but not all the way to the edge. Leave a 2-inch border of pastry all around. Gather the edges of the pastry dough, pleating as you go with your fingertips (don’t worry about being even – these are free form. Imperfections are wonderful anyways…). Bake for about 40 to 50 minutes or until the galettes are golden brown
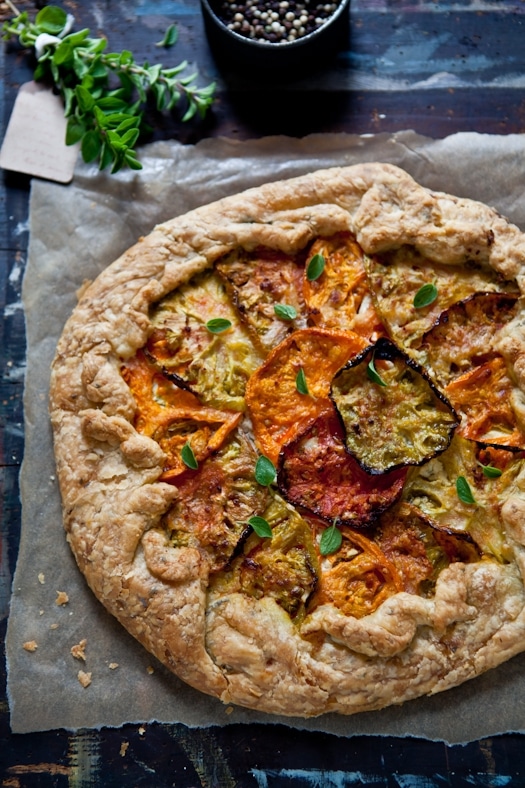
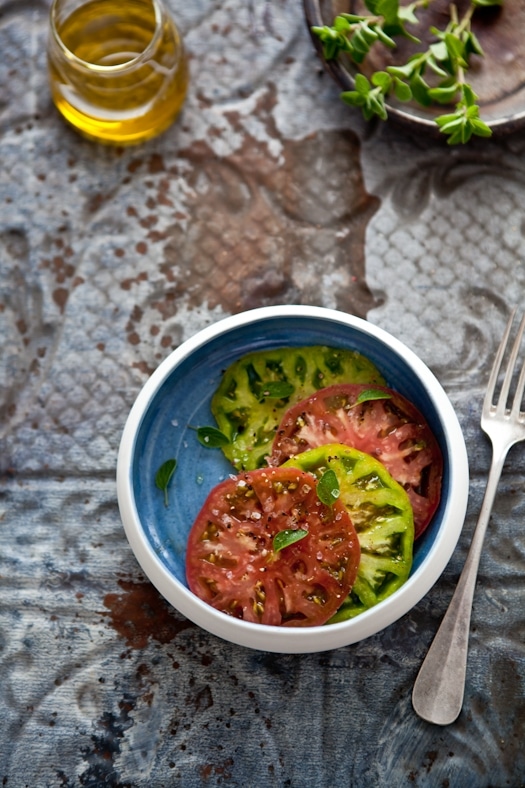
I was going to start this by saying that I had not married into a typical Southern family but to tell you the truth, I can’t think of one typical Southern home. Here in the South you can be from the Lowcountry, the Midlands or the Mountains. Three different ways of life, three different Southern twang lingering after each word. Three different ways of seeing the sun shine bright and to make a tomato pie.
I married into a Southern family with history and well, more history. My family is nomad in comparison with a history of adaptation, made colorful by the people in it and the countries we come from. I married a guy with a keen ability to retain only the goodness of the past to move into the present. He understands that I will adapt both our traditions to keep connected to my family and call his, my home. The Lowcountry does feel like home to me now. I have embraced its food, its ingredients, the seasons (sort of) that bring picnics at the beach in December and ripe juicy tomatoes in March. And tomato pies.
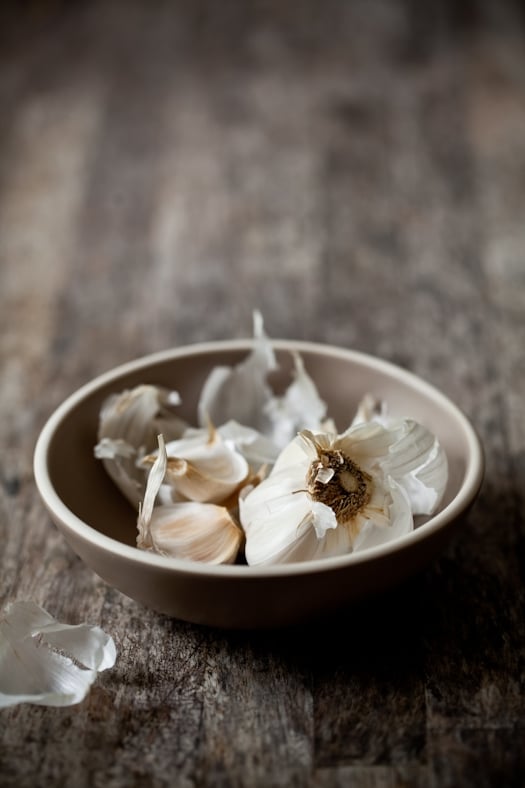
I had never had a tomato pie until I met my mother in law. Actually, I met the pie first. Bill brought it to a picnic date and I also fell in love with my future family that day. If she wanted to tie me up to South Carolina through its culinary traditions, she had me at "another slice honey?" Juicy tomato slices in a buttery crust, happily nested in a creamy filling with plenty of basil, garlic and topped with a generous handful of sharp cheddar.
Nothing that my doctor would be thrilled about. Nothing that my brain, deeply anchored in its own culinary ways, could compute. Nothing that I would admit craving as soon as Spring rolls around. And yet, I could not control my will power and had another generous slice. I felt completely and utterly happy, satisfied and calm. Giddy from my brain to my toes. From a tomato pie. Alright…and from the man before me.
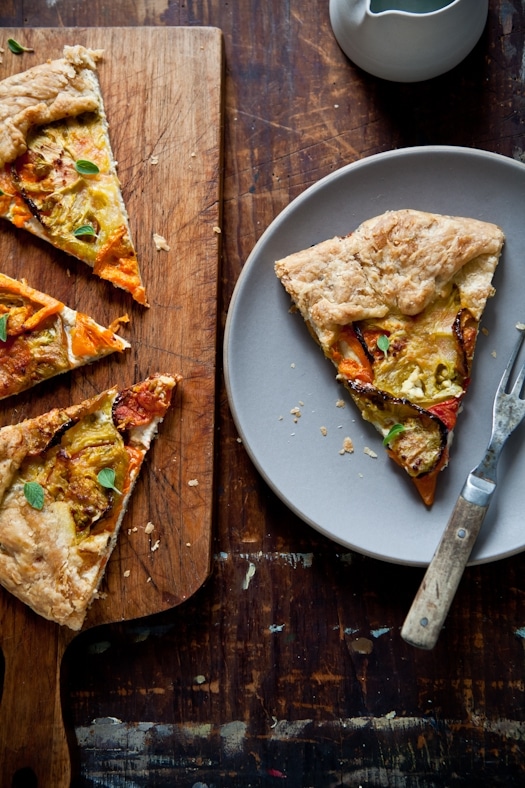
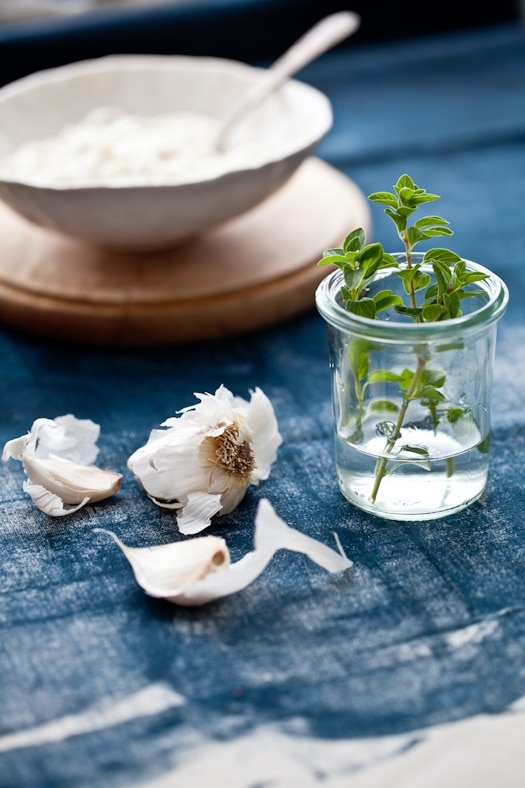
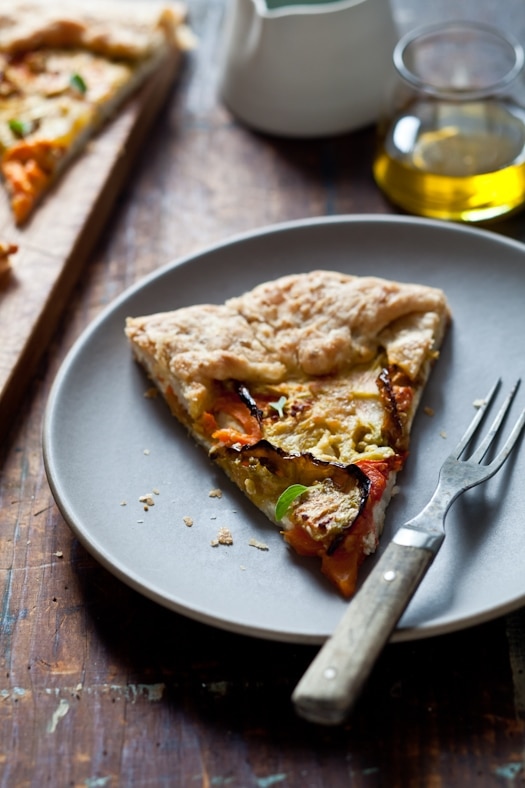
That very same day, I vowed to do something my grandmother and mother had advised years before: never ever, under any circumstance try to replicate that pie. I had now entered the potential "it’s not quite like when my mom makes it" territory. I ain’t no fool…Instead I decided to create my own version. The one adapting ingredients we have here to flavors and tastes from back home. A different approach to the same theme. A Tomato galette with homemade ricotta and plenty of oregano. A drizzle of olive oil and a sprinkle of parmesan.
Heirloom Tomato Galette:
Serves 4 to 6:
Ingredients:
For the crust:
1 1/4 cup Jeanne’s all purpose gluten free flour mix (or regular all purpose flour if not gluten free)
1/2 teaspoon salt
1/2 teaspoon dried oregano
110 gr cold butter (1 stick)
1/4 cup icy cold water
For the ricotta filling:
1 cup ricotta (I use this recipe to make homemade ricotta)
1 garlic clove, minced
1 tablespoon finely chopped fresh oregano
Directions:
Prepare the crust:
In the bowl of a food processor, (or follow the same instructions if doing by hand), pulse together the flour, salt and oregano until incorporated. Add the butter and pulse until the butter resembles small peas and is evenly incorporated. Gradually, stream in the cold water until the flour just comes together. Turn the mixture out onto your work surface and form into a 2-inch thick, round disk. Wrap with plastic wrap and refrigerate at least 30 minutes (or overnight) before rolling out.
Preheat the oven to 350F and position a rack in the center.
Prepare the filling:
In a large bowl, mix all the ingredients together and keep refrigerated until ready to use.
Slice the tomatoes and spread them out on layers of paper towels to drain some of their moisture out while you roll out the pastry.
On a large surface area, well floured, roll out the pastry dough to a 10-inch circle, spread the ricotta filling but not all the way to the edge. Leave a 2-inch border of pastry all around. Layer the tomatoes on top. Gather the edges of the pastry dough, pleating as you go with your fingertips (don’t worry about being even – these are free form. Imperfections are wonderful anyways…). Sprinkle the tomatoes with parmesan. Bake for about 40 to 50 minutes. Let cool slightly, drizzle with the olive oil, some more oregano and serve.
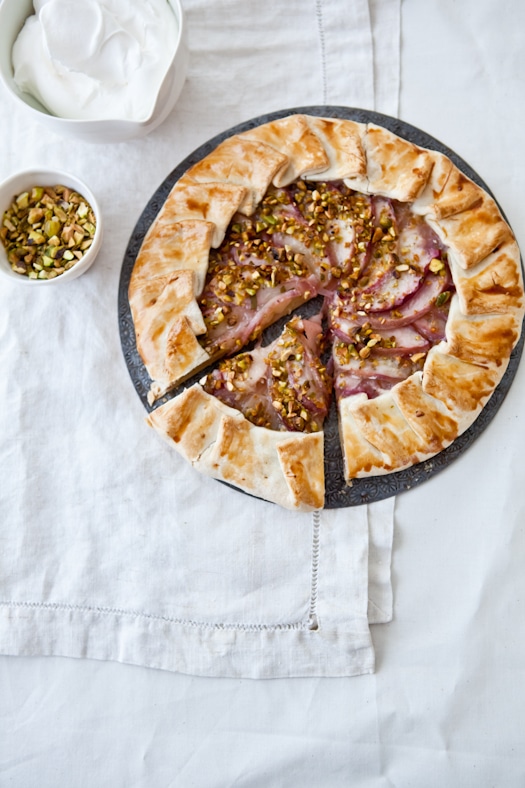
Don’t judge but a slice of this white nectarine galette has ben breakfast for the past two days. Tomorrow also. Even though we are taking a road trip cross country, B. requested I’d pack the galette along for the ride. I am not that interested in breakfast usually. Unless there is pie. Or eggs and bacon. These would seriously get me in trouble. As a gourmande through and through, I’d happily sit down and cut myself a not-so-shy piece of pie if you’d let me. Especially when filled with juicy white nectarines from the farmers market.
The moment I took this one out of the oven, I made another one. Certain that we would appreciate waking up to share a piece while sipping our coffees. We are indeed on the road, heading to The Pionneer Woman’s Ranch. The macaron and photo workshop weekend is finally here! And well, instead of spending time in airport, airplanes and muttering over missed flights and too short connections, we decided to pack up the van and take a littlelong trip out West.
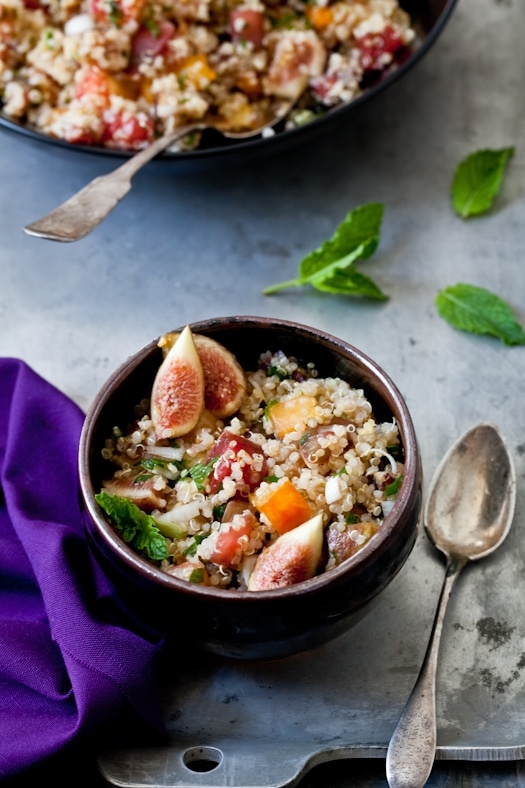
I did leave a few goodies and cookies for the house sitter but not this pie. Nor the leftover sautéed chanterelles we shared for lunch under the shade of a huge oak tree in the middle of nowhere Alabama. Nor did I leave the couple of servings of the quinoa and fig tabouleh our gluttonous selves could not finish the night before we left. All three were packed up and enjoyed quietly. And well.
It’s been ages since Bill and I went on a long road trip together and when I mentioned the trip to Ree he turned to me with a big bright smile “I am free that week! Let’s just get in the car and see the country!”. I gotta love his enthusiasm because if you know me, you also know that I fall asleep the minute I get in the car. There is something with enclosed spaces that make me go “ka-plunk” asleep. I feel terrible about it. Really!
There is nothing I enjoy more than having the time to catch up with Bill as we pass through towns along this big vast American soil.I just love this place. Its complexities and diversity. Its textures and personas. So far, I am doing good on this trip. Proof is that I am writing this as he drives. We have been able to catch up on family stories as we drove through South Carolina, Georgia, Alabama and now Mississippi.
We just enjoy those rare moments now when both our schedules allow for some free time together. What can I say… Fourteen years have passed since our first excursion together and we still dig just being with the other. In the moment. And I want to believe it’s not only because of the delicious foods I pack up when we head out.
These four recipes are perfect for a picnic, on the side of the road, at the local park or even on a hot day at the beach. They pack easy and well and last a while since they are better at room temperature. As I was preparing them, I wanted nothing less than to set aside some time to pull out a blanket in the backyard and have an impromptu picnic by the creek. But there was more cooking to be done before heading out!
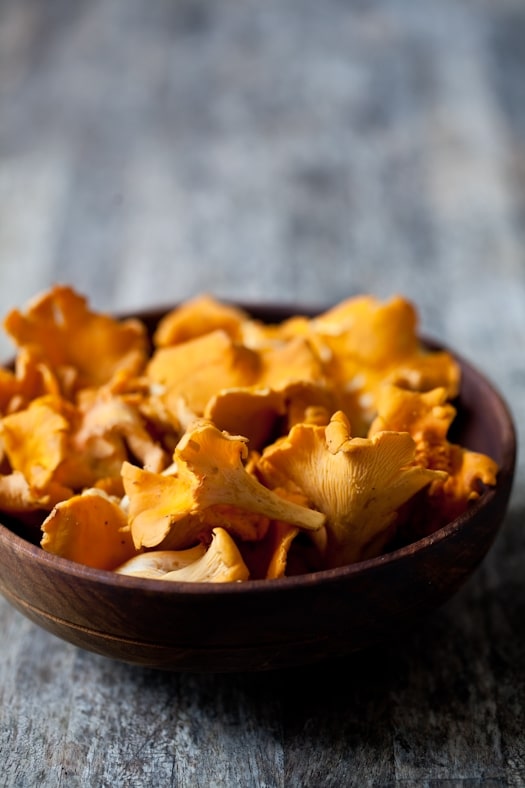
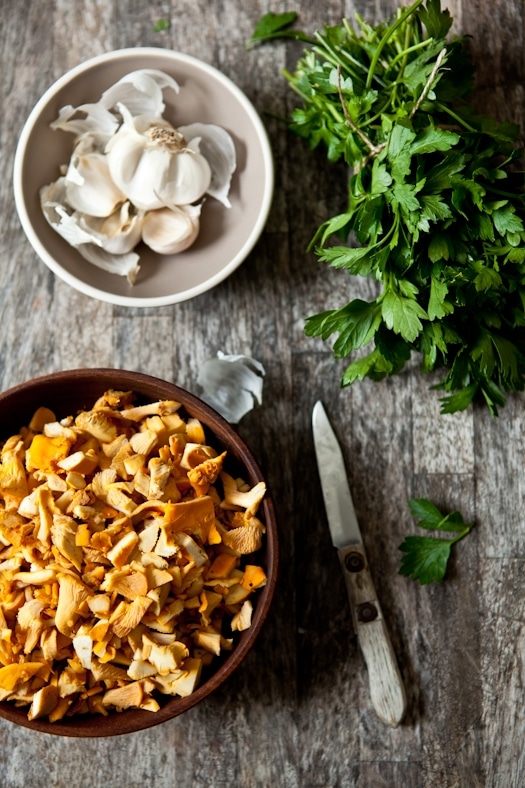
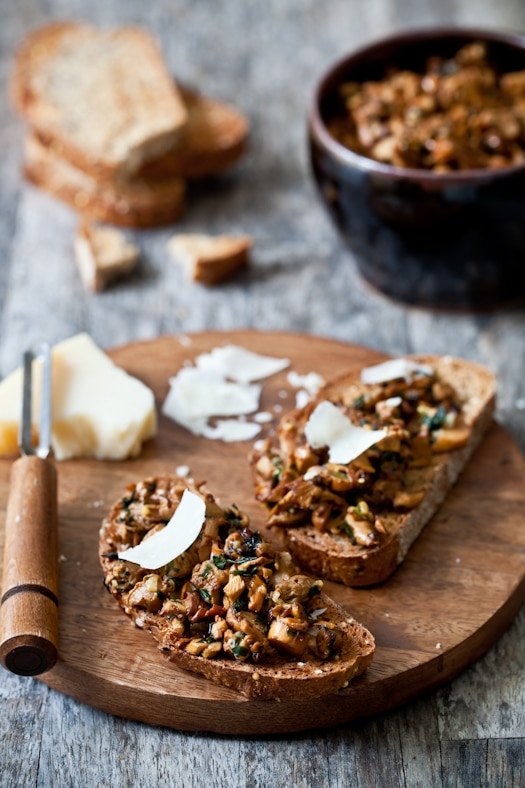
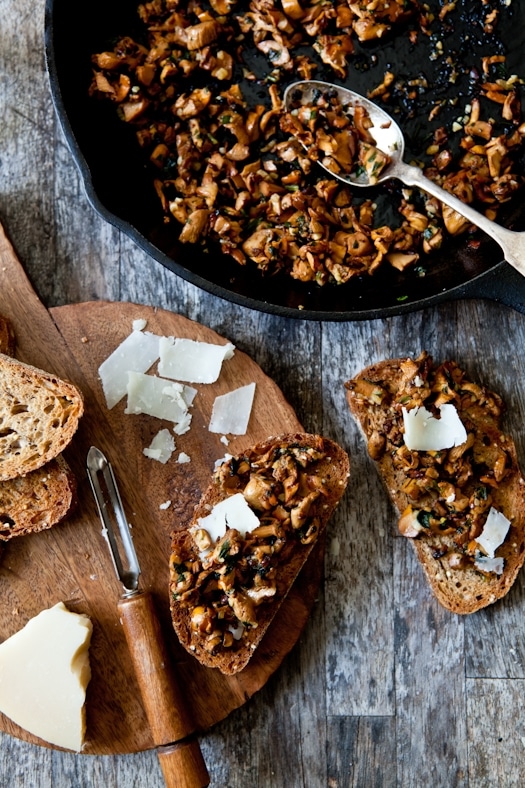
When Jason at the market said he’d have freshly picked chanterelles, I literally jumped in my seat. My mind going only in one direction. Chanterelles sauteed in butter with garlic, parsley, salt and pepper. Served on toast with a sliver of pecorino. That’s all I could think about. This is by far my favorite way to enjoy wild mushrooms.
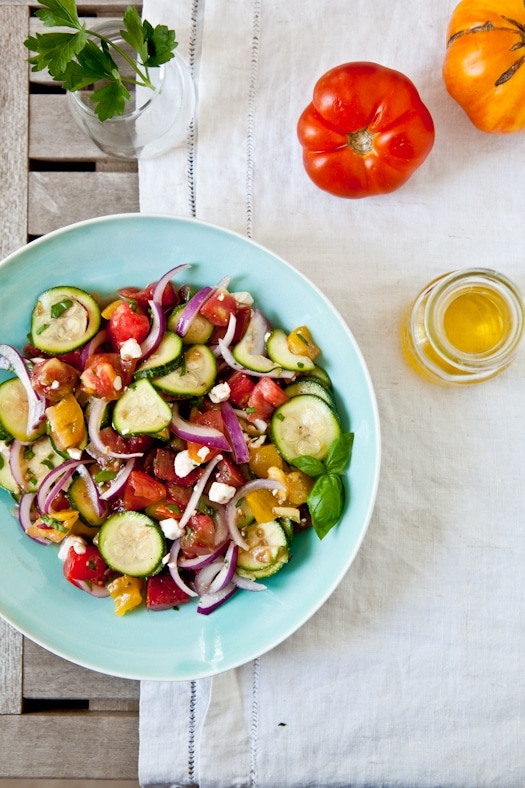
This salad of heirloom tomatoes, thinly sliced zucchini and feta is actually a take on a salad I ate while in Salt Lake City during a pot luck. The original version featured zucchini, sliced thin, with feta, dill and a drizzle of olive oil. I loved the combo so much that I started my own riff on it as soon as I got home. My advice? Make more than what you think you will need. You’ll eat it all. And more!
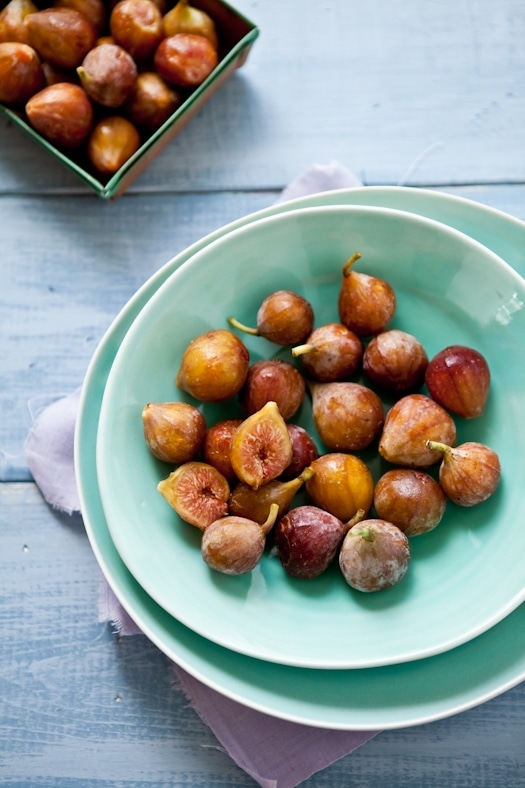
The quinoa and fig tabouleh is an interpretation of a recipe from Elle a Table. I was intrigued by adding figs to a savory grain salad. Figs and savory are opposites and harmonious at the same time. Such a perfect fruit to pair up with tomatoes, mint and lots lemon juice! We are full blown in fig season down here and I can’t stop filling my basket with them.
I think the most doubting soul that the combo would work was Bill but as soon as I was done taking those pictures, I handed him a spoonful and before I knew it, I was almost prying the bowl from his hands so we would have some left for dinner! The tabouleh also works great with millet or other whole grains.
I will try to post some pictures and updates of the weekend on the ranch as soon as I get back, if not sooner! Have a great rest of the week! White Nectarine Galette:
Makes one 6-inch galettes
Ingredients:
For the crust (pate brisee)
2/3 cup millet flour
1/3 cup superfine white rice flour
1/4 cup sorghum flour
(or you can use 1&1/4 cup all purpose flour instead of the 3 flours mentioned above)
2 tablespoons powdered sugar
8 tablespoons butter, very cold and cut in 1/2 inch dice
2 tablespoons to 1/4 cup ice water
1 egg mixed with 1 tablespoon water (to brush on the top crust)
Or milk to add some color to the crust
chopped nuts for topping (optional)
For the filling:
4 small white nectarines
1 tablespoon pineapple sage, freshly chopped (or mint, lemon thyme, lemon balm, etc…)
1/4 cup honey
1 tablespoon cornstarch
Directions:
Prepare the crust
In a large bowl, mix together the millet, rice and sorghum flour. Add the powdered sugar and mix. Add the cold butter and mix with a pastry cutter or your fingertips until the mixture resembles coarse crumbs. Add the water, one tablespoon at a time and mix until the dough comes together in a ball. Flatten into a disk in between your hands and wrap in plastic wrap. Refrigerate 30 minutes (you can make it the day before too).
In the meantime, prepare the fruit:
Cut the nectarines in half and remove the pits. Cut each half in thin slices. Mix them together in a large bowl with the herb, honey and cornstarch. Let stand 10 minutes.
Preheat the oven to 350F and position a rack in the middle.
When ready to assemble, roll the dough in between sheets of plastic to about 1/8-inch thick to make a rough 9 to 10-inch circle. Place the nectarine slices inside that circle. Bring the edges over the fruit to create a 2-inch border or so and repeat the procedure until a complete border is created. Brush with the egg wash or some milk if desired (adds color to the crust), sprinkle with nuts with desired, and bake for about 30 minutes.
—————————————– Chanterelle Tartines:
For 2 hungry people
Ingredients:
1 tablespoon butter
half a pound fresh chanterelles, cleaned of dirt
2 garlic cloves, minced
1/4 cup to 1/3 cup chopped flat leaf pasley
salt and pepper
thin slices of pecorino or other hard fragrant cheese.
Freshly toasted whole grain bread
Instructions:
In a large sautee pan set over medium high heat, melt the butter until it sizzles. Add the mushrooms, garlic, parsley, salt and pepper and cook until nicely colored, about 8-10 minutes.
Let cool slightly and spoon a bit of that mixture onto pieces of toast with a little sliver of cheese. Serve warm.
————————————– Tomato Zucchini and Feta Salad:
Serves 4 to 6 as a side dish.
Ingredients:
3 tomatoes (heirloom if you can), cut into small cubes
2 zucchini, thinly sliced
1 small red onion, shaved
1/3 cup feta cheese
1/4 cup to 1/3 cup loosely packed fresh basil, chopped
salt, pepper
2 tablespoons olive oil
Instructions:
Combine all the ingredients together and let sit in the refrigerator at least a couple of hours before serving so all the flavors have time to meld together.
——————————— Quinoa and Fig Tabouleh, adapted from Elle A Table:
Serves 6 as a side dish
Ingredients:
1.5 cups dry quinoa
3 cups water
6 large figs or 10 small ones, diced
3 tomatoes (heirloom if possible), diced
4 green onions, thinly sliced, white and green parts included
1/3 cup to 1/2 cups loosely packed fresh mint
juice of two lemons
salt and pepper
1/4 cup olive oil
Instructions:
In a large pot, bring the quinoa and water to a boil, reduce the heat and simmer, covered until all the water has been absorbed (about 20 minutes). Remove from the heat, fluff with a for and place in a large bowl to cool for 20 minutes.
Add the figs, tomatoes, green onions, mint, lemon juice. Add salt and pepper to taste and the oil. Let sit at room temperature for another 20 minutes and refrigerate after that if not consumed right away.
If everything goes according to plan, I’ll be home in France in two weeks. It’s been four years since I have not been back and it was not for lack of planning or trying. Just happened that way. But now, as we get closer to the date, I buzz about even faster. As B. said "now you’re like a buzzy bee on a sugar high"… There is so much to do, straighten out, finalize, revise…Things I don’t want to do while away. People to see, places to be, milestones to celebrate. Life. Family. Time. Away.
I am already thinking about all the flavors of my childhood. Lavender fields, apricot jam and cherry clafoutis, cantaloupe with a splash of port wine, nectarines, barbecues and Champagne and cassis cocktails. Picking berries on the side of the roads by the Durance river. The juice of fresh peaches trickling down my chin, and my arm, and ruining my dress. But always leaving me happy happy.
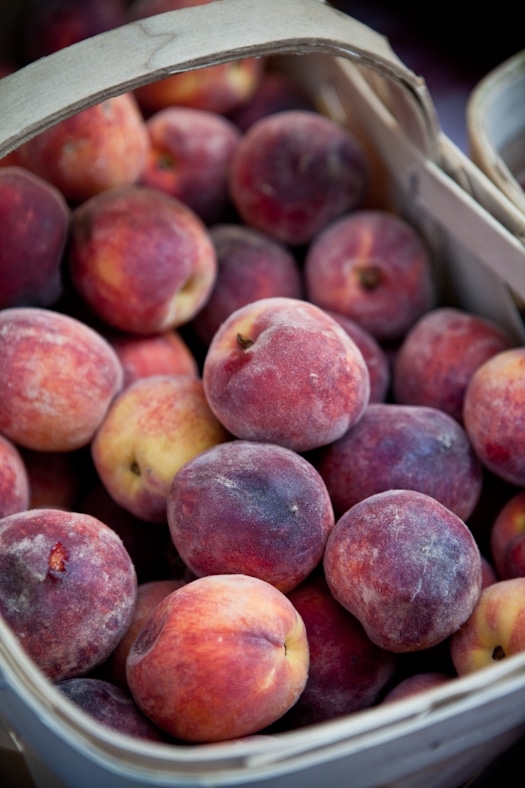
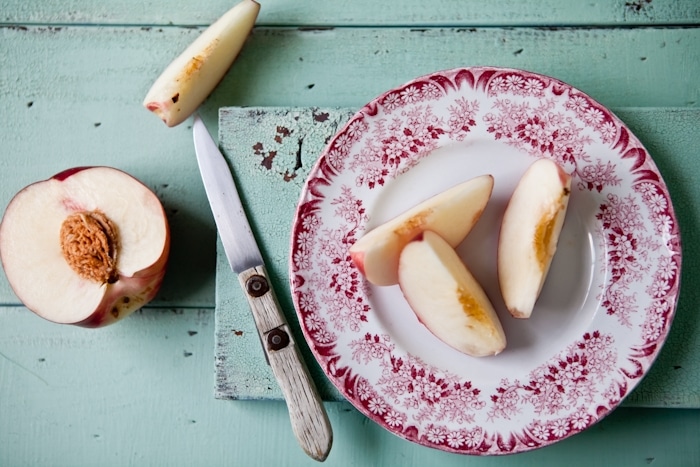
I’ve always thought my little corner of Provence has some of the best stone fruit until I tried a Southern peach here. I can’t even compare they are so different. South Carolina peaches are a treat for sure. Think about your favorite peach scented anything and there you have it. It sounds like it has magical powers doesn’t it? Well it does. Right now, it makes the perfect dessert. Breakfast. Snack. I am even tempted to call it dinner tonight.
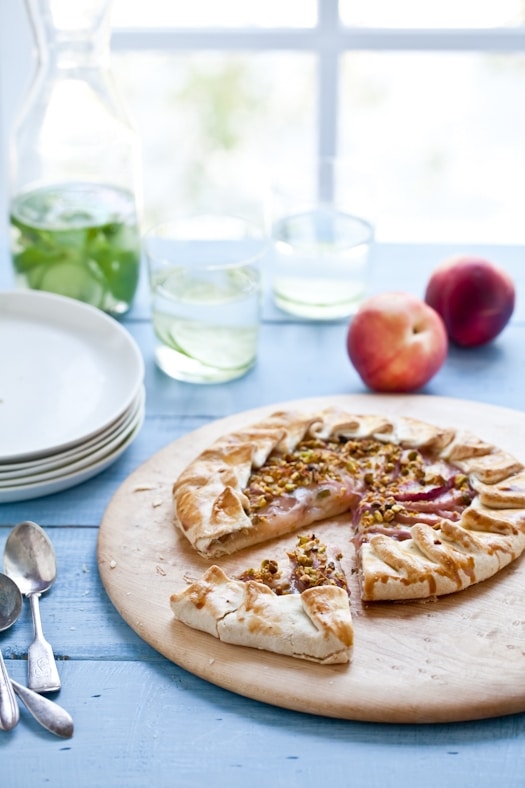
Imagine how giddy I was this week when I found myself the recipient of over 10 pounds of just ripe, just perfect peaches. Yeah. Giddy. It did not take me long to figure out what I wanted to do with them. Instincts kicked in and once back in the kitchen I started the little dance I’d do everytime at the restaurant. I started poaching, roasting, peeling, dicing…Pots and pans filled every corner of the stove and countertops. From savory to sweet, salsa to sorbet. Truly a good day.
The first thing I made though was galettes, free form tarts. I poached four peaches in jasmine tea, let them cool completely, peeled, pitted and sliced them thin. I used half a peach per galette, some I left all peach and some had a small handful of blueberries added to them. All were sprinkled with sugar infused with lemon thyme like I did previously in these Fresh Berries Tartelettes. Simply rub herbs and sugar together, can be citrus zest too, it works wonders!
I love how packed the summer gets. I love the epic heat of a day spent outdoors followed by stormy winds and thunderstorms. Summer. When rules are bent and time extends following the sunset. And mostly, right now, I love summer because of peach galettes….
Peach and Peach Blueberry Galettes With Lemon Thyme Sugar:
Makes 8 individual galettes (we share but you don’t have to)
Notes:
– I use lemon thyme a lot this year because our one little plant is going wild. Our lemon balm and mint have suffered from the heat but you could definitely use those flavor.
Rosemary, oregano, chocolate mint and sweet basil work beautifully too. The sky is the limit!
– we are not fond of the taste of tapioca flour so I use cornstarch instead but feel free to use either or.
– If you are not baking gluten free, replace the rice, millet, sorghum flours and cornstarch with 1.5 cups of all purpose flour and omit the xanthan gum.
– you can make this as one large 9-inch galette if you want to.
For the pastry dough:
5 tablespoons (70gr) unsalted butter, at room temperature
2 egg yolks
pinch salt
1/2 cup (80gr) superfine sweet white rice flour
1/2 cup (60gr) millet flour
1/4 cup (30gr) sorghum flour
1/4 cup (40gr) corn starch (or tapioca flour)
1/2 teaspoon xanthan gum
2 tablespoons to 1/4 cup cold milk
For the fruits:
4 peaches
1 tea bag jasmine tea (or your favorite)
2 tablespoons sugar
1/2 cup blueberries
For the lemon thyme sugar:
1/4 cup sugar
1 tablespoon lemon thyme finely chopped
Prepare the crust:
In a mixer, whip the butter on medium speed until light and airy. Add the egg yolks, one at a time and beating well after each addition. Mix until incorporated. Add the salt, and all the different flours, and the xantham gum and mix briefly. Add enough milk to moisten it. Dump the whole mixture onto a lightly floured (use more rice flour) board and gather the dough into a smooth ball. Flatten the dough into a disk, wrap it in plastic wrap and refrigerate for an hour.
Prepare the fruits:
While the dough is resting, place the peaches, tea bag, sugar and enough water to cover the fruit in a large saucepan set over high heat. Bring to a boil, reduce the heat and poach the peach until just fork tender. Remove from the heat and let them cool on a clean kitchen towel. Once cooled, peel and halve them, remove the pits and slice the peaches thin.
Prepare the sugar:
In a small bowl, mix the sugar and lemon thyme together with your fingertips and set aside.
Preheat oven to 350F and position a rack in the center.
When the dough is nice and cold, roll it out on a lightly floured board or in between two sheets of plastic. If the dough tears while you roll, just patch it with your fingertips. Cut eight 4-inch rounds, rerolling and using the dough as you go (ig it gets too soft, just refrigerate for a few minutes as you fill the other galettes with fruit).
Arrange the slices of half a peach in the center of each round and gather the edges, pleating as you go with your fingertips (don’t worry about being even – these are free form. Imperfections are wonderful anyways…). Add blueberries on top if desired and sprinkle with some lemon thyme sugar.
Place all the galettes on a parchment lined baking sheet and bake for about 30-35 minutes.
————————————————————————————- Props:
– bike and handlebar basket: ours
– basket on bench: Dollar Store (yes…)
– wooden bowl: Star Provisions, Atlanta
– linen last picture: Cicada Studio, etsy
– wooden forks: Sprout Home
– enamel pot: ebay
Time flies like mad these days! I really thought this week would be calmer than the ones ahead. I even said it outloud. With a satisfactory smile on my face and a head full of light hearted things to do. So you can guess what happened. It got a wee bit crazy. One night that I was trying to sort it all out, my dear B. sat next to me with mugs of tea and a couple of tartelettes. I knew we were simultaneously feeling how wonderful it is to be able to rely on the simplicity of seasonal baking when there’s combobulation around.
As my family back home was gathering around my grandfather to celebrate Epiphany, we were virtually sharing the moment with individual "Galette des Rois", the traditional frangipane filled puff pastry tarts served for the occasion. B. is well aware of my family’s "must dos" and how they translate into my baking and cooking as definite advantages for him even this far away, like truffles at Christmas and galette or brioche for Epiphany.
Like in many a French person, galettes des rois are a big deal. A lot of families take this opportunity to gather together one last time towards the end of the holidays, have a glass of Champagne and wish one another a Happy New Year before things go back to their usual "metro-boulout-dodo" (commute-work-sleep). Since most years we were visiting my grandparents in Paris for the holidays, we would have "galette des rois" there and, once back home in Provence, we would have "brioche des rois". And sometimes both which was perfect for the gourmande in me!
When I mentioned the possibility of not baking any galette this year, you should have seen the look on my husband’s face. As if I was taking his favorite toy away. My symptoms have been so greatly improved by removing gluten entirely from our diet that I did not really want to make a full batch of puff pastry and galettes. I can’t stand being that selfish either but from the previous results I’d had turning puff pastry gluten free, a complete gf galette des rois was not going to happen. So I made them anyway, the regular way. I only had one bite too many to know I shouldn’t have but he was happy and that makes up for a lot of things.
Back in September, I tried a couple of times to come up with a gluten free puff pastry for a Daring Bakers challenge but none of the attempts left me satisfied. I came up with a ratio for the flours I wanted to use, ran it by Shauna for confirmation and was elated to see my dough was flexible enough to roll and to fold and bake into beautiful crispy layers. Each time though I had the same problem: too much butter if I followed traditional ratios and, as Shauna pointed out, not enough protein. Shauna, Danny and I are actively working on that project again and more decided than ever to come up with a gluten free puff pastry so good and fluffy you will be proud to point out it is gluten free.
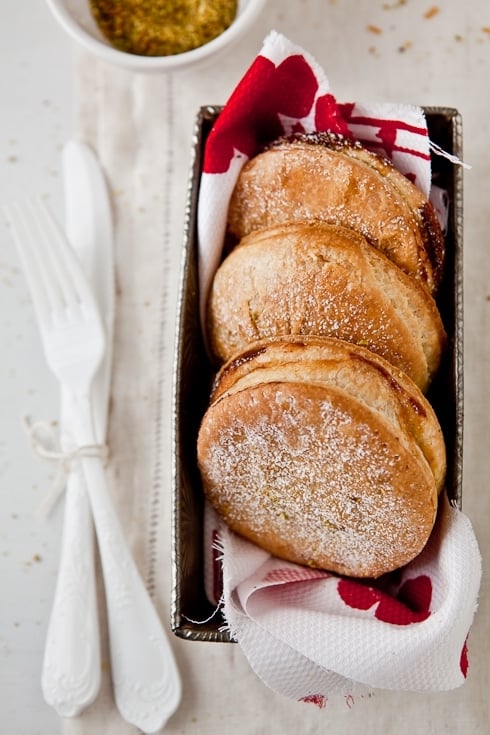
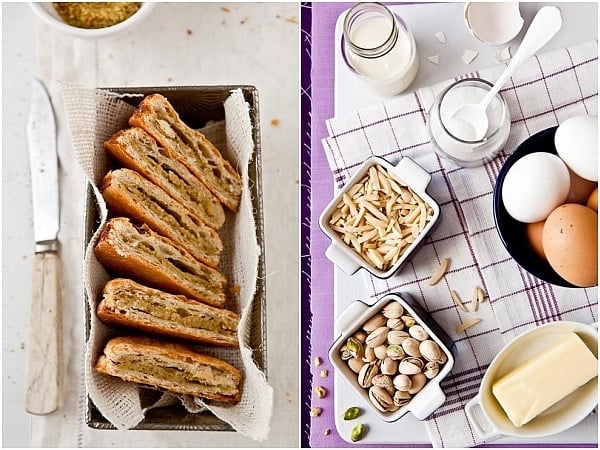
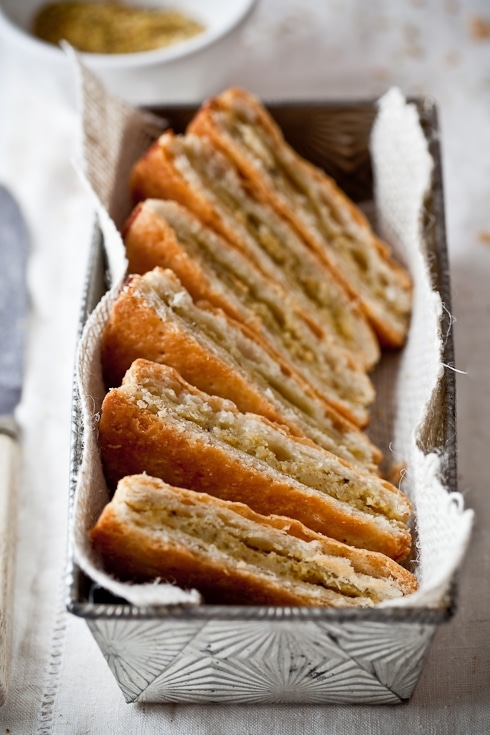
The most traditional filling for these tarts is almond frangipane (almond cream) but it’s never a bad thing to change things up so this time around I replaced half the almonds with pistachios and it could well be my favorite flavor so far for these. I used tart rings to form and bake them so the filling would stay neatly encased but you can most definitely make these free form as long as you keep careful to seal the edges tight.
I prepared and baked the tarts, set the tray to cool on the countertop and just starting giggling like a child. It came to absolutely no surprise to my dear husband that I completely forgot to sneak inside that little ceramic trinket designating the King or Queen of the day. I declared him King anyway and we happily cut into a warm frangipane galette right away.
Twitter people might already know this but I must tell you of an awesome event planned by Jen, event planner extraordinaire and writer of the blog Devour The World, Rachael of La Fuji Mama and Gaby, personal chef and author of What’s Gaby Cooking. They have arranged to fly me out to Los Angeles and secure enough space and time for me to teach two macarons classes at the Academy of Culinary Education on Friday March 5th and Saturday March 6th. Zoink!
So, if you live in the area and have always wanted to know how to bake the perfect macaron here is your chance to do so in a professional but relaxed atmosphere. I just can’t wait to be there and be able to help 1 on 1. Come join us! Please email Rachael rachael{at}lafujimama {dot}com for all the details as I hear both classes are filling up rather fast. Working also on another surprise for that trip…
Thanks for the positive feedback on giving out the recipes in both English and French. Starting with a salad was quite easy and I almost said "forget it" when I realized I would have to translate a recipe for puff pastry on this post but there it is after the jump!
Have a great weekend! Galette Des Rois:
Makes four or eight 4-inch tarts
Notes: I hope you’ll try your hand at puff pastry soon. It sounds harder than it is. Really. But I understand and you can get very close by using a simpler Rough Puff Pastry.
For the puff pastry:
3 cups (420gr) all-purpose flour, plus more for work surface
3/4 cup (105gr) cake flour
1 1/2 teaspoons salt (7 gr)
4 tablespoons (60gr) unsalted butter, cut into 1/2-inch pieces, well chilled
1 1/4 cups (300ml) icy cold water
1 tablespoon (14gr) all-purpose flour
1 3/4 cups (3 1/2 sticks)(405gr) unsalted butter, well-chilled
Make the dough package:
In a large mixing bowl, combine both flours with the salt. Scatter butter pieces over the flour mixture; using your fingers or a pastry cutter, incorporate butter until mixture resembles coarse meal.
Form a well in center of mixture, and pour the water into well. Using your hands, gradually draw flour mixture over the water, covering and gathering until mixture is well blended and begins to come together. Gently knead mixture in the bowl just until it comes together to form a dough, about 15 seconds. Pat dough into a rough ball, and turn out onto a piece of plastic wrap. Wrap tightly, and place in refrigerator to chill 1 hour.
Make the butter package:
Sprinkle 1/2 tablespoon flour on a sheet of waxed or parchment paper. Place uncut sticks of butter on top, and sprinkle with remaining 1/2 tablespoon flour. Top with another sheet of paper; using a rolling pin, pound butter to soften and flatten to about 1/2 inch. Remove top sheet of paper, and fold butter package in half onto itself. Replace top sheet of paper, and pound again until butter is about A inch thick. Repeat process two or three times, or until butter becomes quite pliable. Using your hands, shape butter package into a 6-inch square. Wrap well in plastic wrap, and place in refrigerator until it is chilled but not hardened, no more than 10 minutes.
Assemble and roll the dough:
Remove dough package from refrigerator, and place on a lightly floured work surface. Using a rolling pin, gently roll dough into a 9-inch round. Remove butter package from refrigerator, and place it in the center of the dough round. Using a paring knife or bench scraper, lightly score the dough to outline the butter square; remove butter, and set it aside. Starting from each side of the center square, gently roll out dough with the rolling pin, forming four flaps, each 4 to 5 inches long; do not touch the raised square in the center of the dough. Replace butter package on the center square. Fold flaps of dough over the butter package so that it is completely enclosed. Press with your hands to seal.
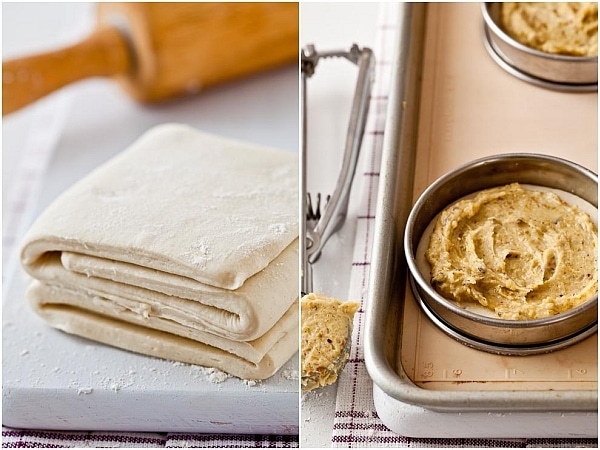
Using the rolling pin, press down on the dough at regular intervals, repeating and covering the entire surface area, until it is about 1 inch thick. Gently roll out the dough into a large rectangle, about 9 by 20 inches, with one of the short sides closest to you. Be careful not to press too hard around the edges, and keep the corners even as you roll out the dough by squaring them with the side of the rolling pin or your hands. Brush off any excess flour. Starting at the near end, fold the rectangle in thirds as you would a business letter; this completes the first single turn.Wrap in plastic wrap; place in refrigerator 45 to 60 minutes.
6/ Remove dough from refrigerator, and repeat process in step 5, giving it five more single turns.Always start with the flap opening on the right as if it were a book. Mark the dough with your knuckle each time you complete a turn to help you keep track. Chill 1 hour between each turn. After the sixth and final turn, wrap dough in plastic wrap; refrigerate at least 4 hours or overnight before using.
For the frangipane filling:
1 stick (110 gr) unsalted butter, at room temperature
1/2 cup (100 gr) sugar
1/2 cup (50 gr) ground almond
1/2 cup (50 gr) ground pistachios
2 eggs
1/4 cup (60ml) heavy cream
Place the butter, sugar, almond powder and the eggs in a large bowl and whisk until smooth (can also be done in a food processor). Add the cream but stir in it instead of whisking so as not to emulsify it or it will rise while baking. Refrigerate for at least an hour.
To assemble the tarts (4 at a time).
Divide the dough in half and keep one half refrigerated.
Preheat the oven to 350F and line a baking sheet with a piece of parchment paper or a silpat.
Roll the puff pastry to about 1/4 inch thick on a lightly floured countertop. Using a 4 inch tart rings, cut out 8 rings into the dough. Place four dough circles into 4 tart rings. Top with about 2 tablespoons of the frangipane filling. Top with 4 dough circles and seal the edges well by pressing your fingertips inside the rings onto the dough edges.
If you wish to use the rest of dough and filling right away, just repeat those steps or you can refirgerate both for a week or freeze for up to 3 months and thaw overnight in the fridge.
Bake for about 20-30 minutes or until the tarts are golden brown.
————————————————————————————- Le P’tit Coin Francais:
Pour 4 a 8 tartes.
Pour la pate feuilletee:
420gr de farine
105gr de farine a gateau (fine)
7gr de sel
60gr de beurre non sale, tres froid et coupe en petits des
300ml d’eau tres froide (glaciale a la limite)
405 gr de beurre non sale bien froid
Faire le paton:
Dans un grand bol. melangez les deux farine et le sel. Ajouter le beurre et servez vous de vos doigts ou de deux fourchettes pour incorporer le beurre au farines jusqu’a ce que le melange ressemble a de gros grains de sable.
Formez un puit au milieu et ajoutez l’eau. A l’aide de vos mains, commencer a ramener la farine vers l’eau jusqu’a ce que la masse devienne homogene. Ramassez la masse en boule assez vite de facon a petrir le moin possible. Couvrez d’un linge ou de film plastique. Refrigerez la pate pendant une heure.
Faire le bloc de beurre:
Saupoudrez une feuille de papier sulfurise avec la moitie de la farine restante. Deposez-y le beurre et saupoudrez du reste de farine. Placez une 2eme feuille de papier sulfurise au dessus du beurre et avec votre rouleau a patisserie, frappez le beurre de facon a le ramollir et l’aplatir sur une epaisseur de 1.5cm environ. Levez la feuille de papier du dessus, et a l’aide de celle du dessous, rabattez le beurre sur lui meme. Remettez la feuille de papier au dessu et recommencez l’operation 2 a 3 fois jusqu’a ce que le beurre soit bien maleable. A l’aide de vos mains et en vous aidant des feuilles de papier, formez un carre de beurre d’environ 15cm. Refrigerez le pendant 10 minutes (pas plus).
Assembler la pate:
A l’aide de votre rouleau a patisserie, etalez la pate en un cercle de 23cm de diametre. Placez le beurre au centre du cercle et a l’aide d’un couteau fin, deligner l’emplacement du beurre sur la pate, sans faire de coupure directement dans celle-ci. Enlevez le beurre et mettez le de cote. Demarrez de chaque cote du carre et roulez la pate pour obtenir 4 grandes oreilles d’au moins 10 a 12 cm de long. Vous devez obtenir un petit carre plus epais au centre de cette facon. Placez y le beurre et rabattre les oreilles dessus. Pressez du bout des doigts pour bien enfermer le paquet de beurre.
Etalez la pate a intervals reguliers de facon a bien distribuer le beurre jussqu’a ce que la pate soit de 2cm d’epaisseur environ. Farinez votre plan de travail si necessaire au fur et a mesure. Etalez la pate en un rectangle de 23 cm de large et 50cm de long, en gardant le cote de plus court pres de vous. En partant a peu pres du milieu, pliez la pate en trois de facon porte-feuille. (1er tour) Refrigerez la pate pendant 45min a 1 heure.
Apres ce premier temps de repos, repetez l’operation 5 fois de plus pour un total de 6 tours. Refrigerez entre chaque tours au moins une demi heure. Une fois le dernier tour effectue, refrigerez la pate pendant au moins 4 heure, toute la nuit si voud pouvez.
Pour la frangipane:
100 gr de beurre non sale, et a temperature ambiante
100 gr de sucre
50 gr d’amamde en poudre
50gr de pistache en poudre
2 oeufs
60ml de creme entiere liquide
Dans un bol, melangez au fouet le beurre et le sucre jusqu’a ce que le beurre soit pale et aere. Ajoutez les amandes et melangez. Ajoutez les oeufs un a un et bien melangez au fouet. Ajoutez la creme et donnez quelques coups de fouet ou de spatule pour rendre le melange homogene.
Assembler les galettes:
En supposant que l’on se sert de 4 cercles a tarte individuels a la fois.
Prechauffez le four a 350F/175C. Preparez une plaque de cuisson avec une feuille de papier sulfurise.
Quand la pate feuilletee est prete a etre utilisee, divisez la en deux, gardez une moitie au refrigerateur et etale l’autre moitie sur un plan de travail legerement farine. Servez vous de 4 cercles a tartelette de cm de diametre et decouper 8 cercles. Deposez un cercle dans chacun des cercles. Deposez une grosse cuilliere de frangipane. Ajoutez un cercle de pate et du bout des doigts fermer bien les bords. Laissez les tartes dans les cercle, et les placez delicatement sur votre plaque de cuisson. Repetez l’operation avec le reste de pate et de frangipane.
Faites cuires les tartes pendant 20 a 30 minutes jusqu’a ce que le dessus soit bien dorer.