
friends

Around The World In 100 Cookies: Field Guide To Cookie Book Tour

Viennese Crescents


Here is another post in the series "When blogging become much more than just blogging". I am loving the extra dimentional relationships formed and cultivated through blogging and when Anita asked a few of us to take her first released book "Field Guide To Cookies" on a virtual tour, I literary smiled from ear to ear. Anita is a sweetheart, a terrific baker, a great friend, a fellow Daring Baker (we hosted the Saint Honore challenge together), and an extremely talented writer. Indeed, no one can describe flavors and textures as well as she does. Trust me. Head over to her blog, Dessert First and then tell me if you did not get lost in the fold of a sweet pie or the silkiness of an ice cream.

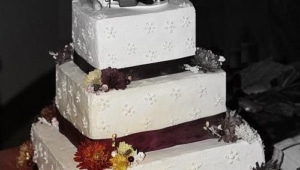
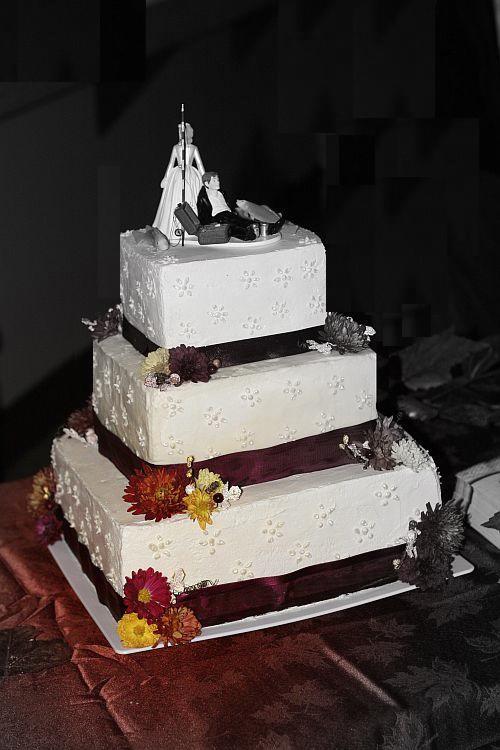
It just happened that Anita asked us to take her book on a tour at the same time that I was completing the Princess Torte assignment for Desserts Magazine and the editor mentionned that the next issue would be on cookies. Ha! "Well…I am just getting this nifty pocket book filled with 100 recipes of cookies from all over the world. I am sure I can come up with something!" And I sure did! Viennese Crescents, Indian Cookies, Algerian Almond Tarts, Dark Chocolate Crinkles (I won’t post the recipe as you can see on another host’s blog, Sara from Ms. Adventures In Italy), Pecan Sandies and Turtle Bars were made and devoured by the neighbors and us in a mere couple of weeks. They went so fast that I did not have the chance to take a picture of the Turtle Bars…they were going faster than I was cutting them!

“The Field Guide To” is a fun and informative series on how to master almost anything in the kitchen from meat to cocktails and now cookies. The whole format behind the series is to have a booklet full of information on how to achieve the perfect cookie, every time, whether you are a novice baker or a seasoned one. The book is divided into four chapters: drop cookies, bar cookies, molded cookies and rolled cookies. The notes on the perfect cookies and baking tools are perfect for beginners in the kitchen, giving them detailed explanation of what usually goes wrong in cookie making. The pocket size format makes it easy to have it around the kitchen and out on the counter top almost all the time. I like the fact that I can carry Anita’s recipes with me on weekend escapades, family gatherings or friends and have a delicious recipe to prepare for them!
Knowing her care for details and wonderful writing skills, this book went beyond all expectations I had. Each recipe is so much more than just a recipe. It starts with a general description that reads more like a history lesson then just a description of taste and texture. All the recipes have a nifty little coding system making it easy to know where you are in the recipe: prepping, mixing, baking, storing, etc… I was so happy to be able to test Anita’s recipes and have a copy of her book that I asked her if she’d be ok answering a few questions that popped in my head while I was baking. Here are a couple to get your appetite going. For the rest of the interview, check the next issue of Desserts Magazine coming out next week.

Dark Chocolate Crinckles


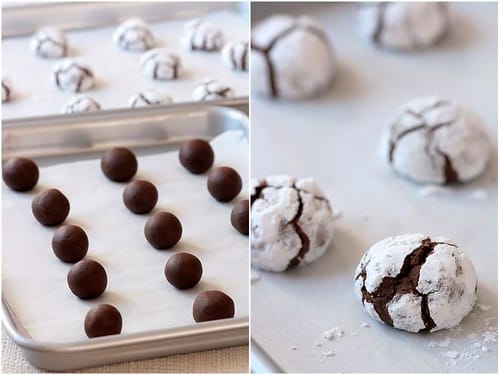
Dark Chocolate Crinkles – Before and After

Tartelette: As the introduction states it, this book is about more than just cookies, but also tea cakes and small bites. How did you decide which ones would make it into the book?
Anita: Even though 100 cookies sounds like a lot, it was tricky to decide which ones would make it and which ones would be cut. My editor and I wanted to cover as many styles of cookies as possible, and include ones that maybe many people had not heard of. On the other hand, since the book was primarily targeted for a North American audience, we needed to include many of the classics familar to most people and not scare them away with too many strange and unknown cookies. I hope I found a balance between many traditional favorites like chocolate chip and oatmeal raisin, but also the more exotic and international, like macarons and pizzelles.

Tartelette: Which aspects of the writing experience did you like best? Baking, testing, researching?
Anita: I really enjoyed researching the cookies. Since this cookbook is a little different than most other cookbooks with the longer entries, I needed to do a lot more research than just looking up recipes: I needed to find out where the cookie had originated, who first made them, how it evolved through time. I definitely boned up on my world history doing research on this book! Of course, I also enjoyed testing the recipes – my one biggest wish is that I had more time to test the recipes, because you always think of something else to tweak that might turn the recipe from good to fantastic! I had a great team of recipe testers to help me out, although sometimes I wished I had their job and could just bake all day, forget about the research and writing parts!
To be continued…

Viennese Crescents


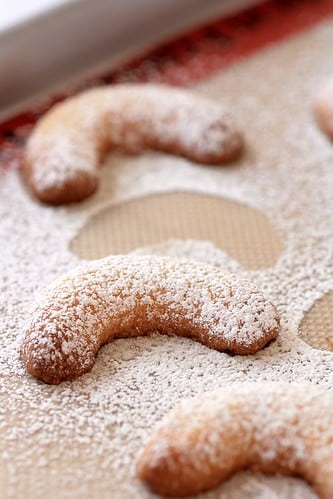
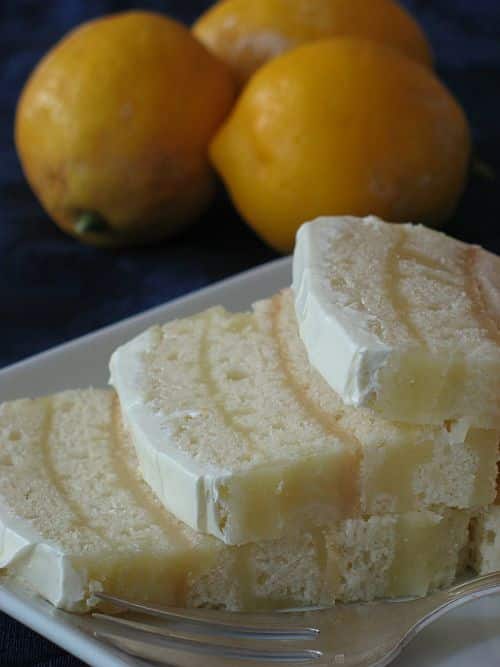
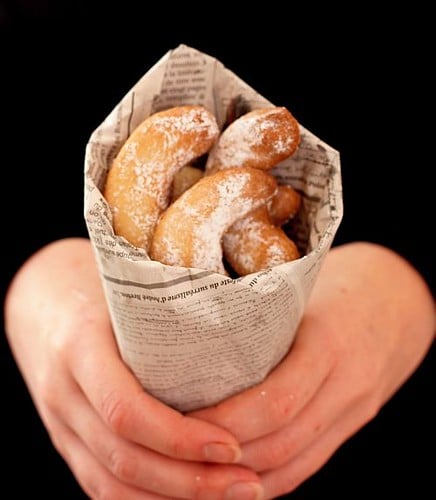
Viennese Almond Crescents, (reprinted with permission of the author)(first picture also)
Makes about 2 dozen cookies

1/2 cup ground almonds
1/2 cup confectioners’ sugar
1/2 cup softened unsalted butter
1 1/2 teaspoon vanilla extract
1 teaspoon almond extract
1 cup all-purpose flour
1/8 teaspoon salt
1/2 cup vanilla sugar (I used powdered sugar), for coating

Sift together the ground almonds and confectioners’ sugar in a bowl.
In a stand mixer, beat butter on medium speed for several minutes until smooth.
Add in the almond mixture and mix until combined. Add in the vanilla and almond extracts and mix until combined. Add in the flour and salt and mix on low just until combined and the dough starts clumping together.
Turn dough out onto a piece of plastic wrap, wrap tightly, and chill for about 20 minutes.
When you are ready to bake the cookies, preheat the oven to 350°F. Line a few cookie sheets with parchment paper or silicone baking mats.
Form dough into 1-inch balls. Roll into a log and curve the ends to make a crescent shape. Place on cookie sheets about 1 1/2 inches apart.
Bake for 8 to 10 minutes, rotating sheets halfway through; the edges of the cookies should turn light brown but the tops should not get too dark. Cool sheets on wire racks for about 4 to 5 minutes. While they are still warm, roll cookies in the vanilla sugar to coat. Let them finish cooling on wire racks. They are best enjoyed the day they are made, but you can store them in an airtight container between sheets of wax paper for 2 weeks.

Algerian Tarts


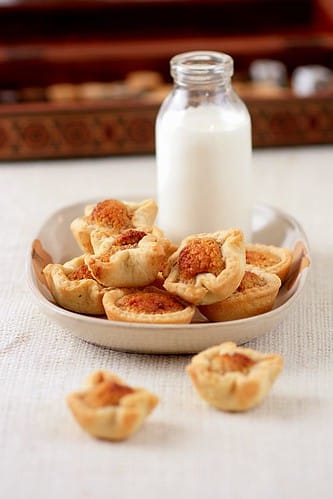
Algerian Almond Tarts, (reprinted with permission of the author).
Yield: About 2 1/2 dozen cookies

Pastry:
2 cups all-purpose flour
1/4 teaspoon salt
1/2 cup unsalted butter, melted
2 eggs
2 tablespoon rosewater or orange flower water
1 teaspoon lemon juice

Filling:
3 cups sliced almonds
1 1/2 cups sugar
2 eggs
1 1/2 teaspoons lemon zest
2 teaspoons rosewater or orange flower water
1/2 teaspoon vanilla extract

Topping:
1/2 cup honey
Pine nuts (optional)

Preheat oven to 350°F. Lightly grease a few cookie sheets or line with silicone baking mats.
In a stand mixer, combine the flour and salt. With the mixer running on low speed, gradually add butter, egg, vanilla, rosewater, and lemon juice. Mix for a few minutes until dough is smooth. Cover dough with a damp cloth and set aside while you make the filling.
Using a food processor, grind almonds and sugar to a fine meal. Add eggs, lemon zest, rosewater, and vanilla and process until all ingredients are evenly incorporated.
Roll out dough to about 1/16” on a lightly floured surface. Using a 2 to 3 inch cookie cutter to cut out circles from the dough.
Drop tablespoonfuls of filling into the center of each circle. Wet fingers with water and pinch the dough together into four corners, forming a cup around the filling. Or, if you have a mini muffin tin or other small molds, you can fit the dough circles into the molds and fill about 3/4 full with the filling.
Place tarts on sheets. Bake for 20 minutes, rotating cookie sheets halfway through until filling begins to brown and the cookies are a light golden color.
Remove sheets from oven and place on wire racks. Drizzle honey over each of the tarts. Let tarts cool on sheets before serving. Store in an airtight container for up to 1 week.

Indian Cookies


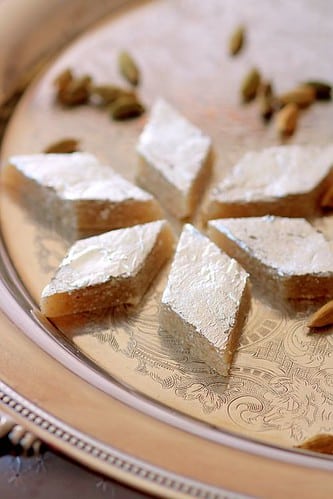
Indian Almond Cookies, (reprinted with permission of the author).
Makes about 3 dozen cookies

2 cups blanched almonds
2 tablespoons milk (I did have to use 2 extra tablespoons because my dough was really dry)
1 3/4 cups sugar
1/2 teaspoon cardamom powder
Silver foil

In a food processor or blender, grind blanched almonds to a fine powder. Add milk and mix until a smooth paste is acquired.
In a heavy saucepan, combine the paste, sugar, and cardamom at medium-low heat, constantly stirring to avoid burning; stir 8 minutes or until a lump of dough is formed.
Spread the dough onto a lightly greased jelly roll pan or baking dish, flour or grease a rolling pin, and and gently roll the dough to approximately 1/4 inch thick. Apply silver foil and press slightly with the foil’s paper packaging or a paper towel so that the silver adheres to the dough.
As the dough cools, its texture resembles that of marzipan. Once it has completely cooled, cut it into 1–2 inch diamond shapes. They will keep up to 1 week if sealed in an airtight container.

Pecan Sandies

Pecan Sandies, (reprinted with permission of the author) Perfect for Christmas!
Makes 2-3 dozen

1 1/2 cups pecans, toasted
1/3 cup confectioners’ sugar
1/3 cup light brown sugar
1 1/2 cups all-purpose flour
1/4 teaspoon salt
3/4 cup plus 2 tablespoons cold unsalted butter
1 egg
1/2 teaspoon vanilla extract
About 30 pecan halves for decorating

Kitchen Note: the day I made these we had 100% humdity so my dough never got firm enough to even roll into a log and I ended up doing drop cookies instead. Turned out perfect.

Grind pecans and sugars together in a food processor until the nuts are finely ground. Add in the flour and salt and process until combined. Cut the butter into small pieces and scatter over the mixture in the food processor. Process until the mixture resembles coarse crumbs.
Add egg and vanilla and process until the dough comes together.
Turn dough out onto a piece of parchment paper or silicone baking mat. Roll out to about 1/4 in thick. Sprinkle the dough with a little flour if it gets too sticky.
Cover the dough with plastic wrap and chill in the refrigerator for about 1 hour or until firm.
When you are ready to bake the cookies, preheat the oven to 325°F. Line several cookie sheets with parchment paper or silicone baking mats. Using a cookie cutter, cut out cookies from the chilled dough, about 2 inches in diameter. Place a pecan half in the center of each cookie.
Bake for 18 to 20 minutes or until the edges of the cookies turn golden brown, rotating cookie sheets halfway through. Cool cookie sheets on wire racks for a couple of minutes before transferring cookies directly onto wire racks with a spatula to finish cooling.Store in an airtight container for up to 1 week.

Do not miss the entire tour which you can follow as the book travels around the world:
Nov. 11th – Jen of use real butter
Nov. 12th – Ari of Baking and Books
Nov. 13th – Sara of Ms. Adventures in Italy
Nov. 14th – Ivonne of Cream Puffs in Venice
Nov. 17th – Tartelette
Nov. 18th – Veronica of Veronica’s Test Kitchen
Nov. 19th – Aran of Cannelle et Vanille
Nov. 20th – Bea of La Tartine Gourmande
Nov. 21st – Peabody of Culinary Concoctions by Peabody

My Best Friend’s Wedding

My Best Friend's Wedding


Never in my wildest thoughts would I have imagined forming such a strong relationship with somebody met online. Yet, over the past two and a half years, Lisa has become just that: my bestfriend. I would have done (almost) anything, even singing badly at the corner bar to pay for my fare. No way I was going to miss that. They had decided to cater their own wedding and we quickly started exchanging emails about the how’s and what’s of the project. She mentionned getting her wedding cake from a bakery she liked and my first thought was "Yeah! I get to be in the wedding instead of baking for it!". My second thought was "Geez! I could save them so much money if I did it myself!" It would be my wedding gift and yes, that’s how it all got started.

Since I was baking for a close friend, at her house, right there in the middle of 6 other women preparing all the food, I expected something to go wrong. And it did….to a small extent since nobody saw it, but it was staring me in the face everytime I was working on the layers. Hence my constant "spatulating"….to say that the cakes got enough "massage" time is an understatement. I remember Lisa’s friend Kim stopping her work to stare at me with that look of "OMG, you’re patience is without limit, you are kind of loopy though". Yes, I was loopy (wouldn’t you be after a few nights with a 5am bed time?) and yes, I have endless patience.

It all started just fine really. We had trouble finding the right pan size but that is nothing that can’t be fixed so instead of doing a 12 inch – 9inch – 6 inch tiered cake. We bought one 12 inch pan for the bottom, I used one of Lisa’s 8 inch square for the middle and trimmed another 8 inch into a 6 inch for the top. I started at 4pm on thursday and I turned the oven off at 2am…10 hours of oven time. Yeehaaww! While the cakes were baking, I was doing other things like the fillings, the buttercream, getting the next batches ready, making sure they would all stack to the same height, etc…. I made all the buttercream I needed that same night to free some room in the kitchen for Friday’s savory preps. Kelly, Lisa and I marveled how gorgeously silky and soft it was, pure white…I just wanted to kiss it!

By 10am the next day, I just wanted to kill it…well, not all of it….It got really humid and rainy that night and one batch of buttercream (and I am not talking 2 cups here…think industrial quantities!!!) was breaking, terribly, but I doctored it and moved on. Murphy’s Law: out of time, out of room and as I went to apply it to the middle tier, it broke on the cake…not as bad as in the mixing bowl and everybody was saying it looked fine….but if you have been in charge of a project you cared for deeply, you will understand why all the imperfections of that middle tier just kept staring me in the face (and it’s not like I don’t know my way with Mrs. Buttercream!), I had no option but to keep going. I proceeding with the decorations with a pinch in my heart…I hated it. It was not until I took it to the reception hall and started putting the ribbon and flowers around it that I got excited again. W. was there helping out and when he saw it coming together, he got all tiery eyed. I let out a big sigh of relief. Lisa had seen the baking and building but I was keeping the final decorations out of her sight, for the real moment of surprise later. I think it worked, she said it did. Except for the ribbon that started to bubble because of the humidity in the walk-in refrigerator where the cake was waiting next to a small water leak. Murphy’s Law….again!

Before I proceed with a little explanation of the picture below, let me recap the tiers for you and run down a fun list:
– bottom tier: carrot cake with cream cheese frosting
– middle tier: pumpkin cake with butterscoth filling
– top tier: dark chocolate cake with vanilla buttercream
– the whole cake was covered with the same buttercream.
– ten hours of oven time, 7 pounds of butter, 11 pounds of sugar, 43 eggs, 16 cups of grated carrots, 3 batches of carrot cake, 3 batches of pumpkin cake, 5 batches of chocolate cake (2 of those were used to make chocolate cupcakes), 2 batches of cream cheese filling, 2 batches of butterscoth filling.
– Sleep on the plane back home: priceless….

Sorry if the quality of the pictures is touch and go but I borrowed from three different people what I needed to illustrate the "making of" the cake. No set ups…almost real life feed. I had brought minimal equipment and lenses and left my flash gear at home (doh!). I did have to doctor the cake picture by brushing off a garbage can that was right behind it, one arm and a couple of wires. Hopefully you get a good feel of how interesting those 5 days were at Casa Lisa!!

Photobucket


Once the layers are cut, the buttercream is applied in between each, then the cake is stacked and waiting for a little coating.

I am only showing you one tier and not all of them because it is just a matter of repeating the same steps for each layer.
Tip: To prevent your cake from forming a dome and having to level each layer, lower your oven temperature. I baked all the cakes at 340F instead of 350F and did not have to level any of them (I did however cut a small layer off for Lisa to sample!).
Tip: make sure to clean as you go and have plenty of cardboard to move your cakes around. Cut your cost like I did by recycling shipping boxes which work just as well as specialty made cake squares or rounds. I did however bought the final cake boards in the exact dimensions I needed as they are less thick and better looking for the finished product.

Photobucket


The cake gets a first "crumb coat", a thin layer of buttercream is applied all over then the cake gets refrigerated until the buttercream is hard. This prevents cake crumbs from mixing into your final buttercream coat. Simple 5 petal "flowers" are randomly piped on each side.

I don’t always crumb coat cakes but when it comes to wedding cakes or party cakes, I automatically do. It really traps all the crumbs from getting into your buttercream as you spread it on the cakes. Cover with a thin and relatively smooth layer but do not worry about it being even or perfect. It is going to get covered anyway.
Tip: apply large dots of buttercream to the sides and play a connect the dots game to spread the buttercream evenly as you run your spatula over the sides and top.
Tip: if you have uneven corners or edges, do not worry. Refrigerate the cake until the buttercream is hard and work with your spatula dipped in hot water and wiped dry to smooth things out.

Photobucket


The cake is all decorated with piped flowers then refrigerated until the buttercream gets hard so it will be easy to paint on the flowers later on. I trimmed one layer of the cake for a visual of what the final layer would look like. Also gave Lisa an idea of where on earth I was headed!!

Before piping the flowers, I ran the ribbon around the cake to mark its height and I stopped piping the flowers right above that line. Saves you time and assures you that the ribbon will stay nice and flat…usually (read above).
Lisa made me happy by choosing a very simple piping design since I had told her how much I disliked buttercream flowers and roses. I don’t dislike seeing them, I dislike making them…to each his/her own.

Photobucket


White pearl dust is mixed with small amount of clear vanilla extract to make a semi liquid paste, then each flower gets painted over with it to add a little shimmer to the final cake.

I used the same shimmer dust from Wilton I used to paint on the Poire D’Eve cake, but in pearl white which came out slightly lighter than silver and added the perfect accent to the cake.
Tip: use clear vanilla or another clear alcohol (type vodka) to form a paint and add more as it dries as you paint..or talk.

Photobucket


Each cake layer gets a trim with a purple ribbon (thinner at the top layer for optical effect), fresh mums and artificial frosted berries, twigs and leaves are applied at each corner. Finally the cake topper gets positionned on the cake and Helen lets out a deep breath.

Since the theme of the wedding was Fall Extravaganza, the hall and tables were decorated with fresh mums of the most beautiful shades and I had a lot to chose from the ones not used for the room. I accented the flowers with artificial frosted berries, twigs, etc…cut from a wreath bought at a craft store that I cut apart.Since the flowers were positioned just a couple of hours before serving I just soaked the stems in water to hydrate them well and clean them up.
Tip: if you use fresh flowers on a cake that remains at room temperature for a long time in the middle of summer, use specialty made tubes that you fill with water and stick in the cake.

Photobucket


Homemade wedding cake topper: the bride dragging the groom was cute but plain, so Lisa had a friend glue on the "gone fishing" trunk, the beer cans and the fishes were just positionned on the buttercream. Fresh mum and berries details on the right.

The topper was flat so I just set it on the cake with a dab of buttercream on the bottom but that was not even necessary. Depending on what topper you chose, you can secure it with buttercream or toothpicks, extra flowers, etc… Do not be afraid to get crafty and make your own if you don’t find excatly what you need, like Lisa did.

Photobucket


As it is customary, the top layer was set aside for Lisa and Wayne’s first anniversary. Double and tripled wrapped in their freezer. Display of macarons sent by Veronica. Love those distressed cake stands!!

So, taking the top tier off may not be the cleanest or easiest job to do but it came off without a hitch (Murphy had to much to drink and left us alone!).
Veronica from Veronica’s Test Kitchen took time out of her busy baking and selling schedule (check out her online store!!) and sent Lisa 8 dozens macarons (I think, I lost track after the 5th box) to add to the dessert table and they were all gone (except for the bridal dozen) by the end of the evening. Who would not jump on passion fruit-milk chocolate, rose buttercream and salted butter caramel?!!!

Photobucket


16 cups of freshly grated carrots went in the cake…See, it was healthy after all..hmmhmm. My bridesmaid bouquet.

Not much to add there except that all the flowers and bouquets were exquisite and perfectly arranged for a Fall wedding.


I turned the cake pictures into black and white ones with a color focal point to minimize the glare from the flashes as about 20 people were taking the same pictures at the same time.

A Year In Posts


I always admire people who send out Christmas or New Year’s newsletters and tell you all the wonderful, funny or tragic details of the year past. I keep feeling nothing major happened in my life but I start thinking about things and quickly realize that I am far from the truth. Starting at home, there is never a dull moment, whether it be due to our different cultures and customs or whether it be because of our age difference, B. and I surely know how to keep ourselves entertained…!

Then there is this blog. It has given me so much in the past year that I wanted to remember the good and sad moments, the friendships and mind blowing events I have experienced. I did this post a little selfishly to have a reference of this past year but I also wanted to highlights for you guys the moments of 2007 that make this blog what it is today and I could not do it without your readership.

January 2007: After a wonderful 3 weeks back home in France it was hard to get myself back in the groove. I had tasted so many delicious pastries and foods that I felt kind of lame in my little kitchen. It made me miss restaurant work (and trust me I itch for it everyday but not in this town!). One way to quickly snap out of it was by making creamy delicious Chestnut Mousse.

February 2007: Month of all things Valentine reds and rosy pink, little did I know that by sending Ivonne a Valentine’s card that she would try to seduce me with a cake. Mr.Tartelette still does not quite get it! It was also the month I finally made the most fat laden lemon cream filling by bloggers’s sugar daddy Pierre Herme, and this most excellent Nutella Mousse with Macarons.

March 2007: It was “step out of your comfort zone” for me. First,inspired by Marce I had the brilliant (sarcasm) idea to put Dulce de Leche in brioche rolls…talk about gooey sticky mess all over my counter top, apron, and pan! I then experience with sweet avocado cream and meringue. I still can’t get people to trust me on that one, but one bite and they are sold. Then there was the Sunflower bread, time consuming but delicious. Lastly, I won my first “competition”, HHDD hosted by less evil twin Peabody, with a Japanese style cheesecake served with Salted butter Caramel sauce. Surprised, elated…happy ya’ll deemed it worthy!

April 2007: As the winner of HHDD I got to host my first blog event and what a thrill that was! I loved every minute of it, the energy and high of hosting! Then there was the ever notorious Daring Bakers’ Chocolate Cr(a)epe cake challenge. I got in touch with my inner caramel diva but the whole thing made me curse the Martha! Poor Brilynn for calming our frustrations! That month I also professed my love for another sugar daddy, Richard Leach and made my best macarons to date (according to the people who ate them) Blood Orange Macarons. I also started to give you guys serious hints about my love for verrines and all things that are small and can be put in a glass.

May 2007: Definitely a bittersweet month. By participating in the Livestrong event, hosted by Barbara, one of the nicest bloggers around (and she is so good to me) I experienced with a sweet creations while remembering the loss of my grandmother and brother to cancer. Blog surfing one day, I met Kate from Applemint and we realized we had the same birthday and decided to blog bake a cake for each other to mark the occasion. May was very related to home and family, clafoutis, ile flottante but I was obviously as serious with my ice cream making!! Oh, and more caramel by hosting my first Daring Bakers challenge with Anita, one of my first reads before I started blogging. Meeta also trusted me enough to ask me to write articles for The Daily Tiffin, and it is a pleasure to be able to motivate people.

June 2007: What did not start as great month turned out to be the one of the most heart fulfilling ones after all. Blogging friends came numerous to cheer me up after a loss in my family with notes, cards, emails, and presents, every single day there was something wonderful and magic at my doorstep. Celebrating friends’birthday or blogging event provided great times in the kitchen. Putting our favorite candy in macarons was also one of the highlights of the month. The other one being winning DMBLGIT for the first time with this spur of the moment picture.

July 2007: Finally meeting Lisa was definitely “it” in July. To put it in her words, finding this bestest friend was quite unexpected but fills me everyday with joy and laughter…oh boy do I hold my ribs when opening my emails! Thinking outside the box and using bubble wrap in unusual ways was also another fun moment that she pushed me to do when I was not sure it would turn out ok. Starting a fun world wide event with Hannah and her cutest crochet eggs (not bad for a vegan!) was a way to get more bloggers involved to reach across the miles…I am dying to know where are the eggs now!

August 2007: Definitely a family month for me. My goddaughter came to the US for the first time and we had a great time both in the kitchen and in the city. It made me realize how many American things and habits had become "mine" and how many traditions I still had from home. Macarons and cakes were made many times, as well as cute cupcake cones and delicious caramel chocolate tarts! I was the cool godmother, woohoo!!

September 2007: I became a Brownie babe, with a cool apron to show for it!! My parents came for a while and I had to adopt our favorite treat due to their diet restrictions, but this month was particularly enhanced thanks to gorgeous gifts from other bloggers dear to my heart. Mary and Elle, I cannot thank you enough for the boxes of Meyer lemons and quinces that helped me bake tasty treats for those around me. When the craziness of the holidays calms down a bit you’d better stay close to your mailboxes.

October 2007: Wow! Another DMBLGIT award and I have to thank my mom for that one because my Daring Baker’s sticky buns look much better with her frames as the background! I enjoyed playing with my blowtorch and pretend it was Fall while carving some pumpkins. I went to see Lisa for the second time, and was joined by Mary who really went out of her way with the flight situations. We had a wonderful time, baked up a storm and while I was there I copied so many recipes from a magazine Lisa had that I am surprised I only made this cake so far!!

November 2007: All about friends and pies and buns again! I tried new flavors and food, such as dried hibiscus flowers, but also reminisced about my late grandmother and her great tarts. Coconut cream pie looked mighty deconstructed and prettier thanks to a long time friend while cranberry and nuts tart became a new Thanksgiving favorites. The cross states cinnabon knockoff adventures made up a sick day turn into play day thanks to Mrs. Sassy herself. Then Tanna asked me to cover myself in sticky dough and I could not refuse!

December 2007: This month finally sealed my addiction for cinnamon rolls and unusual macaron flavors. It was also the month to celebrate other’s holidays as well as my own traditions. I was the lucky recipient of a pay it forward package and I am dying to send one to Sarah to continue the chain, as soon as I get her mailing address. It was all about the friends who become family and good times. Cream became the definite flavor this month and I might have a couple more up my sleeve to start the New Year. Stay tuned!

Well, there you have it….my blogging year in a nutshell. What a wonderful year 2007 was! I plan on continuing to share the love with you guys in 2008 and keep improving my recipes, pictures and writing. Thanks for your comments, questions and readership, they mean the world to me!

Happy New Year!

Paying It Forward: You Might Be The Lucky One


There is a game going around the blogosphere these days called "Pay It Forward". It looks like it started as craft exchange and slowly made its way into food blogs. Last month Graeme from Blood Sugar found himself the lucky recipient of a goodie package from Fanny and decided to pay it forward by having a little drawing of his own, and my name got picked…Yeahhh!!! On a side note, if you have never visited his blog, run to it people: amazing photography, delicious recipes and a wicked sense of humor!

I received my package last Thursday and dare I say we already made a good dent in it! While exchanging emails with Graeme, I heavily hinted that I had a thing for Flake candy bars crossing my fingers that he would include one in the box. Lucky me, he put two: one praline and one dipped. There 's one missing in the picture, I know, talk to my stomach about that one! He also included a jar of onion confit that was delicious with roasted pork tenderloin last night. There was also a little square of tahini based "halva" . Seems like the lady in the shop where he was would not let him leave without it, and it turned out to be pretty good. B’s favorite was the foam shrimp candy, it reminded him of the foam peanuts of his childhood, and I believe I only had a couple before the bag found its way into his desk drawer…hugh…!
Last but not least, he included two very cute wooden cats, labelled as "ring holders' from his mother’s favorite craft shop. What a sensitive guy!

Thanks Graeme for everything. There is something really heartwarming about receiving a package whatever the content may be,unless it is a bag of coals from Santa! Now it is my turn to pay it forward.

So here it is folks: all you have to do is leave a comment on this post and Monday night I will pick, at random, one person to be the lucky recipient of a box of handmade/homemade and favorite goodies from Tartelette’s kitchen.

Ricotta Cake With Meyer Lemon Curd

Ricotta Cake With Meyer Lemon Curd

I realize it could sound cliche or a little simple but this cake should really be called "Friendship Cake". It would not have been made, eaten and shared without the giving spirit of great friend:

Over the summer, Mary wrote several posts and shared recipes with Meyer lemons, each more tempting than the next. What started on my part as an innocent "I wish I could find Meyer lemons here" became a tortured "Mary, please send me some, I’ll pay for shipping!". Believe me, I searched everywhere in town for the coveted lemon and nothing…people would even give me the odd "why is it so important?". Well, if you have been reading this blog for a while you know by now how much I love anything and everything lemon, sour, tart, tangy and if bloggers on the west coast keep waxing poetic about the fragrant Meyer lemon, then I need to know what one tastes like.

Well, the postman rang the doorbell the other day handing B. a pretty heavy box and he exclaimed "It’s for you! From California"….Oh gosh, did I make a Recchiuti purchase in my sleep? Did I sleep walk to the computer and ordered Banana Cream Pie from Tartine?…No peeps…even better: Mary had sent me a box full of Meyer lemons! My eyes grew bigger, my tastebuds all awaken by the fragrance coming out from under the newpaper padding. I am aware that we all make food discoveries throughout our life but when you are of age to really enjoy what is under your nose, the experience is quite intoxicating. I have never had a lemon that tasted like a sour clementine with a faint smell of cardamom before. I am sure others will find that funny, but yes, I smell that spice everytime I bring one of those lemons to my nose…and it makes me happy!
I received Mary’s gift on friday and I have already put them to good use, not only with this cake, but in a batch of plum jam where I used the rinds to flavor the preserve, in sauces, ice creams and other cakes…just to give you a preview of things to come.

I was craving my beloved yogurt cake sunday afternoon but I wanted to try another recipe, something of the same substance but that would allow me to use the Meyer lemons as well as other ingredients. I was thinking ricotta instead of yogurt, and before following my usual recipe I decided to browse the web. Boy am I glad I did! I think I spent over an hour on both Sigrid’s blogs, looking at her magnificient photography and pretending to speak Italian fluently (!) and stumbled upon a recipe for a lemon ricotta cake from the sardinia region of Italy. Bingo! Fate!Kismet! or whatever else you find appropriate. I did not change much but reduce the sugar a bit. I also baked the cake in a rectangular pan and cut it in 5 long pieces, cut these in 3 separate layers and layered them with a light lemon curd filling(no butter in the cake or the curd). Perfect for an afternoon tea. I have to say that this is one of the desserts that never made it to the neighbors: I cut and froze slices so I could savour my precious loot for special times. You know, when you feel like bringing a friend closer to you although they are miles away, like tonight.

Mary, thank you. I truly hope that one day our paths do cross, in the kitchen and around a homemade meal. Yes folks, I have a wonderful friend, and I have never met her.

Ricotta Cake With Meyer Lemon Curd
Ricotta and Lemon Cake, adapted from here:

300 gr flour
200 gr sugar
300 gr. ricotta
3 eggs, separated
1 lemon , zest and juice
2 tsp. baking powder

Preheat oven to 350F.
In a large bowl, combine the ricotta and sugar. Add the egg yolks, the lemon juice and zest, then the flour and baking powder. In the bowl of an electric mixer, whip the egg whites until stiff and getly incorporate them to the egg/flour batter.
Butter and flour a 13×9 inch baking pan and pour in the batter. Bake for 40 minutes or when a toothpick inserted in the middle come out clean. Let cool completely.
Divide the cake in three lenghtwise and 5 crosswise. (you may have leftover slices…just eat them plain or with a touch of jam). In a large loaf cake pan line with plastic wrap, layer slices of cake and Meyer lemon curd. Refrigerate. Slice and eat when you are ready!

Meyer Lemon Curd Filling:

grated zest of 2 Meyer lemons
1cup strained lemon juice
1/2 cup sugar
2 eggs
1 packet gelatin, dissolved in 1/3 cup of water

Combine the zest, sugar, juice in a saucepan, and bring to a simmer.
In a small bowl, beat the eggs until light.Beat some of the lemon mixture into the eggs to temper. Scrape the mixture back into the saucepan and cook stirring constantly until it thickens up, about 5 minutes. Meanwhile, heat the gelatin in the microwave until dissolved, about 30 seconds. Remove the curd from the heat, stir in the gelatin and whisk until well incorporated. Let cool to room temp and use to fill the cake.
Strain and refrigerate, covered with plastic wrap until ready to use.

Update: I realize I forgot to tell you what I used on top of the cake. I took about /2 cup to 3/4 of mascarpone and mixed in some honey and iced the top with this. I have done similar cakes with sour cream or cream cheese instead, worked as well.

A Tale Of Two Aprons

Aprons Provencal apron is Grandma’s, the pinkish one is mine.

No recipe today but a little story or two. The weather is so bad I have been struggling with my photo session this morning so I gave up and give you a little post about a couple of things: aprons and your own Italian Chef.

Ilva, from Lucullian Delights asked food bloggers everywhere to show her their apron. When I was taking picutres of mine and explained to B. what I was doing, he had that look on his face "Weirdos…" Well, at least she did not ask us to show our feet or naked selves….!
I could not post about just one apron. There is the one I use almost everyday and the one that I keep in a kitchen drawer, much like a good luck charm.

The blue and yellow provencal inspired apron in the picture above belonged to my Grandmother Paulette. If you have been reading this site for some time, you know how important she was to me. I credit my love of anything sweet and kitchen related to my grandmother. Her kitchen was constantly in action and very much the place where all of us would gather and chat. She had a collection of aprons that would make any women jealous, rugged or pristine, lived in or barely worn. When she passed away, my mom and aunt were in charge of organizing her closets and going through all of her little things (gosh, the woman kept everything). They were going through piles and piles of clothes and other utilitary items that my grandfather could not bear to see anymore and that would be of better use to other women. I know how hard it had to be for them to do this, but there was no point in keeping all that stuff in closets and boxes. They aked my two cousins and me (we are just months apart) if there was anything of Grandma that we wanted as a souvenir, like a scarf or a handkerchief.
We all replied at the same time: "one of her aprons!" This is how we knew and remember her, presiding the kitchen, making things happen behind the scene. I don’t even know if she enjoyed cooking that much, we never talked about it, she was just good at it.

That provencal apron is interesting to me for a couple of reasons. No matter what I cook in the kitchen, everytime I take it out to look at it, I can’t help but smell it….and even if I am making a curry or a tagine, it still smells like her, even after all these years. On one of the pictures you can notice a safety pin, close to the top. This is quite funny to me because she would use a safety pins on the ones that were broken at the neck part and kept using them like that. This one, although worn and faded, is not broken, yet she had attached a safety pin to it, as if she knew it would break eventually. Can’t really tell how long she had it before she passed away, but from the look of the other ones, this one was either relatively new or well taken care of for unknown reasons. I can’t wear it though. I am afraid of messing it up and it is hers. It’s got her fit, her smell, her touch, safety pin and all.

The other apron is mine. I don’t do full length aprons like Grandma. As soon as I started working in a restaurant, I did what 99% of the other chefs did, wear mine as a half apron. Top part folded underneath, ties wrapped around twice and knotted in the front, knot folded on itself so it does not catch on anything you are working on. At the house I do the same with the few aprons that I have. Recenty I started looking into making my own with large kitchen towels, that I would turn into half aprons. I had seen a couple of crafting sites withe the project explained, seemed easy enough, but what can I say…after work, baking, and playing I don’t have much time left for sewing. I turned to my trusted Etsy site and found a great gal, Rebecca, who was making fabulous ones, exactly like I wanted, with great colors and patterns. Just a few days after ordering I was able to play it very mod in my own kitchen. I only have this one from her, but believe me, she has not heard the last of me!!

As for the Italian Chef? Lisa posted her account of the fabulous 5 days we spent together. I just want to add a few things, or at least my own memory of it!
– the look at the airport: I was just amazed they were pulling in as soon as I had gotten my luggage. Perfect timing, and less time to spend outside with weirdos!
– the dogs: I did not want Chloe to smell my dog and bark at me. Lisa’s pupps are just adorable, loving and all over the place!
– friday night liquor consumption: well, that was pretty much Hubbs and sister. I went to bed shortly after Lisa, but kept hearing them laughing so I went back to the kitchen and talked while they were getting cozy with the booze…I had water…really.
– I had only one s’mores,(but plenty of roasted marshmallows) I coud have had 3 but I was trying to behave and not show the glutton in me!!
– Sur La Table: I agree that store is evil….everytime I was picking somethig up I was thinking B. would have a fit…except for the glasses, he had "ordered" me to get her something nice and if a woman says "I covet them", well, you just got to get it!!
– cooking: oh yeah, we took our time but when I think of all the stuff we did in 2 days, I am very happy! And that tomato sauce….I am having it everyday, with everything! No more jarred!! The meatballs, well, let’s just say I scored really high with B….!!
– her husband is the sweetest man ever. He adores her and clearly worships the ground she walks on….now, if he could only teach mine how to cook!!
– she learned that keeping me up late at night meant feeding me more and more and more….!
– do not believe her about the macarons: I only helped with the piping, the rest is hers!
– if I could I would find a way for us to be neighbors. From the moment we met, there was no awckard silence, no strange moment of adjustment. We trusted each other and showed good, the bad and the ugly. Lisa has the biggest heart ever, and the knack for saying the right things at the right time. Her patience is beyond words and her 'joie de vivre' is contagious!

Stay tuned as we planned a little guest posts on our blogs. I’ll visit hers for a ratatouille dish, and she’ll come over here for her macaron adventure. If only we could do it again soon. Hopefully they can visit here soon! Thanks Lisa for everything. I was able to relax, take some time to reflect on the past few months and really have a good time. You are the most gracious host.

The Pack Lisa’s little family: Chloe the Australian Shepherd (my dog would totally make out with her), Nigel the Lhassa Apso (reminded me so much of my previous dog a black Lhassa ), and Wicked the Cat of more than 9 lives, and the pond where we relaxed a lot.