Time flies like mad these days! I really thought this week would be calmer than the ones ahead. I even said it outloud. With a satisfactory smile on my face and a head full of light hearted things to do. So you can guess what happened. It got a wee bit crazy. One night that I was trying to sort it all out, my dear B. sat next to me with mugs of tea and a couple of tartelettes. I knew we were simultaneously feeling how wonderful it is to be able to rely on the simplicity of seasonal baking when there’s combobulation around.
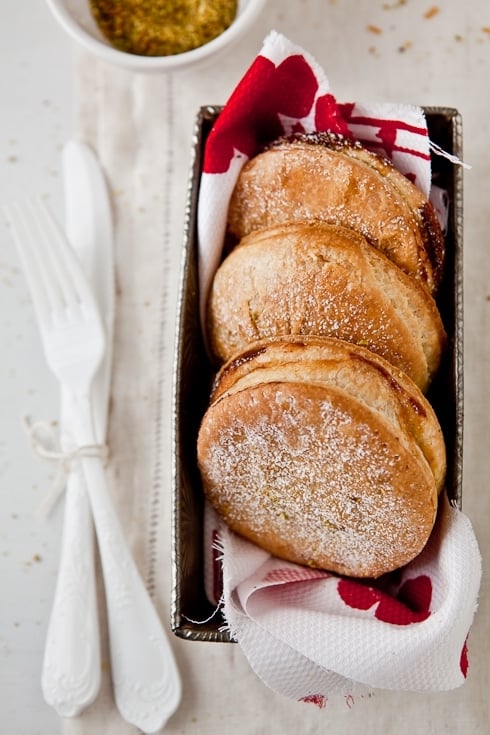
As my family back home was gathering around my grandfather to celebrate Epiphany, we were virtually sharing the moment with individual "Galette des Rois", the traditional frangipane filled puff pastry tarts served for the occasion. B. is well aware of my family’s "must dos" and how they translate into my baking and cooking as definite advantages for him even this far away, like truffles at Christmas and galette or brioche for Epiphany.
Like in many a French person, galettes des rois are a big deal. A lot of families take this opportunity to gather together one last time towards the end of the holidays, have a glass of Champagne and wish one another a Happy New Year before things go back to their usual "metro-boulout-dodo" (commute-work-sleep). Since most years we were visiting my grandparents in Paris for the holidays, we would have "galette des rois" there and, once back home in Provence, we would have "brioche des rois". And sometimes both which was perfect for the gourmande in me!
When I mentioned the possibility of not baking any galette this year, you should have seen the look on my husband’s face. As if I was taking his favorite toy away. My symptoms have been so greatly improved by removing gluten entirely from our diet that I did not really want to make a full batch of puff pastry and galettes. I can’t stand being that selfish either but from the previous results I’d had turning puff pastry gluten free, a complete gf galette des rois was not going to happen. So I made them anyway, the regular way. I only had one bite too many to know I shouldn’t have but he was happy and that makes up for a lot of things.
Back in September, I tried a couple of times to come up with a gluten free puff pastry for a Daring Bakers challenge but none of the attempts left me satisfied. I came up with a ratio for the flours I wanted to use, ran it by Shauna for confirmation and was elated to see my dough was flexible enough to roll and to fold and bake into beautiful crispy layers. Each time though I had the same problem: too much butter if I followed traditional ratios and, as Shauna pointed out, not enough protein. Shauna, Danny and I are actively working on that project again and more decided than ever to come up with a gluten free puff pastry so good and fluffy you will be proud to point out it is gluten free.
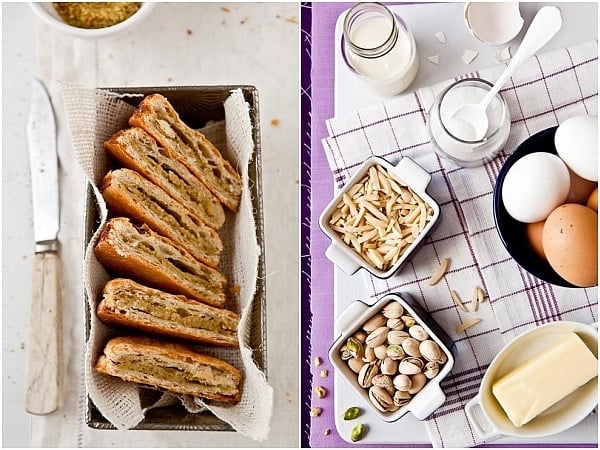
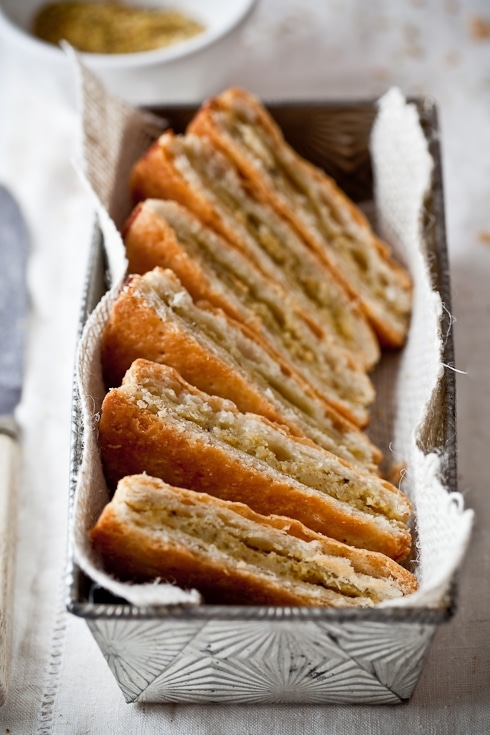
The most traditional filling for these tarts is almond frangipane (almond cream) but it’s never a bad thing to change things up so this time around I replaced half the almonds with pistachios and it could well be my favorite flavor so far for these. I used tart rings to form and bake them so the filling would stay neatly encased but you can most definitely make these free form as long as you keep careful to seal the edges tight.
I prepared and baked the tarts, set the tray to cool on the countertop and just starting giggling like a child. It came to absolutely no surprise to my dear husband that I completely forgot to sneak inside that little ceramic trinket designating the King or Queen of the day. I declared him King anyway and we happily cut into a warm frangipane galette right away.
Twitter people might already know this but I must tell you of an awesome event planned by Jen, event planner extraordinaire and writer of the blog Devour The World, Rachael of La Fuji Mama and Gaby, personal chef and author of What’s Gaby Cooking. They have arranged to fly me out to Los Angeles and secure enough space and time for me to teach two macarons classes at the Academy of Culinary Education on Friday March 5th and Saturday March 6th. Zoink!
So, if you live in the area and have always wanted to know how to bake the perfect macaron here is your chance to do so in a professional but relaxed atmosphere. I just can’t wait to be there and be able to help 1 on 1. Come join us! Please email Rachael rachael{at}lafujimama {dot}com for all the details as I hear both classes are filling up rather fast. Working also on another surprise for that trip…
Thanks for the positive feedback on giving out the recipes in both English and French. Starting with a salad was quite easy and I almost said "forget it" when I realized I would have to translate a recipe for puff pastry on this post but there it is after the jump!
Have a great weekend!
Galette Des Rois:
Makes four or eight 4-inch tarts
Notes: I hope you’ll try your hand at puff pastry soon. It sounds harder than it is. Really. But I understand and you can get very close by using a simpler Rough Puff Pastry.
For the puff pastry:
3 cups (420gr) all-purpose flour, plus more for work surface
3/4 cup (105gr) cake flour
1 1/2 teaspoons salt (7 gr)
4 tablespoons (60gr) unsalted butter, cut into 1/2-inch pieces, well chilled
1 1/4 cups (300ml) icy cold water
1 tablespoon (14gr) all-purpose flour
1 3/4 cups (3 1/2 sticks)(405gr) unsalted butter, well-chilled
Make the dough package:
In a large mixing bowl, combine both flours with the salt. Scatter butter pieces over the flour mixture; using your fingers or a pastry cutter, incorporate butter until mixture resembles coarse meal.
Form a well in center of mixture, and pour the water into well. Using your hands, gradually draw flour mixture over the water, covering and gathering until mixture is well blended and begins to come together. Gently knead mixture in the bowl just until it comes together to form a dough, about 15 seconds. Pat dough into a rough ball, and turn out onto a piece of plastic wrap. Wrap tightly, and place in refrigerator to chill 1 hour.
Make the butter package:
Sprinkle 1/2 tablespoon flour on a sheet of waxed or parchment paper. Place uncut sticks of butter on top, and sprinkle with remaining 1/2 tablespoon flour. Top with another sheet of paper; using a rolling pin, pound butter to soften and flatten to about 1/2 inch. Remove top sheet of paper, and fold butter package in half onto itself. Replace top sheet of paper, and pound again until butter is about A inch thick. Repeat process two or three times, or until butter becomes quite pliable. Using your hands, shape butter package into a 6-inch square. Wrap well in plastic wrap, and place in refrigerator until it is chilled but not hardened, no more than 10 minutes.
Assemble and roll the dough:
Remove dough package from refrigerator, and place on a lightly floured work surface. Using a rolling pin, gently roll dough into a 9-inch round. Remove butter package from refrigerator, and place it in the center of the dough round. Using a paring knife or bench scraper, lightly score the dough to outline the butter square; remove butter, and set it aside. Starting from each side of the center square, gently roll out dough with the rolling pin, forming four flaps, each 4 to 5 inches long; do not touch the raised square in the center of the dough. Replace butter package on the center square. Fold flaps of dough over the butter package so that it is completely enclosed. Press with your hands to seal.
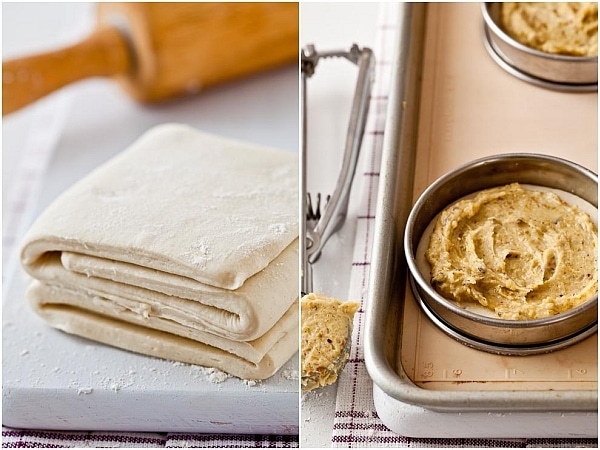
Using the rolling pin, press down on the dough at regular intervals, repeating and covering the entire surface area, until it is about 1 inch thick. Gently roll out the dough into a large rectangle, about 9 by 20 inches, with one of the short sides closest to you. Be careful not to press too hard around the edges, and keep the corners even as you roll out the dough by squaring them with the side of the rolling pin or your hands. Brush off any excess flour. Starting at the near end, fold the rectangle in thirds as you would a business letter; this completes the first single turn.Wrap in plastic wrap; place in refrigerator 45 to 60 minutes.
6/ Remove dough from refrigerator, and repeat process in step 5, giving it five more single turns.Always start with the flap opening on the right as if it were a book. Mark the dough with your knuckle each time you complete a turn to help you keep track. Chill 1 hour between each turn. After the sixth and final turn, wrap dough in plastic wrap; refrigerate at least 4 hours or overnight before using.
For the frangipane filling:
1 stick (110 gr) unsalted butter, at room temperature
1/2 cup (100 gr) sugar
1/2 cup (50 gr) ground almond
1/2 cup (50 gr) ground pistachios
2 eggs
1/4 cup (60ml) heavy cream
Place the butter, sugar, almond powder and the eggs in a large bowl and whisk until smooth (can also be done in a food processor). Add the cream but stir in it instead of whisking so as not to emulsify it or it will rise while baking. Refrigerate for at least an hour.
To assemble the tarts (4 at a time).
Divide the dough in half and keep one half refrigerated.
Preheat the oven to 350F and line a baking sheet with a piece of parchment paper or a silpat.
Roll the puff pastry to about 1/4 inch thick on a lightly floured countertop. Using a 4 inch tart rings, cut out 8 rings into the dough. Place four dough circles into 4 tart rings. Top with about 2 tablespoons of the frangipane filling. Top with 4 dough circles and seal the edges well by pressing your fingertips inside the rings onto the dough edges.
If you wish to use the rest of dough and filling right away, just repeat those steps or you can refirgerate both for a week or freeze for up to 3 months and thaw overnight in the fridge.
Bake for about 20-30 minutes or until the tarts are golden brown.
————————————————————————————-
Le P’tit Coin Francais:
Pour 4 a 8 tartes.
Pour la pate feuilletee:
420gr de farine
105gr de farine a gateau (fine)
7gr de sel
60gr de beurre non sale, tres froid et coupe en petits des
300ml d’eau tres froide (glaciale a la limite)
405 gr de beurre non sale bien froid
Faire le paton:
Dans un grand bol. melangez les deux farine et le sel. Ajouter le beurre et servez vous de vos doigts ou de deux fourchettes pour incorporer le beurre au farines jusqu’a ce que le melange ressemble a de gros grains de sable.
Formez un puit au milieu et ajoutez l’eau. A l’aide de vos mains, commencer a ramener la farine vers l’eau jusqu’a ce que la masse devienne homogene. Ramassez la masse en boule assez vite de facon a petrir le moin possible. Couvrez d’un linge ou de film plastique. Refrigerez la pate pendant une heure.
Faire le bloc de beurre:
Saupoudrez une feuille de papier sulfurise avec la moitie de la farine restante. Deposez-y le beurre et saupoudrez du reste de farine. Placez une 2eme feuille de papier sulfurise au dessus du beurre et avec votre rouleau a patisserie, frappez le beurre de facon a le ramollir et l’aplatir sur une epaisseur de 1.5cm environ. Levez la feuille de papier du dessus, et a l’aide de celle du dessous, rabattez le beurre sur lui meme. Remettez la feuille de papier au dessu et recommencez l’operation 2 a 3 fois jusqu’a ce que le beurre soit bien maleable. A l’aide de vos mains et en vous aidant des feuilles de papier, formez un carre de beurre d’environ 15cm. Refrigerez le pendant 10 minutes (pas plus).
Assembler la pate:
A l’aide de votre rouleau a patisserie, etalez la pate en un cercle de 23cm de diametre. Placez le beurre au centre du cercle et a l’aide d’un couteau fin, deligner l’emplacement du beurre sur la pate, sans faire de coupure directement dans celle-ci. Enlevez le beurre et mettez le de cote. Demarrez de chaque cote du carre et roulez la pate pour obtenir 4 grandes oreilles d’au moins 10 a 12 cm de long. Vous devez obtenir un petit carre plus epais au centre de cette facon. Placez y le beurre et rabattre les oreilles dessus. Pressez du bout des doigts pour bien enfermer le paquet de beurre.
Etalez la pate a intervals reguliers de facon a bien distribuer le beurre jussqu’a ce que la pate soit de 2cm d’epaisseur environ. Farinez votre plan de travail si necessaire au fur et a mesure. Etalez la pate en un rectangle de 23 cm de large et 50cm de long, en gardant le cote de plus court pres de vous. En partant a peu pres du milieu, pliez la pate en trois de facon porte-feuille. (1er tour) Refrigerez la pate pendant 45min a 1 heure.
Apres ce premier temps de repos, repetez l’operation 5 fois de plus pour un total de 6 tours. Refrigerez entre chaque tours au moins une demi heure. Une fois le dernier tour effectue, refrigerez la pate pendant au moins 4 heure, toute la nuit si voud pouvez.
Pour la frangipane:
100 gr de beurre non sale, et a temperature ambiante
100 gr de sucre
50 gr d’amamde en poudre
50gr de pistache en poudre
2 oeufs
60ml de creme entiere liquide
Dans un bol, melangez au fouet le beurre et le sucre jusqu’a ce que le beurre soit pale et aere. Ajoutez les amandes et melangez. Ajoutez les oeufs un a un et bien melangez au fouet. Ajoutez la creme et donnez quelques coups de fouet ou de spatule pour rendre le melange homogene.
Assembler les galettes:
En supposant que l’on se sert de 4 cercles a tarte individuels a la fois.
Prechauffez le four a 350F/175C. Preparez une plaque de cuisson avec une feuille de papier sulfurise.
Quand la pate feuilletee est prete a etre utilisee, divisez la en deux, gardez une moitie au refrigerateur et etale l’autre moitie sur un plan de travail legerement farine. Servez vous de 4 cercles a tartelette de cm de diametre et decouper 8 cercles. Deposez un cercle dans chacun des cercles. Deposez une grosse cuilliere de frangipane. Ajoutez un cercle de pate et du bout des doigts fermer bien les bords. Laissez les tartes dans les cercle, et les placez delicatement sur votre plaque de cuisson. Repetez l’operation avec le reste de pate et de frangipane.
Faites cuires les tartes pendant 20 a 30 minutes jusqu’a ce que le dessus soit bien dorer.