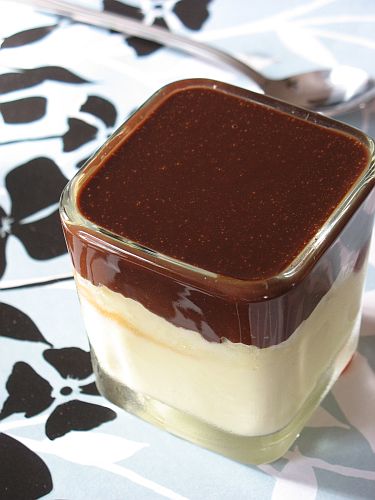
custard

Braised Artichokes With Olives & Feta, a Lavender Buttermilk Tart & A Cookbook Giveaway!

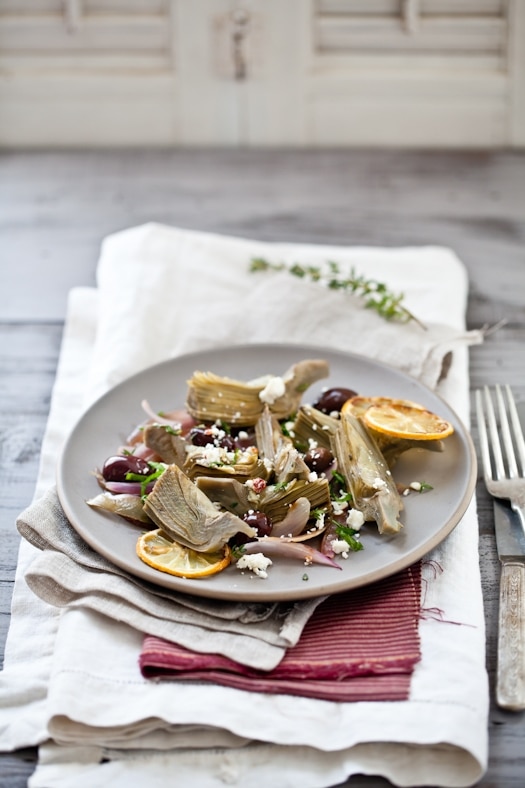
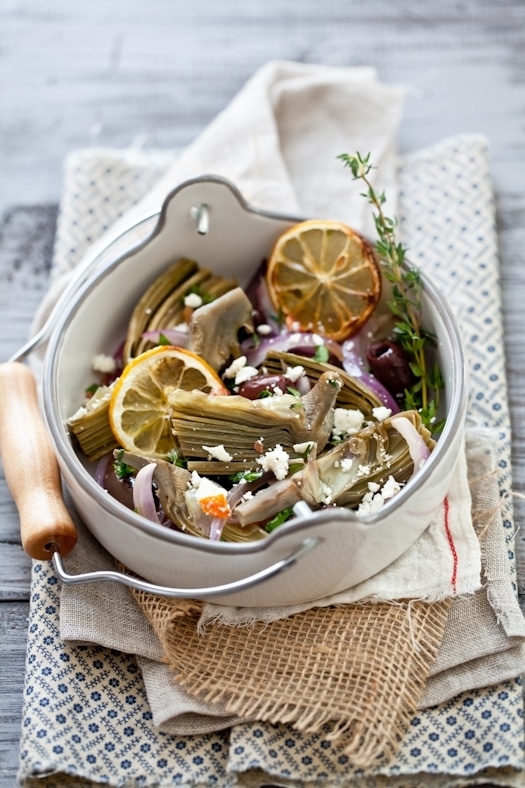
Baked Artichoke Hearts With Olives & Feta


I’ve had the chance to travel to the West coast and back twice in the last couple of weeks and twice I had high hopes of experiencing some lower, nice Fall-ish temperatures. I was ready. Sweaters picked. Scarves tied up to my purse. Instead, it was tank top and summer dressed that ended up in my suitcase. It felt exactly like what October is here in the South. A soft stroke of the sun, a lull of breeze in the trees. A delicious moment.

Since we never really get a transition between seasons, it’s always a bit difficult to feel in an autumnal mood with food and recipes. I do, however, like to get in the kitchen and try to conjure up some wicked good Fall recipes whenever possible. It most often involves roasting, slow simmers, braising. Warmth and aromas filling the house with the comfort of nostalgia and the promise of another season ahead. Yes, it does make me mellow.

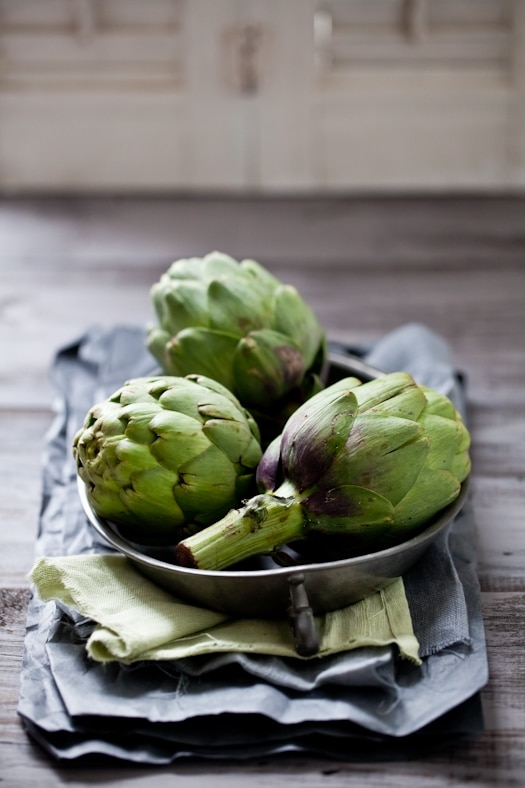
Artichokes


One of the dishes I made recently that really invoked Fall as I knew it back home was artichokes, braised with plenty of onions, lemon, olives, thyme and feta. I did not vary much, if at all, from the original recipe I found in a magazine my mom sent me. I usually ad lib the recipes I read but this one was too intriguing to pass up.

When it comes to artichokes, we usually fix them two ways: steamed ad served with vinaigrette to dip or barigoule (barigoule is the name of a certain kind of mushroom in Provence by the way). We had this with sauteed scallops one night which turned out to be a perfect match. Hearty and light. Not quite Summer anymore and not yet Fall either.

Baked Artichoke Hearts With Olives & Feta


I made the artichoke dish the evening before a trip to Portland last week and fully expected to have some leftover for B. to warm up while I was gone but we almost polished the entire thing with our dinner companions that evening.

Tonight, I prepared a Lavender and Buttermilk Tart for tomorrow’s dinner, right on the eve of my departure for New Hampshire. I am teaching two food photography and styling workshops at the bi-annual creative retreat Squam Art Workshops. I like for Bill to have a little something sweet while I am gone. In moderation right now because I’m pretty much here and gone for another couple of months for various work projects.

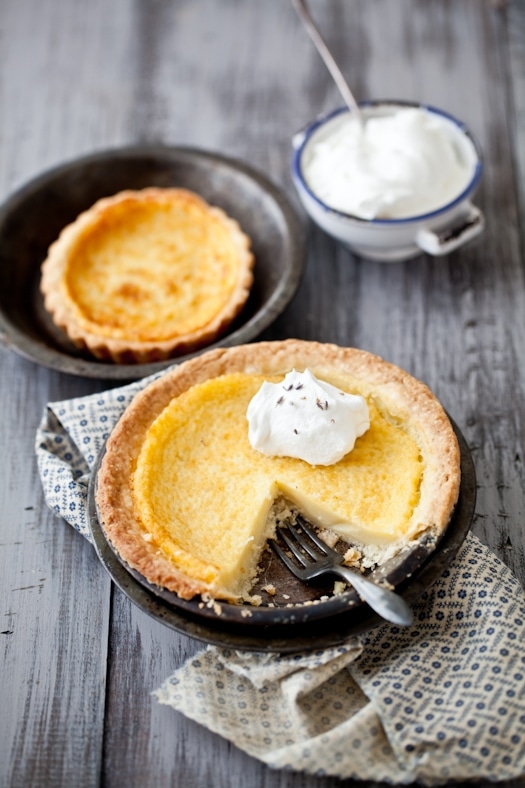
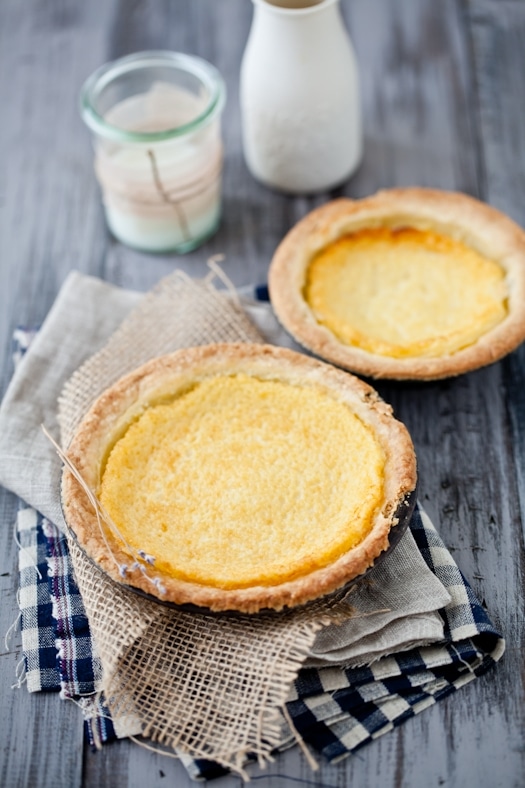
Lavender & Buttermilk Pie


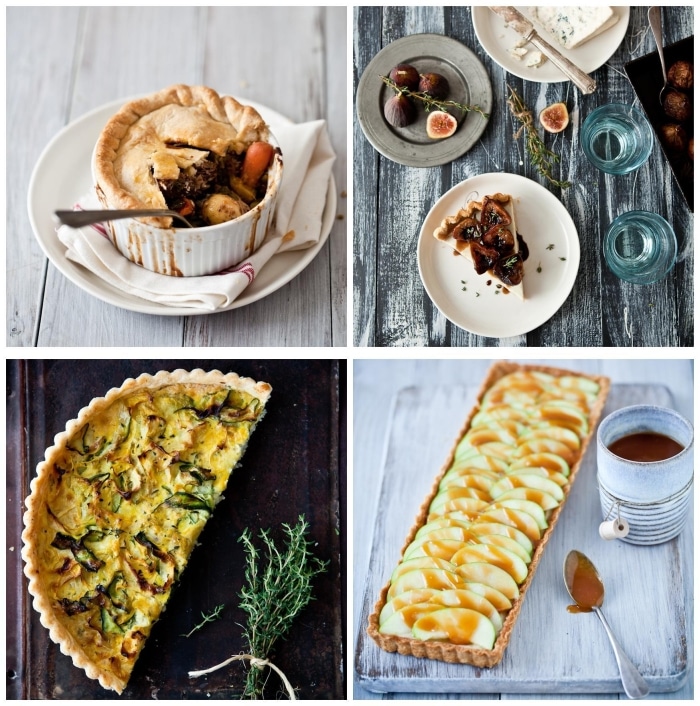
The tart is from Holly Herrick's newly released "Tart Love: Sassy, Savory and Sweet" and for which I was honored to be commissioned to do the photography. I must tell you why I dig this book so much. Beside the fact that I am thrilled of the work that the designer and publisher did with the photos and lay out, I am completely enamored with all the recipes in this book. Holly is not only a prolific recipe writer but a darn good one to boot. Her flavor combination were at times intriguing but always spot on and a sure success. Trust her to know what flavors and tastes work together and in what quantity.

The woman is an amazing chef. Her pastry crust is flaky, rich, easy to make and easy to roll and re-roll without ending with rubber. The recipes are creative, fun and quirky at times: Feisty Shrimp & Grits Pockets, Salad Nicoise Tart, Raspberry Creme Brulee Tartlets, Butterscotch & Caramel Apple Tarts. I love her titles as much as I love that Holly’s personality and love of seasonal produce comes through each recipe.

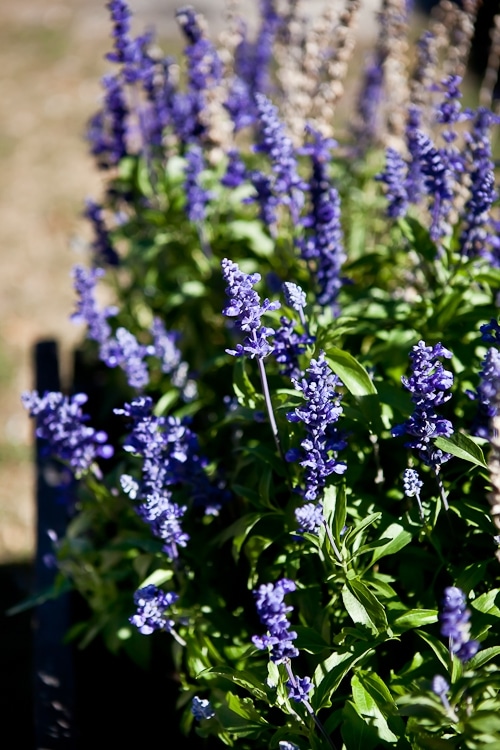
Lavande


I could talk about the tarts in this book for hours. I loved making all of them as much as I loved photographing them. Whether you are a novice or an advanced cook, you will find more than ten tarts you can start baking right from the start. Seriously. If you are nervous about making a tart crust, Holly takes you through each step with care and ease. If you wish you had more interesting or just some new/other tart fillings in your repertoire, this is also the book for you.

Trust me. I just received my "official" copy the other day and I have rediscovered, with great excitement, recipes I had cooked just a year ago. I am thrilled to give away two copies of Holly’s book, Tart Love. Fresh from the press, tested, tasted and approved by yours truly. And my husband and about everyone in the neighborhood when I was done taking the tarts mug shots, ahah!

Tart Love

Photos from Tart Love: Sassy, Savory and Sweet. © Helene Dujardin 2011

All you have to do to enter the giveaway is to:
– leave a comment at the end of this post. One entry per person, duplicates will be rejected and anonymous will not be accepted (unless you are my mother, but she knows better…!)
– Please allow 48 hours for your comment to be moderated and to show up on the blog as I will be traveling this week.
– The giveaway will close Sunday September 18th 2011, at midnight Eastern time

Keep your eyes peeled for other reviews and giveaway of the book as some bloggers have graciously offered to take it on a virtual launch tour! Could not be more excited for Holly to give her hard work the recognition it deserves.

Lavender & Buttermilk Pie


Braised Artichokes With Onion, Olives & Thyme, barely adapted from Saveurs (France)

Serves 6

Ingredients:
2 lemons
6 baby artichokes
1 1/2 tablespoons olive oil, divided
1 red onion, sliced
1/2 cup white wine or stock (vegetable or chicken)
1/2 cup Kalamata olives, pitted
1/2 cup feta cheese, crumbled
6 sprigs of thyme, chopped
1 teaspoon vinegar

Directions:
Turn the oven to broiler setting. Slice one of the lemons horizontally and spread the slices on a baking sheet line with parchment paper. Place under the broiler until the lemons turn a bit dark on the edges. Remove from the oven and let cool.
Fill a large bowl with water and the juice of the remaining lemon. Cut the top of the artichokes and remove the outer leaves almost down to the core (only the softer leaves should remain). Save the leaves to steam later and snack on if desired.
Cut the artichokes in half and clean the inside of that fuzzy part (in France, we call this the "hay"). Cut each half once more and place each quarter immediately in the lemon water to prevent oxidation.
Heat up one tablespoon of olive oil in a large sauteeing pan and cook the onion for about 5 minutes, until tender.
Add the artichokes to the pan, the white wine (or stock) and the same amount of water (1/2 cup). Season with salt and pepper according to your preference. Cover with a lid and cook for 30 minutes. Remove the lid and cook another 10 minutes. Let cool completely.
Place the artichokes and onions on serving plate, randomly add olives, feta cheese, lemon slices and chopped thyme. Drizzle with 1/2 tablespoon of olive oil and the vinegar. Check the salt and pepper if necessary.

——————————————————————————-

Lavender & Buttermilk Tart, adapted with permission from Holly Herrick’s Tart Love: Sassy, Savory and Sweet.

(Serves 6 to 8)

Tart Crust:
2 1/4 cups White Lily all-purpose flour (or other brand if White Lilly is not available)
1/4 cup granulated sugar
pinch of sea salt or kosher salt
2 sticks (1 cup) unsalted butter, cold and cut into 1/4-inch cubes
3 tablespoons ice-cold water, or just enough to hold the pastry together

At least 30 minutes before rolling and baking (or up to one day in advance), prepare the pastry. In the bowl of a food processor fitted with a plastic blade, pulse together the flour, sugar and salt. Add the butter and pulse rapidly, 40 – 50 times, or until the butter is blended into the flour and is coarse and the butter is the size of small peas. Gradually, add the water in a small trickle, with the processor running. Continue adding just as the pastry starts coming together in the shape of a loose, crumbly ball. Turn out onto a lightly floured surface. Form into a disc, about 1″ high, and wrap tightly with plastic wrap. Refrigerate at least 30 minutes or overnight.

1 egg wash – yolk, pinch salt, splash water, blended together

For the lavender infused buttermilk:
1 1/2 cups buttermilk
1/2 cup whole cream
1 tablespoon dried lavender flowers or lavender leaves (available at most gourmet specialty stores and some groceries)

For the custard dry ingredients:
1/4 cup flour
3/4 cup sugar
1/4 teaspoon kosher or sea salt

For the custard wet ingredients:
3 large eggs
6 tablespoons sweet butter, melted
1 teaspoon best-quality vanilla extract

Prepare tart crust. Chill 30 minutes (or overnight), and roll out into your preferred tart pan, creating a little border above the rim of the pan itself. Chill 20 – 30 minutes.
Preheat the oven to 375F. Place the prepared shell on a baking pan and partially blind bake the pastry by placing a piece of parchment paper on the bottom crust, filling it with dried beans or pie weight and baking for about 10 -15 minutes. Let cool and remove weights and paper. Brush down the pastry with the egg wash, and return to the oven to finish baking until golden brown, another 10 minutes. Remove the pre-baked shell from the oven and reduce the oven temperature to 350F. Allow the shell to cool slightly at room temperature.

Meanwhile, infuse the buttermilk with the lavender. Combine the buttermilk, cream and lavender flowers in a saucepan, whisking to combine. Turn the heat on high and bring up to a low boil, reduce the heat to medium low and simmer gently for 10 minutes. Remove from the heat and set aside to steep five minutes. Using a fine sieve, strain the infused buttermilk into a medium bowl and refrigerate to cool.

Meanwhile, in a large bowl, whisk together the dry ingredients (flour, sugar and salt), whisking to combine. In a medium bowl, combine the wet ingredients. Whisk the eggs for one minute until light and lemon-colored and fluffy. Whisk in the butter and vanilla. When the buttermilk has cooled to body-temperature or cooler, it’s time to add it to the wet mixture, slowly streaming into the egg mixture and whisking to combine. To finish the custard, stream the milk/egg mixture into the dry ingredients mixture, whisking constantly. Pour the custard into the prepared tart shell. Bake 35 minutes or until the custard has browned to a light tan and the custard still quivers to the touch. Remove from oven and cool for at least one hour before slicing.
Meyer Lemon Creams, Meyer Lemon Macarons & a Giveaway!

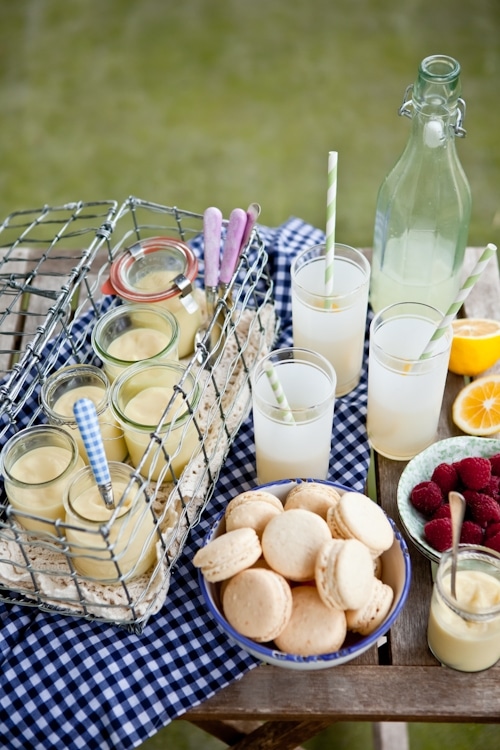
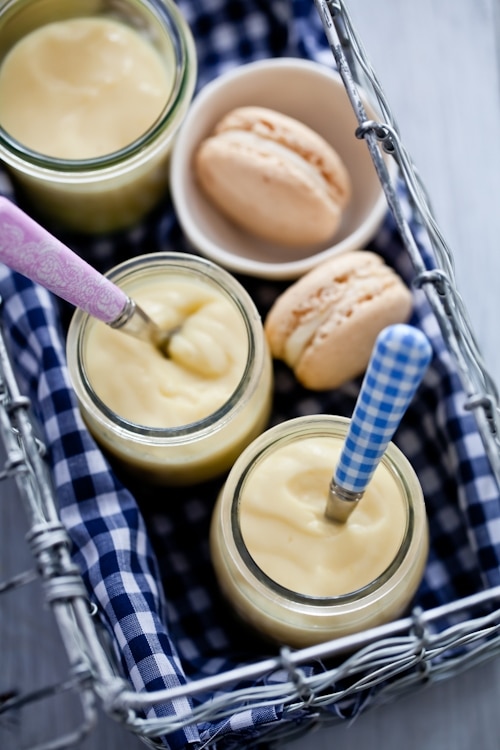
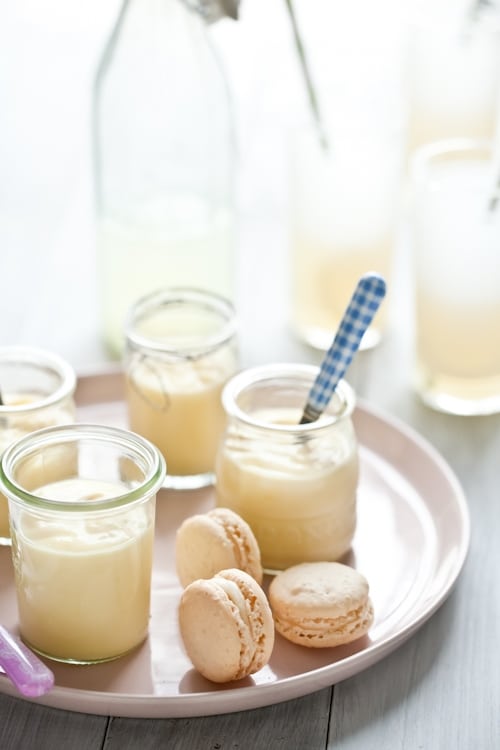
Meyer Lemon Cream & Meyer Lemon Macarons


I got to say, from my view point right this minute that I am a very relaxed and lucky gal. It’s been months since I have had the ability to take a day and just chill. I happen to be sharing that feeling with a dozen other bloggers too. See, this weekend a few of us are attending the first Go Savor Culinary Retreat and we are all spending some quality time getting to know each other, share our blogging experiences and enjoy the beautiful Southern sun.

I was very fortunate to teach a workshop with Bill on artificial lighting last night, giving more options for folks who can only shoot at night. It was a very casual discussions and sharing of experiences, all facilitated by a good dinner and a few glasses of wine.

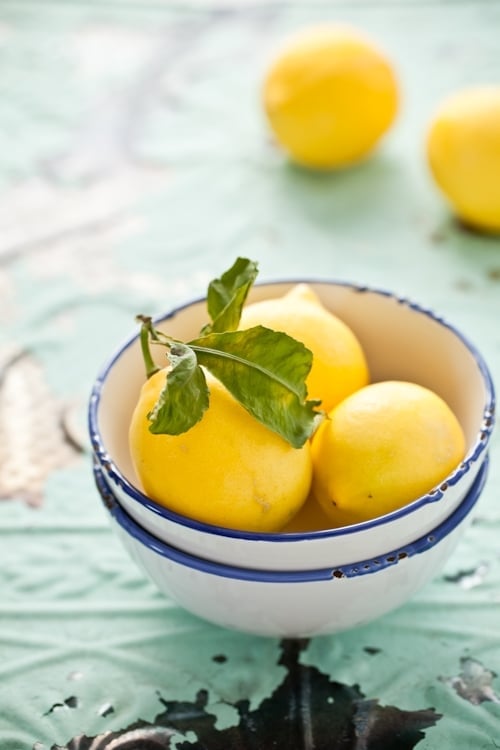
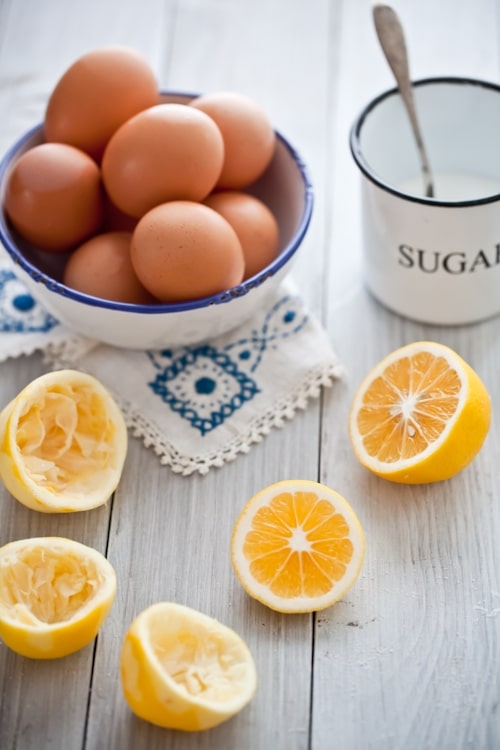
Meyer Lemons


This morning Tami and I taught a workshop on composition, food styling, choice of focal points, natural light sources, shooting tethered, etc… I absolutely *love* working with Tami. We don’t even have to wonder or ask questions. It’s very organic, calm, focused and efficient. We loved this session just from the sheer number of "ah doh" moment that many had. That was our goal: to provide sensible informations, techniques and tips that every one would be able to duplicate at home.

It’s really quite an honor to be able to share something we love with others. If it works, great. If someone decides to do something else, great! The worst thing you can do is not even consider the possibility. Photography is a series of unplanned moments, possibilities you create as well as a series of coherent decisions. It feels good to be able to share a passion with others just as passionate and interested.

Meyer Lemon Cream


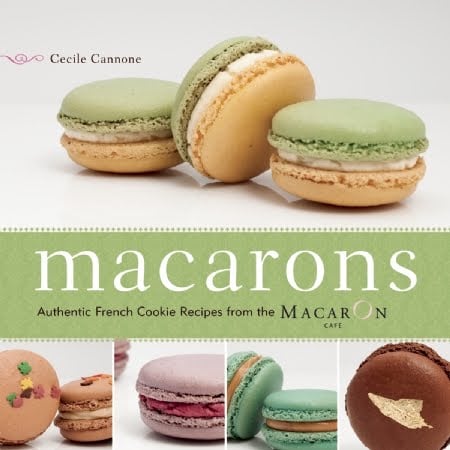
Same goes with baking and cooking. It is truly an honor to be sharing new recipes and ideas with you. Today it’s a recipe for Meyer Lemon Cream and Meyer Lemon Macarons as well as the chance to win a super fun little new cookbook "Macarons: Authentic French Cookie Recipes from the Macaron Cafe" by Cecile Cannone.


Yes, it’s giveaway time! All you have to do is leave a comment on this blog, one per person, no anonymous, until Monday March 14th at midnight. A winner will be picked at random by my lovely husband and announced on the following blog post.

Meyer Lemons


I really enjoyed the pocket size appearance of the book as well as all the recipes, techniques and troubleshooting suggestions Cecile offers for both Italian and French Meringue Macarons. I found lots of familiar ideas such as painted macarons and lollipop macarons but also a lot of new and interesting flavors such as gingerbread buttercream and apple cinnamon buttercream.

I followed Cecile’s instructions for French meringue macarons and flavored the shells with Meyer lemon zest and filled them with my own filling of cream cheese flavored with more lemon and a touch of honey. The Meyer Lemon creams are so simple and refreshing, you’d wish you had them at every meal. Almost. Variety is key I know, but for a lemon lover like me, this lemon all around dessert tray was heaven! Why so much lemony goodness you might ask. I have to thank my friends Anita and Jeanne for sending me a bunch of fresh, California Meyer and pink lemons to feed my addiction.

Meyer Lemon Cream & Meyer Lemon Macarons


Hope you enjoy the rest of the weekend! Spring is on its way…

Meyer Lemon Creams and Meyer Lemon Macarons:

Note: once the macarons are made, let them mature in the fridge at least 2 days prior to eating so the flavor and textures can meld together better.

For the creams:
1/2 cup sugar
1/4 cup cornstarch
zest of one lemon
3 egg yolks
2 cups whole milk
1/2 cup lemon juice

In a large bowl, whisk together the sugar, cornstarch, lemon zest and egg yolks until pale. Slowly add the milk and whisk well.
Bring the mixture to boiling point in a heavy bottomed saucepan placed over high heat. Reduce the heat and simmer until thick. Remove from the heat and slowly add the lemon juice. Return to medium low heat for a couple of minutes. Remove from the heat and let cool. Divide among ramekins or cup and place a piece of plastic wrap over each portions to prevent a skin from forming.

French Meringue Macarons, with permission of Ulysses Press.

Makes 50 to 60 shells, for 25 to 30 filled macarons.
2¾ cups (8.8 ounces/250 grams) almond flour
2¾ cups (12.4 ounces/350 grams)
powdered sugar
1 cup egg whites (from 7 or 8 eggs),
at room temperature
Pinch of salt
2 teaspoons powdered egg whites, if weather is humid
¾ cup (5.3 ounces/150 grams) superfine granulated sugar
5 to 7 drops gel paste food coloring (optional) (I used 2 teaspoons lemon zest instead)

Step 1: Preheat the oven to 300°F (325°F for a non-convection oven), and line your baking sheets with parchment paper.

Step 2: Blend the almond flour with the powdered sugar in your food processor to make a fine powder (or sift together, discarding any large crumbs and adding a bit more almond flour and powdered sugar as needed to compensate). Then sift the mixture through a strainer until it is as fine as you can get it. This keeps crumbs from forming on the macaron tops as they bake.

Step 3: With the wire whip attachment on the electric mixer, beat the egg whites with the salt and the powdered egg whites (if you are using them), starting slowly and then increasing speed as the whites start to rise. Add the granulated sugar and the food coloring. Beat until the egg whites form stiff peaks and your meringue is firm and shiny.

Step 4: Pour the beaten egg whites onto your almond flour mixture and gently fold them in, using a rubber spatula. Move your spatula from the bottom of the bowl to the edges with one hand, using your other hand to rotate the bowl. Now slap the sides of the bowl until the batter falls in a wide ribbon when you raise your spatula. When you can’t see any crumbs of almond flour and the mixture is shiny and flowing, you are ready to start piping.
The French have a special word—macaronner—to describe the physical action of mixing all the ingredients for macarons. This has to be done by hand. You cannot do it with your mixer—you must be able to feel the consistency of the macaron batter.
Step 5: Fit your pastry bag with a number 8 tip and fill with batter. Start by squeezing out a small amount of mix onto a parchment-lined baking sheet to form a 2½-inch circle. Be sure to leave 1 inch of space between macarons so they will not touch each other while they bake.
If the peak that forms on the top of the macaron does not disappear after piping, it means the batter could have been beaten a little more. Tap the baking sheet on the tabletop, making sure to hold the parchment paper in place with your thumbs.
Let the piped macarons rest for 15 minutes.

Step 6: Bake for 14 minutes at 300°F. After the first 5 minutes, open the oven door briefly to let the steam out.
Let the macarons cool completely on a rack before taking them off the parchment paper. Press the bottom of a cooled baked macaron shell with your finger; it should be soft. If the bottom of the shell is hard, reduce the baking time for the rest of your macarons from 14 minutes to 13 minutes.
Using a pastry bag requires some practice. It may seem awkward at first, but you’ll soon get the hang of it.
Prepare the bag (if it hasn’t been used before) by cutting about 2 inches off the narrow end—just enough so that when you insert a number 8 decorating tip, about a third of the tip extends outside the bag. Push the tip firmly in place and spoon in your filling, leaving enough room at the top to twist the bag shut. It is best to fill the bag with half of the batter at a time, that way it is not too heavy. To make it easier to fill your pastry bag, place it upright in an empty jar or other straight-sided container. This will help steady the bag while you fill it with batter.
Squeezing the bag slowly, pipe each macaron shell out in a single dollop. Lift the bag quickly to finish.

Cream Cheese Filling:
Juice and zest of one lemon
8 ounces (227 grams) cream cheese, room temperature
1/4 cup powdered sugar

In bowl of electric mixer, beat the lemon zest, juice and cream cheese on low speed, until very smooth with no lumps. Add the sifted powdered sugar and beat, on low speed, until fully incorporated and smooth. Pipe or spoon about a tablespoon into the center of each macaron shell and top with another shell.

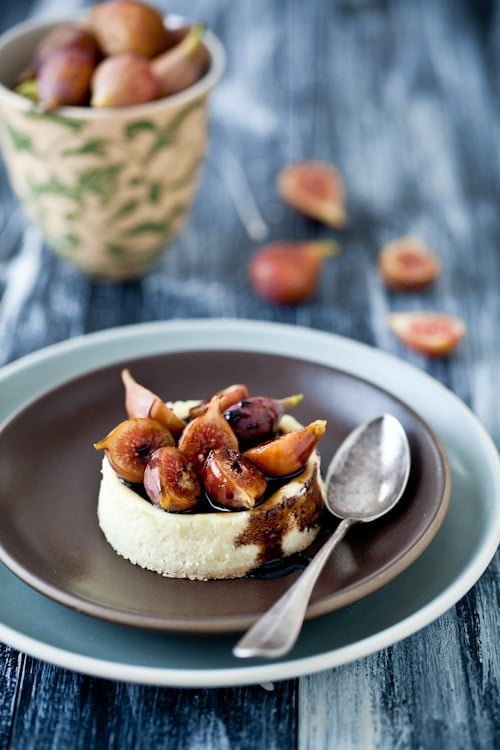
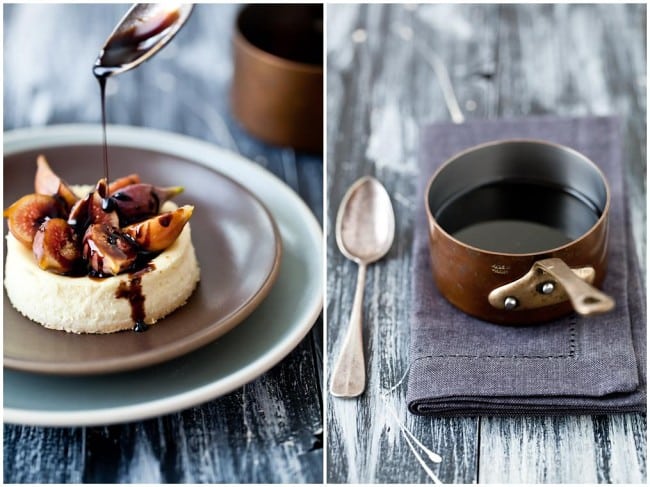
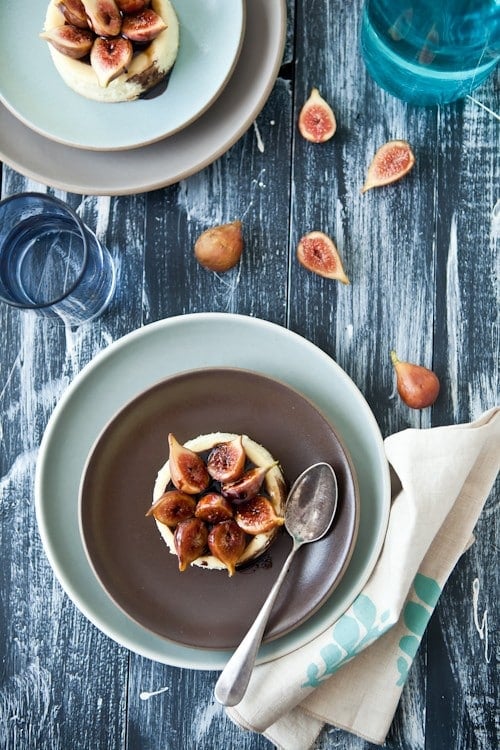
Goat Cheese Custards With Figs & Balsamic Syrup

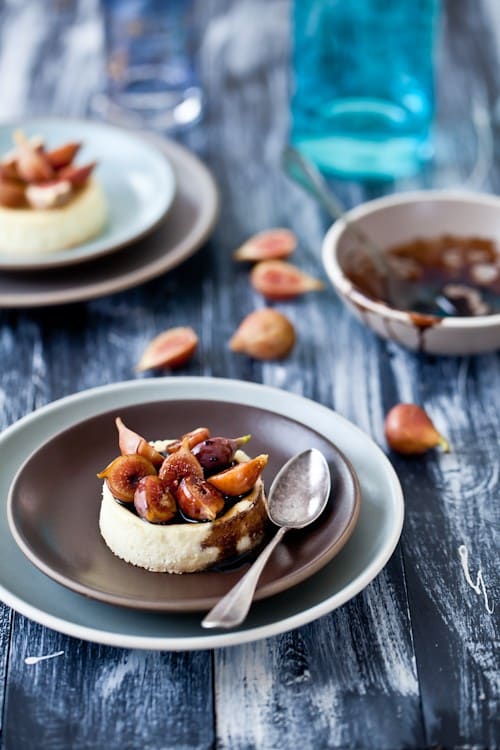
Goat Cheese Custard With Figs & Balsamic Syrup


I love Saturdays around here. Right now. In the blistering hot summer days of the Lowcountry. Oh yes…I do love our Saturdays. We literally jump out of bed and head out for the farmers market first thing in the morning. Some times we are a bit more tired than others (depending on the festivities of the night before), and can’t decide whether we are ready for breakfast or brunch. But that’s ok. It’s summer. Bountiful. The choices are enough to make our head spin.

Simplicity is key: we nibble on radishes dipped in a bit of salt, some tomatoes rubbed on thick pieces of bread. A handful of warm olives and soft boiled eggs. Big chunks of watermelon just as juicy as the sun ripened peaches we get every week. Promises of grilled corn and freshly caught fish for dinner. It’s easy to forget the heat in those instances. We did just that the other day as soon as we felt a breeze coming in. A sure sign of a storm later on in the afternoon.

After the Farmers Market


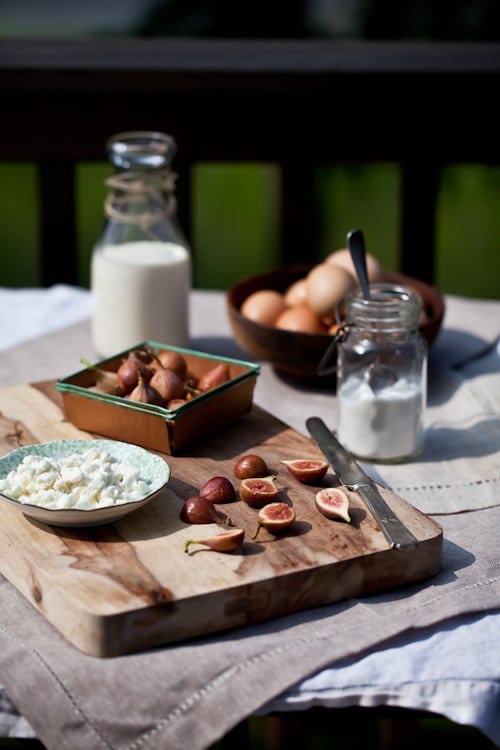
We snacked on fresh figs and fresh goat cheese, fresh eggs scrambled with some chives from the garden and big mugs of coffee. Our pups decided to have a barking session with the neighbors' pets, cats included and within minutes we were down by the marsh making afternoon boating and late dinner plans with them. I really love where we live. So easy going and laid back. Reminds me a lot of summers back home.

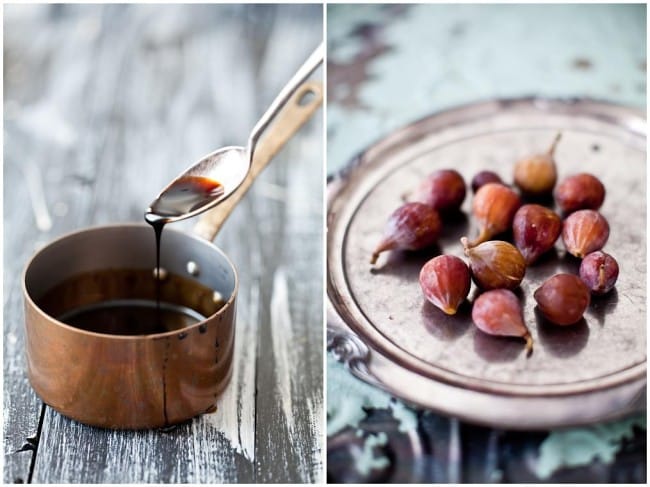
Balsamic Vinegar Syrup  & Figs


The sound of doors swinging open and kids running out. Free. Loud. My mom’s tabouli salad with tons of mint, oilve oil and lemon juice. I felt my heart nagging at me when I called home the other day and my brother was heading to the chalet where we’d spend our summers. I could taste the camp fires, the dives in the river and the hikes up our favorite trails. Filled me with serenity and the strong desire to keep on building my own new memories and trails here. Miles and years away.

I find it a bit harder here where people are constantly on the move but it seems that our street has finally found stability again. The group has changed a bit and that’s a good thing. New faces, new stories, new opinions. Same kindness and desire to share which fits right in with the old team. So you see, it’s not unusual to wave people over for a nibble and to have them stay the day.

Goat Cheese Custard With Figs & Balsamic Syrup


When that happens I like to have something easy to whip up and serve for dinner and one of the recipes that often comes to my mind is custard. Creme brulee, creme caramels, pots de creme…things like that. This time though I went and dug out one of my all time favorite cookbook for a something new: Sweet Seasons by Richard Leach.

Seasons oriented cookbooks are not "news" but his book is the first one that stuck such a strong cord with me. A perfect mix of simple flavors and recipes with more high end ones. No matter which core recipe you settle for, you can pick one, more or none of the elements around it. This is the only cookbook that I have used from page one til the end. There is absolutely zero flaw in the recipes, explanations and techniques.

Goat Cheese Custard With Figs & Balsamic Syrup


I had ear marked Chef Leach’s recipe for Mascarpone and Goat Cheese Custard with Fresh Berries moons ago and you guessed it, never got around to make it until this past Saturday. We were nibbling on goat cheese and fresh figs when the proverbial light bulb came upon me and I remembered the recipe in Sweet Seasons, promptly removed the goat cheese plate from under B.’s nose and headed to the kitchen.

A friend in town put the bug in my ear one day about figs and balsamic when she was describing tart flavors she was putting together. I could not wait to get more figs at the market to pair them with a sweet balsamic reduction. Let me tell you…the combination with the goat cheese custards was perfect. A little sweet, a little tart, a little tangy. I made eight. I served six. Yep. We just could not wait…

Goat Cheese Custard With Figs & Balsamic Syrup


Goat Cheese Custards With Figs & Balsamic Syrup, (custard recipe adapted from Sweet Seasons by Richard Leach).

Makes 8

Notes:
The custards are a breeze to prepare and you could substitute cream cheese instead of mascarpone if you needed to.
These are best prepared a couple of hours in advance and can be kept in the fridge for up to 3 days.

For the custards:
3/4 cup mascarpone cheese
3/4 cup ricotta cheese
3/4 cup fresh goat cheese
1/3 cup honey
zest of one lemon
2 large eggs
1 large egg white
3/4 cup heavy cream
pate brisee or gluten free tart dough.
2 cups fresh figs (depending on the size you might have to quarter them)

Preheat the oven to 300F.
In a large mixing bowl, whisk together the cheeses, honey and lemon zest until smooth. Add the eggs, egg white and heavy cream and whisk until smooth. This is best done by hand so you don’t incorporate too much air in the batter which would make your custard rise, fall and crack.

Roll the pastry dough to about 1/8 – inch thick and cut eight 3.5-inch disks from it. Place the 8 disks on a parchment paper lined baking sheet. Gently indedt a 3-inch metal ring into each disk but without cutting through.
This will form a seal between the baking sheet and the custard and provide a bit of a crunch when you eat the custards. If this step is too time consuming, simply bake the custards in ramekins.
Bake the disks with the rings for about 20 minutes and allow to cool before filling.

Lower the oven temperature to 250F.
Fill the rings to about 3/4 full with the cheese custard and bake for about 30 minutes or until the filling seems set (should not wiggle anymore). Let cool and run a knife inside the rings to release the custards. Refrigerate until ready to serve.

For the balsamic syrup:
1 cup balsamic vinegar
1/3 cup honey

Put the vinegar and honey in a medium, heavy bottomed saucepan and bring to a strong simmer over high heat. Turn the heat down to medium and let the vinegar reduce by half or until thick enough to coat the back of a spoon. Keep warm.

To serve, place cut figs (either halved or quartered depending on the size) and drizzle with balsamic syrup.

——————————————————————————–

Props:
– plates from Heath Ceramics
– tea towel from Jewelweeds on etsy
– silverware, milk bottle, sugar jar from vintage shop in town
– cup from Anthropologie
– vintage strawberry short baskets from Sadie Olive on etsy.

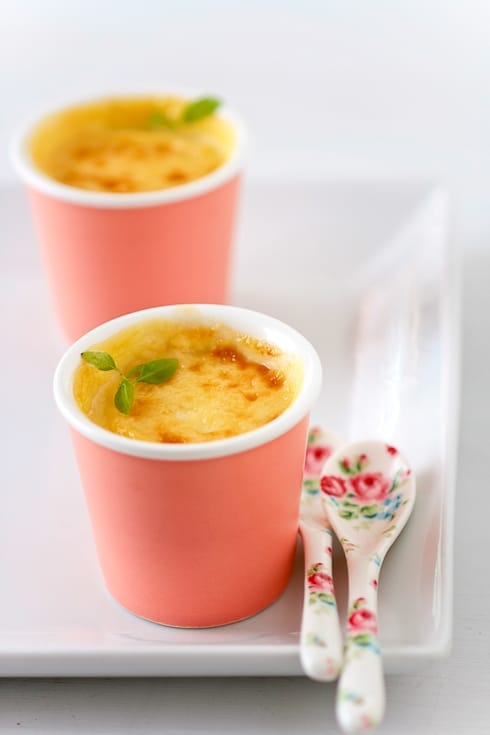
Lemon Chamomile Pots De Creme & A Taste Of Yellow

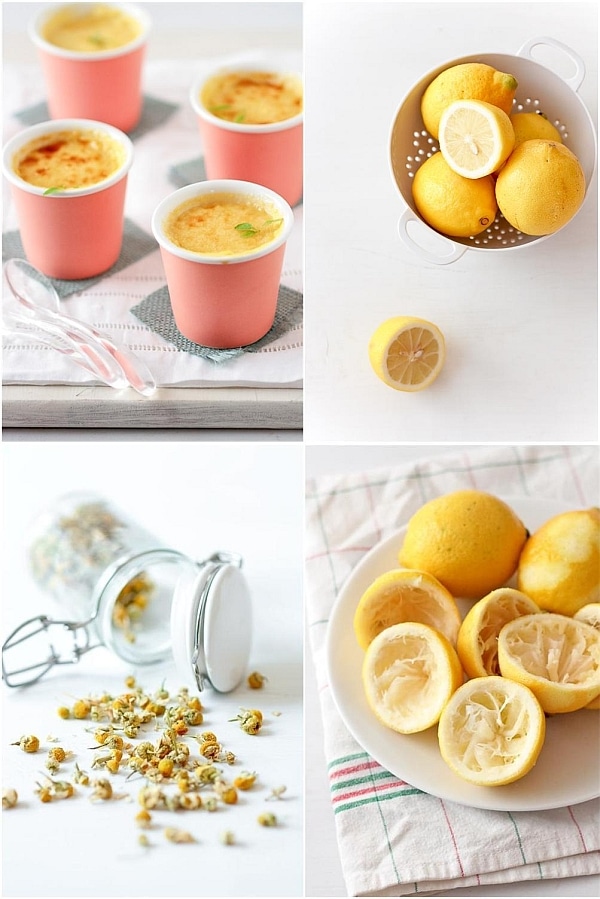
Lemon Chamomille Pots de Creme


Yesterday morning, I stood in the middle of the kitchen trying to find something, anything yellow that I could bake with. I thought I was finally ahead of the game for a change with recipes, writing, pictures, yet I had this nagging feeling that I was forgetting something. I was mumbling "yellow, yellow, something yellow" pacing the kitchen, opening the fridge, the pantry. Bill looked at me, banana in hand and exclaimed "That’s yellow!". Read this post and you will understand why I immediately protested: "Non pas encore des bananes. Y’en a marre des bananes!" (no, no more bananas. Enough with the bananas!) Lemons would be nice. Lemon Pots de Creme would even be nicer.

An hour later a baker friend stopped by with a small case of lemons. "Fell off the truck!" he said with a wink. I know it meant they had overstocked and they knew I’d find good use for them. "Oh yes! Yellow overstock! Please find a spot on my countertop" I thought while wringing my hands scheming. I did not have much time yesterday but I did not want to miss Barbara’s event LiveStrong With A Taste of Yellow for anything. Barbara gives so much of her friendship and wisdom to all of us. It’s all about giving back.

I could write paragraphs after paragraphs about people I know and love who are touched by cancer right now and people I have loved and lost to cancer but it would not do anybody any good. You know some, you love some. It hurts and it’s ugly and it is not what Barbara or the event is about. For the past three years, Barbara has gathered food bloggers around the world to create a yellow dish in support of the Lance Armstrong Foundation to raise cancer awareness.

Lemon Chamomille Pots de Creme


Two years ago I went with an all mango dessert that was devoured by my husband two seconds after I had taken a picture and last year I made tropical verrines with peach macarons that were also devoured right after the pictures. This year I baked Lemon Chamomile Pots de Creme, and guess what happened? Well yes, 3 were gone before lunch! You can’t leave two lemon heads like us around these and expect us to behave, not that we would have tried anyway.

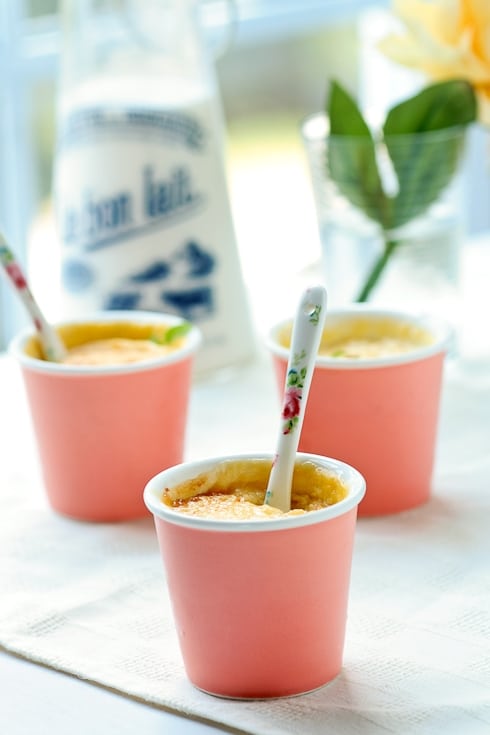
"Pots de creme" are exactly that: little cups of creamy custard. Heavy cream, egg yolks, sugar. The rest is up to your imagination. I remember when my friend M. was undergoing chemo, she would often ask for a cup of tea with a lemon slice and some chamomille buds in there. As a tribute to her kicking cancer away for now, I added a small handful of chamomile buds with the cream and let it steep before mixing the cream with the rest of the ingredients and a serious dose of lemons. The result was soothing, tongue nipping and down right refreshing.

Lemon Chamomille Pots de Creme


Side note: a few people have emailed asking me how I keep my tablecloths so white even after putting crumbs or ice cream right on them. HA AH! Here is my little secret: I use wood. Large blocks of wood or 2x4s that I sand, stain and paint (sometimes dark) so all I have to do is take a sponge when I am done photographing. Unlike Martha Stewart, I don’t find doing laundry and ironing that much of fun time. I have enough with the napkins and placemats I use!

Lemon Chamomile Pots de Creme:

Makes 4 to 6 depending on the size of your ramekins.

1 1/2 cups (375ml) heavy cream
2 tablespoons edible chamomille buds (found mine at health food store with bulk herbs and spices)
6 large egg yolks
1/2 cup (100gr) sugar
zest and juice of 2-3 lemons (you’ll need 1/4 cup or 60ml of juice)
pinch of salt

Preheat oven to 325F and position a rack in the center. Place your ramekins in a heavy deep pan and set aside.
In a medium saucepan, bring the heavy cream and the chamomile to a simmer. Turn the heat off and let the chamomile steep in the cream while you prepare the rest of the ingredients.
In a large bowl, whisk together the egg yolks and the sugar until pale yellow. Add the lemon juice and salt and whisk until smooth.
Strain the heavy cream and discard the chamomile. Slowly pour the heavy cream over the egg yolk mixture, whisking well. Let stand for a couple of minutes to let any foam rise to the top, skim it off and divide the mixture among your ramekins. Pour hot water inside the pan, making sure the water comes at least halfway up the sides of your dishes. Bake for 20 to 30 minutes.

Bostini Cream Pie: The Daring Bakers Take A Classic For Spin


I can’t believe it has already been a month since our last Daring Bakers' challenge, and once again I had such a good time getting this one done. I got the greatest opportunity of all by making it in my kitchen with my mom beside me….It is quite special since we don’t get to cook or bake together much often since I left France. Mom laughed when we were done putting it together because she felt she was not doing much. Since I move rather fast and I know where all my utensils are, I get around quicker but I really appreciated the help she provided by handing me the ingredients, weighing everything, washing the dishes and most of all being there with me in the same room, chatting about nothing and everything at once. I can’t begin to tell you how much I loved the moments spent reminiscing about my grandmother or her teaching me how to make my first dough or chocolate mousse.

Mary, from my Alpineberry (one of my first blog reads) and our host for October chose a recipe that took a classic looking Boston Cream Pie and turned it into a completely 100% deliciously buttery and creamy: a Bostini Cream Pie. Eggs a plenty, heavy cream flowing like a river…everything to make your Tartelette a happy gal! Working with that many eggs, can be daunting for new cooks and bakers but remember to temper your egg yolks for the custard (adding some hot liquid to them so they get acclimated to the temperature rise) and folding in 2 or 3 times the egg whites for the sponge. Once to thin out the cake mixture thus making more susceptible to the texture change when you incorporate the rest of the whites. Eggs are fussy but when you get the basics, they really are just as sweet as the cake they make.

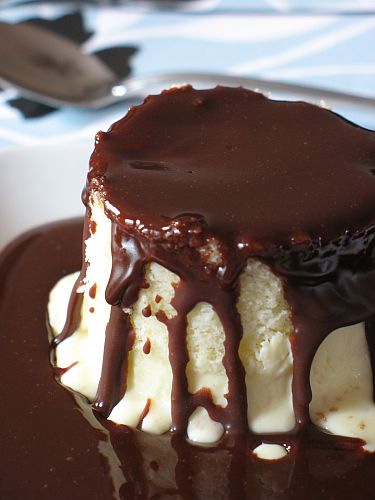
This Bostini Cream Pie is a soft orange chiffon sponge set on a pool of vanilla flavored custard and covered with a buttery dark chocolate glaze. I am thankful that Mary allowed us to change the cake flavor while keeping it light colored. I immediately went for coconut water. I have become addicted to this over the summer as it was the only thing I could put in my stomach before and after an outdoor run in the morning. The chiffon sponge turned out beautiful and this is by far the best recipe I have used for chiffons and believe me I have gone through many a recipe for that airy, soft not mushy texture. Beside its health benefits, it is colorless, has a nice toasty coconut flavor that get very mellow while bakes, which gave plenty of space for the custard to shine through. And what a custard! I rarely make custard sauce with that many egg yolks or rich heavy cream, and now I know why….there was barely enough for the dinner time plating!! I used vanilla paste, since all my vanilla beans are flavoring my vodka to make extract and oh my god….B. had to hide the bowl away from me and mom!! The custard was quite thick enough that I was able to plate a cake round (3 inches) on top of the custard set in a pastry ring and refrigerated it, unmolded and had a short time to photograph it before it fell apart in contact with my spoon. The part I liked the least was the chocolate glaze, equal parts chocolate and butter and that was a little too much butter for me..oh I can’t believe I just wrote that but it was. I would have preferred a light ganache, but I have had Boston Cream Pies before that featured both styles so I guess I could "push" myself t eat them anyway (ahahahaha… "push", eheheh!!)

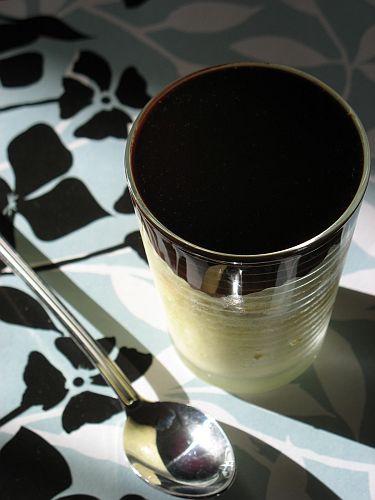
I am also thankful to Mary for giving us creative license with the plating of the Bostini. The first night with my parents I used a cookie cutter and cut out 3-4 inches circles out of the sponge (baked in a 9×13 inch pan). The remaining servings were set in different sized and shaped glasses to be taken to a dinner party down the street. When I make the recipe again, and notice I did not say "when", I will halve it if it is for us or a small dinner party or keep it the same if I know I have more than a dozen guests (if I use 3 inches diameter cookie cutters again)


Bostini Cream Pie
(from Donna Scala & Kurtis Baguley of Bistro Don Giovanni and Scala’s Bistro)
Makes 8 generous servings

INGREDIENTS:

Custard

3/4 cup whole milk
2 3/4 tablespoons cornstarch
1 whole egg, beaten
9 egg yolks, beaten
3 3/4 cups heavy whipping cream
1/2 vanilla bean ( I used 1 tsp. vanilla bean)
1/2 cup + 1 tablespoon sugar

Chiffon Cake

1 1/2 cups cake flour
3/4 cup superfine sugar
1 1/3 teaspoons baking powder
1/3 teaspoon salt
1/3 cup canola oil
1/3 cup beaten egg yolks (3 to 4 yolks)
3/4 cup fresh orange juice (I used coconut water)
1 1/2 tablespoons grated orange zest
1 teaspoon pure vanilla extract
1 cup egg whites (about 8 large)
1 teaspoon cream of tartar

Chocolate Glaze

8 ounces semi or bittersweet chocolate
8 ounces unsalted butter

To prepare the custard:

Combine the milk and cornstarch in a bowl; blend until smooth. Whisk in the whole egg and yolks, beating until smooth. Combine the cream, vanilla bean and sugar in a saucepan and carefully bring to a boil. When the mixture just boils, whisk a ladleful into the egg mixture to temper it, then whisk this back into the cream mixture. Cook, stirring constantly, until the mixture is thick enough to coat the back of a spoon. Strain the custard and pour into 8 large custard cups. Refrigerate to chill.

To prepare the chiffon cakes:

Preheat the oven to 325°F. Spray 8 molds with nonstick cooking spray. You may use 7-ounce custard cups, ovenproof wide mugs or even large foil cups. Whatever you use should be the same size as the custard cups.
Sift the cake flour, sugar, baking powder and salt into a large bowl. Add the oil, egg yolks, orange juice, zest and vanilla. Stir until smooth, but do not overbeat.

Beat the egg whites until frothy. Add the cream of tartar and beat until soft peaks form. Gently fold the beaten whites into the orange batter. Fill the sprayed molds nearly to the top with the batter.
Bake approximately 25 minutes, until the cakes bounce back when lightly pressed with your fingertip. Do not overbake. Remove from the oven and let cool on a wire rack. When completely cool, remove the cakes from the molds. Cover the cakes to keep them moist.

To prepare the glaze:
Chop the chocolate into small pieces. Place the butter in a saucepan and heat until it is just about to bubble. Remove from the heat; add the chocolate and stir to melt. Pour through a strainer and keep warm.

To assemble:
Cut a thin slice from the top of each cake to create a flat surface. Place a cake flat-side down on top of each custard. Cover the tops with warm chocolate glaze. Serve immediately.

Or layer the custard, cake and glaze in glasses or cups.