curd

Calamansi Mousse Tartelettes With Candied Kumquats

Calamansi Lime Mousse Tartelettes


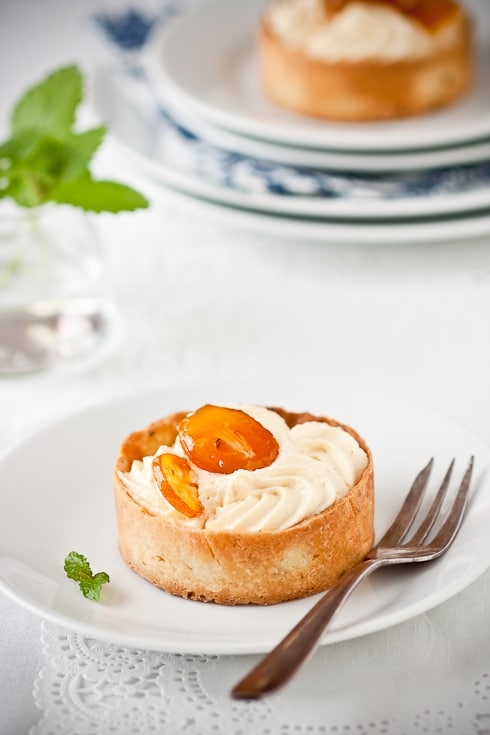
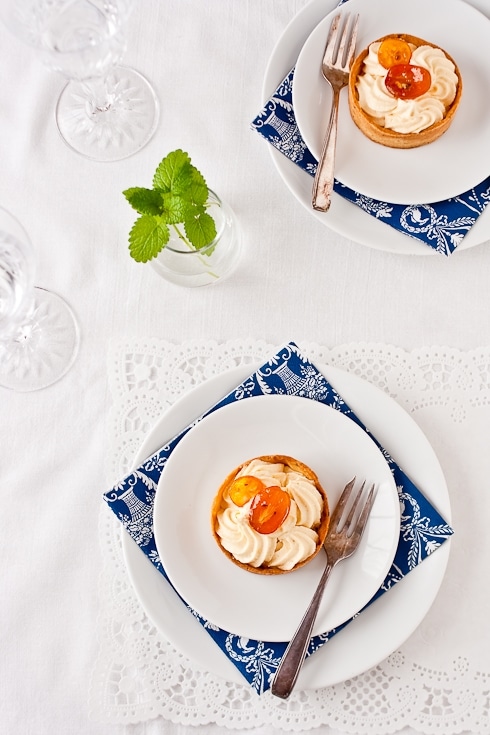
The story could beging with "I’ve got these two friends, you see"…And then I could even attempt a rhyme like "they are wild and crazy". But that would be putting Todd and Diane in a box and these two, their hearts and their generosity will never bump the corners of a box. What am I talking about…their garden knows no boundaries. Over a month ago, they sent me a box of Calamansi limes from their own tree and it took me very little time to figure out what I wanted to do with them. Calamansi Mousse Tartelettes With Candied Kumquats.

Every time I virtually enter Todd and Diane’s garden, I get lost in all of its beauty and amazing givings. I literally get lost there and in the gorgeous pictures this amazing team pairs up with their delicious recipes. You get it, I am running low on adjectives to describe them and what they contribute to the blogging world. Actually wait, here’s another one, hot. These two are smoking hot. And hilarious. I’ve been fortunate to meet them both twice and twice I’ve wanted to bottle them up and take them home with me.

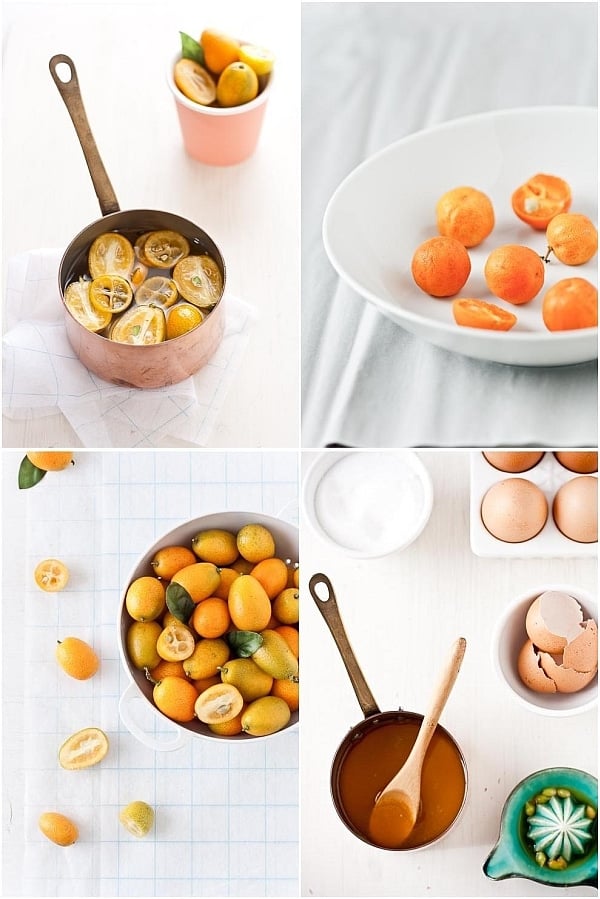
Ingredients for tartelettes

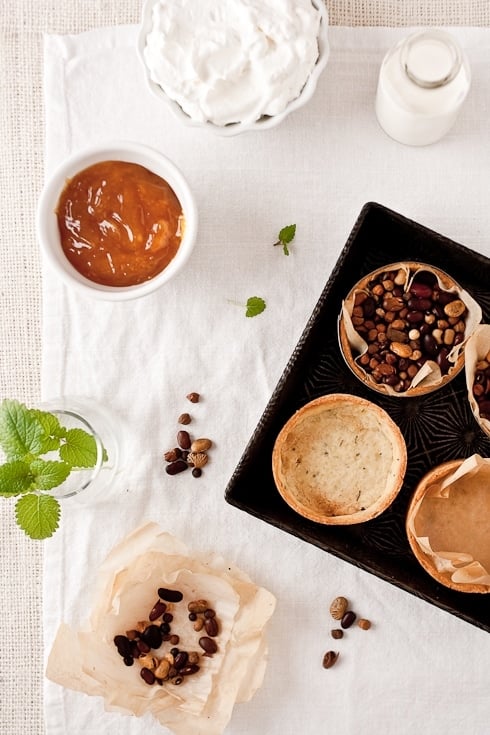
Clockwise: kumquats getting candied – fresh Calamansi limes – Calamsi curd in progress – fresh kumquats.

I had tasted Calamansi limes once years ago, before getting this shipment from Todd and Diane. Oh how I remember that first encounter. Could be one for the "what not to do" list. They look like rounded kumquats and I did what I usually do with kumquats. I popped a whole one in my mouth. Then I remember distinctly squinting my eyes, feeling my cheeks draw themselves inward. I love tart and I love sour but this on a scale from 1 to 10 was 25 in the sour-tart department. Oh my, did I squint!!

This time I had a plan. I zested about half of them and juiced them all and believe me, that took a little while and I was left with about 3/4 cup of juice. I immediately thought about making curd for tartelettes and mixed it with whipped cream to tone done the sour factor. The mousse was just right for everyone. For the shells, I used my favorite short crust dough but added some freshly chopped lemon balm to enhance the hints of citrus. Lemon verbena or lemon thyme would work quite well here also.

Making Tartelettes


Since all the little limes from the box had been used for juice, I candied some sliced kumquats to crown the tartelettes with. This almost did not happen as we had a full house munching on them the day I made them and barely saved enough for the tarts. These are like crack in our house. They take a bit of time with slicing and removing the seeds but they are well worth the time. I used them in breads instead of raisins, on tartines with herbed goat cheese, and my favorite way is to tuck pieces into a bowl of my freshly made rice pudding.

The combination of flavors worked out perfectly well from top to bottom. Literally. I know Calamansi limes are not available everywhere but you could easily replace them with limes or lemons, any citrus would work beautifully here.

Calamansi Lime Mousse Tartelettes


Calamansi Mousse Tartelettes With Candied Kumquats:

Makes four 3-inch tartelettes

For the sable crust:
1/2 stick (55 grams) unsalted butter, at room temperature
2 tablespoons (25 grams) sugar
1 egg yolk
3/4 cup (95 grams) all purpose flour
Pinch of salt
1 tablespoon freshly chopped lemon balm

For the Calamansi lime mousse:
3/4 cup (190 ml) calamansi juice (or lemon or lime juice)
1 cup (100gr) sugar
2 egg yolks
2 tablespoons unsalted butter, at room temperature
3/4 cup (190ml) heavy cream

Prepare the crust:In a stand mixer fitted with the paddle attachment, whip the butter and sugar until light and creamy. Add the egg yolk and mix for a short minute. Add the flour, salt and chopped lemon balm and beat until the dough just starts to come together. Gather the dough into a ball, flatten it a little to a small disk and wrap it well in plastic wrap. Refrigerate one hour before using.

Preheat oven to 350F.
Roll the dough between two sheets of parchment paper or on a well floured board until 1/4-inch thick. Cut out four 4 inch rounds of pastry dough and fit them inside four 3 inch tartlet molds, patting the dough in with your fingertips if needed. Place a small piece of parchment paper inside the tart shells, fill with beans or pie weights and blind bake for 12-15 minutes. Let cool to room temperature and remove the shells from the rings.

Prepare the curd:
In a heavy medium saucepan, stir together the Calamansi juice and sugar and bring to a simmer over medium heat until the sugar dissolves. In a small bowl, beat the egg yolks to break them up. Beat some of the Calamansi mixture into the egg yolks to temper. Scrape the mixture back into the saucepan and cook stirring constantly until it thickens up, about 5 minutes. Remove the curd from the heat, stir in the butter until it is completely incorporated. Let cool completely. If not using immediately, place a piece of plastic wrap over the top.
Whip the heavy cream to medium stiff peeks and gently fold it in the citrus curd in two additions or until no streaks of whipped cream remains.
Place the mousse into a piping bag fitted with a star tip and pipes rosettes of mousse inside the shells. You can also simply spoon the mousse inside the shells. Top with candied kumquat slices if desired and refrigerate.

Candied kumquats:
You can blanch the kumquats in boiling water for a minute before candying them but I forgot to one year at the restaurant and honestly did not see a difference in taste or time. If you think yours have been treated heavily with chemicals before packaging, I encourage to drop the kumquat slices in boiling water for a minute, drain them and proceed to the candy part.
1/2 cup (125ml) water
1 cup (100gr) sugar
1 pint fresh kumquats, washed, patted dry, and cut in 1/8 inch thin slices

In a heavy saucepan, combine the water and sugar and bring to a boil over high heat. Add the kumquats, being careful not to overcrowd your pan. Reduce the heat to a simmer and let the fruit become translucent, about 20-30 minutes. Remove the fruit with a slotted spoon and place it, separating the slices, on a piece of parchment paper or silpat. Use as desired.
Lemon Raspberry Mille Feuilles

Lemon Raspberry Mille Feuilles


I know, I know, it is Fall…so why all the raspberries? And now the lemon? Store diplays, magazine covers and tv shows "fall season" premieres are doing a great job at convincing me it is Fall. Yet, one step outside in the middle of the afternoon keeps telling me otherwise, time and time again. Still wearing flip flops and shorts so I hope you will indulge me for a couple more raspberry posts. I promise the next one will have an autumnal twist.

We are enjoying quite a few dinners outside with the neighbors and the summer grill outs have finally given way to wonderful oyster roasts. It is hard to believe the way our street functions but if you spend one week here it’d be easy to see why I wish I could take the whole street with me if we ever move. It is not uncommon to harbor someone else’s dog while they help you run after your own, have about 3 strollers and 8 dogs walking alongside your own crazy little-big ones. A walk up to the dock usually turns into a crabbing or shrimping fest while 2 of the above mentionned dogs decide to go for a swim without giving you notice first.

These are the moments that my soul swell with life and good feelings, the ones that make you wish your arms were big enough to grab a hold of it all. So you let your heart do it. You let all the wonderful strangers in. There will be moves and departures, goodbyes and boxes of macarons dropped at the doorstep of new neigbors. Just let them in…because they never ask why and what.

Our little nucleus likes to gather on the front steps of C&H and the twins. It is much easier to monitor the pets, the kids and we literally can throw a head of lettuce in direction of the picnic table if someone forgot the greens. I have not tossed anything like cakes and desserts, although the twins are polishing their receivers' skills for that very purpose. This past weekend we celebrated A’s first time without training wheels, AJ’s first three teeth (all or nothing kind of baby!), a tiny peaceful newborn, a kittie and a new neighbor. Somebody rented the house next to ours for the next few months and C. and I started to joke around that she might run away scared after one weekend spent around here. Loud. Busy. Open doors. Skateboards. Loud. Treehouse. S’mores. Frisbees. Did I say loud? I was feeling bad for this poor lady but I remembered the phrase "baptism by fire"…

Saturday night, the steamer started going full blast, we dragged the long narrow table upfront and set out buckets, oyster knives, crackers, wine, cocktails, etc… The kids really wanted to meet this new neighbor and were wondering if she might ever come out and say hi. I laughed and said "don’t worry, she will…and fast I bet. If she comes down fast and smiling that means she is hungry and wants to meet you. If it is fast and fuming, run!!!" Within 20 minutes, L. was among us, glass of wine in one hand and my dog licking her other hand clean.

Lemon Raspberry Mille Feuilles


I am just in charge of desserts here. C. has a talent for making a yard or a driveway feel like the front steps of a magical kingdom. She laid down a huge and almost brand new rug she had found on the side of the street a couple days prior, a couple of newly painted red lawn chairs picked up from an army depot store and the kids were watching movies projected on a oversized curtain on the side of the house while the adults were seriously entertaining.

Since the mood was light and the temperatures still in the upper 80s, I decided to bring a summer-ish dessert to our picnic table. The children love to eat what the Pretending-To-Be-Grownups eat, preferably without plates or utensils, and the messier the better. While we delicately forked into our Lemon and Raspberry Mille Feuilles, sometimes separating layer for more of that flaky effect, they exercised perfect gluttony by eating these in two bites, flat. Good thing they were light and not too tangy and that I had made twice the amount necessary!

Light is the word. Mille Feuilles takes its name from the numerous layers puff pastry and although the traditional one, well, the one I grew up on, is filled with vanilla custard and topped with chocolate fondant, once you get the hang of it, the possibilities are endless. Puff pastry is not that difficult to do. No really, I am not just saying that. It requires patience and time, so yes, it best left for a day you are around the house doing other things. Make sure your kitchen is not blistering hot and that you let the dough rest the require amount of time in between each turn. Not only is it crucial to relax it but it also prevents the butter from turning to mush and running out of your dough while you roll.

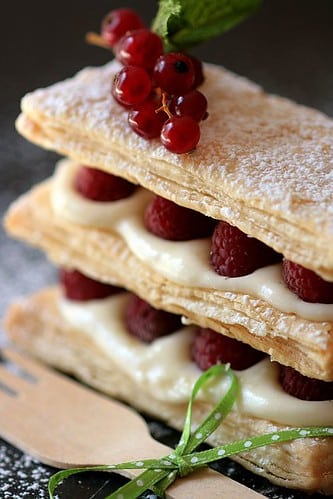
What you see in the pictures is a quick puff pastry I have been working on and I am really excited of the way it turned out, but I can’t give you the recipe quite yet. I will however re-direct you to another one I absolutely love, from Martha Stewart. Works like a charm and make the most tender, flaky dough, and if you have to learn one basic, well hers is a great start. Each layer is filled with a lemon curd mousse and topped with rows of raspberries. Again, feel free to change the fruit as any would work great with lemon. There is plenty of chocolate coming up with the holidays so a little lemon-berry slice is a welcome lighter sight (that is if you forget all the butter in the dough!)

Lemon Raspberry Mille Feuilles


Lemon Raspberry Mille Feuilles:

Makes 6-8 depending on the size of your rectangles.

Kitchen Note: the dough makes more than you need but double wrap it in plastic film and freeze for a later use. You won’t regret it.

For the puff pastry:
Makes about 2 1/2 pounds.
3 cups all-purpose flour, plus more for work surface (420 gr)
3/4 cup cake flour (105 gr)
1 1/2 teaspoons salt (7 gr)
4 tablespoons unsalted butter, cut into 1/2-inch pieces, well chilled (60 gr)
1 1/4 cups cold water (295.5 ml)
1 tablespoon all-purpose flour (14 gr)
1 3/4 cups (3 1/2 sticks) unsalted butter, well-chilled (405 gr)

– Make the dough package: In a large mixing bowl, combine both flours with the salt. Scatter butter pieces over the flour mixture; using your fingers or a pastry cutter, mix in the butter until it resembles coarse meal.
-Form a well in center and pour in the water. Using your hands, gradually draw flour mixture over the water, covering and gathering until mixture is well blended and begins to come together. Gently knead mixture in the bowl just until it comes together to form a dough, about 15 seconds. Pat dough into a ball, and turn out onto a piece of plastic wrap. Wrap tightly, and refrigerate 1 hour.
– Make the butter package: sprinkle 1/2 tablespoon flour on a sheet of parchment paper. Place uncut sticks of butter on top, and sprinkle with remaining 1/2 tablespoon flour. Top with another sheet of paper; using a rolling pin, pound butter to soften and flatten to about 1/2 inch. Remove top sheet of paper, and fold butter package in half onto itself. Replace top sheet of paper, and pound again until butter is about 1 inch thick. Repeat process two or three times, or until butter becomes quite pliable. Using your hands, shape butter package into a 6-inch square. Wrap well in plastic wrap, and place in refrigerator until it is chilled but not hardened, no more than 10 minutes.
-Assemble and roll the dough: Remove dough package from refrigerator, and place on a lightly floured work surface. Roll dough into a 9-inch square. Remove butter package from refrigerator, and place it in the center of the dough square. Fold each corner of dough square over the butter package so that it is completely enclosed. Press with your hands to seal.
– Using the rolling pin, press down on the dough at regular intervals, repeating and covering the entire surface area, until it is about 1 inch thick. Gently roll out the dough into a large rectangle, about 9 by 20 inches, with one of the short sides closest to you. Be careful not to press too hard around the edges, and keep the corners even as you roll. Brush off any excess flour. Starting at the near end, fold the rectangle in thirds as you would a business letter. This completes the first single turn. Wrap in plastic wrap and refrigerate 45 to 60 minutes.
– Remove dough from refrigerator, and repeat the rolling and folding process, giving it five more single turns. Always start with the flap opening on the right as if it were a book. Mark the dough with your finger each time you complete a turn to help you keep track. Chill 1 hour between each turn. After the sixth and final turn, wrap dough in plastic wrap; refrigerate at least 4 hours or overnight before using.
-Divide the dough in half, double wrap one half with a sheet of parchment paper and plastic wrap and freeze for a later use. The dough can be frozen up to three months.
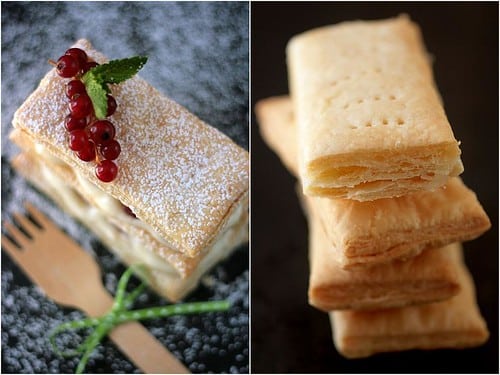
-Roll one half to a 1/8 inch (3 mm) thick 18×10 or so rectangle and cut out 4×2 rectangles and place them on a parchment paper lined baking sheet. Dock the dough with a fork to let the steam out while baking so your rectangles will be evenly puffed. Bake at 350F until golden brown. Let cool completely before filling with the mousse.

For the lemon mousse:
grated zest of 1 lemon
1 cup (250 ml) lemon juice
1/2 cup (100gr)sugar
2 eggs
1 cup (250 ml)heavy cream
2 pints fresh rapsberries (about 2 cups)

Combine the zest, sugar, juice in a saucepan, and bring to a simmer. In a small bowl, beat the eggs until light. Beat some of the lemon mixture into the eggs to temper. Scrape the mixture back into the saucepan and cook stirring constantly until it thickens up, about 5 minutes. Strain and let it cool to room temperature, covered with plastic wrap until ready to use.
In a stand mixer, whip the cream to medium stiff peaks. Incorporate the cooled lemon curd in three additions. Place in a piping bag and pipe (or spoon) onto the puff pastry rectangles. Top with raspberries and repeat to obtain two or three sheet stacks.