I was this close to posting a new recipe when I started getting a flurry of email about Christmas cookies (baking time, shelf life, etc…). It made me realize that if I did not start on my own Christmas baking soon, no one in the family would get their present.
For the past ten years, we have bagged the idea of buying presents for Bill’s family and we give each (friends too) a big box filled with homemade cookies, truffles, confections. (Click on this link to see a sample look). Depending on the recipient we also include a couple of movie tickets, a coffee shop card, a babysitting pass, a gas card or two…you get the idea.
Yes, this is our actual mantel deco every year…
I personally don’t mind doing all that baking, sends me back to my days as a pastry chef getting ready for the holidays. I also like that on Christmas Eve, it’s Bill and I boxing it all up, labeling everything and of course…sampling the broken pieces.
Here are all the goodies going in the gift boxes this year, recipes gleaned from my archives and from all around the blogs I read and enjoy.
Maybe this will give you an idea for a last minute baking spree!
In addition, as my Christmas gift to you, I am giving away one copy of Girl Hunter by Georgia Pellegrini and two copies of "Plate To Pixel. Digital Food Photography and Styling". Funny to think I was right in the deep of writing it this time last year and now it is in its third printing! Third!! Woohoo! Thanks everyone for the support and love for this book.
Anyway…Three books, three winners!
All you have to do is leave a comment at the end of this post (no anonymous, no double entry). A winner will be selected on Christmas Day at 10pm and announced shortly after.
When I called my mother yesterday I had a burning question to ask her. As soon as we started talking, I completely forgot. I was outside on the deck and heard a plane over my head. Felt a cool breeze through the pecan tree and just sat there. It took me back to our chalet in the Alps on a hot summer day. Gliders brushing the mountain sides, kids biking furiously to the pool. I got pensive. Mostly I had a smile on my face.
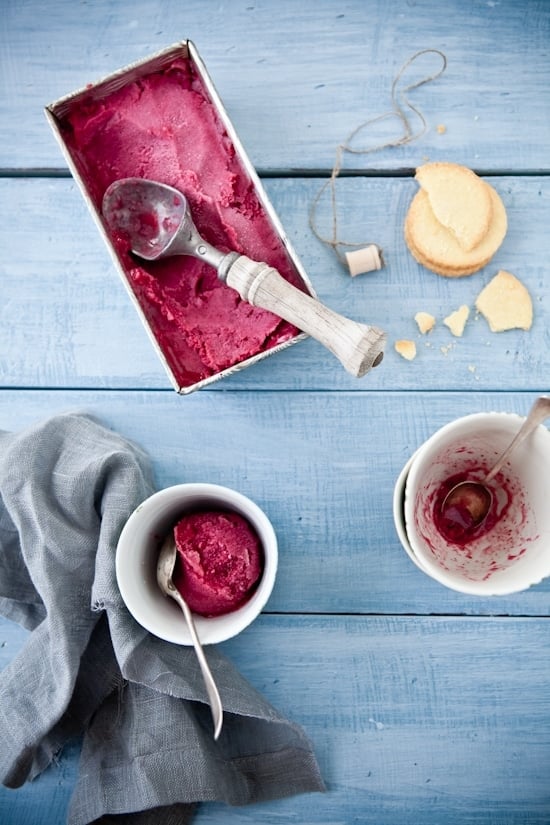
I got quiet for a little while and she asked if I was getting sad as we talked about summers, the cousins growing up, their travel plans, etc… I mumbled "I’m fine! I am testing the mixed berries sorbet I just made!" She asked if I could focus on the conversation to which I replied "no can’t do. Do you still have your T-Fal sorbet maker?" I had remembered my, well at least to me, burning question.
Her turn to get quiet for a while "I have no idea. Why do you ask?". I knew I had piqued her curiosity. "No reason. Everytime I make sorbet I think about that darn sorbetiere and how much we’d crank it up in the summers. It was cool. It was special." It was special indeed. I’ll always remember the day my mother brought that sorbet make home. Homemade sorbet anytime we wanted? As kids it was like Christmas in July!
See, in France, desserts eaten at home during the week are not buttery flaky pastries bought at the corner bakery on the way home from work. Those are for Sundays. No, desserts often consist of a dairy product and a fruit. I grew up on homemade yogurt and fruit for dessert. Ice creams and sorbets were not only specials, they were a once a year kind of thing. They spelled Summer.
It was a special thing indeed to have sorbet or ice cream or pastries back home. I do the exact same thing here. The weekends and dinner with friends are meant for special treats. And for good reasons. Time on slower motion is something to be celebrated (I’m always on even when I’m off. Can’t help it). Time spent with friends is celebrated. The generosity of their sharing our table, their time and stories with us. I want to acknowledge that by making them something special.
Enter sorbets, ice cream, tarts, mousses, and all sorts of goodies I enjoy making. I enjoy seeing their shoulders drop and their pupils scintillate as they dig in the first bites. I enjoy that pause as the flavors wraps around their taste buds, the scents and aromas arousing their senses. I am at my happiest when I gather people I love and respect around food. I know that’d make my grandmother smile.
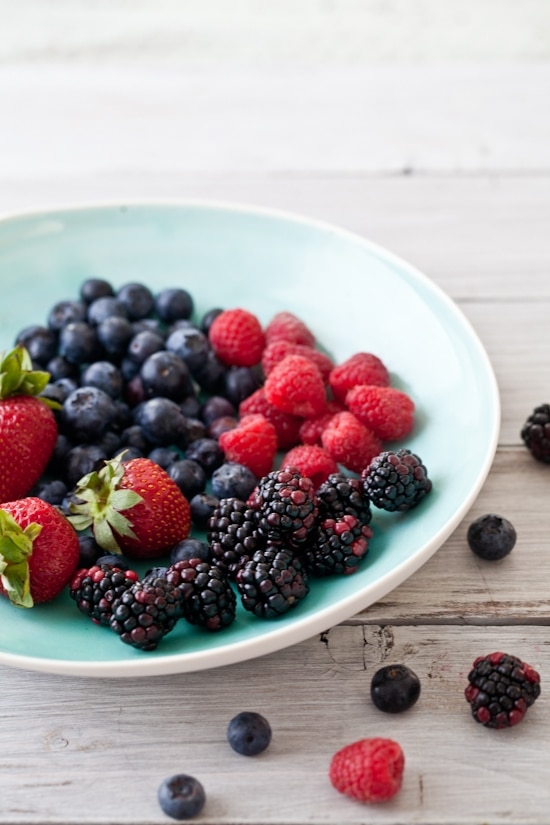
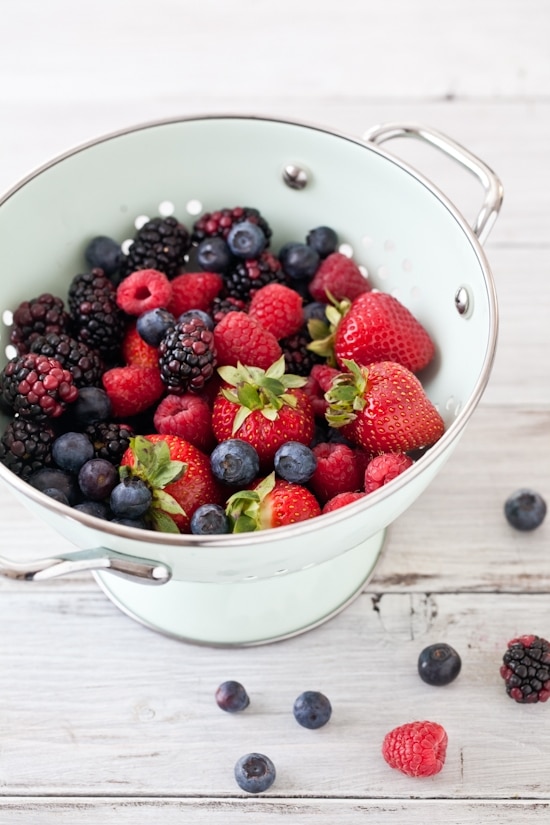
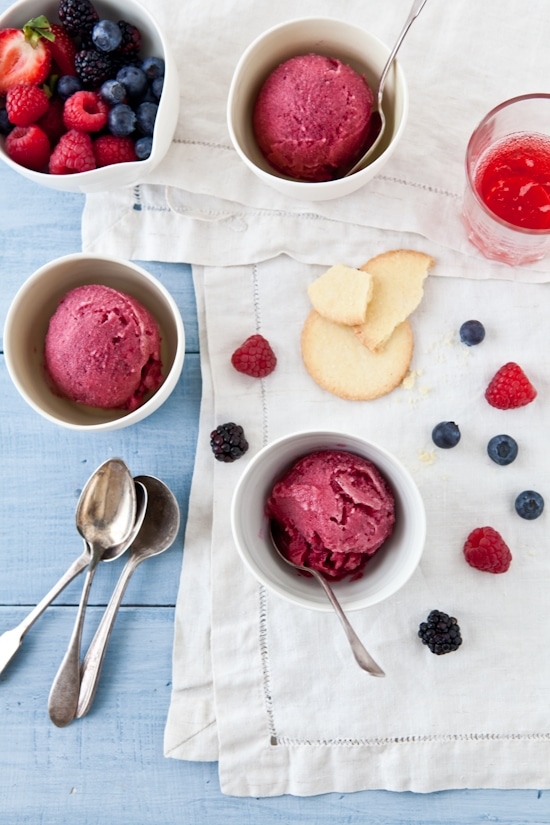
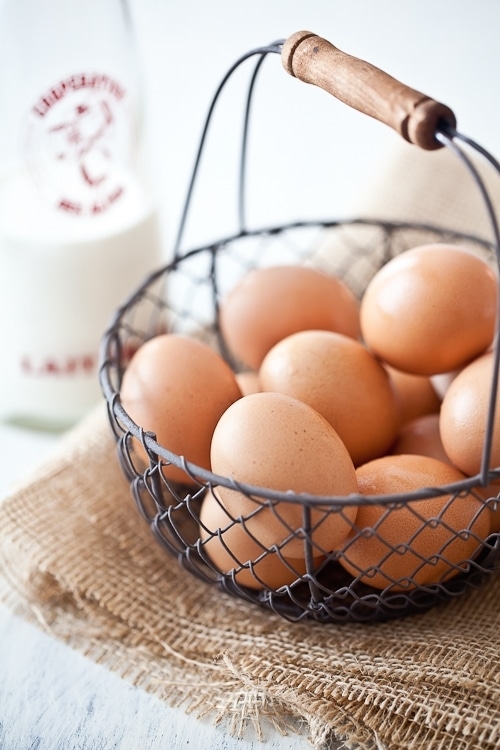
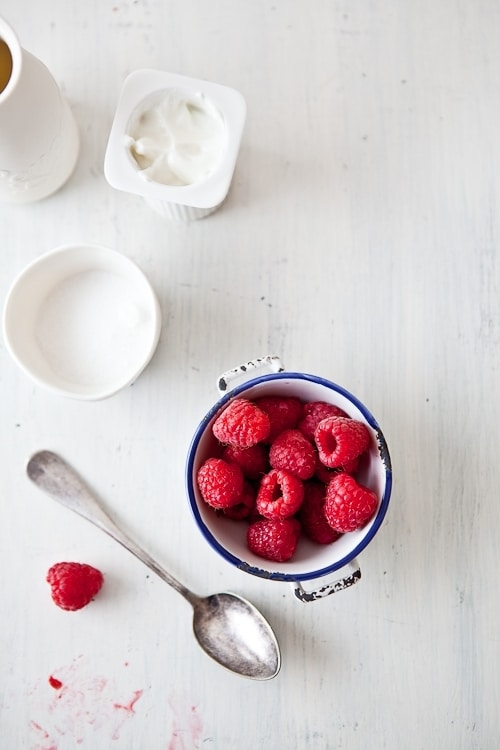
There were so many luscious berry baskets at the farmers market this past week that I got a lot of everything. Blueberries, blackberries (twice), strawberries (again), raspberries (always). Stone fruits and rhubarb also ended up in our basket but that’s for another get together later this week. It’s summer! The house is open to anyone with a good story and a smile.
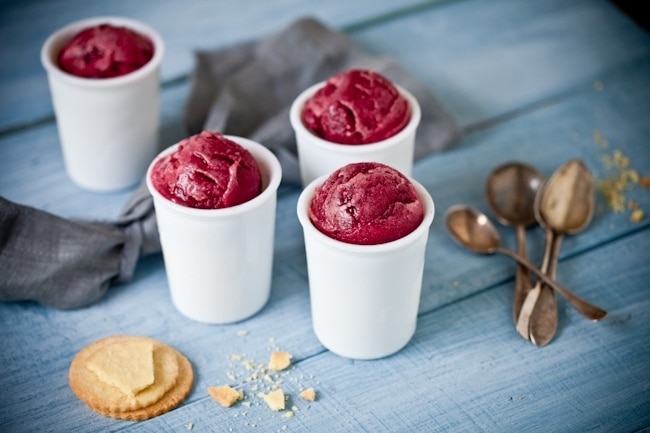
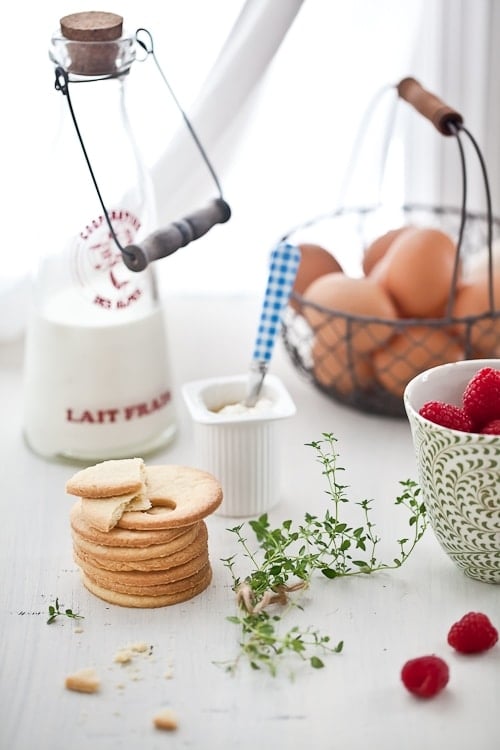
This sorbet is my go-to recipe as I can change the fruit according to the season and always get the same delicious result. Tart and sweet flavors. You can really taste them all separately and together with every bite. Paired with a simple vanilla shortbread cookies and you have one of our favorite summer treats.
Now…I need to fly home and find that sorbetiere my mom bough when we were kids…!
Ingredients:
3 cups fresh or frozen mixed berries of your choice
1 cup sugar
2 cups water
zest and juice of one lemon
Directions:
In a medium saucepan set over medium high heat, place the berries and the rest of the ingredients and bring to a quick boil. Reduce the heat to low and simmer 10 minutes. Remove from the heat and let cool completely. Puree until smooth in a blender or food processor and then strain through a fine mesh chinois (strainer). Process in your ice cream machine according to the manufacturer’s instructions.
Vanilla Shortbread Cookies:
Makes about twenty 2-inch round cookies.
Ingredients:
1 stick unsalted butter at room temperature
1/4 cup sugar
1/2 vanilla bean
2 egg yolks
1 cup millet flour
1/2 cup sweet rice flour
2 tablespoons to 1/4 cup milk (optional)
Directions:
In the bowl of stand mixer fitted with the paddle attachment, whip the butter and egg yolks together on medium speed until creamy looking. Split the vanilla bean in half and scrape the seeds with the back of a knife and add to the butter and sugar mixture. Mix for 10 seconds. Add the millet and sweet rice flour with the mixer still on low speed. If the mixture feels too crumbly add a little bit of milk to obtain a smooth but not too wet dough. Start with one tablespoon at a time.
Gather the dough into a bowl and refrigerate for about 2 hours.
When ready to bake, turn the oven to 350F and position a rack in the middle.
Roll the dough in between 2 sheets of parchment paper and roll to about 1/4 to 1/8-inch thick. Cut cookies out in the dough and place them on a parchment lined baing sheet. Bake for 10-12 minutes or until golden.
Serve with the sorbet.
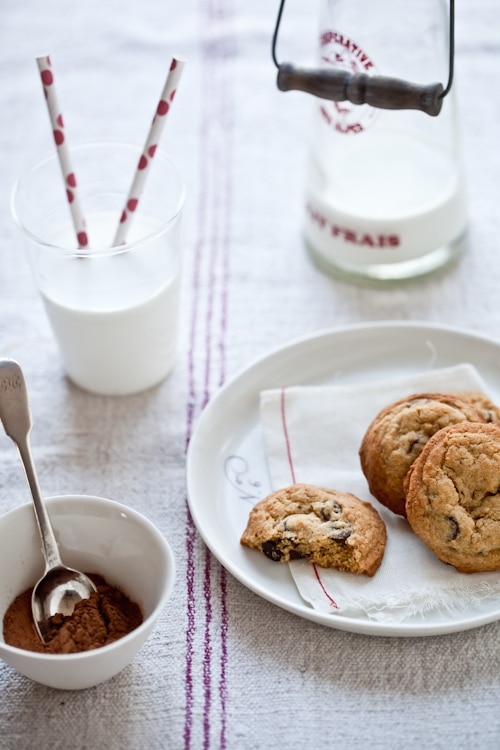
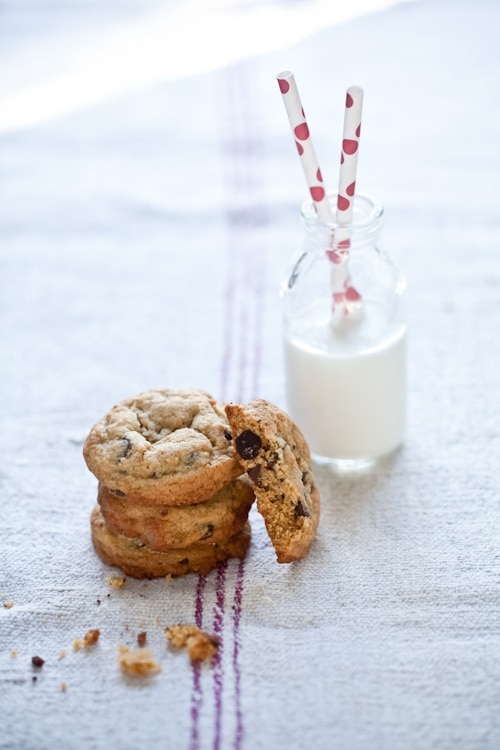
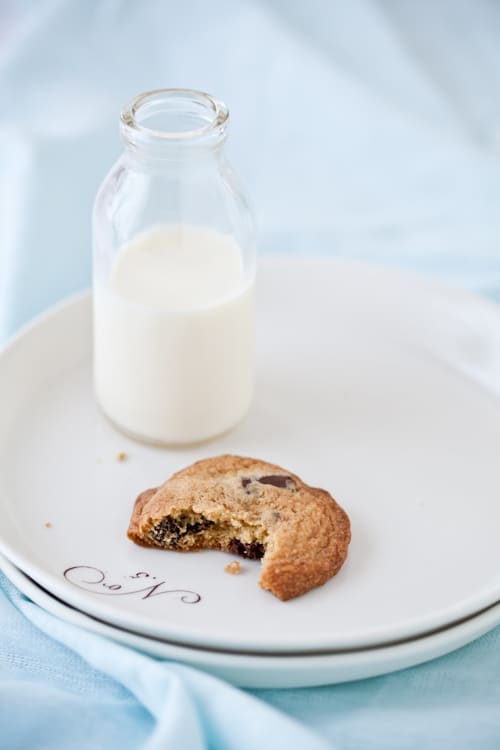
Do you have those days when you could just use a cookie and a glass of milk? When being six sounds just about as good as winning the lottery? Nothing has to be terribly wrong or terribly right. No. Just good enough to feel like having a cookie.
A warm embrace. A love note. A familiar face. A couple of cookies and a glass of milk. Same difference.
With work and life moving at a million happy miles an hour, all I wanted to do the other day was just to put my pen down and make cookies. And I did just that. The simple act of taking a tray out of the even and getting that first whiff of freshly baked cookies was just the ticket.
I think I got a bit carried away though because I ended up making 3 dozens! I have a difficult time with happy mediums apparently. I am all or nothing. Even while baking. I was on a baking high and well, procrastinating on everything else for an hour made me feel like a kid skipping homework. Everything would be ok, there were cookies.
I grabbed a few and a glass of milk and I started going through all your comments about your food styling struggles or photography in general. You’ll be happy to know that your questions on camera modes, settings, lighting, composition are covered in depth. As far as styling goes, I was thrilled to see that so many of your issues were topics I had chosen to use as examples. But I did see a couple of interesting ones which I must keep under wrap until the whole project is complete.
There has been a lot brown foods made and eaten here the last few days, as well as soups, steaks, pasta, purees, pizza, etc… Lots more than we can eat in one day just the two of us! So with a box of cookies in one hand and a container of chili in the other, I knocked on the neighbors' doors ever so gently and left them at the door. They just had a baby you see. I bet everyone was happily getting some shut eye for a while.
It won’t make everything get better but I figured that if a couple of cookies and a glass of milk made me alright with the world well, maybe the same could happen for them. On a side note, I still have to make the old pup stop howling everytime he hears the baby cries. It’s not helping, ehehe!
One more thing before I end this post. Like everyone else, we are glued to the news regarding the events in Egypt and as someone with friends deeply tied in with the country, I just want to tell all you who are affected by these events that we are keeping you close to our hearts.
Chocolate Chip Cookies, adapted from David Leite of Leite Culinaria.
Notes: I used half coconut oil and half butter for the fat in these cookies. If you do the same, make sure the coconut oil is soft still but not liquid. Coconut butter would work too. You can of course use the same amount in butter which would bring the butter amount to a total of 10 tablespoons.
I used ground flax seeds soaked in a little water to act as a binding agent to mimic the gluten or xanthan gum (I was out of it).
B. finds that flaxseed has a taste so I add just a pinch of cocoa powder to the batter to tone down the flax seed taste.
1/2 cup sorghum flour
1/2 cup millet flour
1/2 cup corn starch (you can sub tapioca starch)
1/2 cup potato starch
3/4 teaspoon baking soda
1 teaspoon baking powder
1/2 teaspoon kosher salt
5 tablespoons unsalted butter, at room temperature
5 tablespoons coconut oil (centrifuged, extra virgin)
1/2 cup brown sugar
1/2 cup granulated sugar
2 teaspoons ground flaxseed soaked in 1/2 tablespoon water for 10 minutes
a pinch cocoa powder
1 large egg, at room temperature
1 teaspoon vanilla extract
1 cups chocolate chips or chocolate chunks
In a large bowl, whisk together each of the flours and "starches" along with the baking soda and baking powder.
In the bowl of an electric mixer fitted with the paddle attachment, beat together the butter and the sugars on medium speed for a couple of minutes, then mix for 1 minute more. Reduce the speed to slow and ddd the flaxseed and cocoa powder, the egg, beating well and scraping the sides of your mixer bowl if necessary. Add the vanilla extract and beat 30 seconds longer.
Add the flour mixture into the batter, mixing just until the dry ingredients are coming together. Add the chocolate chips and mix briefly to incorporate.
Cover the dough with plastic wrap and refrigerate 1-2 hours.
When ready to bake, preheat the oven to 350°F, position a rack in the middle of the oven and line baking sheets with parchment paper or a non-stick baking mat.
Scoop your preferred size of dough balls onto your baking sheet, 2 inches apart from each other.
Bake the cookies about 12-15 minutes, depending on the size or until golden brown. Let them cool 10 minutes on the baking sheets before transferring to cooling racks.
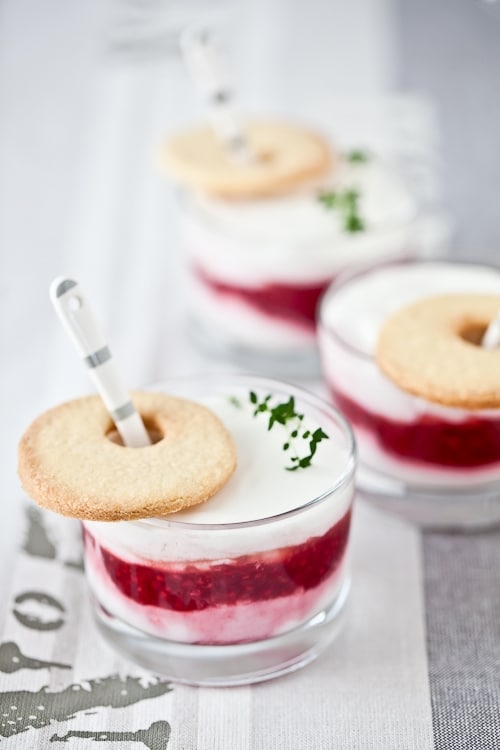
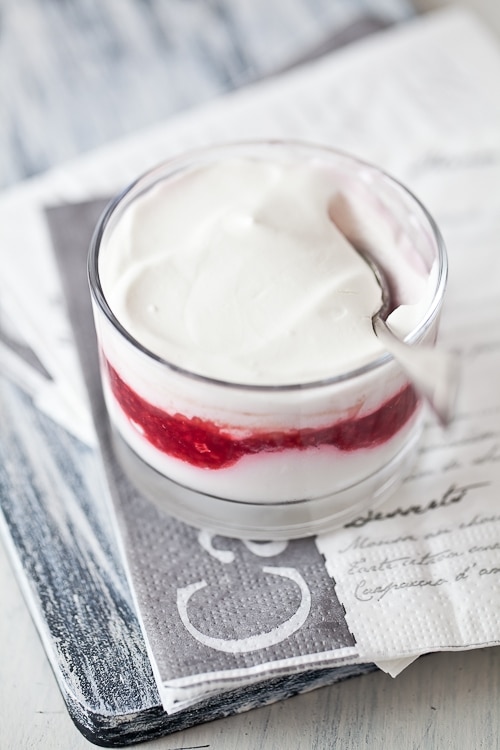
Time flies. Let’s face it, the only time when it doesn’t is when we twirl our thumbs. And even then, I have seen people twirl they thumbs long enough to realize how time flew by – along with life – as they were doing so. The only thing I’ve twirled this week were my hair while sitting at the computer to edit pictures and lastly the spoon in my verrine of Honey Yogurt Mousse with Raspberry Coulis. And cookies! I have twirled a cookie around my little finger. My life is now complete…
Ok, you know that’s sarcasm. There is more to life than mousse and cookies… although…Simplicity has been the motus operandi lately around the house and will remain for a little while (more on that later) and as such, these fit the bill perfectly. I could not help but giggle as I was spooning the different layers in the glasses. I kept thinking of my niece Camille who looked at me with wide open eyes one morning I was twirling honey and yogurt for my cereals.
She’s at the age of food discoveries and adventures. Foods that look good touching, separated, stacked. Textures that play well together. Or not. Colors. Foods that fly on spoon to get into your belly. Those especially rock. And I was happy to oblige and fly that spoon for her. I’ll always treasure those moments alone just as much as those spent with her sister or with her sister alone. These two are just beautiful inside-out and I am proud of my brother for that. Awesome parenting.
The little things that are second nature to an adult like mixing honey and yogurt mean a great deal to her right now. Other food related questions were pretty entertaining too. How do you make the air bubble up in a mousse? Why do you turn your spoon in your cup as you eat? Our morning rituals were about the essentials of food. Came four o’clock and we were into Disney Princesses and their lack of fashion sense. Go figure.
All these moments came rushing back in my head as I was making these and taking great care in separating the layers of yogurt mousse and raspberry sauce. Why? No idea since it would all turn into a giant swirly twirly mess once we’d start digging. It reminded me of the day Camille spent 15 minutes separating her steak from her tabouleh salad only to mix it all up in the end. It’s food. It’s fun. And if you don’t mind eating cold, play along.
When I say we have to do simple these days, I am not exaggerating. I don’t usually talk a whole lot about work here (that’s what the "tear sheet" section of my portfolio is here for – needs an update too) but the next few weeks, months, will be trying my energy to come here to post. Right before leaving for France I signed a contract with Gibbs Smith Publisher to do the photography and styling for Holly Herrick's new book on Tarts. Holly is wrapping up the writing and I have started the photography as we speak (Fall/winter 2011 release). I am completely psyched about it!
It’s Holly’s third book as an author, my second as photographer & stylist and our first together. With a blog titled Tartelette, I also think it was kismet…
It is as rewarding as it sounds. It’s a lot of hard work too. I am doing the shopping, cooking, styling, photographing, post processing, etc… Holly is an accomplished recipe writer (and food stylist – team work!) so I do work with the assurance that the recipes will work. I just take extra steps since we only have one shot to tell you a thousand thoughts. So yes, there is necessary tweezer action in pulling that piece of tomato forward to even out colors or tucking that slice of peach sticking out like a cowlick on a baby’s head.
Some of you have emailed wondering about another book. I can tell you that Carrie’s book that I styled and photographed, Deliciously Organic will be released in November. I just got the chance to look at the final manuscript and I got such a strong pinch in my heart. I am so honored to have participated in Carrie’s vision and message and at the same time worked with such a professional team. And the food…ah the food! It will knock your socks off!
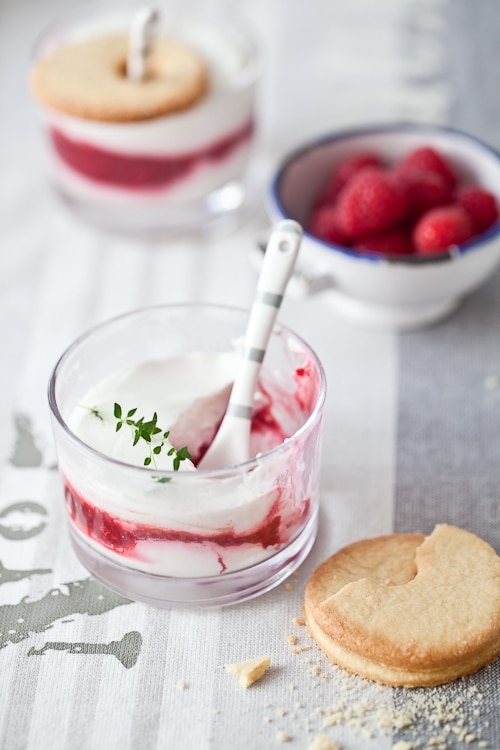
Just thinking about the pile of work ahead makes me reach for one of those yogurt mousses. Soft, creamy, tangy from the raspberry and with that soft touch of honey through and through. Exactly what the doctor should prescribe on a Friday night. Make mine a double!! The cookie is a necessary icing on the cake so to speak. Trust me. Makes it even better…
Honey Yogurt Mousse With Raspberry Coulis:
Makes 4 to 6
Notes: the gelatin amount used in the mousse is small enough to help stabilize the whipped cream and prevent the liquids from separating but is not enough to gel it completely so the texture remains soft and silky.
You can use 1 1/2 cups all purpose flour instead of the rice, millet and potato flour used in the gluten free shortbread recipe.
For the coulis:
2 cups (500gr) fresh or frozen raspberries
a few springs of lemon thyme (or lemon verbena, lemon balm, mint, lavender, etc…)
1/4 cup honey
For the mousse:
1 teaspoon powdered gelatin
2 tablespoons water
1 cup (250ml) Greek yogurt
1/4 cup (60gr) honey (I use a lavender honey from the Hautes Alpes)
1 cup (250ml) heavy whipping cream
For the shortbread cookies:
1 stick (115 gr) unsalted butter, at room temperature
3/4 cup (95 gr) powdered sugar (unsifted)
1 large egg yolk
1/2 cup superfine white rice flour
1/2 cup millet flour
1/2 potato flour
(or replace the rice, millet and potato flour with 1 1/2 cups all purpose)
2 tablespoons milk
pinch of salt
Prepare the raspberry coulis:
Place the raspberries, lemon thyme and honey into a heavy saucepan. Cook on medium heat until the raspberries start to break down, about 10 minutes. Remove from the heat, let cool and discard the lemon thyme if using. Set aside until ready to layer with the mousse.
Prepare the mousse:
In a small bowl, sprinkle the gelatin over the water and set aside.
In a medium bowl, whisk together the yogurt and honey. In the bowl of an electric mixer fitted with the paddle attachment, whip the cream to medium stiff peaks. Set aside.
Heat the gelatin in the microwave for 12 seconds or melt on top of a double boiler. Working quickly, pour the melted gelatin over the yogurt and whisk thoroughly. Gently fold in the whipped cream until everything is blended.
To assemble: layer about 1/4 to 1/3 cup of mousse and 2-3 tablespoons coulis in glasses and repeat the layers one more time. Serve with shortbread cookies if desired.
Prepare the shortbread cookies:
In a stand mixer fitted with the paddle attachment, whip the butter and sugar together until light and fluffy on medium speed, 2-3 minutes. Add the egg and mix until combined. Add the flours, milk and salt and mix briefly to incorporate. Dump the whole mixture onto a lightly floured board and gather the dough into a smooth ball. Do not work the dough while in the mixer or it will toughen up. Flatten the dough into a disk, wrap it in plastic wrap and refrigerate for an hour.
Preheat the oven to 350F and position a rack in the middle. Line a baking sheet with parchment paper. Set aside.
When the dough is nice and cold, roll it out on a lightly floured board or in between sheets of plastic wrap to about 1/4 – inch thick. Cut out rounds with a pastry ring or cookie cutter of your preferred size. Place them on the prepared baking sheet and bake for 10-12 minutes. Let cool.
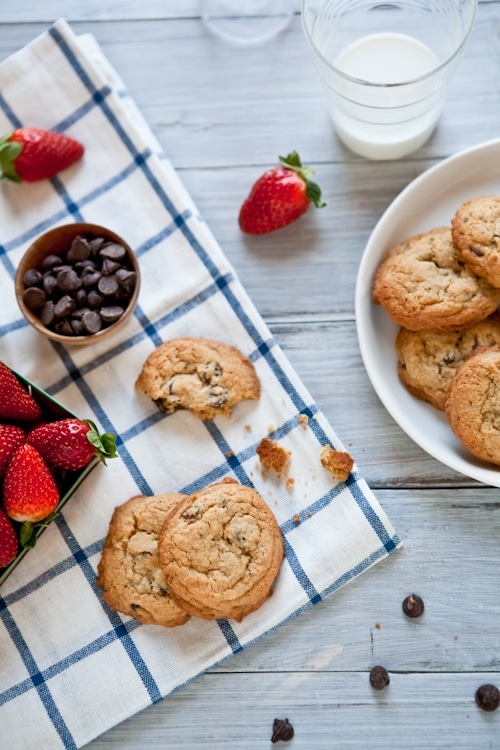
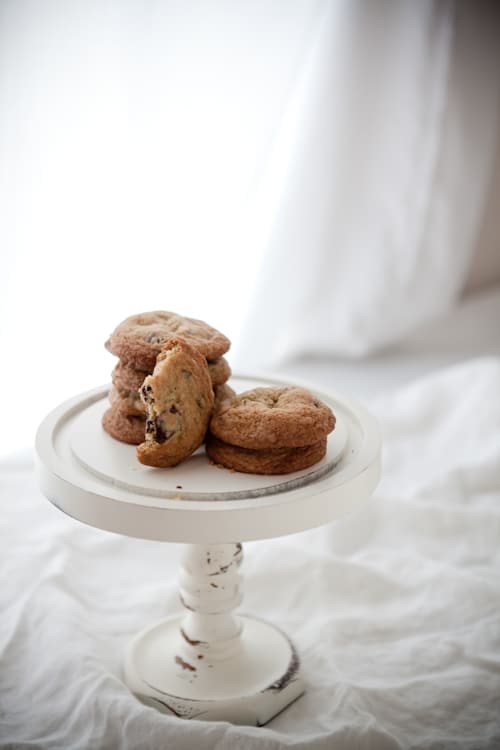
Cookies. Milk. Afternoon showers. Looking at the shoreline through the window. That was just the medicine needed the other day. Even if just for the enticing aroma of warm chocolate wafting through the house. I did not know the power of chocolate chip cookies until I moved to the US though. We don’t really do those back home. We have eclairs, macarons, financiers. These I knew as my pick up-feel better-never let me down treats. Until I met B.
Turns out I married a chocolate chip cookie monster. It does not matter which kind comes out of the oven, a tray usually disappears in its entirety as soon as the cookies are cool enough to handle. And before I am done with the batch I can pretty much start over. His favorites are hands down chocolate chip cookies and I think I have baked 100 different recipes so far. Always in search of the next best one.
I must say, after years of marriage and oodles of batches behind me that I get it. the French have their baguette and chocolate bar as a snack, here it’s cookies and milk….and I love that too. Unlike B. I am good after a couple of cookies but I had to find a gluten free recipe now and one that he would not even blink twice about trying. And liking.
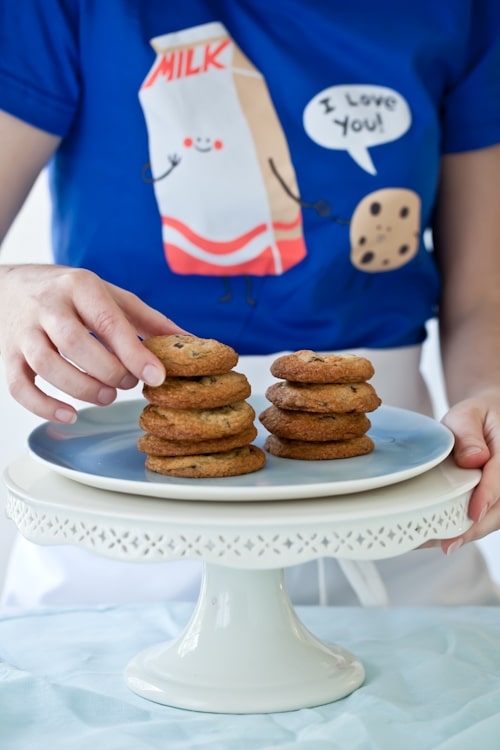
I really had not particularly trying to find one until the good folks at Threadless contacted me about a promo they were doing. I have a personal rule not to do product review here, mostly because I hate to commit to a deadline for one when work is already full of deadlines as it is. But it’s Threadless tees…I love them. I bought my first one four years ago and probably bought over a dozen for friends and family since then. They are awesome. Different, fun and they promote artists and individual talent.
Before I agreed I checked the selection they wanted to promote, trying to tie it in somehow with this blog and give you something back at the same time in the form of a new recipe. You can guess I fell in love with the Cookie Loves Milk design. And I had the perfect reason to search for that gluten free chocolate chip recipe my repertoire was missing.
I picked the most reliable gluten free source I know, my friend Shauna from Gluten Free Girl and The Chef. I know the extent with which her recipes are developed and the love she puts in making them for us around. If you doubt it, watch this video trailer for their upcoming cookbook. See what I mean? I picked her cookie recipe in the Blog Aid cookbook we both participated in to raise funds for the Haiti this past winter. Tons of your favorite bloggers contributed pictures and recipes! And dorky as I am, I baked in my brand new Cookie Loves Milk tee….
You know what I love about that tee-shirt? It brings a smile on everyone’s face. Even the cranky bank teller giggled. Five seconds of giggles in your day and you have already done a great deal for your inner self. Smiling. The good for the soul kind of workout. Something I am definitely happy to promote and stand behind. Not to mention that this tee is so comfortable to wear I almost went to bed with it..eheheh! The flip-flops that came along? Just what I needed for the beach…
But that’s not all… Threadless has nicely offered to giveaway a "Cookie Loves Milk" tee shirt to one lucky reader of this blog (they unfortunately ran out of flip-flops) and I am am adding a copy of the Blog Aid – Recipes For Haiti cookbook where the following recipe comes from. To enter:
– leave a comment on this post (why not tell me your favorite cookie?) between today Wednesday August 11th and Sunday August 15th, midnight eastern US time.
– one entry per person, duplicates will not be published
– no anonymous entry. Sign Zorro or Bambi if you must…
36-hour Chocolate Chip Cookies – originally adapted from David Leite from Leite’s Culinaria, now adapted from Shauna’s version.
Note: Read more about why 36 hours in the fridge makes them better here.
1 cup sorghum flour
1 cup corn starch (you can sub tapioca starch)
1 cup potato starch
1 cup millet flour
1 tablespoon xanthan gum
1 1/2 teaspoons baking soda
2 teaspoons baking powder
1 1/2 teaspoons kosher salt
2 1/2 sticks unsalted butter, at room temperature
1 1/4 cups brown sugar
1 cup plus granulated sugar
2 large eggs, at room temperature
2 teaspoons vanilla extract
2 cups chocolate chips or chocolate chunks
Sea salt
In a large bowl, whisk together each of the flours and "starches" along with the xanthan gum, baking soda and baking powder.
In the bowl of an electric mixer fitted with the paddle attachment, beat together the butter and the sugars on medium speed for a couple of minutes. then mix for 1 minute more. Don’t overmix. the eggs, 1 at a time, beating well in between each addition and scraping the sides and bottom of your mixer bowl if necessary. Add the vanilla extract and beat an extra 30 seconds.
Add the flour mixture into the batter, 1/2 cup at a time, mixing just until the dry ingredients are coming together. Add the chocolate and mix briefly to incorporate.
Cover the dough with plastic wrap and refrigerate for 36 hours.
When ready to bake, preheat the oven to 350°F, position a rack in the middle of the oven and line baking sheets with parchment paper or a non-stick baking mat.
Scoop your preferred size of dough balls onto your baking sheet, 2 inches apart from each other. Sprinkle the tops with the sea salt.
Bake the cookies about 12-15 minutes, depending on the size of your cookies or until golden brown. Let cool the cookies 10 minutes on the baking sheets before transferring to cooling racks.
It’s the little things lately that fuel me up. The details. Paying attention. So much is out my hands that it’s all in the little things. Maybe it’s the renewed warmth of Spring doing that to me with very much intensity. Maybe it’s the rhythm of the work days that intensified lately. It makes me crave finding my grounds, keeping them and taking care of us.
Food is naturally part of that equilibrium. Roasted chicken and mixed greens enjoyed with friends during a lazy Sunday lunch. A simple salad of heirloom tomatoes shared with B. in between his classes and his music. A classic nosh of French cheeses and pate downtown at a new favorite hang out. A simple plate of lentils and kale topped with a friend egg on a weeknight. Simple. Details. Seasonings. Spices. Balance.
When it comes to dessert, you can bet I am right around the corner with a big plate and large smile! I rarely want a slice of cake or a dozen cookies. Fresh. Seasonal. Textures. Aromas. These words resonate strongly when it comes to picking desserts. There are things I can’t have anymore and ingredients I need to pay attention to so desserts need to pack a punch in a few bites. They need to make me weak in the knees or I’ll pass. I am a gourmande. I’d like to enjoy that for a while and not feel worse because I am not keeping tabs of what I do.
Most nights dessert is a bowl of strawberries or raspberries and a dollop of whipped cream (my absolute weakness), a handful of cherries, a baked apple. Simple. Then there are the simple but planned out desserts we enjoy a couple of times a week. The ones I come to tell you about here. The ones which flavors dance in my head long before I actually make them.
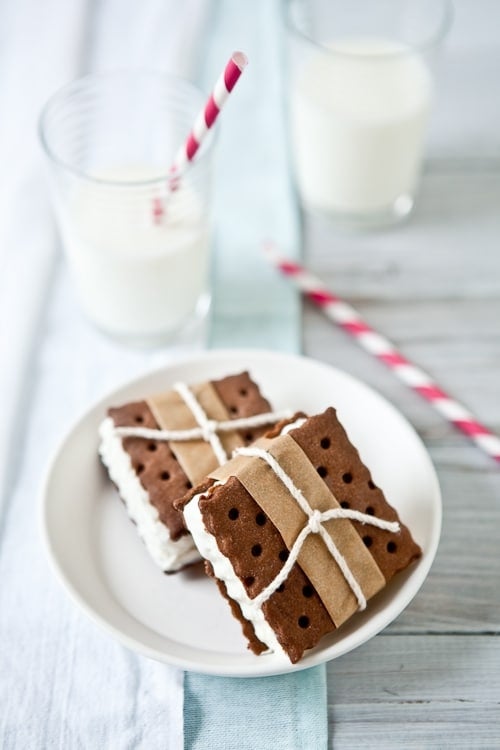
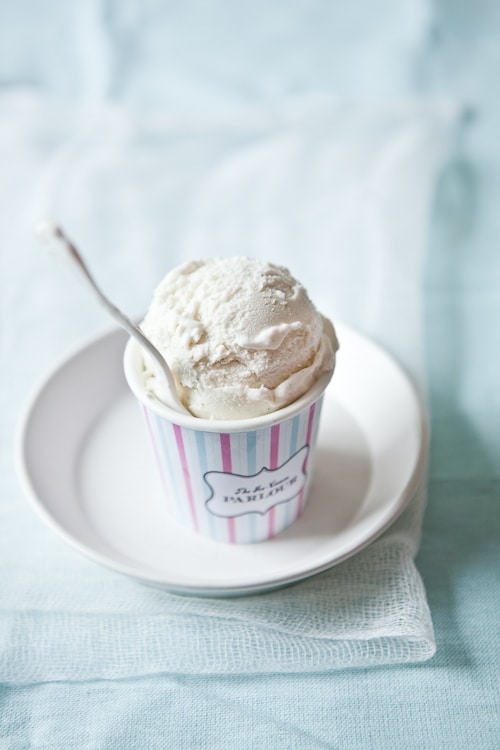
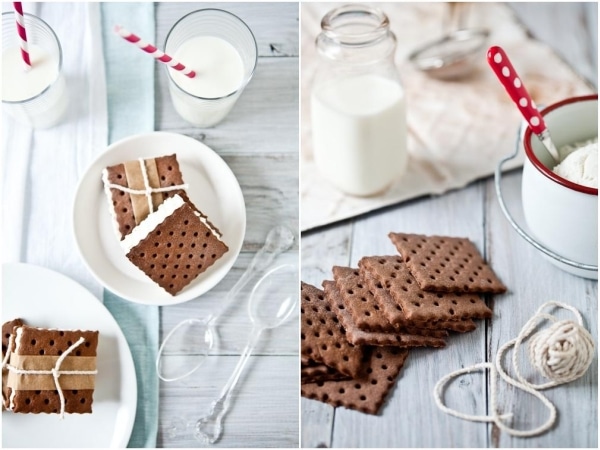
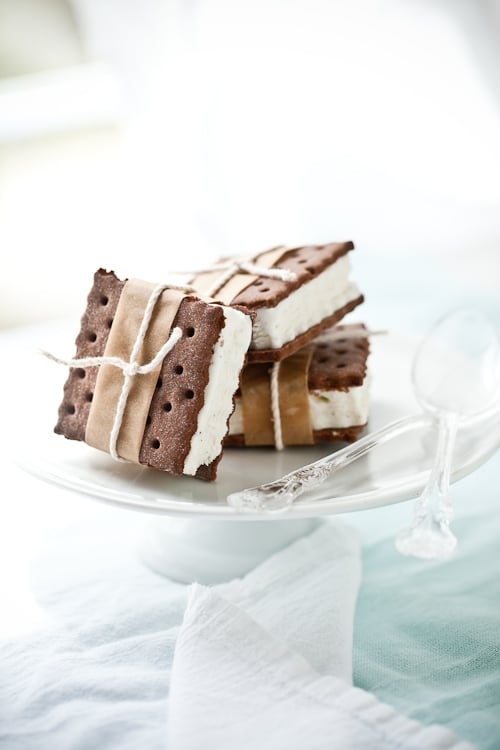
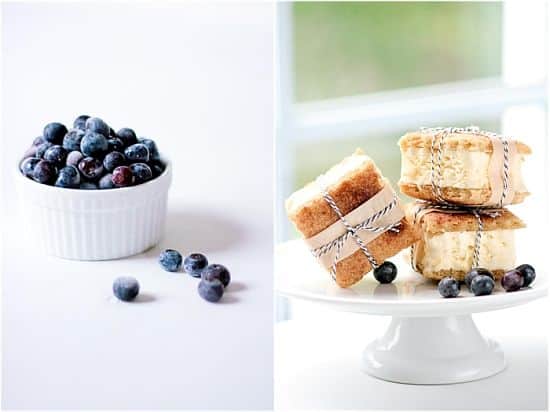
Like these Vanilla Ice Cream Sandwiches. They were not just good. They were simple. They were made from scratch with good stuff like homemade vanilla ice cream. And they were gluten free. I know! You’re thinking "Stop the healthy stuff Helen or we’re going to throw you a cookie.""Ice cream! Portable! Yes!".
I could fit one in my hand without a problem. I could do a 3 bite dance just as easily. I could also carry one in my pocket. I am sure the pups would follow me to the end of the earth with such a trick, ahahah! B. simply loved the taste of the wafers which always make me happy as I bake more and more gluten free that he can’t point out the switch. He grabbed a handful of plain wafers on his way out earlier. Just like that.
I took the cookie recipe used on a job last week and modified to be gluten free and I was really pleased to see the end products behaved the same while being prepared, baked and stacked. The original recipe called for margarine which I subbed for half butter and half coconut oil (see reasons and how to’s in recipe section here) but feel free to use all butter. For the ice cream, I kept it pretty simple and did an eggless base loaded with good vanilla seeds.
Here’s what I like about making ice cream sandwiches from scratch beside the obvious "they’re better for us": it gives me an excuse to make fresh ice cream for some other night of the week. I don’t have to fill all the cookies at once and can do so as we please since they too can be kept in the freezer and I can keep some cookies plain on the side when a chocolate cravings comes knocking at midnight. As it is now….
Why is the freezer door this loud this time of night when everyone is asleep but me? Ha!
————————————————————————————
One more thing before I go: If you are curious to read about more about the whys/whats/wheres of this blog, check out an interview I just completed on Bizymoms by going here. Thanks! Props:
– milk bottle and various plates: ebay
– flatware and straws: Kikkerland on amazon.com
– paper straws: Bake It Pretty (I hear Anthropologie also has them)
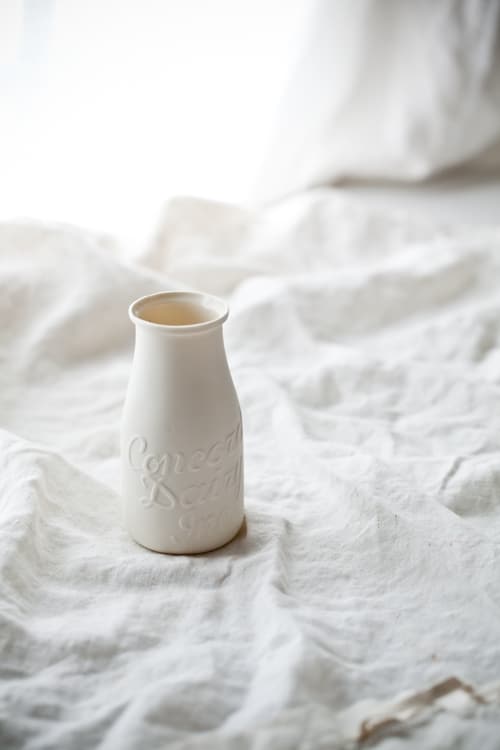
– "Ice Cream Parlor" cup (2nd picture): cup outfitted with a DIY pattern from Eat Drink Chic.
Vanilla Ice Cream Sandwiches:
Makes twelve 3-inch square sandwiches
Notes:
– you can use 2 cups all purpose flour instead of all the combined gluten free flours (sweet rice through cornstarch)
– for the dotted look on the sandwiches, I used one of the tools comprised in this set that I received as a gift years ago.
For the cookies:
4 tablespoons (55gr) unsalted butter, at room temperature
4 tablespoons coconut oil (55gr), at room temperature
1 cup sucanat (organic cane sugar) muscovado or brown sugar
2 large eggs
1 tsp. vanilla extract
1/2 cup cocoa powder
1/2 cup superfine or regular sweet rice flour
1/2 cup superfine or regular brown rice flour
1/2 cup millet flour
1/2 cup cornstarch (use tapioca flour if allergic to corn)
1/2 tsp xanthan gum
1 tsp. baking powder
1/4 tsp. salt
Prepare the cookies:
In the bowl of a electric mixer fitted with the paddle attachment, beat the butterm coconut oil and muscovado sugar on medium speed until fluffy, about 2-3 minutes. Lower the speed and add the eggs, one at a time, beating well after each addition. Add the vanilla extract.
In a separate medium bowl, combine the cocoa powder, all the flours, baking powder, and salt. Still with the mixer on low speed, at the dry ingredients to the butter mixture and mix until the dough starts to come together. Gather the dough into a ball and refrigerate at least 1 hour.
Preheat the oven to 350 degrees and line a pan with parchment paper or a silicone mat.
On a lightly floured surface or a Silpat, roll out the dough to about 1/4-inch thick. Use your preferred cookie cutter to cut out as many pieces as you can. Gather and re-roll the scraps if necessary. Make patters on cookie with a fork or other tool (see notes) if desired. Place on lined baking sheet and bake 8 – 10 minutes. Cool completely before sandwiching them with ice cream.
For the vanilla ice cream:
1 cups (250ml) heavy cream
1 cup (250ml) whole milk
1 cup (250ml) whole coconut milk
1/2 cup (125gr) mild honey
1/2 vanilla bean, split open and scraped – seeds set aside
Prepare the ice cream:
In a large saucepan set over medium low heat, bring the cream, milk, coconut milk, honey and vanilla bean seeds to a simmer, stirring occasionally. Remove from the heat and let it cool to room temperature. Refrigerate, preferably overnight.
Process the mixture into your ice cream maker according to the manufacturer’s intructions.
Once the ice cream has reached soft serve consistency, pour about half into a 9×9 freeze proof dish lined with plastic wrap (try to get about 1 to 1.5 inch thickness for the ice cream to sandwich later on) and the other half into a freezable container. Freeze until firm.
No ice cream maker? No problem! Pour the cream into a freeze proof container and freeze for a couple of hours. Take it out and whip it with an electric mixer or immersion blender, freeze it again, whip it again….do that four or five times. The mixture won’t be quite the same but pretty darn close.
Assemble:
With the same cookie cutter, cut through the ice cream that was poured into the 9×9 inch pan and sandwich in between two cookies. Keep frozen. The cookies will keep well wrapped in the freezer for up to 3 months.
————————————————————————————-
I’ll upload the recipe in French either tonight or Wednesday – ran out of steam tonight!
La recette en Francais ce soir ou demain au plus tard. Le boulot ca fatigue – ahahahah!
More on the CSA Cook-Off I mentioned in my last post: Diane and Todd of White On Rice Couple posted a wonderfully illustrated account of the experience. I just laughed my little derriere off all over again reading it!
I am going to be put to the task of interactive baking and cooking again starting tomorrow. A good friend and fellow food blogger is flying me to Richmond where I will be teaching her the ins and outs of a few pastry items and techniques. So forgive me if there are even less replies to your emails and comments until the end of the weekend. I hear we’ll even have time to take some margarita breaks, now that’s the cherry on the cake, wouldn’t you say?
I started this post on Monday night. It is now Thursday and I am finally done selecting my favorite pics to illustrate Part 3 of our adventures in Asheville. That was a tough job. Seriously. More tasty locally grown foods, more talented people and artisans. Colors and stories to awaken all your senses.
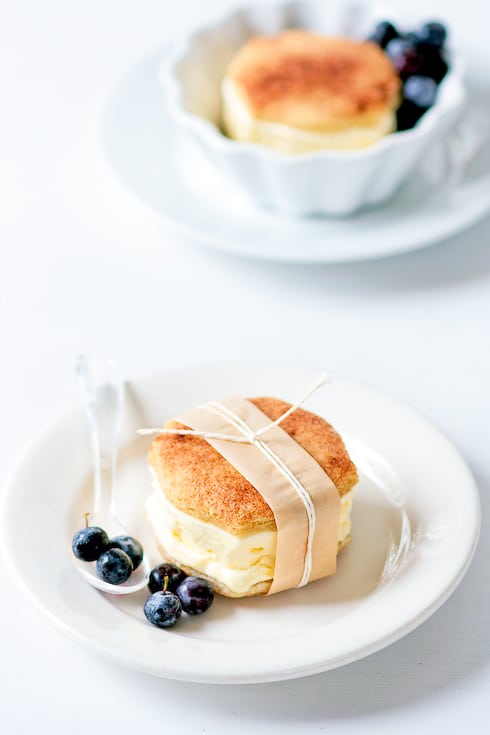
On the other hand, an easy thing to do was to work on today’s post while eating a couple of these Snickerdoodle Ice Cream Sandwiches inspired by the dessert we were served at lunch that day. I don’t have pictures for what happened half the day (camera battery spare in hotel room, classic) but hopefully some of my fellow food bloggers do(hint!).
If Tuesday ended with the King of all gourmet meals, Wednesday was all about the people who thought it through and made it happen. I am just as happy putting on a pretty dress and sit down to a 6 course meal as I am an apron and help milk some goats. I do know how to but I am glad they never asked. It’s been a while and it is nothing like riding a bicyle, trust me.
Interestingly enough, we woke up Wednesday morning without major pains (sake does have magic powers), and the general consensus was definitely to try to pace ourselves given the day’s planned activities. Thought quickly abandoned upon sitting on the patio of Sunny Point Cafe and perusing the menu. Funny how a tall and super fresh Mimosa makes you wish for a nibble. I am not a breakfast person but I sacrificed my habit in the name of research again and devored a plate of peppery salad greens, popping under your teeth grape tomatoes, and smooth scrambled eggs. Oh yeah, still not liking breakfast unless I have this everyday!
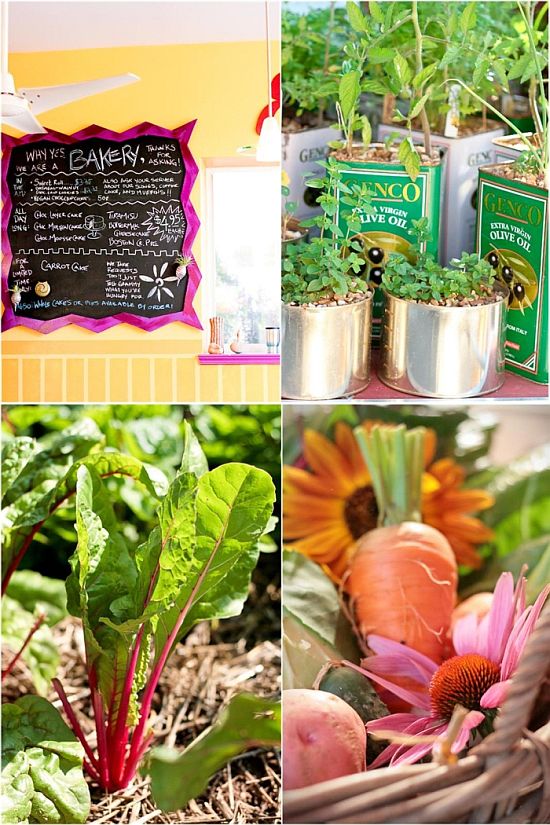
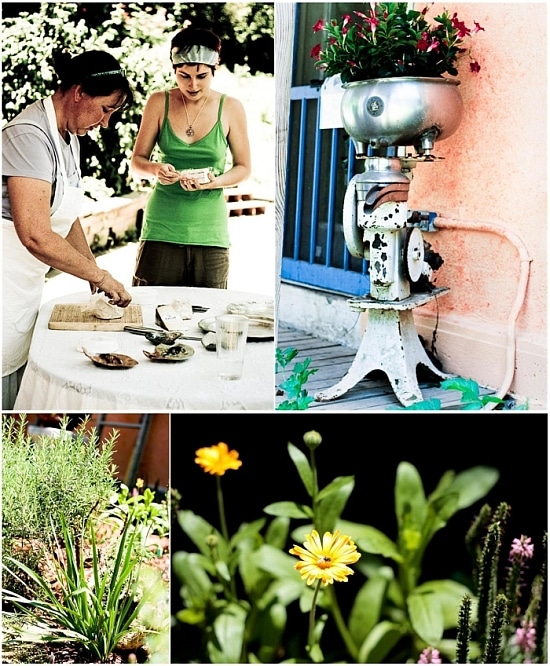
If you are cook, Sunny Point is the kind of place you want to work for no matter how hard the job. As a customer, you know you can meet up with friends, have a cosy moment with your moment, knowing that you will have the same consistent quality dishes after dishes (I did ask the locals sitted next to me!).
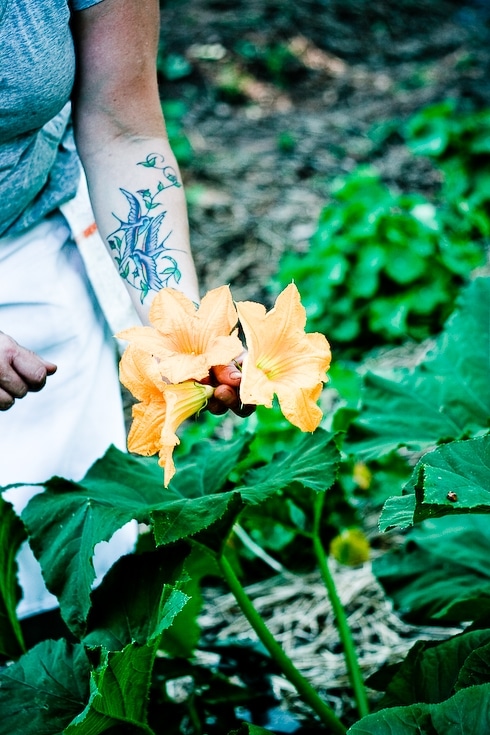
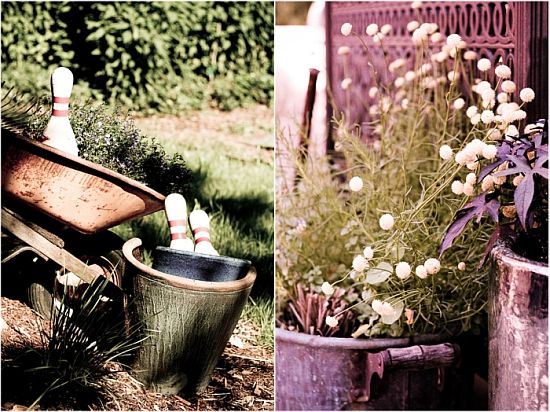
Why? When a bubbly, tatoo-bearing chef takes you to the garden and pulls out some squash blossom with a smile as big as the moon going down the list of possibilities for dinner, it just becomes contagious. You simply want to start pulling weed with the staff or rush home and water your potted herbs. Indeed, the vegetables on your plates are straight from the adjacent garden, cooked just right in the restaurant kitchen and perfectly matched with fresh homemade breads.
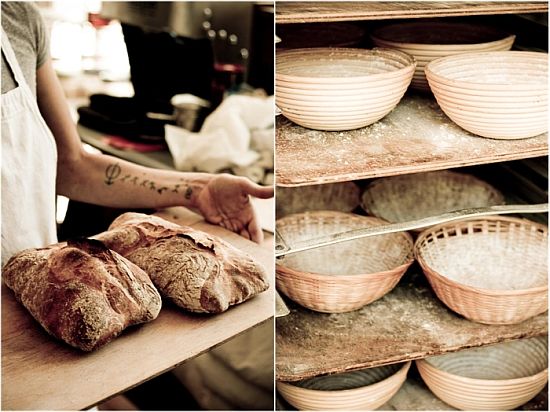
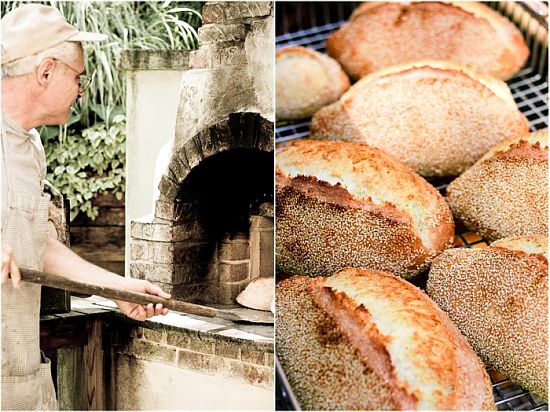
After a thorough tour of Sunny Point’s garden we headed to Wake Robin Farm, on the outskirts of Asheville. I know that meeting Steve Bardwell became a strong point of our trip. We quickly named him "Steve The Bread Man" and literaly drank the passionate words coming out of his mouth as he explained his baking process and ideas. Some of us even swooned. Or was it the tray of pastries brought over by David Bauer from Farm and Sparrow? Flaky croissants and danishes but I had to pass, entirely motivated by distand visions of antacid pills and Tylenol and the desire to enjoy the rest of the day food fest.
Steve loves his craft. He knows it. He understands what it takes to make good bread. Dedication, great ingredients and of course, a kick-ass oven like the one built right outside the house. I was checking out the pans, breads displayed and work flow of the bakers while Brian noticed a few details that escaped me that day. One thing for sure is that we all left wanting a wood burning oven just like his and some of us have already made it their summer project.
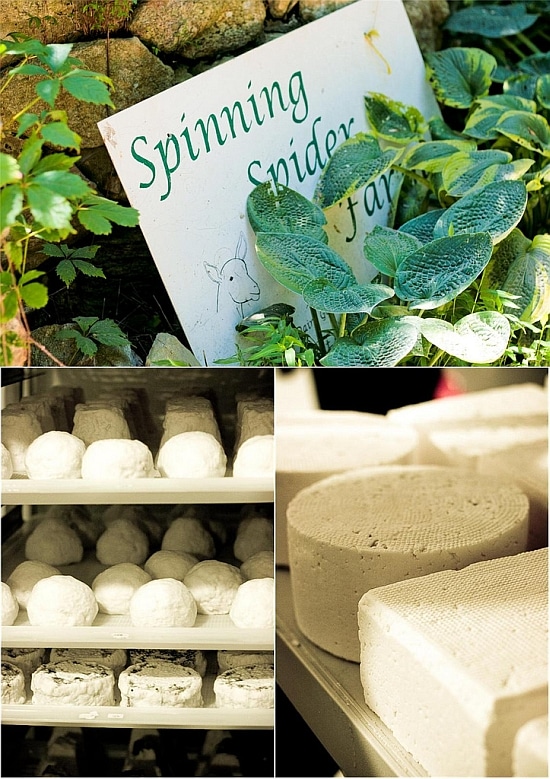
The scenery at Wake Robin Farm Breads is absolutely gorgeous but Spinning Spider Creamery was next on our list and I was ready! I had tasted goat cheese from The Owen’s creamery on a previous visit to Asheville and was looking forward to meeting the people and structure behind it.
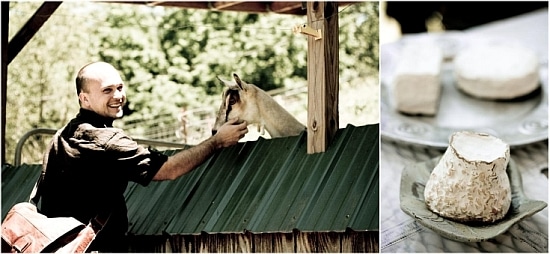
Goat cheeses are among my favorites and I am thrilled when friends discover that it goat cheese making goes far deeper than the fresh logs you find at the supermarket. My childhood favorites were hard rock little crottins that my grandmother would age on top of the fridge or the ash covered goat pyramid she would make me choose from the cheesemonger’s stand at the market. I could have listened to Chris, the cheesemaker for hours as she explained the creamery’s process and history. I want to thank her for taking the time to humor my questions about the ash covering process on the logs and pyramids. Maybe one day when I get a goat…
Happy goats, quality ingredients and obvious care. It really shone in the vast array of cheese we sampled (with Steve’s bread!), from fresh to hard goat cheese, mild or pungent. I think we all found our bit of happiness that day! One thing I did not expect was to meet a young lady I sort of knew through her writing. Standing in front of me, beautiful and serene in her green shirt and perfect porcelain skin was hard working Megan from The Importance Of Being Sentient. She loves the mountains and all that surrounds her as much as I loved the ones from Provence. Such a quiet person and yet you sense how much she wants to shout Carpe Diem out loud on all the rooftops of the world. Well go ahead girl and never ever stop!
We were deep into our cheese tasting that Dodie ushered us to meet Jamie Ager from Hickory Nut Gap Farm who purveys Asheville’s restaurant with some of the tastiest grass fed beef and pork I have tasted. And that’s when my battery gave out. Right as we were about to have another fine feast laid out for our tasting pleasure. Jamie is a riot. His sense of family and partnership extending to his cousin who provided the vegetables for lunch as well as his good friend from The Corner Kitchen who prepared the feast with his chef de cuisine.
You are just have to trust that the pork belly salad we started with was mighty fine with the perfect ratio of meat to fat, that the grass fed beef absolutely knocked my socks off, and that my truffled potato salad did not mean a drizzle of truffle oil but a giant slice of black truffle (I think I had a slice and a speck but I horded that one!). And when I thought I had no room left for dessert, I quickly changed my mind at the first bite.
You would too if you had Lemon Ice Cream from Ultimate Ice Cream paired with The Corner Kitchen’s Snickerdoodles and a few blueberries for good measure. I could have had a vat of it and still wished for more. We did have quite a bit of ice cream on this trip but I will never be one to object. Quite perfect to end such strong meals. I begged (again…completely shameless when it comes to you and desserts!) and both Joe and Kevin kindly provided the recipes that have made Bill and I say "oooh this is so easy and good!" for the past 3 days. Thank you gentlemen.
Snickerdoodle Lemon Ice Cream Sandwiches:
For the snickerdoodle cookies:
½ cup each butter and shortening, at room temperature
1 ½ cups sugar
2 eggs
1 ½ teaspoons cream of tartar
1 teaspoon baking soda
1/4 teaspoon salt
2 ¾ cups all-purpose flour
Beat butter, shortening, sugar and eggs together until creamy. Add cream
of tartar, baking soda and salt. Beat until smooth. Add flour and mix well.
Chilling overnight is preferred; otherwise at least two hours.
Combine topping ingredients in small, shallow bowl. After chilling, roll out to 1/4-inch thick in between sheets of plastic wrap and cut out desired shapes. Place on ungreased baking sheets, sprinkle with cinnamon sugar and refrigerate 30 minutes.
Preheat oven to 375F and position a rack in the middle. Bake the cookies for 10 minutes or until golden brown. Let cool completely before filling them with the ice cream.
Ultimate Lemon Ice Cream:
Finely grated zest of 3 lemons
1/2 cup fresh lemon juice
3/4 cup sugar or 2/3 cup agave nectar
4 egg yolks
pinch of salt
1 cup milk
2 cups heavy cream
In a non-reactive bowl, mix the lemon zest, juice and sugar (or agave nectar). Refrigerate one to two hours to blend flavors
In a large bowl, slightly beat the egg yolks to break them up. Heat milk to a bare boil in a large heavy saucepan. Pour the milk over the eggs and return combined mixture to the saucepan and gently heat (do not boil) until the mixture coats the back of a spoon. Refrigerate for at least 2 hours. Combine milk mixture with heavy cream and lemon mixture. Spin in your ice cream maker according to the manufacturer’s directions
——————————————————————————-
I also want to extend a huge Thank You to Holly of Decor8 for featuring my pictures in her "8 Inspiring Photographers, post. I am blushing.
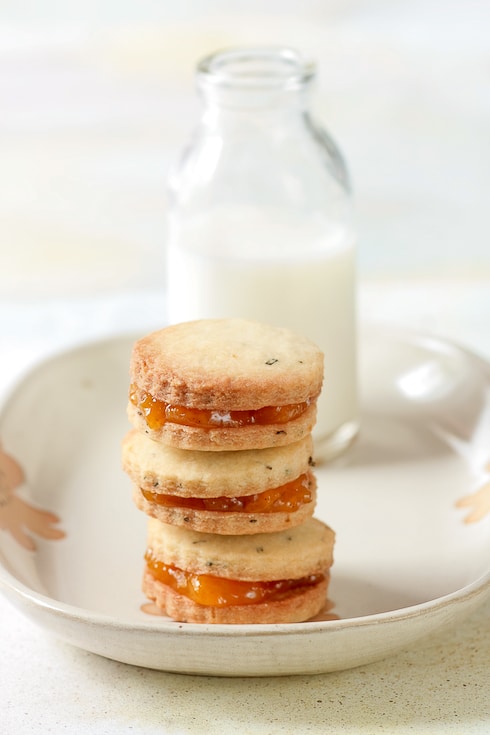
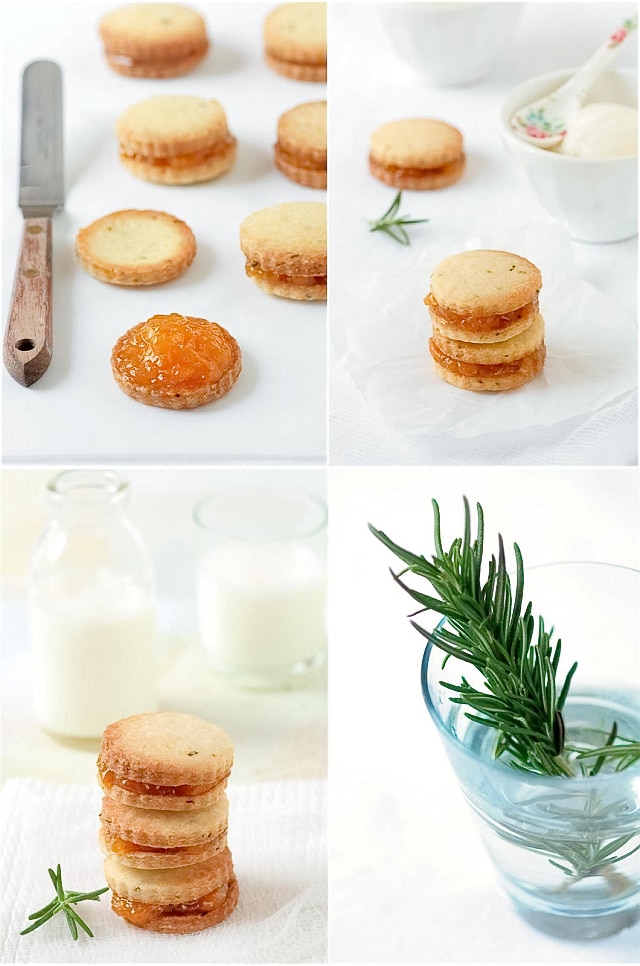
Tada! No strawberries! I can do this. A completely strawberry free post right in the middle of the season. Didn’t hurt either. Ok, maybe a little but the pain was eased by the handful of blakberries gathered today in the yard and having a batch of these Rosemary and Apricot Shortbread Cookies while working through various deadlines. Crumbly shortbread specked with freshly chopped rosemary and filled with homemade apricot jam. Sigh…there is only one left.
I realized that unless I am nicely bribed by friends to make cookies, I don’t usually make or post many on this site, except for macarons but they are in a league of their own. I guess cookies are not in my DNA, I am more a tea cakes, and tarts kind of gal. Bill on the other hand has the reputation among his family and friends to be The Cookie Monster. I guess this was his lucky weekend.
A few weeks ago I was asked to post links back to Better Home and Gardens and specifically to their Spring Dessert and cookie recipes, as did my pal Jen who posted the most lucious lemon cake I have seen in a while. Like her, I did not feel comfortble blindly posting about something I was not familiar with and decided the best way to approach this would be to try one of their recipes myself.
I like BH&G and I did get the chance to read quite many of their magazines while living with my in-laws when we were building our house. Fifteen months can be long without having a real place of your own and I did enjoy day dreaming while reading about their house renovations and decorations. But I admit that I never quite paid attention to the recipe section. No particular reason other than having a pretty big database of my own and many recipes still to get to on my to do list. Until now…
There were so many pop-ups ads that I almost stopped browsing the recipe section after I had found one that I liked. But for the sake of doing this right, I persevered and finally settled on these cookies. Except I had a senior moment while shopping for ingredients and it’s not even my birthday yet! I meant to make the Apricot Sage Cookies but my brain got stuck on rosemary instead. I think it worked out for the better because neither Bill or I are great fans of sage in sweet things. Rosemary, thyme, lemon basil…oh yes!
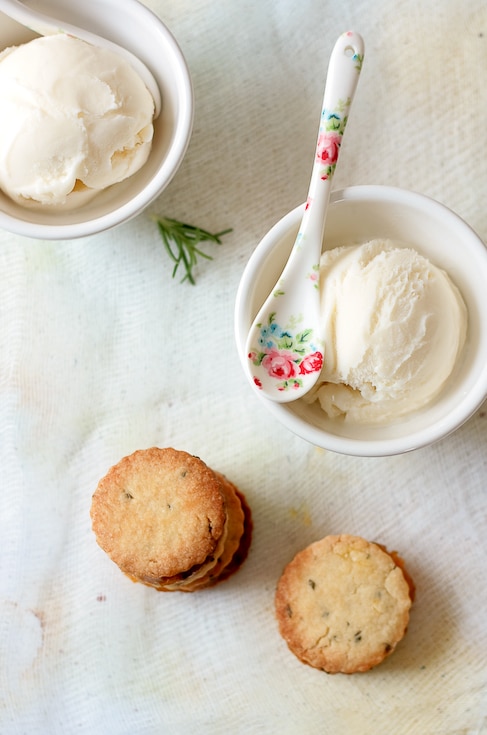
The cookie recipe is very straightforward and it has just the right amount of herb to play with the buttery flavor of the shortbread. I used homemade apricot and vanilla bean jam that I had in the freezer but any good quality jam will do. I got to tell you though, they are addicting! We had friends over the day I made them and I almost wished I had baked a double batch! To add sweet insult to dessert injury, I served these with homemade goat cheese ice creamand that, as Shuna will agree, was just the right combination.
Rosemary Apricot Shortbread Cookies, from and with permission of Better Homes and Gardens
Notes: I baked these at 350F in a convection oven instead of 375F and I used a smaller cookie cutter which yielded 25 cookies once assembled.
Makes 20
1-3/4 cups all-purpose flour
1/3 cup sugar
1/4 cup yellow cornmeal
1/2 cup butter
2 Tbsp. snipped fresh rosemary or 2 tsp. dried rosemary
3 Tbsp. milk
Apricot spreadable fruit
Preheat oven to 375 degrees F. In a bowl stir together flour, sugar, and cornmeal. Using pastry blender, cut in butter until mixture resembles fine crumbs. Stir in sage. Add milk. Stir with fork to combine; form into ball. Knead until smooth; divide in half.
On lightly floured surface, roll half the dough at a time to 1/4-inch thickness. Using 2-inch round cookie cutter, cut out dough.
Place cutouts 1 inch apart on ungreased cookie sheet. Bake about 10 minutes or until edges are firm and bottoms are very lightly browned. Transfer cookies to wire rack. Cool.
Spread bottoms of half the cookies with spreadable fruit. Top with remaining cookies. Makes 20 sandwich cookies.
To store: Place in layers separated by waxed paper in an airtight container; cover. Store at room temperature up to 3 days. Or freeze unfilled cookies up to 3 months. Thaw cookies; fill with spreadable fruit.
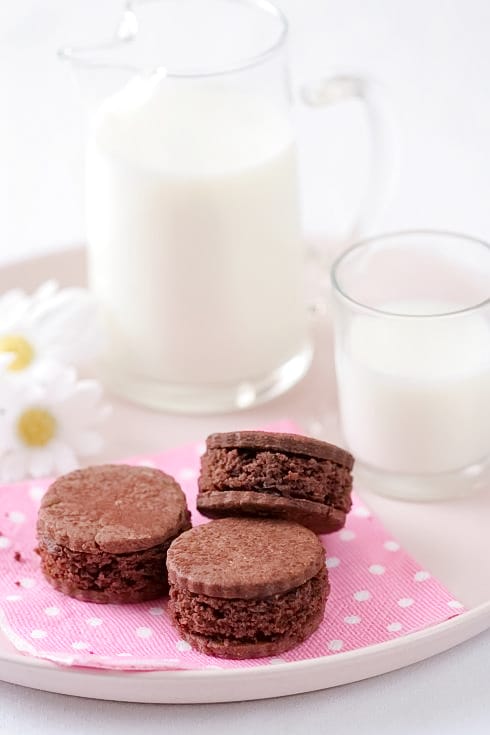
I can hardly believe my parents have been here a week already. Actually, I can notice it rather clearly: I only had time to make cookies this week! But these little bites of heaven were enough to keep us talking and eating for a few days! Imagine a chocolate cake with a hint of coffee sandwiched between two dark chocolate shortbread cookies and held together by a dab of chocolate ganache. The combination of textures is just perfect.
A good bit of time is spent around the dinner table catching up, making plans. It’s like being on vacation at home. The weather has been gorgeous and we have spent most afternoons out and about, sightseeing, catching the first flower blooms and enjoying the warm, already summer like temperatures. I hope I don’t sound like a broken record with my "parent stories" but it is one of the most important things on my agenda right now. I want to write it down and share so I can remember and be reminded. It’s a good break for them and a good break for me.
I know B. loves having them around too as he and my mom are like two peas in a pod and he loves catching up with the family "back home". He’s been so gracious in giving our "together time" for the next few weeks that I wanted to bake him something special. I know the man loves cookies. Small word if you saw his face when I asked what kind he would like. "Something fun!" he said.
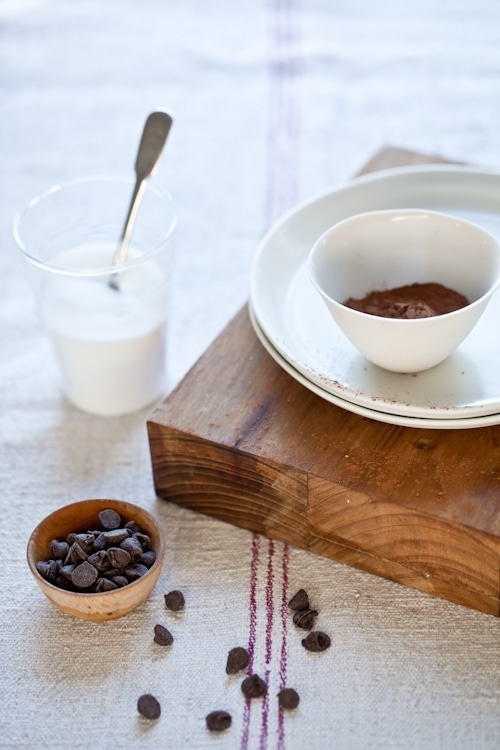
Small cookies are always fun and since it was for him and I know he likes cakes as much as cookies. Mud cake cookie sandwiches fit the bill perfectly. It may sound odd, ok I admit it, it did sound really strange to my parents but trust me, it works. These are probably the best fun bites I have had in a while. Crunch, creamy and soft. They are great with a simple glass of milk but they are also perfect with homemade chocolate sorbet. Pure chocolate therapy.
Chocolate Mud Cake Cookie Sandwiches Recipe:
Makes 24
For the Chocolate Sable Cookies: 1 stick butter (113 grams) butter, at room temperature
¼ cup (50 grams) sugar
½ vanilla bean, seeded or 2 teaspoons pure vanilla extract or 2 teaspoons vanilla bean paste
2 egg yolks
1 ½ cups (190 grams) all purpose flour, minus 3 tablespoons
3 tablespoons (16gr) cocoa powder
Pinch of salt
1 to 2 tablespoons heavy cream (optional)
Preheat oven to 350F.
In a stand mixer fitted with the paddle attachment, whip the butter and sugar until light and creamy. Add vanilla, then the egg yolks, one at a time, scraping the bottom and side of the bowl in between each addition. Add the flour, cocoa powder and salt and beat until the dough just starts to come together. Add some heavy cream if the dough still looks very crumbly and dry. Gather the dough into a ball, flatten it a little to a small disk and wrap it well in plastic wrap. Refrigerate two hours before using.
Lightly flour your work area well and start rolling the dough from the center out, lifting it from the work area every 2-3 times you roll over it. With a 2 1/2-inch cookie cutter, cut out 48 rounds in the dough, gathering scraps and rerolling as you go (you might need to refrigerate the dough for 20 minutes if it becomes too soft to roll out easily).
Place the cookies on 2 parchment lined baking sheets and refrigerate 20 minutes. Bake for 10-12 minutes. Let cool.
For the ganache: 6 oz (180gr) bittersweet chocolate, chopped
1/3 cup heavy cream
Place the chocolate in a medium size bowl and set aside.
In a small saucepan set over medium high heat, bring the cream to a boil. Remove from the heat and pour it over the chocolate. Let the mixture stand for 3 to 5 minutes. Slowly stir the chocolate and cream together until the ganache is completely smooth. Let cool to room temperature.
For the Mud Cake (adapted from Pamela Clark):
1 stick (113gr) butter, at room temperature
4 oz (120gr) dark chocolate, chopped
1 cup (200gr) sugar
1/2 cup (125ml) water
3 tablespoons (30gr) coffee liqueur
2 egg yolks
1 cup (125gr) all purpose flour
3 tablespoons (16gr) cocoa powder
Preheat oven to 350F. Slightly coat two 8-x12-inch pans with cooking spray and line them with a piece of parchment paper. Slightly coat the parchment paper with cooking spray or vegetable oil.
In a small pot set over low heat, combine the butter, chocolate, sugar and water and stir until everything is melted and smooth. Remove from the heat, add the coffee liqueur and let cool to room temperature. Whisk in the egg yolks, then the flour and cocoa powder. Divide the batter between the prepared pans and bake for 20 minutes. Let cool completely. Cut 24 rounds of the same size as the cookies.
To assemble the cookies: Spread a small amount of chocolate ganache under each cookie and sandwich a mud cake round in between two of them. Dust with cocoa powder if desired
Here is another post in the series "When blogging become much more than just blogging". I am loving the extra dimentional relationships formed and cultivated through blogging and when Anita asked a few of us to take her first released book "Field Guide To Cookies" on a virtual tour, I literary smiled from ear to ear. Anita is a sweetheart, a terrific baker, a great friend, a fellow Daring Baker (we hosted the Saint Honore challenge together), and an extremely talented writer. Indeed, no one can describe flavors and textures as well as she does. Trust me. Head over to her blog, Dessert First and then tell me if you did not get lost in the fold of a sweet pie or the silkiness of an ice cream.
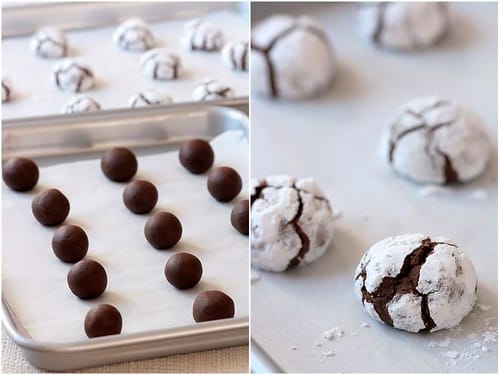
It just happened that Anita asked us to take her book on a tour at the same time that I was completing the Princess Torte assignment for Desserts Magazine and the editor mentionned that the next issue would be on cookies. Ha! "Well…I am just getting this nifty pocket book filled with 100 recipes of cookies from all over the world. I am sure I can come up with something!" And I sure did! Viennese Crescents, Indian Cookies, Algerian Almond Tarts, Dark Chocolate Crinkles (I won’t post the recipe as you can see on another host’s blog, Sara from Ms. Adventures In Italy), Pecan Sandies and Turtle Bars were made and devoured by the neighbors and us in a mere couple of weeks. They went so fast that I did not have the chance to take a picture of the Turtle Bars…they were going faster than I was cutting them!
“The Field Guide To” is a fun and informative series on how to master almost anything in the kitchen from meat to cocktails and now cookies. The whole format behind the series is to have a booklet full of information on how to achieve the perfect cookie, every time, whether you are a novice baker or a seasoned one. The book is divided into four chapters: drop cookies, bar cookies, molded cookies and rolled cookies. The notes on the perfect cookies and baking tools are perfect for beginners in the kitchen, giving them detailed explanation of what usually goes wrong in cookie making. The pocket size format makes it easy to have it around the kitchen and out on the counter top almost all the time. I like the fact that I can carry Anita’s recipes with me on weekend escapades, family gatherings or friends and have a delicious recipe to prepare for them!
Knowing her care for details and wonderful writing skills, this book went beyond all expectations I had. Each recipe is so much more than just a recipe. It starts with a general description that reads more like a history lesson then just a description of taste and texture. All the recipes have a nifty little coding system making it easy to know where you are in the recipe: prepping, mixing, baking, storing, etc… I was so happy to be able to test Anita’s recipes and have a copy of her book that I asked her if she’d be ok answering a few questions that popped in my head while I was baking. Here are a couple to get your appetite going. For the rest of the interview, check the next issue of Desserts Magazine coming out next week.
Dark Chocolate Crinkles – Before and After
Tartelette: As the introduction states it, this book is about more than just cookies, but also tea cakes and small bites. How did you decide which ones would make it into the book? Anita: Even though 100 cookies sounds like a lot, it was tricky to decide which ones would make it and which ones would be cut. My editor and I wanted to cover as many styles of cookies as possible, and include ones that maybe many people had not heard of. On the other hand, since the book was primarily targeted for a North American audience, we needed to include many of the classics familar to most people and not scare them away with too many strange and unknown cookies. I hope I found a balance between many traditional favorites like chocolate chip and oatmeal raisin, but also the more exotic and international, like macarons and pizzelles.
Tartelette: Which aspects of the writing experience did you like best? Baking, testing, researching? Anita: I really enjoyed researching the cookies. Since this cookbook is a little different than most other cookbooks with the longer entries, I needed to do a lot more research than just looking up recipes: I needed to find out where the cookie had originated, who first made them, how it evolved through time. I definitely boned up on my world history doing research on this book! Of course, I also enjoyed testing the recipes – my one biggest wish is that I had more time to test the recipes, because you always think of something else to tweak that might turn the recipe from good to fantastic! I had a great team of recipe testers to help me out, although sometimes I wished I had their job and could just bake all day, forget about the research and writing parts! To be continued…
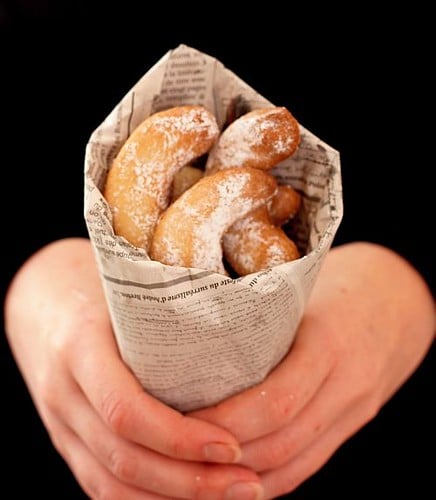
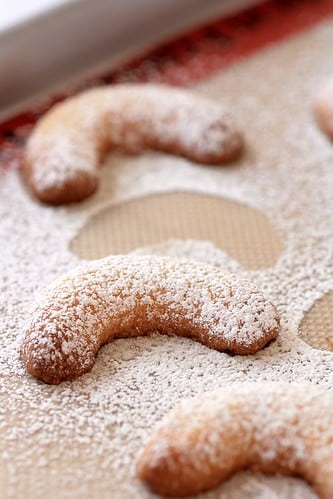
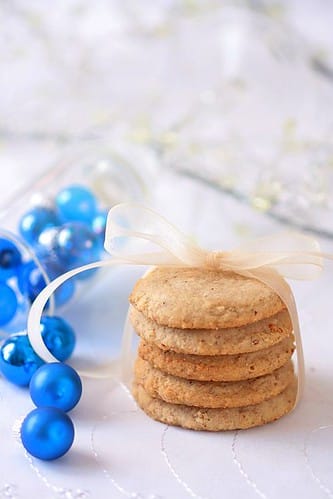
Viennese Almond Crescents, (reprinted with permission of the author)(first picture also)
Makes about 2 dozen cookies
1/2 cup ground almonds
1/2 cup confectioners’ sugar
1/2 cup softened unsalted butter
1 1/2 teaspoon vanilla extract
1 teaspoon almond extract
1 cup all-purpose flour
1/8 teaspoon salt
1/2 cup vanilla sugar (I used powdered sugar), for coating
Sift together the ground almonds and confectioners’ sugar in a bowl.
In a stand mixer, beat butter on medium speed for several minutes until smooth.
Add in the almond mixture and mix until combined. Add in the vanilla and almond extracts and mix until combined. Add in the flour and salt and mix on low just until combined and the dough starts clumping together.
Turn dough out onto a piece of plastic wrap, wrap tightly, and chill for about 20 minutes.
When you are ready to bake the cookies, preheat the oven to 350°F. Line a few cookie sheets with parchment paper or silicone baking mats.
Form dough into 1-inch balls. Roll into a log and curve the ends to make a crescent shape. Place on cookie sheets about 1 1/2 inches apart.
Bake for 8 to 10 minutes, rotating sheets halfway through; the edges of the cookies should turn light brown but the tops should not get too dark. Cool sheets on wire racks for about 4 to 5 minutes. While they are still warm, roll cookies in the vanilla sugar to coat. Let them finish cooling on wire racks. They are best enjoyed the day they are made, but you can store them in an airtight container between sheets of wax paper for 2 weeks.
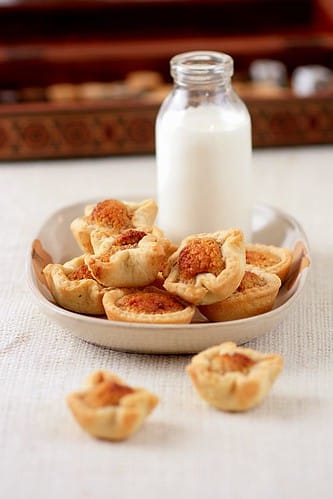
Algerian Almond Tarts, (reprinted with permission of the author).
Yield: About 2 1/2 dozen cookies
Pastry:
2 cups all-purpose flour
1/4 teaspoon salt
1/2 cup unsalted butter, melted
2 eggs
2 tablespoon rosewater or orange flower water
1 teaspoon lemon juice
Preheat oven to 350°F. Lightly grease a few cookie sheets or line with silicone baking mats.
In a stand mixer, combine the flour and salt. With the mixer running on low speed, gradually add butter, egg, vanilla, rosewater, and lemon juice. Mix for a few minutes until dough is smooth. Cover dough with a damp cloth and set aside while you make the filling.
Using a food processor, grind almonds and sugar to a fine meal. Add eggs, lemon zest, rosewater, and vanilla and process until all ingredients are evenly incorporated.
Roll out dough to about 1/16” on a lightly floured surface. Using a 2 to 3 inch cookie cutter to cut out circles from the dough.
Drop tablespoonfuls of filling into the center of each circle. Wet fingers with water and pinch the dough together into four corners, forming a cup around the filling. Or, if you have a mini muffin tin or other small molds, you can fit the dough circles into the molds and fill about 3/4 full with the filling.
Place tarts on sheets. Bake for 20 minutes, rotating cookie sheets halfway through until filling begins to brown and the cookies are a light golden color.
Remove sheets from oven and place on wire racks. Drizzle honey over each of the tarts. Let tarts cool on sheets before serving. Store in an airtight container for up to 1 week.
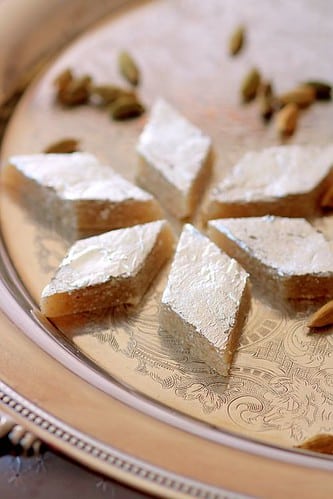
Indian Almond Cookies, (reprinted with permission of the author).
Makes about 3 dozen cookies
2 cups blanched almonds
2 tablespoons milk (I did have to use 2 extra tablespoons because my dough was really dry)
1 3/4 cups sugar
1/2 teaspoon cardamom powder
Silver foil
In a food processor or blender, grind blanched almonds to a fine powder. Add milk and mix until a smooth paste is acquired.
In a heavy saucepan, combine the paste, sugar, and cardamom at medium-low heat, constantly stirring to avoid burning; stir 8 minutes or until a lump of dough is formed.
Spread the dough onto a lightly greased jelly roll pan or baking dish, flour or grease a rolling pin, and and gently roll the dough to approximately 1/4 inch thick. Apply silver foil and press slightly with the foil’s paper packaging or a paper towel so that the silver adheres to the dough.
As the dough cools, its texture resembles that of marzipan. Once it has completely cooled, cut it into 1–2 inch diamond shapes. They will keep up to 1 week if sealed in an airtight container.
Pecan Sandies, (reprinted with permission of the author) Perfect for Christmas!
Makes 2-3 dozen
1 1/2 cups pecans, toasted
1/3 cup confectioners’ sugar
1/3 cup light brown sugar
1 1/2 cups all-purpose flour
1/4 teaspoon salt
3/4 cup plus 2 tablespoons cold unsalted butter
1 egg
1/2 teaspoon vanilla extract
About 30 pecan halves for decorating
Kitchen Note: the day I made these we had 100% humdity so my dough never got firm enough to even roll into a log and I ended up doing drop cookies instead. Turned out perfect.
Grind pecans and sugars together in a food processor until the nuts are finely ground. Add in the flour and salt and process until combined. Cut the butter into small pieces and scatter over the mixture in the food processor. Process until the mixture resembles coarse crumbs.
Add egg and vanilla and process until the dough comes together.
Turn dough out onto a piece of parchment paper or silicone baking mat. Roll out to about 1/4 in thick. Sprinkle the dough with a little flour if it gets too sticky.
Cover the dough with plastic wrap and chill in the refrigerator for about 1 hour or until firm.
When you are ready to bake the cookies, preheat the oven to 325°F. Line several cookie sheets with parchment paper or silicone baking mats. Using a cookie cutter, cut out cookies from the chilled dough, about 2 inches in diameter. Place a pecan half in the center of each cookie.
Bake for 18 to 20 minutes or until the edges of the cookies turn golden brown, rotating cookie sheets halfway through. Cool cookie sheets on wire racks for a couple of minutes before transferring cookies directly onto wire racks with a spatula to finish cooling.Store in an airtight container for up to 1 week.