chocolate

Tamarind Coffee Cupcakes With Cream Cheese Chocolate Frosting

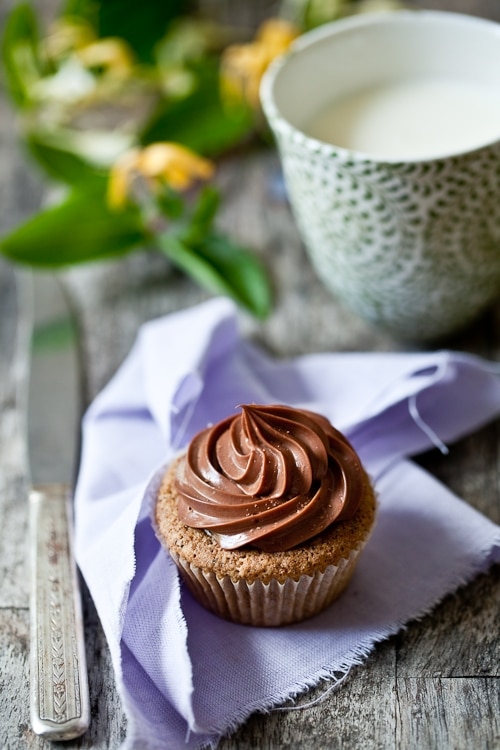
Tamarind Coffee Cupcakes


Dear Breakfast,

I have tried. Really I have. I just can’t seem to get you. Or you aren’t that captivating enough to me. Not after that many years trying. I am willing to sacrifice more time getting to get you though. Really, I am. Even the little time I have left these days in the morning is not without a thought or two for you. Unfortunately it’s been the extent of our relationship lately. "The thought of you". Well, until I made these Tamarind Coffee Cupcakes. Now it’s all about "the very thought of them".

You and I are comfortable with each other. We’re not bored and we’re not indifferent but we just can’t seem to get wild and crazy about each other either. Let’s recap a little here. We tried early on to build a solid foundation with a cup of coffee and a piece of toast. Until I got burned out on the toast with butter and jam, dunked in my coffee because I wanted that just about 10 more times before heading out the door.

Tamarind Coffee Cupcakes


So we decided to make it bit more structured and add an egg and piece of bacon to that toast. Oh. Beautiful mornings ensued. Definitely. Until I got lazy in our relationship and refused to do this much clean up before work. You would not compromise and a full break-up followed. Months without a nibble. Until a roomate made a piping hot bowl of oatmeal topped with a splash of honey and a handful of roasted hazelnuts.

I wanted to marry you then. We did have a long engagement. It became clear though that I do have a "coeur d’artichaut", even for you. It just was not enough. So we made pancakes with oatmeal and honey and nuts. Then waffles. And crepes. More pancakes. Eventually I started forgetting the toasted nuts. The honey too. Then one day I woke up and hit the snooze button and gave you the silent treatment. Sorry.

Last Four


I went back to the eggs. Soft boiled. Poached. Sunny side up. You name it. I had it. It was almost indecent. Then I had a smoothie period. A green juice period. A funky smoked fish and German bread period. A bowl of fruit, sprinkle of flax seed period. Virtuous is not me. That also went out the window. I cheat with mid-morning snack. A tomato with sea salt. A handful of nuts, etc… You see?

It’s not you. It’s me. I’m not just fickle. I am a gourmande. Of life. Of food. Of emotions. If I didn’t have to watch for certain health issues, I’d have croissant, pains au chocolat, chaussons aux pommes and other French delicacies every day for breakfast. And I would not get bored. All that butter. But if I did, I’d rapidly wear them on my derriere. So the Frenchies and I have a Sunday rendez-vous instead.

Tamarind Coffee Cupcakes


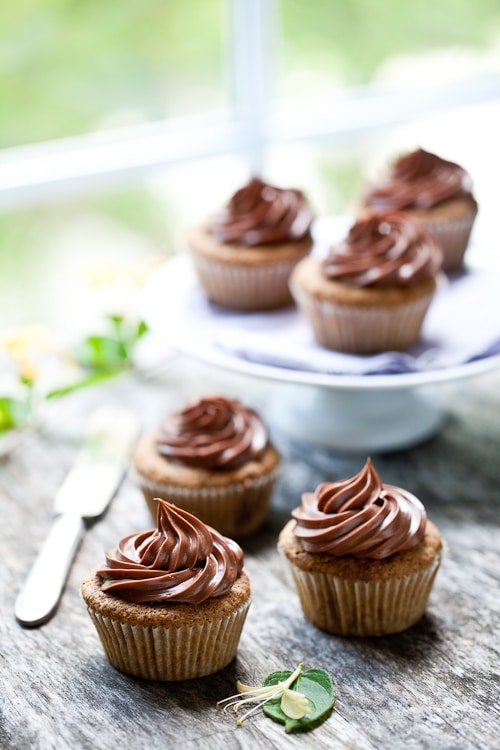
I was about ready to give up on the whole thing and remain a breakfast spinster until Dan Lepard posted these Tamarind Coffee Cupcakes. The coffee makes them incredibly versatile while the tamarind provides the perfect hint to wake up your tastebuds. In the morning I have one without frosting on my way up to the studio and in the afternoon a dollop of cream cheese-chocolate frosting is just a reminder that a sweet pause and a cup of tea is just what the doctor ordered during a long day on the job.

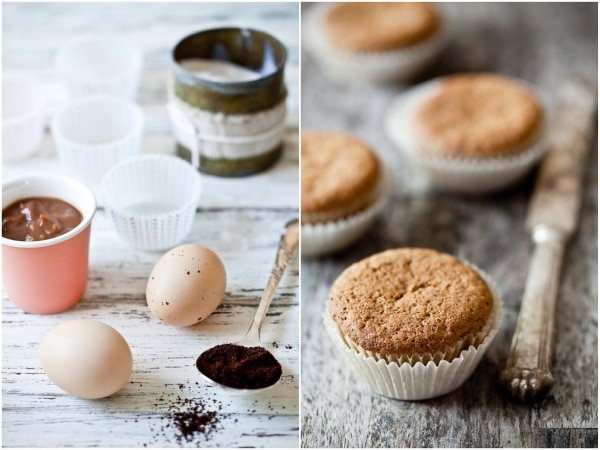
I used a mix of superfine sweet rice flour (info previously here and here), cornstarch as we don’t like tapioca flour but you can substitute either or according to your preference and millet flour. I did half butter and half coconut oil and used raw honey which intensifies the coffee in the cupcakes and brings out the chocolate when frosted.

Tamarind Coffee Cupcakes


Even B. agrees that this kind of love affair is also to his benefit. Indeed, I can’t possibly eat all 12 cupcakes in one sitting so I must share with him. We might finally find our groove you and I, dear Breakfast.

Yours truly,
Helene.

Tamarind Coffee Cupcakes With Chocolate Cream Cheese Frosting, adapted from Dan Lepard.

Makes 12

For the cupcakes:

55g unsalted butter, at room temperature
55gr extra virgin coconut oil
1/3 cup (110gr)honey or light brown sugar
1 tablespoon ground coffee
1/4 cup tamarind paste
2 large eggs
1/2 cup plus 2 tablespoons (100 gr) superfine sweet rice flour
1/4 cup (50 gr) millet flour
1/4 cup (50 gr) cornstarch (or use tapioca flour)
1 teaspoon baking soda
pinch of salt

For the frosting:
1 block (8 oz) cream cheese, at room temperature
3/4 cup (170gr) semisweet chocolate, melted and slightly cooled

Prepare the cupcakes:
Preheat the oven to 350F. Place 12 muffin liners inside a muffin pan and lightly brush with melted butter (or cooking spray).
In an electric mixer, whip the butter, coconut oil and honey until fluffy at medium speed, 2-3 minutes. Reduce the speed to low and add the tamarind and coffee. Still on low, add the eggs, one at time and scraping the bowl after each addition. In a separate bowl, mix together the flours, cornstarch, baking soda and salt and slowly fold this in with the butter – tamarind mixture until the mixture is smooth. Divide evenly among the muffin liners and bake 20-25 minutes. Let cool completely before frosting or enjoy warm without.

Prepare the frosting:
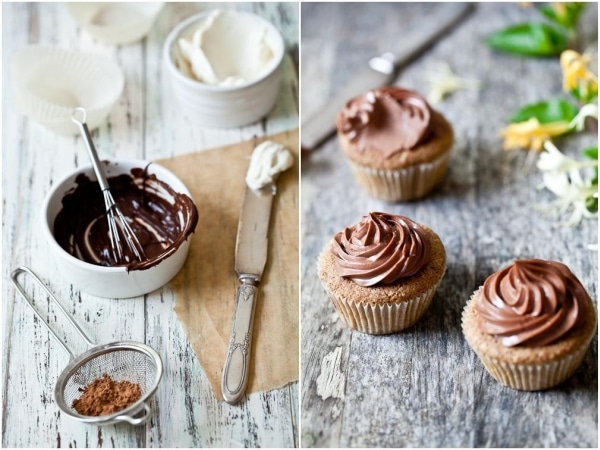
In a large bowl, whisk together the cream cheese and semisweet chocolate until smooth. Fill a pastry bag with the mixture and pipe on top of each cupcake.

———————————————————————————–

Petits gateaux au tamarin et glacage au cream cheese chocolat:

Pour 12 petits gateaux

55 gr beurre, non sale, a temperature ambiante
55 gr d’huile de noix de coco, a temperature ambiante
110 gr de miel
1 cs de cafe moulu
70 gr de pulpe de tamarin
2 oeufs
100gr de farine de riz
50 gr de maizena
50 gr de farine de millet
1 cc de bicarbonate de soude
une pincee de sel

Pour le glacage:
210 gr de fromage frais, type Philadelphia, a temperature ambiante
170 gr chocolat (pas trop corse), fondu et legerement refroidi

Prechauffer le four a 175C. Aligner 12 caissettes a muffins dans une plaque a muffin et beurrer legerement l’interieur (pinceau et beurre fondu).
Dans un grand bol, mixer le beurre, l’huile de noix de coco et le miel jusqu’a ce que le melange soit leger, 2 a 3 minutes. Ajouter le cafe et le tamarin et ensuite les oeufs a un a jusqu’a obtention d’une pate homogene. Ajouter les farines, la maizena, le bicarbonate de soude et le sel et battre jusqu’a ce que le melange soit lisse.
Repartir dans les caisettes et faire cuire 20 a 25 minutes.

Pour le glacage:
Battre dans un grand bol le cream cheese et chocolate fondu jusqu’a obtenir un melange homogene. Le mettre dans un poche a douille et en glacer les petits gateaux une fois que ces derniers sont refroidis.

———————————————————————————–
This post is syndicated on BlogHer. Click here.
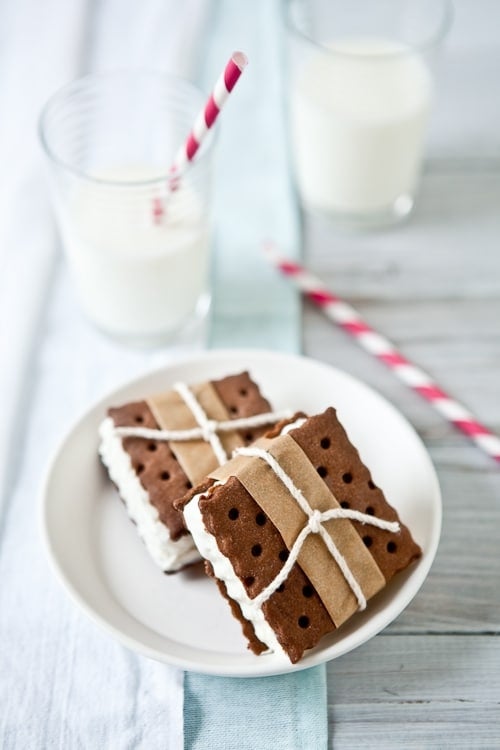
Vanilla Bean Chocolate Ice Cream Sandwiches

Vanilla Ice Cream Sandwiches


It’s the little things lately that fuel me up. The details. Paying attention. So much is out my hands that it’s all in the little things. Maybe it’s the renewed warmth of Spring doing that to me with very much intensity. Maybe it’s the rhythm of the work days that intensified lately. It makes me crave finding my grounds, keeping them and taking care of us.

Food is naturally part of that equilibrium. Roasted chicken and mixed greens enjoyed with friends during a lazy Sunday lunch. A simple salad of heirloom tomatoes shared with B. in between his classes and his music. A classic nosh of French cheeses and pate downtown at a new favorite hang out. A simple plate of lentils and kale topped with a friend egg on a weeknight. Simple. Details. Seasonings. Spices. Balance.

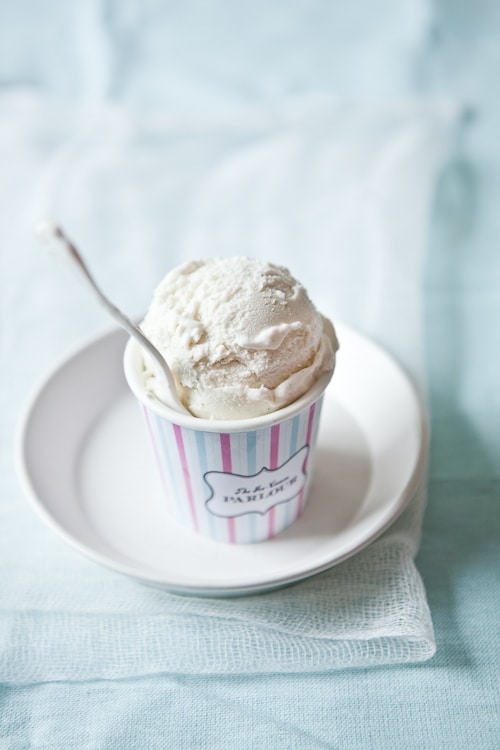
Vanilla Ice Cream


When it comes to dessert, you can bet I am right around the corner with a big plate and large smile! I rarely want a slice of cake or a dozen cookies. Fresh. Seasonal. Textures. Aromas. These words resonate strongly when it comes to picking desserts. There are things I can’t have anymore and ingredients I need to pay attention to so desserts need to pack a punch in a few bites. They need to make me weak in the knees or I’ll pass. I am a gourmande. I’d like to enjoy that for a while and not feel worse because I am not keeping tabs of what I do.

Most nights dessert is a bowl of strawberries or raspberries and a dollop of whipped cream (my absolute weakness), a handful of cherries, a baked apple. Simple. Then there are the simple but planned out desserts we enjoy a couple of times a week. The ones I come to tell you about here. The ones which flavors dance in my head long before I actually make them.
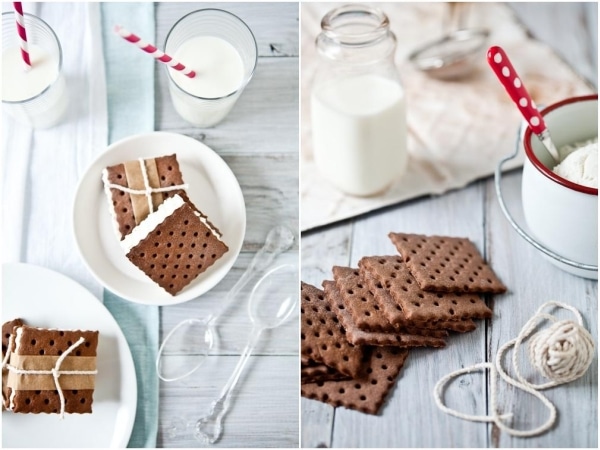
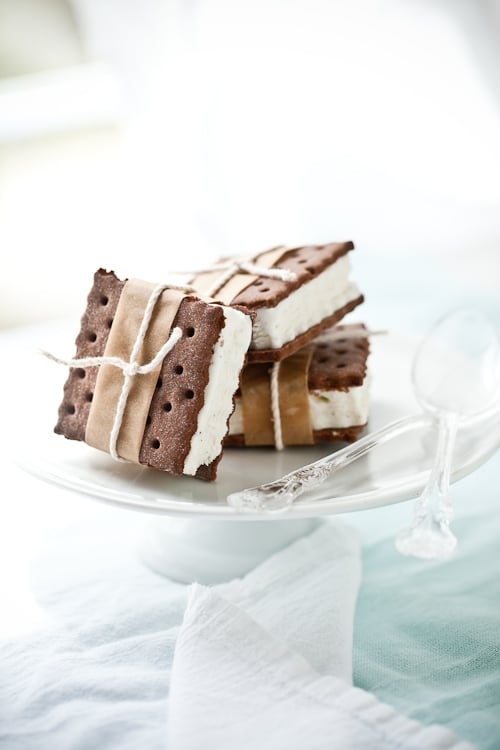
Vanilla Ice Cream Sandwiches


Like these Vanilla Ice Cream Sandwiches. They were not just good. They were simple. They were made from scratch with good stuff like homemade vanilla ice cream. And they were gluten free. I know! You’re thinking "Stop the healthy stuff Helen or we’re going to throw you a cookie." "Ice cream! Portable! Yes!".

I could fit one in my hand without a problem. I could do a 3 bite dance just as easily. I could also carry one in my pocket. I am sure the pups would follow me to the end of the earth with such a trick, ahahah! B. simply loved the taste of the wafers which always make me happy as I bake more and more gluten free that he can’t point out the switch. He grabbed a handful of plain wafers on his way out earlier. Just like that.

Vanilla Ice Cream Sandwiches


I took the cookie recipe used on a job last week and modified to be gluten free and I was really pleased to see the end products behaved the same while being prepared, baked and stacked. The original recipe called for margarine which I subbed for half butter and half coconut oil (see reasons and how to’s in recipe section here) but feel free to use all butter. For the ice cream, I kept it pretty simple and did an eggless base loaded with good vanilla seeds.

Here’s what I like about making ice cream sandwiches from scratch beside the obvious "they’re better for us": it gives me an excuse to make fresh ice cream for some other night of the week. I don’t have to fill all the cookies at once and can do so as we please since they too can be kept in the freezer and I can keep some cookies plain on the side when a chocolate cravings comes knocking at midnight. As it is now….

Why is the freezer door this loud this time of night when everyone is asleep but me? Ha!
————————————————————————————
One more thing before I go: If you are curious to read about more about the whys/whats/wheres of this blog, check out an interview I just completed on Bizymoms by going here. Thanks!
Props:
– milk bottle and various plates: ebay
– flatware and straws: Kikkerland on amazon.com
– paper straws: Bake It Pretty (I hear Anthropologie also has them)
– "Ice Cream Parlor" cup (2nd picture): cup outfitted with a DIY pattern from Eat Drink Chic.

Vanilla Ice Cream Sandwiches:

Makes twelve 3-inch square sandwiches

Notes:
– you can use 2 cups all purpose flour instead of all the combined gluten free flours (sweet rice through cornstarch)

– for the dotted look on the sandwiches, I used one of the tools comprised in this set that I received as a gift years ago.

For the cookies:
4 tablespoons (55gr) unsalted butter, at room temperature
4 tablespoons coconut oil (55gr), at room temperature
1 cup sucanat (organic cane sugar) muscovado or brown sugar
2 large eggs
1 tsp. vanilla extract
1/2 cup cocoa powder
1/2 cup superfine or regular sweet rice flour
1/2 cup superfine or regular brown rice flour
1/2 cup millet flour
1/2 cup cornstarch (use tapioca flour if allergic to corn)
1/2 tsp xanthan gum
1 tsp. baking powder
1/4 tsp. salt

Prepare the cookies:
In the bowl of a electric mixer fitted with the paddle attachment, beat the butterm coconut oil and muscovado sugar on medium speed until fluffy, about 2-3 minutes. Lower the speed and add the eggs, one at a time, beating well after each addition. Add the vanilla extract.
In a separate medium bowl, combine the cocoa powder, all the flours, baking powder, and salt. Still with the mixer on low speed, at the dry ingredients to the butter mixture and mix until the dough starts to come together. Gather the dough into a ball and refrigerate at least 1 hour.
Preheat the oven to 350 degrees and line a pan with parchment paper or a silicone mat.
On a lightly floured surface or a Silpat, roll out the dough to about 1/4-inch thick. Use your preferred cookie cutter to cut out as many pieces as you can. Gather and re-roll the scraps if necessary. Make patters on cookie with a fork or other tool (see notes) if desired. Place on lined baking sheet and bake 8 – 10 minutes. Cool completely before sandwiching them with ice cream.

For the vanilla ice cream:
1 cups (250ml) heavy cream
1 cup (250ml) whole milk
1 cup (250ml) whole coconut milk
1/2 cup (125gr) mild honey
1/2 vanilla bean, split open and scraped – seeds set aside

Prepare the ice cream:
In a large saucepan set over medium low heat, bring the cream, milk, coconut milk, honey and vanilla bean seeds to a simmer, stirring occasionally. Remove from the heat and let it cool to room temperature. Refrigerate, preferably overnight.
Process the mixture into your ice cream maker according to the manufacturer’s intructions.
Once the ice cream has reached soft serve consistency, pour about half into a 9×9 freeze proof dish lined with plastic wrap (try to get about 1 to 1.5 inch thickness for the ice cream to sandwich later on) and the other half into a freezable container. Freeze until firm.
No ice cream maker? No problem! Pour the cream into a freeze proof container and freeze for a couple of hours. Take it out and whip it with an electric mixer or immersion blender, freeze it again, whip it again….do that four or five times. The mixture won’t be quite the same but pretty darn close.

Assemble:
With the same cookie cutter, cut through the ice cream that was poured into the 9×9 inch pan and sandwich in between two cookies. Keep frozen. The cookies will keep well wrapped in the freezer for up to 3 months.

————————————————————————————-
I’ll upload the recipe in French either tonight or Wednesday – ran out of steam tonight!

La recette en Francais ce soir ou demain au plus tard. Le boulot ca fatigue – ahahahah!

Chocolate Whiskey Pots de Creme

Chocolate Whiskey Pots de Creme


It hit me while on the plane back to Charleston last week. I was fidgetting with excitement at the thought of seeing B. again soon. I did have a blast in L.A and Seattle but it would have been nice to share that with him. All the moments. On the moment. I just couldn’t wait to get home and tell him all about the week. I still need to sift through my hundreds of pictures and thoughts.

The people I met, the friends I saw again. The exchange of information. Being part of a community. All these things are always better shared. He laughed with me and listen to my stories. Dozens of names he had never heard before. Patiently. He asked questions and encouraged me. And so, while sitting on the plane, about ready to take off, it hit me: Saint Patrick’s Day was just around the corner.

Comfort


This household is half Irish after all. I had to do something to mark the occasion. Knowing us we will be debating the virtues of historical markers versus those of green foods, green shirts and green beer. Still, he never fails to help me keep up with my roots so I wanted to do the same for his. Minus the green. Plus whiskey instead.

Green is far from being my favorite color to start with and I also did not feel like messing with green coloring. There was plenty of that during the Seattle workshops, well done and beautifully mastered. I was worried of ending up with Shrek green instead of Irish green. (I did before, hence the reference).

Chocolate Whiskey Pots De Creme


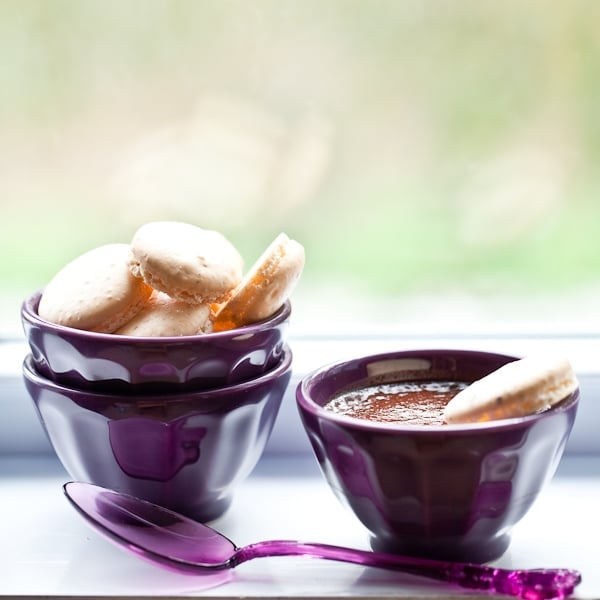
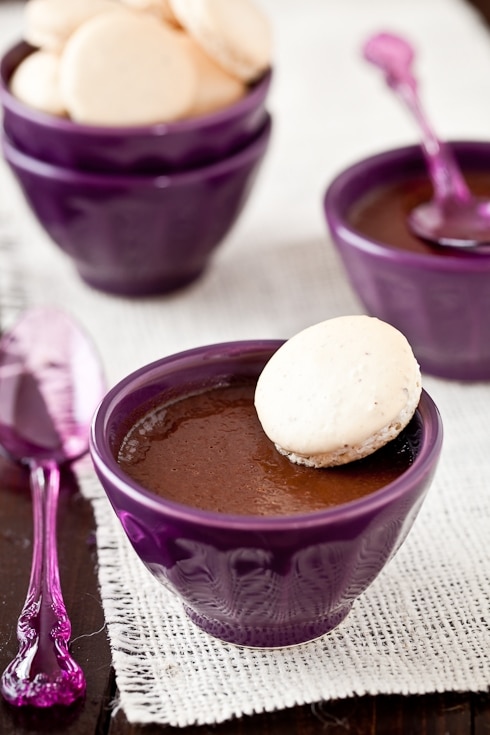
I like to have an easy dessert ready to be served for the first meal after my parents get in town. Tonight it’s quiche and salad and these Chocolate Whiskey Pots de Creme served with some plain almond macarons to use up the egg whites left from the custard recipe. It’s pretty sums up perfected comfort this time of year when the days still have this distinct nip in air. A foot in between two seasons.

Pots de creme always make me think of a warm motherly embrace. Trust me. We’ve been hugging. And catching up. My parents got here last night and in the middle of my mom’s health problems, it is no small battle. But she’s a rockstar. She’s my rockstar. Even when she tells me half of everything (grrr…) She also tends to agree that a lot of problems are better solved around a good glass of Irish liquor. Whiskey is not my thing. Unless it is surrounded by chocolate. Oh yes…

As soon as I am done squeezing my mom silly, get done with work this week and go through my thoughts, I’ll post more about the workshops but you can start by reading Rachael’s recap of L.A here.
Chocolate Whiskey Pots de Creme:

Serves 6 to 8

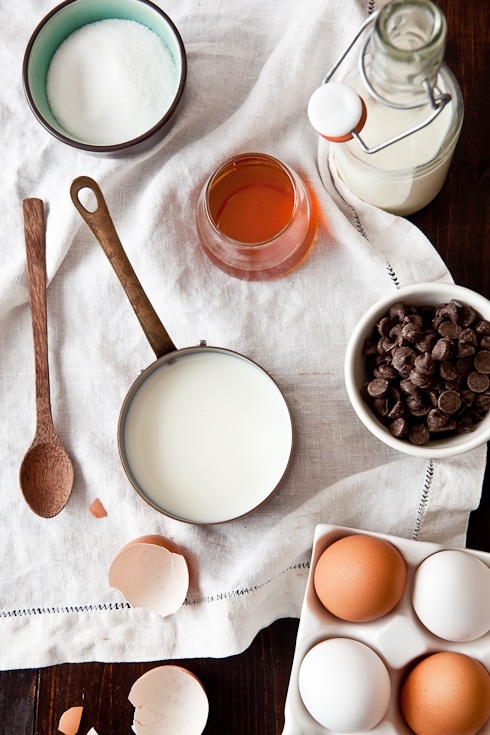
6 large egg yolks
1/4 cup (60ml) honey
1/2 cup (125ml) whole milk
1 cup (250ml) heavy cream
6 oz (180gr) bittersweet chocolate
3 tablespoons to 1/4 cup Irish whiskey

Place 6 to 8 ramekins into a roasting pan and set aside. Preheat oven to 350F and position a rack in the center.
In a large bowl, whisk the egg yolks with the honey for 2-3 minutes.
In the meantime, bring the milk and cream to a simmer in a large saucepan set over medium high heat. Remove from the heat and add the chocolate to the mixture. Slowly whisk until the chocolate is completely melted. (return over low heat if it needs a bit more heat to dissolve). Slowly pour the chocolate mixture over the egg yolks and honey, whisking constantly until both mixtures come together. Add the whiskey and stir briefly.
Divide the chocolate batter evenly among the ramekins. Pour hot water into the roasting pan so that it reaches halfway up the sides of the dishes. Bake for 30 to 40 minutes or until the cream appears just set. Remove from the heat and let cool to room temperature. Refrigerate at least 2 hours before eating.
Pots de Creme Chocolat Whisky:

Pour 6 a 8 personnes

6 jaunes d’oeufs
60ml miel
125ml lait entier
250ml creme entiere liquide
180gr chocolat 60%
3 – 4 cs whisky

Prechauffer le four a 180F et mettre une plaque au milieu.
Dans un grand bol, battre les jaunes d’oeufs et le miel pendant 2-3 minutes.
Dans une casserole, faire chauffer le lait et creme jusqu’a ebullition. Retirer du feu et ajouter le chocolat et remuer jusqu’a ce que le chocolat soit fondu.
Verser l’appareil sur les jaunes d’oeufs. Ajouter le whisky et melanger.
Verser l’appareil dans 6 a 8 ramequins et les mettre dans une plat profond allant au four. Verser de l’eau chaude jusqu’a a la moitie de la hauteur des ramequins. Faire cuire 30 a 40 minutes.

Chocolate Caramel Banana Tart & A CookBook For Haiti

Chocolate Caramel Banana Tart


What I am happy and honored to announce below is closely related to the Chocolate Caramel Banana Tart above. But I need your attention for 2 paragraphs before I tell you more about the tart. It’s important. [Update: the BlogAid Cookbook is not available for sale anymore. For more info read this.]

A few days after the horrible tragedy of the earthquake in Haiti, I received an email from Julie from Dinner With Julie that made me jump in my seat and say "Heck yes I’m with you!". She had been watching the news and with every passing hour, she was as feeling as upset and hopeless as a lot of us did. She had a plan to help raise money for Haiti and she emailed for help. Julie set out to create the BlogAid Cookbook. Twenty seven of us came together and provided her with some of our favorite recipes and pictures.

Julie and her friend Cathryn worked almost around the clock to pull it all together. and I am honored and thrilled to announce that the BlogAid Cookbook is up for order!

Blog_Aid_Button


The proceeds from the book sales will go straight to Haitian relief via the Red Cross and Doctors without Borders. It’s not all though! Both West Canadian AND Blurb are matching the dollar amount of the proceeds raised, to TRIPLE those dollars going to Haiti. And until February 12th, the Canadian government will match that.

It’s a POD (print-on-demand) system, meaning the books are printed and shipped as they’re ordered and arrive at your doorstep in about 8 days. You can purchase yours for a good cause here.

Vespa Green


While Julie was working on this project I was having interesting discussions with a good friend about buying too much, accumulating without purpose, wanting versus needing. I am the child of a homemaker and an army guy who lived on a small pension. I worked in a restaurant where every purchase-usage-spoilage was scrutinized, discussed and fixed. And it’s in everything I do now as an adult. I am not talking about being cheap but about using things to the last drop. Or the last crumb…

My friend has a small farm. She raises a few chickens. This year she got a couple of goats. She is slowly transitioning into a path that suits her to a T and she is making enormous sacrifices along the way. Her positive energy and generosity are always invigorating. So are the eggs she gives me for baking. You can bet that none of them go to waste. As a thank you I made her this Chocolate Caramel Banana Tart.

I love the meals and snacks that take place when I clean up the pantry of fridge of all the bits and pieces before it’s too late. A homemade vegetable soup with fried pieces of prosciutto, an omelette topped with the last bit of the aged gouda I like so much, a mixed up pasta dish full of different handful of herbs. I bet there’s a bit of the same going on in your kitchen at times!

Chocolate Caramel Banana Tart


Desserts are always a different story at our house. Between us, the neighbors, the friends, the family, it’s rare to have leftovers. Dough scraps seem to abound in the freezer though. Oh and little containers with only spoonfuls of ice cream. Too many. I lost track.

Bananas are always the ones that end up being frozen and forgotten or mashed and forgotten. Or simply forgotten. Except when I play my "make a dessert by association" in my head. Banana – peanut butter – chocolate – crust. I originally thought about doing just caramel and chocolate but this version ended up being much better than anticipated.

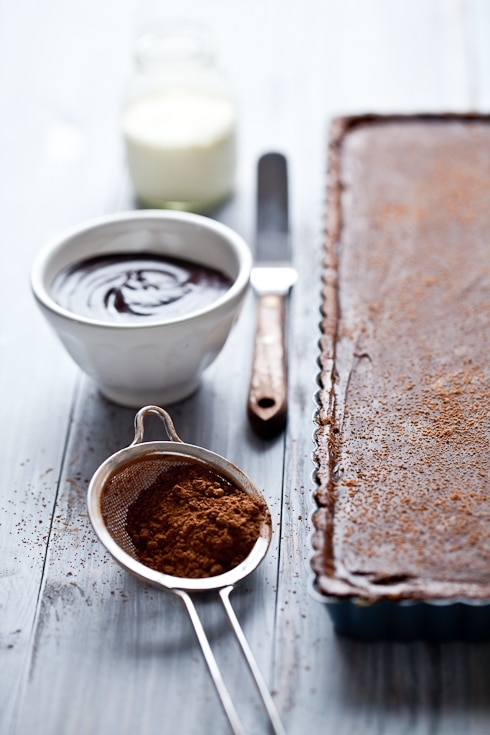
I finally nailed a gluten free chocolate shortcrust recipe that we both love and it makes perfect chocolate shortbread cookies too. The tart filling was soft and gooey without flowing all over your fork. Just don’t be walking around the house with a slice of pie. Don’t say I did not warn you…

Chocolate Caramel Banana Tart


Chocolate Caramel Banana Tart:

Serves 8-10

For the crust:
1 stick (113gr) unsalted butter, at room temperature
1/2 cup (60gr) unsifted powdered sugar
3 egg yolks
pinch of salt
1 cup (160gr) white rice flour
1/4 cup (30gr) amaranth flour
1/4 cup (40gr) tapioca starch
1/2 teaspoon xantham gum
1/4 cup (20gr) unsweetened cocoa powder

For the caramel-peanut butter-banana layer:
1/2 cup (100gr) sugar
2 tablespoons water
2 tablespoons heavy cream
2 tablespoons unsalted butter at room temperature
1/4 cup peanut butter (your choice smooth or crunchy)
2 small bananas, peeled and mashed

For the chocolate ganache topping:
1 cup semisweet chocolate chunks or chips
1/2 cup heavy cream

Prepare the crust:
In a mixer, whip together the butter and sugar together until light and fluffy. Add the egg yolks, one at a time and beating well after each addition. Mix until incorporated. Add the three different flours, the xantham gum and cocoa powder and mix briefly. Dump the whole mixture onto a lightly floured (use more rice flour) board and gather the dough into a smooth ball. Flatten the dough into a disk, wrap it in plastic wrap and refrigerate for an hour.
Preheat oven to 350F and position a rack in the center.
When the dough is nice and cold, roll it out on a lightly floured board or in between two sheets of plastic to fit your prefered pie pan. (I went with rectangular this time) If the dough tears while you roll or/and transfer into the pan, just patch it with your fingertips. Line the dough with a piece of parchment paper, fill with pie weights or dy beans and par bake for 15-20 minutes until completely done. Remove the weights and parchment paper.

Prepare the filling:
In a heavy bottom saucepan, bring the sugar and water to a boil over meadium high heat and cook until you get a dark caramel. (do not walk away – it only takes minutes). Remove the pan from the heat and add the cream and butter. The mixture will bubble so be careful. Place the pot back on the stove and cook on low until the mixture is smooth. Remove from heat and let cool to room temperature.
Once cooled, add the peanut butter and banana and whisk until completely smooth. Pour over the crust. Refrigerate for 2 hours before topping with the ganache.

Prepare the ganache:
Place the chocolate in a medium size bowl. In a small saucepan set over medium high heat, bring the cream to a strong simmer. Remove from the heat and pour over the chocolate. Let stand for a couple of minutes and slowly stir in with a whisk or spoon until smooth. Let cool for 5 minutes and spread all over the banana filling. Refrigerate until firm.

————————————————————————————-

Le P’tit Coin Francais:

Pour la pate:

115gr beurre mou
60 gr de sucre glace
3 jaunes d’oeufs
pincee de sel
160gr farine de riz blanc
30 gr farine d’amaranthe
40gr farine de tapioca
1/2 c.c de gomme xanthan
20 gr de cacao

Pour la garniture:
For the caramel-peanut butter-banana layer:
100gr sucre
2 c.s d’eau
2 cs creme liquide entiere
2cs beurre mou
30gr de beurre de cacahuete (avec ou sans morceaux)
2 petites bananes mure, epelees et ecrasees

Pour la ganache:
240gr chocolat en morceaux
125ml de creme liquide entiere

Le reste des instructions arrive…promis.

Chocolate Caramel Banana Tart

Chocolate Wontons And Tonka Bean Ice Cream

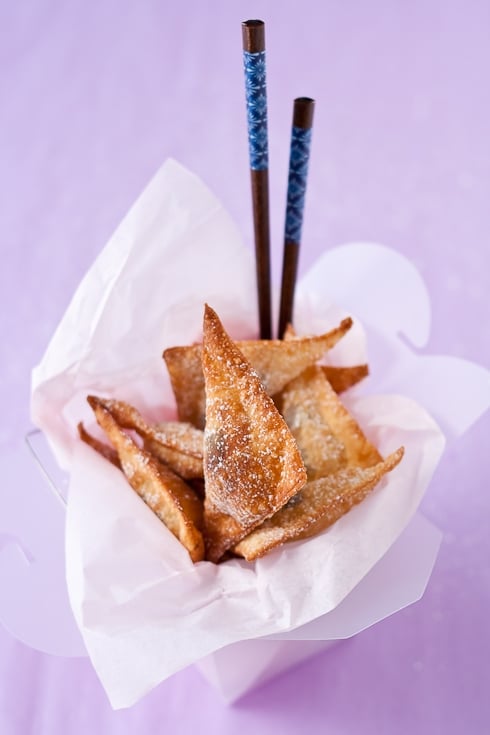
Chocolate Wontons


If I were to wait for the proper weather to bake certain desserts, I’d never get to turn the oven on or fry some donuts and the ice cream machine would be churning year round. Take Halloween day, it was near 90F pretty much all day long and yet I wanted to bake some fun goodies for the neighbors. We spent the day in short sleeves, going about the neighborhood with the kids steaming in their costumes. More than one of them thought ill of their parents for dressing them up as a furry teddy bear or a heavy padded alligator. I know these feelings disappeared when I brought down these hot Chocolate Wontons and a batch of Tonka Bean Ice Cream that we had with glasses of apple cider…on ice.

Years ago we used to have a different chocolate special everyday at the restaurant and certain mornings proved difficult to come up with a bright idea at 5am when I was hand deep into kneading baguettes. I remember opening Chocolate Passion by Timothy Moriarty and Tish Boyle with the assurance that I’d have a winner and often recommended it to patrons asking me for a recipe. When I stumbled upon Maury Rubin’s Book Of Tarts, I think I baked just about every one of them they were so creative.

Sometimes it’s a technique or a subject that makes me delve in a cookbook. Sometimes it’s the story behind its coming to life, an anedocte, the writing. Sometimes it’s the author and her/his journey. In short, something that moves me beyond the recipes (I have quite a head full of those already) which is the case with Jaden’s first cookbook, The Steamy Kitchen Cookbook, from which I made the chocolate wontons. Having shared a plane, meals, drinks, and a panel with her, I can tell you that Jaden is good people and I am extremely proud of her. I knew her book would be one I could open at any page and cook something new, delicious and fresh. All four recipes I have made so far were a hit with us and our friends.

Chocolate Wontons and Tonka Bean Ice Cream


If you were to come to my house you’d think I spend all my spare change on cookbooks. If you looked a little closer, you would see a fine print on most reading "preview copy", "press release copy", etc… About twice a week, the mailman makes the hike up to the front door and drops a new box on the porch. He also leaves a couple of doggie treats for the pupps. They know it, they go crazy until I get to the door. What do I do? I open the box, I flip through the book and get the post-its out. "This one will be great for friend S." or "This is one for R." and so forth.

I am very appreciative of this situation, believe me and I am under no obligation to review or pimp them out on this site. I know that a friend would benefit from a crockpot recipe book more than I will since I don’t own such a beast, or my baking-challenged friend S. might enjoy a basic dessert cookbook more than I will. But there are books I hoard, read, cook and bake from, hoard again, read some more and cook from until the hinges get worn out. Jaden’s book will be one of them.

I must give Jaden kuddos for the dessert section though she said it was tough to write. Her approach to dessert is very much what we like throughout the week: fresh fruits, easy to prepare frozen treats and the occasional splurge like the chocolate wontons. The headnotes say they will make little girls squeals and little boys break out into a disco dance (I am paraphrasing) and the neighbors' kids did just that on Halloween when I handed them out! I think I even saw a couple of adults shake their bootie in delight too!

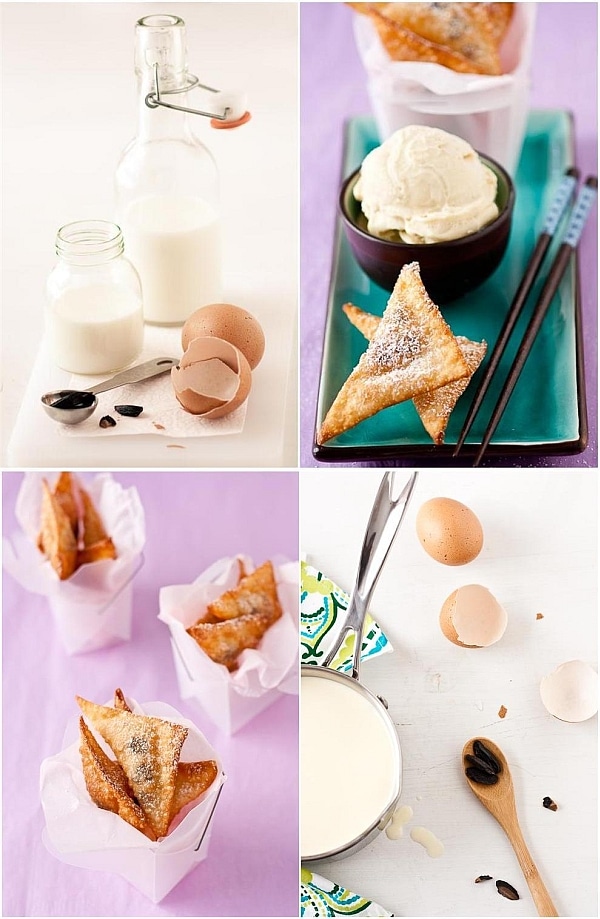
Fried Chocolate Wontons


These are so easy to make and if you get an extra set of hands to help out, you can make a double batch in a flash. Plan on that as they disappear very fast! There is no need for a deep fryer and if you keep the oil at a steady 350F you end up with perfectly crisp, never oily wontons which chocolate center oozes out as you bite into them. I had planned to serve them with her Asian Pear Frozen Yogurt but we devoured that one too fast so I went with my own tonka bean ice cream instead. The almond and vanilla flavor of the tonka paired really well with the chocolate once again. (see recipe notes)

Chocolate Wontons, from The Steamy Kitchen Cookbook, with permission of Jaden Hair

Makes 12

1 egg
1 tablespoon water
12 wonton wrappers
12 pieces of chocolates (I used about 4 chocolate chips per wonton)
high heat oil for frying (I used canola)
Powdered sugar for dusting

In a small bowl, make an egg wash by whisking together the egg and the water.
On a clean, dry surface, place a wrapper down with a point facing you. Place a piece of chocolate or chocolate chips near the top end of the wrapper. Brush a thin lauer of egg wash on the edges of the warpper. Fold the bottom corner up to create a triangle and press down at the edges to remove as much air from the middle as possible. Make sure the wrapper is sealed completely. Repeat with the remaining wrappers and chocolate pieces. Keep the prepared wontons covered with a piece of plastic wrap or a damp towel to prevent them from drying.
In a wok or medium pot (I used a 9-inch cast iron pan), heat about 2 inches of oil to 350F and gently slide a few wontons into the hot oil. Do not crowd the pan as the oil temperature would lower too much and you would end up with grease-soggy wontons.
Fry 1 to 1 1/3 minutes on each side until both sides are golden crisp.
Drain on paper towels and sprinkle with powdered sugar

Tonka Bean Ice Cream:

Notes: Yes, tonka beans are banned from import in the US by the FDA, yet they are used by many countries in food preparation and desserts in particular. Consumed in large quantities, they can be toxic as they contain an anticoagulant which many blood thinning medications are based on, courmarin. So, it’s banned, but its main agent is used in meds here and you can purchase tonka beans on ebay. UGH?!! Gotta love the FDA and large medical companies politics. Since I use 2-3 beans a year in recipes that feed no less than 8 people each time, I know we are ok but research and educate yourself before cooking with tonka beans if you are interested.

By the way, if you have vanilla extract from South America in your pantry and wonder why it smells like a vanilla bean got too close to an almond one night, that’s probably because tonka beans were used instead of real vanilla or diluted with it to make it cheaper to sell. Nothing wrong with that if you are aware of all the facts.

Tonka beans smell like a cross between vanilla and almond extracts and if you can’t find or do not wish to use tonka beans, substitute with each extract in the ice cream recipe and you will get close to the actual flavor.

6 egg yolks
1 cup (100gr)
2 cups whole milk
1 cup heavy cream
1 tonka bean (or 1 teaspoon vanilla + 1/2 teaspoon almond extracts)

In a large bowl, whisk the egg yolks and the sugar until pale and thick. In a saucepan set over medium heat, bring the milk, cream to a simmer, without letting it come to a full boil. With a microplane, grate the tonka bean right over the milk and cream simmering (I add the little knob left for extra flavor). Slowly pour the hot cream over the egg yolks mixture while whisking to temper the egg yolks. Pour the whole mixture back into the saucepan and cook over low heat, stirring constantly, until the cream coats the back of spoon. It should register 170F on a candy thermometer. At this point you have made a custard sauce, also known as "creme anglaise". Let cool completely, strain and refrigerate until cold, preferably overnight.
Once and the custard is cold, process according to your ice cream maker manufacturer’s instructions.

Vanilla,Salted Butter Caramel and Chocolate Mousse And A Giveaway

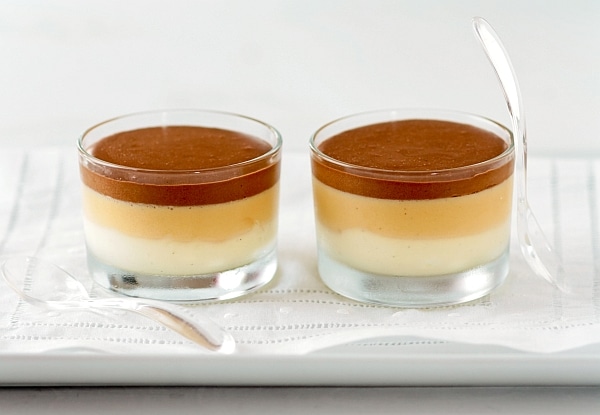
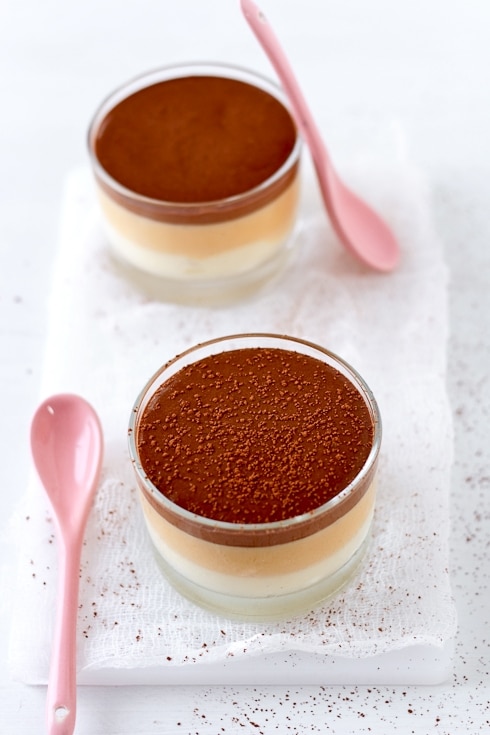
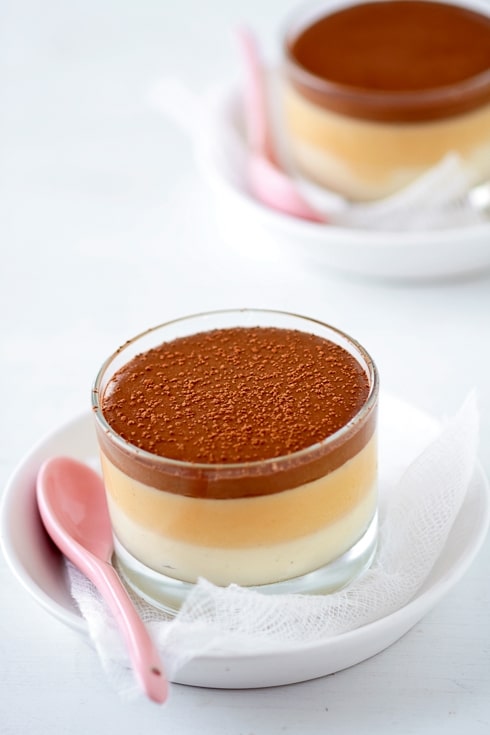
Vanilla, Caramel & Chocolate Mousse


When I asked Bill what he would like me to prepare for him while I am gone for a few days, his answer was an unequivocal "Mousse please!". Yes, he is a softee and I know his mom spoiled him with homemade desserts pretty much all his life so his answer did not come as a surprise. I did prepare a few things to warm up after work during the five days I’ll be gone but I know Bill. When I showed him where everything was in the fridge, his eyes immediately landed on these Vanilla, Salted Butter Caramel and Chocolate Mousses. And they were all the way in the back. Of course.

So where am I going for 5 days that he needs a fridge full of goodies? San Francisco! I am attending the 2009 BlogHer conference which will be held on Saturday. I am also one of the speakers at the conference! I am so psyched about this event for so many reasons. For starters just take a look at the program here. All these amazing bloggers giving of their experience and expertise, I am honored to be among them and hope to contribute as much as they are.

Then there are all these attendees that I will finely get to meet in person and finally hug silly until they call security because Tartelette is cutting their air supply from excitement! Friends kept tweeting they wanted to meet me, well I want to meet them just as much.

Making Mousse


Last May, I was supposed to join Bill on a working trip near Jen from Use Real Butter and we immediately made the plan that I’d stay with her a few days while he’d work. That plan fell through. We were both upset at the circumstances and she asked if I’d be coming to San Francisco for BlogHer. She was. Maybe we could meet up there. This summer has been financially sucky so we were pretty much tied down not going anywhere for a long time. She emailed back the same day and said in her usual ways "Damn it Helen! You’re going! Here are Frequent Flyers miles we are not using and you are sharing a room with me. Get a conference ticket and we’ll figure something out."

Yes. That is the kind of chick Jen is and I am proud to call her my friend. She rocks. Period.

Man! Those tickets were hotter than the best Nutella crepes on a street cart in Paris. They sold out before I could even log on the computer. So waitlist it was. Drats! Then my name got tossed in the hat for potential speaker and the wait began. Either a ticket would come open or I’d be a speaker in which case I would not need one. Nothing happened on either front for a very long time. Then, I finally scored a ticket and three days later got an email about being a speaker (in case you are wondering, that ticket went back in the ticket pool).

Vanilla, Caramel & Chocolate Mousse


So here we are…On Friday I get to squeeze silly one of the best gals I know and on Saturday I will be talking about "Your Blog is Great…now what? Letting your blog lead the way to new opportunity". I am honored, ecstatic and nervous all at once. Sharing this panel with Jaden and Amy gives the chance to see three different people with different opportunities, different paths and at different pit stops on their careers. I have no doubt this panel will be informative and fun. Did I say I was psyched already? Ok, ok….

Well, I am not done being psyched because my friend Anita from Married With Dinner extended an invite to stay with her a couple for a few days passed the conference and of course I jumped on it! Finally we get to hang out! We have plenty of fun things planned and I can’t wait to tell you about it through pictures and emotions. There will be plenty of dinners, lunches and stories shared with friends and strangers and I hope to post a few fun shots while I am gone.

I know by now you must be pretty tired about me gushing about the next five days, so I will shut up and give you back some of the "good schtuff" I am lucky to experience everyday by hosting a little giveaway.

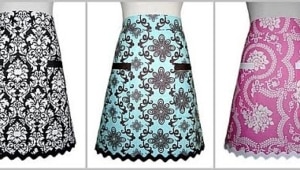
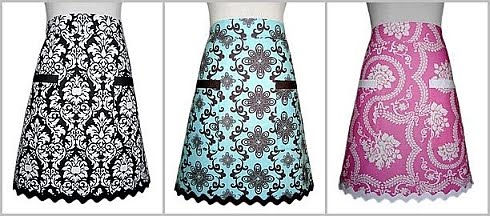
Aprons sample, for more colors and motifs, check The Hip Hostess website.

To win one of these adorable demi style aprons by The Hip Hostess (winner’s choice) all you have to do is leave a comment on this post between Thursday September 24th and Sunday September 27th, midnight Eastern Time. My dear husband will draw the winner at random and I will put her/him in contact with The Hip Hostess to pick the preferred demi style apron. But that’s not all! Deborah from The Hip Hostess generously offers all the readers of Tartelette a 15% discount on any order throughout October 15th 2009. Use the promo code TART (all caps) at check out. Very cool!

Enter Jen’s to win an Ipod Nano and enter here to win a fabulous apron handmade by The Hip Hostess, so you can bake and groove in style. And no, we did not plan it, would not have worked, ahah!

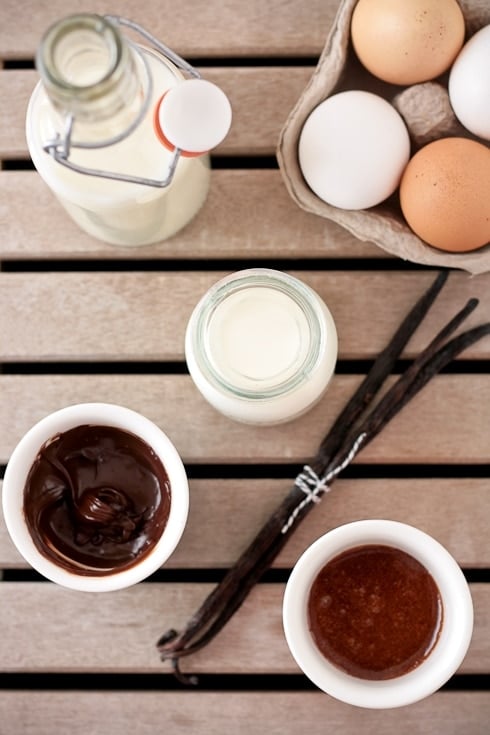
Now you can understand why I loaded the fridge with tons of good things for Bill to eat while I am gone. I am sad he won’t be able to walk around SF with me but I know he is not yet prepared for a room full of people saying "Oh my god it’s you!" and hugging you every 5 minutes. He said mousse was just fine. Especially one that starts with a soft and silky Bavarian cream and combines delicious layers such as vanilla, salted butter caramel and chocolate…

Vanilla, Caramel & Chocolate Mousse


Vanilla, Salted Butter Caramel and Chocolate Mousse:

Serves 4 to 6 depending on the size of your ramekins

Notes: you want to prepare the caramel part of this triplr mousse first as it needs to cool down properly before being incorporated to the rest of the base.

For the caramel:
1/2 cup (100gr) sugar
2 tablespoons (30ml) water
1/2 teaspoon fleur de sel or fine sea salt
1/4 cup (60ml ) heavy cream
2 teaspoons (10gr) unsalted butter

For the chocolate:
4 oz (120gr) dark semisweet chocolate

For the vanilla mousse base:
4 egg yolks
1/4 cup (50 gr) sugar
1 cup (250 ml) whole milk
1/2 vanilla bean
1 Tb (7gr) powdered gelatin, sprinkled over 3 Tb water
1 cup (250ml) heavy cream

Prepare the caramel:Place the sugar and water in a medium heavy bottomed saucepan and bring to a boil over high heat. Continue to cook until caramel in color. Remove from the heat and add the salt, heavy cream and butter. Stir with a wooden spoon until completely smooth. Let cool to room temperature.

Prepare the chocolate:
In a medium bowl set over a pan of simmering water, melt the chocolate until smooth. Remove from the heat and let cool to room temperature.

Prepare the mousse base:
In a large bowl, whisk the egg yolks with the sugar until very pale. In the meantime, in a large saucepan set over medium heat, bring the milk and the vanilla bean (split open and scraped over the milk) to a boil. Slowly pour the milk over the yolks, whisking constantly. Pour the mixture back into the saucepan over medium low heat and cook until the cream coats the back of a spoon (as if making creme anglaise). Add the softened gelatin and stir until melted completely into the cream. Let cool to room temperature.
Whip the heavy cream to soft peaks and fold it into the cooled cream base. Divide the base into three equal portions (one will stay untouched).

Assemble:
Add a couple of tablespoons of the base to the caramel to lighten it a bit and stir with a spoon. Gently fold the rest of the alloted mousse base into the caramel with a spatula.
Do the same for the chocolate portion.
Layer all three parts evenly into dishes or ramekins and refrigerate for an hour.

Double Chocolate And Pear Cakes

Double Chocolate And Pear Cakes


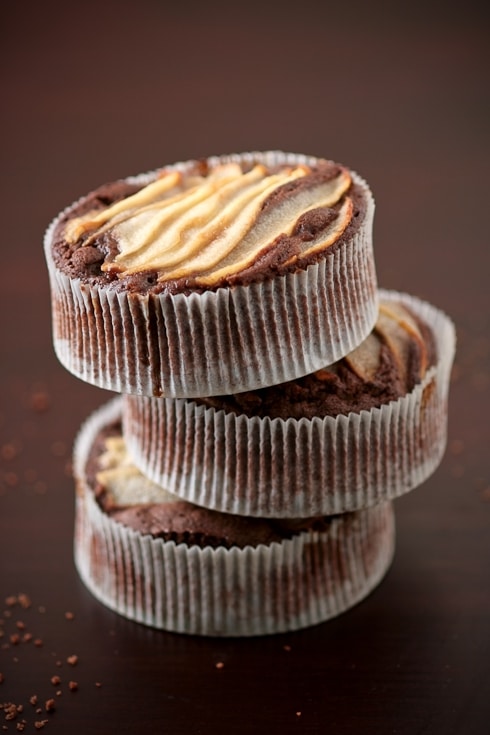
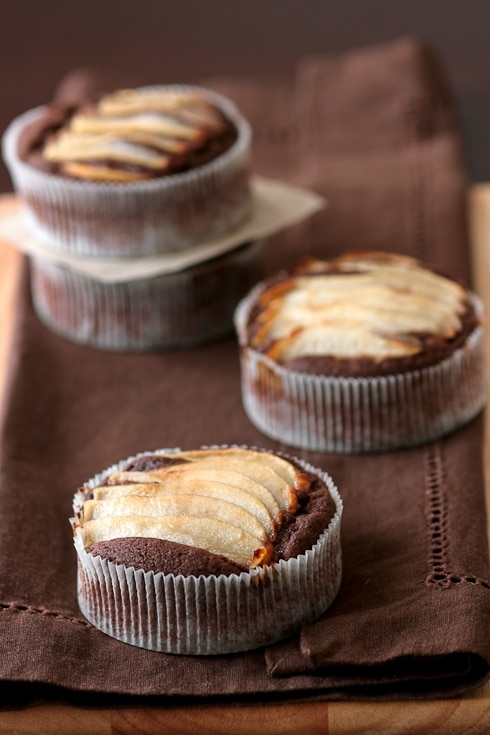
When I look out the window, it is hard to imagine that Fall officially starts tomorrow. We have two seasons here more or less, Warm and Hot. Christmas celebrated in a summer dress, well, "it ain’t fittin'. It jes' ain’t fittin'" But there are signs that cannot be mistaken. Night falls earlier, the wind has finally picked up, the pecans are weighing the tree branches down. The light is now giving cold blue undertones, I put the diffuser back up in the studio, my shooting schedule has changed. Most importantly, the oven is buzzing with tarts, custards and cakes like these Double Chocolate And Pear Cakes, a gluten free adaptation of my mother’s recipe.

I like spontaneity as much as I like certain family rituals. One that my folks have back home is to get together for tea time everyday around four or five o’clock. Even now that my grandmother is gone, my mother makes the same one yard walk to my grandfather’s and continues the tradition. One of my fondest memories is always this moment shared around their dining room table right when it is getting darker outside and we cozy up around a slice of cake and a hot cup of tea and chat.

Getting Ready For Fall


As a kid, I’d sit quietly and listen to a mix of conversations ranging from politics and literature to the more basic questions of what to cook for the next family get together. As a teenager I started taking part by bringing treats of my own like madeleines and langues de chats. As an adult, every time I go home, I just sit quietly and listen, literally captivated by every word they say, every event or family member they talk about. I try to encapsulate those precious moments for the long strips of time I spent away from them.

Comes Fall when my "cozying-it-up" starts to kick in, I make this cake every weekend so that we can have tea and cake like they do back home. I have no idea where my mom got the original recipe, I just found several copies of it in different recipe tins around the house. I love it for the simple reason that you can make it your own with the flavor that you like. October might be cardamom and pistachios, November might give way to almond and vanilla while December might see some colorful candied fruits. Right now it’s pears and chocolate.

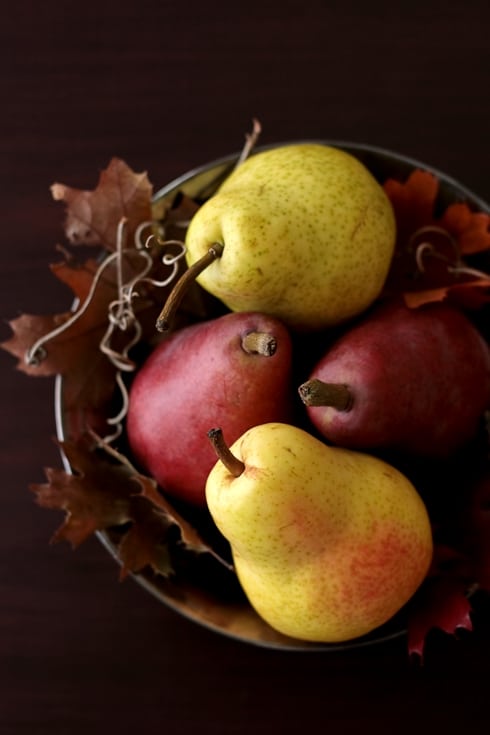
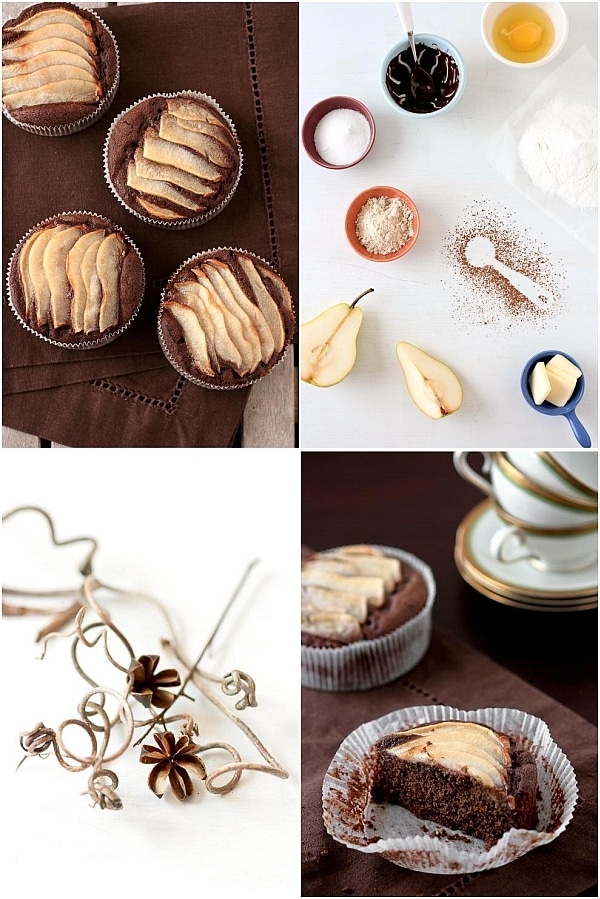
After successfully adapting a chocolate tart recipe earlier this month to a gluten version, I thought my favorite cake would be next to become gluten free. The cake was not difficult to adapt using different flours and eggs and butter are there to help ingredients bind and raise properly. I mean, it’s hard to mess things up when there are eggs and butter. I added cocoa powder and melted dark chocolate to the batter and topped each cake with slices of ripe pears. I knew the flours could lend a different, sandy texture to the finished cakes so I slightly underbaked them so they’d remain moist for a couple of days.

Double Chocolate And Pear Cakes


I purposely left out any kind of spice this time but I am thinking cardamom for the next cup of tea. I also want to try adapting this gorgeous Olive Oil Cake by Connie and these cute Nutella pound cakes by Dana. I can tell Fall is here…

Double Chocolate And Pear Cakes


Double Chocolate And Pear Cakes:

Makes five 3-inch cakes (I used these liners) or one loaf cake.

1 stick (113gr)unsalted butter, at room temperature
1/2 cup (100gr) sugar
3 eggs
2 oz (60gr) semisweet chocolate, melted and slightly cooled
1/4 cup (60ml) buttermilk
1/3 cup (60gr) sweet rice flour
1/3 cup (60gr) sorghum flour (you could use amaranth or quinoa)
OR 1 cup (125gr) all purpose flour instead, if not going gluten free
3 tablespoons (15gr) cocoa powder
1 1/4 teaspoon baking powder
1 pear, ripe, peeled, pitted and thinly sliced

Preheat the oven to 350F and position a rack in the center. Grease cupcake liners or a loaf pan and place them on a baking sheet. Set aside.
In the bowl of a stand mixer fitted with the paddle attachment, beat the butter and sugar on medium speed until light and creamy, about 2-3 minutes. Reduce the speed to low and add the eggs, one at a time, scarping the sides of the bowl in between each addition. Add the melted chocolate and beat until smooth. Add the buttermilk and beat, still on low, until incorporated. Add the flours, cocoa and baking powders and beat for 30 seconds. Increase the speed to medium and beat for a minute. Pour the mixture into your prepared pan(s) and place the slices of pears on top. Bake for 30-40 minutes for a loaf, 20-25 minutes for individual cakes. Check at the earliest baking time indicated as each oven runs differently and you want to keep the cake(s) moist inside.

Chocolate Truffle Tarts

Chocolate Trufle Tarts


Hanging out on Twitter late at night when I can’t seem to figure out where sleep went has very very good outcomes. I get to talk to my favorite people as if they were just a few feet away and beside geeking out with Jen, ZenChef and Mark, I also get to talk gluten free with Shauna of Gluten Free Girl . I love the way she is gently coaxing me to push my own boundaries. These Chocolate Truffle Tarts for example are the pure result of an idea that Shauna unkowingly planted in my head one late night.

When we are having large gatherings of friends and family like this weekend, I always try to accomodate everyone’s needs, especially when it comes to gluten free and low salt recipes since they directly affect me too. After weeks spent reading about my diagnosis last year and ways to eleviate the symptoms, I realized that a gluten free diet could help a lot with genetic diseases and there was not much around as far as treatments were concerned. Our diet is 90% gf to start with except when it comes to pastries. Even there, I take a small portion and ship the rest to the neighbors, family or friends.

I admit, beside the obvious desserts like macarons, ice creams, panna cottas and financiers, I rarely practice my gluten free flours to the most of their ability. I should, I know it. I clearly see a difference when I keep the salt and gluten under wrap. The attacks are far less and few in between, the strength a bit less violent and I recover faster from feeling on a rollercoaster for a couple of hours. Trust me, it’s not only "not fun", it’s rather debilitating when you are in the middle of work. And who likes to feel like they are on a plane 24/7 from the ringing and pressure?

Chocolate Trufle Tarts


Thus, hanging out on Twitter and chatting with people like Shauna gives me the necessary push to try making more gluten free desserts. I have played with gf mixes in the past and often ended up with a brick to cut or cement to chew. I knew it was my lack of practice, and time to persue the issue because there are millions (the gf Daring Bakers for a start) eating gf pastries that not only look good but taste great. I mean, just give a look at this pie!

I had the perfect oppportunity this weekend to tackle a gluten free dessert once again. There are full blown celiacs in our family and then there’s me, who does not have the usual stomach reactions but who could benefit from a little tightening of the regimen here and there. I had just the ticket with Chocolate Truffle Tarts and since the filling is already gf, the only thing I’d have to work on was the chocolate crust. I put one of Shauna’s recipes side by side with mine and went about tweaking.

Oh happy happy me! The result was exactly like the original. A crisp, deep chocolate flavored crust, filled with an amazing truffle like chocolate filling and topped with a rich chocolate ganache. If I had been looking for my chocolate cravings to be back all these weeks, well….I was surely not looking anymore with these. Decadent and rich without being heavy or coyingly sweet. My kind of chocolate heaven!

Chocolate Trufle Tarts


While I don’t think about turning this blog into a complete gluten free one, and developing the gf recipes I want to make demands more than I can handle right now, I am looking forward to finding the right balance for you readers and us here at home. I can cheat about 10% and feel fine but I know I am also tempting my symptoms and playing with the good days. These tarts were the perfect place to start. Not a crumb was left on anybody’s plates.

Chocolate Truffle Tarts:

Makes eight 4-inch tarts

Note: There are many gluten free flours out there that would work with this crust and I just used what I had available in the pantry. Here is a list of gluten free flours from which you can get inspired to try your own concoctions. For a non gf crust, use 1 1/4 cup all purpose flour instead of the 3 gf flours

For the chocolate crust: (adapted from Shauna’s pie crust recipe)
1 stick (113gr) unsalted butter, at room temperature
1/2 cup (60gr) unsifted powdered sugar
3 egg yolks
pinch of salt
1 cup (160gr) white rice flour
1/4 cup (30gr) amaranth flour (you could use sorghum flour)
1/4 (40gr) potato starch
1/4 cup (20gr) unsweetened cocoa powder

For the chocolate truffle filling:
8 ounces (240gr) bittersweet chocolate
12 tablespoons (170gr) unsalted butter, at room temperature
1/4 (50gr)cup sugar
1/4 cup (60ml) strong brewed coffee
4 large eggs

For the chocolate ganache:
4 ounces (120gr) bittersweet chocolate
1/3 cup heavy whipping cream
2 tablespoons unsalted butter, at room temperature

Prepare the crust:
In a mixer, whip together the butter and sugar together until light and fluffy. Add the egg yolks and pinch of salt and mix until incorporated. Add the three different flours and cocoa pwder and mix briefly. Dump the whole mixture onto a lightly floured (use more rice flour) board and gather the dough into a smooth ball. Do not work the dough while in the mixer or it will toughen it up. Flatten the dough into a disk, wrap it in plastic wrap and refrigerate for an hour.
Preheat oven to 350F and position a rack in the center. Place eight tart rings on a parchment lined baking sheet and set aside.
When the dough is nice and cold, roll it out on a lightly floured board or in between two sheets of plastic. Cut out eight 6-inch-rounds into the dough and fit them into eight 4-inch tart rings. If the dough tears while you roll or/and transfer into the rings, just patch it with your fingertips. Line the dough with pieces of parchment paper, fill with pie weights or dy beans and par bake for 10 minutes. Remove the weights and parchment paper. Keep the oven at 350F.

Prepare the filling:
Place the chocolate in a medium bowland set aside. In a medium saucepan set over medium heat, bring the butter, sugar, and coffee together to a boil over medium. Pour the mixture over the chocolate and leave it undisturbed for 2-3 minutes. Gently whisk until smooth. Add the eggs, one at a time whisking quickly until the mixture is smooth. Divide the batter evenly among the tart shells and bake for 10 minutes.
Let cool completely.

Prepare the chocolate ganache:
Place the chocolate in a medium bowl and set aside. In a medium saucepan set over medium heat, bring the heavy cream to a gentle boil. Pour it over the chocolate and let sit for 2-3 minutes. Whisk until smooth and incorporate the butter at the same time until the ganache is completely smooth. Divide evenly on top of the tarts and snooth out with an offset spatula. Refrigerate until ready to eat.

Daring Bakers Do Chocolate Covered Marshmallow Cookies

Mallow Cookies


Happy birthday to you! Happy Birthday to you! Happy Birthday dear Bill! Happy Birthday to you!!

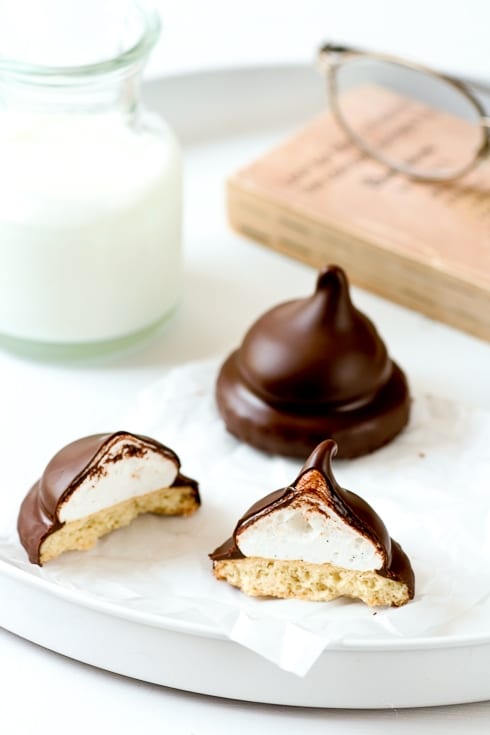
I know today is the Daring Bakers' challenge reveal but it is also my better half, the pepper to my salt, the flour to my sugar and my favorite Cookie Monster’s birthday today! The man should clearly enter cookie eating contests. I have never seen him shy away at the idea of eating a dozen, straight up with a glass of milk. That’s why I waited until the last couple of days before the challenge reveal date to make these Mallow Cookies. Just for him.

Well, not really. Where there is shortbread cookie, there is Bill. Where there is marshmallow there is me. And where there is chocolate there is us. Hmmm, let’s start over. Where there is a shortbread cookie, there is me. Where there is marshmallow there is Bill and where there is chocolate there is us. Ha! Obviously these Mallows did not stand a chance with either of us.

Ok, so I won’t go as far as putting a red bow around a few or stick a candle in one of them but they will be part of the mini dessert bar/table I am putting together for dinner. Nothing lavish, just a few close friends, good wines and good cheers!

Mallow Cookies


I must say that this month challenge was actually two in one: either make the Mallows or Milanos cookies or make both. I did make both and tossed the Milanos to the birds (hence the lack of pictures for those). We literally looked at each other and said "not worth it". To us, it was a waste of ingredients in a cookie that had neither texture nor taste to show for it. Now, that’s only our opinion (we like having one) and some Daring Bakers have enjoyed their cookies just fine. I’d say make half the recipe once to decide if it’s worth keeping in your repertoire.

So, the Mallows. Good. Even better with a layer of peanut butter sandwiched between the cookie and the marshmallow for some. I kept the dominant flavor simple because I was waiting on Bill to decide what he really wanted (birthday boy also had a weekend pass!). We didn’t stray too far from that, using Mexican vanilla which has slightly spicy undertones and worked well to play ying to the yang that was the chocolate.

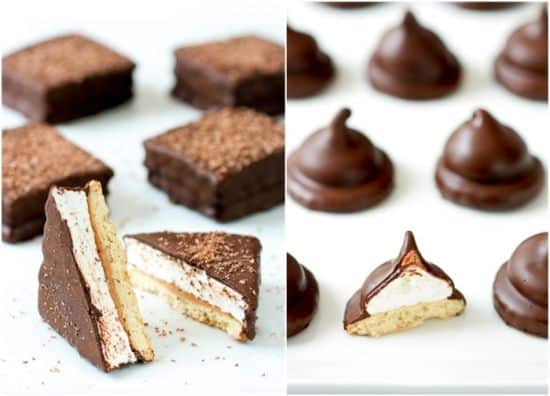
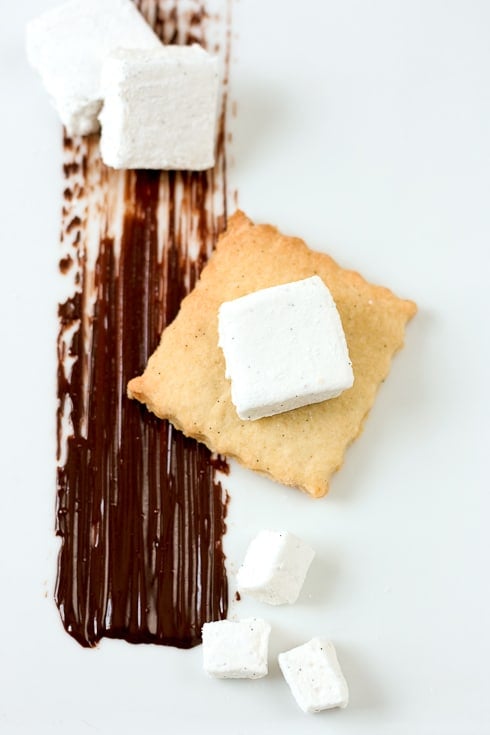
While I was making the Mallows I decided to keep half the cookies as described in the recipe and made square shapes with the other half both with the cookie dough and marshmallow which I poured in a small square dish before it had time to set. Once "cured", I cut square shapes the same size as the shortbread bottoms, spread some peanut butter, topped with a square of marshmallow and dipped the whole thing in chocolate. I also saved a couple and made a deconstructed Mallow with each component laid out separately on a plate.

Mallow Cookies- Peanut Butter & Vanilla


Oops, except I did not dip. There were so many cookies that I placed them on cooling rack over parchment paper and poured the chocolate right over them, gave them a rattle and a shake and left them to set before refrigerating. I am all about better time management lately and that saved me a good bit of time instead of standing in front of the island dipping. And it’s summer, it’s hot and birthday boy wanted to go to the beach!

Would I make them again. Maybe. Probably. Why not? With friends, around a hot cup of cocoa in the winter most likely.

The July Daring Bakers' challenge was hosted by Nicole at Sweet Tooth. She chose Chocolate Covered Marshmallow Cookies and Milan Cookies from pastry chef Gale Gand of the Food Network.

Deconstructed Mallow Cookies


One year ago: Daring Bakers Nut and Chocolate Gateau.

Mallows (Chocolate Covered Marshmallow Cookies), adapted from Gale Gand, from Food Network website

For the Cookies:
3 cups (375grams/13.23oz) all purpose flour
1/2 cup (112.5grams/3.97oz) white sugar
1/2 teaspoon salt
3/4 teaspoon baking powder
3/8 teaspoon baking soda
1/2 teaspoon ground cinnamon
12 tablespoons (170grams/ 6 oz) unsalted butter
3 eggs, whisked together

For the marshmallows:
1/4 cup (60ml) water
1/4 cup (60ml) light corn syrup
3/4 cup (170 grams) sugar
1 tablespoon powdered gelatin
2 tablespoons cold water
2 egg whites, room temperature
1 whole vanilla bean, split open and seeded

For the chocolate glaze:
12 ounces semisweet chocolate
2 ounces cocoa butter or vegetable oil
(I used 2 pounds of chocolate and 2 tablespoons shortening)

Prepare the cookies:
In a mixer with the paddle attachment, blend the dry ingredients. On low speed, add the butter and mix until sandy. Add the eggs and mix until combine. Form the dough into a disk, wrap with clingfilm or parchment and refrigerate at least 1 hour and up to 3 days. When ready to bake, grease a cookie sheet or line it with parchment paper or a silicon mat.
Preheat the oven to 375 degrees F. Roll out the dough to 1/8-inch thickness, on a lightly floured surface. Use a 1 to 1 1/2 inches cookie cutter to cut out small rounds of dough. Transfer to the prepared pan and bake for 10 minutes or until light golden brown. Let cool to room temperature.

Prepare the marshmallows:
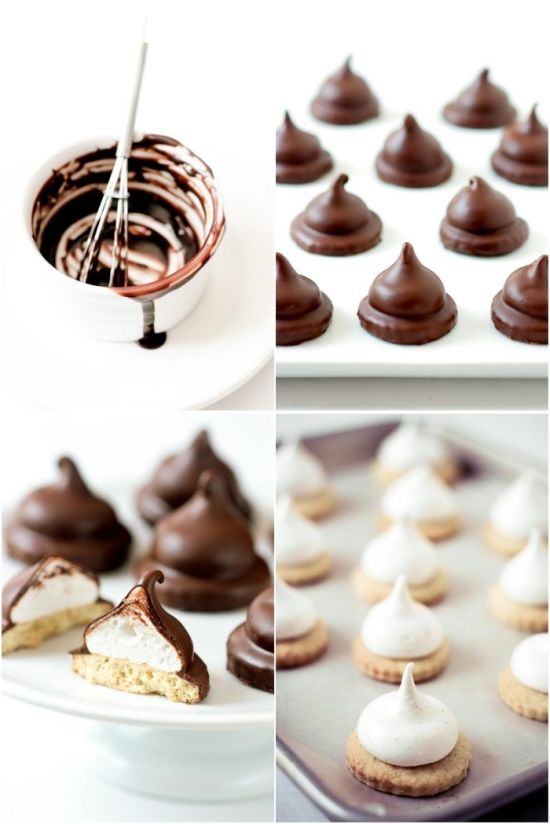
In a medium saucepan, combine the water, corn syrup, and sugar, bring to a boil until “soft-ball” stage, or 235 degrees on a candy thermometer. Sprinkle the gelatin over the cold water and let dissolve. Remove the syrup from the heat, add the gelatin, and mix. Whip the whites until soft peaks form and pour the syrup into the whites. Add the vanilla seeds and continue whipping until stiff. Transfer to a pastry bag.

Prepare the chocolate glaze:
Melt the chocolate and shortening together in the top of a double boiler or a bowl set over barely simmering water.

To assemble:
Pipe a “kiss” of marshmallow onto each cookie. Let set at room temperature for 2 hours. Line a cookie sheet with parchment or silicon mat. One at a time, gently drop the marshmallow-topped cookies into the warm chocolate glaze. Lift out with a fork and let excess chocolate drip back into the bowl. Place on the prepared pan and let set at room temperature until the coating is firm, about 1 to 2 hours.

Asheville Trip To Foodtopia – Part II

Chocolate Torte, Caramel Ice Cream and Chocolate Sorbet


Day two of our trip in Asheville had us move around a bit less but was just as intense, keeping us on our toes until bedtime. Or was it until we all rolled, stumbled, fell, crashed on our beds?! Ha! Yes, we can blame it on all the tasty wines, succulent dishes, intense Iron Chef competition, culminating with an outstanding dinner at Horizons in The Grove Park Inn.

The 4 Diamond restaurant gathered us around one of the best meals I have had in my life, ending in the most perfect sweet note: a chocolate and caramel tasting executed by Pastry Chef Laura Bogard. Before I could even ask our hosts if Laura would be kind enough to share a couple of the recipes, I was graciously handed a print out of all the components of our plate. Once back home in SC, I decided to put my own spin on it and make this Chocolate Torte topped with Caramel Ice Cream and Chocolate Sorbet, inspired by that evening. But let’s talk about the day first…

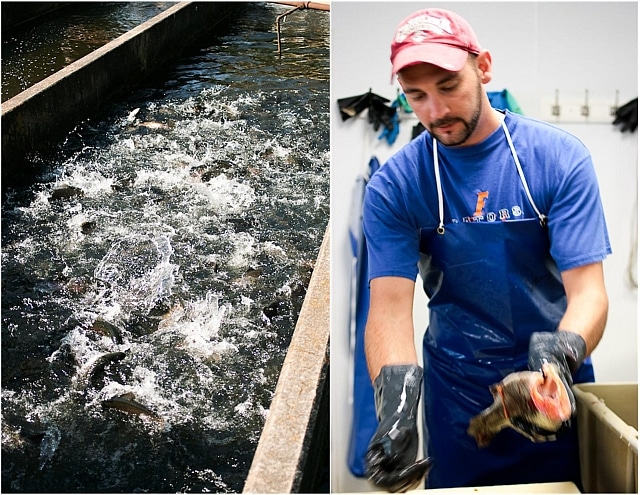
We started with a visit to Sunburst Trout Farm outside of Asheville. I was really looking forward to it for the simple reasons that I used to go trout fishing all the time as a kid and I fully support trout farming when done with sound ecological practices. I was thrilled to meet Sally, her family and her staff after I had read more about them and their operation. They confirmed every thought I had already formed in my head: happy trout, careful workers, quality products.

Sunburst Trout Farm


Before meddling with the trout we were treated to a scrumptious breakfast smorgasbord of trout dishes, carefully prepared by their research and development chef, Charles Hudson. Trout dip, trout omelette, trout gravy and biscuits, hot smoked, cold smoked…you name it, we probably had it. All accompanied by fresh and pickled vegetables from the chef’s garden. A feast. We had to draw the line and think about the next round of food aventures and skip lunch.

Food bloggers skipping lunch? Ah yes. We had to keep ourselves sharp and moveable for what was awaiting us next. A full blown, very serious and incredibly fun CSA Mystery Box Iron Chef Competition held at AB-Tech Culinary Arts Center. If I were a student looking for a culinary college, I would, hands down, apply there first. Everything there is made to teach and practice without being stale or stuffy. Me? I was trying to contain that beaming smile of being back on the familiar grounds of a professional kitchen.

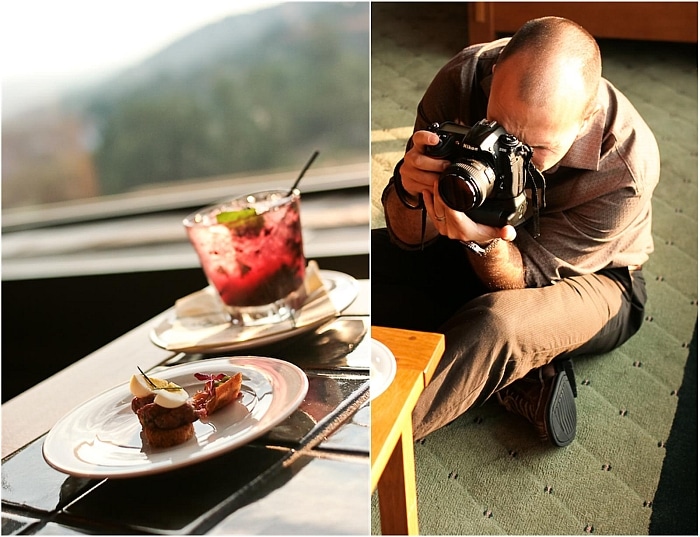
I wish I could have combined my two loves of cooking and photographing but I was about to get my hands chopping and my apron dirty. Diane of White On Rice Couple was our full-on photography journalist that day so I will be sure to update you when they post about it. We all had such a blast that I can’t wait to see it in pictures!

Each blogger was paired with a local chef to create two courses using the content of CSA boxes provided by The Appalachian Sustainable Agricultural Project, as well as the trout we had filleted that morning and extra ingredients provided by Blue Ridge Food Ventures (love that project – please take the time to click) and our own chefs.

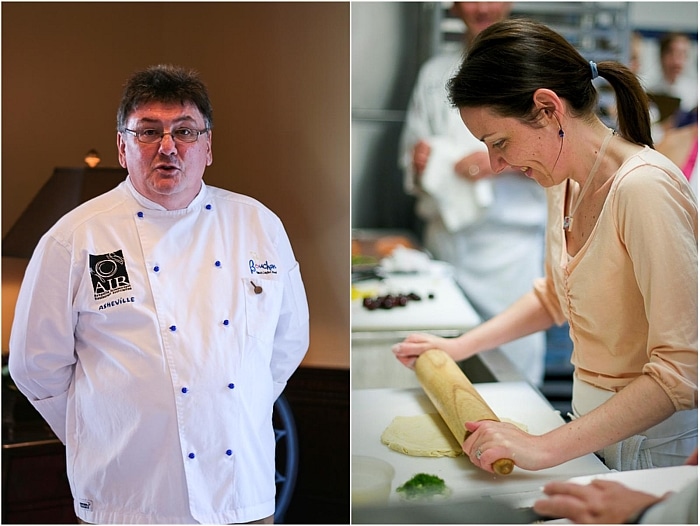
Team France: Chef Michel Baudouin - Tartelette

Right photo courtesy of Diane at White On Rice Couple.
Meet Team France! Yes. Could there have been a better pairing than this? I think not! Indeed, I was teaming up with Chef Michel Baudoin, owner and chef of Bouchon . I have to say that the first thing I told Dodie was "Oh sh!t (!) you know that two French chefs competing together is more explosive than them competing against each other, right?!" She mentioned Michel had a similar reaction, eheh. Ah yes, that’s us French peeps. Bill says we take out our swords first and talk later. Very right. But in this case, very wrong.

We had a blast! Talking and yapping away in French. Chopping and dicing while coming up with our competition dishes. We were supposed to make only two dishes, but I guess you will not be surprised to hear that we made three. See! It’s not only me during Daring Bakers challenges! It’s genetic!! We started off with a fennel and zucchini tart, topped off with chorizo crumbles. Our main course was a Sunburst trout fillet stuffed with local goat cheese, baby turnip filled with purple potato puree. (picture here)

Michel is so low key and humble, I just had the greatest time cooking with him and talking about our experiences with food, cultures, restaurants, etc…I previously had dinner at Bouchon a few years ago and I am looking forward to returning to Asheville just for that!

Dessert was my grandmother’s vanilla apple compote served with pecan shortbread cookies. My biggest fear was this item. Seriously. Baking without measuring or weighing, mixing everything while eye balling and feeling the dough. I think I had a couple of shots of moonshine brought over by Todd’s chef while the cookies were baking! Turns out that everyone raved about that simple, homey dessert and it even earned us an extra five points. We still lost by 1/2 point though while Alison and Chef Annie Pettry took the high honors of the day.

Food Blogger In Action


It was an intense competition but with such great spirited and talented chefs that even if we were feeling it in our gambettes (legs), we still had enough of an adrenaline high to carry on with dinner planned at The Grove Park Inn’s Horizons restaurant, Horizons.

We started off by a round of cocktails (check out Jaden’s post about her tasty Xanadu libation) and appetizers which got their beauty shot courtesy of Todd.

Dinner At Horizons


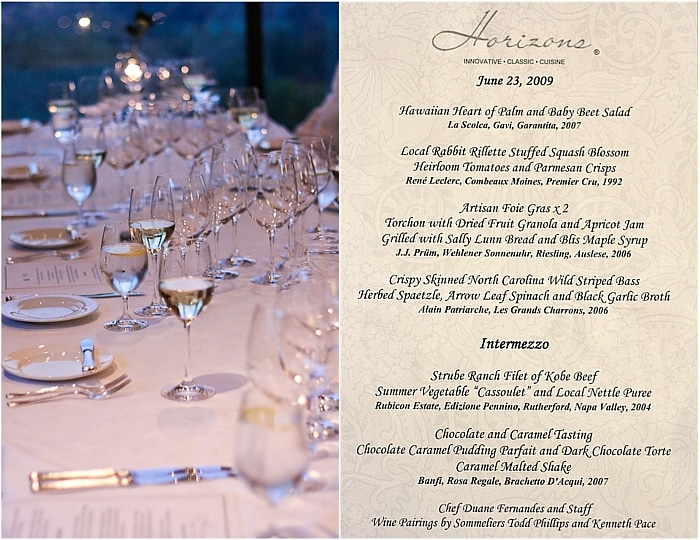
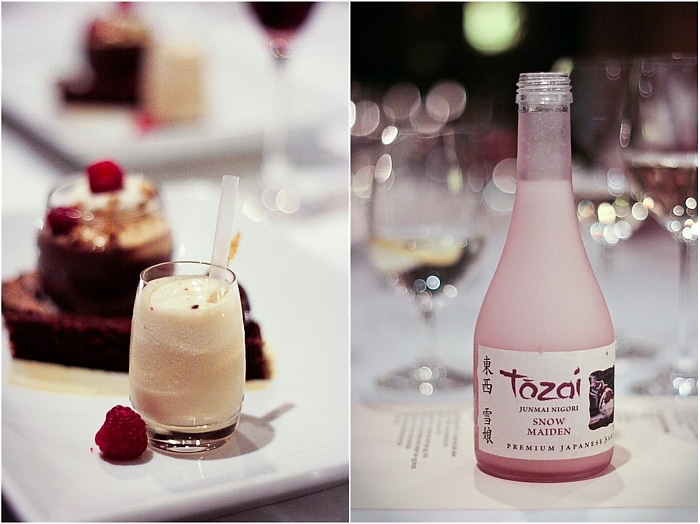
I did take pictures from that dinner but let’s recap my physical state at this poing: late breakfast + cooking competition + a few nibbles of the finished dishes + moonshine + wine + cocktails + outstanding dishes + wine pairings + sake tasting = one very fuzzy sets of pics. Love that Bill knows me so well that he immediately asked the next day whether I had behaved. I think I did 🙂

Aren’t you lucky I don’t have all the words, the right words to describe how outstanding this dinner was?! I mean just look at that menu and sigh. I am! Thank you Jeff and Kevin for the superb setting and organization, you can be proud of the team you have cooking for your guests. Seriously, and I am not saying that because I never saw the check, this was one of the best meals of my life. Everything so fresh, sourced locally as much as possible, and executed with such perfection by Chef Duane Fernandes and his staff that I finished each- and- everyone- of- my- plates- OMG- I still- can’t- believe- I did this! And the wines…I want to do it all over again but with just the wines! Ok, maybe not…because there is a seriously tempting dessert tray to talk about.

Dinner at Horizons


Chocolate almond torte, chocolate sorbet, chocolate and caramel pudding and caramel ice cream and malt shakes. So happy to see I am not the only one thinking mini milkshakes are cool (see DB challenge)! I admit, while deep with both chocolate and caramel flavors, the pudding is the only item I left on the plate after sampling a few bites (research people, it’s all research). I did wish for a groundhog day type situation in which that chocolate torte, chocolate sorbet and caramel ice cream would just keep on appearing before my eyes and plate. This good. I have not even been really in the mood for chocolate lately but after making this at home, it is all I can see!!

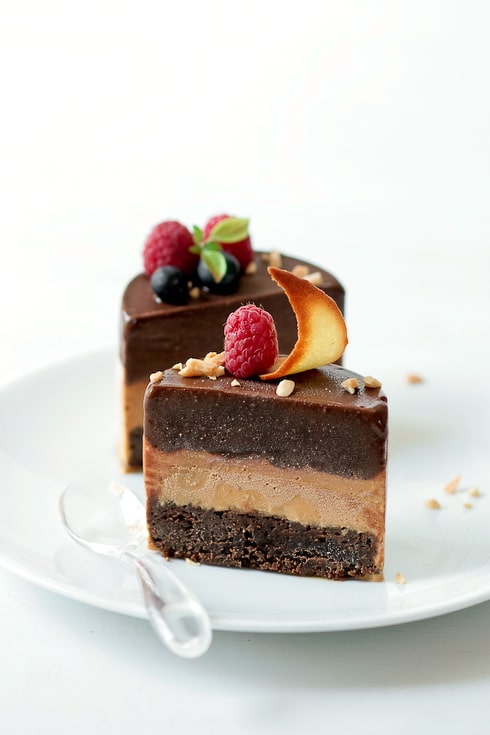
Soft, luscious, powerful, smooth, intense. I took the three elements I loved the most about our dessert sampler that night and combined them in this entremet, starting with the chocolate torte as the base and then topped off with the caramel ice cream and chocolate sorbet. I made six. We had 2. That’s four more for me if I find a way to sneak around Bill. I hope it convinces you to try all three together or separately. It was hard to keep the caramel ice cream around long enough to have any left to fill the cake rings!

Are you still with me for Day 3 and 4 and a couple more exquisite recipes from the chefs of Asheville? Sure hope so!

Have a wonderful 4th of July!

The Making Of: Chocolate Ice Cream Cake


Chocolate Torte, Caramel Ice Cream and Chocolate Sorbet:

For the chocolate torte:
10 oz (300gr) chocolate
8 oz (230gr) unsalted butter, at room temperature
6 eggs
3/4 cup (150gr) sugar
1/2 tsp vanilla
2 tablespoons (15gr) flour
3/4 cup (70gr)finely ground almonds
1/2 teaspoon espresso
1/4 teaspoon almond extract

For the Caramel Ice Cream:
1 1/2 cups (300gr) sugar
1 teaspoon honey
1/2 cup (125ml) water
1 quart (1L) half and half
or 2 cups whole milk + 2 cups heavy cream
12 egg yolks
1 1/2 teaspoon vanilla
3/4 teaspoon salt

For the chocolate sorbet:

2 1/2 cups (625ml) water, divided
1 cup (200gr) sugar
3/4 cup (65gr) cocoa powder
8 oz (240gr) dark chocolate
1/2 teaspoon vanilla

Prepare the chocolate torte:
Preheat oven to 350F and position a rack in the middle. Line a quarter sheet pan with parchment paper and set aside.
In a large bowl set over a pot of simmering water, melt together the chocolate and butter. Remove from the heat and let cool to room temperature.
In a stand mixer (or with hand held beaters), whisk the eggs and sugar on medium speed until slightly thickened. Add the vanilla. Turn the speed to low and add the chocolate mixture and whip for a minute. Still on low speed, add the rest of the ingredients. Beat one minute until everything is incorporated.
Spread the batter on the prepared sheet pan and bake for 20-30 minutes or unti the center is just set.
Let cool completely.

Prepare the caramel ice cream:
In a heavy saucepan, set over high heat, stir together the sugar, honey, and water and cook to a dark amber caramel. Slowly add 2 cups of half and half and return to a boil, stirring to dissolve all the caramel bits. Slowly add the remaining 2 cups of half and half and return to a boil.
In a large bowl, whisk the egg yokls to break them up and slowly pour the hot caramel mixture over them to temper. Pour the content of the bowl back in the saucepan and cook over medium low heat until it coats the back of a spoon. Remove from the heat, add the vanilla and salt and stir until dissolved.
Let cool completely, refrigerate until cold.
Process in an ice cream machine according to manufacturer’s instructions.

Prepare the chocolate sorbet:
In a heavy saucepan set over medium high heat, stir together 1 1/2 cups water, sugar, cocoa, and a pinch of salt. Bring to boil, turn the heat down and simmer for a minute. Remove from the heat. Stir in the remainin 1 cup of water, chocolate and vanilla. Let stand for a minute. Whisk the mixture thoroughly to make sure that everything is incorporated and smooth.
Let cool completely. Refrigerate until cold before processing in your ice cream machine according to manufacturer’s instructions.

To assemble:
Line six 3-inch round cake rings with acetate or platic cover sheets and place them on a parchment paper line baking sheet. Cut out six 3-inch rounds in the chocolate torte and place them inside the prepared cake rings. Divide the caramel ice cream and chocolate sorbet evenly in between the cake rings. Freeze until solid.

I topped the cakes with fresh berries and tuiles made out leftover frangipane from the last Daring Bakers Challenge.