
cheesecake

Asheville Trip To Foodtopia Part 1

Chocolate Strawberry Cheesecake


Update: check Todd and Diane’s Part 1 here. Amazing!

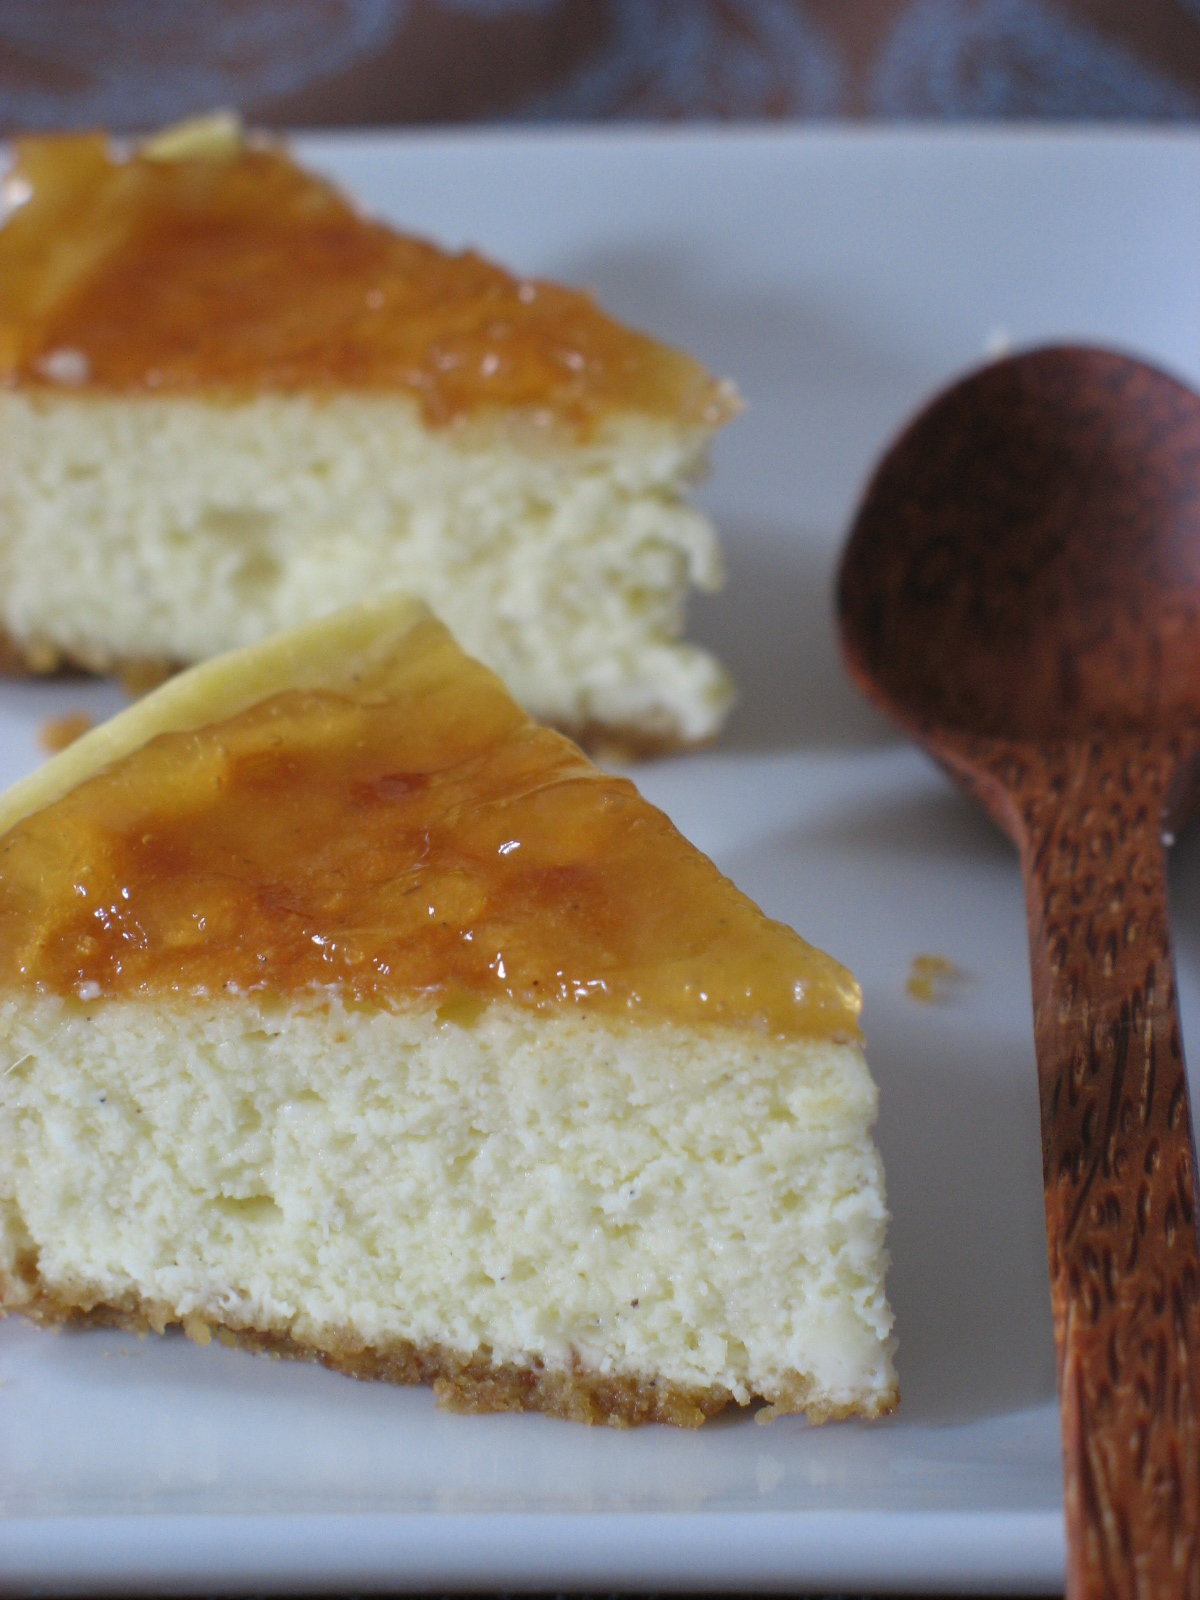
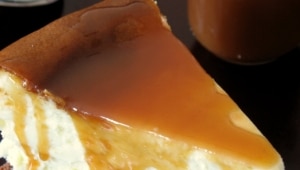
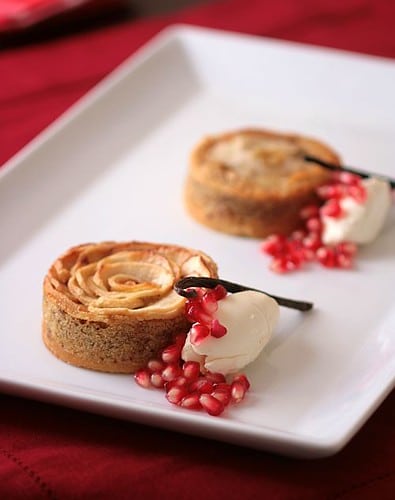
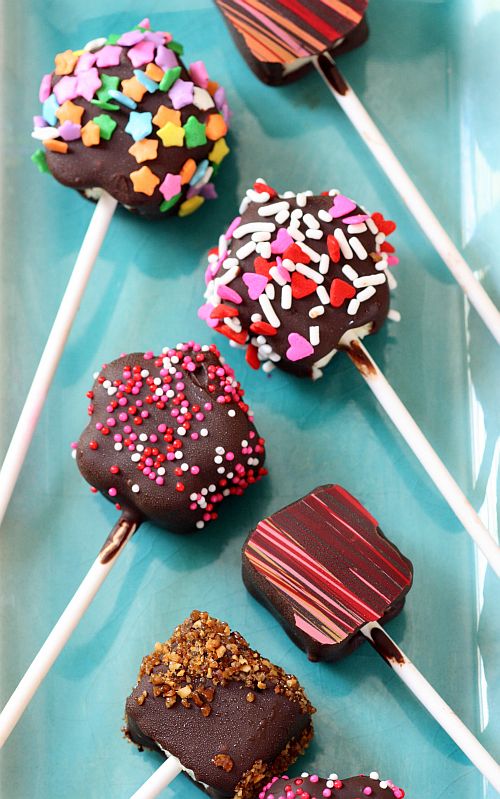
One of the first things I did when I got back from Asheville, NC was to email Jael and Dan Rattigan from The Chocolate Lounge and beg ask them to share a recipe, any recipe, from their outstanding repertoire. So happy they sent the one for their Chocolate Covered Strawberry Cheesecake (see end of post). Most delicious thing I have had in terms of cheesecakes. Really.

We were in NC to discover the Foodtopian Society of Asheville and we all fell in love with the pair, the minute we walked into their shop. Proof? We told Dodie (Super Mistress of Organization – Tourism Office PR Manager) that we had to take Brian, Todd and Diane there as soon as they’d arrive. Great chocolates, cakes, great photo opps, etc…Yeah, truth is we wanted more. More chocolate, more cookies and more of Jael and Dan. A couple of us even went back a third time and will have a post up soon.

Even though I have spent the last week being wined and dined by the wonderful chefs and artisans of Asheville, I did work very hard (smile and beg a lot primarily) to get you some of the dessert recipes I enjoyed on the trip. As a chef, I know it is no small gesture to part with one and I greatly thank the chefs who shared their creations with me and now you. This is one more example of the generosity of the artisan food crafters we have encountered.

As Diane mentioned one day, these people, restaurant owners, chefs, farmers, cheese makers, bakers, never talk about themselves. They talk about their crop, their product, how it evolved and how they evolved with it, not the other way around. They listened, they laughed, they patiently answered our questions, shared their knowledge and passion. We all took home different views and feelings from this trip I am sure, except one common trait uniting food professionals and food bloggers: we are passionate about food. We are all very tuned in to all of this so I think it was a pretty easy group to talk to but I know that they would have said and done the same for newbies to the concept of locally grown foods.

The Mighty Team


But who are these fellow food bloggers I keep mentionning? Let me tell you, I felt I had been a little sign that read "for good Kharma" when meeting them last week. Each of us had a little/lot of something to share and discover and oh my! Can we talk! And eat! And photograph! I have certainly made new friends, fell in love with the world again but dang country for being so wide! France is as big as Texas – a trip cross country is done in half a day! Yep, until I find a better way and until we meet again, I’ll just keep on reading their blogs.

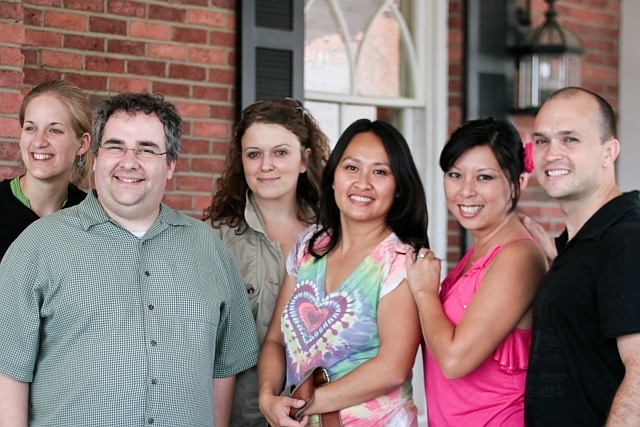
From left to right: Alison at The Humble Gourmand, Brian from The Food Geek, Tami from Running With Tweezers, Diane from White on Rice Couple, Jaden from Steamy Kitchen and Todd from White On Rice Couple. Truly, honestly, amazingly, funny, smart, down to earth, talented and all around good people to be with. (And no, I am not saying that just because I can’t remember certain moments where lots of wine was poured and realised there might be video to remind me why.) On a side note, Tami works as a food stylist and you can guess that we were glued to her stories and experiences. Looking forward to taking her up on her offer to see her in action!

It's A Blogging Thing


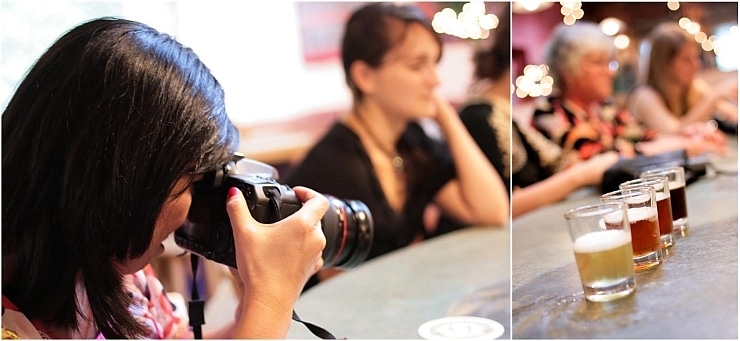
As soon as we had checked in at the hotel, we were off for a little walking tour of Asheville complete with a few gourmet samples and later on dinner. It hit me as we sat down at The Laughing Seed for a tasting of locally brewed beer that I was among hardcore food bloggers like me: listening with both ears, shooting with both eyes (one on the camera, one checking out the aesthetics around), all senses working like mad to capture it all. Having been to Asheville before, I can vouch that The Laughing Seed’s popularity is justified: great food, great kitchen staff, fresh ingredients and minimal fuss. Love this place and I was so happy to go back!

Inside Grove Arcade

Top left photo courtesy of Alison at The Humble Gourmand.

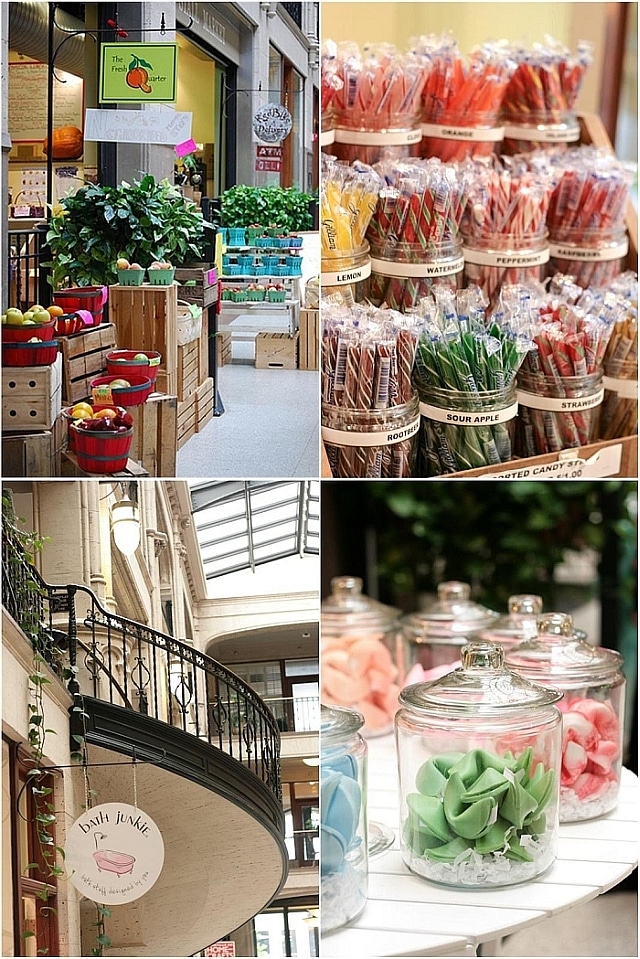
A little walk through Grove Arcade revealed more than just a "little walk": indoor fresh markets, specialty cheeses and honeys, cute little shops of all sorts. And then we entered Jael and Dan’s shop. We could have stayed there for hours. They are genuinely good artisan chocolatiers. Conversation flowed, questions arised and were patiently answered. They are so passionate and knowledgeable about their truffles making, very easy to listen to and get inspired by. Especially when Dan kept passing the chocolate covered roasted hazelnuts around. And they have coffees, amazing hot chocolates and a plethora of baked goods too! More on that with the Chocolate Covered Strawberry Cheesecake recipe.

At Zambra

Left picture courtesy of Alison from The Humble Gourmand.

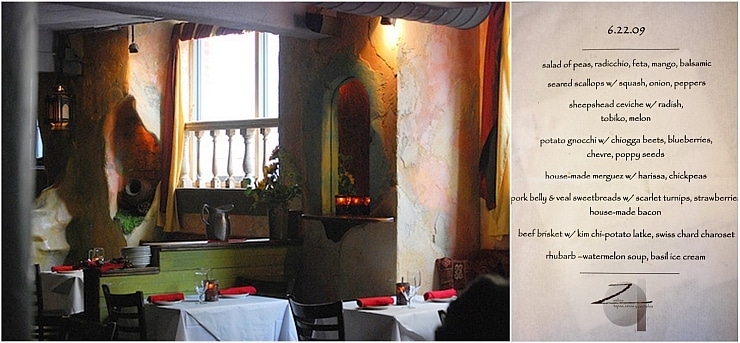
We had dinner reservation at Zambra and we kind of reluctantly left The Chocolate Lounge. Little did we know what awaited us at this tappas restaurant. The decor is as luscious as the food and at the same time comfortable and never intimidating, much like the plates that Executive Chef Adam Bannasch and his staff prepared. Jaden recognized right off the bat that portions would have to be somewhat downsized or we wouldn’t be able to make it through this 8 course meal. Me? You can’t ask me that question at the beginning of a meal! Of course I am going to say "bring it on!". Even with a small downsizing we still ended up rolling out of the restaurant in a certain food haze (or was it the sangria?). Content. Fresh, local and innovative food. Everything well balanced and perfectly executed. And that dessert! Most tasty fruit soup paired with an outstanding basil ice cream. Perfect balance of sugar and herb. Adam, anytime you feel like coming this side of Southern, I’d be happy to take you around our own restaurant gems!

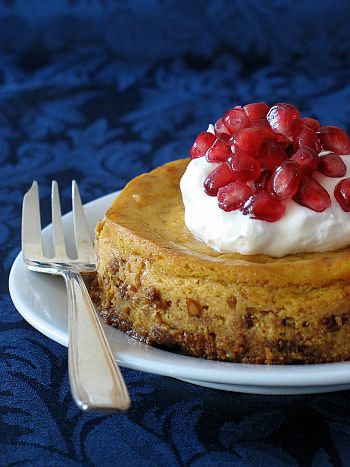
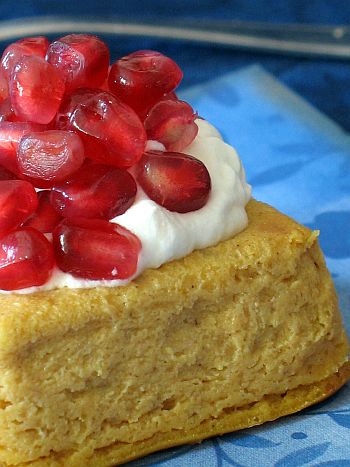
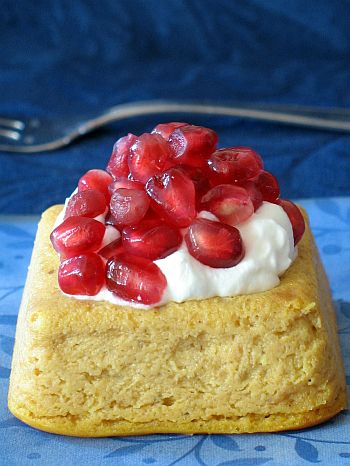
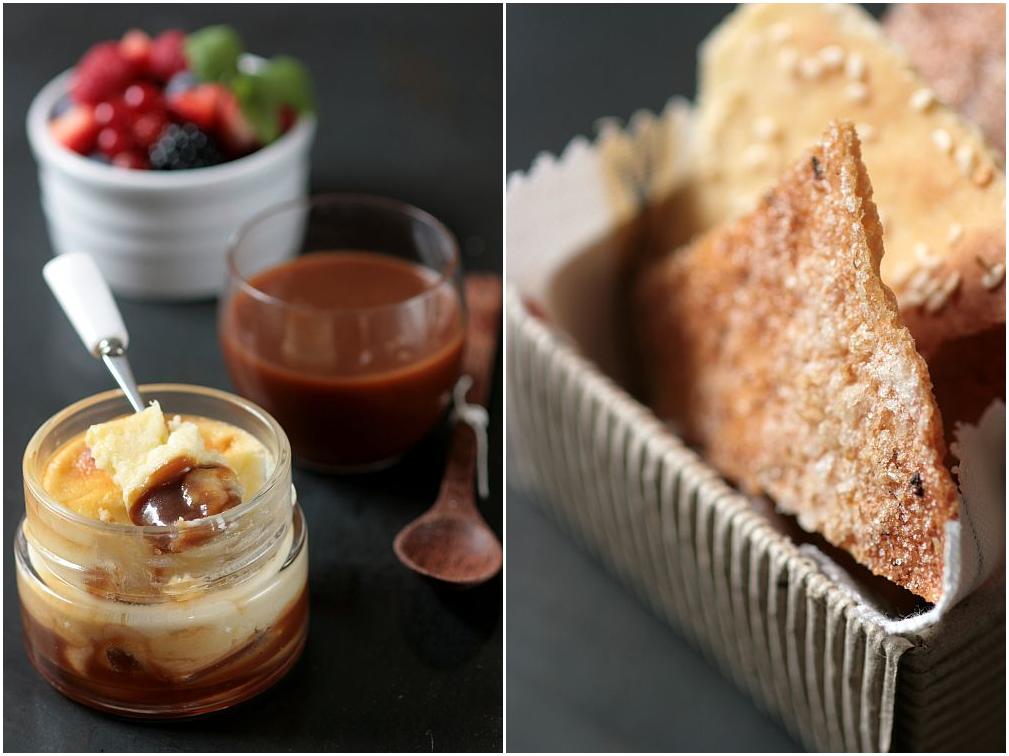
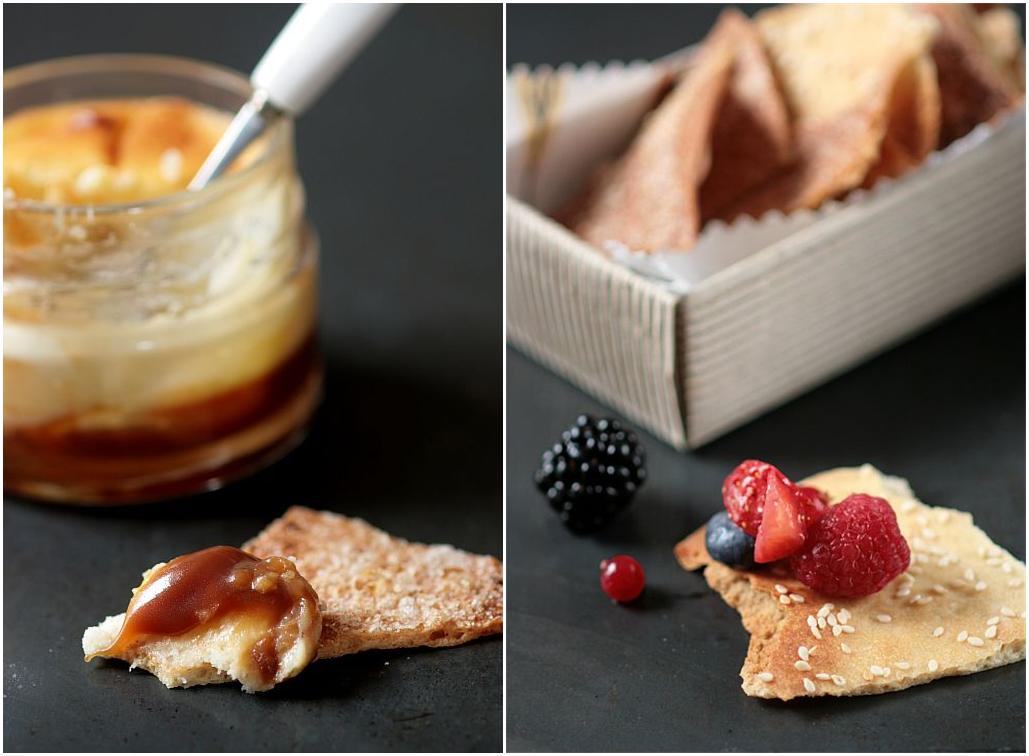
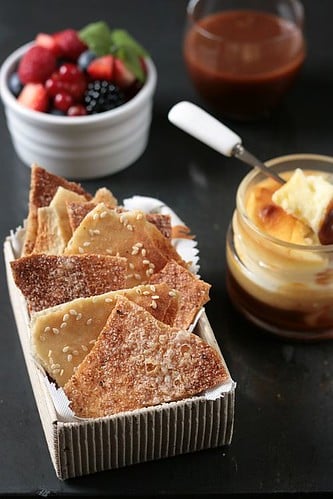
As you can see, we were off to a pretty good start! We went back to The Chocolate Lounge with Brian, Diane and Todd the next day. Within a few minutes we were sitting with some tasty French press coffee and one of the best slices of cheesecakes I have ever had. I am not just saying that. I am not one to like fruit and chocolate, especially berries and chocolate, and I am not the best advocate of cheesecakes in the world. But this? This is something I would want to eat everyday. This Mousse of Strawberry Cheesecake not just "strawberry cheesecake". Run. To. Make. It.

I leave you with this fine introduction and recipe they wrote while I prepare part 2 of this trip. Trust me it gets even better!

At French Broad Chocolate


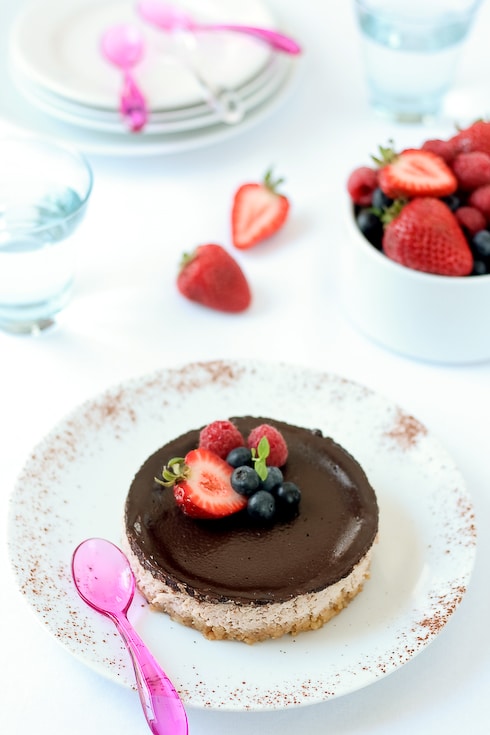
Chocolate Covered Strawberry Cheesecake, from Jael and Dan Rattigan.

Serves 12

The best time of year to enjoy this cake is when strawberries are in season, so it can be garnished with fresh berries. however, you’ll see that the puree is made from frozen berries (because the freezing and subsequent thawing releases the juice from the berry’s cells which were ruptured in the freezing process), so enjoy any time of year, and try the same recipe with a seasonal, locally-available fruit of your choosing!

Other ingredient notes: choose ingredients with the same care and attention you would use to pick a babysitter for your kid. dessert is serious business! we use all organic dairy, free-range local eggs, organic sugar, and a highly aromatic vanilla extract. as for chocolate: the ganache topping only uses 4 ounces, so get a couple bars of something you would enjoy nibbling, preferably with a fruit-forward bouquet to complement your berries!

Strawberry puree:
10 oz. frozen strawberries
2 Tbsp. sugar
2 tsp. freshly squeezed lemon juice

Almond crust:
2 cups whole raw almonds
2 oz soft unsalted butter
3 T sugar
¼ t salt

Strawberry cheesecake:
1 lb. cream cheese, room temp
1 cup (7.5 oz.) sugar
3 large eggs, room temp
1 ½ tsp pure vanilla extract
¼ tsp salt
12 oz sour cream, room temp
2/3 cup strawberry puree

Ganache topping:
4 oz. chocolate (50-55% cacao mass is best), finely chopped
4 ½ oz. cream
½ large egg (beat 1 egg, weigh it, and use half)

Prepare the strawberries:
Thaw strawberries and strain out the juice completely (reserve pulp, should be about 5 oz). Place juice in a small saucepan and, at a simmer, cook down to a third of original volume. (you should start with about 5-6 oz, and end with 2 oz.) Add sugar to reduction and stir to dissolve. Mix juice and pulp together with lemon juice.
blend in food processor or with immersion blender.

Prepare the crust:
Preheat oven to 400F and position a rack in the center.
Pulverize almonds, sugar, and salt in food processor until crumbly. Add butter and pulse to combine. Press into bottom and sides of 9” springform pan (2.5” tall)
bake 15-20 min, or until deep golden brown. Set aside to cool while you make the cheesecake.

Prepare the cheesecake:
Turn the oven down to 350F.
Beat cream cheese and sugar until very smooth (3 min) in a stand mixer at medium speed using the whisk attachment.(yes you read right. It gives the cake that mousse quality). Add eggs, 1 at a time, scraping bowl and beating after each just until smooth. Add vanilla & salt and beat until incorporated. Beat in sour cream. Beat in strawberry puree. Wrap the pan with the crust in a double layer of aluminum foil.
Pour batter into crust. Place in water bath (hot water) in a larger oven proof pan
bake 45-55 min.

5-10 min before cheesecake is done, make ganache topping:
Boil cream. Pour over chocolate and let sit a minute. Whisk gently until chocolate is melted and smooth. Gently whisk in egg. Spread over hot cheesecake (careful, and don’t pour it all in one place as cheesecake is fragile). Smooth out the top. Bake 12-15 more minutes until ganache is set along the sides. Remove from oven and place on a cooling rack, with a large mixing bowl over the pan (to cool slowly). When it reaches room temp, refrigerate. Chill 8 hours before unmolding. To unmold, run a thin blade knife around the cake pan sides. Remove springform. Gently slide cake onto serving plate. Store covered in refrigerator.
it’s easier to cut the cake if you heat the knife. run it under very hot water, then dry it. Slice!

Apple Frangipane Tartelettes With Cheesecake Ice Cream

Apple Frangipane Tartelettes And Cheesecake Ice Cream


When I was a little girl I had quite a few nicknames. I will spare you the ones my dear and gentle (hmmm…) brothers gave me but my family gave me two that are still around today: Tartelette and Reine des Pommes. The first one is obvious as I love to make tarts and they were probably my first venture in the kitchen. The second needs a little French idiom explanation. It’s not that I ate that many apples but " une pomme" is also a person with a kooky or funky personality. I was just that as a child, coming up from my day dreams just long enough to breath some fresh air, realize the world out there was not that great and going back deep into my fantasies.

Whenever something was wrong I’d find comfort eating some of my mother’s apple cake while reading a Charles Perrault’s fairy tale. A slice of my grandmother’s apple pie was also enough to transport me into a magical world of brave knights and pretty princesses. Yes, just from one slice. One of my favorite fairy tale was indeed Snow White, so Pomme quickly became my nickname. Even today B. calls me his "petite pomme" and I know he does not mean his "little airhead" as the idiom is sometimes used too. No man in their right mind would call his dear wife that when she is holding a plate of his favorite cookies right under his nose!

A couple of times before I have written here about our friend M. who is facing the biggest battle of her life right now. On the weekends, we go visit M. and her husband and try to help as much as we can. I do a little grocery shopping for her on my way there and try to fix a couple of dishes for the week. B. and her husband work in the same department so they talk shop or fix something around the house. I usually end up reading some pages to M. while she rests or tries to eat something. Last weekend she did not feel like reading from her current book. "Why don’t you tell me one of your stories?" she asked instead. "A fairy tale", she added. "Allright, but we need apple tartelettes for that!" I replied.

She was a little caught off guard by my response and I quickly explained the pomme nickname, the childhood day dreams, the apple desserts and Snow White. Her request was perfect as I had brought some freshly made apple tartelettes to have for dinner with them. I remembered they liked theirs with ice cream so I also made a fresh batch of cheesecake ice cream to change from vanilla. Nothing wrong with that, I just wanted something a little different. We sort of forgot to tell the men we were digging into the dessert and sat on her bed with our tartelettes and ice cream while I proceeded to tell her a fairy tale.

Yes, she was the heroin, defended by her valiant King, conquering the villain Cancer Witch with the help of Little Pomme and her wonderful Prince Pomme and their two fearless and giant dogs (hum..hum..). I know M. I know I can come up with stories like that and not make her depressed or sad. Indeed, she cracked up and felt invigorated by this little tale proving my parents they were wrong to tell me that day dreams are useless. You just have to know when to use them, that’s all.

The tartelettes are built in ring molds, starting with a sable breton base (shortbread), filled with a layer of frangipane (almond) cream and topped by slices of honey roasted apples. If you do not have ring molds, you can of course build the tartelettes into regular individual molds, they may not be as tall. The cheesecake ice cream is so easy to make and delicious I wish I could have some everyday for breakfast. Well, I could….I can….day dreaming again…oops! It is not too sweet and a nice change from vanilla ice cream. I like to add some graham cracker crumbs when I serve it on its own but I left it plain this time as they were already plenty of crust to go around. I used 3 inch round molds bought at the local craft store (Mickael’s). Same store where I get the cupcake liners (Wilton brand) that some of you asked about in the previous post. The ribbons were added with a piece of thin double sided tape.

Apple Frangipane Tartelette


Apple Frangipane Tartelettes With Cheesecake Ice Cream:

Serves 8

Sable Dough:
1 stick (115 gr) butter, at room temperature
3/4 cup (93 gr) powdered sugar
1 large egg
1 1 /2 cups (188gr) flour
2 tablespoons (20 gr) cornstarch (makes for a lighter crumb)
pinch of salt

In a mixer, cream the butter and sugar together until light and fluffy. Add the egg and mix until combined. Add the flour, cornstarch and salt and mix briefly to incorporate. Dump the whole mixture onto a lightly floured board and gather the dough into a smooth ball. Do not work the dough while in the mixer or it will toughen up. Flatten the dough into a disk, wrap it in plastic wrap and refrigerate for an hour.
When the dough is nice and cold, roll it out on a lightly floured board or in between the sheets of plastic. You will need half the amount of dough to make the tartelettes. The other half can be kept in the fridge for up to 5 days or frozen, well wrapped for up to 3 months. Cut out rounds with a 3 inch pastry ring. Place them on a baking sheet lined with parchment paper and bake at 350F for 8-10 minutes. Let cool.

For the Honey Roasted Apples:
4 medium apples
1/2 cup honey

Preheat the oven to 350F. Peel core and cut the apples in thin slices. Lay them on a couple of parchment paper lined baking sheets and drizzle at will with the honey. Bake for 10-15 minutes until golden. Let cool.

For the Frangipane Cream:
1 stick (115 gr) butter, softened
1/2 cup (100 gr) granulated sugar
1 cup (100 gr) ground almond
seeds from one vanilla bean or 2 teaspoons vanilla paste or extract
2 eggs
1/4 cup (60gr) heavy cream

Place the butter, sugar, almond powder, vanilla bean seeds and the eggs in a large bowl and whisk until smooth (can also be done in a food processor). Add the cream but stir in it instead of whisking not to emulsify it or it will rise while baking. Refrigerate for 30 minutes. Place 8 baked rounds of dough in 8 pastry rings, divide the cream evenly among the rings and bake 20 minutes at 350F. Let cool. Once cooled, remove the tarts from the rings and arrange the apple slices decoratively on top.

For the Cheesecake Ice Cream:
2 cups (50cl) whole milk
1/3 cup (10cl) heavy cream
3/4 cup (170gr) sugar
2 egg yolks
4 oz cream cheese (120gr)

Whisk the egg yolks with the sugar. In a saucepan set on medium heat, bring the milk and the cream to boiling point, slowly pour a small amount on the egg yolks to temper. Pour the remaining over the yolks and sugar. Stir well then pour back in the saucepan and cook over medium low heat until the cream thickens and coats the back of a wooden spoon. Remove from the heat and whisk in the cream cheese until completely melted and incorporated. Cool to room temperature. Cover and refrigerate until cold. Process in an ice cream maker according to your machine’s manufacturer’s instruction. If you do not have an ice cream machine, follow the directions laid out in this post.

Apple Frangipane Ice Cream And Cheesecake Ice Cream

Gluten Free And Vegan Daring Bakers' Challenge

Gluten Free Crackers and Salted Butter Caramel Sauce


It is indeed a first in the history of the Daring Bakers, a gluten free and vegan challenge! Since being a Daring Baker in December 2006, I have seen the group grow by leaps and bounds, with members from all walks of life partaking in our monthly bake-offs. I know it is daunting at times for some Daring Bakers to adapt recipes to fit their dietary lifestyles and I always marvel at how creative and resourceful gluten free and vegan members are. I was really excited to see that our hostesses this month, Natalie from Gluten A Go Go, and co-host Shelly, of Musings From the Fishbowl, chose Lavash Crackers from Peter Reinhart’s The Bread Baker’s Apprentice: Mastering The Art of Extraordinary Bread.

Natalie being a gluten free baker asked us to challenge ourselves and make the crackers gluten free while Shel asked us to come up with vegan dips and spreads to go along. Being a ubber cool group, we still had the choice to make them with regular flour if gluten free baking did not appeal to us. I welcomed both challenges with open arms! Indeed, there are quite a few gluten free eaters among our friends and family members and I can always stretch my gf baking repertoire. Coming up with vegan dips and spreads was a good opportunity to try a couple of different ingredients, but furthermore really understand and appreciate many people put behind being vegan.

Lavash Crackers and Toppings


The past month has been quite busy and full of twists and turns and I did not get to make the dough until Wednesday afternoon. I used a gluten free baking mix by Bob…..and realised after the first rise that had forgotten to add xanthan gum to the dough which acts like gluten in baked goods and helps stretch and relax the dough. I did not even bother rolling that one out, waited until Thursday to go buy some xanthan gum and started again. The quantities are so small here that I mixed the dough by hand and left it to rise, rolled it paper thin, baked and then broke it to shards. I rolled the dough into one large baking sheet and topped 1/4 with sesame seeds, 1/4 with grated Tonka Beans, 1/4 with cinnamon sugar and the last quarter was brushed with agave syrup and half a vanilla bean, seeded. The smells that were invading the house made it hard to resist not breaking into it as soon as it came out of the oven!!

For the toppings, our hostesses gave us complete freedom with only one rule: it had to be vegan. I was really interested to see how some of my favorites would turn if made vegan and with the tremendous array of choices and progress made in vegan foods, I was able to serve the crackers with a vegan salted butter caramel sauce, a vegan caramel cheesecake in a jar spread and my now favorite lemon balm infused berry salad. I love salted butter caramel anything, not being a fashion victim but I grew up on that stuff!

The salted butter caramel sauce is an adaptation of my favorite sauce and the only problem encountered was that it took a longer time for the butter and sugar to come to a caramel color and consistency but the rest was the same. I used Earth Balance butter and soy creamer instead of their regular counterparts and added some Fleur de Sel for the salty factor. I could taste a difference from the original, sure can’t say it’s the "real thing" but it came out pretty darn close and what mattered is that I was able to make one of my vegan neighbors very very happy!!

The vegan caramel cheesecake is also an adaptation and was easy to make using Ener-G Egg Replacer and vegan cream cheese (Tofutti brand). I divided the batter between four jam/jelly jars and added some salted butter caramel sauce at the bottom. I have to say that B. thought it was "different but worth eating" and I loved it.

The berry salad is nothing new but since I made this lemon balm berry salad, it has been on rotation at the house and for dinner parties with the neighbors. It works just like a savory salsa with the crackers and is great for a little 4 o’clock pick me up with a cup of tea.

Thank you Natalie an Shelly for this opportunity to bake gluten free and vegan! It was a blast! Check out the others' creations here.


Gluten Free Lavash Crackers:

Makes one sheet pan:

1 1/2 cups (6.75 oz) unbleached bread flour or gluten free flour blend (If you use a blend without xanthan gum, add 1 tsp xanthan or guar gum to the recipe)
1/2 tsp (.13 oz) salt
1/2 tsp (.055 oz) instant yeast
1 Tb (.75 oz) agave syrup or sugar
1 Tb (.5 oz) vegetable oil
1/3 to 1/2 cup + 2 Tb (3 to 4 oz) water, at room temperature
Poppy seeds, sesame seeds, paprika, cumin seeds, caraway seeds, or kosher salt for toppings

In a mixing bowl, stir together the flour, salt yeast, agave, oil, and just enough water to bring everything together into a ball. You may not need the full 1/2 cup + 2 Tb of water, but be prepared to use it all if needed.
For Non Gluten Free Cracker Dough: Sprinkle some flour on the counter and transfer the dough to the counter. Knead for about 10 minutes, or until the ingredients are evenly distributed. The dough should be firmer than French bread dough, but not quite as firm as bagel dough (what I call medium-firm dough), satiny to the touch, not tacky, and supple enough to stretch when pulled. Lightly oil a bowl and transfer the dough to the bowl, rolling it around to coat it with oil. Cover the bowl with plastic wrap.
For Gluten Free Cracker Dough: The dough should be firmer than French bread dough, but not quite as firm as bagel dough (what I call medium-firm dough), and slightly tacky. Lightly oil a bowl and transfer the dough to the bowl, rolling it around to coat it with oil. Cover the bowl with plastic wrap.
Ferment at room temperature for 90 minutes, or until the dough doubles in size. (You can also retard the dough overnight in the refrigerator immediately after kneading or mixing).
For Non Gluten Free Cracker Dough: Mist the counter lightly with spray oil and transfer the dough to the counter. Press the dough into a square with your hand and dust the top of the dough lightly with flour. Roll it out with a rolling pin into a paper thin sheet about 15 inches by 12 inches. You may have to stop from time to time so that the gluten can relax. At these times, lift the dough from the counter and wave it a little, and then lay it back down. Cover it with a towel or plastic wrap while it relaxes. When it is the desired thinness, let the dough relax for 5 minutes. Line a sheet pan with baking parchment. Carefully lift the sheet of dough and lay it on the parchment. If it overlaps the edge of the pan, snip off the excess with scissors.
For Gluten Free Cracker Dough: Lay out two sheets of parchment paper. Divide the cracker dough in half and then sandwich the dough between the two sheets of parchment. Roll out the dough until it is a paper thin sheet about 15 inches by 12 inches. Slowly peel away the top layer of parchment paper. Then set the bottom layer of parchment paper with the cracker dough on it onto a baking sheet.
Preheat the oven to 350 degrees Fahrenheit with the oven rack on the middle shelf. Mist the top of the dough with water and sprinkle a covering of seeds or spices on the dough (such as alternating rows of poppy seeds, sesame seeds, paprika, cumin seeds, caraway seeds, kosher or pretzel salt, etc.) Be careful with spices and salt – a little goes a long way. If you want to precut the cracker, use a pizza cutter (rolling blade) and cut diamonds or rectangles in the dough. You do not need to separate the pieces, as they will snap apart after baking. If you want to make shards, bake the sheet of dough without cutting it first.
Bake for 15 to 20 minutes, or until the crackers begin to brown evenly across the top (the time will depend on how thinly and evenly you rolled the dough).
When the crackers are baked, remove the pan from the oven and let them cool in the pan for about 10 minutes. You can then snap them apart or snap off shards and serve.

Vegan Salted Butter Caramel Sauce:
240 gr. sugar (1 1/4 cups)
80 ml water
115 gr vegan butter (1 stick)
150 ml vegan creamer
1 1/2 tsp Fleur de sel

In a heavy saucepan set over low heat, combine the sugar and water and heat just until the sugar is dissolved. Add the butter. Let it come to a boil and cook until it reaches a golden caramel color (takes between 25-35 minutes), stirring occasionally. Remove from the heat and add the creamer ( it will splatter and get crazy, but do not fear and trust the recipe). Whisk to combine and put back on the stove. Let it come to a boil again over low heat and cook 10-15 minutes until you reach a nice creamy consistency. Remove from the heat, add the salt and stir until melted. Keeps for about 2 weeks.

Vegan Caramel Cheesecake In a Jar:
1/2 cup salted butter caramel sauce
8 oz vegan cream cheese, at room temperature
1 Tb. vegan butter
1/2 cup sugar
3 Tb. Egg-Replacer mixed with 1/4 cup water

Divide the caramel sauce between 4 small jam jars. Set aside.
In a large bowl, with the electric mixer or by hand , mix the cream cheese, butter and sugar. Add the egg replacer mixture and beat until well incorporated.
Divide the batter among the 4 jars. Set them in a roasting pan and fill with water until it reaches halfway up the sides of the jars. Bake at 300F for 20-30 minutes. Let cool completely before refrigerating or serving.

Lemon Balm Infused Berry Salad:
Click here for the recipe.

Gluten Free Lavash Crackers And Vegan Spreads

Cheesecake Pops – Dunking With The Daring Bakers

Cheesecake Pops-Copyright©Tartelette 2008 I get excited every month about posting the Daring Bakers challenges. Actually it is more like an act in three part. On reveal day, I check our site in my pajamas like a kid waiting to open her Christmas present. I give myself a week or so to think about how I want to go about the challenge, baking, cutting, plating and photographing. Then, I usually get them done the second week and then I tend to lose the mood until posting day. That’s when it hits me, why I love it so much: it’s the sense of community, knowing that there is a bunch of us out there loving the same thing…baking and sharing the fruits of our labor. It may be more or less challenging for some of us each time but it gives me the opportunity to share my love of baking and eating with you all. I just realized my first challenge was on December 2006 with Biscotti, right after Lisa and Ivonne introduced the concept of a group baking session. Time flies when you are having fun!!

Since I have been in the States for over 10 years, I can’t say that cheesecake is new to me, having churned about 2-3 a day at work back in the days and a few here on this site However turning a cheesecake into a lollipop was something I had never done before but always wanted to try, ever since I had watched a show on a restaurant dunking big slices of cheesecake in chocolate and serving them as ice cream pops. But you know…so many recipes, so little time! That’s until Deborah from Taste and Tell and Elle from Feeding My Enthusiasms chose these Cheesecake Pops from Sticky, Chewy, Messy, Gooey by Jill O’Connor. Thank you ladies I don’t know when I would have gotten around to making these bites but thanks to the Daring Bakers, now it was… (I know, not grammatically correct but you get it).

I made the pops for our weekly gathering with the neighbors and decided to make half the recipe. This turned out to be a little mistake since one of the couples present was celebrating their anniversary yesterday and he asked me if I could make some as party favors and a small box with heart sprinkles on them especially for her. I forgot about it until yesterday morning and I was still duking pops a few hours before the party a la Bridget Jones….read with curlers in my hair and a party dress on. I also almost walked into the reception room with one curler still on my head but that is another story!

Anyways….each half batch took about 40-45 minutes to bake which makes me think that the 55 minutes indicated for the full batch is very very conservative, and from what other Daring Bakers have reported throughout the month, it was more like over an hour of baking time. I went for the queen of flavors (just my opinion) for the cake, vanilla, scraping a whole bean into the batter and the cake tasted like vanilla ice cream. I thought about adding a blueberry or a raspberry into each pop but in the end I kept relatively simple. The result? Decadent pleasure…
I used good old store bought chocolate chips for the coating and it worked perfectly. The only problem with a recipe that calls for variance in temperatures like dunking the frozen pops into hot chocolate coating where I live is that within 20 minutes with the humidity and the heat around make the chocolate sweat. I notice that this morning when I was dunking the remaining bites and taking extra pictures. It was humid and hot in the room where I was and it made my pops go into thermal shock!! No big deal, they did not suffer long… Will I make them again? Probably but this time I want to cut bigger slices and put them on ice cream sticks, ahahaha!!!

Cheesecake Pops-Copyright©Tartelette 2008 Cheesecake Pops, (full recipe) adapted from Sticky, Chewy, Messy, Gooey by Jill O’Connor

Makes 30 – 40 Pops (or more if you make them small like I did)
Printable Recipe

5 8-oz. packages cream cheese at room temperature
2 cups sugar
¼ cup all-purpose flour
¼ teaspoon salt
5 large eggs (I used 3 eggs when I baked half the recipe without a problem)
2 egg yolks
1 vanilla bean, seeded
¼ cup heavy cream

Thirty to forty 8-inch lollipop sticks
1 pound chocolate, chopped or in chips
2 tablespoons vegetable shortening
(Note: White chocolate is harder to use this way, but not impossible)

Assorted decorations such as chopped nuts, colored jimmies, crushed peppermints, mini chocolate chips, sanding sugars, dragees) I also used cut chocolate transfer sheets.

Position oven rack in the middle of the oven and preheat to 325 degrees F. Set some water to boil.
In a large bowl, beat together the cream cheese, sugar, flour, and salt until smooth. If using a mixer, mix on low speed. Add the whole eggs and the egg yolks, one at a time, beating well (but still at low speed) after each addition. Beat in the vanilla and cream.
Grease a 10-inch cake pan (not a springform pan), and pour the batter into the cake pan. Place the pan in a larger roasting pan. Fill the roasting pan with the boiling water until it reaches halfway up the sides of the cake pan. Bake until the cheesecake is firm and slightly golden on top, 35 to 45 minutes.
Remove the cheesecake from the water bath and cool to room temperature. Cover the cheesecake with plastic wrap and refrigerate until very cold, at least 3 hours or up to overnight.
When the cheesecake is cold and very firm, scoop the cheesecake and place on a parchment paper-lined baking sheet. Carefully insert a lollipop stick into each cheesecake ball. Freeze the cheesecake pops, uncovered, until very hard, at least 1 to 2 hours.

When the cheesecake pops are frozen and ready for dipping, prepare the chocolate. In the top of a double boiler, set over simmering water, or in a heatproof bowl set over a pot of simmering water, heat half the chocolate and half the shortening, stirring often, until chocolate is melted and chocolate and shortening are combined. Stir until completely smooth. Do not heat the chocolate too much or your chocolate will lose it’s shine after it has dried. Save the rest of the chocolate and shortening for later dipping, or use another type of chocolate for variety.
Alternately, you can microwave the same amount of chocolate coating pieces on high at 30 second intervals, stirring until smooth.

Quickly dip a frozen cheesecake pop in the melted chocolate, swirling quickly to coat it completely. Shake off any excess into the melted chocolate. If you like, you can now roll the pops quickly in optional decorations. You can also drizzle them with a contrasting color of melted chocolate (dark chocolate drizzled over milk chocolate or white chocolate over dark chocolate, etc.) Place the pop on a clean parchment paperlined baking sheet to set. Repeat with remaining pops, melting more chocolate and shortening (or confectionary chocolate pieces) as needed.
Refrigerate the pops for up to 24 hours, until ready to serve.

Cheesecake Pops-Copyright©Tartelette 2008Don’t forget to check out the other Daring Bakers' creations here and again thanks Lisa and Ivonne for your hard work this month setting us up with a brand new forum!!

Pineapple Almond Cheesecakes With Caramelized Pineapple

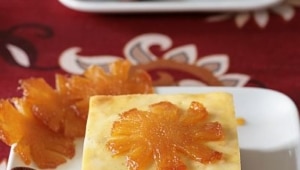
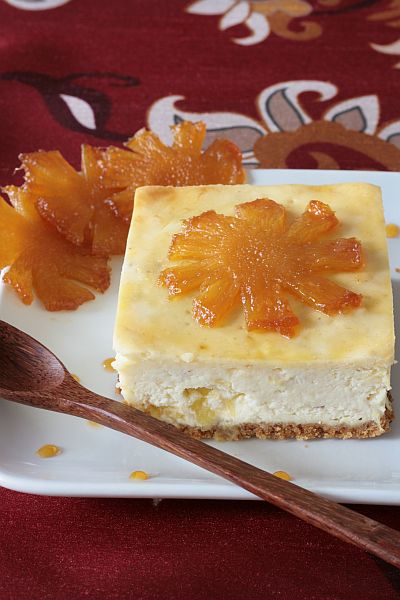
We all know the phrase "when life throws you lemons make lemonade" and while I am not going to tell you that when life throws you pineapples you should made pineapple-ade, I do have admit that our kitchen counter tops did look like they were sprouting pineapples like mad this past week.

It started when Sunny, my wonderful produce guy cornered me near the okra "Hey! It’s been a while since I saw pineapples on your blog!" Oh dear! He read the bits about himself then…maybe I should make him sound like he is Mark Wahlberg’s perfect look alike?….Hugh, I digress…"Hmm, I did sorbet once at the very beginning…." He then pushed 3 perfect little pineapples down in my cart "Well then, that’s settled! These should give you some materials to bake with!" I already had my hands full with baking this week, so I was unsure if I would get to them in time, but given that pineapples are the symbol of hospitality and good wishes, I could not refuse. You don’t have to be anywhere special to see this exotic fruit on door bells, gates, napkins, calendars, jewelry, license plates. The South loves pineapples allright!

I know, I know…three pineapples are nothing to write home about and not enough to make pineapple-ade or be all hung up about. If only it had ended there! The very same day, my lovely neighbor C. dropped off a couple of pineapples because "they were on sale and we all know I can’t bake but you can!". Two days later it was my mother in law who loves to shop huge discount stores and brought me three more. Let’s pause a second: so far we have 8 pineapples..which is getting out there but still manageable…somewhat! Thursday, as I was leaving the catering kitchen, the produce delivery guy stopped by and after I signed the invoice, I saw him walking towards me with a pineapple in each hand. I started heading towards my car but he yelled "Hey! These fell off to the back during the trip, and I can’t figure out which box they’re from. Why don’t you take them?" Before I could even say "no, thank you", there I was holding the fruits like a couple of newborn babies.

I was started to think that my Chinese fortune cookie from Sunday dinner reading "Go with the flow" was definitely coming true. Now I had a whole counter of the kitchen dedicated to pineapples…We went the easy routes first and juiced a couple which brought the number back down to eight. I made a quick ambrosia with one and took it to my mother-in-law’s book club; it is the ladies' favorite and all were happy. That night I made a fruit salad and stewed pineapples for crepes…down to six. What next? Jam! That would knock down a couple,easy…! Then one for a special verrine for Old Chef and one for these cheesecakes…and now I have the more reasonable two pineapples on the counter. Gee! That reminded me of the time the Exec. Chef kept ordering case after case of pears like they were going out of production!

We had the cheesecakes Saturday night at the end of a casual dinner (charcuterie, cheese, bread, salad and wine) shared with another couple. I used ground almonds in the crust as well as ginger cookie crumbs and since I have tonka beans stored in the fridge I grated one in the batter to impart that bitter almond taste that I love so much. Before I get emails and comments about these: yes, I am aware that they contain coumarin which is a blood thinner but I will say that you have the option of using almond extract if you are worried about this. I am no kamikaze either but I figure that one grated bean divided among four cheesecakes is fine, no to mention that I bake with them once every other month…Be responsible and eat everything in moderation (butter, sugar, oil and tonka beans…).

I used fresh cut pineapple in the batter and I caramelized cut slices of the fruit for the topping, using the pan juices to drizzle on the plate. I wrote the recipe for four 4 inch round cheesecake springform pans, but to change the presentation a bit, I cut each unmolded cheesecake into a square. Feel free to leave them whole (kind of a large portion for one person) or to split them up. You can also make one 8 inch cheesecake with the same amount of batter if you want. Since he kitchen looked more like a pineapple field this past week, I am sending this entry to Cookthink Root Source Challenge #2.

Pineapple Almond Cheesecakes With Caramelized Pineapple:

Makes four 4 inch round cakes (springform pans)

24 oz cream cheese, at room temperature
1 cup sugar
3 eggs
1 tonka bean, grated or 2 tsp. almond extract
1 Tb lemon zest
1 cup diced fresh pineapple (you can sub canned if you want)
1/2 cup graham cracker crumbs (or ginger cookies crumbled up to make 1/2 cup)
1/2 cup ground almonds (also called almond meal, almond powder, almond flour)
1/4 cup melted butter
1/4 cup sugar
4 slices pineapples
1/3 sugar
2 Tbs butter

Preheat oven to 350F. In a medium size bowl, combine the graham cracker crumbs,almonds, sugar and the melted butter. Divide among 4 mini springform pans lined with parchment paper and pat with your fingers until evenly distributed. Bake 10 minutes. Lower temperature to 300F.
In a large bowl, with the stand mixer or hand held one, mix the cream cheese and sugar. Add the eggs, one at a time until well incorporated. Add the tonka bean or almond extract, and the lemon zest. Fold in the diced pineapple. Divide between the springform pans. Bake for about 40 minutes, or until they wiggle just a tiny bit in the middle. They will set more after an overnight trip in the fridge. When ready to serve, run a hot knife on the inside of the pan and release the cheesecakes.
For the caramelized pineapple: in a large saute pan, melt the sugar over medium high heat until it starts to get a nice amber tone, add the butter, whisk to incorporate and add the pineapple slices. Let them cook 10-15 minutes or until golden brown. Remove from the pan and place them on top of the cheesecakes. Use the pan sauce to serve with the cheesecakes if desired.

Blueberry Heart Cheesecakes For My Valentine

Since I just asked you to vote for me in the Death By Chocolate contest so that you would be sending me and B. on the mini honeymoon we never had, I thought it would be fitting to share a tad more mushy sentiments with you all. If you are not a softie today….skip to the previous post…or the one before….February seems to be a love fest around here!!! Anyways…

You all know him as B. and sometimes "The Cookie Monster" but I usually call him "my better half" and I would be the first one to tell you how fitting the phrase is. When I am wild and crazy or childish as only a woman can be, he is the mature one keeping me grounded and putting things in perpective. When I am the nervous one or the mature one, he becomes the childish one and relieves tension by cracking up a joke or coming up with something fun to do. He never said a word to me along the lines of "grow up" "stop playing" or "relax"…all he has to do is to hold me. He has got my heart beating inside his.

Here is one of the many examples that makes it "why it’s working for us". One thing that used to get to me in our early years together was the fact that I would never get flowers, chocolate or trinkets…When I asked him why and that I was expecting at least some flowers for my birthday, he would always say "expectations will ruin your life". He would wait a day or two and give me the mot thoughtful and hip present. I would feel completely stupid of course and over the years I have known to set aside my expectations and apprehensions; he will take care of things, of people, with a lot of thought and care. I have learned not to have expectations because in the end things would work themselves out, and in the process he would allow me to grow and mature and never feel like I really was 19 years his junior.

At the same time, I let him be the 15 year old he is at heart. He is constantly fixing things he finds on the side of the road: we could probably give you a couple of chain saws, electric drills and vacuum cleaners that we found while walking the dog and that he fixed back up. While I get dinner ready, he goes down to the garage and unscrews, solders and plugs things in…and puts them in the "garage sale" box. We have never had a garage sale and I don’t foresee us having one soon either! I let him work through his piles and stuff because I know how giddy his little heart gets when something is plugged and actually works. Eh! I am all about free vaccum cleaners with a long haired dog!!

Allright, Tartelette…we get it…ya’ll luuuuurrrvvvve each other….but what is the link to the cheesecakes?!! This:
A heart for your Valentine

My dear friend Zorra is hosting a Valentine’s Day event and she got me thinking about what I wanted to make B. to tell him how thankful I was that he had said "I do" to the whole Tartelette package 10 years ago. We don’t really do anything special on Valentine’s Day, mostly because of the whole commercial aspect of it, but all the red and hearts seen everywhere lately can’t but make us a little softer. I usually make him a giant heart shaped chocolate chip cookie and when he saw I was cranking the mixer one evening he asked if I was going to make him a treat for Valentine’s Day. I replied "nothing that you migh expect!"…ahahaha! I learned that trick from the master himself!! Instead I made simple lemon scented cheesecakes (4 inches round) and cooked some blueberries that I placed in a heart shape on top. He loved it…Unexpected, light and refreshing….and not chocolate!!


Blueberry Heart Cheesecakes:

Makes 4 4 inch cheesecakes

16 oz cream cheese, at room temperature
1/2 cup sugar
3 eggs
1 tsp. vanilla extract
1 Tb lemon zest
2 Tb lemon juice
1 cup graham cracker crumbs
1/4 cup melted butter
1/4 cup sugar
Blueberry Topping

Preheat oven to 350F. In a medium size bowl, combine the graham cracker crumbs and the melted butter. Divide among 4 mini springform pans and pat with your fingers until evenly distributed. Bake 10 minutes. Lower temperature to 325. In a large bowl, with the electric mixer or by hand , mix the cream cheese, butter and sugar. Add the eggs, one at a time until well incorporated. Add the vanilla,lemon zest and juice. Divide between the springform pans. Wrap each pan with heavy duty foil. Set them in a roasting pan, fill with water and bake at 325 for about 40 minutes, or until they wiggle just a tiny bit in the middle. They will set more after an overnight trip in the fridge. Remove the foil, let cool, and refrigerate.When ready to serve, run a hot knife on the inside of the pan and release the cheesecakes.
To decorate, place a cokkie cutter on top of each cheesecake and fill with the cooled blueberry topping. Let set in the fridge for an hour and slowly remove the cookie cutter before eating.

Blueberry Topping:

2 cups fresh or frozen blueberries
1/2 cup sugar
1 Tb lemon juice
2 Tb corntarch dissolved in 1/4 cup water

In a heavy saucepan, heat the blueberries with the sugar and the lemon juice until the sugar melts and the berries strat to release their juices. Stir the cornstarch in the pan and cook until the liquid becomes clear again and starts to thicken. Let cool to room temperature.

We laughed that night while eating them with my mother as she exclaimed that we were indeed easy to satisfy "give him a broken drill and you a block of cheesecake and you guys are happy as pie" and to my huband The Professor to add "would not be bad if the drill was an antique?!"…and there you go…we are indeed happy with very little. It would however make our day if you voted for me in the Death By Chocolate contest so we could say all that from Napa! Don’t forget that they will also send a reader to the chocolate festival!!

Pumpkin Praline Cheesecake


I often post about the most important women in my life, my mother and grandmother but I rarely post about my dad. Why? Because if I did, I would not have many secret left to you…we are very much alike…very much. Sometimes, I find that disturbing because it’s like looking at your personality in a mirror, with all your faults and cracks. See, my dad talks a lot but he never really reveals much about himself. He’s private, he does not ask questions. He’s discreet, he does not want to make you uncomfortable.

All these apply except when it comes to cheesecake….Oh he will be a true gentleman and wait patiently for dessert but then only two words will be uttered by this General: "cheesecake please!" and then I dare you to try to get a bite from his plate. If you have never been met with a cold grey stare, (yep, his eyes are grey, for real), wait until you try to sneak a nibble from his plate. You have guessed it, I am the same…

When I was growing up in France, we did not know cheesecakes. I had vaguely heard of "gateau de fromage blanc" or "tarte au fromage blanc", there were not traditional of my family so it was not until I moved to the US that I had the pleasure of trying the cream cheese based cheesecakes (which can easily substituted with Kiri in France). When I became in charge of the pastry kitchen at the restaurant, I kept the cheesecake on the menu and gave myself a little playroom by changing it every time I had to make a new one which was probably every other day (creme brulee being the most popular, go figure…). I loved the traditional flavor of vanilla, chocolate and berries but I also loved to stray a little with Earl Grey cheesecake, Apple Tatin, and Pineapple Upside Down. It helped that I had an awesome waitstaff to tell me frankly if it was going to fly or not, but one that was sure to hit the spot in November – December was always the Pumpkin Praline Cheesecake. What was best is that I could use up all those giant cans/vats (Libby’s multiplied by 20) of pumpkin puree….useful but not my favorite color at 4am! I could not turn enough of these and every time a friend would ask me to bring cheesecake for dessert, I would *always* bring something else…enough of that thing (and I am not the only pastry cook in this case!).


However, with the years going by, I am slowly making cheesecakes again for fun…and my father…and Sugar High Friday this month. Leslie, from Definitely Not Martha has chosen Beta Carotene as the theme this month and that includes "gourds and roots – pumpkin, squash, sweet potato, etc…" So there you have it, I decided to make a yummy cheesecake and pretend it was healthi-er because loaded with good for you pumpkin and topped with even better for you fresh pomegranate. For the crust I just crushed some locally made pecan pralines, and scattered them at the bottom. The recipe makes one large cheesecake but in traditional Tartelette fashion I made four small ones and eight two-bite ones. I wish I could send a couple to my father but he is just going to have to lick his screen…sorry dad!

Pumpkin Praline Cheesecake:

1 cup pecan pralines, crushed
1 1/2 cups solid pack pumpkin
3 large eggs
1 teaspoon cinnamon
1/2 teaspoon freshly grated nutmeg
1/2 teaspoon ground ginger
1/2 teaspoon salt
1/2 cup firmly packed light brown sugar
three 8-ounce packages cream cheese, softened
1/2 cup granulated sugar
1 tablespoon cornstarch
1 teaspoon vanilla
whipped cream and pomegranate seeds to decorate

Scatter the praline crumbs at the bottom of one 10 inch springform pan, lined with parchment paper and coated with cooking spray (or several pans if you decided to go minis).
Preheat oven to 350F.
In a bowl whisk together the pumpkin, the egg, the cinnamon, the nutmeg, the ginger, the salt, and the brown sugar. In a large bowl with an electric mixer cream together the cream cheese and the granulated sugar, beat in the cornstarch, the vanilla, and the pumpkin mixture, and beat the filling until it is smooth.
Pour the filling into the crust, bake the cheesecake for 50 to 55 minutes, or until the center is just set. Let the cheesecake cool in the pan on a rack and chill it, covered, overnight.
When ready to serve, spoon some whipped cream and pomegranate seeds on top.

Ginger Cheesecakes With Yuzu Glaze

Ginger Cheesecakes with Yuzu

It is 1.35am here and I am wide awake….and I just half of one of these babies. For some of you it is the middle of the night, for others, mid-morning, or later somewhere somehow…so enjoy the pictures while I slowly slip into bed. Recipe later on today…
————————————————————————————————

Looking at your comments I can tell that cheesecakes stimulate your appetites. I also feel the need to explain that I bake "constantly": sometimes for us or the neighbors, and a lot for special orders. I "rescued" the cheesecake in the picture from a larger order for a friend’s dinner party with her in-laws. I bake at odd times, whenever I get the chance, and I have a whole shelf of the fridge reserved for prep work full batters, baked sheet cakes, genoises, dacquoise, egg whites, creams and all the tralalas…There is no telling when Old Chef is going to call me or when stangers email me for cakes. My job at the gym is only part time so I can keep practicing my first job. This said back to the cheesecakes…

My friend C. has her in-laws visiting and they love cheesecakes and she loves mini-everything. She has a whole array of molds, pans, serving dishes ready to satisfy the most avid baker and yet, she hates anything that has to do with putting on an apron and spending time in the kitchen. She usually calls me to the rescue and I always love to oblige. A visit to her house is always a treat as she is the most perfect host, Martha has nothing on her, believe me, and I spend quite a bit of time admiring her designer’s eye an skills at the same time I deliver my baked goods.
Her requests for the cheesecake flavors were minimal: light an airy, no chocolate, maybe some citrus…needs to go well with vodka cocktails an margaritas….Hmmm…I think I can manage that!
I did not have to look deep into the pantry or the fridge for what I wanted the cheesecakes to be. While visiting Lisa a couple of weeks ago, I begged her to take me to Trader Joes (why we don’t have one here is beyond my understanding!) and picked up a jar of their ginger spread (like a thick ginger jam) as well as a jar of Yuzu marmelade.

After a successful first run with Yuzu curd, I knew C. would love a thin glaze of the marmelade on the cheesecakes. I made a couple of extras the day before her dinner so that we could try them out….you know…for safety purposes!!! Before I could get my spoon into one of them, she had already made her way through 3/4 of it, so I packed one up to share with B. later on. Well, later on was last night and he went to bed as soon as he got home from a music gig. I, on the other hand was all revved up from chatting with a friend….And why oh why was this cheesecake strategically positioned in the fridge that everytime I’d open the door for water, there it was, sending me subliminal messages. After a 30 minutes dance between my fork and the water, the fork won and I sat outside with half of it. Needless to say, I fell asleep like a baby!!!

Ginger Cheesecakes With Yuzu Glaze:

Makes 2 41/2 inch cheesecakes

8 oz cream cheese, at room temperature
1 Tb. butter
1/2 cup sugar
2 eggs
1 tsp. vanilla extract
2 Tb ginger spread (you can sub 1 Tb fresh grated ginger)
1/2 cup graham cracker crumbs
2 Tb melted butter
1/2 cup yuzu marmelade ( you can sub. lemon curd or orange marmelade)

Preheat oven to 350F.
In a medium side bowl, combine the graham cracker crumbs and the melted butter. Divide among 2 4 1/2 inch mini springform pans and pat with your fingers until evenly distributed. Bake 10 minutes. Lower temperature to 325.
In a large bowl, with the electric mixer or by hand , mix the cream cheese, butter and sugar. Add the eggs, one at a time until well incorporated. Add the vanilla and ginger spread. Divide betwee the springform pans. Wrap each pan with heavy duty foil. Set them in a roasting pan, fill with water and bake at 325 for about 40 minutes, or until they wiggle just a tiny bit in the middle. They will set more after an overnight trip in the fridge. Remove the foil, let cool, and refrigerate.
When ready to serve, run a hot knife on the inside of the pan and release the cheesecakes. Heat up the marmelade in the microwave until of spreadable consistency and spoon on top of each cake….you are ready to go!

Ginger Cheesecake with Yuzu

Cheesecake or Cinnamon Ice Cream? Both?!

I don’t particularly enjoy ice cream drips on my coffee table, but by the time I shot some pictures and we finally decided what flavor we wanted, there were tiny ice cream puddles and lots of slurping, licking and "humhumhums" heard around. Both ice creams are good together, both are good on their own and both are better shared with friends.
In my case, I liked them equally (a lot) and I played around having small scoops of both in a bowl. I even drizzled dulce de leche on one of them, then both…Thanks Marce for the bottle!

How I came to make the cheesecake ice cream is actually quite funny, at least to me but I am easily amused. I started with the cinnamon to take to the neighbors for our weekly cookouts, but I wanted to bring another dessert in case some did not like it. I had my elbow on this cookbook and realized I had not made anything from it yet. My brother gave it to me when he came to visit last year and thought that bringing Alain Ducasse, chef of chefs, and Sophie Dudemaine, queen of cakes, into my kitchen would make me feel closer to home. And what do I do? I close my eyes, grab the recipe section with both hands and open the book on the only American inspired recipe, Cheesecake Ice Cream…ahahah!!! I took it as a sign that I was perfectly integrated in my life (sometimes homesick but who is not?) and happy in my shoes.

Both ice creams were equally loved and quickly disappeared. In the meantime I have nothing planned for dessert tonight but I have enough ice cream recipes to fill my stomach virtually: check out my fellow Daring Bakers' creations: mascarpone, chocolate, rhubarb…is your ice cream churning yet?

Cheesecake Ice Cream, adapted from Alain Ducasse:

2 cups milk (50 cl)
1/3 cup heavy cream (10 cl)
3/4 cup sugar (170 gr)
2 egg yolks
3 oz cream cheese (90gr)

Whisk the egg yolks with the sugar.
In a saucepan set on medium heat, bring the milk and the cream to boiling point, slowly pour a small amount on the egg yolks to temper. Pour the remaining over the yolks and sugar. Stir well then pour back in the saucepan and cook over medium low heat until the cream thickens and coats the back of a wooden spoon. Remove from the heat and whisk in the cream cheese until completely melted and incorporated.
Cool to room temperature. Cover and refrigerate until cold. Process in an ice cream maker according to your machine’s manufacturer’s instruction.
Number of servings: if I apply the rules of reason and moderation, I would say 6…but if you want your friends happy, more like 4!

I use a counter top style ice cream machine as well as an hand held immersion blender when the former is already at work.

Cinnamon Ice Cream, adapted from this post:

4 egg yolks
2 cups half and half
4 oz sugar
1 tsp vanilla extract
1 heaping teaspoon cinnamon

In a large bowl, whisk the egg yolks and sugar until pale and thick, add the vanilla.
In a saucepan, on medium heat, bring the half and half and cinnamon to boiling point but do not let it boil.
Slowly pour the hot cream onto the egg yolks mixture and stir to combine (tempering). Pour the whole mixture back into the saucepan and cook over low heat, stirring constantly, until the cream coats the back of spoon. At this point you have made a custard sauce, also known as "creme anglaise".
Let cool completely, strain and refrigerate until cold. Process the custard according to your ice cream maker manufacturer’s instructions or use a hand held immersion blender.

Thank You!

Thank you to everyone who voted for this cheesecake during the last HHDD event hosted by Peabody, and created by Barbara.
Peabody did an amazing job hosting and rounding up everybody’s entries. I am thrilled and exciting to be hosting HHDD for April.

Stay tuned as I will announce the theme in a couple of days.

Thanks again!