
caramel

Chocolate Caramel Banana Tart & A CookBook For Haiti

Chocolate Caramel Banana Tart


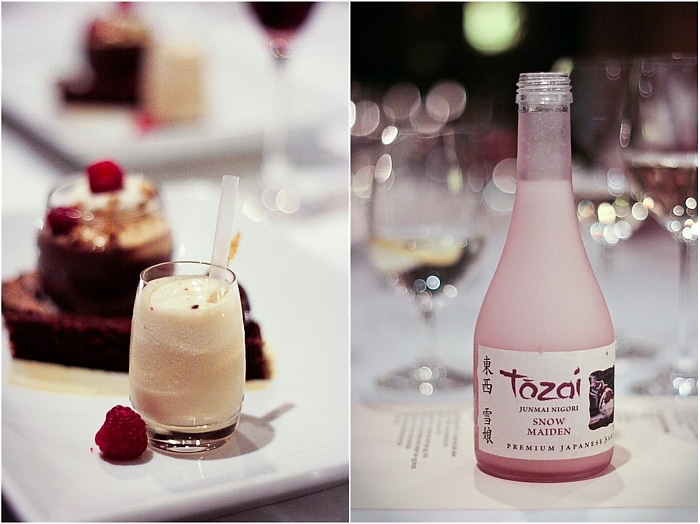
What I am happy and honored to announce below is closely related to the Chocolate Caramel Banana Tart above. But I need your attention for 2 paragraphs before I tell you more about the tart. It’s important. [Update: the BlogAid Cookbook is not available for sale anymore. For more info read this.]

A few days after the horrible tragedy of the earthquake in Haiti, I received an email from Julie from Dinner With Julie that made me jump in my seat and say "Heck yes I’m with you!". She had been watching the news and with every passing hour, she was as feeling as upset and hopeless as a lot of us did. She had a plan to help raise money for Haiti and she emailed for help. Julie set out to create the BlogAid Cookbook. Twenty seven of us came together and provided her with some of our favorite recipes and pictures.

Julie and her friend Cathryn worked almost around the clock to pull it all together. and I am honored and thrilled to announce that the BlogAid Cookbook is up for order!

Blog_Aid_Button


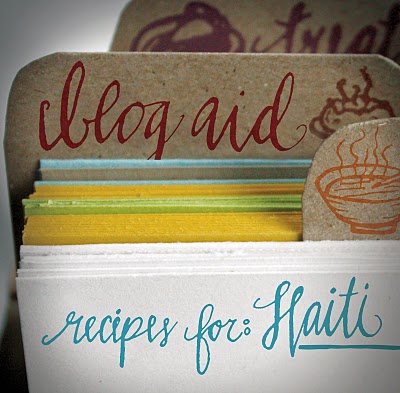
The proceeds from the book sales will go straight to Haitian relief via the Red Cross and Doctors without Borders. It’s not all though! Both West Canadian AND Blurb are matching the dollar amount of the proceeds raised, to TRIPLE those dollars going to Haiti. And until February 12th, the Canadian government will match that.

It’s a POD (print-on-demand) system, meaning the books are printed and shipped as they’re ordered and arrive at your doorstep in about 8 days. You can purchase yours for a good cause here.

Vespa Green


While Julie was working on this project I was having interesting discussions with a good friend about buying too much, accumulating without purpose, wanting versus needing. I am the child of a homemaker and an army guy who lived on a small pension. I worked in a restaurant where every purchase-usage-spoilage was scrutinized, discussed and fixed. And it’s in everything I do now as an adult. I am not talking about being cheap but about using things to the last drop. Or the last crumb…

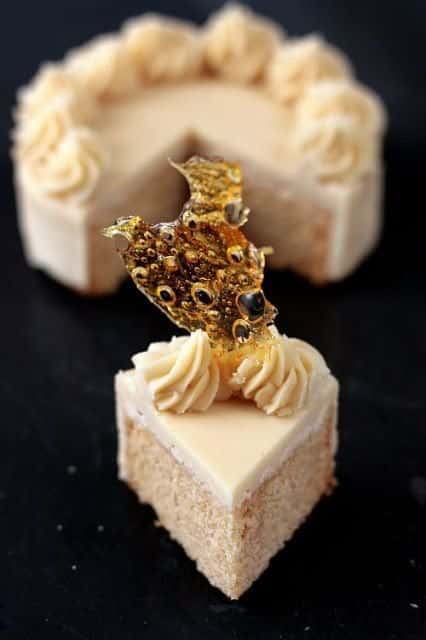
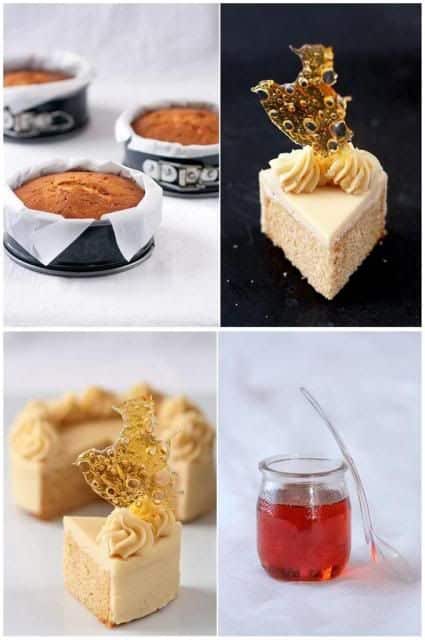
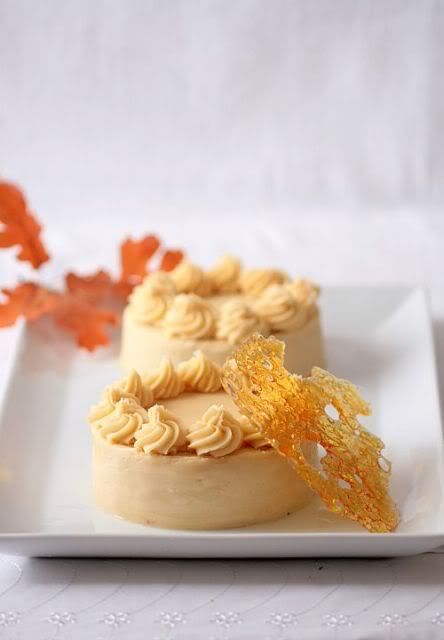
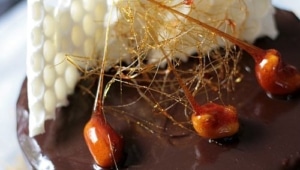
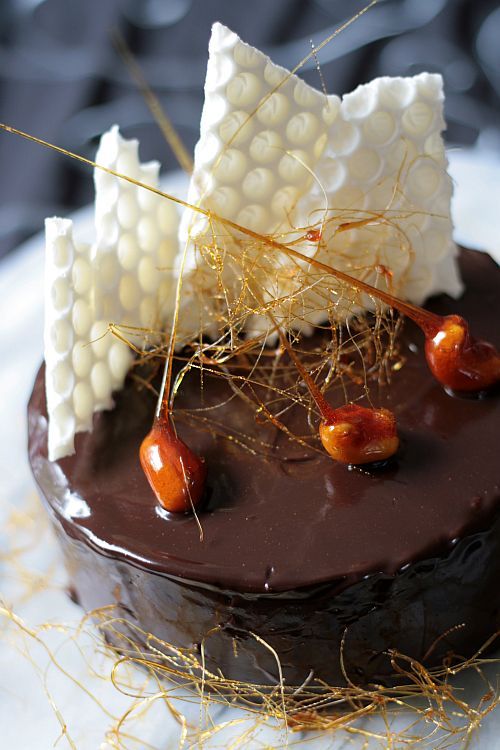
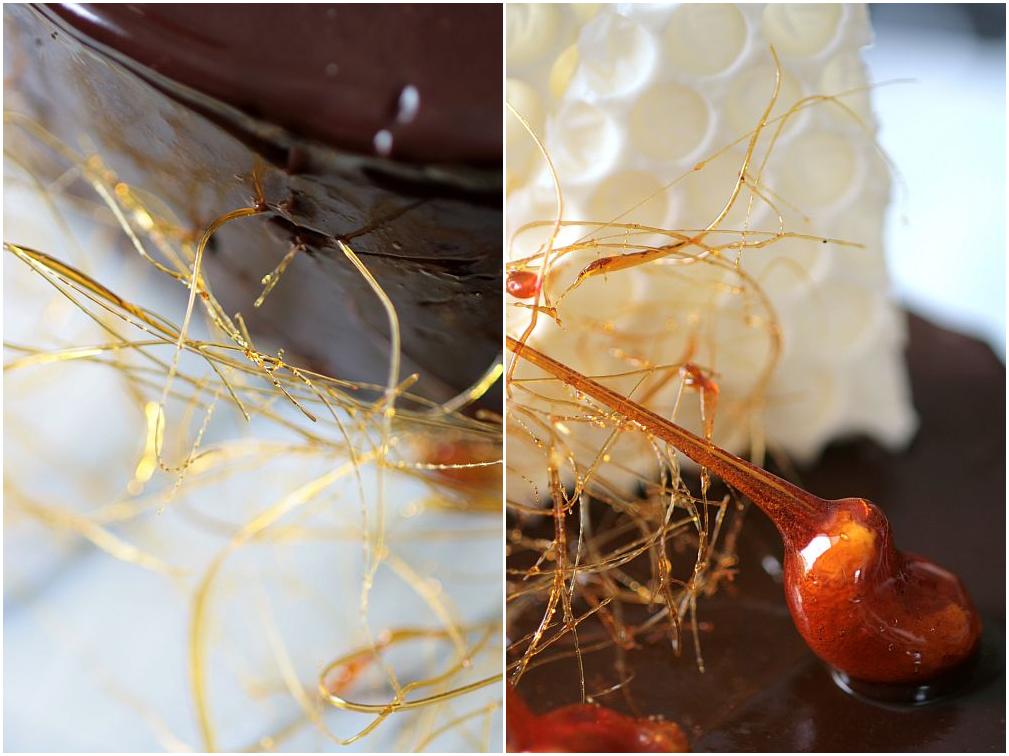
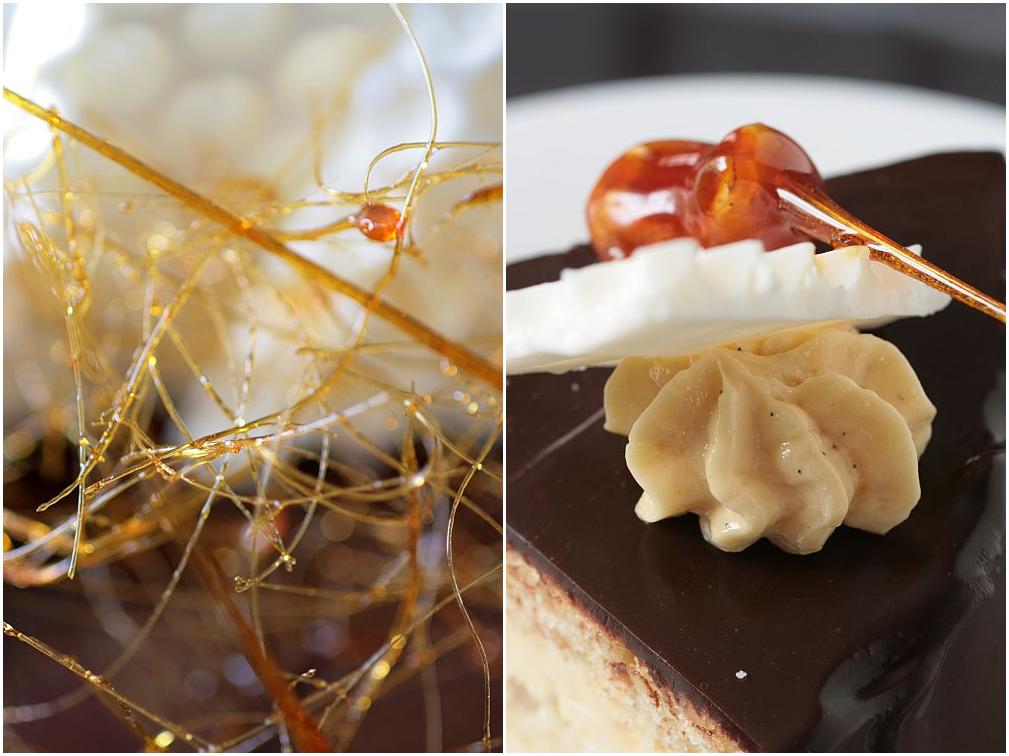
My friend has a small farm. She raises a few chickens. This year she got a couple of goats. She is slowly transitioning into a path that suits her to a T and she is making enormous sacrifices along the way. Her positive energy and generosity are always invigorating. So are the eggs she gives me for baking. You can bet that none of them go to waste. As a thank you I made her this Chocolate Caramel Banana Tart.

I love the meals and snacks that take place when I clean up the pantry of fridge of all the bits and pieces before it’s too late. A homemade vegetable soup with fried pieces of prosciutto, an omelette topped with the last bit of the aged gouda I like so much, a mixed up pasta dish full of different handful of herbs. I bet there’s a bit of the same going on in your kitchen at times!

Chocolate Caramel Banana Tart


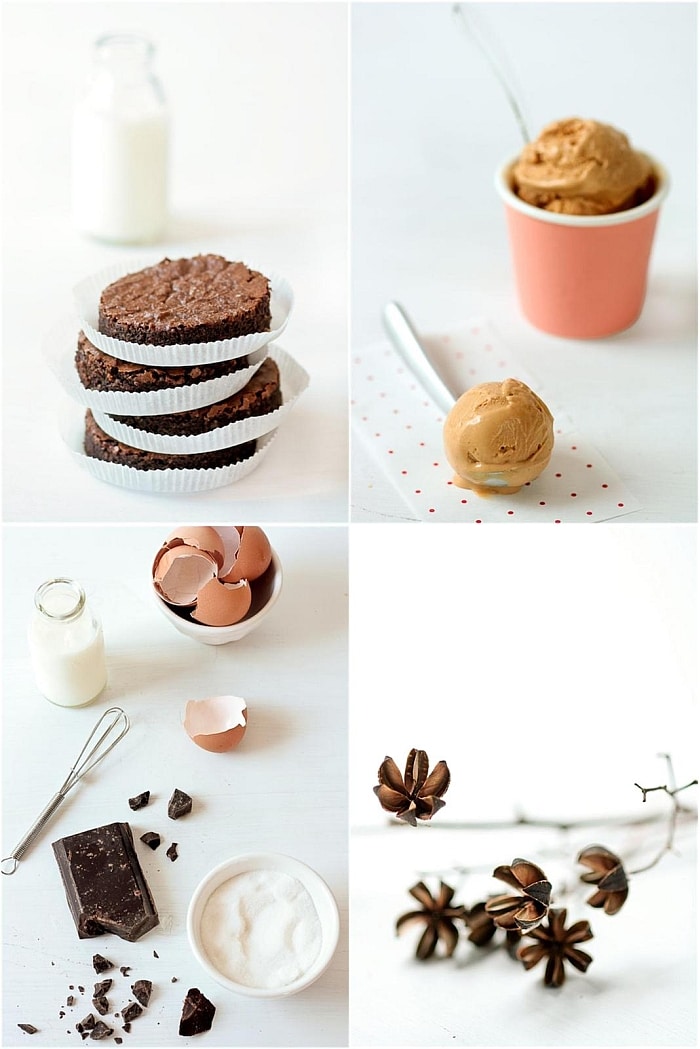
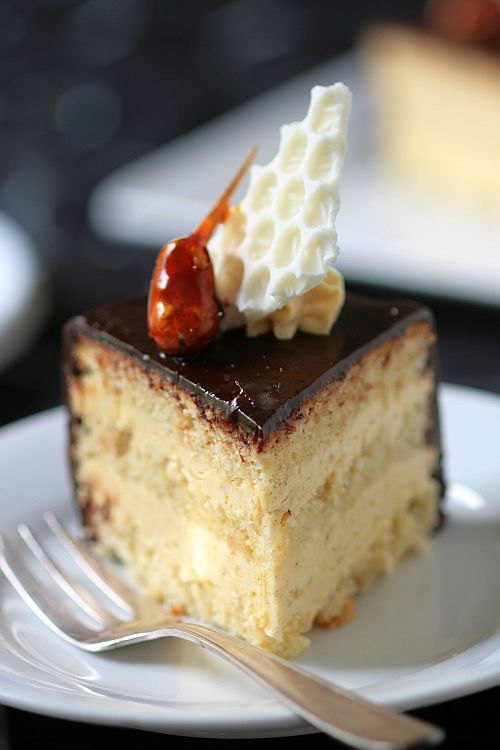
Desserts are always a different story at our house. Between us, the neighbors, the friends, the family, it’s rare to have leftovers. Dough scraps seem to abound in the freezer though. Oh and little containers with only spoonfuls of ice cream. Too many. I lost track.

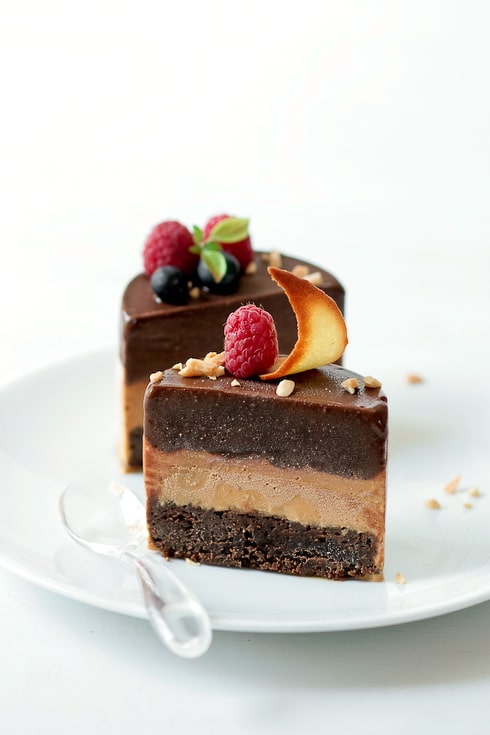
Bananas are always the ones that end up being frozen and forgotten or mashed and forgotten. Or simply forgotten. Except when I play my "make a dessert by association" in my head. Banana – peanut butter – chocolate – crust. I originally thought about doing just caramel and chocolate but this version ended up being much better than anticipated.

I finally nailed a gluten free chocolate shortcrust recipe that we both love and it makes perfect chocolate shortbread cookies too. The tart filling was soft and gooey without flowing all over your fork. Just don’t be walking around the house with a slice of pie. Don’t say I did not warn you…

Chocolate Caramel Banana Tart


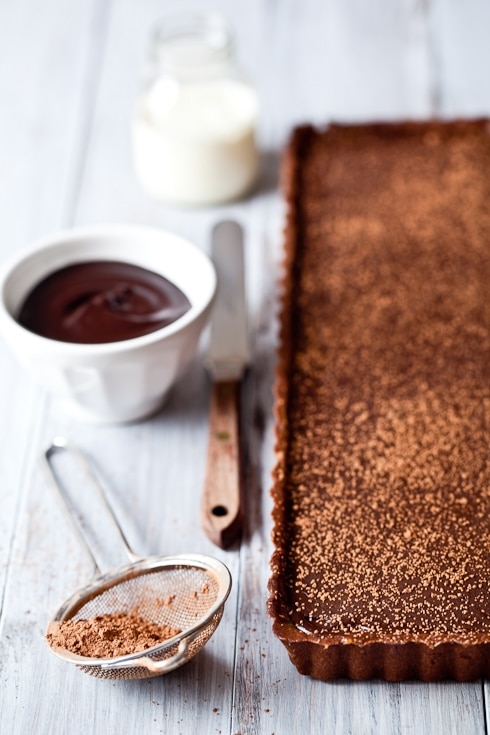
Chocolate Caramel Banana Tart:

Serves 8-10

For the crust:
1 stick (113gr) unsalted butter, at room temperature
1/2 cup (60gr) unsifted powdered sugar
3 egg yolks
pinch of salt
1 cup (160gr) white rice flour
1/4 cup (30gr) amaranth flour
1/4 cup (40gr) tapioca starch
1/2 teaspoon xantham gum
1/4 cup (20gr) unsweetened cocoa powder

For the caramel-peanut butter-banana layer:
1/2 cup (100gr) sugar
2 tablespoons water
2 tablespoons heavy cream
2 tablespoons unsalted butter at room temperature
1/4 cup peanut butter (your choice smooth or crunchy)
2 small bananas, peeled and mashed

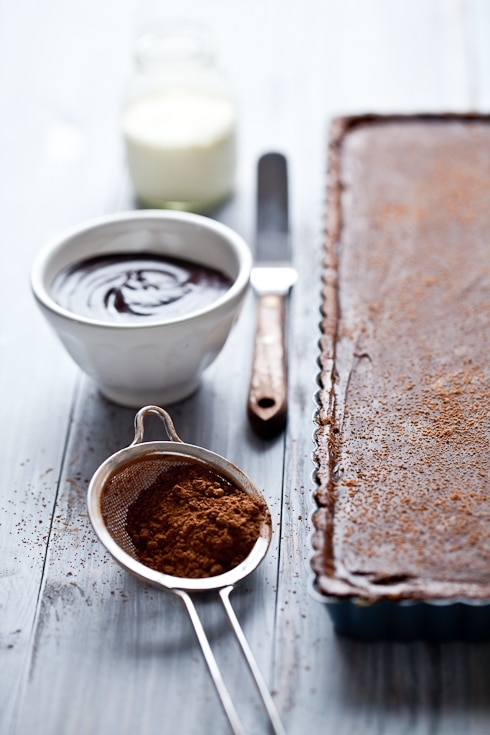
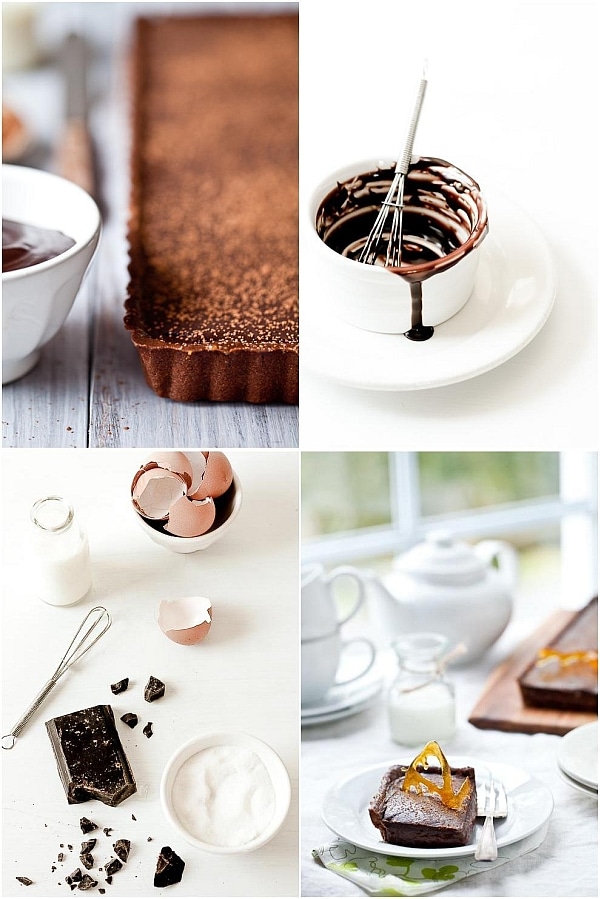
For the chocolate ganache topping:
1 cup semisweet chocolate chunks or chips
1/2 cup heavy cream

Prepare the crust:
In a mixer, whip together the butter and sugar together until light and fluffy. Add the egg yolks, one at a time and beating well after each addition. Mix until incorporated. Add the three different flours, the xantham gum and cocoa powder and mix briefly. Dump the whole mixture onto a lightly floured (use more rice flour) board and gather the dough into a smooth ball. Flatten the dough into a disk, wrap it in plastic wrap and refrigerate for an hour.
Preheat oven to 350F and position a rack in the center.
When the dough is nice and cold, roll it out on a lightly floured board or in between two sheets of plastic to fit your prefered pie pan. (I went with rectangular this time) If the dough tears while you roll or/and transfer into the pan, just patch it with your fingertips. Line the dough with a piece of parchment paper, fill with pie weights or dy beans and par bake for 15-20 minutes until completely done. Remove the weights and parchment paper.

Prepare the filling:
In a heavy bottom saucepan, bring the sugar and water to a boil over meadium high heat and cook until you get a dark caramel. (do not walk away – it only takes minutes). Remove the pan from the heat and add the cream and butter. The mixture will bubble so be careful. Place the pot back on the stove and cook on low until the mixture is smooth. Remove from heat and let cool to room temperature.
Once cooled, add the peanut butter and banana and whisk until completely smooth. Pour over the crust. Refrigerate for 2 hours before topping with the ganache.

Prepare the ganache:
Place the chocolate in a medium size bowl. In a small saucepan set over medium high heat, bring the cream to a strong simmer. Remove from the heat and pour over the chocolate. Let stand for a couple of minutes and slowly stir in with a whisk or spoon until smooth. Let cool for 5 minutes and spread all over the banana filling. Refrigerate until firm.

————————————————————————————-

Le P’tit Coin Francais:

Pour la pate:

115gr beurre mou
60 gr de sucre glace
3 jaunes d’oeufs
pincee de sel
160gr farine de riz blanc
30 gr farine d’amaranthe
40gr farine de tapioca
1/2 c.c de gomme xanthan
20 gr de cacao

Pour la garniture:
For the caramel-peanut butter-banana layer:
100gr sucre
2 c.s d’eau
2 cs creme liquide entiere
2cs beurre mou
30gr de beurre de cacahuete (avec ou sans morceaux)
2 petites bananes mure, epelees et ecrasees

Pour la ganache:
240gr chocolat en morceaux
125ml de creme liquide entiere

Le reste des instructions arrive…promis.

Chocolate Caramel Banana Tart

Asheville Trip To Foodtopia – Part II

Chocolate Torte, Caramel Ice Cream and Chocolate Sorbet


Day two of our trip in Asheville had us move around a bit less but was just as intense, keeping us on our toes until bedtime. Or was it until we all rolled, stumbled, fell, crashed on our beds?! Ha! Yes, we can blame it on all the tasty wines, succulent dishes, intense Iron Chef competition, culminating with an outstanding dinner at Horizons in The Grove Park Inn.

The 4 Diamond restaurant gathered us around one of the best meals I have had in my life, ending in the most perfect sweet note: a chocolate and caramel tasting executed by Pastry Chef Laura Bogard. Before I could even ask our hosts if Laura would be kind enough to share a couple of the recipes, I was graciously handed a print out of all the components of our plate. Once back home in SC, I decided to put my own spin on it and make this Chocolate Torte topped with Caramel Ice Cream and Chocolate Sorbet, inspired by that evening. But let’s talk about the day first…

We started with a visit to Sunburst Trout Farm outside of Asheville. I was really looking forward to it for the simple reasons that I used to go trout fishing all the time as a kid and I fully support trout farming when done with sound ecological practices. I was thrilled to meet Sally, her family and her staff after I had read more about them and their operation. They confirmed every thought I had already formed in my head: happy trout, careful workers, quality products.

Sunburst Trout Farm


Before meddling with the trout we were treated to a scrumptious breakfast smorgasbord of trout dishes, carefully prepared by their research and development chef, Charles Hudson. Trout dip, trout omelette, trout gravy and biscuits, hot smoked, cold smoked…you name it, we probably had it. All accompanied by fresh and pickled vegetables from the chef’s garden. A feast. We had to draw the line and think about the next round of food aventures and skip lunch.

Food bloggers skipping lunch? Ah yes. We had to keep ourselves sharp and moveable for what was awaiting us next. A full blown, very serious and incredibly fun CSA Mystery Box Iron Chef Competition held at AB-Tech Culinary Arts Center. If I were a student looking for a culinary college, I would, hands down, apply there first. Everything there is made to teach and practice without being stale or stuffy. Me? I was trying to contain that beaming smile of being back on the familiar grounds of a professional kitchen.

I wish I could have combined my two loves of cooking and photographing but I was about to get my hands chopping and my apron dirty. Diane of White On Rice Couple was our full-on photography journalist that day so I will be sure to update you when they post about it. We all had such a blast that I can’t wait to see it in pictures!

Each blogger was paired with a local chef to create two courses using the content of CSA boxes provided by The Appalachian Sustainable Agricultural Project, as well as the trout we had filleted that morning and extra ingredients provided by Blue Ridge Food Ventures (love that project – please take the time to click) and our own chefs.

Team France: Chef Michel Baudouin - Tartelette

Right photo courtesy of Diane at White On Rice Couple.
Meet Team France! Yes. Could there have been a better pairing than this? I think not! Indeed, I was teaming up with Chef Michel Baudoin, owner and chef of Bouchon . I have to say that the first thing I told Dodie was "Oh sh!t (!) you know that two French chefs competing together is more explosive than them competing against each other, right?!" She mentioned Michel had a similar reaction, eheh. Ah yes, that’s us French peeps. Bill says we take out our swords first and talk later. Very right. But in this case, very wrong.

We had a blast! Talking and yapping away in French. Chopping and dicing while coming up with our competition dishes. We were supposed to make only two dishes, but I guess you will not be surprised to hear that we made three. See! It’s not only me during Daring Bakers challenges! It’s genetic!! We started off with a fennel and zucchini tart, topped off with chorizo crumbles. Our main course was a Sunburst trout fillet stuffed with local goat cheese, baby turnip filled with purple potato puree. (picture here)

Michel is so low key and humble, I just had the greatest time cooking with him and talking about our experiences with food, cultures, restaurants, etc…I previously had dinner at Bouchon a few years ago and I am looking forward to returning to Asheville just for that!

Dessert was my grandmother’s vanilla apple compote served with pecan shortbread cookies. My biggest fear was this item. Seriously. Baking without measuring or weighing, mixing everything while eye balling and feeling the dough. I think I had a couple of shots of moonshine brought over by Todd’s chef while the cookies were baking! Turns out that everyone raved about that simple, homey dessert and it even earned us an extra five points. We still lost by 1/2 point though while Alison and Chef Annie Pettry took the high honors of the day.

Food Blogger In Action


It was an intense competition but with such great spirited and talented chefs that even if we were feeling it in our gambettes (legs), we still had enough of an adrenaline high to carry on with dinner planned at The Grove Park Inn’s Horizons restaurant, Horizons.

We started off by a round of cocktails (check out Jaden’s post about her tasty Xanadu libation) and appetizers which got their beauty shot courtesy of Todd.

Dinner At Horizons


I did take pictures from that dinner but let’s recap my physical state at this poing: late breakfast + cooking competition + a few nibbles of the finished dishes + moonshine + wine + cocktails + outstanding dishes + wine pairings + sake tasting = one very fuzzy sets of pics. Love that Bill knows me so well that he immediately asked the next day whether I had behaved. I think I did 🙂

Aren’t you lucky I don’t have all the words, the right words to describe how outstanding this dinner was?! I mean just look at that menu and sigh. I am! Thank you Jeff and Kevin for the superb setting and organization, you can be proud of the team you have cooking for your guests. Seriously, and I am not saying that because I never saw the check, this was one of the best meals of my life. Everything so fresh, sourced locally as much as possible, and executed with such perfection by Chef Duane Fernandes and his staff that I finished each- and- everyone- of- my- plates- OMG- I still- can’t- believe- I did this! And the wines…I want to do it all over again but with just the wines! Ok, maybe not…because there is a seriously tempting dessert tray to talk about.

Dinner at Horizons


Chocolate almond torte, chocolate sorbet, chocolate and caramel pudding and caramel ice cream and malt shakes. So happy to see I am not the only one thinking mini milkshakes are cool (see DB challenge)! I admit, while deep with both chocolate and caramel flavors, the pudding is the only item I left on the plate after sampling a few bites (research people, it’s all research). I did wish for a groundhog day type situation in which that chocolate torte, chocolate sorbet and caramel ice cream would just keep on appearing before my eyes and plate. This good. I have not even been really in the mood for chocolate lately but after making this at home, it is all I can see!!

Soft, luscious, powerful, smooth, intense. I took the three elements I loved the most about our dessert sampler that night and combined them in this entremet, starting with the chocolate torte as the base and then topped off with the caramel ice cream and chocolate sorbet. I made six. We had 2. That’s four more for me if I find a way to sneak around Bill. I hope it convinces you to try all three together or separately. It was hard to keep the caramel ice cream around long enough to have any left to fill the cake rings!

Are you still with me for Day 3 and 4 and a couple more exquisite recipes from the chefs of Asheville? Sure hope so!

Have a wonderful 4th of July!

The Making Of: Chocolate Ice Cream Cake


Chocolate Torte, Caramel Ice Cream and Chocolate Sorbet:

For the chocolate torte:
10 oz (300gr) chocolate
8 oz (230gr) unsalted butter, at room temperature
6 eggs
3/4 cup (150gr) sugar
1/2 tsp vanilla
2 tablespoons (15gr) flour
3/4 cup (70gr)finely ground almonds
1/2 teaspoon espresso
1/4 teaspoon almond extract

For the Caramel Ice Cream:
1 1/2 cups (300gr) sugar
1 teaspoon honey
1/2 cup (125ml) water
1 quart (1L) half and half
or 2 cups whole milk + 2 cups heavy cream
12 egg yolks
1 1/2 teaspoon vanilla
3/4 teaspoon salt

For the chocolate sorbet:

2 1/2 cups (625ml) water, divided
1 cup (200gr) sugar
3/4 cup (65gr) cocoa powder
8 oz (240gr) dark chocolate
1/2 teaspoon vanilla

Prepare the chocolate torte:
Preheat oven to 350F and position a rack in the middle. Line a quarter sheet pan with parchment paper and set aside.
In a large bowl set over a pot of simmering water, melt together the chocolate and butter. Remove from the heat and let cool to room temperature.
In a stand mixer (or with hand held beaters), whisk the eggs and sugar on medium speed until slightly thickened. Add the vanilla. Turn the speed to low and add the chocolate mixture and whip for a minute. Still on low speed, add the rest of the ingredients. Beat one minute until everything is incorporated.
Spread the batter on the prepared sheet pan and bake for 20-30 minutes or unti the center is just set.
Let cool completely.

Prepare the caramel ice cream:
In a heavy saucepan, set over high heat, stir together the sugar, honey, and water and cook to a dark amber caramel. Slowly add 2 cups of half and half and return to a boil, stirring to dissolve all the caramel bits. Slowly add the remaining 2 cups of half and half and return to a boil.
In a large bowl, whisk the egg yokls to break them up and slowly pour the hot caramel mixture over them to temper. Pour the content of the bowl back in the saucepan and cook over medium low heat until it coats the back of a spoon. Remove from the heat, add the vanilla and salt and stir until dissolved.
Let cool completely, refrigerate until cold.
Process in an ice cream machine according to manufacturer’s instructions.

Prepare the chocolate sorbet:
In a heavy saucepan set over medium high heat, stir together 1 1/2 cups water, sugar, cocoa, and a pinch of salt. Bring to boil, turn the heat down and simmer for a minute. Remove from the heat. Stir in the remainin 1 cup of water, chocolate and vanilla. Let stand for a minute. Whisk the mixture thoroughly to make sure that everything is incorporated and smooth.
Let cool completely. Refrigerate until cold before processing in your ice cream machine according to manufacturer’s instructions.

To assemble:
Line six 3-inch round cake rings with acetate or platic cover sheets and place them on a parchment paper line baking sheet. Cut out six 3-inch rounds in the chocolate torte and place them inside the prepared cake rings. Divide the caramel ice cream and chocolate sorbet evenly in between the cake rings. Freeze until solid.

I topped the cakes with fresh berries and tuiles made out leftover frangipane from the last Daring Bakers Challenge.

Banana Tatin Verrines

Banana Tatin Verrines


I never know "sur quel pied danser" (on which foot to dance) the last few days leading to Christmas. I have my feet in the starters' block but it is too soon to get going! The tree is up, the house is decorated, all the doughs for the cookies and treats are made and parked in the fridge waiting for Tuesday to be baked and Wednesday to be packaged. The menu is set, the food has been shopped for and is awaiting its own oven time. Today, there were moments of pure calm with a "yeah, I can have a cup of tea and a sit down" mixed with "Oh geez! Should I be panicking, should I, should I?"

I could have panicked this afternoon when B. asked me what were the plans for lunch. I opened the fridge, peeked in the drawers, closed the door and smiled "well, I know you wouldn’t have a problem eating raw biscotti dough for dinner but it ain’t Christmas yet child…so let’s go get some fish and grill". I was telling Lisa last night that I was on my 4th batch of shortbread dough and not because I was packing them up but because B. was eating them faster than I was baking them!!

We took the long way home coming back from the store and walked around the neighborhood checking houses all decked up for the holidays. All of a sudden the wind picked up and the air got downright chilly, and tonight there is a 20 degrees difference from the same time yesterday. Absurd…Yet the perfect occasion for one of those dessert you tend to crave on chilly days….like a tarte tatin. I opted for Banana Tatin Verrines instead with caramelized bananas layered, creme fraiche and a ginger crumble topping. Comfort in a spoon…

Banana Tatin Verrine


Banana Tatins Verrines:

1/2 cup creme fraiche or sour cream
(to make your own: mix one cup heavy cream with 1/4 cup sour cream and let sit overnight in the oven with the pilot light on, uncovered, refrigerate after that)
1/2 cup sugar
2 tablespoons water
2 tablespoons butter
2 bananas, cut into thick slices
Crumble topping (recipe follows)

Divide the creme fraiche between two glasses or ramekins.
In a large skillet set over medium high heat, cook the sugar with the water until it caramelizes to a golden caramel. Turn the heat down to medium and add the butter. Let it melt before adding the bananas. Let them cook in the caramel for a couple of minutes until soft and caramelized. Remove from the heat and wait a couple of minutes before dividing the banana slices in between your glasses. Top with the crumble and serve.

For the crumble topping:
1/4 cup light brown sugar
4 tablespoons all purpose flour
3 tablespoons cold butter
2 tablespoons chopped crystallized ginger

Preheat your oven to 350F.
In a bowl, combine the sugar, flour. Add the butter cut in small pieces, the ginger and mix with your fingertips until you get a mixture that ressembles coarse crumbs. Spread the mixture on a parchment lined baking sheet and bake for 15 minutes until golden brown. Let cool to room temperature.

Photobucket

Santa came a little early thanks to my dear friend Hannah from Bittersweet who sent me the cutest felt macarons that she made herself. Aren’t these adorable? And calorie free!!

I might be able to post around Christmas day (maybe some pics of all the finally baked goodies and house decorations?) but I wanted to wish you all the Happiest Holidays and much love spent celebrating with family and friends!

Daring Bakers, Caramel Cake and Soft Grand Marnier Caramels

Photobucket


I can hardly believe that the Daring Bakers are already two years old and that next month will be my own two year anniversary with the group. I can hardly believe that it went from Lisa emailing me with "hey there are four of us making biscotti, are you interested?" to "hey should we have a name?" to a full blown multi national group of bakers of all ages and all levels. We may all see the challenges differently but it does not matter as long there is a good dose of butter, sugar, flour! I am learning so much about others, the way they approach recipes and ideas as well as their cultures. Cheers to two years Daring Bakers and to many more!

I love when things come full circle or half circle or when there is a little something somewhere, a little detail that makes sense to me or/and others. It did this month in the sweetest way (pun completely intended), when Dolores from Culinary Curiosity , along with Alex from Blondie and Brownie and Jenny of Foray into Food chose Shuna’s Caramel Cake as our November Challenge. When I first started reading food blogs, I tuned in to Shuna’s Eggbeater almost everyday. It took me forever and a day to leave a comment as every time I finished her last sentence I felt so inadequate posting a simple "Wonderful post". She has right the words to describe our industry, about being a chef, a woman, a human being wearing her heart upon her sleeve. I laugh, I cry, I shake my head "yes" and when she announced she was moving to London I was so thrilled for her…following what’s next and embracing all the unknowns that go with it.

Photobucket


So yes…making Shuna’s Caramel Cake on the Daring Bakers' two year anniversary was one of those little details that mean a lot to me…like paying it forward in some way. And if you have been reading this blog for a little while you know how much I like playing with hot sugar (…blue caramel plate anyone?). Yep, I liked the idea from the get go, especially with a frosting that starts with browned butter. The smell in the house was enough to make you want someone would bottle it up in a perfume! The cake was easy to make and we all (us and the neighbors) loved its texture, and at first the frosting was a little too sweet to me but I did add some fleur de sel which really enhanced its flavor on the second day. Ah! The pleasure of biting into little salt crystals at the same time as biting into that sweet caramel frosting…hmmhmmhmm.

Given that we were given a lot of leeway in the making of the cake, I went ahead and made 4 small cakes instead of one. Granted I love caramel and salt but I also love caramel and citrus so I did add some grated lemon zest to the cake batter and as previously mentionned some fleur de sel to the frosting. I thought I would not have time to make the extra recipe for caramels but I needed to stand and move around after Thanksgiving dinner last night and I went ahead and did Grand Marnier caramels (citrus again) that I wrapped in waxed paper and boxed up in little Christmas tins for gift giving (except half of them are already gone…oops!). From turkey low to sugar high, I think we have all the compenents of a perfect holiday season!
For the decoration, there was a bunch of kids eating with us so I kept it simple but did sneak in some "bubble caramel", a caramel technique that makes me giggle everytime I use it, (and the kids too) although be careful as you "play" with pouring hot sugar syrup over alcohol to create the bubble effect.

Thank you Lisa and Ivonne once more and our wonderful hostesses! Check out the rest of the Daring Bakers and their fantabulastic creations here.

Photobucket


Caramel Cake With Caramelized Butter Frosting, courtesy of Shuna:

10 Tablespoons unsalted butter at room temperature
1 1/4 Cups granulated sugar
1/2 teaspoon kosher salt
1/3 Cup Caramel Syrup (see recipe below)
2 each eggs, at room temperature
splash vanilla extract
2 Cups all-purpose flour
1/2 teaspoon baking powder
1 cup milk, at room temperature

Preheat oven to 350F. Butter one tall (2 – 2.5 inch deep) 9-inch cake pan.
In the bowl of a stand mixer fitted with a paddle attachment, cream butter until smooth. Add sugar and salt & cream until light and fluffy.
Slowly pour room temperature caramel syrup into bowl. Scrape down bowl and increase speed. Add eggs/vanilla extract a little at a time, mixing well after each addition. Scrape down bowl again, beat mixture until light and uniform.
Sift flour and baking powder. Turn mixer to lowest speed, and add one third of the dry ingredients. When incorporated, add half of the milk, a little at a time. Add another third of the dry ingredients, then the other half of the milk and finish with the dry ingredients. {This is called the dry, wet, dry, wet, dry method in cake making. It is often employed when there is a high proportion of liquid in the batter.}
Take off mixer and by hand, use a spatula to do a few last folds, making sure batter is uniform. Turn batter into prepared cake pan. Place cake pan on cookie sheet or 1/2 sheet pan. Set first timer for 30 minutes, rotate pan and set timer for another 15-20 minutes. Your own oven will set the pace. Bake until sides pull away from the pan and skewer inserted in middle comes out clean. Cool cake completely before icing it. Cake will keep for three days outside of the refrigerator.

Caramel Syrup:
2 cups sugar
1/2 cup water
1 cup water (for "stopping" the caramelization process)

In a small stainless steel saucepan, with tall sides, mix water and sugar until mixture feels like wet sand. Brush down any stray sugar crystals with wet pastry brush. Turn on heat to highest flame. Cook until smoking slightly: dark amber.
When color is achieved, very carefully pour in one cup of water. Caramel will jump and sputter about! It is very dangerous, so have long sleeves on and be prepared to step back.
Whisk over medium heat until it has reduced slightly and feels sticky between two fingers. {Obviously wait for it to cool on a spoon before touching it.}

Caramelized Butter Frosting:
12 tablespoons unsalted butter
1 pound confectioner’s sugar, sifted
4-6 tablespoons heavy cream
2 teaspoons vanilla extract
2-4 tablespoons caramel syrup
Kosher or sea salt to taste

Cook butter until brown. Pour through a fine meshed sieve into a heatproof bowl, set aside to cool.
Pour cooled brown butter into mixer bowl. In a stand mixer fitted with a paddle or whisk attachment, add confectioner’s sugar a little at a time. When mixture looks too chunky to take any more, add a bit of cream and or caramel syrup. Repeat until mixture looks smooth and all confectioner’s sugar has been incorporated. Add salt to taste.
Note: Caramelized butter frosting will keep in fridge for up to a month.To smooth out from cold, microwave a bit, then mix with paddle attachment until smooth and light.

Bubble Caramel:
1/2 cup (100gr) sugar
3 tablespoon (45 ml water)
1 tablespoon (15 gr) corn syrup
rubbing alcohol (I use a spray bottle)

Combine all the ingredients in a heavy saucepan and bring them to a boil. Monitor the temperature with a candy thermometer and bring the mixture to 300F. While the caramel is reaching its desired temperature, take a sheet of parchment paper and crinkle it between your hands then flatten it out a bit. This will help with the forming of the bubbles. Spray rubbing alcohol on the parchement paper right before the caramel reach its temperature (don’t do it ahead of time or it will be dry when you are ready to pour). When the caramel is ready, slowly pour it over the parchment paper and watch the bubble form. You can lift the paper carefully to spread it around the surface if needed but watch out! I do this over a large sheetpan so all is required for clean up is hot water. Let cool completely before breaking into shards. This is more a deco than an edible piece of caramel given the alcohol used. I guess one could use a high percentage clear alcohol (maybe my uncle’s moonshine that cleans the bottoms of coffee cups!) but I haven’t tried it that way yet.

Homemade Grand Marnier Caramels


Grand Marnier Caramels, adapted from Alice Medrich’s Pure Dessert.

Makes eighty-one 1-inch caramels
Note: the original recipe calls for Golden Syrup but I wanted to finish the corn syrup I had so I subsituted one invert sugar for another one without a problem.

1 cup corn syrup
2 cups sugar
3/8 teaspoon fine sea salt
2 cups heavy cream
1 tablespoon plus 1 teaspoon Grand Marnier
3 tablespoons unsalted butter, cut into chunks, softened

Line the bottom and sides of the baking pan with aluminum foil and grease the foil. Combine the corn syrup, sugar, and salt in a heavy 3-quart saucepan and cook over medium heat, stirring with a silicone spatula or wooden spoon, until the mixture begins to simmer around the edges. Wash the sugar and syrup from the sides of the pan with a pastry brush dipped in water. Cover and cook for about 3 minutes. (Meanwhile, rinse the spatula or spoon before using it again later.) Uncover the pan and wash down the sides once more. Attach the candy thermometer to the pan, without letting it touch the bottom of the pan, and cook, uncovered (without stirring) until the mixture reaches 305°F. Meanwhile, heat the cream in a small saucepan until tiny bubbles form around the edges of the pan. Turn off the heat and cover the pan to keep the cream hot.

When the sugar mixture reaches 305°F, turn off the heat and stir in the butter chunks. Gradually stir in the hot cream; it will bubble up and steam dramatically, so be careful. Turn the burner back on and adjust it so that the mixture boils energetically but not violently. Stir until any thickened syrup at the bottom of the pan is dissolved and the mixture is smooth. Continue to cook, stirring occasionally, to about 245°F. Then cook, stirring constantly, to 260°f for soft, chewy caramels or 265°F; for firmer chewy caramels.

Remove the pan from the heat and stir in the Grand Marnier extract. Pour the caramel into the lined pan. Let set for 4 to 5 hours, or overnight until firm.

Lift the pan liner from the pan and invert the sheet of caramel onto a sheet of parchment paper. Peel off the liner. Cut the caramels with an oiled knife. Wrap each caramel individually in wax paper or cellophane.

Pear And Pecan Tea Cakes – An Afternoon With Grandma

Pear - Pecan Cakes


I’d like to dedicate this post to another great lady, Bri who passed away last night. My sincere condolences to her husband and her family.

A post I was reading the other week prompted me to take out my grandmother’s china and silverware out of their cases and bring them to life for a little while. The time of a dessert, a picture or a post. The time of a memory I might give my mother about a certain time in her past. I know I’ll never be as creative as Pia in styling and setting the mood for the pieces I inherited but the moment was right to polish those spoons and dust off those cups.

I started to take pictures of the spoons on their own and although pretty, something was missing. I made some tea and hoped that the smell and relaxing atmosphere would inspire me a little. It was allright…not bad, there was still that little "je ne sais quoi" missing. I took a step back and tried to remember the last time I had seen my grandmother use those pieces. Had I? Ever? No, not really….So I tried to imagine grandma holding that cup of tea in one hand, swirling her sugar and lemon slice, spoon in the other. That’s when it hit me! Cake! The one thing missing was one of my grandmother’s tea cakes!

I cannot remember a day without going to her house for a 4 o’clock cup of tea and a slice of cake! There was never a shortage of pretty china and silverware, although I strongly suspect she had secretively put these cups and spoons away for me. Yes, they are just things….and they fell on my lap pretty much the same way they did on hers: they were all handed down from many women before me. If they weren’t in our family, well eh, no big deal. But they are, and they are old, and they speak a little bit of my past and the women in the family every time I take them out, to me it is a big deal. I find it magical that every time I look at them, I can’t wait for 4 o’clock to come around so I can make myself a cup of tea and have some cake.

I started to think about the cake that would reflect the mood around grandma’s table at tea time. Tense! Really! It seems like we were always planning some kind of event, party, celebration, vacation..something. It was also very warm and playful. Mamie Paulette was indeed a study in contradictions. Tense, but with a great sense of humor and a joyous personality. Those little pear and pecan cakes with their little skirt of roasted pear slices are just that. They are a little tense if you don’t bake often but they do not require major scientific knowledge (we all know I would not be baking them if they did!), no intricate technique (nothing wrong with that, just short on time these days!), or special ingredients (nothing wrong here either, grandma just happened to love pears). They also tend to look like roses….like the ones on grandma’s little spoons.

The pear cakes start with a basic cake batter in which I threw chunks of pears and chopped pecans but feel free to use the same dessert with plums, apples, peaches, etc…. For the pear slices, make sure to cut them thin and choose pears of the same size if you can. Slice them first and use the end pieces and short slices, chopped, in the cakes. I used regular size muffin pans but one cup capacity ramequins or baking dished work well too. The tense part of the dessert comes when you position the pear slices around the cakes. Arm yourself with patience and have some bakery twine or rafia strings close by, wrap them around the slices, tie them up and let the cakes sit for 20 minutes. After that time, you can either remove the twine if you think you guests won’t like it, and the slices will stick to the sides of the cakes on their own, of if your friends like ribbons as much as mine do, by all means, leave them be. Well, I did use some hot sugar (I guess I can’t help myself) as I sprinkled some pecan praline on the plates before serving, but you can skip that step of course.

Pear Cakes and Grandma's China


Pear And Pecan Tea Cakes With Pecan Praline:

Makes 8 muffin size tea cakes.

For the roasted pear slices:
8 pears
1/3 cup of sugar

Preheat the oven to 300F. Peel the pears and cut them in thin slices. Reserve the small slices and meaty pieces from what is left on the stem for the cake batter. Place the pear slices on parchment line baking sheet and sprinkle them with the sugar. Bake for 15 minutes or until golden brown. Remove from the oven and let cool.

For the tea cakes:
1/2 cup sugar
1/2 cup olive oil
1 egg
1 1/2 cups all purpose flour
1/2 teaspoon baking soda
1/2 teaspoon cinnamon
1/4 cup milk
1/3 cup pecans, coarsely chopped
remnant pear slices and pieces from the pears used in the previous step, chopped, plus more if needed to make one cup.

In a mixer, combine the sugar, oil, and egg and whisk with the paddle attachment until light and fluffy. Add the flour, baking soda and cinnamon and whisk until the batter starts to come together. Add the milk and whisk until smooth. By hand, fold in the pecans and pears. Divide the batter evenly among 8 muffin cups sprayed with cooking spray and bake at 350F for 15-20 minutes, until a toothpick inserted in the middle comes back free of crumbs. Let cool.
Arrange the cooled roasted pear slices around the cake and secure with bakery twine (use butcher twine if you don’t plan on serving them tied up). Refrigerate if not ready to serve within the hour. All the elements will keep fine for 3 days in the fridge but they are easier to assemble and nicer to eat at room temperature.

For the pecan praline:
1/2 cup sugar
3/4 cup chopped pecans

Place the pecans on a baking sheet covered with parchment paper or a silicone mat. Place the sugar and 2 tablespoons of water in a heavy saucepan on high heat and cook until you get a golden caramel. Immediately pour it over the pecans and let sit until cold and hard. Chop into small pieces.

Pear - Pecan Cakes

Pecan Pie Macarons and Giveaway Winners

Pecan Pie Macarons


I know! Macarons…again! Before you roll your eyes and quit reading, indulge me for a minute, there is a story behind it. A lovely meeting with a fellow Daring Baker and an afternoon spent baking macarons…and a lot of them! Before I get to that, I must announce the winners of the Confetti Cakes For Kids Cookbook for which I let the Random Number Generator pick the five lucky you’s.
#9: Dorothy from The Fat Free Tester Squad
#19: Allie (no blog)
# 76: Ruby from Ruby’s Tuesday
#106: Sugar Chef
# 266: Erica from The Underground Cupcake

Congratulations ladies! Please send me an email at marinette1 at comcast dot net with your mailing address and I’ll pass on all your info to the publisher.

Now…the rest of the story and the Pecan Pie Macarons. When I can’t sleep at night, I usually don’t count sheeps, I think of flavor combinations for macarons instead. Seriously. You think I’d joke about that?!! Problem is, the world in my head and the world around me don’t always agree with each other but I knew this one would work. I have been meaning to make a pecan pie inspired macaron for ages but you know how it goes….your mind wonders off and before you know it you are baking something else that you "just had to make". I wanted these to have a French twist and instead of figuring out how to put the traditional pecan pie filling into a mac, I used salted butter caramel sauce. It’s not like I need an occasion to make them but I pretexted C’s birthday to put a few many of these together for her. However, it took a few years and an afternoon baking with a new friend to get my head together with my hands and my time on that one!

A few weeks ago, I was reading my favorite American in Paris, David Lebovitz, when I read Kim’s comment about how she had slaved for two days over macarons and most of them flopped. Kim writes one of my favorite blogs, A Yankee In A Southern Kitchen and lives in the same town. "Get out!"….Seriously! We "met" over the internet last year and tried to get our schedules together to meet and it never happened. As a joke, I have started a list of all the dishes I would like her to make me when we meet. Crabcakes, Cola Ribs, Tomato Pie, and so many more are already on the list. After reading about her misadventures in macaron making, I sent her an email saying that if she needed help next time, not to hesitate and I’d be happy to give her a hand. Last week, Kim asked if we could get together this past Monday so I could give her a macaron 101 lesson. Yes, yes, yes!

Caramels


Her kitchen is a foodie’s dream: spacious, well equipped, bright with a huge window giving on the serenity of a beautiful garden. Now, let me add that meeting Kim was truly wonderful: cheery, full of Southern charm and hospitality and sweet as pie. Her daughter M. joined us and we spent the afternoon measuring, grinding, folding, piping, sprinkling, filling. We troubleshooted what went wrong the first time she made them and also figured out the proper settings for the ovens which was no small business. We made plain macarons Bourbon vanilla buttercream, pecan macarons with coconut cream cheese buttercream and peanut ginger macarons. The afternoon was graced by lovely weather, great conversations and laughs. I left with a skip in my step.

That evening as I was mentally registering all the delicious moments of the afternoon, I got a craving for the pecan macarons we made and decided it was time to make the Pecan Pie inspired one I have been thinking about. It also helped that I had plenty of egg whites and salted butter caramel sauce already made. The shells were half almonds and half pecans from our tree and the extra pecan boost was a little piece of pecan brittle in the middle. Hugh…yes….they are sweet….but dang! One is just perfect with a cup of coffee! So here’s to new friends, new adventures and new experiences!

Pecan Pie Macarons and Pecan Brittle

Pecan Pie Macarons:
Makes about 20

For the shells:
3 egg whites (about 90 gr)
40 gr granulated sugar
200 gr powdered sugar
55 gr almonds
55 gr pecans

For the whites: the day before (24hrs), separate your eggs and store the whites at room temperature in a covered container. If you want to use 48hrs (or more) egg whites, you can store them in the fridge. In a stand mixer fitted with the whisk attachment, whip the egg whites to a foam, gradually add the sugar until you obtain a glossy meringue. Do not overbeat your meringue or it will be too dry. Combine the almonds,pecans and powdered sugar in a food processor and give them a good pulse until the nuts are finely ground. Add them to the meringue, give it a quick fold to break some of the air and then fold the mass carefully until you obtain a batter that flows like magma or a thick ribbon. Give quick strokes at first to break the mass and slow down.The whole process should not take more than 50 strokes. Test a small amount on a plate: if the tops flattens on its own you are good to go. If there is a small beak, give the batter a couple of turns.
Fill a pastry bag fitted with a plain tip (Ateco #807 or #809) with the batter and pipe small rounds (1.5 inches in diameter) onto parchment paper lined baking sheets. Preheat the oven to 300F. Let the macarons sit out for 30 minutes to an hour to harden their shells a bit and bake for 15-20 minutes, depending on their size. Let cool. If you have trouble removing the shells, pour a couple of drops of water under the parchment paper while the sheet is still a bit warm and the macarons will lift up more easily do to the moisture. Don’t let them sit there in it too long or they will become soggy. Once baked and if you are not using them right away, store them in an airtight container out of the fridge for a couple of days or in the freezer.

For the filling:
Half a recipe of Salted Butter Caramel Sauce
100 gr (1/2 cup) sugar
80 gr (3/4 cup) chopped pecans

Make the sauce and refrigerate until cold so it won’t ooze out of your macarons when you sandwich them together (mine only did because it was hot upstairs where I photograph).
For the pecan brittle: Place the pecans on a baking sheet covered with parchment paper or a silicone mat. Place the sugar and 2 tablespoons of water in a heavy saucepan on high heat and cook until you get a golden caramel. Immediately pour it over the pecans and let sit until cold and hard. Crack the brittle in small pieces to fit inside your macarons. Place a about a tablespoon of sauce on one shell, add a piece of brittle and top with another macaron shell.

Gluten Free And Vegan Daring Bakers' Challenge

Gluten Free Crackers and Salted Butter Caramel Sauce


It is indeed a first in the history of the Daring Bakers, a gluten free and vegan challenge! Since being a Daring Baker in December 2006, I have seen the group grow by leaps and bounds, with members from all walks of life partaking in our monthly bake-offs. I know it is daunting at times for some Daring Bakers to adapt recipes to fit their dietary lifestyles and I always marvel at how creative and resourceful gluten free and vegan members are. I was really excited to see that our hostesses this month, Natalie from Gluten A Go Go, and co-host Shelly, of Musings From the Fishbowl, chose Lavash Crackers from Peter Reinhart’s The Bread Baker’s Apprentice: Mastering The Art of Extraordinary Bread.

Natalie being a gluten free baker asked us to challenge ourselves and make the crackers gluten free while Shel asked us to come up with vegan dips and spreads to go along. Being a ubber cool group, we still had the choice to make them with regular flour if gluten free baking did not appeal to us. I welcomed both challenges with open arms! Indeed, there are quite a few gluten free eaters among our friends and family members and I can always stretch my gf baking repertoire. Coming up with vegan dips and spreads was a good opportunity to try a couple of different ingredients, but furthermore really understand and appreciate many people put behind being vegan.

Lavash Crackers and Toppings


The past month has been quite busy and full of twists and turns and I did not get to make the dough until Wednesday afternoon. I used a gluten free baking mix by Bob…..and realised after the first rise that had forgotten to add xanthan gum to the dough which acts like gluten in baked goods and helps stretch and relax the dough. I did not even bother rolling that one out, waited until Thursday to go buy some xanthan gum and started again. The quantities are so small here that I mixed the dough by hand and left it to rise, rolled it paper thin, baked and then broke it to shards. I rolled the dough into one large baking sheet and topped 1/4 with sesame seeds, 1/4 with grated Tonka Beans, 1/4 with cinnamon sugar and the last quarter was brushed with agave syrup and half a vanilla bean, seeded. The smells that were invading the house made it hard to resist not breaking into it as soon as it came out of the oven!!

For the toppings, our hostesses gave us complete freedom with only one rule: it had to be vegan. I was really interested to see how some of my favorites would turn if made vegan and with the tremendous array of choices and progress made in vegan foods, I was able to serve the crackers with a vegan salted butter caramel sauce, a vegan caramel cheesecake in a jar spread and my now favorite lemon balm infused berry salad. I love salted butter caramel anything, not being a fashion victim but I grew up on that stuff!

The salted butter caramel sauce is an adaptation of my favorite sauce and the only problem encountered was that it took a longer time for the butter and sugar to come to a caramel color and consistency but the rest was the same. I used Earth Balance butter and soy creamer instead of their regular counterparts and added some Fleur de Sel for the salty factor. I could taste a difference from the original, sure can’t say it’s the "real thing" but it came out pretty darn close and what mattered is that I was able to make one of my vegan neighbors very very happy!!

The vegan caramel cheesecake is also an adaptation and was easy to make using Ener-G Egg Replacer and vegan cream cheese (Tofutti brand). I divided the batter between four jam/jelly jars and added some salted butter caramel sauce at the bottom. I have to say that B. thought it was "different but worth eating" and I loved it.

The berry salad is nothing new but since I made this lemon balm berry salad, it has been on rotation at the house and for dinner parties with the neighbors. It works just like a savory salsa with the crackers and is great for a little 4 o’clock pick me up with a cup of tea.

Thank you Natalie an Shelly for this opportunity to bake gluten free and vegan! It was a blast! Check out the others' creations here.


Gluten Free Lavash Crackers:

Makes one sheet pan:

1 1/2 cups (6.75 oz) unbleached bread flour or gluten free flour blend (If you use a blend without xanthan gum, add 1 tsp xanthan or guar gum to the recipe)
1/2 tsp (.13 oz) salt
1/2 tsp (.055 oz) instant yeast
1 Tb (.75 oz) agave syrup or sugar
1 Tb (.5 oz) vegetable oil
1/3 to 1/2 cup + 2 Tb (3 to 4 oz) water, at room temperature
Poppy seeds, sesame seeds, paprika, cumin seeds, caraway seeds, or kosher salt for toppings

In a mixing bowl, stir together the flour, salt yeast, agave, oil, and just enough water to bring everything together into a ball. You may not need the full 1/2 cup + 2 Tb of water, but be prepared to use it all if needed.
For Non Gluten Free Cracker Dough: Sprinkle some flour on the counter and transfer the dough to the counter. Knead for about 10 minutes, or until the ingredients are evenly distributed. The dough should be firmer than French bread dough, but not quite as firm as bagel dough (what I call medium-firm dough), satiny to the touch, not tacky, and supple enough to stretch when pulled. Lightly oil a bowl and transfer the dough to the bowl, rolling it around to coat it with oil. Cover the bowl with plastic wrap.
For Gluten Free Cracker Dough: The dough should be firmer than French bread dough, but not quite as firm as bagel dough (what I call medium-firm dough), and slightly tacky. Lightly oil a bowl and transfer the dough to the bowl, rolling it around to coat it with oil. Cover the bowl with plastic wrap.
Ferment at room temperature for 90 minutes, or until the dough doubles in size. (You can also retard the dough overnight in the refrigerator immediately after kneading or mixing).
For Non Gluten Free Cracker Dough: Mist the counter lightly with spray oil and transfer the dough to the counter. Press the dough into a square with your hand and dust the top of the dough lightly with flour. Roll it out with a rolling pin into a paper thin sheet about 15 inches by 12 inches. You may have to stop from time to time so that the gluten can relax. At these times, lift the dough from the counter and wave it a little, and then lay it back down. Cover it with a towel or plastic wrap while it relaxes. When it is the desired thinness, let the dough relax for 5 minutes. Line a sheet pan with baking parchment. Carefully lift the sheet of dough and lay it on the parchment. If it overlaps the edge of the pan, snip off the excess with scissors.
For Gluten Free Cracker Dough: Lay out two sheets of parchment paper. Divide the cracker dough in half and then sandwich the dough between the two sheets of parchment. Roll out the dough until it is a paper thin sheet about 15 inches by 12 inches. Slowly peel away the top layer of parchment paper. Then set the bottom layer of parchment paper with the cracker dough on it onto a baking sheet.
Preheat the oven to 350 degrees Fahrenheit with the oven rack on the middle shelf. Mist the top of the dough with water and sprinkle a covering of seeds or spices on the dough (such as alternating rows of poppy seeds, sesame seeds, paprika, cumin seeds, caraway seeds, kosher or pretzel salt, etc.) Be careful with spices and salt – a little goes a long way. If you want to precut the cracker, use a pizza cutter (rolling blade) and cut diamonds or rectangles in the dough. You do not need to separate the pieces, as they will snap apart after baking. If you want to make shards, bake the sheet of dough without cutting it first.
Bake for 15 to 20 minutes, or until the crackers begin to brown evenly across the top (the time will depend on how thinly and evenly you rolled the dough).
When the crackers are baked, remove the pan from the oven and let them cool in the pan for about 10 minutes. You can then snap them apart or snap off shards and serve.

Vegan Salted Butter Caramel Sauce:
240 gr. sugar (1 1/4 cups)
80 ml water
115 gr vegan butter (1 stick)
150 ml vegan creamer
1 1/2 tsp Fleur de sel

In a heavy saucepan set over low heat, combine the sugar and water and heat just until the sugar is dissolved. Add the butter. Let it come to a boil and cook until it reaches a golden caramel color (takes between 25-35 minutes), stirring occasionally. Remove from the heat and add the creamer ( it will splatter and get crazy, but do not fear and trust the recipe). Whisk to combine and put back on the stove. Let it come to a boil again over low heat and cook 10-15 minutes until you reach a nice creamy consistency. Remove from the heat, add the salt and stir until melted. Keeps for about 2 weeks.

Vegan Caramel Cheesecake In a Jar:
1/2 cup salted butter caramel sauce
8 oz vegan cream cheese, at room temperature
1 Tb. vegan butter
1/2 cup sugar
3 Tb. Egg-Replacer mixed with 1/4 cup water

Divide the caramel sauce between 4 small jam jars. Set aside.
In a large bowl, with the electric mixer or by hand , mix the cream cheese, butter and sugar. Add the egg replacer mixture and beat until well incorporated.
Divide the batter among the 4 jars. Set them in a roasting pan and fill with water until it reaches halfway up the sides of the jars. Bake at 300F for 20-30 minutes. Let cool completely before refrigerating or serving.

Lemon Balm Infused Berry Salad:
Click here for the recipe.

Gluten Free Lavash Crackers And Vegan Spreads

Two Chocolates, Some Salted Butter Caramel Mousse And A Smile On My Face!

Two Chocolates and Salted Butter Caramel Mousse


As you know from my last post, Monday was a pretty rough day, ups and downs, high and lows, laughing at the most ridiculous things and crying over the simplest ones, but I have to thank you for cheering me up and on throughout the day with your words both here and privately. This little giant group of bloggers sure knows how to laugh, cry, send hugs and cheer up and cheer on. Thank you. I wish I could say that to each of you individually but I can’t. Instead I am bringing you a little dessert that is sure to heal a bad case of the blues or just make you feel better after a bad day. Problem is….I could not come up with a name for it and I am hoping that you can. What’s in it for you? Well, I have two copies of Tartine and only one being read so it is up for grabs…skip to the end of the post for details.

It was about 4 o’clock when I finally sat down on the front steps of C’s house, after a day filled with tons of little errands. You know, the ones you keep putting off but suddenly on a bad day they are the perfect thing to do to keep your mind busy and thought free. We started chatting about the kids going back to school, philosophising about the summer and that it had been a pretty rough one for everybody around us for different reasons. Just to think that a couple of months ago they were thinking about moving…I don’t think the neighborhood would be the same kindred one without them and the twins. We did not notice our husbands were doing the same thing but on our front steps until the wind started to carry their voices closer to us. We leaned over and asked what the heck they could be complaining about that we did not already know…"women, kids, pms, mortgages…what about you?", we pushed a united "same here, different gender!" and we all busted out laughing!!

I stood up and exclaimed "Well, I think the situation calls for chocolate and caramel…and a little grill-out with a good bottle of wine!" I asked the gentlemen to please tend to the grilling part that us women are so clueless about and that we would be back with dessert. I had an idea of what I wanted the final taste to be and a vague idea about the process and elements. That’s kind of the way I work with pastry I have noticed. I think of tastes I like together, close my eyes and try to imagine the texture, what flavor comes through first, which one is the last I want to keep. Then I think of the building process, kind of like playing Tetris with ingredients and ratio…sometimes it all fits together, sometimes the Tetris-like pieces catch up with me before I get right and I have got to start over. If you play Tetris, do you still see the pieces go down when you close your eyes after a game? I do…makes me laugh….

I had rearranged the pantry a couple of days prior to this story and had found an unexpected bar of dark chocolate, one of milk chocolate and a bag of salted butter caramel from Normandy…I had a square of chocolate followed by salted butter caramel (I did drop the pms word earlier, remember?!) and thought to myself that these three fellas needed to end up together in a dessert somehow. By Monday evening I had a plan: a dark chocolate and walnut fudgy brownie, a milk chocolate and salted butter caramel mousse, topped with chocolate ganache. Yes, I know there is one more element in the pictures, the little cut out triangles and squares are actually coffee jelly pieces but they did not turn like I wanted so it will be re-worked and blogged another time. I could not resist making some hot chocolate to go with it and it turned out to be very fitting to the windy and rainy evening we ended up having.

Two Chocolates and Salted Butter Caramel Mousse


And this is where I need you, I turned this in my head in every which way possible and I can’t come up with one name that makes me say "that’s it! I want it!"…and I really hope you can. All you have to do is leave a comment between Thursday August 21st and Saturday August 23rd at midnight eastern time and I will submit each title to the group who shared those with me and let them pick the one they like best. Think about it as playing Tetris with the chance to add a fantastic cookbook to your collection!

Something chocolate and caramel:

Makes 16 servings (you can even cut the bars tinier if you want)

Dark Chocolate Walnut Brownie base:

6 tablespoons unsalted butter
6 ounces bittersweet chocolate
3/4 cup all-purpose flour
1/4 teaspoon baking powder
1/8 teaspoon salt
2 large eggs
3/4 cup sugar
2 teaspoons pure vanilla extract
1/2 cup chopped walnuts

Preheat oven to 350°. Line an 9×13 inch baking dish with parchment paper or foil, leaving a 2 inch overhang on to sides (you pick). Coat with cooking spray or a dab of butter.
Melt together butter and chocolate in a heatproof bowl set over a pot of simmering water. Remove the bowl from heat and stir until smooth. Let the chocolate mixture cool slightly.
Whisk together the flour, baking powder, and salt in a medium bowl and set aside.
In the bowl of an electric mixer fitted with the paddle attachment, beat the eggs with the sugar and vanilla until pale and thick, about 3 minutes. Beat in the chocolate mixture. Add the flour mix and beat until just incorporated, scraping down the sides of the bowl as needed. Fold in the walnuts with a spatula.
Transfer the batter to the prepared pan, and smooth top with an spatula. Bake until a cake tester inserted into brownie between edge and center comes out with a few crumbs, 30 to 35 minutes, depending on your oven (Do not overbake.) Let cool 15 minutes; lift out of pan, and transfer to a wire rack. Let cool completely. Line a 9×9 inch square pan with parchment paper or plastic wrap. Cut your brownie base to fit inside the square pan, and set it down as your first layering component. Munch on the leftover or cut in little bites and cover with ganache for instant petits fours. Proceed to the rest of the recipe.

Milk Chocolate and Salted Butter Caramel Mousse Layer:

1/2 cup granulated sugar
2 Tb water
2 Tb salted butter, room temperature
1 cup heavy cream, divided
6 oz (3/4 cup) milk chocolate

Measure 3/4 cup of cream and refrigerate, this portion will be used to make whipped cream so keep it well chilled. In a microwave or small saucepan, heat the 1/4 cup remaining until it is fairly hot. It will be added to the caramel and by being hot it will prevent the caramel from seizing on you and clumping up.
Melt the chocolate in the microwave or in an heatproof bowl set over a pot of simmering water (make sure the bottom of the bowl does not touch the water). Set aside.
In a heavy bottomed saucepan, add the sugar to the water over medium high heat and cook, without stirring until you get a dark brown caramel. Take the pan off the heat and add the butter and 1/4 cream. It will bubble like mad but it will not run over….if the butter and cream are not cold the bubbling will be minimal and short lived. Stir with a wooden spoon to smooth the caramel if necessary. Let it cool to lukewarm. Add the caramel to the chocolate and stir until smooth.
Whip the remaining heavy cream to soft peaks in the bowl of a stand mixer fitted with the whisk attachment. Fold 1/3 of the whipped cream to the chocolate/caramel to loosen it up and then add the remaining whipped cream. Spread over the brownie base and refrigerate until completely set.

Dark Chocolate Ganache:
1/2 cup heavy cream
3/4 cup dark chocolate

In a medium saucepan, bring the cream to a simmer, remove from the heat. Add the chocolate to the cream and let sit for 5 minutes. Slowly stir the heavy cream and chocolate until they come together and form a shiny ganache. Let cool. You want the ganache to still be pourable but not too warm that it will melt the mousse.
Spread it over the caramel mousse and refrigerate until set.

To serve: lift the dessert out of the pan and trim the sides with a sharp knife (heated under hot water and wiped dry works great too), cut into the desired number of servings and enjoy.

Hot Chocolate And Some Caramels

Cashew Gateau With Coffee Cardamom Mousse

Cashew Cake and Coffee Mousse


Thank you all for the very nice birthday wishes for my mother, she truly appreciated the thought. Funny story about birthdays in my family and birthdays phone calls especially: my grandmother had the habit to see whom of her children would call her first to wish her a happy birthday. When I called my mom on Tuesday, I immediately said "I know I am not the first but I am the furthest…that’s got to count!".

Anyways, back to today’s dessert… I can’t plan..Let me rephrase this: I can’t plan to have a distraction free day because we all know that concept never truly works. I had planned yesterday to be a writing day punctuated by a few walks with the dogs, a couple of play breaks with them and the neighbors' kids, no grocery shopping, no baking commitment, no visits, no errands…just me and my thoughts. Ha! I should have checked the weather channel because as soon as I woke up the rain had decided to fall hard and steady, which meant no walks with the dogs, no play time nextdoor. Thus I had two crazy monkeys on my hands who all of a sudden had decided to team up to tear the house apart when I was not looking. I am still laughing when I think about the tricks those two played on me!

It all started when I was sipping my coffee looking at the creek and the rain…and the high tide…tidal creek during high rain equals a big puddle in your yard and a creek boat (think small fishing tin there people….we’re not the yacht type) that threatens to float away. B. went outside to tighten the rope, the dogs followed and found the yard, sorry puddle…and all hell broke lose. They played fetch with each other for thirty minutes and all we could do was watch. Watch them turn from beige to black really…Two bathes and numerous towels later and everybody settled down…a little. By then I had lost my writing mojo and decided to bake instead. At least it was easier to stop their shenanigans with a whisk in my hand than a thought up in the air.

Baking did take place but not in the case of this cake. How can I make a cake without turning the oven on? Recycling….When we did the last Daring Bakers challenge I did the whole batter but baked a 6 inch cake for the challenge and a 8 inch cake that I froze, not really sure of what I would use it for. I got a call from a friend Tuesday morning and told her to come by meet the puppy later that day over coffee and cake. I thawed the cashew gateau and started working on a filling when she called to cancel: her best laid plans got also derailed that day. We reset for the day after (gosh I have never written anything with that much timeline involved!), which turned out great given the way my rainy day was shaping up.

Stained Caramel Window


For the cake I used pastry rings to cut out 4 rounds into the cake and split those minis in half. I used one half at the bottom of each ring, topped them with a simple coffee and cardamom mousse, (you might have extra mousse in which case I recommend you divide it into glasses and eat as is. It is easier to make the full amount and have extra than the opposite. It is really good on its own), one more layer of cake and let them set in the fridge overnight. Wednesday morning I topped each mini cake with a dark chocolate ganache. The inspiration for the caramel stained "glass" panel comes from my grandmother (same one!) who used to say "I don’t care if it rains as long as there is some sun and some colors somewhere". I feel the exact same way but since there was no sun in sight I decided there would be colors then! I go a lucky break of 20 minutes to take some pictures and walk the crazy monkeys. Not too bad a day after all.

Cashew Gateau With Coffee Cardamom Mousse:

Serves 4

For the gateau:
3/4 cups cashew, toasted/skinned
1/3 cup cake flour, unsifted
1 Tbsp. cornstarch
3 large egg yolks
1/2 cup sugar, divided (2Tb & 6 Tb)
1/2 tsp. vanilla extract
½ tsp. grated lemon rind
2 lg. egg whites
2 Tb melted butter, cooled

Position rack in the lower 3rd of the oven and preheat to 350 degrees. Grease and flour a 8” X 4” inch round springform pan. Using a food processor, process nuts, cake flour, and cornstarch for about 30 seconds. Then, pulse the mixture about 10 times to get a fine, powdery mixture. While you want to make sure there aren’t any large pieces, don’t over-process. Set aside.
Put the yolks in the bowl of an electric mixer, with the paddle attachment, and beat until thick and light in color, about 3-4 minutes on med-high speed. Slowly, add 8 Tb of sugar. It is best to do so by adding a tablespoon at a time, taking about 3 minutes for this step. When finished, the mixture should be ribbony. Blend in the vanilla and grated lemon rind. Remove and set aside.
Place egg whites in a large, clean bowl of the electric mixer with the whisk attachment and beat on medium speed, until soft peaks. Increase to med-high speed and slowly add the remaining 2 Tb of sugar, over 15-20 seconds or so. Continue to beat for another ½ minute. Fold the yolk mixture to the whites. Pour the warm butter in a liquid measure cup (or a spouted container). Put the nut meal in a mesh strainer (or use your hand – working quickly) and sprinkle it in about 2 tablespoons at a time – folding it carefully. Be sure to exclude any large chunks/pieces of nuts. Again, work quickly and carefully as to not deflate the mixture. When all but about 2 Tbsp. of nut meal remain, quickly and steadily pour the warm butter over the batter. Then, with the remaining nut meal, fold the batter to incorporate. With a rubber spatula, transfer the batter into the prepared pan, smoothing the surface with the spatula or back of a spoon. Tap the pan on the counter to remove air bubbles and bake in the preheated oven for 30-35 minutes. You’ll know the cake is done when it is springy to the touch and it separates itself from the side of the pan. Remove from oven and allow to stand for 5 minutes. Invert onto a cake rack sprayed with nonstick coating, removing the pan. Cool the cake completely.

For the coffee cardamom mousse:
1/2 teaspoon ground cardamom
1/2 cup espresso or strong coffee
1/4 cup sugar
1 tsp powdered unflavored gelatin, softened in 1 tablespoon cold water
1 cup heavy cream, cold

In a mediu saucepan, bring the coffee, sugar and cardamom to a simmer. Remove from the heat and stir in the gelatin until it is completely dissolved. Let cool to room temperature. In the bowl of a stand mixer with the whisk attachment or with hand held beaters with balloon whisks, whipe the cream just until it holds stiff peaks, do not overbeat or it will become grainy and separate. Add a small amount first to the coffee mixture to loosen up the batter, slowly fold the rest of the whipped cream. Do not let it set completely before using it for the cake filling (have your cake baked, cooled, and cut before using)

For the chocolate ganache:
1/2 cup heavy cream
3/4 cup chopped chocolate or chocolate chips (about 6 oz or 180 gr)

In a medium saucepan, bring the cream to a simmer, remove from the heat and add the chocolate. Let it sit for 5 minutes so that the chocolate starts to melt then slowly stir the cream and chocolate until they come together to make the ganache. Let cool slightly before using it over the cakes.

To assemble:
Cut 4 rounds out of the 8 inch cake and cut each round in half. Using 4 3 inch round pastry rings, place a cake round at the bottom of each ring, top with about 1/4 cup of coffee mousse, top with another cake round and let sit overnight. In the morning, make the ganache. Line a sheet pan with a sheet of parchment paper, position a cooling rack or a grid over it, position your cake over the grid and slowly pour the ganache over all the cakes to cover the completely. Rap the sheet over the counter top (be gentle, no jumping cakes allowed!), to let the ganache fall evenly. Let them set in the fridge for a couple of hours. You can dust them with a good coat of cocoa powder if desired like I did here.

For the stained glass caramel windows:
250gr sugar (1 cup)
37.5 ml water (35 gr) (2 1/2 Tb)
various food colorings

Line a baking sheet with parchement paper. Drop a few drops of food coloring onto the paper. Do not touch them, sirl them or move them.
In a heavy saucepan, combine the sugar and water, do not stir and bring to a boil over high heat. Continue to boil until the caramel reaches the soft crack stage or 140C – 285F on a candy thermometer (do not let it turn color). Immediately pour over the parchment paper with the food coloring. Take the baking sheet with your hands and move it left to right, right to left to move and swirl the colors. Let set until completely cooled. Break pieces of your desired size to decorate the cakes with.

Cashew Cake And Coffee Mousse

Daring Bakers' Nut and Chocolate Gateau

Cashew Praline Gateau-Copyright©Tartelette 2008 First I would like to start this post by dedicating it to Sher from What Did You Eat? and fellow Daring Baker who past away last week. This past Sunday, a lot of bloggers honored her memory by cooking something from her site. We were in celebratory birthday mode on Sunday for my husband so I never got around to it. I did look through her desserts archives and noticed that a lot of them were previous Daring Bakers' challenges…so here is to you Sher, because I know we almost did have the same thought that a chocolate bath can’t be such a bad thing after all! You are missed and loved all over the world. It is definitely strange without you around today, "reveal day", but I’ll just come and say hey anyway.

Our host this month was wild red headed Chris from Mele Cotte who chose a Filbert Gateau with Praline Buttercream from "Great Cakes" by Carol Walter. I had the pleasure of meeting Chris in the flesh this month after many months of chatting over the phone, so you could say we are "friends". That did not stop me from telling her last night that I approached this challenge not as enthusiastically as I usually do. It’s been around 100F (no kidding) and over almost everyday here, and very humid with thunderstorms almost every afternoons so making a cake while in the middle of another baking project did not make me jump up and down. Filberts (hazelnuts) are quite pricey here and the baking budget is pretty much well spent already. In July, I crave ice creams and fruits and I would probably not tackle a multi part "gateau' unless asked to. Oh wait! I was asked to, by Chris and B. needed a proper birthday cake too! The fact that Chris came to visit with a tote full of nuts (yeehaw) and other goodies also gave me another reason to roll up my sleeve and get down and dirty with this cake.

Cashew Praline Gateau-Copyright©Tartelette 2008
I am glad I did. The genoise part was light and flavorful, the praline buttercream perfectly balanced in sweetness and nuts and the chocolate ganache rich and delicious. I chose to go with cashews instead of hazelnuts in the cake, (although I prefer hazelnuts in all nutty things) did a cashew praline for the buttercream. One requisite was to use a layer of apricot glaze underneath the chocolate ganache but I am a very peculiar bird who does not like fruit messing with my chocolate (no dipped candied orange segments for me or chocolate-raspberry anything…can’t stand it, there I said it), so I did a salted butter caramel sauce instead. I was going to use mango jam I had just made but change my mind at the last minute.

Since I was essentially making it for B’s birthday and it was a small gathering, I baked and filled a 6 inch round cake and I still have a 8 inch cashew gateau ready to be used in the freezer (ah the possibilities!). I am glad Chris gave us many options to play around with because I used to the max to make a cake that everyone at the dinner table would enjoy. I left the liqueur out of the buttercream and used half a vanilla bean instead of extract. The soaking syrup for the cake was made with rum (per the recipe) with the addition of lime zest and lime juice. The chocolate glaze required corn syrup and I substituted honey instead to give a little flavor while I removed the alcohol part of it.

We did have to keep the cake round but decorations were left up to us as long as some of the buttercream made it "on" the cake. I almost read through that line without registering. As I was putting the decorations up on the cake, I stopped, "what was it again about the buttercream?" Gah…got to find its way on top somehow….Oh good, I just needed some "glue" to anchor the shards white chocolate bubble wrap! I dipped some cashews in caramel (dry sugar method) and played around with caramel strands too. I think everything "required" ended up in the cake, albeit modified since we could play around. Well, maybe not, I did skip the "clarified butter" and used just plain melted butter without an issue in my cake rising or changing in texture. Oh, oh…almost forgot, since we had the option of using of a layer of whipped cream with the buttercream, I prefered to opt out. There was just something rubbing me funny with whipped cream on buttercream on cake. I "love" buttercream you see so masking it with whipped cream would have been a shame in my opinion, especially with a praline buttercream.

This cake was like a little Christmas in July and I am glad there were outside forces helping me wrap my mind and time around making it. That’s what I like about being a Daring Baker, that "may the making force be with you" attitude that make us dive in into big pools of butter, flour, sugar and/or chocolate at any given month! Thank you Chris for choosing a tasty cake and thank you Ivonne and Lisa for all the tremendous work done to keep it organised and civilised. Bake on!

Cashew Praline Gateau-Copyright©Tartelette 2008 With the heat and humidity the caramel strands lasted about 2 minutes. See…there is buttercream sneaking its way on the gateau!

Cashew Gateau with Praline Buttercream, adapted from Great Cakes by Carol Walter

Cashew Genoise
1 ½ cups cashew, toasted/skinned
2/3 cup cake flour, unsifted
2 Tbsp. cornstarch
7 large egg yolks
1 cup sugar, divided ¼ & ¾ cups
1 tsp. vanilla extract
½ tsp. grated lemon rind
5 lg. egg whites
¼ cup melted butter, cooled

Position rack in the lower 3rd of the oven and preheat to 350 degrees. Grease and flour a 10” X 2” inch round cake pan. Using a food processor, process nuts, cake flour, and cornstarch for about 30 seconds. Then, pulse the mixture about 10 times to get a fine, powdery mixture. While you want to make sure there aren’t any large pieces, don’t over-process. Set aside. Put the yolks in the bowl of an electric mixer, with the paddle attachment, and beat until thick and light in color, about 3-4 minutes on med-high speed. Slowly, add ¾ cup of sugar. It is best to do so by adding a tablespoon at a time, taking about 3 minutes for this step. When finished, the mixture should be ribbony. Blend in the vanilla and grated lemon rind. Remove and set aside.
Place egg whites in a large, clean bowl of the electric mixer with the whisk attachment and beat on medium speed, until soft peaks. Increase to med-high speed and slowly add the remaining ¼ cup of sugar, over 15-20 seconds or so. Continue to beat for another ½ minute. Fold the yolk mixture to the whites. Pour the warm butter in a liquid measure cup (or a spouted container). Put the nut meal in a mesh strainer (or use your hand – working quickly) and sprinkle it in about 2 tablespoons at a time – folding it carefully. Be sure to exclude any large chunks/pieces of nuts. Again, work quickly and carefully as to not deflate the mixture. When all but about 2 Tbsp. of nut meal remain, quickly and steadily pour the warm butter over the batter. Then, with the remaining nut meal, fold the batter to incorporate. With a rubber spatula, transfer the batter into the prepared pan, smoothing the surface with the spatula or back of a spoon.
Tap the pan on the counter to remove air bubbles and bake in the preheated oven for 30-35 minutes. You’ll know the cake is done when it is springy to the touch and it separates itself from the side of the pan. Remove from oven and allow to stand for 5 minutes. Invert onto a cake rack sprayed with nonstick coating, removing the pan. Cool the cake completely.*If not using the cake right away, wrap thoroughly in plastic wrap, then in a plastic bag, then in the refrigerator for up to 3 days. If freezing, wrap in foil, then the bag and use within 2-3 months.

Sugar Syrup
1 cup water
¼ cup sugar
2 Tbsp. dark rum
zest and juice of one lime

In a small, yet heavy saucepan, bring the water and sugar to a boil and simmer for 5 minutes. Remove from heat, add the liqueur,lime zest and juice. Cool slightly before using on the cake.

Praline Buttercream
1 recipe Swiss Buttercream
1/3 cup praline paste

Blend ½ cup buttercream into the paste, then add to the remaining buttercream. Whip briefly on med-low speed to combine.

Swiss Buttercream
4 lg. egg whites
¾ cup sugar
1 ½ cups (3 sticks) unsalted butter, slightly firm
1/2 vanilla bean, cut open and grated

Place the egg whites in a large bowl of a electric mixer and beat with the whisk attachment until the whites are foamy and they begin to thicken (just before the soft peak stage). Set the bowl over a saucepan filled with about 2 inches of simmering water, making sure the bowl is not touching the water. Then, whisk in the sugar by adding 1-2 tablespoon of sugar at a time over a minutes time. Continue beating 2-3 minutes or until the whites are warm (about 120 degrees) and the sugar is dissolved. The mixture should look thick and like whipped marshmallows. Remove from pan and with the whisk attachment, beat the egg whites and sugar on med-high until its a thick, cool meringue – about 5-7 minutes. Set aside. Place the butter in a separate clean mixing bowl and, using the paddle attachment, cream the butter at medium speed for 40-60 seconds, or until smooth and creamy. Keep the butter around 65F. On med-low speed, blend the meringue into the butter, about 1-2 Tbsp. at a time, over 1 minute. Add the vanilla bean seeds and mix for 30-45 seconds longer, until thick and creamy.Refrigerate 10-15 minutes before using.

Praline Paste
1 cup (4 ½ oz.) cashews, toasted/skinless
2/3 cup sugar

Line a jelly roll pan with parchment and lightly butter. Put the sugar in a heavy 10-inch skillet. Heat on low flame for about 10-20 min until the sugar melts around the edges. Do not stir the sugar. Swirl the pan if necessary to prevent the melted sugar from burning. Brush the sides of the pan with water to remove sugar crystals. If the sugar in the center does not melt, stir briefly. When the sugar is completely melted and caramel in color, remove from heat. Stir in the nuts with a wooden spoon and separate the clusters. Return to low heat and stir to coat the nuts on all sides. Cook until the mixture starts to bubble. Then onto the parchment lined sheet and spread as evenly as possible. As it cools, it will harden into brittle. Break the candied nuts into pieces and place them in the food processor. Pulse into a medium-fine crunch or process until the brittle turns into a powder. To make paste, process for several minutes. Store in an airtight container and store in a cook dry place. Do not refrigerate.

Salted Butter Caramel Sauce
See here (I used about 2/3 of a cup)

Ganache Glaze
6 oz. (good) semisweet or bittersweet chocolate
6 oz. (¾ cup) heavy cream
1 tbsp honey
¾ tsp. vanilla
½ – 1 tsp. hot water, if needed

Break the chocolate into 1-inch pieces and place in the basket of a food processor and pulse until finely chopped. Transfer into a medium sized bowl and set aside. Heat the cream and honey in a saucepan, on low, until it reached a gentle boil. Once to the gently boil, immediately and carefully pour over the chocolate. Leave it alone for one minute, then slowly stir and mix the chocolate and cream together until the chocolate is melted and incorporated into the cream. Add the vanilla. If the surface seems oily, add ½ – 1 tsp hot water. The glaze will thicken, but should still be pourable. If it doesn’t thicken, refrigerate for about 5 minutes, but make sure it doesn’t get too cold!

Assembling Cake
Cut a cardboard disk slightly smaller than the cake. Divide the cake into 3 layers and place the first layer top-side down on the disk. Using a pastry brush, moisten the layer with 3-4 Tbsp. of warm sugar syrup. Measure out 1 cup of praline buttercream and set aside.
Spread the bottom layer with a ¼-inch thickness of the remaining buttercream. Place the middle layer over the first, brush with sugar syrup, spreading with buttercream. Moisten the cut side of the third layer with additional sugar syrup and place cut side down on the cake. Gently, press the sides of the cake to align the layers. Refrigerate to chill for at least 30 minutes. Brush the top and sides of the cake with cooled caramel sauce, sealing the cut areas completely. Chill while you prepare the ganache.Place a rack over a large shallow pan to catch the ganache drippings. Remove the gateau from the refrigerator and put it the rack. With a metal spatula in hand, and holding the saucepan about 10 inches above the cake, pour the ganache onto the cake’s center. Move the spatula over the top of the ganache about 4 times to get a smooth and mirror-like appearance. The ganache should cover the top and run down the sides of the cake. When the ganache has been poured and is coating the cake, lift one side of the rack and bang it once on the counter to help spread the ganache evenly and break any air bubbles. (Work fast before setting starts.) Patch any bare spots on the sides with a smaller spatula, but do not touch the top after the “bang”. Let the cake stand at least 15 minutes to set after glazing.

Cashew Praline Gateau-Copyright©Tartelette 2008 Hellooooo there little slice 🙂