
blogging event

Apple And Thyme: Pear Tart With Grandma And Mom

It’s interesting how life comes at you full force, sometimes from people you don’t even know.
A few weeks ago one member of the Daring Bakers, Inge, posted an event she was hosting to honor the women, be it moms or grandmothers (or any person special to us) who influenced us in the kitchen. The event, Apple and Thyme, was somewhat prompted by the fact that a blogging friend of hers, Jeni from the Passionate Palate, had just lost her mother to a long battle with cancer.

Losing is the right term when it comes to loved ones, especially mothers. You lose a bit of your essence, a small part of your flesh is ripped and your heart is taken away from away from you. The hurt and the pain diminish with time but never really go away. I am sorry that Jeni had to experience such a tragedy. I often think about the pain my own mother must feel day in day out after losing her own mother and it just breaks my heart. I can’t think about a day without my mom, even though we do not talk on the phone everyday or even when sometimes we don’t really like each other (hey, we all have our moods!). Jeni, I offer you my deepest condolences and thank you for reminding me to hug my mom, even if only in my dreams.

If you have been reading this blog for a while, you know how deeply my grandmother has influenced my baking. She had that magical touch…you would come to visit and within half an hour the table was set with a wonderful spread of foods. It seemed almost effortless to her to come up with the most delicious foods. I used to believe my grandmother was this goddess of the kitchen, even when she was too frail from battling cancer. It’s not that I thought less of my mother’s cooking and baking, don’t get me wrong, but I felt like my mother was showing me the ropes, the behind the scenes, while grandma was giving me the picture perfect, no mise-en-place necessary final product.

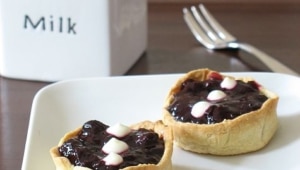
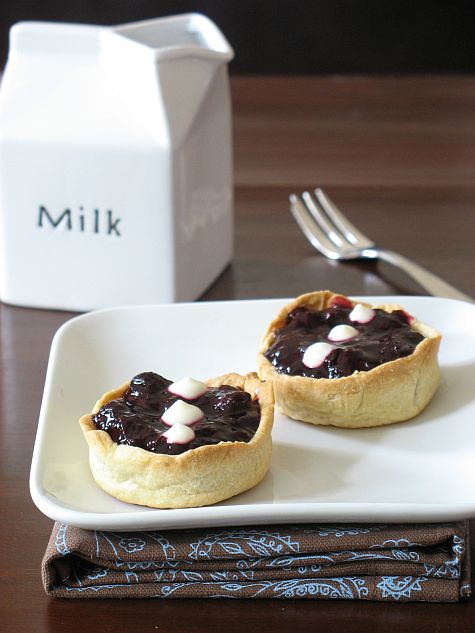
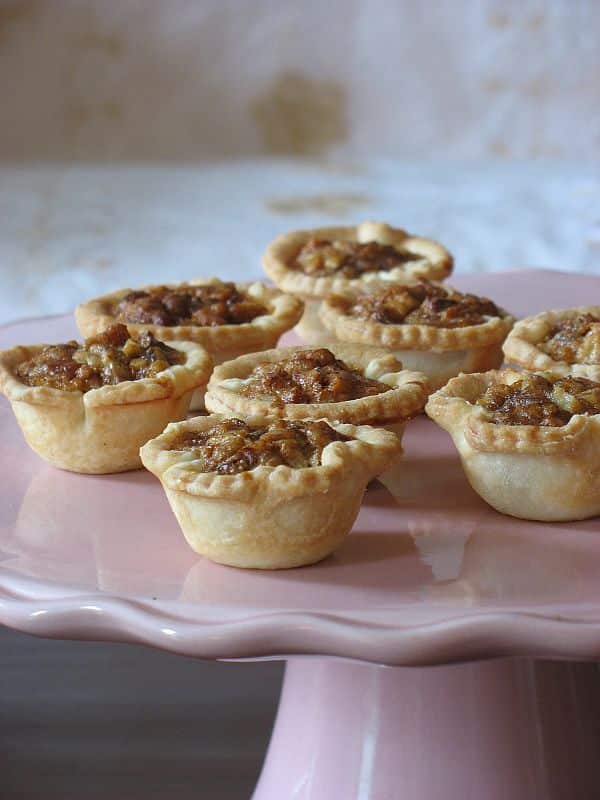
My mother is more of a cook than a baker but when she tackles the dough, man! She is good! Just as good as her own mother and I hope I am up to par with their talent. Most French house cooks and bakers do not make elaborate 5 courses meal or produce 3 layer mousse cakes every day of the week. We make yogurt cakes, chocolate mousses, clafoutis, flans, and tarts….lots of tarts!! I think the first item I ever baked was a tart, maybe a quiche, something with a crust, something with a filling, something with cream….and I got hooked, hence the blog name "Tartelette"…. There is always a tart of some sort in the fridge…no lie. Well, except tonight because I finished the last slice of this one. I love the contrast between crust and filling, the endless possibilities of ingredients combination. If a tart had a cousin, it would be a salad: both can be as rustic or elaborate as you wish, both can make a meal (savory tart) or a side, both make use of seasonal produce or what is overripe in the fruit basket and both adapt to a myriad of cultures and cuisines.

I remember my mother and grandmother teaching me the A,B,Cs of tart doughs, "pate sablee, pate brisee, pate feuilletee" (shortbread, basic, puff pastry), and I grew up making my doughs from scratch every time. Even when the times brought packages of ready made tart dough at the grocery store, they were still making them from scratch most of the time. It always seemed funny to me to buy them only to have them remain in the fridge drawer. "Juste au cas ou" …just in case. But again, "just in case" never usually happens in France…because nobody drops in "just like that"…we are a nation of planners you see, so there is always plenty of time to make dough…but that aspect of French culture is for another post. I have one of those pre-made dough in my fridge actually…and you know what? I think I ought to throw it away…it’s been there for a while and probably will never get used…why? In my mind, there is nothing like homemade: it is neither labor nor time consuming and if you are really lazy, you can turn a dough in your food processor in less than 5 minutes. A little resting time, a little rolling and "hop" you’re there…

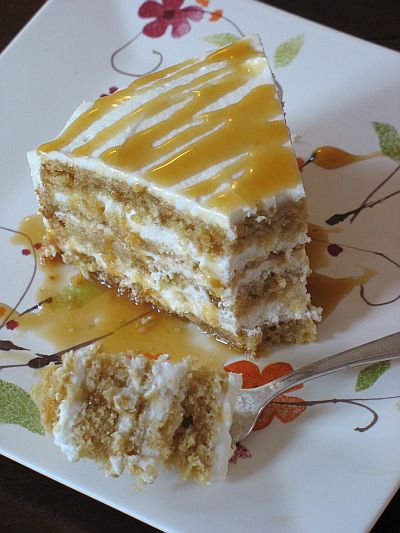
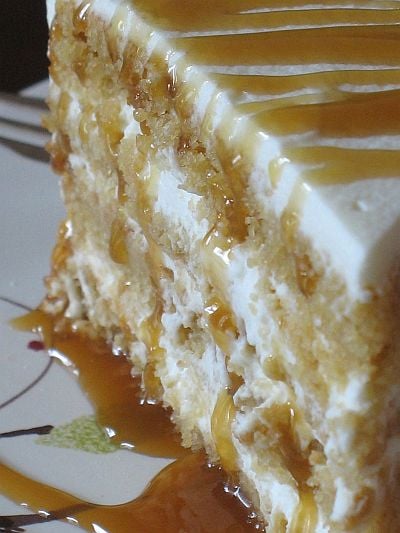
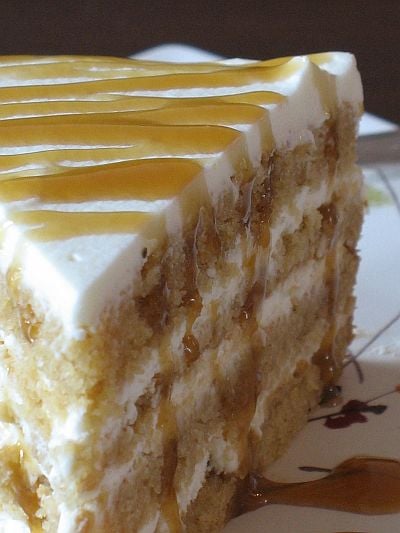
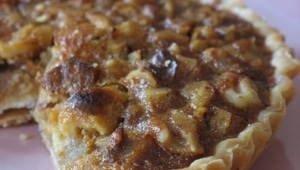
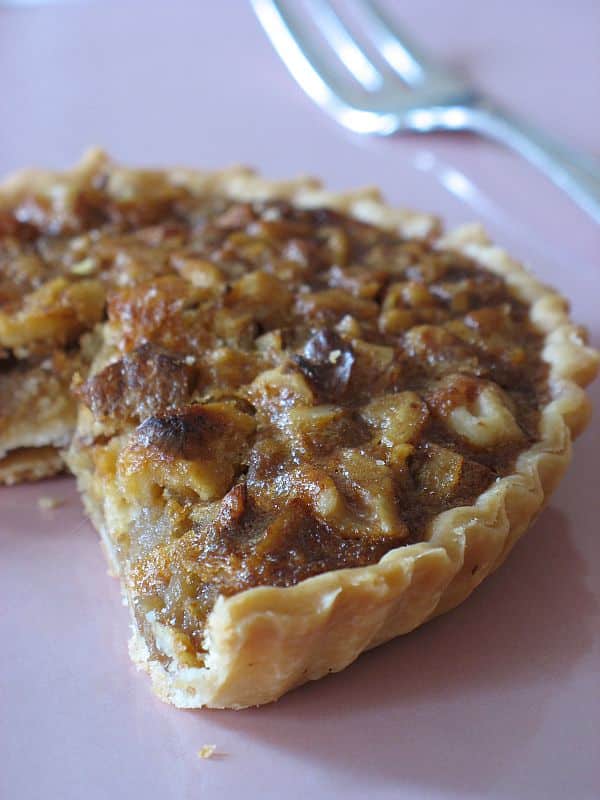
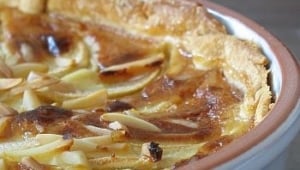
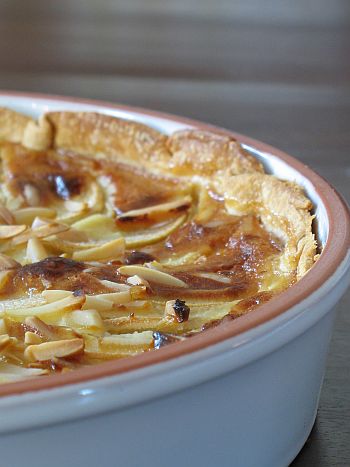
For this particular tart to pay tribute to both my mother and grandmother I have chosen one of our favorite combination: pears and almonds. I miss you grandma and mom, and hope I make you proud everytime I step in and out of the kitchen.


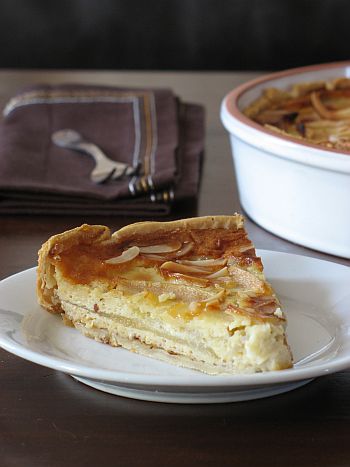
Pear And Almond Tart

Makes one 10 inch tart.

Crust:
1 1/4 cups all-purpose flour
1 1/2 Tbs sugar
1/2 cup chilled (1 stick) unsalted butter, cut in pieces
2 Tbs ice water
1 egg yolk, lightly beaten

Place flour and sugar in the bowl of a food processor, and process for a few seconds. Add butter, and process until the mixture resembles coarse crumbs. Add the ice water then the egg yolk, processing just until the dough holds together. Do not process for more than 30 seconds. Turn the dough out onto a work surface. Place on a sheet of plastic wrap. Flatten, and form into a disc. Wrap, and refrigerate at least 1 hour before using.
Preheat oven to 350F and blind bake the tart shells: roll the dough out on a lightly floured surface, lay into tart shell, cover with parchment paper or foil, pour dry beans or pie weights on top and bake fro 15 minutes. Let cool before proceeding.

Filling:
2 large pears, peeled and cored, thinly sliced (I chose Comice for this tart)
3 eggs
1/2 cup sugar
1/2 cup ground almonds
1 cup milk
1/2 cup heavy cream
1/4 cup slivered almonds

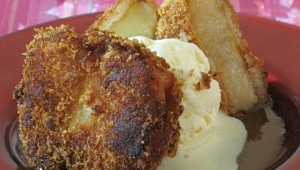
In a large mixing bowl, whisk together the eggs and the sugar until pale. Whisk in the ground almonds, milk and cream. Pour into the cooled pie shell, leaving about a 1 inch border so that the batter does not overflow when you arrange the ears on top. Arrange the pear slices over the top and sprinkle with the slivered almonds. Bake at 350 until golden brown, do not worry if it still wiggles a bit in the middle, the custard will keep on setting once removed from the oven. Serve warm or at room temperature…oh heck! Eat it anyway you want, it is darn good even cold!!

Waiter There Is Something In My…Butterscotch Mascarpone Cream Layer Cake!

It seems like an eternity since I have participated in a WTSIM event, and that is not for lack of ideas, recipes or just plain desire to get in the kitchen and cook, but pure and simple lack of time. Oh sure, there are lots of baking going on in the house, but with all the visitors we have had lately I rely on tried and true, easy to come together desserts, most of which have already been published here…except this one Butterscotch Mascarpone Cream Cake…..And it has been a long time coming believe me!

Let’s see if I can make a long story short about that one (can I do that?!)…When I first visited Lisa last July, she had received a an issue from the magazine Wicked, a special publication from The Australian Women’s Weekly dedicated to pastries and sweets. I remember looking at every recipe and drooling over them and the pictures. Her printer had a little malfunction that time, believe me it was all my fault, I just have to stare at anything plugged or battery operated for it to break down,….anyway, life took over and we both forgot about the pages I had marked in the magazine. This time around though, I went ahead and copied them by hand. I always do that, not that I don’t trust the machine, but over the years I have developed my own recipe writing pattern, especially if I am at someone’s house or the library and have minimal space to write them on. Back home this week, I quickly flipped my notebook to the Butterscotch Cake recipe..what’s not to love in caramel, mascarpone and tender flaky cake? Nothing, trust me!!

I thought it was also a tasty cake to add to Waiter There Is Something In My ….Layered Cakes, hosted this month by Andrew from Spittoon Extra


Butterscotch Mascarpone Cream Layer Cake:

Serves 10-12

For the Cake:
250 gr. butter, softened
1 cup packed dark brown sugar
2 eggs
1 Tb. honey
1 1/4 self rising flour (I used 1 1/4 cup all purpose flour and 1 1/2 tsp. baking powder)
1/2 cup milk

Cream together the butter and sugar. Beat in the eggs, one at time. Add the honey and flour. Add the milk slowly and mi until combined. Pour into 2 8-inch cake pans and bake at 350F for 45 minutes, or until a knife inserted in the middle comes out clean. Let cool and unmold. Cut each cake in half.

For the Mascarpone Cream:
250 gr. mascarpone, at room temperature
300 ml. heavy whipping cream
1/4 cup powdered sugar

Whip the heavy cream and sugar to soft peaks. Fold it into the mascarpone and spread 1/4 on one cake layer, repeat with all the cake layers, finishing with the cream on top.

For the Butterscotch Sauce:
60 gr. butter
1/4 cup dark brown sugar
1/4 cup milk
1 1/2 cups powdered sugar

Heat the butter, sugar and milk until dissolved. Remove from the heat and add the powdered sugar, stir until smooth.

Apple Beignets And Cheesecake Ice Cream


Waking up this morning after getting in town late last night I really wished I had saved a couple of these beignets to pan fry and have along with my coffee….But no I was too greedy as they were made last week and eaten right before I went to spend the weekend at Lisa’s house with Mary. My original intention was to post them for Sugar High Friday, hosted this month by Andrew. I believe I am a day late but I will send him my entry nonetheless and see if he accepts it.

It is good to be home, sleep next to my husband and waking up with my dog curling with me on the bed. I have a lot to tell you about this past weekend. So many emotions, laughs, good times, foods and desserts to think over and straighten in my head before I can write more about it all. What can I say…there was cheese, wine, markets, ethnic foods, homemade bread, benne seed wafers, pecan sandies, a giant German chocolate cake, Trader Joes, Sur La Table (aka "On The Table") and Crate and Barrel. We did a lot, drank a lot, baked a lot. My heart, eyes and head are still full of all the precious time I have had with Lisa and Mary. So stay tuned for a more detailed account….one more guest arriving tomorrow and then I regain my sanity back (we hope!)

Back to the apple beignets…Ever since I was a child, I have been in love with them convincing myself that the frying oil effects were completely negated by the healthy aspect of the fruit..hummhumm. I went for a more grown up version this time, using the same method I had tried before (here) adapting it for apples. The fruit is first dipped in a light batter then coated with Panko breadcrumbs and then fried. You could deep fry the beignets but I did mine in a cast iron pan with about 2 inches of oil heated to 350F. The ice cream is once again nothing new, but a flavor I try to keep around as much as possible because we seem to go through it like crazy.
The result exactly what I had hoped for, a childhood favorite adapted for my grown up palate as there is alcohol in the batter. Serve as soon as they come out of the frying pan, with a glass of cider and you’re set!

Apple Beignets, adapted from Richard Leach:

2 Tb light brown sugar mixed with 2 Tb. granulated sugar
1/2 cup + 2 Tb flour
1/4 cup granulated sugar
1 1/2 tsp. baking powder
1/2 cup cider (the alcohol based one)
4 apples
1 cup Panko breadcrumbs
vegetable oil for frying

Preheat oven to 275F.Core the apples (do not peel) and cut them in half. Sprinkle with the sugar mix and bake for 30 minutes. Let cool.
Heat oil to 350F.
Combine flour, sugar, baking powder add water in a bowl until smooth. Dip apple halves in beignet batter. Roll in breadcrumbs. Deep fry until golden brown.

Cheesecake Ice Cream, adapted from this post:

2 cups milk (50 cl)
1/3 cup heavy cream (10 cl)
3/4 cup sugar (170 gr)2 egg yolks
3 oz cream cheese (90gr)

Whisk the egg yolks with the sugar. In a saucepan set on medium heat, bring the milk and the cream to boiling point, slowly pour a small amount on the egg yolks to temper. Pour the remaining over the yolks and sugar. Stir well then pour back in the saucepan and cook over medium low heat until the cream thickens and coats the back of a wooden spoon. Remove from the heat and whisk in the cream cheese until completely melted and incorporated. Cool to room temperature. Cover and refrigerate until cold. Process in an ice cream maker according to your machine’s manufacturer’s instruction.

Apricot Couronne – World Bread Day

Apricot Couronne
Just like my baking partner in crime, Peabody (who is packing and moving right now), I am not posting as much as I would like to and let alone comment on other people’s blogs but the past few months have been rich with life and full of good times and family moments that have kept me away and scrambling for time to come here and post. Not, that I haven’t been baking! First there was my goddaughter Sophie during August, then a brief escapade to the beach and then my parents arrived. This Thursday I will be flying to my favorite home away from home and walking the markets and baking up a storm with another favorite lady of mine. That’s right folks, Lisa and I are at it again, but this time we have Mary to add fuel to the fire! I "need" a little weekend away! When I come back next week, we have another friend staying with us for a week….so you can imagine than my posts will be sparse…but I promise a filled November…how’s that?

I could not leave for my little escapade without celebrating World Bread Day, hosted again by the wonderful and talented Zorra from Kochtopf. Last WBD was a huge success and the After Party was a blast also. I know this is last minute, but this will give you the general mood of things around here at Casa Tartelette for the past few months and the coming weeks….rush…rush…rush… Except that for this bread, ain’t nothing but waiting, and being rewarded with the sweetest scent of yeasted apricot dough on a chilly morning (allright everything was there but the chilly part this morning). I know it’s last minute to post about World Bread Day, but trust me we have been celebrating by nibbling on this all day long!

The recipe is from one of my favorite break baker, the super talented Paul Hollywood. I first caught a glimpse of his talent during an interview on the French food network years ago and I fell in love with his simple and down to earth demeanour. I started collecting some of his recipes and was delighted to find a library of his tv show on the UK food network. Some recipes also have videos to go along and it becomes quite entertaining to listen to him while you bake. I bookmarked his recipe for Apricot Couronne at least a couple of years ago and it took me all this time to finally make it. Boy! Did I miss on something good for a long time! This bread is easy to make, the dough is soft and stretchable at will and the scent as you cut into it and serve it with a hot cup of tea is just …perfect. Makes me want to have a never ending supply of apricots and yeast to make this everyday! I made a a few change to it by substituting dried cherries for the raisins, adding orange marmelade inside with the filling instead of using it for a glaze. Don’t be scared by the cutting through of the roll and twisting of the dough, there is really nothing to it if you just dive in (Look at the video and you will see what I am talking about).

Apricot Couronne Apricot Couronne, adapted from Paul Hollywood.

For the dough
250g strong white flour
5g salt
50g butter, softened
120ml warm milk
12g fresh yeast or 7g dried (one packet)
1 egg, beaten

For the filling
120g dried apricots
150ml orange juice
90g butter
70g light brown sugar
35g plain flour
60g dried cherries
65g chopped walnuts
50g apricot jam

1. Prepare the filling. Place the apricots and orange juice in a bowl and set aside to marinate for a couple of hours.
2. To make the dough, place the strong white flour, salt, butter, warm milk, yeast and egg in a mixing bowl. If using dried yeast, dissolve in the warm milk first, let stand 10 minutes, then add the rest of the ingredients.
3. Mix well together to form a dough.
4. Turn the dough onto a lightly floured surface and knead for 6 minutes.
5. Return the dough to a clean mixing bowl and set aside to rise in a warm place for 1 hour.
6. While the dough is rising, drain the marinated apricots.
7. In a mixing bowl, cream together the butter and brown sugar until fluffy. Mix in the drained apricots, flour, dried cherries, and walnuts.
8. Turn the risen dough out onto a lightly floured surface. Roll out the dough into a rectangle, approximately 25 x 33cm.
9. Spread the apricot mixture evenly over the dough rectangle. Spread the orange marmelade over it.
10. Roll up the rectangle tightly until it resembles a Swiss roll. Roll it slightly then cut lengthways along the dough and plait the 2 dough lengths together.
11. Place the dough plait on a lined baking sheet and set aside to rise for 1 hour.
12. Preheat the oven to 200°C/400F
13. Bake for 25 minutes until risen and golden. Set it aside to cool.

Lemon Lime Meringue Cupcakes


I wish I could tell you I am sitting right here enjoying one of these lemon lime cupcakes as I type my post but truth is I am trying to write in a room where English and French are mingling with hand gestures and strange sounds, and my brain is not sure this post is going to make sense by the time you read it. I tried isolation, taking one cupcake to the office room, sitting down at the computer with a cup of tea but I keep being interrupted because it seems that nobody understand my house, kitchen and pantry set-ups, hmmmm….really?….and I thought I was Ol' Deat Martha!! Anyways…back to the cupcakes.

Laurie from Quirkie Cupcake posted a Cupcake Hero Event focused on lime and as a new September Daring Bakers I wanted to give her full support, except that I am late….I can’t lie…It’s funny how I can think so much (three weeks) that it almost seems real, like I already made it, and then I wake up the morning of the deadline to realize that it was all in my head, a nice pretty dream, full of lemon and lime and soft meringue…

We have a saying in French that goes like this: "Il n’a pas invente la poudre" translating as "he surely did not event gunpowder", which is pretty much what I did when I made these the other day. They had been on my "must try" list for a long time and this month I finally had the opportunity to play around with them and my blow torch. I used a recipe from one of my favorite blogs, Cupcake Bakeshop. Cheryl’s site is not only amazing to look at but I admire her adventurous spirit when it comes to pairing ingredients and flavors, creating recipes and styling them with the most relevant details. I fell in love with her meringue cupcakes ever since they jumped at me through the screen. I followed one of her recipes for the cupcakes adapting it to fit Laurie’s challenge, except I can’t remember which one as I scribbled it in my blue notepad one day I was in a hurry. I used lime oil as an added boost of flavor. The lime curd inside is my usual foolproof recipe that I make time and time again and probably make you guys sick ad tired of it….but if it ain’t broken why fix it? As for the meringue, well, if you have a blow torch it does make the job easier. I have not tried the broiler in my oven for these so far, but if you do, please let me know the outcome.


Lemon Lime Meringue Cupcakes:

Makes 12

Cupcakes:

1 stick unsalted butter, room temperature
1 cup sugar
3 large eggs
1½ cups all-purpose flour
1 teaspoon baking powder
½ teaspoon salt
2 teaspoons lime oil
½ cup buttermilk
1/4 cup fresh lime juice
zest of one lime

In the bowl of an electric mixer with the paddle attachment, cream butter and sugar. Add eggs, one at a time, beating well in between each addition. In a medium bowl, combine the flour, baking powder, and salt. Add flour mixture and milk alternatively to the butter/eggs mixture, beginning and ending with flour mixture. Add the lime juice and zest. Fill cupcake tins 2/3 full. Bake at 350 for 20 minutes until a cake tester comes out clean.

Lemon Curd:

grated zest of 2
1/2 cup strained lemon juice
1/2 cup sugar
2 eggs

Combine the zest, sugar, juice in a saucepan, and bring to a simmer. In a small bowl, beat the eggs until light.Beat some of the lemon mixture into the eggs to temper. Scrape the mixture back into the saucepan and cook stirring constantly until it thickens up, about 5 minutes. Remove the curd from the heat, let cool completely.

Lime Meringue Frosting:

1 cup egg whites
2 cups sugar
1 tsp. lime juice

Combine egg whites and sugar into the mixing bowl of your stand mixer and set over a water bath. Whisk by hand for a few minutes until the sugar is dissolved or preferably until the mixture reaches 110F . Transfer bowl to electric mixer, beat on medium speed for 10 minutes. Add lime juice Beat on high speed until stiff glossy peaks form, about 2 to 5 minutes more.

To fill the cupcakes: with a sharp knife cut a small hole in the cupcake, not cutting all the through. Fill the cavity with the lemon curd, and put the top back on. Spread the meringue and brown with a blow torch.

Lemon Almond Blueberry Tarts

Lemon Almond Blueberry Tartlets" Chaos"… that’s the word that comes to my mind when I think about these little tarts. They are not difficult to make, although they will take you some time if you make everything from scratch, but the results are really worth the effort. What I meant by "chaos" is all the noise, movements, tribulations that took place around them while they were getting their shiny coats and lemon dots.

I decided to make my tarts for Hay Hay It’s Donna Day, created by Barbara of Winos and Foodies and hosted this month by Sarina of TriniGourmet this past tuesday. My day was pretty skimpy on training appointments so I figured I would have ample time to make these and a couple of other pastries for orders. I started with the dough right before I left for work, inspired by one that did the rounds of the French bloggsophere last year. A sort of easy and fast mock puff pastry, which originaly calls for "petits suisses" as a moisture source but I’ll say "hot dang!" (because I love them) the day I find those here, so I subbed sour cream and everything worked out fine. Once back home, the dough got a little resting time on the countertop before being tooled out. Smooth as a baby’s bottom and soft as a pillow I almost wished our rolling time would have to come to an end in a pie plate…Have you ever kneaded a bread dough or other that was so nice to you, so pliable that you wish you could do it forever?…Ok, if it wasn’t official before, now you can definitely see how weird I can be about my doughs!

Anyway, I disgress…I was about to fill my mini pie pans when I heard kids’ voices in the garage. Our neighbors’ twins were down there figuring a way to get in the middle if the action with B. You bet, for two 7 year-old boys, our garage is like a treasure cave of trouble to get into with tools galore, boating equipment, golf clubs, crab and shrimp nests, etc….They are so bubbly, it sounded like there were 6 kids playing around. My dear husband sent them upstairs to get some water and a treat and that’s when chaos ensued…I love baking with children, I think their take on things is honest and down to earth. They are also very creative and bring good ideas to the table when it comes to ease of preparation and decorations. If you are calm enough to understand that within 10 minutes your kitchen is going to be splaterred with flour, sugar and your utensils flying in every directions, then you are going to have a serious good time!

One of the boys looked at the shells filled with the almond filling coming out of the oven and started to blow on them so they would cool faster and they’d be able to fill them with the blueberry compote. They even suggested holding them over the AC vent for quicker cool down time, not practical but smart for sure!
Once filled with the blueberry compore, the twins proceeded to help me out with dotting the tarts with lemon curd cream. I believe they were quite proud to get about one cup in the pastry bag and not on their shoes. The dots were another story… The three photographed tarts are actually the ok looking ones, the others much ressemble the surfaces of Mars and the Moon, and I even recall one tart attempted to smile. They ate 3 mini ones right then on the spot, too happy to show my husband their blue tongues! Within the nest couple of days, the tarts kept disappearing at great speed, so much so that I think I only ate one… not fair!

Lemon Almond Blueberry Tartlets
The recipe given by Sarina to illustrate this month "Tarts" theme starts with a puff pastry and I wanted to keep with this idea but was pressed for time visiting with the parents so I tried this quick puff pastry I mentioned above. The filling is my "go-to" frangipane (almond cream) filling that I used last month with fresh figs. The blueberry compote is nothing else than cooked down fresh picked blueberries (there is a patch 15 minutes down the road), and the lemon curd is leftover from the Meyer lemon curd I made for a Ricotta Cake and that I had in the freezer. All the parts can come together over several days, so there is no feeling of waiting or rushing if you spread the work over 2-3 days. You can also keep everything unbaked for 3-4 days.

While talking to Veronica a couple of weeks ago about the Meyer lemons Mary had sent us, I was talking to her about possible uses and tart options for HHDD. As it happens when most cooks and bakers talk together the conversation quickly moved from "lemon and blueberry tarts" to "Meyer lemon curd, blueberry compote on frangipane cream in mini shells"…I can see how a simple Sunday dinner could turn into a New Year’s Eve Party. I exagerate of course, but you get the point. Thanks Veronica for the tasty brainstorming!

Lemon Almond Blueberry Tartlets

Lemon Almond Blueberry Tarts:

Quick Puff Pastry:

180 gr. flour
180 gr. sour cream
90gr. butter
pinch of salt

Process all the ingredients in a food processor until the dough comes together. Remove and knead a couple of times until smooth. Roll out and fold in three like a business letter. Repeat a couple of times and refrigerate for 20 minutes.
Roll the dough and fit into pie shells of different sorts or one large 12 inch one. Blind bake for 10 minutes at 350F. Let cool.

Frangipane Cream:

1/3 cup whole almonds (about 2 ounces)
1/3 cup sugar
1 large egg
3 tablespoons unsalted butter, room temperature
4 teaspoons rum or brandy

Finely grind almonds with sugar in processor. Add egg, butter and 2 teaspoons rum. Process until batter forms. Pour filling into crust. Bake for 15 minutes at 350F. Let cool completely.

Blueberry Filling:

1 pint fresh blueberries
zest and juice from one lime
1/2 cup sugar
1/2 tsp. ground cardamom
2 Tb. cornstarch

In a heavy saucepan, combine all the ingredients and heat over medium until the blueberries release their juices and the whole mix start to thicken, about 10 minutes. Let cool to room temperature.

Lemon Curd Cream:

grated zest of 2 (Meyer) lemons
1 cup strained lemon juice
1/2 cup sugar
2 eggs
1 Tb powdered gelatin set to bloom in 3 Tb water
1/2 cup heavy cream, whipped to soft peaks

Combine the zest, sugar, juice in a saucepan, and bring to a simmer.
In a small bowl, beat the eggs until light.Beat some of the lemon mixture into the eggs to temper. Scrape the mixture back into the saucepan and cook stirring constantly until it thickens up, about 5 minutes. Meanwhile, heat the gelatin in the microwave until dissolved, about 30 seconds. Remove the curd from the heat, let cool completely. Gently fold in the whipped cream.

Assembly:
Spoon the blueberry filling into the tart or divide evenly among the mini ones. Pour the lemon curd cream into a pastry bags and dot the blueberry filling with it.
Enjoy!

The combinations of all the flavors is truly outstanding. Just plenty to make it sweet and just enough of a little pucker with the lemon.

Goat Cheese And Fig Cake with Fig Mascarpone Verrine

There is something about blogging that is quite exceptional. I don’t mean all the wonderful friendships, mail exchanges, meetings, packages and other benefits of creating strong bonds over the internet. There is something in the air it seems, whether we get inspired by the same author, recipe or share our discoveries of the “in” food item of the moment. It has been happening to me lately, I come home from the market with a fruit, type of chocolate or a load of yeast and flour. I turn on the computer, check out my favorite blogs, discover new ones through comments left here and elsewhere and find delicious pictures that incorporate exactly what I just brought back in my basket. What has put this sort of cosmic/kismet feeling over the top recently is when I just pulled out something from the oven, set it out to cool on the countertop, read a few blogs, waiting impatiently before things cool enough for me to take a bite, and found that someone has just posted about it…and I made it without even knowing. When it comes to seasonal produce I can understand but a specific item….makes you wonder what water bloggers are drinking…(insert Twilight Zone music here).

Let me illustrate that thought. I was slowly working my way through a giant bag of figs when my favorite Cream Puff, Ivonne announced she was hosting Sugar High Friday “The Beautiful Fig”…Uh, it’s not like she is my neighbor and she is trying to help me go through my loot, but in this case her post was received with both a sigh of relief , “Yes! Something I have, and plenty of it!” and excitement “Yes! I have another excuse to make something fancier than jam on toast!”.

I knew exactly what I wanted to bake. From the day I got Richard Leach’s book last year, I have been wanting to make every single dessert in it. Not only are the pictures exceptional, but the quality of his work is outstanding. I want to push it as to say that I equate him to my sugar daddy Pierre Herme: talented, innovative and funky. I have had my eye on one particular page in the book where one simple item, the Black Mission fig, becomes three impressive creations. Had I had the luxury of time last week, I know I would have tried to put my spin on them but I had to rely on my own creativity to capture the essence of the pages before me and come up with my own interpretation.

The goat cheese cake is so easy to make and so fragrant, I want to make it every single Sunday brunch. It would be fantastic with egg dishes such as omelettes and Benedict but also perfect served as is with a good drizzle of maple syrup. It has a nice crumb, made with both semolina and all purpose flours, and don’t be tempted to skip on the orange zest in it, it really enhances the flavor. The figs on top are simply sliced and drizzled with a little bit of local wild flower honey. Instead of paring the cake with fig sorbet and a fig flan as suggested by Leach, I went for something that would enhance the fresh figs instead of pulverizing them (nothing against sorbet) or cooking them. They were perfectly ripe and very tasty so I just made a little mascarpone cream and pomegranate and cardamom syrup and layered them in a “verrine”, and the spice instantly puts it in another dimension. A bite of cake, a bite of cream and we were in heaven. It may seem like a lot of work, but you can make things over several days as I did: the cake was made early in the week then cut and frozen, the pomegranate sauce keeps easily for a week and the verrine comes together in five minutes top. Eating it took even less time!

Goat Cheese and Fig Cake with Fig Mascarpone Verrine in Pomegranate Syrup:

For the Cake (serves 8)
1 cup all purpose flour
1 cup semolina flour
1 cup sugar
1 Tb baking powder
½ tsp. grated orange zest
½ tsp. salt
4 egg whites
½ cup milk
1 cup fresh goat cheese
1 cup unsalted butter, melted
6 to 8 Black Mission Figs, sliced
¼ cup honey (your choice)

Preheat oven to 300F.
Using an electric mixer fitted with a paddle attachment, combine flours, sugar, baking powder, orange zest and salt. In a small bowl, combine the egg whites, goat cheese and milk. Whisk until smooth, then add to the dry ingredients. Whisk in the melted butter. Pour the batter into a buttered and flour 9×9 inch baking pan. Bake for 15-20 minutes, until firm and lightly golden. Allow to cool. With a 4 inch cookie cutter, cut out 8 rounds, cover with fresh fig slices. Drizzle with the honey.

For the Pomegranate Cardamom Syrup:
In a saucepan set over medium heat, bring 4 cups of pomegranate juice to a boil with 3 whole cardamom pods, reduce heat and simmer until reduced by half. It will thicken as it reduces.

For the Fig and Mascarpone Verrine:
6-8 Black Mission figs, diced
1-11/2 cups pomegranate syrup
8 oz mascarpone cheese, at room temperature
½ cup heavy cream, kept cold
¼ cup sugar

Whip the heavy cream to soft peaks with the sugar and fold it in the mascarpone cheese.
In a 8 glasses, layer the cream, fresh figs, syrup twice, finishing with the figs and syrup. Refrigerate until ready to use.

To serve: pour a small pool of remaining pomegranate syrup on a large plate, set the goat cheese cake on top and serve it with the verrine on the side.

Ivonne, are you seduced yet?…

Walnuts Honey Tartelettes

Walnut Honey Tartelettes

I made these to satisfy a craving and to help a family member in need of satisfying hers. I know, it is difficult but I feel I should sacrifice my thighs to help family and friends….! When Sophie came to visit this past month, we tried to make her sample as many local delicacies as possible. We could not get okra and hot sauce to pass her lips but she acquired a taste for tortilla chips, chow-chow, Moose Tracks ice cream, and pecan pies…Yummmm! Of course, as godmother extraordinaire I promised her I would hunt for a recipe in French, using ingredients easily available for her and I would make a batch for the blog so she could get an idea of things to come. While my tree is not quite ready to give me the pecans I needed to come up with a substitute.

I was happy to provide her with a recipe and teach her how to make them but we were faced with a couple of problems. It would be difficult for her to find pecans and corn syrup in France to duplicate the recipe. I admit that I rarely use corn syrup when I make mine and I usually substitute maple syrup or honey without a problem. I don’t really have anything against corn syrup, I just don’t understand the concept of an odorless and tasteless syrup when I can use more flavorful ones. Don’t raise your arms up in the air people and scream "food snob", it is just my opinion, my palate, my tastebuds! The extra boost of flavor after that first bite is really something! As far as the pecans, I told her not to worry if she could not find them easily back home and that walnuts made a great substitute. Since I made them a couple of days ago, I have tried them again with pine nuts, pistachios, cashews and I am happy to report that each nut bring an new dimension to the tartelettes (or tassies as they are often called).

Walnuts Honey Tartelettes

Since I found this recipe on a French blog, La Petite Cuisine, written by the lovelie Elodie, I will provide the measurements in grams but feel free to convert using this site. Like her, I usually use a shortbread crust for nut pies. They are already quite rich so why not continue with the idea and make them even richer?!

Walnut Honey Tartelettes, adapted from La Petite Cuisine.

Makes 4 4-inch tartelettes, and 8-10 mini tassies.
For the tart shells: (not provided by Elodie, but this is my go-to recipe)

1 stick plus 1 Tb. butter, cut in small pieces

1 1/2 cups flour

1/2 cup powdered sugar

1 egg yolk

In a food processor, pulse all the dry ingredients. Add the butter and pulse again. Add the egg yolk and pulse until the mixture comes together in a ball. Wrap in plastic and refrigerate while you prepare the filling. Roll between sheets of plastic wrap and cut out circles larger than your tart shells, fit the dough into the molds and cut out the excess. Set them on a sheet pan and bake at 350 for about 10-15 minutes or until golden brown. Because the dough has a tendency to puff up, I take the shells out halfway through the baking process and pat the bottoms flat with the back of a spoon.

For the filling:

150g chopped walnuts
2 eggs
75g butter, melted
100g light brown sugar
100g honey

In large bowl, whish the eggs with the brown sugar an the honey. Add the melted butter.Divide the walnuts among the tart shells. Slowly pour the filling over the nuts, trying not to move them around too much. Bake at 350 for about 20 mits or until deep golden brown.

Walnut Honey Tartelettes

I know I liked them a lot…I ate a obscene number of the mini ones but in an attempt to be completely fair for Sophie, I had B. and the neighbors try some and they all approved of the honey/walnuts combo. So go ahead dear and have fun!

In the meantime, I am taking a fresh batch to Lisa’s and Ivonne’s Festa Al Fresco coming up on September 3rd…what are ya’ll bringing?!

Marbled Ricotta Cheesecake Brownies

Marbled Ricotta Cheesecake

I am not sure these are picture worthy to be a Brownie Babe, but if you could just have a bite of them you would ask, beg, connive for more. After just a sample, B and I became quite protective of the whole batch and reluctantly shared some with the neighbors. I made these the week before Sophie arrived and I know it won’t be long before I make them again as we have been talking them up ever since!

I have made my share of marbled brownies before but I have never used ricotta doing so, always cream cheese. This recipe combines both and it truly makes a difference in the taste. The "cheesecake" part of the brownie is not as tangy than if using just cream cheese, it has a soft, creamy tesxture and flavor…pure delight. The brownies retain that fudgy, deep chocolate quality that I like so much and it only gets better overnight.

I cannot take credit for the recipe and must direct you to my ever ongoing French blog crush, the very talented Guillemette from Chocolat & Caetera. She is also passing it on from another talented blogger, Loukoum and I hope that these brownies keep on making the rounds.
I am sending these to Myriam and stay tuned for an update of the 3rd Brownie Babe round up on her blog.

Marbled Ricotta Cheesecake
Marbled Ricotta Cheesecake Brownies:

maks 35 squares (yeah right…!!)

Cheesecake batter:
250 gr. ricotta (9 oz)
150 gr. cream cheese, at room temperature (5 oz)
1/4 cup granulated sugar
1 tsp. vanilla extract
2 eggs
120 gr. sour cream (4 oz)
2 Tb. all purpose flour

Brownie Batter:
200 gr. butter (7 oz)
300 gr. bitter sweet chocolate (10.5 oz)
6 eggs
200 gr. granulated sugar (7 0z)
1 tsp. vanilla extract
150 gr. flour (5 oz)
pinch of salt

Preheat the oven to 350F. In a bowl, mix together all the ingredeints for the cheesecake batter. Set aside.
For the brownie: melt the butter and the chocolate together in a saucepan over low heat. Let cool a little. In a bowl, mix together the eggs, sugar and vanilla until pale. Add the chocolate/butter and mix until combined. Add the flour and salt.
Line a 13×9 inch with foil, spray with cooking spray. Pour in the chocolate batter. Dot the cream cheese batter over it and with a toothpick or the tip of a knife swirl the batters around.
Cook for 25-35 minutes. Let cool, cut and enjoy!

Amaretti…Or My Adventures In Italy

Amaretti

One night that I was reading a post by my favorite Cream Puff about a beautiful dessert called Lucia’s Walnut Cake. Her post was a beautiful tribute to her grandmother as well as an introduction to a soon to be published cookbook, Adventures of an Italian Food Lover, by Faith Heller Willinger. Cath from A Blithe Palate had been given the opportunity to get a first look at the book before its release and had contacted Ivonne about it. Together they decided to create a blogging event of some sort around its release, sending copies to other bloggers with the sole instruction to make something from it and share their experience in a post, no book reviews necessary. I so wanted to be in the loop that I visited Cath’s site, left her a comment ( Did I beg? maybe…!) and a couple of weeks later I was sitting down on the back porch with an espresso and my own copy of the book.

This book represents everything cooking and baking is for me and my family. There is not a dish I make that does not have a story, a person or a name behind it. Some of the dishes I cook revolve around family holidays or special events, some remind me of the people who crossed my path and made me the person and baker I am today. Faith Willinger has the same approach in this book. All the recipes invite you to in somebody’s home, life and cooking. Little of the foods I make are Italian per se but they bear similarities having lived a good part of my life so close to the area, and I was very excited with the ability and ease this book provided me to broaden my horizons.
Out of all the recipes in the book, my thoughts came coming back to the Amaretti one. I have always admired this delicate cookie and yet, I probably only had it a couple of times in my life.Amaretti are cousins to the macarons in a way: same ingredients, different baking method and no filling. Their white and delicate appearance makes me think of weddings and summer days, long strolls on the beach and fragrant coffee. What can I say…I am a romantic.

The first time I had an Amaretti was during a memorable trip with my parents to Turino. Twenty eight years ago, my parents and grandparents bought a chalet in the southern Alps, a stone throw away from Italy. We would go across the border and get pancetta, coppa, pannetone, grappa and sometimes we would stay for lunch. On one occasion, over 20 years ago, we decided to have lunch at a tiny restaurant with one large dining area painted with a beautiful fresca of Italian coutrysides. It was late already, middle of the summer, hot outside. The chef was on his own, his aides and waiters gone on their daily siesta. We were starving, but well behaved, the chef was making everything from scratch, and plates were coming out one at a time. Our meal was a feast of ravioli, cold cuts, pizza, fish and other delicacies. We decided to make good fortune and the four of us shared each plate that was coming out of the kitchen when it was coming out. We slowed down after the first bites of ravioli filled our tummies with warm rich and cheesey tomato sauce. I don’t think my memories are failing me when I say that I truly believe we had the greatest time as a family that afternoon. The chef was kind and loved the way our little group chatted and feasted. Towards the end, we motionned for him to take a seat with us but he said he could not, he wanted to do the dishes and clean up before the Mrs. would come in and give him a hard time for serving "after hours"! He brought my parents espressos, spearmint syrup and water for us and a plate of amaretti. My first ones! I hesitated as they looked so delicate. My brother ignored his for a while…long enough for me to eat mine and half of his plate! I asked the chef how he made them and he said "I don’t make them, my mother does and she only told me the ingredients"….well, come on man! Dish it out!!! He hesitated for a second, then he replied "ok, well, it’s almonds, sugar, egg whites and a pinch of salt" That was it?!

It took me all this time and this book to finally make them. I don’t know the name of the restaurant that day many moons ago, and I surely do not know the name of the man who cooked us that fabulous meal, but the cookies were just as I remembered. Crisp and delicate, perfect with coffee or mint tea.

Thank you Ivonne and Cath for the opportunity. There are many pages of the book already bookmarked and other recipes already tried like the olive oil brownies that are out of this world. If you would like the recipe for the amaretti, contact me via email(marinette1ATcomcastDOTnet) and I’ll be happy to send it to you.

Amaretti