It’s been a couple of fast paced weeks but I would not change a thing. Work is fairly busy as everyone is preparing to take some time off for the holidays. I am still getting acclimated to all the parameters of the job. Addressing everyone’s expectations can be quite tricky at times but at the end of the day, I think that everyone comes out feeling that they gave or got the best they had.
The daily collaborations are really inspiring and downright fun. There is always lots of laughter and discombobulated moments while being completely focused on the task at hand. I am around serious creative minds allowing me to be as well. I am still learning to let go and just go for it. Whatever "it" may be at the moment. Going for more contrast, an unexpected angle, a bold choice of color.
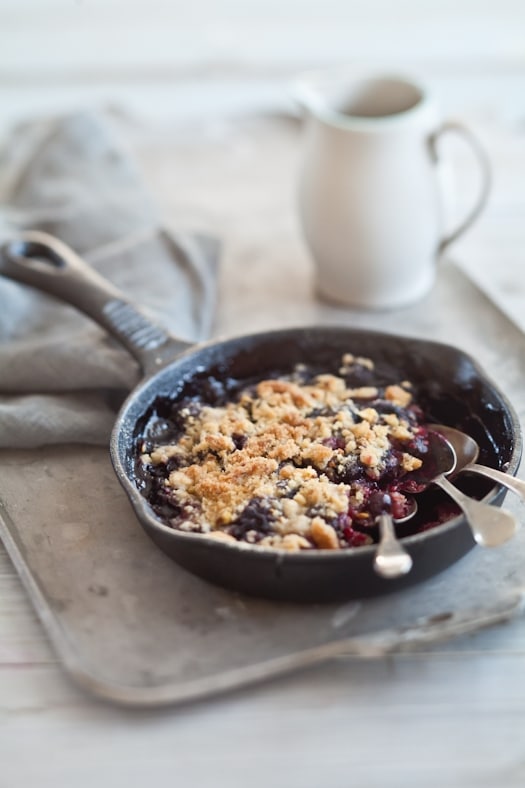
It’s been a little over two months since I started and I am slowly stopping to feel like I am on borrowed time. Seeing the change of season in a new place, new town is a nice way to feel anchored in new surroundings. After a few weeks of spending every evening and weekends with the windows wide open, it has finally started to be "Crisps and Cobbler Weather" around here. Time for some thick plush socks, a nice blanket or a cozy fire.
I have been enjoying quiet evening in the new house with the old dog but I admit, I am ready to head out to Charleston for the holidays and be with Bill. To top this good feeling off, my parents, brother, sister in law and two nieces are arriving in a week. It’s been too long since we last saw everyone! We rented a beach house for everyone, pups included and will be spending the holidays there together. To say that I can’t wait is an understatement.
I can’t wait to spend time chatting with my mom while we cook and bake together, see if my nieces are still enjoying baking as they did a couple of years ago. My brother is a fantastic cook also and it will be interesting to see what we come up with for Christmas dinner. Honestly, I just want to be with them. I’d be happy sitting in a corner watching them interact for a while.
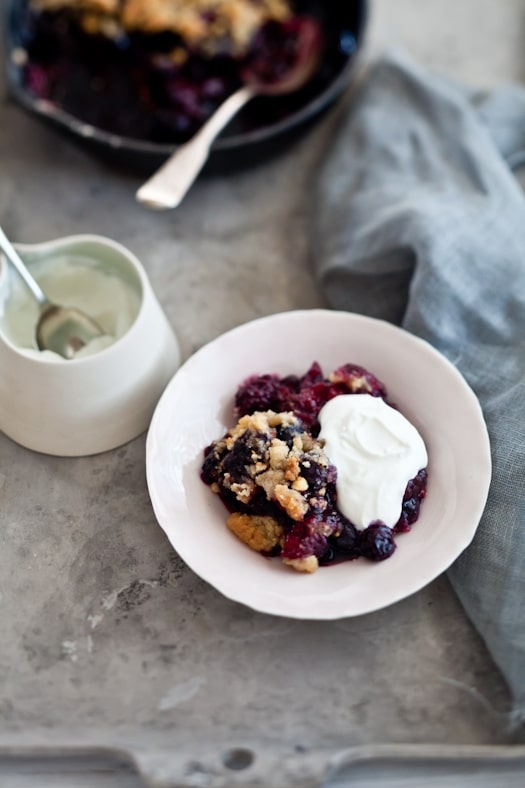
One thing I definitely want to make when we are at the beach in a couple of weeks is this mixed berry cobbler. I dream of coming back from a long walk on the beach on a chilly afternoon and digging into a warm bowl of juicy and tangy cobbler. Maybe topped with a dollop of Chantilly. Maybe not. I plan to spend the holidays guided by the flow of the family’s rhythm. Too many people under one roof. I just want to be and enjoy them. With all their flaws and qualities and all of mine.
I am not sure the nieces ever had cobbler but I sure plan on fixing that!
Thank you everyone for the great response to the food and lifestyle photography workshop I am teaching with Clare in Gulf Shores, Alabama. I am happy to say that there are a few spots left but they are going fast! If you are interested, click here for all the details.
Since Winter never really got here, we are and have been in Spring like mode for quite a few weeks over here. Local seasonal produce has been changing rapidly. Peas are sprouting, winter squash are disappearing. Asparagus are in, wild blackberries and raspberries are popping out in by the marsh behind our house. Strawberries are just a couple of weeks away.
Along with the produce, my whole being makes a little switch. In that time in between mosquitoes and scalding heat, I wake up and immediately open up the windows, I go to bed without pulling the mosquito screens. I continuously check for the progress of the seedlings I planted. Impatiently.
You can feel a natural tingling in the air, to everything and everyone at Spring is approaching. It always gives me inspiration and energy. At home, it means a thorough clean out of the studio and re-organizing equipment and files. Recycling, giving, de-cluttering. Making a space that allows my thoughts to grow even wilder.
In the kitchen, recipes change less than the ingredients they use but soups tend to get lighter and colder, salads take on many more fresh herbs and sprouts. Cakes, cupcakes and such make ways for lots more custards, creams and sorbets. A lot more berries are popping in desserts and sometimes in salads lately.
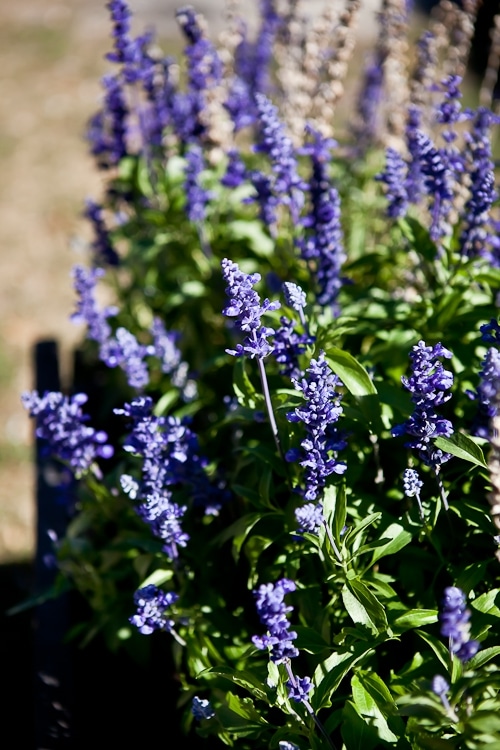
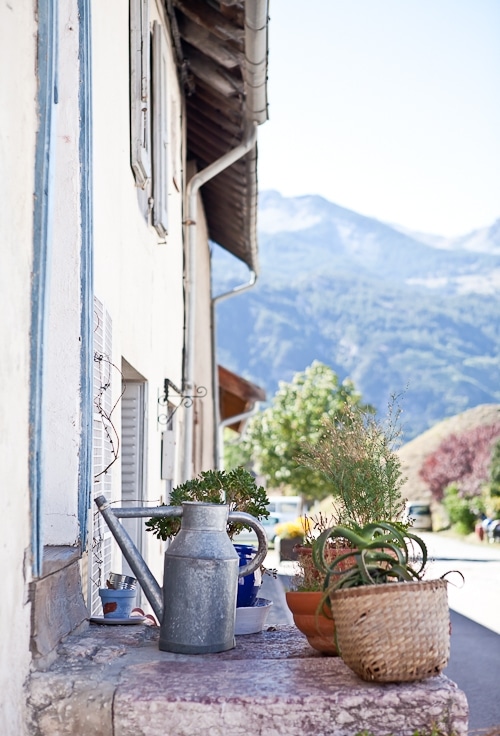
This time of year always make me long for home. The valleys and mountains of Provence and the Hautes Alpes where I grew up. Lavender, thistle, thyme, rosemary. Picking blackberries and raspberries on the side of the roads with my parents. Making lots and lots of blackberry tarts for my dad. Watching my mom stir a long wooden spoon in a heavy copper jam pot. Watching her pull out her sorbetiere to churn homemade treats.
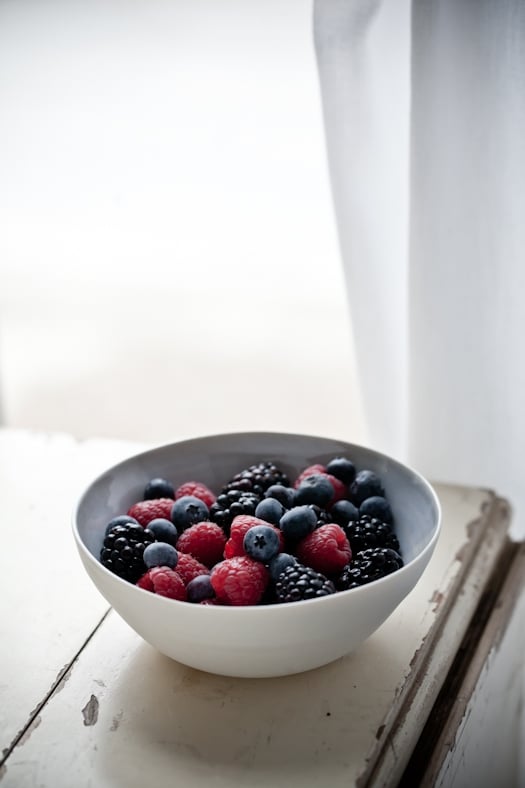
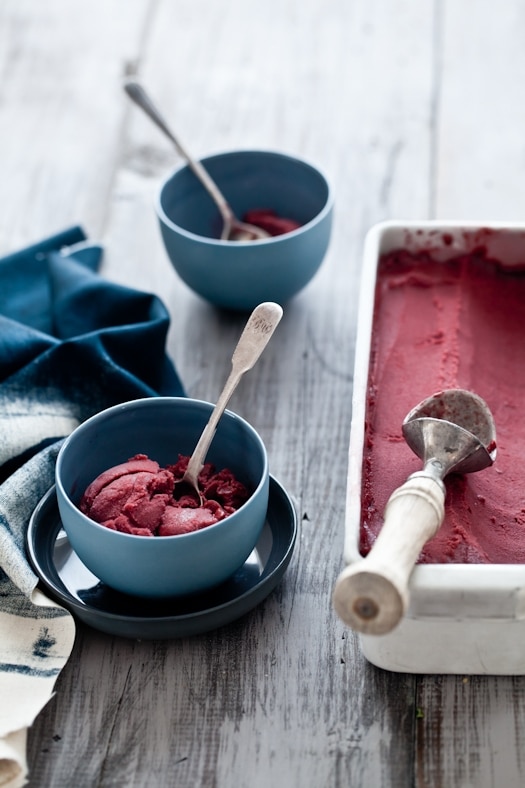
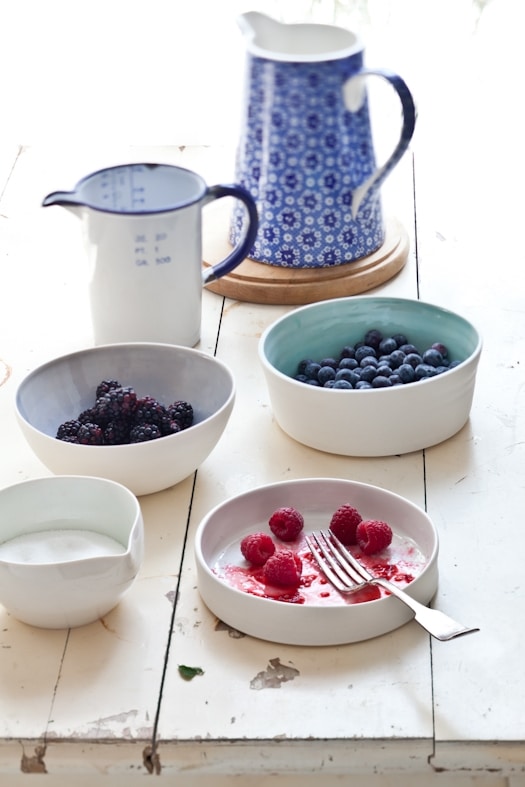
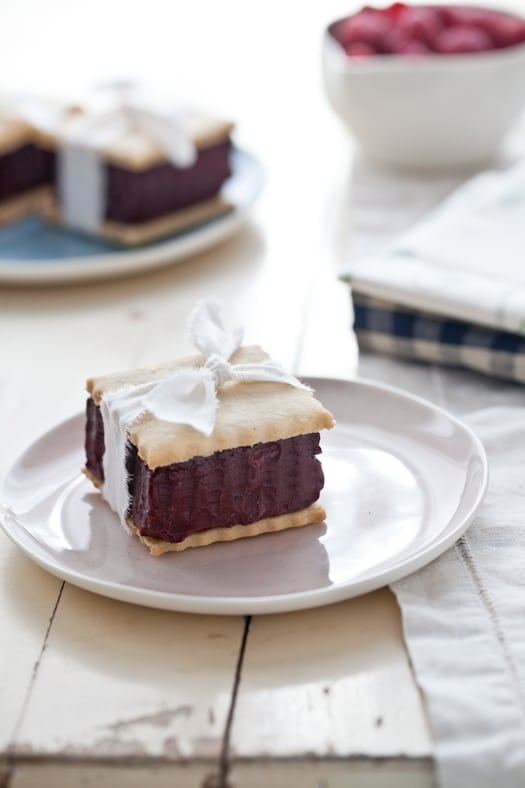
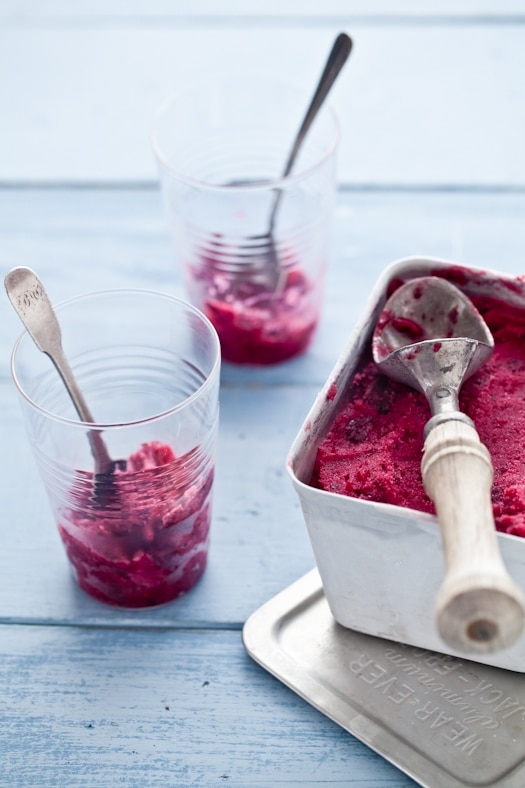
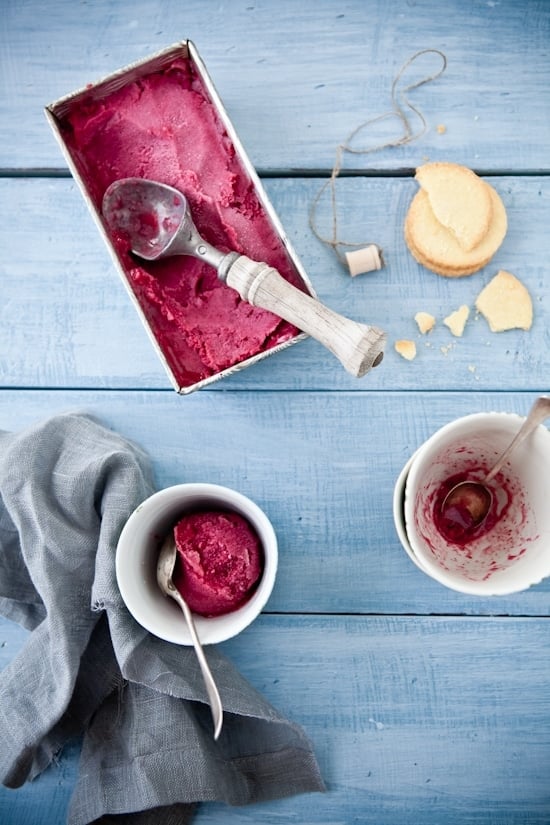
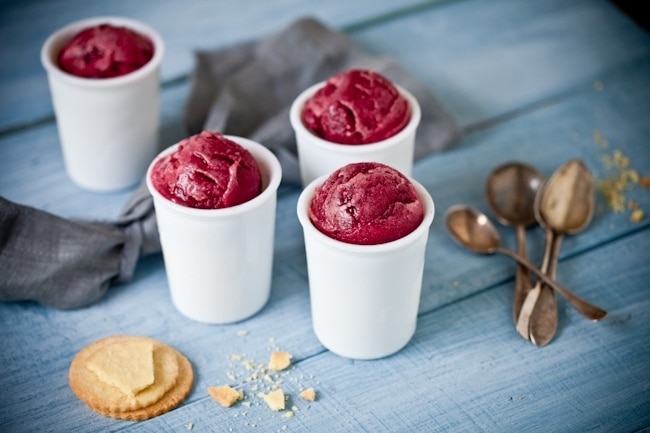
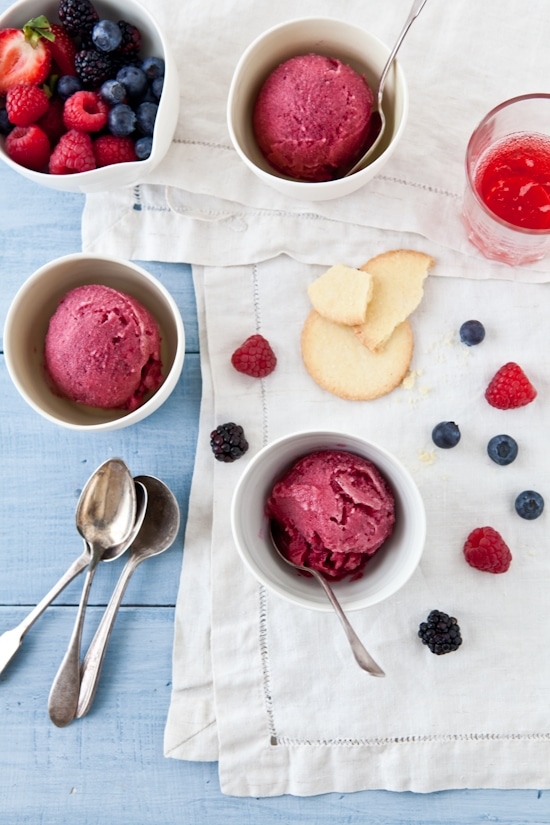
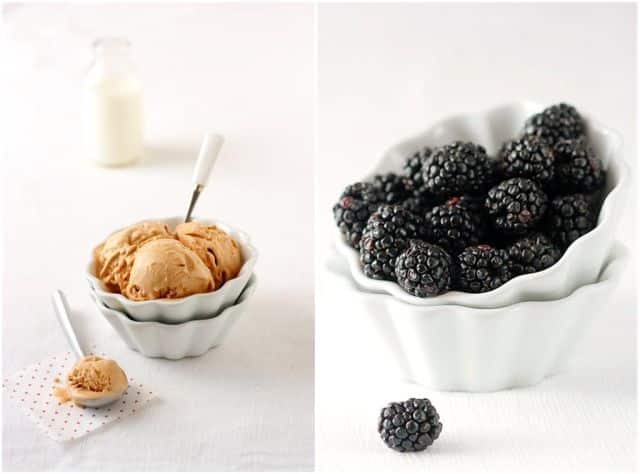
I picked enough blackberries the other day to have enough for a cobbler or a tart but I was really craving sorbet instead. With raspberries and blueberries left over from a shoot the other day, I had plenty to make that sorbet I so desired. I made two small batches, one I left with nice bits of fruits in it and one I pureed smooth to sandwich with lavender shortbread cookies.
Lavender, berries, cookies, sorbet. A fabulous trip down memory lane. And lots of nice treats to share with our neighbors.
Before I leave you, I wanted to share with you two little big things that I had the privilege to do this past month. One was to have some of my photographs used as a backdrop during a Donna Karan’s event for her non profit foundation, Urban Zen. I was in good company with fellow photographers Matt Armendariz and Lindsay Morris. You can see pictures of the event by clicking here and a recap of the foundation’s event here.
I am also extremely honored to have been asked by Heirloom Book Bo. to have my photography on exhibit for the next couple of months. The opening reception took place recently and it was an awesome thing to share with friends. You can find pictures and more info about the exhibit here and here. None of this, work and accolades, would be possible without your constant support and appreciation. Thank you!
Berries Sorbet and Lavender Cookies:
Makes 4 cups (sorbet) and about 1 dozen cookies
Ingredients:
1 cup fresh blackberries
1 cup fresh raspberries
1 cup fresh blueberries
1/2 cup honey
1/4 cup sugar
2 cups water
zest and juice of one lemon
Directions:
In a medium saucepan set over medium high heat, place the berries and the rest of the ingredients and bring to a quick boil. Reduce the heat to low and simmer 10 minutes. Remove from the heat and let cool completely. Puree until smooth in a blender or food processor and then strain through a fine mesh chinois (strainer). Process in your ice cream machine according to the manufacturer’s instructions.
You can also let the mixture cool completely and churn without pureeing it smooth. It will give you a chunkier sorbet.
Lavender Shortbread Cookies:
Makes 12 cookies for sandwiches
1& 3/4 cups all-purpose flour or Jeanne’s Gluten Free All Purpose Mix
1/3 cup sugar
1/4 cup yellow cornmeal
1/2 cup butter
2 teaspoons fresh edible lavender
3 tablespoons milk
Preheat oven to 350F. Position a rack in the middle.
In a bowl stir together flour, sugar, and cornmeal. Using pastry blender, cut in butter until mixture resembles fine crumbs. Stir in lavender. Add milk. Stir with fork to combine and form into ball. Knead until smooth and divide in half.
On lightly floured surface, roll half the dough at a time to 1/4-inch thickness. Using 2-inch square cookie cutter, cut out dough.
Place cutouts 1 inch apart on ungreased cookie sheet. Bake about 10 minutes or until edges are firm and bottoms are very lightly browned. Transfer cookies to wire rack. Cool.
To store: Place in layers separated by waxed paper in an airtight container; cover. Store at room temperature up to 3 days. Or freeze unfilled cookies up to 3 months.
To make sorbet sandwiches:
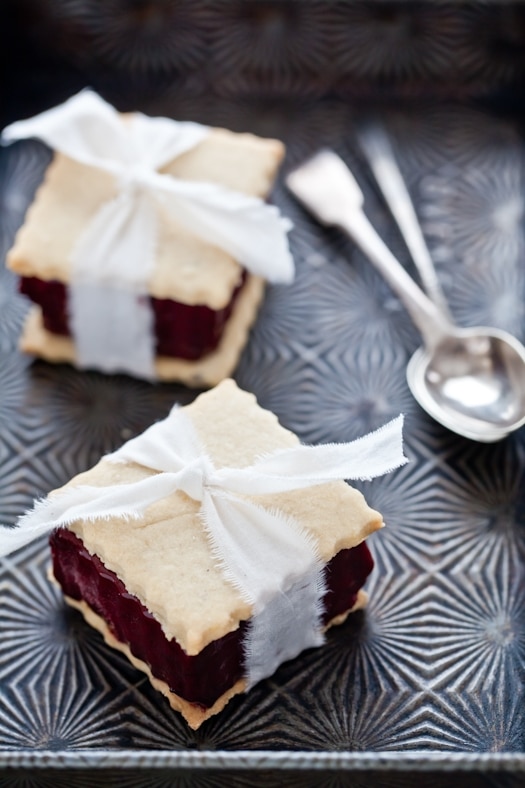
Spread about 2 cups of the sorbet in a 8×8 square pan and freeze until firm. With the same cookie cutter used for the lavender shortbread, cut out square of sorbet. Sandwich between two lavender cookies and freeze again until firm.
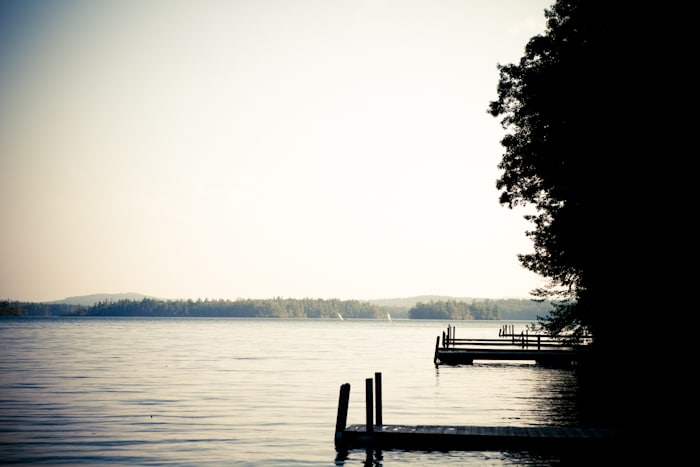
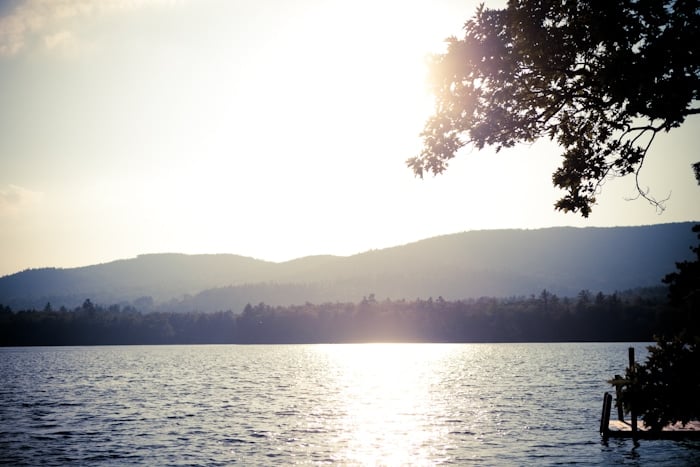
The first time I heard about Squam Lake and Squam Workshops I said outloud "Ugh?". That was last year. Now, when I hear those words, something inside of me lights up and I say "heck yes!"
Squam is truly a magical place. A three day retreat put together by a group of talented women with the gorgeous Elizabeth leading the troups. I was honored to be asked by Elizabeth to come teach last September and the experience changed me deeply. I understood I needed to be nicer to myself. My inner child resurfaced. The one everyone in my family talks about. I found her again. It made me progress and gave me what I called a work inspired. A direction. I am not letting go of that feeling, no matter how hard it is to express.
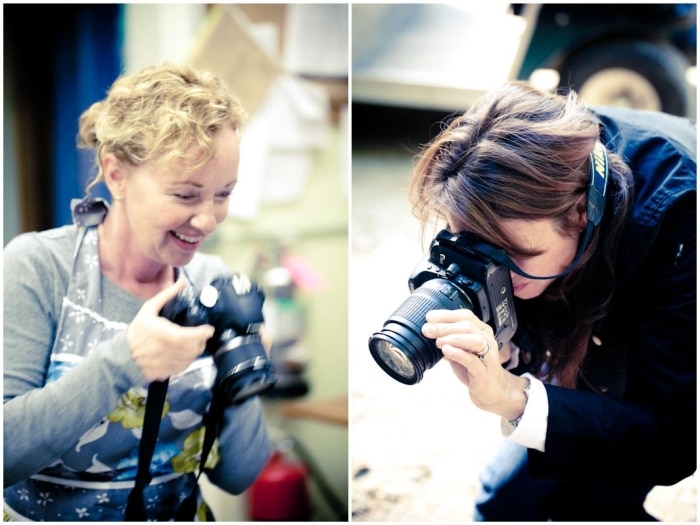
At Squam, I met women so reserved, it was a gift to see their personalities transpire through their paintings, screen printing or story telling sessions. I also meant women so gifted at expressing themselves and leading others into tapping into their resources, that it was inspiring in itself when I went to lead my workshops there.
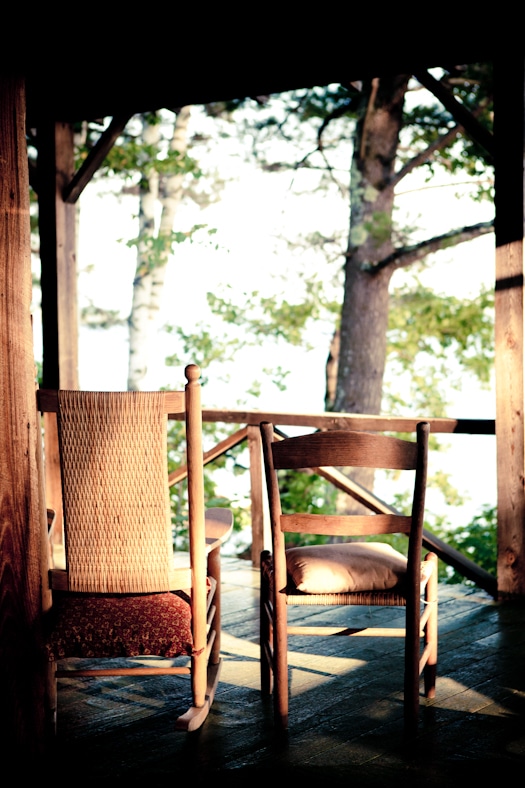
Back in September, I taught two food photography and styling class at Squam and really did not want to see the sessions end. The morning was devoted to cooking the food we would be styling and photographing in the afternoon. We had the luxury of the camp’s commercial kitchen, equipped with everything we could need. During one session we made savory tarts and the day after we made cobblers and crisp.
And we shared with everyone…I had the best roomates to come back to at night and share a glass of wine with in front of a warm fire. A couple of slices of tarts or a spoonful of cobbler and we were good to chat the night away.
I was thrilled when Elizabeth asked me to come back and teach again this year. Not once but three times! I just can’t wait. I love how each session combines cooking and photographing so no matter what you forte is with food and pictures, you will learn and have fun in the process. I loved all my students last year and learned so much from them too that I can’t wait to meet the new ones this year!
I will be teaching two classes at the Squam June Retreat In New Hampshire(I know it reads that one class is over 2 days but both are all day classes. All day Thursday and all day Friday). Then I will be back in NH at Squam for their September Retreat with two more classes. And I am super excited to be teaching at Squam By The Sea on the North Carolina Outer Banks. Check all the classes and schedules on the website. Hope to see you there!
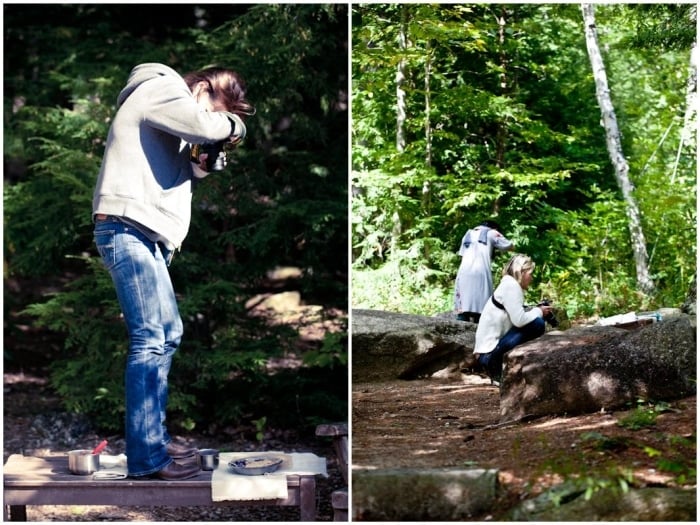
Making. Creating. Having fun. Letting go. Going with the flow. There is something for everyone at Squam. No matter your skill level. Hanging out is also a art form you know…!
Picture by Christine Chitnis.
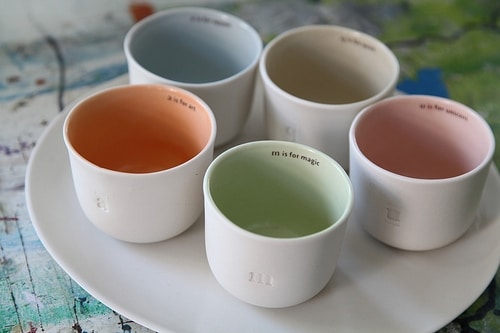
To celebrate this year’s workshops and their brand new shiny website, the folks at Squam are doing a little giveaway for you guys. Every month, the Squam site will offer one exclusive item for sale. This January, it’s these much coveted cups from Gleena Ceramics. I am thrilled to see my friend Asya’s gorgeous pieces associated with all the goodness that is Squam. Up for grabs is the "s" is for squam cup.
All you have to do is leave a comment on this post. I will draw the name of the lucky winner on Tuesday at noon (Eastern US time). Why not taking this opportunity to tell me one Special talent that you have…!
Picture by Christine Chitnis.
Squam is fun, Squam is enriching, Squam is what you want it to be. No one to force you into anything. No one to frown or look at you sideways. Squam is sharing. Tart and cobbler recipes after the jump!
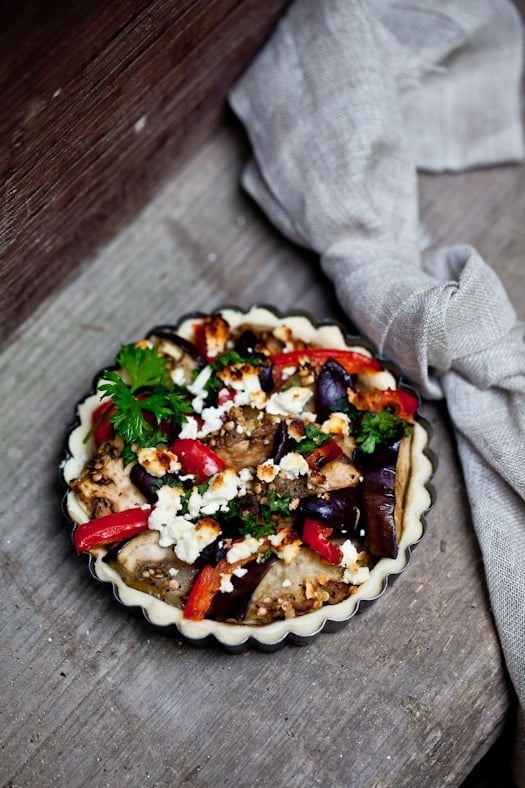
Ratatouille Tart:
Makes one large 9-inch or eight smaller 4-inches tartelettes
Ingredients:
For the crust:
1 1/4 cups all purpose flour (or same amount of Jeanne’s gluten free flour mix)
generous pinch sea salt or kosher salt
1 stick (115gr) cold, unsalted butter, cut into 1/2″ cubes
1/4 cup ice cold water, or enough to just hold together the pastry
1 egg wash – yolk, pinch salt, splash water, blended together
Directions:
In the bowl of a food processor fitted with a plastic blade, pulse together the flour and salt. Add the cold butter all at once. Pulse until the flour is the size of tiny peas. Drizzle the ice water through the mouth of the food processor, while pulsing. Stop just when the pastry begins to come together. Empty the bowl onto a lightly floured surface and form into a disk using your hands. Wrap with plastic wrap and refrigerate for at least 30 minutes. This can be done up to 2-3 days in advance. You can of course, do the whole thing by hand.
Once the pastry has rested, preheat the oven to 375F. Roll it out on a lightly floured surface, to about 1/4″ thickness. Line the tart pan with the pastry (or several tart shells if doing small ones). Line with parchment paper and fill it with pie weights or dried beans and bake in preheated oven for 20 minutes. Remove the parchment and weights, brush down the bottom, sides and edges of the tart shell with the egg wash using a pastry brush. Return the tart pan to the oven and bake another 10 minutes or until golden. Remove from the oven and set aside to cool slightly.
Fill the tart shell(s) with the ratatouille, top with the feta or goat cheese and return to the oven for about 20 minutes.
————————————————————————————-
Blackberry Cobbler:
Makes 6 to 8 (depending on your ramekins)
Ingredients:
For the fruit:
4 cups blackberries
2 tablespoons honey
juice and zest of one lemon
1 tablespoon cornstarch
1 teaspoon cardamom (optional)
For the crisp:
1 cup Jeanne’s all purpose gluten free flour mix (or same quantity regular flour)
1/2 cup (100 gr) light packed brown sugar
1 stick (113 gr) butter, softened
Directions:
Preheat the oven to 350F (convection or regular) and position a rack in the center. Prepare the fruit filling:
Place the blackberries in a large bowl with the honey, lemon zest and juice, cornstarch and cardamom. Toss well and reserve.
Prepare the crisp topping:
In a medium bowl, combine with your fingertips or a pastry blender the flour, sugar and butter and form large clumps of dough. Refrigerate at least an hour or freeze overnight.
Assemble and bake:
Divide the fruit filling evenly among 6 gratin dishes or ramekins. If the crisp dough was refrigerated, just break apart clumps of it over the fruit with your fingertips. If it was frozen, you can simply grate it on top with a large cheese grater.
Bake for 20-30 minutes. Let cool.
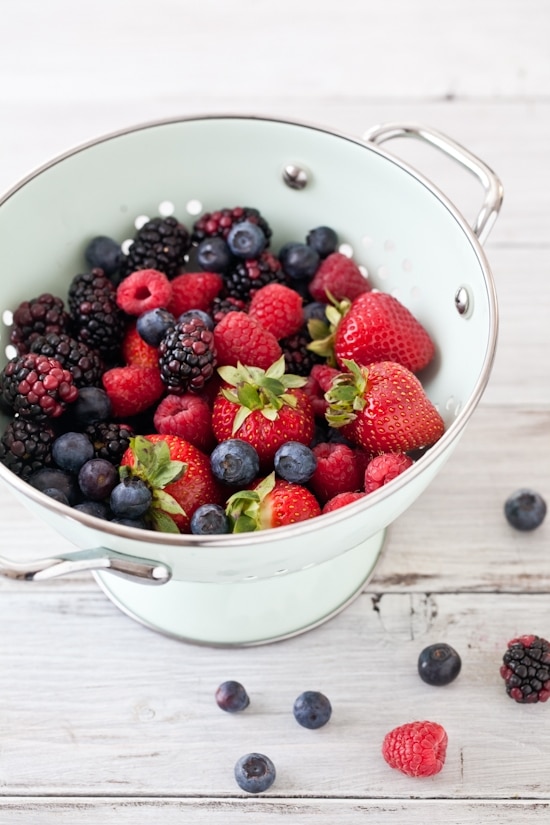
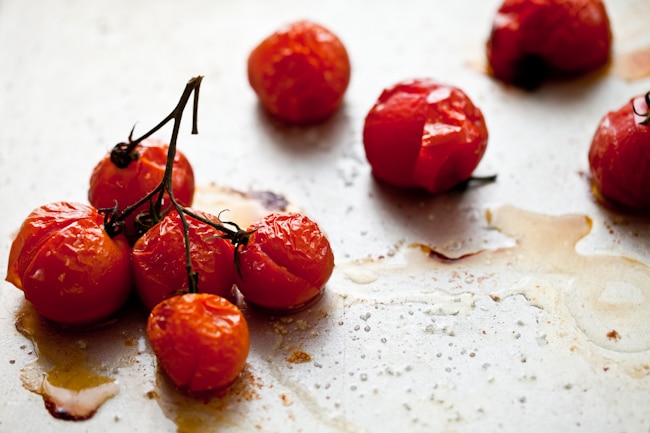
One of the great redeeming qualities of the Spring and Summer heat in South Carolina is the abundance of berries and stone fruits. Every Saturday at the farmers market, I load up on local peaches, plums, and berries. I know berry season only has a few more weeks so I am baking, cooking, freezing blueberries, blackberries, strawberries and raspberries by the pound. Many pounds actually.
My favorite way to eat them is simply not to mess up with them too much…Cut up with with a little lemon juice and creme fraiche. Sometimes vanilla bean ice cream. Lately it’s been with lots of lemon-lavender ice cream though. A whisper and a soft cloud with every bite. Sometimes, it’s simple compote with some honey and lemon-thyme or lemon verbena and we have that with a few shortbread cookies for dessert or a snack.
And then there are pies. Many days. Many pie days. Indeed. You know, with a nickname such as Tartelette that there are going to be quite many pies made around our house. I don’t know. It’s a never ending world of never ending possibilities. I always love seeing other people pie creations. They inspire. They make me hungry and then they make me head back into the kitchen to bake more pie…!
When I caught a glimpse of the Twitter conversation that Shauna, Garrett, Irvin, Justin and Ashley were engaged in one evening, I knew good things would ensue. Within a few short minutes, lots of people started telling them about their favorite pies, tarts, crust and fillings. I got hungry. Again. And decided to head to bed before being tempted to make a pie at two in the morning! I woke up to a delightful and spontaneous virtual Pie event taking place July 5th. I told you these guys were up to plenty of good.
So if you see an avalanche of pies on food blogs, Facebook and Twitter today, do not turn away. Do not worry about the state of the world. If anything it just became sweeter. Just give in. Read for a while and then run to make a pie!
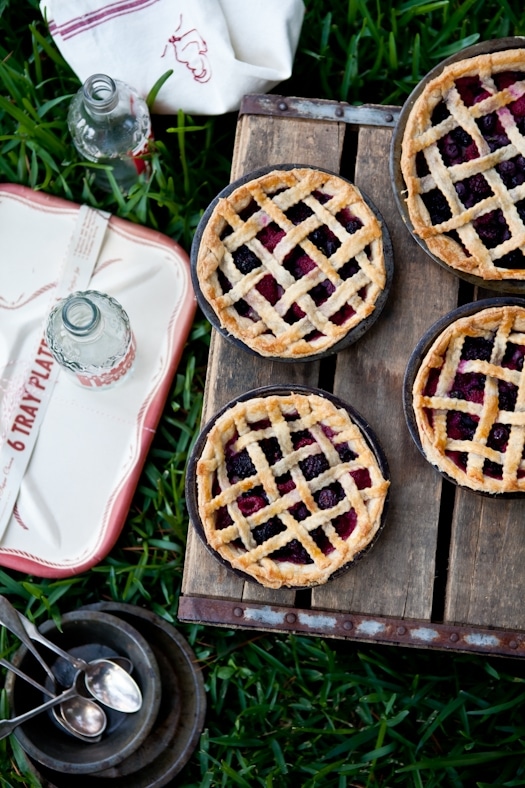
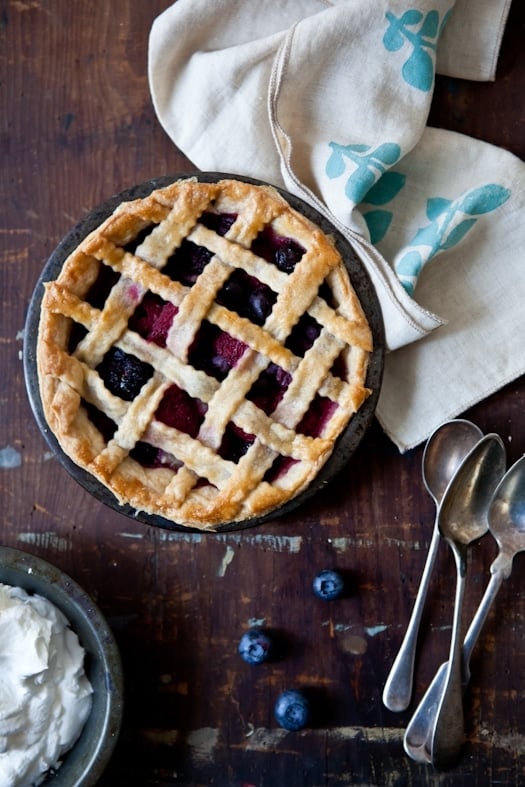
I made one of my favorite pies. A simple mixed berries pies served with whipped cream and a bit of powdered sugar. I added some lemon verbena to the fruits and that pretty much sealed the deal for us. Different. Intoxicating and perfectly soft on the first bite. Evocative on the last.
Pies. People. Make pies…
I am heading out to Salt Lake City today where I will be teaching a workshop organized by Heidi of Foodie Crush, then heading out to Park City, to take part in Evo 11 conference. The line up of panels, workshops and speakers is pretty amazing and inspiring. You can follow along on Twitter with the hashtag #evoconf.
I have to take work with me (proposals and assignments are never truly on hold) but I do plan on taking plenty of notes and pictures to share as much information as possible when I head back. Have a great week! Mixed Berry Pie:
Makes one 9-inch pie
Ingredients:
For the crust (pate brisee)
2/3 cup millet flour
1/3 cup superfine white rice flour
1/4 cup sorghum flour
(or you can use 1&1/4 cup all purpose flour instead of the 3 flours mentioned above)
2 tablespoons powdered sugar
8 tablespoons butter, very cold and cut in 1/2 inch dice
2 tablespoons to 1/4 cup ice water
1 egg mixed with 1 tablespoon water (to brush on the top crust)
Directions:
In a large bowl, mix together the millet, rice and sorghum flour. Add the powdered sugar and mix. Add the cold butter and mix with a pastry cutter or your fingertips until the mixture resembles coarse crumbs. Add the water, one tablespoon at a time and mix until the dough comes together in a ball. Flatten into a disk in between your hands and wrap in plastic wrap. Refrigerate 30 minutes (you can make it the day before too)
For the filling: Ingredients:
1/2 cup blueberries
1 cup strawberries (cut in half or quarters – depending on size)
1/2 cup blackberries
1 cup raspberries
zest and juice of one lemon
1 tablespoon fresh chopped lemon verbena (optional)
1/4 cup honey
2 tablespoons cornstarch or arrowroot
Directions: Place all these ingredients into one large bowl and mix together well. Let set for 20 to 30 minutes.
When ready to bake the pie, preheat the oven to 350F and position a rack in the middle.
Divide the pie into two balls, one slightly larger than the other. Roll the larger ball to 1/8-inch thickness on a floured work surface. Place in your pie plate and trim the excess all around the pan. Add the fruit mixture and spread out evenly on the bottom and pressing them down slighly. Roll the second ball of dough to also 1/8-inch thick and cut 1/4-inch strips from it. Layer them on top of the pie. Brush with the egg wash and bake for 30-40 minutes.
When I called my mother yesterday I had a burning question to ask her. As soon as we started talking, I completely forgot. I was outside on the deck and heard a plane over my head. Felt a cool breeze through the pecan tree and just sat there. It took me back to our chalet in the Alps on a hot summer day. Gliders brushing the mountain sides, kids biking furiously to the pool. I got pensive. Mostly I had a smile on my face.
I got quiet for a little while and she asked if I was getting sad as we talked about summers, the cousins growing up, their travel plans, etc… I mumbled "I’m fine! I am testing the mixed berries sorbet I just made!" She asked if I could focus on the conversation to which I replied "no can’t do. Do you still have your T-Fal sorbet maker?" I had remembered my, well at least to me, burning question.
Her turn to get quiet for a while "I have no idea. Why do you ask?". I knew I had piqued her curiosity. "No reason. Everytime I make sorbet I think about that darn sorbetiere and how much we’d crank it up in the summers. It was cool. It was special." It was special indeed. I’ll always remember the day my mother brought that sorbet make home. Homemade sorbet anytime we wanted? As kids it was like Christmas in July!
See, in France, desserts eaten at home during the week are not buttery flaky pastries bought at the corner bakery on the way home from work. Those are for Sundays. No, desserts often consist of a dairy product and a fruit. I grew up on homemade yogurt and fruit for dessert. Ice creams and sorbets were not only specials, they were a once a year kind of thing. They spelled Summer.
It was a special thing indeed to have sorbet or ice cream or pastries back home. I do the exact same thing here. The weekends and dinner with friends are meant for special treats. And for good reasons. Time on slower motion is something to be celebrated (I’m always on even when I’m off. Can’t help it). Time spent with friends is celebrated. The generosity of their sharing our table, their time and stories with us. I want to acknowledge that by making them something special.
Enter sorbets, ice cream, tarts, mousses, and all sorts of goodies I enjoy making. I enjoy seeing their shoulders drop and their pupils scintillate as they dig in the first bites. I enjoy that pause as the flavors wraps around their taste buds, the scents and aromas arousing their senses. I am at my happiest when I gather people I love and respect around food. I know that’d make my grandmother smile.
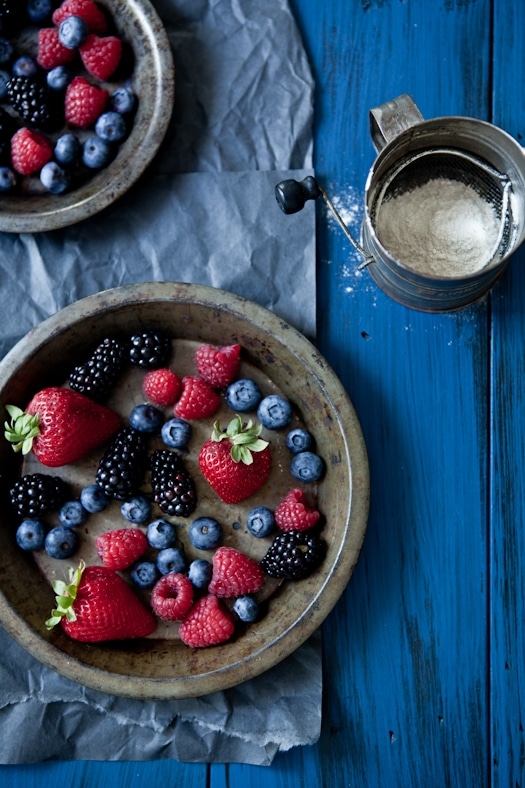
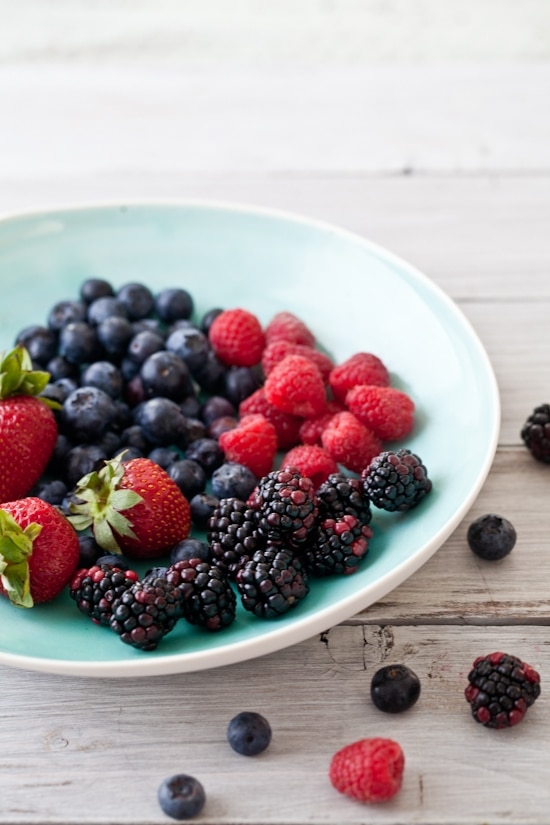
There were so many luscious berry baskets at the farmers market this past week that I got a lot of everything. Blueberries, blackberries (twice), strawberries (again), raspberries (always). Stone fruits and rhubarb also ended up in our basket but that’s for another get together later this week. It’s summer! The house is open to anyone with a good story and a smile.
This sorbet is my go-to recipe as I can change the fruit according to the season and always get the same delicious result. Tart and sweet flavors. You can really taste them all separately and together with every bite. Paired with a simple vanilla shortbread cookies and you have one of our favorite summer treats.
Now…I need to fly home and find that sorbetiere my mom bough when we were kids…!
Ingredients:
3 cups fresh or frozen mixed berries of your choice
1 cup sugar
2 cups water
zest and juice of one lemon
Directions:
In a medium saucepan set over medium high heat, place the berries and the rest of the ingredients and bring to a quick boil. Reduce the heat to low and simmer 10 minutes. Remove from the heat and let cool completely. Puree until smooth in a blender or food processor and then strain through a fine mesh chinois (strainer). Process in your ice cream machine according to the manufacturer’s instructions.
Vanilla Shortbread Cookies:
Makes about twenty 2-inch round cookies.
Ingredients:
1 stick unsalted butter at room temperature
1/4 cup sugar
1/2 vanilla bean
2 egg yolks
1 cup millet flour
1/2 cup sweet rice flour
2 tablespoons to 1/4 cup milk (optional)
Directions:
In the bowl of stand mixer fitted with the paddle attachment, whip the butter and egg yolks together on medium speed until creamy looking. Split the vanilla bean in half and scrape the seeds with the back of a knife and add to the butter and sugar mixture. Mix for 10 seconds. Add the millet and sweet rice flour with the mixer still on low speed. If the mixture feels too crumbly add a little bit of milk to obtain a smooth but not too wet dough. Start with one tablespoon at a time.
Gather the dough into a bowl and refrigerate for about 2 hours.
When ready to bake, turn the oven to 350F and position a rack in the middle.
Roll the dough in between 2 sheets of parchment paper and roll to about 1/4 to 1/8-inch thick. Cut cookies out in the dough and place them on a parchment lined baing sheet. Bake for 10-12 minutes or until golden.
Serve with the sorbet.
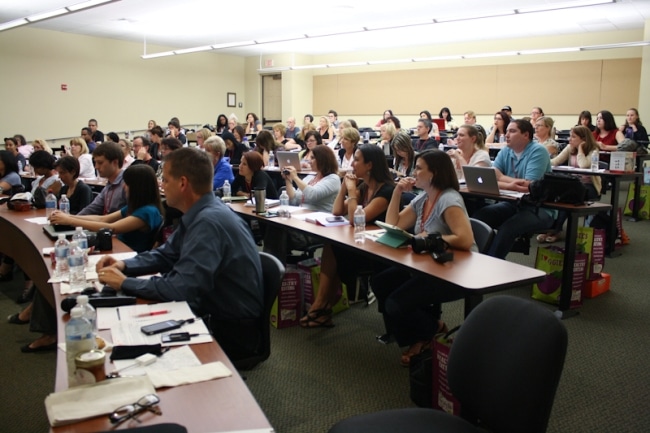
Hard to believe that just last weekend I was in lovely Florida teaching a hands-on photography workshop to a great bunch of bloggers or food enthusiasts. That Sunday was just the icing on the cake actually of an already darn good time in Orlando where I had come to speak at Food Blog Forum (FBF).
When Jaden asked if I wanted to be part of FBF Orlando for the photo sessions, I did not hesitate long. Jaden’s energy, kindness and genuine interest in people know no boundaries. She’s always been great of great counsel to me and I always feel relaxed and smiling after a few hours in her presence. After the intense rhythm of the past 6 months I needed to relax. Mapping out the next six months made me realize it was now or never to give myself a mandatory break.
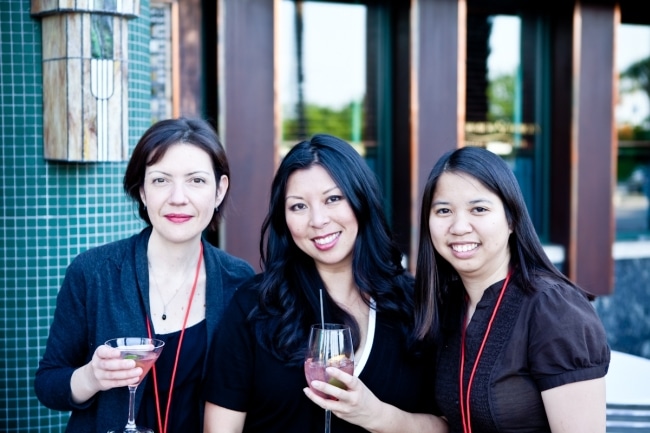
With Jaden and Julie.
I was thrilled to see Julie again and let me tell you, she deserves a long line of kuddos, and "thank yous" for organizing the event so successfully. Not only did she organize the main event on Saturday but she also helped put together an extra hands-on worshop on Sunday for people who wanted to practice more or could not make it to FBF the day before. Thank you Julie!
It does sound cliche but I was thrilled to see familiar faces as well as finally meet the people behind my weekly reads. I love this community. Food bloggers are the best! The generosity of the food community in Florida is awesome. It made me even more excited to be back that way later in the summer and I am looking forward to seeing those wonderful peeps again.
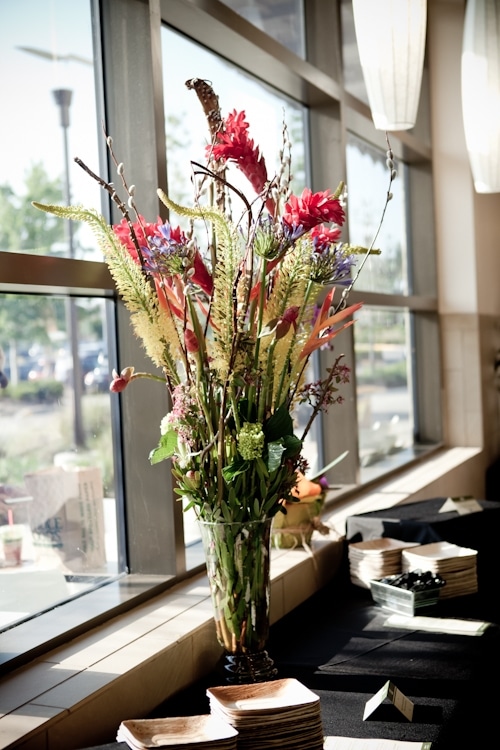
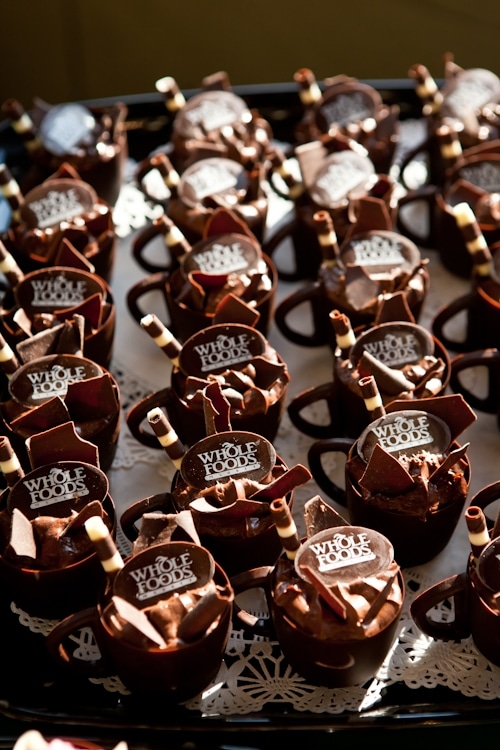
The weekend kicked off with a little mixer/get together at Whole Foods where we were showered with attention, food and wine. Everything from small savory bites, chocolate mousse in chocolate cups to live cooking demos. Every one had the chance to mingle and introduce themselves as well as get all revved up for the next day’s events.
Indeed, Saturday was packed. I love events such as these because there is always something to learn, something to contribute and something to walk away with whether you are a speaker or an attendee. It was like a grand big talk where everyone was at ease to speak, listen and as questions.
It was a treat listening to Jaden and Scott, Jeff Houck from the Tampa Tribune, Heather McPherson from the Orlando Sentinel, Peter Scott from Izea, Lindsay Landis from Purrdesign and Dawn Viola from Wicked Good Dinner. Tons of topics were covered so that everyone could find something that pertained to where they were in their blogging journey. Branding, working with newspapers, working with brands, SEO, blog design, and photography and styling.
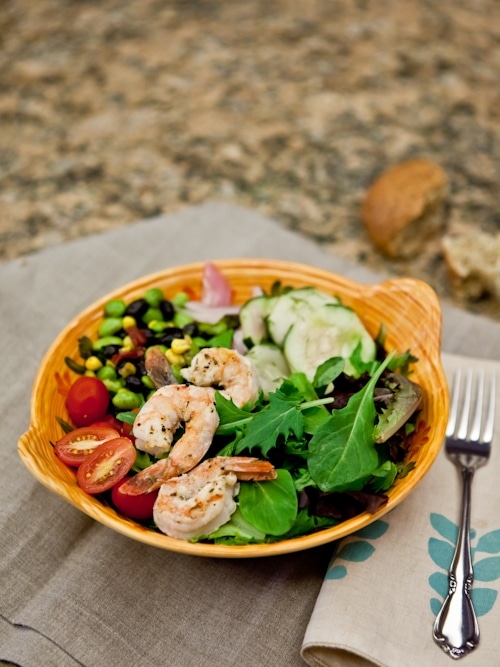
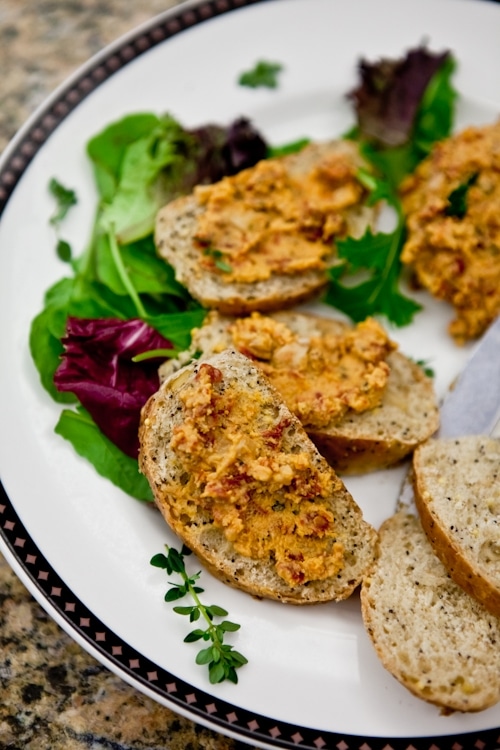
My presentation was broken in two parts with the first one covering basics of camera modes, natural and artificial light while the second part was a live composition and styling demo. I focused the demo on two items, one was a pretty and colorful mixed salad and the other a goopy brown scoop of sun dried tomato and white bean spread. I took the group through my thought process for composing my shot and styling the food just as if I were at home working blog or in the studio with a client.
Here is a recap of the styling photo composition session. Bear in mind that these were just decisions I took on that specific occasion. I am in no way saying that these are the decisive steps to style salads or dips. Every time I style salads and spreads I find myself doing it in a myriad of other ways:
– The salad was to be composed of mixed greens, mixed bean salad, cucumber salad, grilled shrimp and grape tomatoes.
– I decided not to scatter the ingredients all over the salad because they would get lost and would make it hard for the viewer to tell what was what.
– Instead I created small clusters of each component and placed them on the outside so that the bulk of the greens would still be visible and indicate it was a salad indeed.
– I cut a couple of the tomatoes open to add visual interest with a different angle and cut.
– I did not have vinaigrette for the salad but if I’d had some, I would have waited until the last minute to use it on the salad to keep the greens as fresh as possible.
– there were only white plates or rustic yellow bowls available as props (I had brought linens and my styling kit).
– I picked the yellow bowl to play with the all the colors of the salad components and it complemented the linens and surface I was working on.
– kept a 3/4 camera point of view so that I could show the bowl in its entirety without any weird angle and without being too "in your face" which is not helpful when you are trying to see the bigger picture.
– I picked and a medium depth of field, not too shallow that you could not tell the ingredients apart and not too deep that they were all in focus. It helped hide the fact that the cucumber was a bit passed its prime too.
The spread came from a standard grocery store plastic container which I decided not to keep for aesthetics reason and instead decided to show what one can do with a "goopey mess".
– Instead of plating a mound of spread, surrounded by bread slices and a few salad leaves for garnish, I decided to show a progression and use the spread in action so to speak.
– it allows one to play with shapes and angles and not be restricted by just one direction and composition.
– Spreads and dips are less difficult to style and more interesting to shoot if you make them do something.
– I placed a large spoonful of the spread on the side as to show my starting point
– I cut out some slices of bread and spread some of the dip on half the slices, leaving the remaining half without to show that there were still plenty to be used.
– I left the knife on the plate to reinforce this idea of movement from the starting scoop of dip to using the bread to eat it with, etc…
– I used a spring of thyme as it was part of the herbs listed in the ingredient list and it added a nice touch to the plate. I could have scattered more around but it was not really necessary with the view point I wanted to try for taking the shot.
– I went with a closer/tighter camera angle and viewpoint than the salad because there was no reason to show more of the spread/dip than necessary. It was not pretty in its natural state so it was best to focus on the best toast with dip on it.
– I chose a shallow depth of field to keep the background element of more spread and bread which were not that visually interested out of focus but still part of the plate.
Beside picking out the ingredients to style, I did not think a whole lot about what I would do until it was time to do the demo. I wanted to keep things as spontaneous as possible and talk participants through issues or decisions as I was encountering them myself. It also showed them that there is no trick or scientific formulas behind all this. The magic one creates is nothing but a series of decisions and attempts. I also stressed out that this is what I went for that specific day but I could have gone many different ways on many different days depending on light, props, ingredients, time, mood and feel I wanted to portray. There is no wrong or right. Just do what feels sincere to you.
That was the focus of the Sunday workshop which took place independently from FBF. I pretty much let the group lose at Whole Foods (!) to pick a few items to style and we went more in details about camera modes and angles, natural light and how to use its different sources for different purpose, diffusing, bouncing, speedlight and studio light for those who have to shoot late at night. After that everyone styled and composed a shot and I went around giving tips and techniques they could also use.
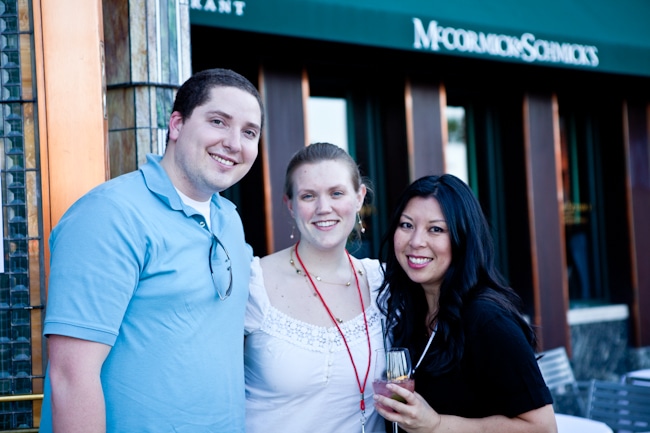
Adam and Joanne from Inspired Taste with Jaden. After the Sunday worshop, they surprised me by asking if I’d mentor them in photography. I said "of course!"…of course!
My goal was to give them as many tools as possible whether they decide to use one or ten. Knowledge is power. So is coming up with your own visual identity. I was thrilled to have 12 participants come up with 12 different ways to view their relationship with the camera. What a breath of fresh air! It was the best 4 hours spent before an airplane ride back to Charleston.
Thank you to all the people who attended FBF! If a Food Blog Forum comes close to you one day, hurry to be part of it. You won’t regret it. You can read more opinions, recaps, thoughts and takeaways on the event at the bottom of the Food Blog Forum Orlando page, here.
It’s another packed Sunday here with friends as well as scheduling work and we are all in the kitchen making Sangria, one of the drinks served at the FBF Saturday reception held at McCormick & Schmick’s. I was so busy playing that I forgot to ask them for the recipe but I knew that my buddy Taylor had a scrumptious one on his blog. Head after the jump to read more about it.
Happy Sunday!
The winners of Super Natural Everyday by Heidi Swanson are: Avery at Love Veggies and Yoga and Janna from Knitting Relaxes Me. Email me your mailing addresses at mytartelette [at] gmail [dot] com so I can pass them on to the publisher. Congrats! Blood Orange & Blackberry Sangria,reprinted with permission of Taylor Mathis:
3 blood oranges
1 cup blackberries
1.5 liter of good red wine
1/4 cup honey
1/2 cup Grand Marnier
Save one of the blood oranges for garnish. Squeeze the juices from the remaining oranges and combine with the blackberries, wine, honey, Grand Marnier into a large pitcher or punch bowl. Stir the mixture until everything is combined.
Chill the sangria over night. Right before serving, cut the blood orange into thin slices and add them to the pitcher or punch bowl. Serve cold.
*******************GIVEAWAY ENDED APRIL 14TH************************************
Last night, as I was waiting for my flight in Orlando for my flight back home, all I could think about was the serving of Heidi’s Macaroon Tart awaiting me back in Charleston.
I have had a great time teaching at Food Blog Forum on Friday and I can’t wait to share pictures and information of what was shared a little later next week. My head is still full and my heart is bursting at the seam. I knew it already, but let me say it again, Food Bloggers Rock! Thanks to Julie who helped plan the whole weekend, I was able to teach a photography and styling workshop today before my flight. Awesomeness again…
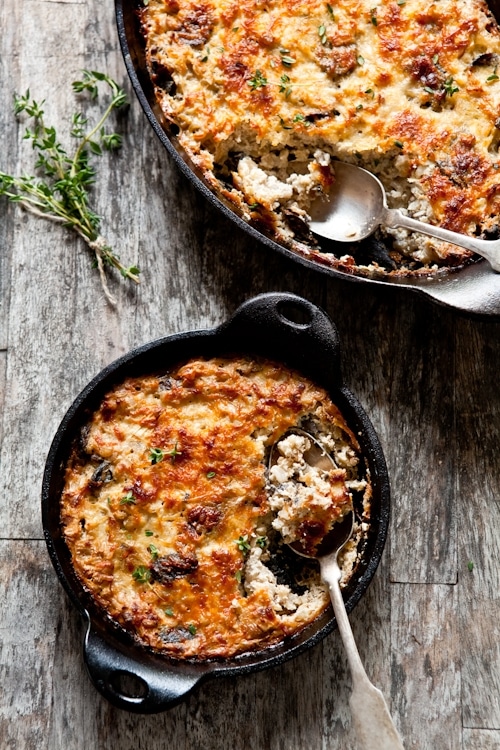
Wild Rice Casserole.
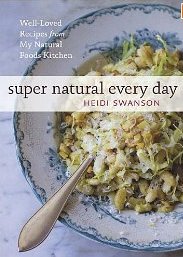
Today, I really want to talk about Heidi Swanson's book Super Natural Everyday except everything I want to say never seems enough. Everytime I get a book for review, I make sure to devote a chunk of the week to cook from it. It helps see the thread use by the author to build the book. the stories, the photography. All the dishes I cooked this past week from her book led me down the same path: practical, satisfying, energizing, good and good for the soul.
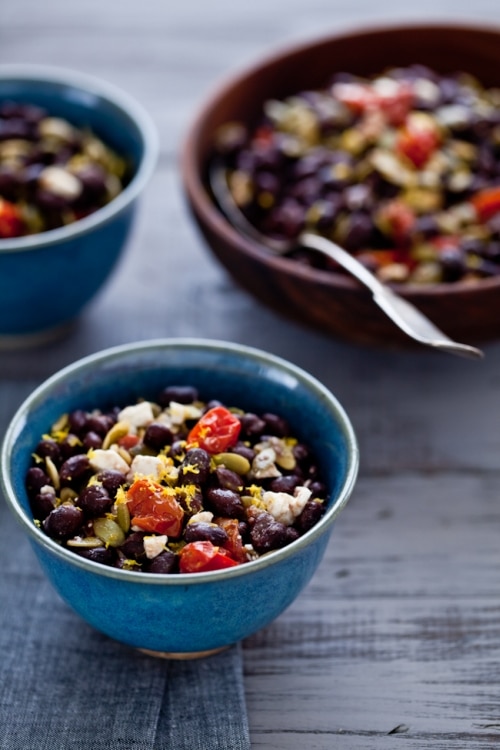
Black Bean Salad.
In one word. I can’t wait to cook from it even more. The food is tasty, fresh and Heidi’s personality and wonderful soul shows at every turn of the page. A beautiful soul with a wonderful message to share. Good food, made with wholesome ingredients does not have to come in gargantuan portions nor is it difficult or time consuming to make. The flavors in all of Heidi’s dishes are a burst of everything that is good with eating and cooking in this world.
And the photography…always loved how Heidi’s lets her readers eat with their eyes first. Her photography is authentic and hers. Just as she is. Just as her food.
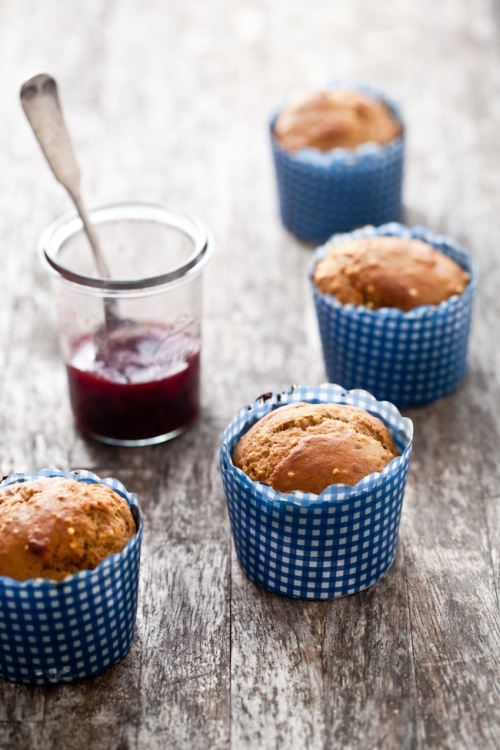
Millet Muffins & homemade strawberry jam.
I emailed her publicist a few days ago and asked if I could hold a giveaway of a copy of Heidi’s book for you guys. To my delight, I am happy to be able to share two copies with you guys! If you need a little enticing, check out the recipes for her Shaved Fennel Salad and Macaroon Tart after the jump!
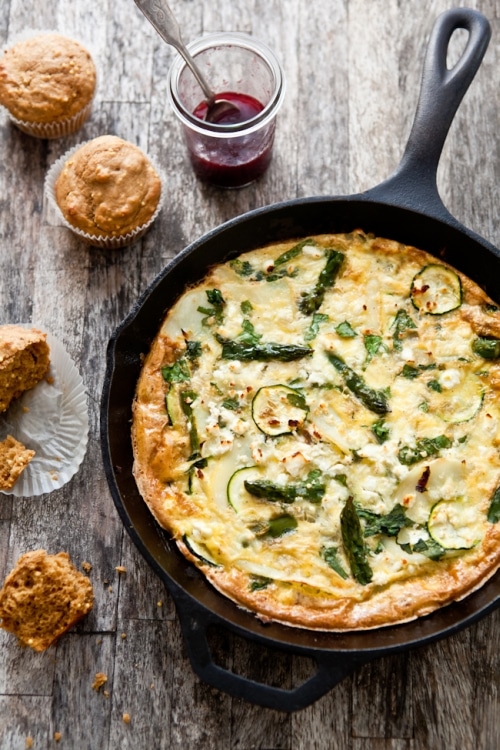
Millet Muffins and Frittata.
To enter the giveaway:
– leave a comment on this post starting today until Thursday April 14th midnight Eastern time.
– one comment per person
– no anonymous comment please
– two winners will be picked randomly by the hand of the wise, my husband
Note: it may take up to 24 hrs for your comment to appear on the page.
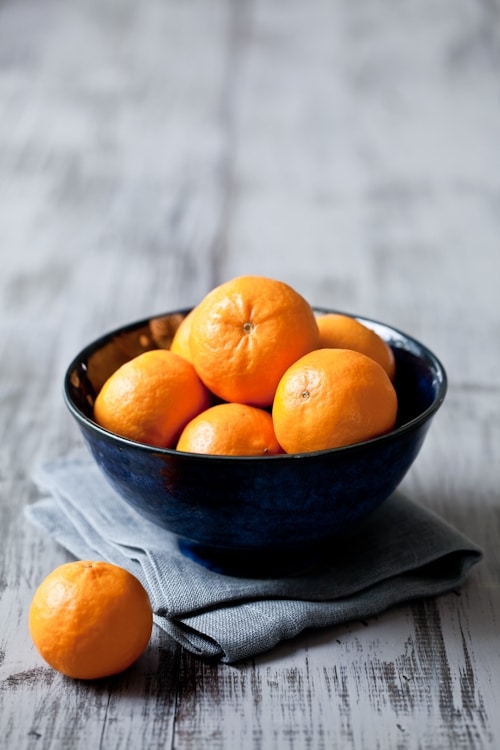
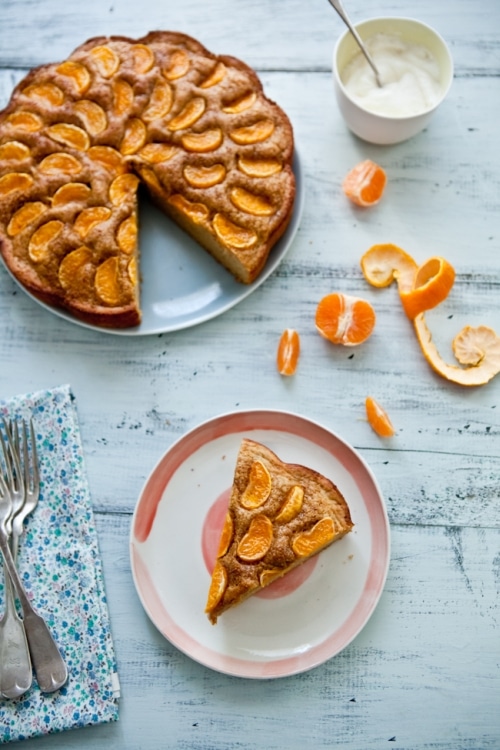
Heidi has this fabulous Buttermilk Cake recipe that she makes with plums but I used Pixie tangerines since they were in season.
Buttermilk Cake.
I had such a blast cooking, eating and photographing her recipes. I take immense pleasure at shooting other people’s recipes and Heidi’s was not exception. When it comes from the heart, the photography part becomes a source of intense joy. I hope the next few shots entice you to get her book and start cooking from her book soon.
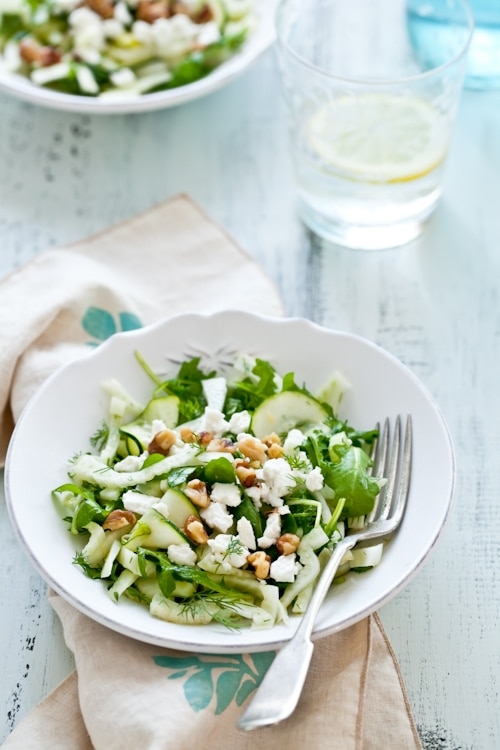
Shaved Fennel Salad.
Shaved Fennel Salad, with permission of Ten Speed Press:
Serves 4 to 6
1 medium large zucchini, sliced into paper thin coins
2 small fennel bulbs, trimmed and shaved paper-thin
2/3 cup/.5oz/15g loosely chopped fresh dill
1/3 cup/80ml fresh lemon juice, plus more if needed
1/3 cup/80ml extra virgin olive oil, plus more if needed
fine grain sea salt
4 or 5 generous handfuls arugula
honey, if needed
1/2 cup/2 oz/ 60g pine nuts, toasted (I used walnuts)
1/3 cup/2 oz/ 60g/ feta cheese, crumbled
Combine the zucchini, fennel and dill in a bowl and toss with the lemon juice, olive oil and 1/4 teaspoon slat. Set aside and marinate for 20 minutes, or up to an hour.
When you are ready to serve the salad, put the arugula in a large bowl. Scoop all of the zucchini and fennel onto the arugula, and our most of the lemon juice dressing on top of that. Toss gently but thoroughly. Taste and adjust with more of the dressing, olive oil, lemon juice, or salt if needed. If the lemons were particularly tart, you may need to counter the pucker-factor by adding a tiny drizzle of honey into the salad at this point. Let your taste buds guide you. Serve topped with pine nuts and feta.
******************************************************************************* Macaroon Tart, with permission of Ten Speed Press
Makes 24 bite size servings (I made 2 rectangular tarts with one recipe)
Crust:
1 1/2 cups/6oz/ 170g white whole wheat flour (I used 1 cup brown rice flour and 1/2 cup millet flour)
3/4 cup/ 2 0z/ 60g unsweetened finely shredded coconut
3/4 cup/ 3.75oz/ 106 g sifted and lightly packed natural cane sugar
Scant 1/2 teaspoon fine grain sea salt
10 tablespoons/5oz/140g unsalted butter, melted
Preheat the oven to 350F/180C with a rack in the middle of the oven. Butter an 8×11-inch tart pan (I used two 14×5 ones) and line the bottom and sides with parchment paper.
To make the crust, in a large bowl, combine the flour, coconut, sugar and salt. Stir in the melted butter and mix until dough is crumbly but no longer dusty looking. Firmly press the mixture into the bottom of the prepared pan (it should form a solid, flat layer). Bake for 15 minutes, or until golden. Remove and set aside to cool for a few minutes.
In the meantime, prepare the coconut macaroon filling by combining the coconut, sugar, and egg whites. Mix until well combined.
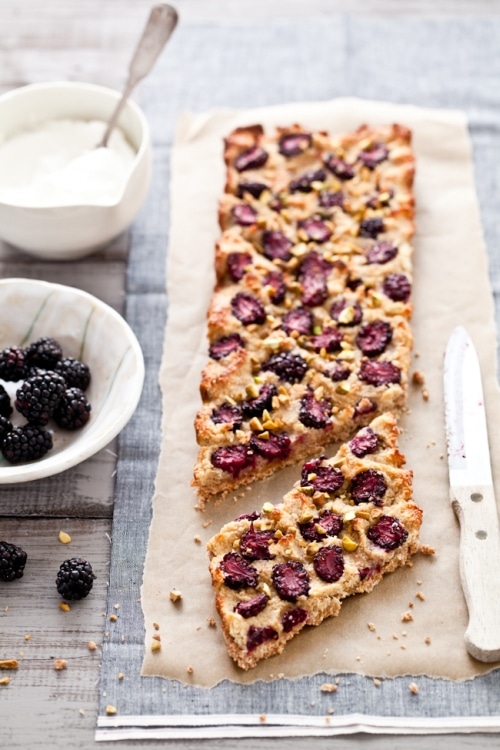
Evenly distribute the blackberries across the tart base. Now drop little dollops of the macaroon filling over the tops of them (dirty up your hands for this part), and mush and press the coconut topping around into the spaces behind the berries. Be sure to let at least some of the colorful berries pop through for visual flair.
bake for 20 to 25 minutes, until the peaks of the macaroon filling are deeply golden brown. Let the tart cool, then garnish with the crusted pistachios before slicing into small squares.
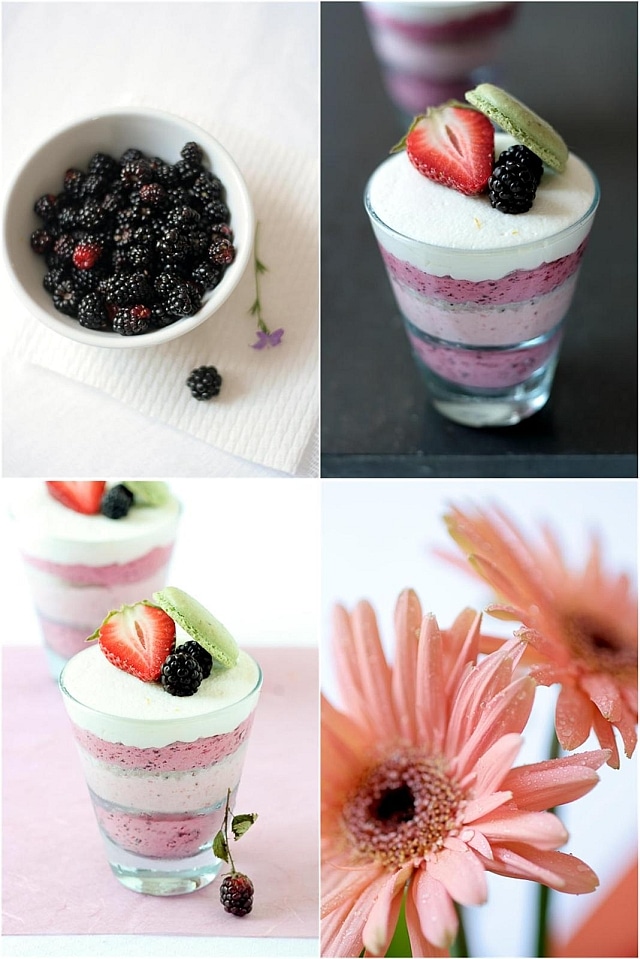
"Whatcha making?" Bill asked when he stepped into the kitchen area on Sunday. "My birthday cake" I replied, scraping the last bit of batter onto a sheetpan. He then pointed at the two bowls filled with strawberries and blackberries, the couple of lemon and the bottle of Limoncello. "Yes, yes, yes…all those for my cake". His eyes lit up in anticipation and he left the room uttering "hmmhmmhmm".
A few hours later, he tried to sneak a peak into the refrigerator to see the final product and opened and closed the refrigerator door a couple of times. "Where is it? Are you done yet? I can’t see it!". I pulled out a tray of glasses and handed him a spoon. "It’s not a cake! Wait…I am sorry. It’s your birthday, I should have known better…"
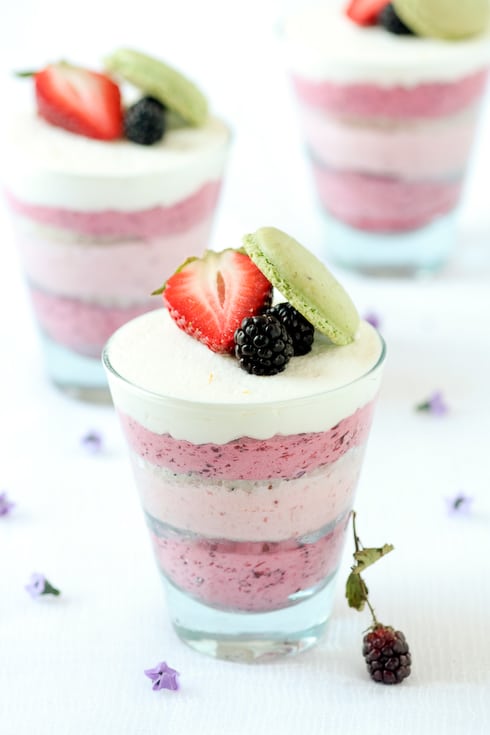
Lemon poppy seed cake brushed with straight Limoncello and layered with strawberry and blackberry mousse. There is cake, there is cream and there is enough space to stick a candle in it. I am ready to celebrate!
Yes, it’s my birthday and since I like to make myself something I really want, it is most often one of three things (and sometimes all at once): it usually contains lemons, it must be small and preferably in a verrine (glass). The sound of spoons digging that last bit of dessert in the bottom of a ramekin or glass is music to my ears. It doesn’t mean the end. It means everybody reached the bottom and "cling-cling" wishes for more. Happy sound.
With the abundance of local strawberries and the hot days we have been having, I started craving something light and refreshing. Everyday I’ve also been getting wild blackberries from the woods across the street and my mere one cup harvest grew to a whopping 1 pound on Sunday morning. I don’t think the new neighbors have realized yet the treasure laying at their feet just a few yards away. I am already scheming blackberry pies, cobblers, sorbet and secretly wish they don’t figure out what I am doing in the morning, reaching down into the bushes. I want it all….I promise to share the results of my baking though. Promise. Yes, really!!
As I was eating my (early) birthday treat, I started thinking about Bea, Anita and Jeannette, also celebrating another year this month and Kate to-day! There is also one tiny person who now can be added to the list of May babies and that is Kristin's newest addition, Leah Katherine, born on Monday night. This dessert is for you all!
Makes enough for ten to twelve 6 to 8 oz ramekins or glasses
For the cake:
1 1/2 cups (185gr) all purpose flour
1 cup (200gr) sugar
1 tablespoon (14gr) baking powder
1/4 (1.5gr) teaspoon salt
1/2 cup egg whites (about 3-4)
3/4 (175ml) cup milk
1/4 cup (62.5ml) lemon juice
grated zest of one lemon
1 tablespoon (9gr) poppy seeds
1 stick (113gr) unsalted butter, melted and cooled
For the strawberry mousse:
2 teaspoons powdered gelatin
1 tablespoon water
8 oz (210gr) strawberries, pureed
1/4 cup (50gr) sugar
1/2 teaspoon lemon zest
1 tablespoon lemon juice
3/4 cup (6oz – 190ml) heavy cream
For the blackberry mousse:
2 teaspoons powdered gelatin
1 tablespoon water
8 oz (210gr) blackberries, pureed
1/4 cup (50gr) sugar
1/2 teaspoon lemon zest
1 tablespoon lemon juice
3/4 cup (6oz – 190ml) heavy cream
Limoncello
Prepare the cake: preheat oven to 300F. In a large bowl, stir together all the dry ingredients for the cake. Set aside. In a separate medium bowl stir together the egg whites and the milk. Make a well in the center of the flour mixture and slowly add in the egg white mixture while stirring with a whisk. Stir in the lemon juice, zest, the poppy seeds and the melted butter. Mix with a whisk until smooth. Line a quarter sheet pan with parchment paper, lightly spray with cooking spray and pour in the batter. Bake for 20 minutes or until a toothpick inserted in the center comes out clean. Let cool completely and cut out as many disks as you need to fit inside your ramekins or glasses.
Prepare the strawberry mousse: sprinkle the gelatin over the water in a small bowl and set aside to bloom (soften).
In a medium saucepan set over medium heat, stir together the strawberries and sugar just until hot. Add the gelatin and stir until it is completely melted. Let cool to room temperature. In the meantime, whip the heavy cream to soft peaks. Once the strawberries are at the right temperature, carefully fold the whipped cream into the fruit base.
Prepare the blackberry mousse the same way.
Assemble the verrines: brush Limoncello on each of the cake pieces or rounds that are going to be used in the glasses. Place a cake round at the bottom of the glass, top with blackberry mousse, one cake round, strawberry mousse, one cake round, blackberry mousse. Finish with more wipped cream if desired (I added lemon zest to mine).
It’s "Share Your Space Friday" here again!! I have never posted that much in a week and the fun part is that I only had to write an intro!!
I am loving having guest bloggers and not only because it gives me time to frolic in the sun (ugh…no not really…!) but mainly because it is like having a friend stop by and share with you a bit of their day, their personality, etc… And if personality had a name, it would be Kelly from Sass and Veracity. I knew from the first post that I’d be reading forever…I think it was her post on creme brulee and I found myself almost hugging the computer screen just staring at her stove. Meeting her last Fall was the icing on the cake….if only my mom and mother-in-law would let me be adopted by this sassy gal…sigh… She’s got verbage, she’s got class, she’s got ethics and an amazing sense of humor. Most of all, I don’t know better person to cheer anybody on in anything they venture doing.
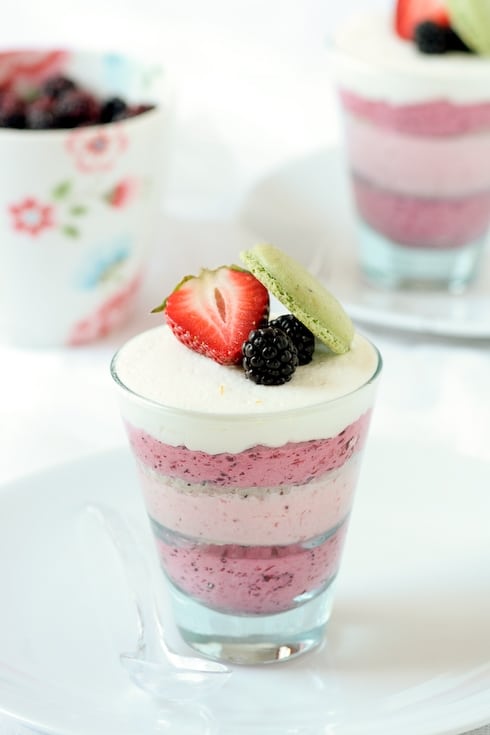
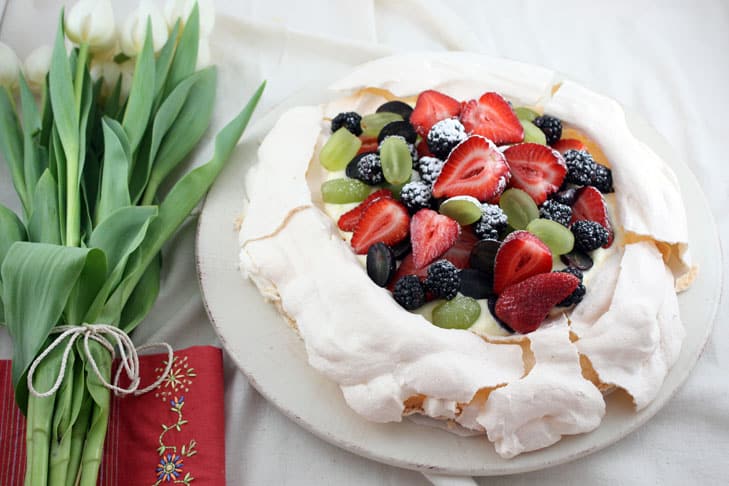
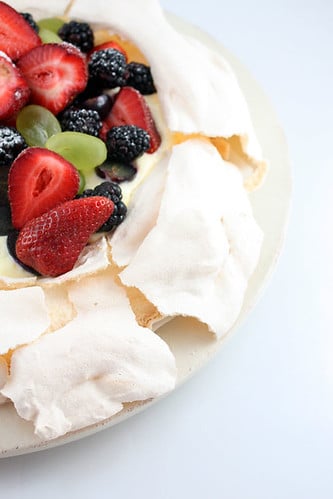
I am thrilled to have Kelly pop by and share with you this amazingly refreshing pavlova. Read on for the recipe. Now….doesn’t this look amazing for Spring! Happy Easter everyone!
I’m one of those cooks who is notorious for preparing recipes I’ve never tried before when there’s a special occasion looming. It doesn’t matter whether it’s for family, close friends, or a party for 40, I can guarantee that everything I make will be new to me. I’m sure that to some, I’m either grossly egotistic, or to others, a complete fool. I’d say adventuresome — or a glutton for punishment. The thrill of discovery during the planning process far exceeds any worry I could have about screwing something up. I love sifting through my magazines, cookbooks, and favorite web sites looking for the perfect recipe — especially if it’s something totally new.
So when Helen contacted me about doing this guest post, after initially grinning like a sap, I felt as if I’d been given permission to create the biggest planning mess I’ve made in a while. Cookbooks and magazines everywhere. A bookmarking frenzy on my Mac. Silly questions about "which recipe would be best" posed to my 16-year-old son who patiently indulged me with a more than one-syllable response. It was as if I’d been invited to a lovely party and then realized I didn’t have anything to wear. Even if I actually had a particular recipe in mind, and said recipe came out perfectly, I’d have to take photos.
Ah, the photos. I’ve all but swooned over Helen’s ethereal photos at one point or another. Light and airy, softly beckoning me to linger over what she has prepared, each photo taunts me with a "just you go ahead and try to make this, girlie!" And I think, in time — all in good time after kicking my procrastination skills into high gear. I met Helen last last Fall at the wedding of a mutual friend, and it took no time at all to learn just why her work is as flawless as it appears. She’s patiently persistent, works hard, is extremely focused, works hard, and has a seemingly bottomless reservoir of energy. Did I mention how hard she works? Meeting her was an absolute pleasure. Clearly, I had to make something that would have a chance of gracing the page, right?
Ironically, I came very close to baking a Paris Brest, something I’ve made before, but at the last minute, changed my mind. I’m sure it has nothing to do with the fact that the last time I made pate a choux, I was less than thrilled with the outcome. Instead, I’ll blame it on the photograph I saw in this month’s issue of Gourmet of the "Pavlova with Lemon Curd and Berries." Its imperfect, simple appearance reminded me of a galette and prodded me to reconsider the long standing issue I’ve had with meringue. Not the meringue on pies — meringue that’s baked. For some reason, I’ve always steered clear of it, not quite relishing the sensation it causes in my teeth when I bite into it. Or maybe it’s the near weightlessness of it. Surely something so light can’t have much substance. Excuses, excuses.
But I was mesmerized by the Pavlova, a dessert named after the famous Russian ballerina who, after touring Australia and New Zealand in the 1930’s, is said to have had this dessert named after her. Although it’s the "light and airy" aspect of her dancing that the dessert was created to mimic, I’m reminded more of a flouncy tutu, fluffed high with tuille. Just beautiful.
I’ve been savoring this dessert since yesterday, marveling over extreme contrasts in texture and flavor. The meringue crust, so delicate that touching it causes it to shatter, melts on my tongue. In the center, the meringue is a creamy, marshmallow treat, its sweetness tempered by the tartness of the lemon cream. The combination of the berries and grapes add a perfect crunch that brings it all together. Whimsical, unpredictable, and oh so delicious.
Here’s to you, Helen. You’re an inspiration to me in many ways and I’m quite honored to have done this for you.
Pavlova with Lemon Cream, Berries, and Grapes
For the meringue…
1 cup superfine granulated sugar
1 tablespoon cornstarch
3 large eggs at room temperature 30 minutes
3 tablespoons cold water
1 teaspoon distilled white vinegar
For the filling…
2/3 cup granulated sugar
1 tablespoon cornstarch
1/8 teaspoon salt
1/3 cup fresh lemon juice
1/2 stick unsalted butter
3 large egg yolks, lightly beaten
2 teaspoons grated lemon zest
1 cup heavy cream
2 cups mixed berries
2 cups grapes
Preheat oven to 300ºF and position a rack in the center. To prepare the lemon cream, stir sugar, cornstarch, and salt in a saucepan. Add the lemon juice and butter, bringing the mixture to a simmer over medium high heat. Continue to whisk at a simmer, about 1 minute. Whisk about 1/4 of the mixture into the beaten egg yolks, then transfer the egg yolk mixture back into the saucepan. Over low heat, continue to cook, but make sure not to boil, whisking constantly until the lemon curd is thick, about 2 minutes. Scrape into a shallow bowl, stir in the lemon zest, and place a piece of parchment over the surface. Refrigerate for about 1-1/2 hours.
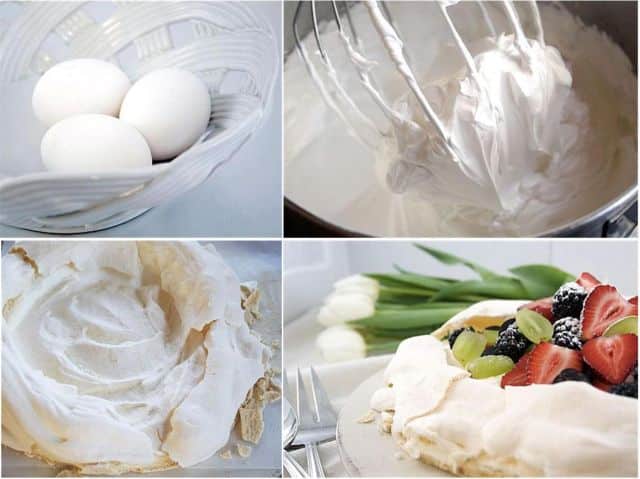
To prepare the meringue, line a baking sheet with parchment and trace a circle about 7″ in diameter in the center. Turn the parchment over.
Whisk superfine sugar and cornstarch together in a small bowl. In the bowl of an electric mixer, beat whites with a pinch of salt at medium speed until soft peaks form. Add the water and beat until whites hold soft peaks once again.
On medium-high, beat in sugar mixture 1 Tbsp at a time. After all sugar has been added, beat 1 minute longer. Add vinegar, then beat at high speed until glossy and stiff peaks form, about 5 minutes (longer if using hand-held mixer). The meringue will be extremely thick.
Spread meringue carefully to cover the circle on the parchment, creating a cavity in the center (for the filling). Bake until meringue is pale golden and has a crust, about 45 minutes. Avoid opening the oven door! Turn oven off and prop door open slightly with a wooden spoon. Cool meringue in oven 1 hour. The exterior will be dry and possibly cracked, the inside more like the consistency of marshmallow.
To assemble the pavlova, beat the heavy cream just as it holds stiff peaks, then 1/4 cup at a time, whisk cream into the lemon curd. Check consistency each time before adding more cream. It should be able to mound. Spoon lemon cream into cooled meringue and mound fruit in the center. Serve with extra whipped cream if desired.
Yesterday I woke up to the sound of my husband’s trombone and although he rarely rehearses at home it did not strike me as unusual. It felt nice actually. Deep, resonant notes, slightly muted as they came through the floor and walls. I immediately recognized the melody of "our" song, "Can’t give you anything but love". The trombone stopped, the pupps rushed down the steps toward the bedroom and when they saw the door open, the immediately jumped on the bed to give me a good round of morning licks. Nice..although not earth shaterring new.
The unusual part was they were spotting brand new heart shaped name tags and a love poem was tucked inside a notch of their collars. Ah! Love Day! A serenade, two pimped up furry fuzz balls and the man whose love is more beautiful than anything I have ever known. Love and the little funny things in life, as we try to live them everyday. Except he tied it all up in a virtual red bow and I had extra butterflies in my stomach. Singletons out there, do not despair!
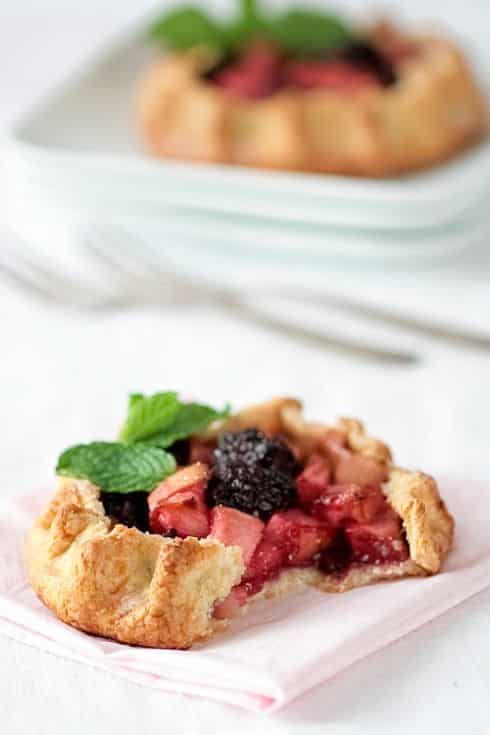
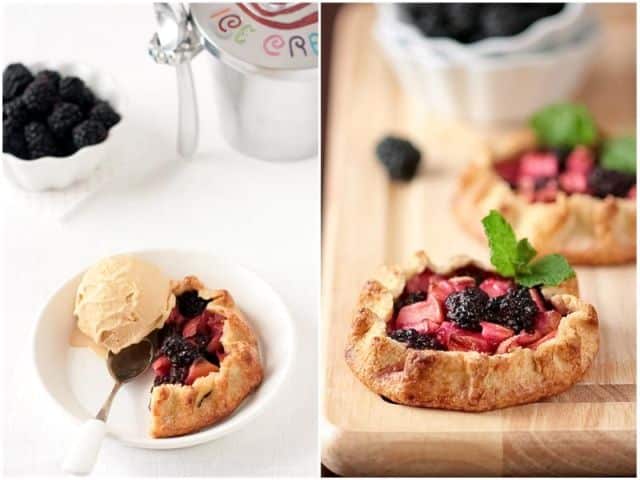
Hidden from him were my breakfast plans. I know B. and I know he loves and enjoy eating and one thing we share is our love for pies, tartlets or galettes and a good ice cream, separate, together, one after the other, etc….Granted this breakfast was a little richer than what we usually have but B. is playing music, serenading others this lovely night, so it was like starting the day the way we would have ended it if we had been together, with dessert. I had made blackberry and apple galettes as a thank you gift for a neighbor and kept one for us to share and topped ours with a scoop of burnt sugar ice cream. Come to think of it, we had all the major food group covered!
The beauty of these galettes is that you can use any combination of fruits that strikes your fancy and you don’t have to worry about tart pans and sizes, blind baking, etc… The pate sucree dough gets just a little rolling, filling, crimping and you’re almost there. I like to add a pinch of fresh cracked pepper to the fruits to enhance their flavor as they bake. The burnt sugar ice cream is one of my favorites from Dorie Greenspan, almost enough to make any man or woman swoon it is that good, creamy and tasty.
Breakfast that is enough make you want to give your mate an extra hug or kiss today and for the days to come…And for those of you who inquired about my friend Linda who was proposing with a ring and a box of heart macarons, I just got a text message that her partner said "yes!" and then there were pelnty of these "!" and a bunch of smileys….
Blackberry Apple Galettes And Burnt Sugar Ice Cream Recipe:
Makes three 5-inch galettes
For the Pate Sucree:
2 cups (250gr) all purpose flour
2 tablespoons (25gr) sugar
pinch of salt
1 stick (113gr) butter, cut in small dices
1 egg
2-4 tablespoons cold water
In a large bowl, combine the flour, sugar and salt and cut in the butter with a pastry cutter or two forks until the mixture ressembles forms pea size crumbs. Make a well in the center and add the egg. With a fork, start working the flour in a little at a time and when most of it is incorporated, quickly mix the dough into a coherent and smooth mass, adding some cold water, a tablespoon at a time, if necessary (this varies depending on the humidity or altitude of where you live). Wrap the dough in plastic and let it rest in the refrigerator for 30 minutes.
For the fruit filling:
1 small apple (I chose Granny Smith, peeled, cored and diced
3 tablespoons lemon juice
2 tablespoons (25gr) sugar, divided
1 tablespoon (10gr)cornstarch
3 tablespoons water
1 cup (200gr) blackberries
pinch of frech cracked black pepper
egg wash to brush the crust with before baking
In a medium saucepan set over medium low heat, cook the apple with one tablespoon of sugar and the lemon juice until fork tender. Add the blackberries and let them cook for a couple of minutes. Dilute the cornstarch in the water and add it to the fruits along with the cracked pepper. Cook until the mixture is not cloudy anymore from the cornstarch. Remove from the heat and let cool to room temperature.
To assemble: Preheat the oven to 350F.
Roll the dough onto a lightly floured surface to 1/4 inch thick and cut three 6-inch rounds in it and place them on a parchment paper lined baking sheet. Fill the center of each round with the filling and crimp the edges towards the center. I don’t like to cover the fruit that much with the dough but that is a personal preference. Brush the crust with egg wash and sprinkle with the remaining sugar over the galettes. Bake for 15-20 minutes or until golden brown.
Burnt Sugar Ice Cream, adapted from Dorie Greenspan:
1/2 cup (100gr)sugar
2 tablespoon water
2 cups(500ml) whole milk
1 cup (125ml) heavy cream
5 egg yolks
pinch of salt
Stir the sugar and water in a saucepan and cook over medium heat until the sugar dissolves. Increase the heat and cook until it becomes a caramel of deep amber color. Lower the heat and add the milk. It will bubble like mad but continue stirring until the mixture is smooth, remove from the heat. Add the cream and stir until combined.
In a large bowl, whip the egg yolks and salt until pale and thick. Slowly pour the hot milk mixture over it and whisk to temper the yolks. Put the mixture back into the saucepan and cook until it coats the back of a spoon (creme anglaise consistency or 170 degrees F).
Let cool completely and refrigerate until very cold (preferably overnight. Process the ice according your ice cream maker manufacturer’s instructions. Freeze for 2 hours or more or until firm to scoop.