
birthdays

Cinnamon Rolls & A Special Little Girl

Cinnamon Rolls


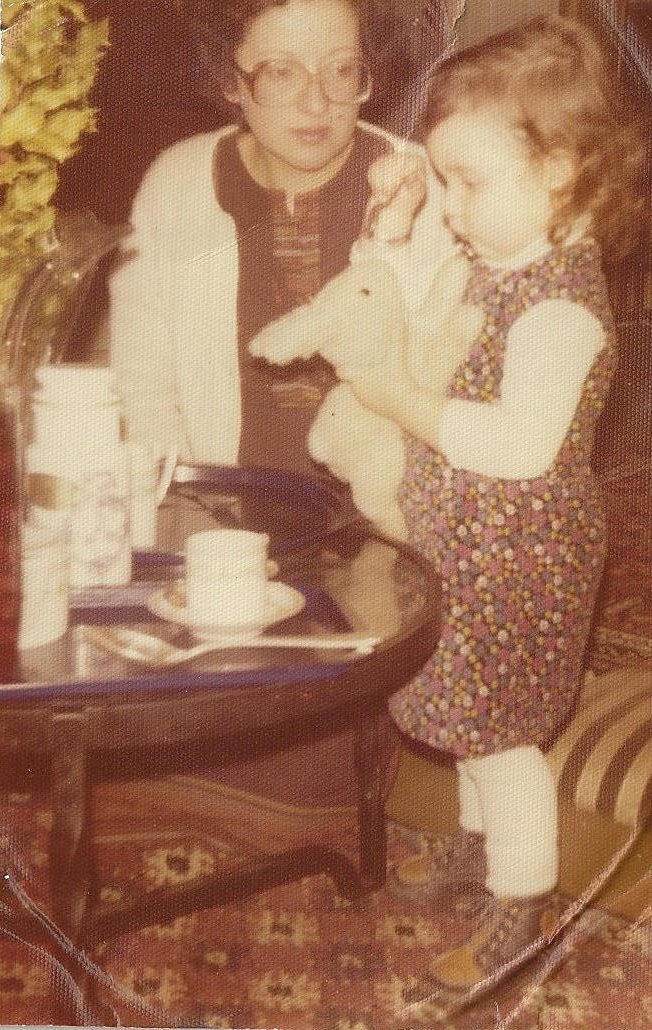
I look at the little girl in the photographs below and I see so much of myself in her. And I hope she’ll beat to the tune of her own heart as I try to. I hope she’ll tell the people in her life, close or distant, how much they matter as I do. As often as possible. Because in the end, it’s what counts. Truly. I hope she has the courage to take chances, get hurt, and love again. To be imperfectly alive. As my friend Brene says "it will confuse and terrify people" but I will be there if she needs me.

She is a part of me. My niece Lea. She’s turning ten on Monday and this post is for her. Being ten is a big deal. I know! I see so little of her over the years that everytime I feel like meeting a different person. I love how my brother and his wife are raising her and her sister. It’s chaotic, it’s loud and imperfect and it’s full of laughs and love, hugs and stories.

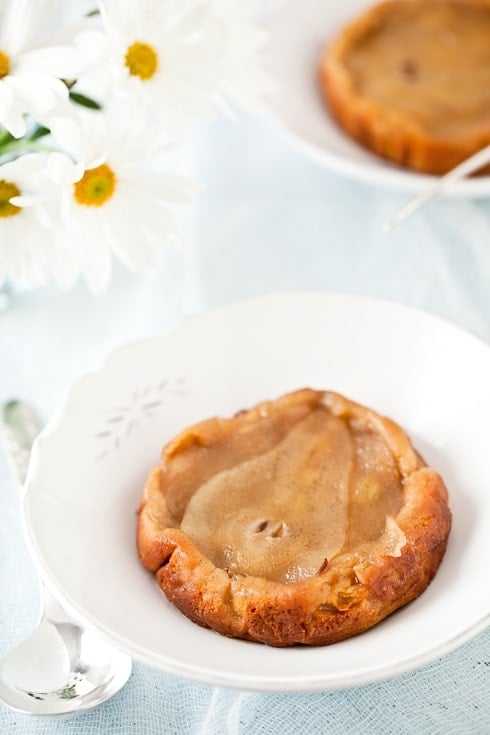
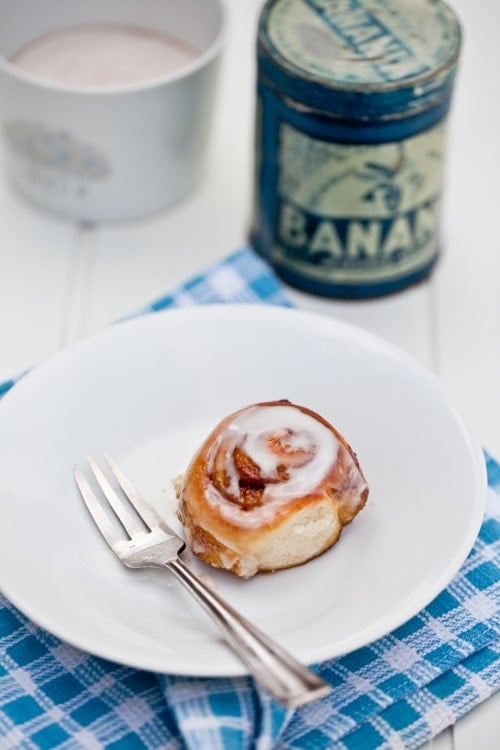
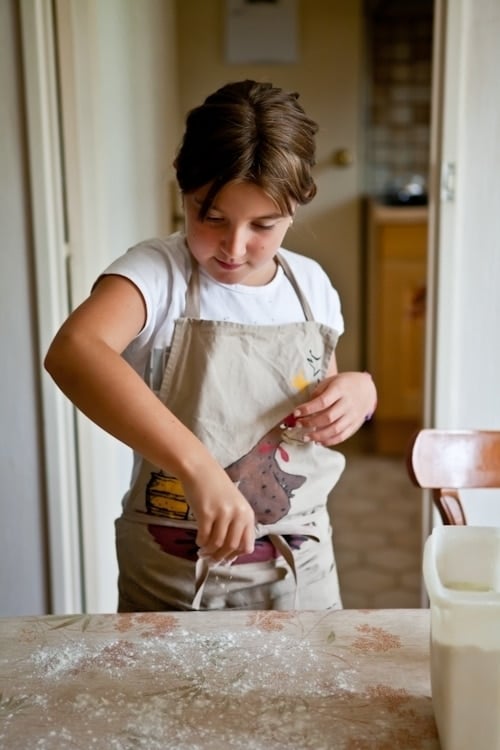
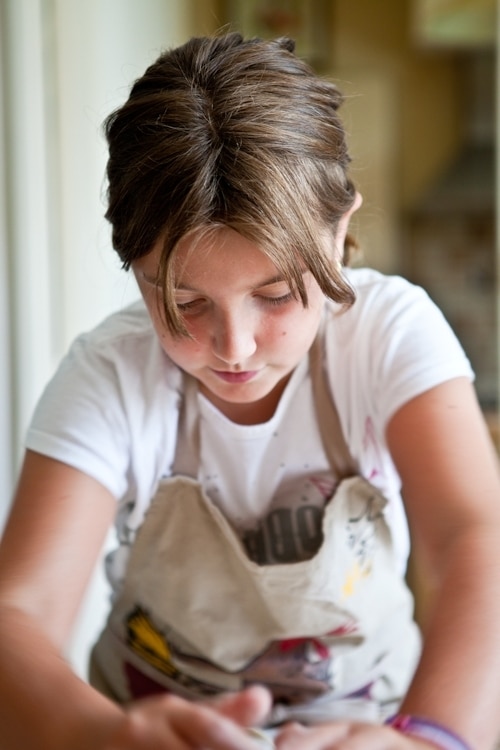
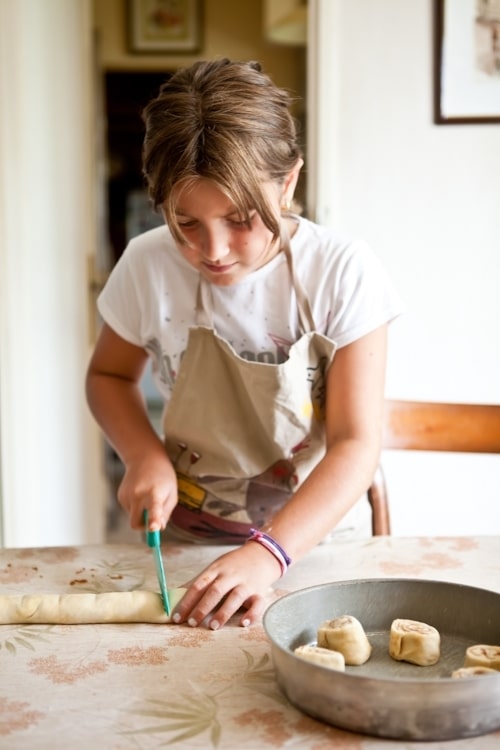
I was so happy to spend some time alone with her while visiting my parents this summer. We took some time out to go about their village, talk about life and take some pictures. We also spent an afternoon baking up a storm together! First there was this lovely Mirabelle and Almond Frangipane Tart and then we made a couple of batches of cinnamon rolls. I had made them for the family one Christmas 4 years ago and knowing how much her dad loved them, she insisted we made some more.

I’m warning you right now, these are not gluten free. I was tempted but I was not home, did not have everything I needed on hand, the equipment and oven were different so I stuck to the original recipe, a knock off version of Cinnabon™ Cinnamon Rolls. For a gluten free equivalent, please check out Shauna’s cinnamon rolls here. Magic.

Please, meet my gorgeous niece Lea in this cinnamon rolls 101.

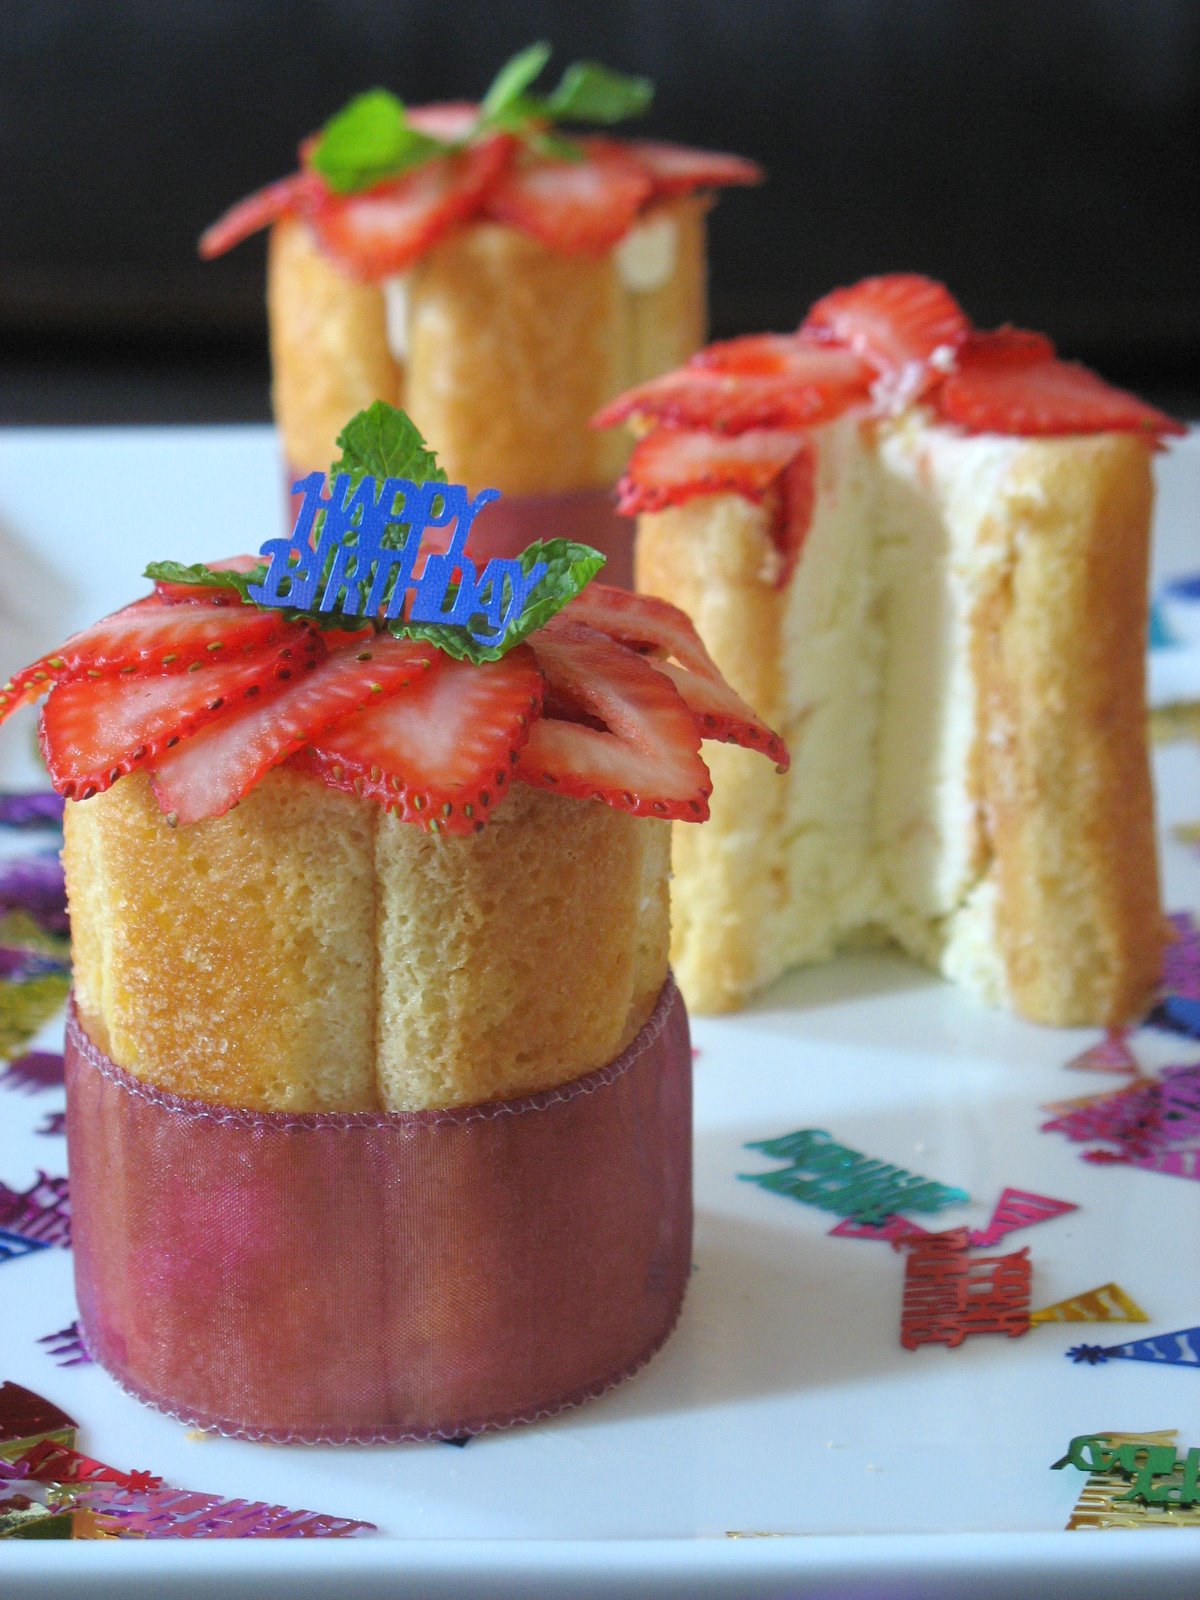
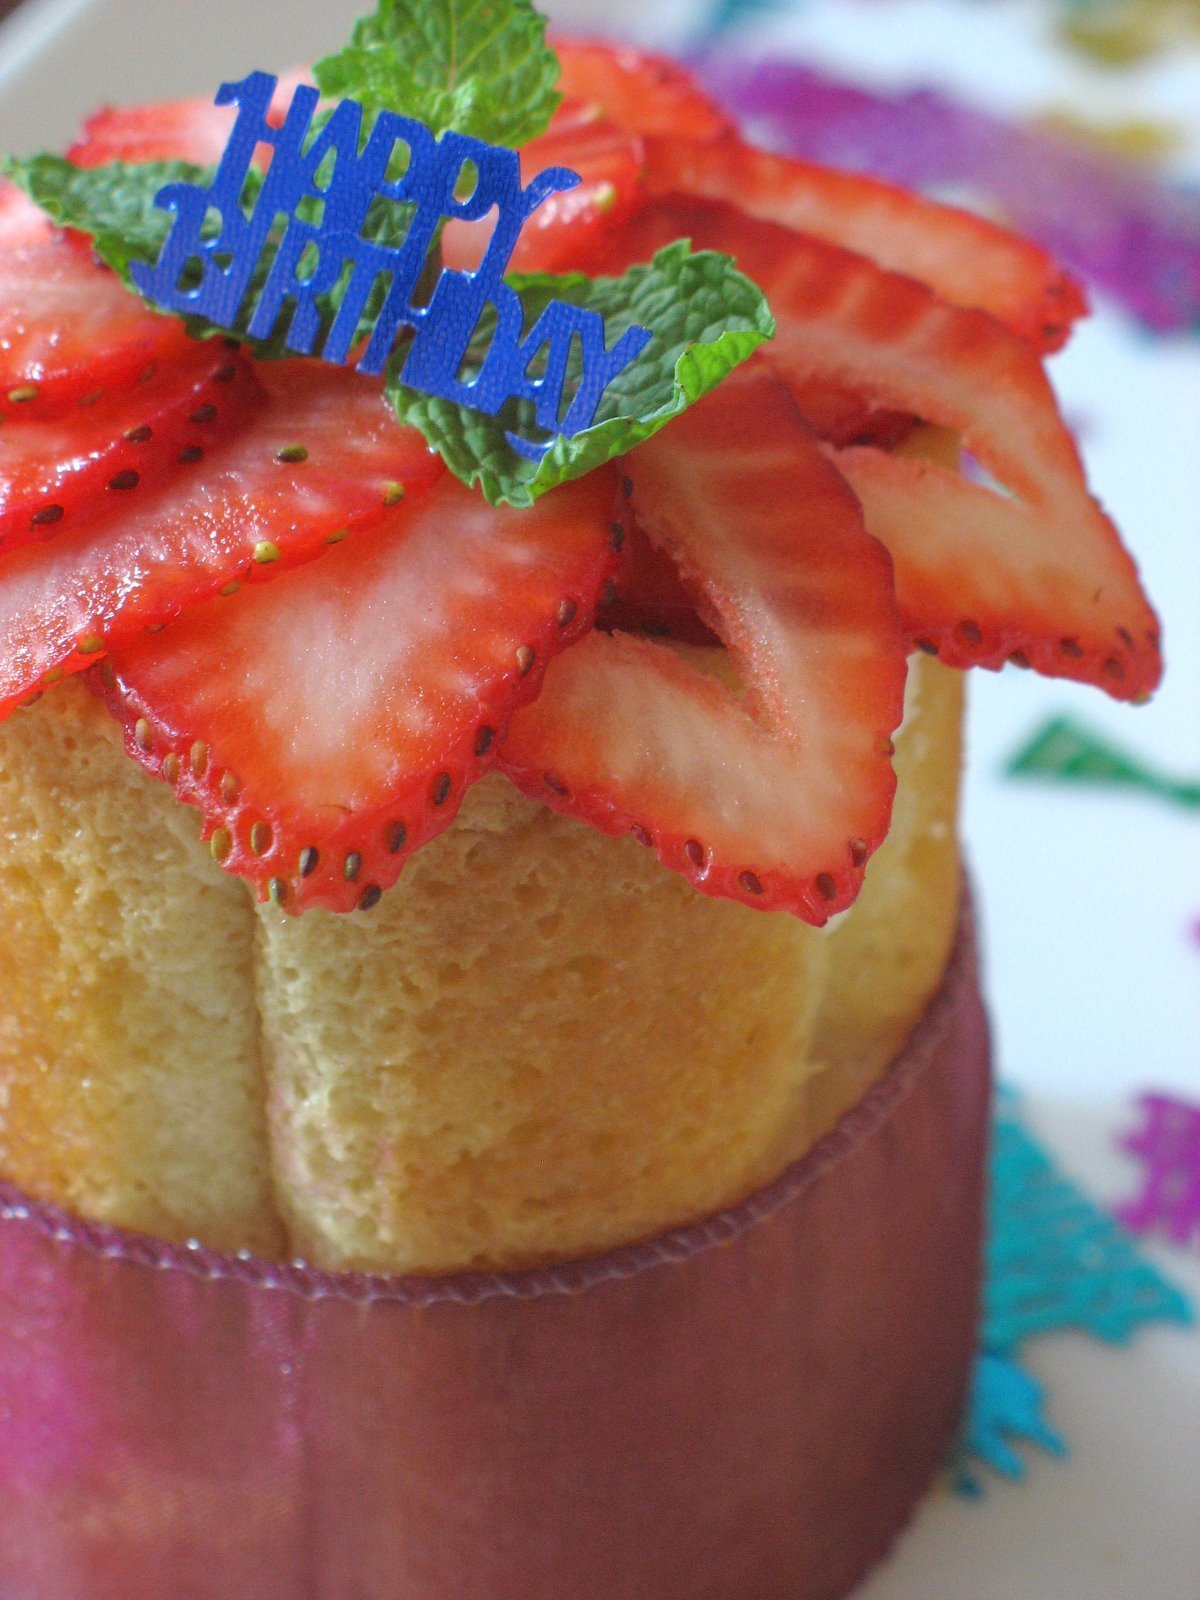
Happy Birthday Sweetie – Joyeux Anniversaire ma belle!

Lea Flouring

Once your dough has risen and is ready to use, flour your work surface abundantly.

Lea & Dough

Get your rolling pin and your smile on – this is going to be good!

Lea

No reason. I just think she’s beautiful…

Lea & Cinnamon Sugar

Liberally sprinkling dark brown sugar and cinnamon over the dough.

Lea Rolling

Rolling the dough into a log.

Lea Cutting

Cutting the log into roll size pieces.

Lea & Camera


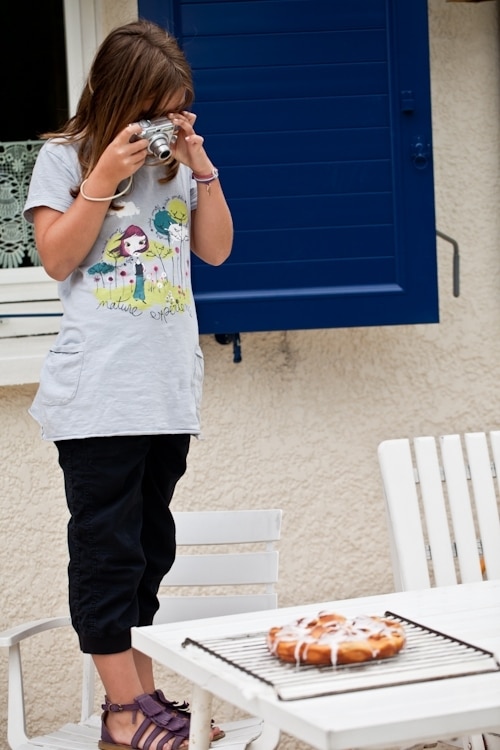
As I was taking pictures outside before a huge thunderstorm hit us, I looked over my shoulder and this is what I saw. And my heart jumped with excitment…A budding food photographer. Yes!

Cinnamon Rolls


Cinnabon™ Knock-off Cinnamon Rolls

Makes 12 rolls

For the dough:
1 pkg. active dry yeast (1/4 oz. size or 2 1/4 tsp.)
1 cup warm milk (105º to 110º F.)
1/2 cup granulated sugar
1/3 cup unsalted butter, melted and slightly cooled
1 tsp. salt
2 eggs
4 cups all-purpose flour

For the filling:
1 cup packed brown sugar
2 1/2 tablespoons ground cinnamon
1/3 cup unsalted butter at room temperature

For the icing:
1/4 cup unsalted butter at room temperature
1/4 cup (2 oz.) cream cheese at room temperature
1 1/2 cups powdered sugar
1 tablespoon whole milk
1/4 teaspoon vanilla extract

Prepare the dough:
Dissolve the yeast in the warm milk in a large bowl.
Mix together the sugar, butter, salt & eggs. Add flour and milk and mix well
Knead the dough into a large ball, using your hands lightly dusted with flour. Put in a bowl, cover, and let rise in a warm place about an hour or until the dough has doubled in size.
Roll the dough out on a lightly floured surface. Roll the dough flat until it is approximately 21 inches long and 16 inches wide. It should be about ¼ inch thick.
Preheat oven to 400º F and position a rack in the middle.

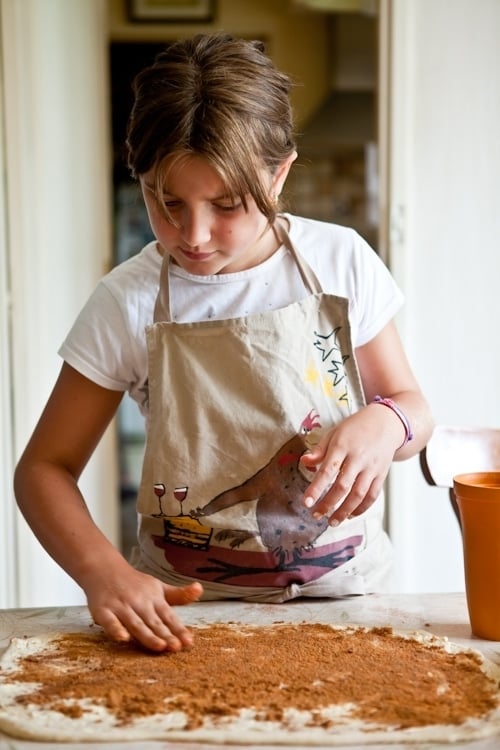
Prepare the filling:
combine the brown sugar and cinnamon in a bowl. Spread the softened butter evenly over the surface of the dough, and then sprinkle the cinnamon-sugar evenly over the surface.
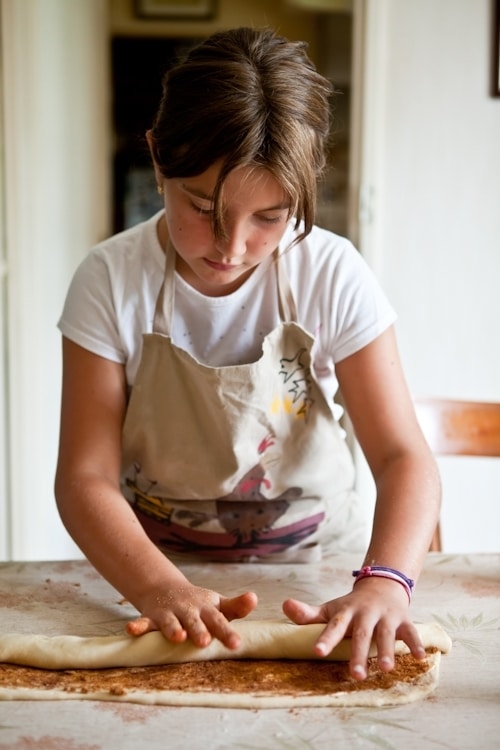
Form the rolls:
Working carefully from the top (a 21 inch side), roll the dough down to the bottom edge.
Cut the rolled dough into 1 ¾ inch slices and place 6 at a time, evenly spaced, in a lightly greased baking pan. Let the rolls rise again until doubled in size (about 30 min.). Bake for 10 minutes, or until golden on top.

Prepare the icing:
While the rolls bake, mix the butter and cream cheese in a large bowl with an electric mixer on high speed. Add the powdered sugar and mix on low speed until the sugar is incorporated, then add the milk and flavorings. Mix on high speed again until the icing is smooth and fluffy.
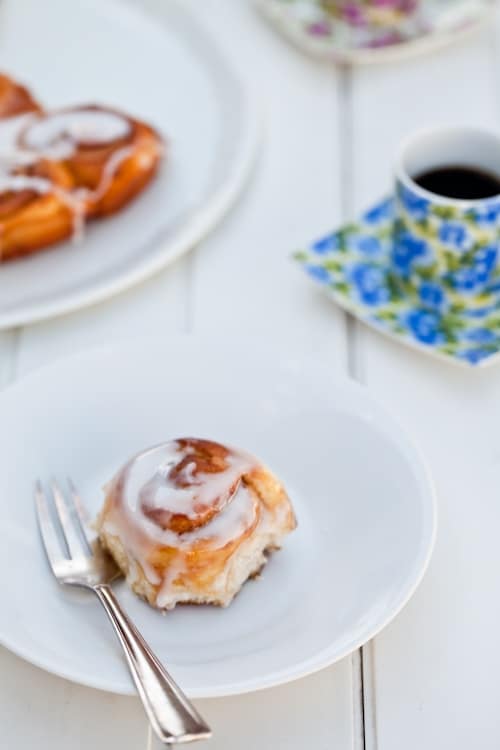
When the rolls come out of the oven, let them cool for about 10 minutes, then coat generously with the icing.

Upside Down Pear Cardamom Cake (GlutenFree)

Gluten Free Pear Cardamom Cakes


Growing up, my brother and I did not have any kind of special relationship. We did not dislike each other but we did not like each other either. I guess you could say we had one typical brother-sister relationship. I had crushes on his friends just about every week and he found my friends a bit too Strawberry Shortcake for his taste. We had wrestling fights, screaming fights, pillow fights and he often hid in my closet to scare me before bedtime. Typical.

I often wondered if we would ever find some common ground. Some place of understanding. We did find it when our brother passed away. Right there, in front of me, stood a broken man. He was not this "my brother-this pain in the rear" boy anymore. He was in pieces. I was too. And we picked them up together. We held each other up and found each other then. There is no reason why things happen. They just do. And we knew what we had to do then. And we still do it. Our way.

Baking With Pears


We still don’t call each other that often. Or send cards. Or email. He knows I got his back and he’s got mine. He’s always smart with business and techie advice for me. He loves food and is an amazing cook. He gave me two beautiful and smart nieces.

While chatting on the phone the other day, we were catching up on each other’s work, progress, accomplishments and to hear him say that he was proud of me was the biggest validation of my life. Like Christmas had come in March. There was also a pause. Very unusual if you know the speed of my brother’s conversations. That’s when he dropped a line that I didn’t expect…

Gluten Free Pear Cardamom Cakes


"Hey, I really like when you write me a post on your blog for my birthday. I also really like when all your virtual friends come wish me a happy birthday." Silence on my part. A bit surprised that he would admit this. I laughed. Out loud. Then I apologized and promised that, yes, I would post something on his birthday. I virtually made him some (gluten free) Upside Down Pear and Cardamom Cakes that we quickly devoured last night.

As a kid, his birthday dinner would always include frog legs with tons of parley and garlic and a chocolate cake with walnuts and oranges that I was not particularly fond of. I did think about making it for him again as a wink to the past but my mom had brought over the new French Saveur and Elle a Table and I kept coming back to the article on upside down cakes in Elle a Table. So many variations from one simple base that it would have been difficult not to find one that suited everyone.

Gluten Free Pear Cardamom Cakes


I adapted the base recipe to make it gluten free and added some cardamom to the ripe pears I used in the cake. There is something about pears and cardamom that is almost magical once baked together. Instead of doing the cakes and the caramel with sugar, I used wildflower honey. I am really enjoying baking with sucanat, honey and maple syrup versus regular granulated sugar these days. So much more fragrant. So many more health benefits too.

The cake was moist from the millet and sweet rice flour, oozying with honey and vanilla bean caramel, and the smell permeating the kitchen was unbelievable. We quickly brewed some fresh coffee and sat down with some cake.

Gluten Free Pear Cardamom Cakes


So here’s to you Arnaud! Happy Birthday! Joyeux Anniversaire!

Upside Down Pear Cardamom Cakes, adapted from Elle A Table

Makes four 4-inch cake or one 8-inch cake. Serves 6-8

For the honey caramel:
1/2 cup honey
1/4 cup water
1/2 vanilla bean, seeded

For the cake batter:
3 pears, peeled and thinly sliced
3 large eggs
1/2 cup (125ml) honey
1 1/2 (160gr) stick unsalted butter, melted and cooled
3 1/2 oz (100gr) superfine sweet rice flour
2 oz (50gr) millet flour
1/2 teaspoon ground cardamom

Preheat oven to 350F. Line the inside of four 4-inch springform pans or one 8-inch pan with parchement paper. Place the pans on a baking sheet and set aside.

For the caramel:
In a large heavy bottomed saucepan, place the honey, water and vanilla bean seed and bring to a boil over high heat. Reduce the heat to medium and let the syrup simmer down until thickened, should take 5-8 minutes. Remove from the heat. Divide the caramel among the prepared cake pans.

For the cake:
Divide the pear slices among the bottom of each cake pan and set aside.
In the bowl of an electric mixer, beat the eggs and honey on medium speed for about 2 minutes. Slowly add in the melted butter. Add the flours and cardamom and mix until fully incorporated, about 1 minute. Divide the batter in between the pans and bake for 30-40 minutes or until golden brown.

Remove from the oven and let cool to room temperature. Unmold carefully over a plate. Watch out for the oozing honey caramel.

For My Birthday Girls: A Raspberry Rose Vanilla Cream Cake

Raspberry Rose Vanilla Birthday Cake


Two people I love are having a birthday this week and as much as I wanted to make something special for each of them, work decided to get in the way big time. Not complaining, just saying, and that’s why I am so late updating this week. Thus, I find myself asking them to share this Raspberry Rose Vanilla Cream Cake. I know they won’t mind because they already share so much. One is my wonderful mother and the other one is my (now) three year-old beautiful niece. Joyeux Anniversaire les filles!

It bugs me to say that I don’t see enough of my niece but a trip to France has not been quite feasible in the past couple of years. I do get to hear a lot about her and her personality through my mom’s reports and pictures my brother sends me. Her sister is just like me and she seems to be more like her dad. Oy! If they keep the ressemblance going, teenage years are going to suck for him big time because we were anything but pleasant to each other!!

Raspberry Rose Vanilla Birthday Cake


While I did make a batch of saffron macarons for my mother, (which we devoured for her, eheheh!) I wanted to find something they could both enjoy, albeit virtually. Not sure little C. is ready for saffron yet, although given how talented a cook my brother is, I would not be surprised!

My mother makes me think of apricots and lavender and she is as soft and delicious as a raspberry mousse tarts (Yes, my mom is delicious). My baby niece on the other hand makes me think of cream and vanilla. Soft as a rose too. A Raspberry Rose and Vanilla Bavarian Cream Cake!

The cake is composed of almond dacquoise slightly enhanced with a bit of rose water and layered with layers of jelled raspberry puree and vanilla bean scented bavarian cream. I added a simple lemon glaze on top to bring forth all the flavors. While it may look complicated and time consuming it is not, I assure you. I made the dacquoise and the raspberry layers one evening and the bavarian cream and assembly the next day. The only difficult part would be to resist the bavarian cream before it actually makes it into the cake!

Raspberry Rose Vanilla Birthday Cake


A year ago: Cashew Gateau With Coffee Cardamom Mousse

Raspberry Rose Vanilla Bavarian Cream Cake:

Serves 8 to 10


For the almond rose dacquoise:

1 1 /2 cups (160gr) almonds
1 cup (100gr) powdered sugar, unsifted
1/4 cup (30gr) all-purpose flour
6 egg whites
1/2 cup (100gr) granulated sugar
2 teaspoons rose water

For the raspberry layers:
2 tablespoons powdered gelatin
1/4 cup cold water
4 cups frozen raspberries
1/2 cup sugar

For the vanilla bavarian cream:
8 egg yolks
1/2 cup (100 gr) sugar
2 cups (500 ml) whole milk
1 vanilla bean
2 tablespoons powdered gelatin, sprinkled over 1/4 cup water
2 cups (500ml) heavy cream

Lemon glaze: (prepare once the cake is set)
1/4 cup (60ml) lemon juice
2 tablespoons (15gr) water
2 tablespoons (25gr) sugar
1 teaspoon powdered gelatin sprinkled over 2 teaspoons water

Prepare the dacquoise:

Preheat the oven to 350F and position a rack in the oven.
In a food processor, pulse the almonds and the powdered sugar together until finely ground. Sift the flour over the mix and reserve. In a stand mixer fitted with the whisk attachment, beat the eggs whites on medium speed until foamy. Gradually add the sugar while whipping the egg whites on high speed until stiff. Add the almond-flour mixture to the egg whites and fold gently with a spatula. Halfway through the process, add the rose water and continue to fold until smooth. Try to keep as much air as possible.
Line two quarter sheet pans with parchment paper, coast slightly with cooking spray and divide the batter among both pans and bake for 12 to 15 minutes, or until golden. Let cool. Inver the pans onto a cutting board and slowly peel off the parchment paper.

Prepare the raspberry layers:
Line two quarter sheet pans with parchment paper.
Sprinkle the gelatin over the cold water and reserve.
In a large saucepan set over medium low heat, bring the raspberrries and sugar to a simmer and cook until the berries are completely thawed and reduced to a puree (smash them down with a spoon if necessary) and the sugar is dissolved. Remove from the heat and add the gelatin, stirring until it completely dissoved in the raspberries. Pour over the prepared sheet pans. Let cool to room temperature and then freeze until firm.

Prepare the Bavarian cream:
In a large bowl, whisk the egg yolks with the sugar until very pale. In the meantime, in a large saucepan set over medium heat, bring the milk and the vanilla bean (split open and scraped over the milk) to a boil. Slowly pour the milk over the yolks, whisking constantly. Pour the mixture back into the saucepan over medium low heat and cook until the cream coats the back of a spoon (as if making creme anglaise). Remove the vanilla bean. Add the softened gelatin and stir until melted completely into the cream. Let cool to room temperature.
Whip the heavy cream to soft peaks and fold it into the cooled cream base. Use immediately.

Prepare the lemon glaze:
In a small saucepan set over medium high heat, bring the lemon juice, water and sugar to a simmer and cook until the sugar is dissolved and the liquid is hot. Remove from the heat and add the softened gelatin. Stir until it is completely dissolved. Let cool to room temperature.

To assemble:
Line a 8×8 or 9×9-inch sqaure baking pan with enough plastic wrap to have about 2 inches overhanging on all sides (easier to pick up to unmold once the cake is set). By all means, use a square frame if you have one instead and build your cake directly in the frame set on a sheet pan.
Cut one of the dacquoise to fit inside the cake pan and place it at the bottom. Remove the raspberry jelly from the freezer and cut a piece to fit inside the cake pan also. Place it on top of the dacquoise layer. Pour a little less than half of the bavarian cream on top of the raspberry layer (you want to keep a little bavarian for the very top layer). Repeat with a layer of dacquoise, a layer of raspberry jelly, a little less than the other half of the bavarian cream. Use the remaining cake cut outs to form a final layer of dacquoise. Smooth the remaining bavarian cream in one thin layer on top. Refrigerate the cake until completely set, about 2 to 4 hours or overnight. Once it is firm, spread the lemon glaze on top. Place the cake back in the fridge and let it set for about 30 minutes. Keep refrigerated until ready to serve. To plate, remove the cake from the pan by lifting all four corners of the plastic wrap and trim the edges.

Berry Mousse and Lemon Poppy Seed Cake Verrines

Berry Mousse - Lemon Poppy Seed Cake Verrines

"Whatcha making?" Bill asked when he stepped into the kitchen area on Sunday. "My birthday cake" I replied, scraping the last bit of batter onto a sheetpan. He then pointed at the two bowls filled with strawberries and blackberries, the couple of lemon and the bottle of Limoncello. "Yes, yes, yes…all those for my cake". His eyes lit up in anticipation and he left the room uttering "hmmhmmhmm".

A few hours later, he tried to sneak a peak into the refrigerator to see the final product and opened and closed the refrigerator door a couple of times. "Where is it? Are you done yet? I can’t see it!". I pulled out a tray of glasses and handed him a spoon. "It’s not a cake! Wait…I am sorry. It’s your birthday, I should have known better…"

Lemon poppy seed cake brushed with straight Limoncello and layered with strawberry and blackberry mousse. There is cake, there is cream and there is enough space to stick a candle in it. I am ready to celebrate!

Berry mousse - Lemon Poppy Seed Cake Verrines


Yes, it’s my birthday and since I like to make myself something I really want, it is most often one of three things (and sometimes all at once): it usually contains lemons, it must be small and preferably in a verrine (glass). The sound of spoons digging that last bit of dessert in the bottom of a ramekin or glass is music to my ears. It doesn’t mean the end. It means everybody reached the bottom and "cling-cling" wishes for more. Happy sound.

With the abundance of local strawberries and the hot days we have been having, I started craving something light and refreshing. Everyday I’ve also been getting wild blackberries from the woods across the street and my mere one cup harvest grew to a whopping 1 pound on Sunday morning. I don’t think the new neighbors have realized yet the treasure laying at their feet just a few yards away. I am already scheming blackberry pies, cobblers, sorbet and secretly wish they don’t figure out what I am doing in the morning, reaching down into the bushes. I want it all….I promise to share the results of my baking though. Promise. Yes, really!!

As I was eating my (early) birthday treat, I started thinking about Bea, Anita and Jeannette, also celebrating another year this month and Kate to-day! There is also one tiny person who now can be added to the list of May babies and that is Kristin's newest addition, Leah Katherine, born on Monday night. This dessert is for you all!

Berry Mousse - Lemon Poppy Seed Cake Verrines


One year ago: Lemon Meringue Cake with Lemon Ice Cream.Two years ago: Birthday Girls and a chocolate cake.

Berry Mousse and Lemon Poppy Seed Cake Verrines:

Makes enough for ten to twelve 6 to 8 oz ramekins or glasses

For the cake:
1 1/2 cups (185gr) all purpose flour
1 cup (200gr) sugar
1 tablespoon (14gr) baking powder
1/4 (1.5gr) teaspoon salt
1/2 cup egg whites (about 3-4)
3/4 (175ml) cup milk
1/4 cup (62.5ml) lemon juice
grated zest of one lemon
1 tablespoon (9gr) poppy seeds
1 stick (113gr) unsalted butter, melted and cooled

For the strawberry mousse:
2 teaspoons powdered gelatin
1 tablespoon water
8 oz (210gr) strawberries, pureed
1/4 cup (50gr) sugar
1/2 teaspoon lemon zest
1 tablespoon lemon juice
3/4 cup (6oz – 190ml) heavy cream

For the blackberry mousse:
2 teaspoons powdered gelatin
1 tablespoon water
8 oz (210gr) blackberries, pureed
1/4 cup (50gr) sugar
1/2 teaspoon lemon zest
1 tablespoon lemon juice
3/4 cup (6oz – 190ml) heavy cream

Limoncello

Prepare the cake: preheat oven to 300F. In a large bowl, stir together all the dry ingredients for the cake. Set aside. In a separate medium bowl stir together the egg whites and the milk. Make a well in the center of the flour mixture and slowly add in the egg white mixture while stirring with a whisk. Stir in the lemon juice, zest, the poppy seeds and the melted butter. Mix with a whisk until smooth. Line a quarter sheet pan with parchment paper, lightly spray with cooking spray and pour in the batter. Bake for 20 minutes or until a toothpick inserted in the center comes out clean. Let cool completely and cut out as many disks as you need to fit inside your ramekins or glasses.

Prepare the strawberry mousse: sprinkle the gelatin over the water in a small bowl and set aside to bloom (soften).
In a medium saucepan set over medium heat, stir together the strawberries and sugar just until hot. Add the gelatin and stir until it is completely melted. Let cool to room temperature. In the meantime, whip the heavy cream to soft peaks. Once the strawberries are at the right temperature, carefully fold the whipped cream into the fruit base.

Prepare the blackberry mousse the same way.

Assemble the verrines: brush Limoncello on each of the cake pieces or rounds that are going to be used in the glasses. Place a cake round at the bottom of the glass, top with blackberry mousse, one cake round, strawberry mousse, one cake round, blackberry mousse. Finish with more wipped cream if desired (I added lemon zest to mine).

Berry Pavlovas: Crunchy Colorful Sweet Birthday Bites

Berry Pavlovas-Copyright©Tartelette 2008Today is B’s birthday and while in the middle of cleaning the house, preparing a little get together for him and speed training a puppy, I realised that I always wish my parents a happy birthday or mother’s day, father’s day, etc…on this blog but I rarely wish B. a happy birthday. Without wanting to make a big deal about it, I think he is a big deal, but a crunchy, colorful and sweet one.

He is very instrumental to my being here doing the things I do and sharing things with you. He happily ventures his spoon in dishes and desserts I set out in front of him. He knows to always take his cell phone with him while running an errand for me at the grocery store. He has quickly come up with associations to remember who is so and so that I keep talking about, and stopped asking me if I have the hiccups when I giggle at the screen chatting online at night. He looks forward to other bloggers' visits as he has an excuse to use all the attachments on the vacuum cleaner (he is so going to yell at me for telling you this!). But more importantly he has more than accepted my bizarre schedule as of late and for that he deserves extra kudos and a public "I Love You – You Rock – Happy Birthday!"

There will be cake for him and a few guests for dinner tonight but this morning he will have some pavlovas filled with fresh blueberries, raspberries and strawberries. Boy do I love summer lately! I can’t get enough of the gorgeous fruits at the market lately and berries have been either my breakfast or my lunch a couple lots of times this week . I can’t say he chose to have this has a birthday breakfast but it’s been a juggling of egg yolks and egg whites lately in the fridge and some room had to be made. Knowing him, I know he’ll have more than one!

I made the shells when Chris was here and kept them in an airtight container at room temperature so they would still be crunchy today. There were just a touch softer in the middle but with the heat and humidity of South Carolina, that was to be expected. To fix that, I turned the oven on to 350F last night before going to bed, put the meringue shells in it and turned the oven off. It helps give them some of that crisp back so I can still hear him say "so-crunch-what is-crunch-for dinner-crunch-tonight- crunch crunch ?"…I love that sound!

Berry Pavlovas-Copyright©Tartelette 2008Pavlovas With Fresh Berries:

Makes 8-12 shells depending on size

3 egg whites
3/4 cup sugar
1 1/2 tsp cornstarch

Preheat oven to 275F. In small bowl, mix the sugar and corn starch together and set aside. In a stand mixer fitted with the balloon whisk, start whipping the egg whites to soft peaks. Start with the machine on low speed to break them a bit and get them "shaking" then increase to speed to medium high. Slowly add the sugar mixture in a slow steady stream, or one tablespoon at a time. At this point you can either spoon the meringue, making 12 circles on 2 parchment paper lined baking sheets or fill a pastry bag fitted with a star tip and pipe the shells onto them. Bake at 275 for 30 minutes and reduce your oven to 250F and continue baking them for another 30 minutes.

For the berries: I did not measure how much of each berry I was mixing in, I went with a couple of handfull of each, sprinkled some sugar on top and chopped fresh mint and let it macerate for a couple of hours.

Birthday Girls: Sharing A Lemon Meringue Ice Cream Cake

Lemon Meringue Ice Cream Cake -Copyright©Tartelette 2008 Happy Birthday to you…Happy Birthday to you…Happy Birthday to you Kate !

Happy Birthday to you…Happy Birthday to you…Happy Birthday to you Tartelette !

Yes, Kate from Aaplemint and I are doing it again! Last year we found out through back and forth banters and emails that we shared the same birthday and decided to bake each other a surprise cake. I just checked Kate’s site and she made me Apricot Financiers, and she did not even know they were among my favorites!! Yipee! We decided to make it tradition, which I hope we last as long as we are both blogging, and here we are again! So my dear Kajal/Kate, here is to you a delicious Lemon Meringue Ice Cream Cake.

The cake is composed of layer of meringue with a hint of lemon zest, lemon curd and homemade lemon ice cream inspired from one in my favorite all lemon book. I actually changed propotions, removed some ingredients, and used my usual curd recipe. I liked the idea not necessarily all of what she did. Except the ice cream….Just make that if you can!! You can make one large one or 4 (4 inches round) small ones like I did. It is best to start the meringue and the ice cream the day before you plan on serving it, assemble in the morning and keep frozen until you serve. We have had a serious bout of humidity this weekend so I made the meringue Friday night and left them to dry in the oven. I assembled the cakes about 4 hours before serving so they would still have a good crunch. I shared one with my mother in law Sunday for Mother’s Day after many excuses for a cold snack these past couple of days, there is still one left for me later today….just me, hands off Mr.Tartelette! This cake is so lemon through and through that it finally satisfied the perfect lemon dessert I have been looking for these last few weeks. Yeah baby!! is what I say!!

Lemon Meringue Ice Cream Cake-Copyright©Tartelette 2008
Lemon Meringue Ice Cream Cake:

Serves 12 (instructions provided for a 8 inch round cake, I just used the same concept for 4 small cakes)

Printable Recipe

1 1/2 cups sugar
1 Tb cornstarch
2 tsp lemon zest
6 large egg whites
pinch of salt
Lemon Custard Ice Cream (recipe follows)
1 cup lemon curd (recipe follows)

For the Meringues:
Preheat the oven to 250F. Trace 2 8-inch circles on each 2 sheets of parchment paper. You need 4 circles total for the 4 meringue layers (you can do these free handed which I did since I knew I would have to trim them a bit before assembling). Invert the paper on the baking sheet.
Whisk 1/2 cup of sugar with the cornstarch and lemon zest and set aside. Beat the egg whites with the salt until they are foamy. Increase the speed and slowly add in the rest of the sugar, one tablespoon at a time until you get a firm and glossy meringue. Carefully fold in the sugar/cornstarch mixture.
With with the back of a spoon (or with a piping bag fitted with a plain tip and filled with the meringue), fill in the circles on the parchment paper. Smooth the tops. Bake the meringues for 1 hour. Turn the oven off and let them dry in the oven overnight.

For the Lemon Ice Cream:
2 cups heavy cream
2 cups half and half
1 cup sugar
1/4 cup finely grated lemon zest
6 large egg yolks
3/4 cup fresh lemon juice

In a heavy bottomed saucepan set over medium high heat, bring the cream, 1/2 cup of sugar, zest and the half and half almost to a boil.
In a separate bowl, whisk the egg whites ad the remaining sugar until they are pale and silky. Slowly add the hot cream mixture over the egg yolks, whisking as you do so to prevent the eggs from curdling. Return the mixture to the saucepan and cook, stirring constantly until the custard coats the back of a wooden spoon, as if you were making creme anglaise. Do not let it boil.
Pour the custard into a container and let cool to room temperature. Refrigerate until completely cold, stir in the lemon juice and freeze according to your ice cream machine instructions. If you do not have one, freeze until firm, whisk it with a hand held mixer or stand mixer and freeze again. Repeat a couple more times.

For the Lemon Curd:
grated zest of 1 lemon
1 cup strained lemon juice
1/2 cup sugar
2 eggs
1 Tb butter, at room temperature

Combine the zest, sugar, juice in a saucepan, and bring to a simmer.
In a small bowl, beat the eggs until light.
Beat some of the lemon mixture into the eggs to temper. Scrape the mixture back into the saucepan and cook stirring constantly until it thickens up, about 5 minutes.
Strain and refrigerate, covered with plastic wrap until ready to use.

Assemble the cake:
Remove the ice cream from the freezer 10 minutes before you start the assembly so it will be easier to spread on the meringue disks.
Remove the meringues from the parchment paper and set aside the least attractive one for the garnish. Put a large piece of plastic wrap at the bottom (going also up the sides) of an 8 inch round springform pan. Fit one meringue disk at the bottom, cover it with about 1 1/2 cups of Lemon Ice Cream, top with about 1/3 cup of Lemon Curd. Top with another meringue, another 1 1/2 cup of ice cream, another 1/3 cup of lemon curd. Repeat one more time. Crumble the reserved meringue disk and sprinkle it on top of the cake. Wrap the cake and freeze for at least 4 hours or overnight.
Let the cake soften in the fridge 15 minutes before you serve it.

~~~~~~~~~~~~~~~~~~~~~~~~~~~~~~~~~~~~~~~~~~~~~~~~~~~~~~~~~~~~~~~~~~~~~~~~~~~~~~~~~~~~
I leave you with a picture of my mom and me taken in 1977. I was already trying to make people eat and my first client was my stuffed rabbit Pipou (which now sit on my dresser…yep…still).

Thank you mom for not giving up on me 30 something years ago on May 13th (the delivery story is rather a long one, not so fit for a food blog) . I love you!

Mom and Helen-Copyright©Tartelette 2008
Finally, I got an early birthday present from Barbara this morning when she posted the round ups to her Taste of Yellow event, click on One and Two to get there. Thank you Barbara for such an amazing job!

Birthday Mingle: Lemon Mascarpone Charlottes

Yesterday, June 2nd was one special lady’s birthday: Meeta from What’s for Lunch Honey? blew another candle and knowing her I am sure it was done in style surrounded by many friends and family members. Happy Birthday one more time, dear Meeta!

During the last roundup of her event Monthly Mingle, she realised it was also a year ago that she started the Monthly Mingle event. Thus, she invited us for the June edition entitled Big Birthday Bang, to make a dish for her, the guest of honor. Smart woman, not only does she get to make her birthday last a little longer but given the past roundups, she can be sure to be served some pretty tasty things!

I have only known Meeta for a few months and through her blogs (she also writes The Daily Tiffin, and asked me to join its writers pool last month), The Daring Bakers, and emails and yet I imagine her to be strong willed, warm, organized and detailed, attentive, a great friend, wife and mother. I also imagine her stylish, feminine and full of pep and colors.

I had a list a mile long list of different birthday cakes I thought about making for her and that special day but once I imagined these Lemon Mascarpone Charlottes, I really found them fit for the event. Just like I envision Meeta, they stand tall with confidence, soft and strong in flavor and yet playful at the same time. A soft and just a bit decadent lemon mascarpone surrounded by Limoncello dipped ladyfingers…enough to make you happy, not tipsy!

Lemon Mascarpone Charlotte, inspired from Mercotte:

Serves 6

1 package Italian style ladyfingers
2 eggs, separated
1 1/2 oz sugar
4 oz mascarpone cheese
150 ml. heavy cream, divided
2 tsp. powdered gelatin (1 sheet) + 1/4 cup water
zest and juice of one lemon

Syrup to dip the ladyfingers:
1/4 cup water
1/4 cup Limoncello

Sprinkle the gelatin over the water, stir and let sit to bloom.
In the meatime, warm up 5o ml. heavy cream until hot but not boiling hot. Stir in the gelatin and allow to cool.
In a large mixing bowl, whisk the mascarpone with the sugar, add 2 egg yolks and whisk until well incorporated. Add the lemon juice and zest.
Whip 2 egg whites until stiff, fold them into the mascarpone mixture.
Whip the remaining heavy cream to medium stiff peaks, and fold into the mascarpone.

To assemble the charlottes, I used 2.5 inch diameters pvc pipe cylinders (I use pvc for cold molded desserts and metal for baked ones), but you can use the diameters that you like best.
Dip the biscuits very briefly (1 second/turn/1 second/done…yes, that fast or you will end up with mush) in the Limoncello water and stand them straight one next to the other into the molds, fill with the mousse. Refrigerate until set. Trim the tops.
At this point I like to freeze the charlottes for a couple of hours, so it is really easy to unmold them. Just push through the bottom, they slide out of the molds very easily.
Decorate with sliced strawberries or whole raspberries.

Birthday Girls…

Tomorrow is my birthday (30 something and rocking…) and Kate’s (20 something and rocking…)

I had no idea when I started this blog over a year ago that blogging would come with benefits. Not only did I become part of a wonderful group of talented, supportive and Daring Bakers (if you knew how fantastic they are you’d get teary-eyed too), I have also been asked to be one of the co-administrators of the Daily Tiffin by my dear friend Meeta….and last but not least I have met a funny and talented young lady, Kate of Applemint while I was hosting HHDD 11.

After exchanging emails we realized we shared the same birthday: May 13th…. We decided to celebrate this coincidence that we would both bake each other a cake.
Euh…Helen, today is May 12th….Ah maybe here in northern America but in Hong Kong where Kate lives it is already the 13th and I want her to see my birthday cake as soon as she turns her computer on. She has made me an awesome lemon sponge with lemon grass and lime leaf mousse with mango compote jelly. I love it! I asked what her favorite flavor(s) was and the answer came in one sweet sentence: "anything with dark chocolate".

In her honor I made a deep dark Devils Food Cake with Dark Chocolate and White Chocolate Ganache.

Happy Birthday to you Kate! Happy Birthday to Me!

Devil’s Food Cake, adapted from Dorie Greenspan:

Makes 8 individual cakes

1 1/3 cups all-purpose flour
1/2 cup unsweetened cocoa powder
3/4 teaspoon baking soda
1/2 teaspoon baking powder
1/4 teaspoon salt
1 1/4 sticks (10 tablespoons) unsalted butter, at room temperature
1/2 cup (packed) light brown sugar
1/2 cup sugar
3 large eggs, at room temperature
1 teaspoon pure vanilla extract
2 ounces bittersweet chocolate, melted and cooled
1/2 cup buttermilk or whole milk, at room temperature
1/2 cup boiling water
4 ounces semisweet or milk chocolate, finely chopped, or 2/3 cup store-bought mini chocolate chips

Center a rack in the oven and preheat the oven to 350 degrees F. Butter two 8-x-2-inch round cake pans, dust the insides with flour, tap out the excess and line the bottoms with parchment or wax paper. Put the pans on a baking sheet.
Sift together the flour, cocoa, baking soda, baking powder and salt.
Working with a stand mixer, preferably fitted with a paddle attachment, or with a hand mixer in a large bowl, beat the butter on medium speed until soft and creamy. Add the sugars and continue to beat for another 3 minutes. Add the eggs one by one, beating for 1 minute after each addition. Beat in the vanilla.
Reduce the mixer speed to low and mix in the melted chocolate. When it is fully incorporated, add the dry ingredients alternately with the buttermilk, adding the dry ingredients in 3 additions and the milk in 2 (begin and end with the dry ingredients). Still working on low speed, mix in the boiling water, which will thin the batter considerably. Switch to a rubber spatula, scrape down the bowl and stir in the chopped chocolate. Divide the batter evenly between the two pans and smooth the tops with the rubber spatula.
Bake for 25 to 30 minutes, rotating the pans at the midway point. Transfer the cake pans to a rack and cool for about 5 minutes, then run a knife around the sides of the cakes, unmold them and peel off the paper liners. Invert and cool to room temperature right side up. Cut 8 4-inch rounds with a cookie cutter. Refrigerate for a couple of hours.

For the glaze:

6 ounces bittersweet chocolate, finely chopped
2/3 cup heavy whipping cream
1 tsp vanilla
2 ounces white chocolate

Put the chopped chocolate in a medium bowl. In a small saucepan, bring the cream to a boil. Remove pan from heat and add the chopped chocolate. Let stand for 1 minute then gently stir until chocolate is melted and the glaze is smooth. Gently stir in the vanilla. Transfer glaze to a small bowl and cover the surface of the glaze with plastic wrap and let cool for 5 minutes at room temperature before using.
Place the chilled cakes, still on the cake round, on a wire rack set over a baking sheet. Slowly pour the hot glaze onto the center of the cake. Smooth the glaze over the top and sides, letting the excess drip onto the baking sheet . Melt the white chocolate and srizzle over the cake.

Kate, I wish you all the best for this new year and wish for the day that you can show me the sights of Hong Kong!

Since I’ll be celebrating my birthday out somewhere tomorrow, I take this opportunity to wish all mothers out there a wonderful Mother’s Day tomorrow. My mom will get her own special post June 3rd when they celebrate Mother’s Day in France.