
Sunday Baking Makes For Good Eating

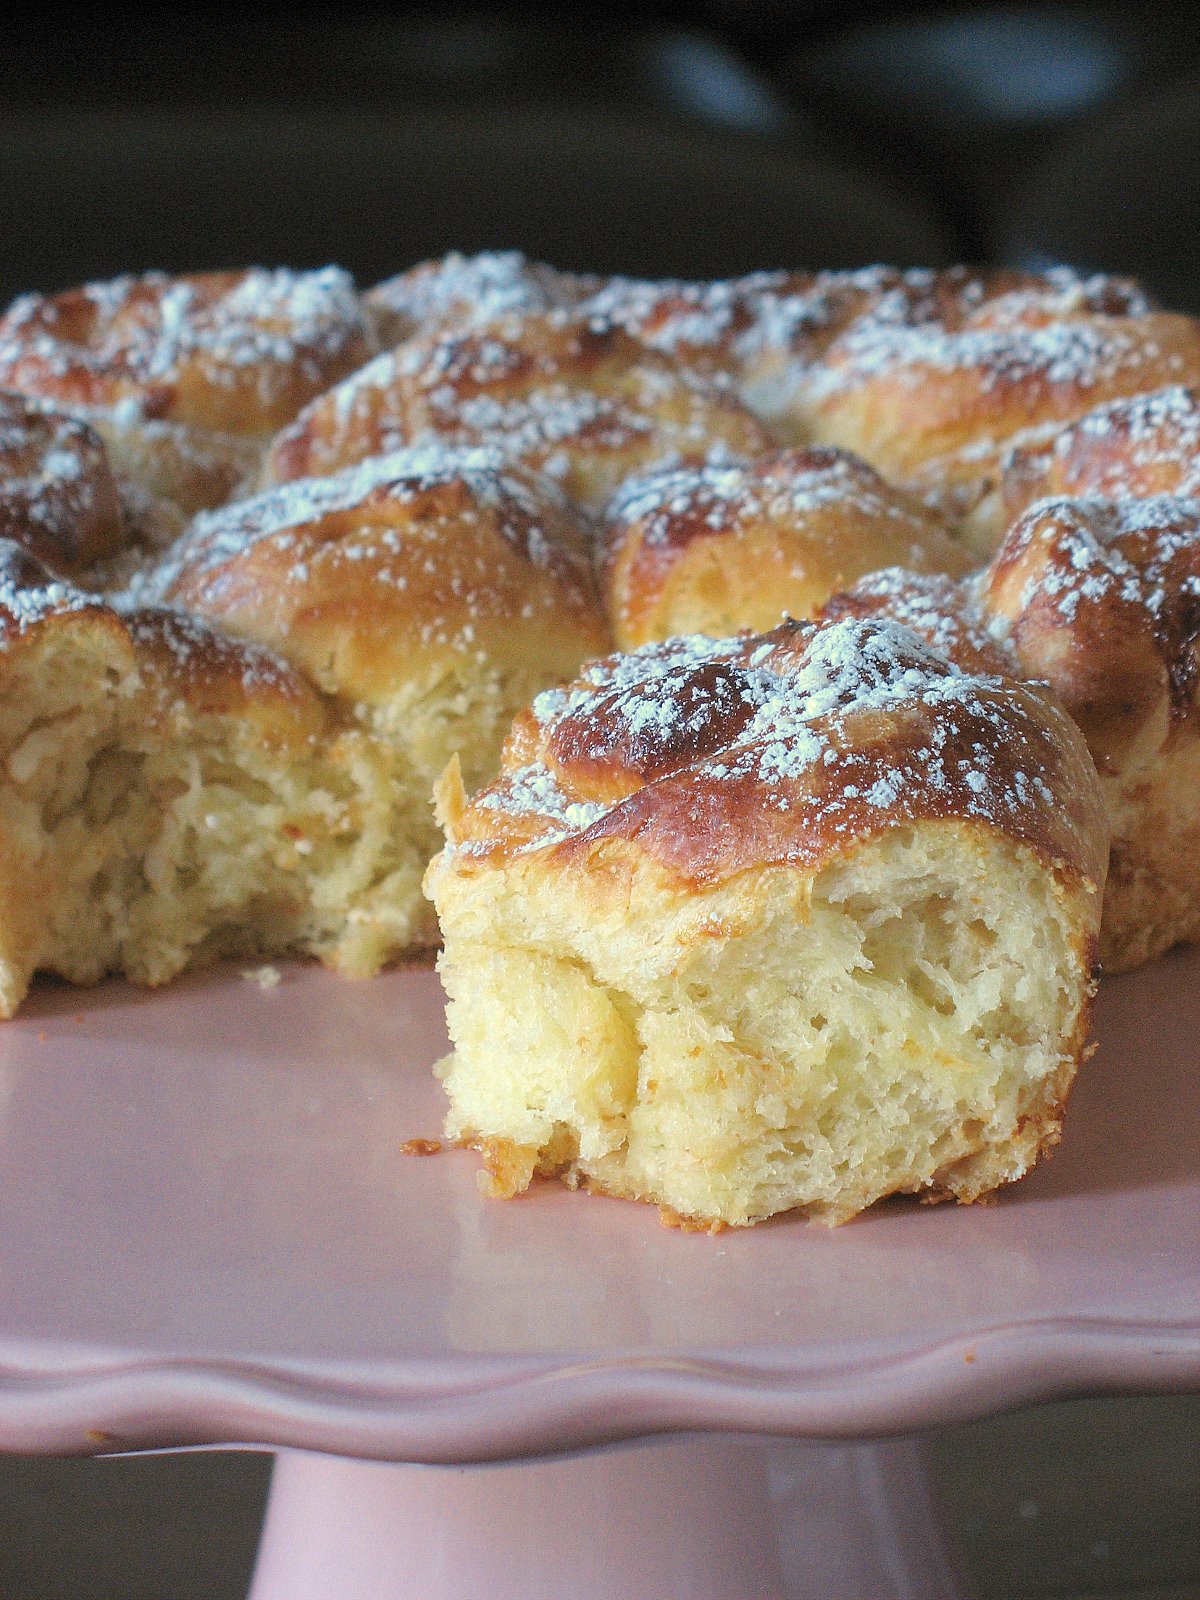
People think I am crazy when I tell them how I relax on the weekends….I knead dough, I watch yeast proof and bubble, I covet the rising of my loaves and delight in the smell pervading through the house. The week has been strange and hectic as I mentionned a couple of days ago and yet the only way I know to relax and recover from it is by making breakfast treats for us or the neighbors. I have got scones in the oven as we speak and we just devoured a half of this beautiful cream cheese braid you see up there.

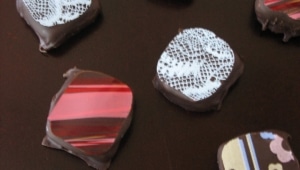
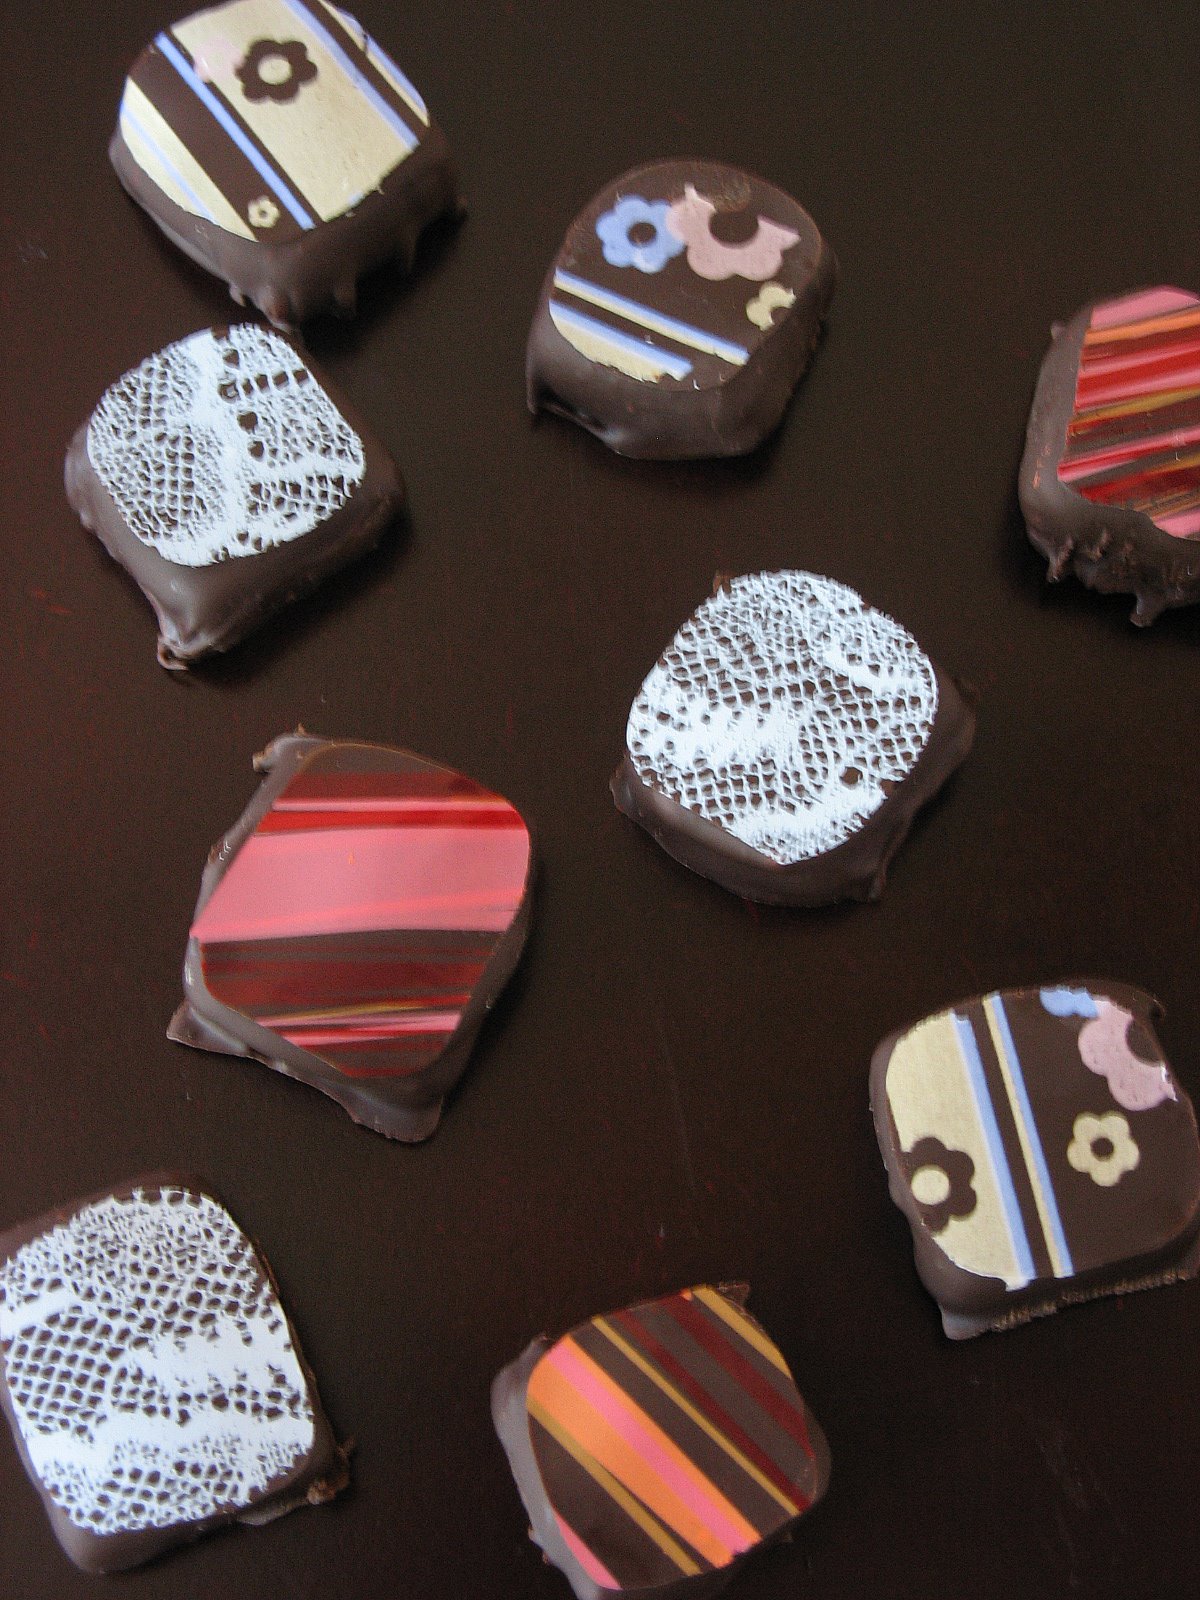
It seems that I have done a lot more bread baking than actual dessert making this week but what you don’t see is the behind the scene…There was a couple of birthday cakes, a French croquembouche for a wedding rehearsal and a whole lot of chocolate making. Granted some weeks my kitchen ressembles more a bakery than a restaurant but I am ready for a change with a couple of great events that are coming up. I also have to confess that the weather has been so nice that I have been caught playing outside when I should have been doing more adult chores (paying bills, cleaning, etc…no fun!)

What is special about this braid…? The cream cheese replaces most of the butter and leaves you with a very soft dough, very creamy without being over the top. The same dough can be the base of multiple variations and I usually do a hazelnut or almond filling alonside this one because it seems that one is never enough!

The inspiration to replace the butter with the cream cheese came from this recipe. The Fresh Loaf is a mine of knowledge and ressources for novice or advanced bakers and this blueberry braid filled with all that creamy goodness made me want to incorporate the cream cheese in the dough to see if the flavor would mellow through it and if the dough would be nice and soft as a pillow. I also have to say that I was getting a little lazy with the whole rolling, spreading the cheese inside, braiding, etc… thus dumping the cheese in the Kitchen Aid alongside the butter. It worked one night and I never looked back!

Cream Cheese Braid, inspired from the Fresh Loaf:

Makes 2 braids

Sponge:
1 tablespoon instant yeast
1 tablespoon sugar
1 1/2 cup warm milk
2 cups unbleached all-purpose flour

Dough:
2 eggs
1 1/2 teaspoons salt
1/3 cup sugar
2 1/2-3 cups unbleached all-purpose flour
6 oz. cream cheese, softened
2 oz. butter, softened

Glaze:
1 cup powdered sugar
1 Tb. melted butter
milk

For the sponge: mix the sugar, yeast, and flour together in bowl. Pour in the warm milk. Beat until smooth, then cover with plastic wrap and set aside for 1/2 hour.
Add the eggs, salt, sugar, and one cup of the flour to the sponge. Beat until smooth. Then add the cream cheese and butter in small chunks and beat well. Add the remaining flour a handful at a time and mix in until you get a soft dough.
Knead the dough by hand or with a mixer about 5 minutes.
Place the dough in a greased bowl, cover with plastic wrap, and let rise and room temperature until doubled in size, 1 1/2 to 2 hours. Deflate the dough, recover the bowl, and refrigerate overnight.

The next day, take the dough out of the fridge, deflate and divide in 2 equal pieces. For the braid, I divide one piece in too and twist them together (so not exactly the conventional braid, but at this point I can’t wait any longer!!). Place it on parchment paper lined baking sheet, allow to rise 45 minutes, brush with some egg was and bake at 375 for 20- 25 minutes.

Take out of the oven, and while it cools a little, prepare the glaze. Add enough milk to the powdered sugar and melted butter to make a soft spreadable glaze and our all that goodness on your braid…and go ahead and eat because after all that you really deserve it!

Do the same for the other braid, or roll out into a rectangle and fill with your avorite filling and braid it according to the recipe on the Fresh Loaf. The details are great and you can’t mess up, makes me wish I ad blueberries left because I have the other loaf awaiting its fate in the fridge…

One Step Forward…Two Steps Back

No, I am not talking about the current clock adjustment we are doing this weekend. I have been asked to make 1000 chocolates like these for a wedding reception tomorrow and everytime I get closer to the magic number, B. comes behind and begs for one….so it went from 500 to 499 to 502 to 501…until I had to chase him out of the kitchen : "Don’t you have papers to grade or something…?"
Hence, the reason why I have not been around much in the past few days….!

They are soft ganache centers dipped in tempered chocolate. The bride asked for flavors such as hazelnut praline, coconut, jasmine tea, Grand Marnier and plain with all three chocolates (milk, dark and white).

It was fun at first now I am dying to post about the Cream Cheese Brioche Braid I made this morning….will have to wait for tomorrow!

By the way, I onl have 25 left to dip and I can have a Martini!

Creme Brulee or Crema: A Week’s Compromise

This has been a very strange week, full of oddities, rescheduling, new scheduling, music jobs, extra catering activities, compromises, surprises, and adventures, but such is the life of two people with more than one job and more than one hobby…luckily there is light at the end of the tunnel: a date planned for saturday night.

Following the theme of the week, I was faced with a dilemma when came dessert time the other night. I needed something comforting, reassuring, (actually I could have used a drink!). I stared at the open fridge and it took me a minute to make up my mind, but B. agreed with me that dessert would not be cake or fruit, we needed cream…we needed sugar. If only it had been the end of it! I wanted coconut cream something with a crunchy top, while B. wanted honey cream something without crunch…and the conversation that followed ressembled something of a ping-pong game:
"coconut creme brulee!"
"honey crema!"
"creme brulee!"
"crema!"…

Remember: …compromise… So I made one of each, same batter, same cooking time, just a different way to eat them…and I sneaked coconut into B’s crema by infusing the mixture with dessicated coconut and straining it prior to baking. He noticed it but agreed that it added a surprising flavor to the dish….ressembling very much the flavors of our work week.

When it comes to creme brulees, cremas or flan, I follow the same recipes I used at the restaurant, scaled down for home purposes, but I really have no clue where and when they originated since they were taught by the departing pastry chef to the newcomer and so forth so here is one that The Chef showed me and that I eventually passed on also.

Honey Coconut Creme Brulee and Crema:

Serves 4

1 1/2 cups heavy cream

1/2 cup whole milk

4 egg yolks

1/3 cup honey

1/3 cup dessicated or shredded unsweetened coconut

extra shredded coconut and sugar for the brulee crunchy topping

In a heavy saucepan, bring the cream and milk toma gentle boil. Add the honey and coconut, remove from heat and let infuse for a couple if minutes.

Beat the egg yolks for a minutes and gently temper them with a bit of the hot cream: pour some slowly over the yolks while whisking, when this is incorporated, pour the rest of the cream.

Let the batter cool to room temperature.

Preheat the oven to 350. Strain the mixture through a fine sieve and divide among 4 ramequins or baking dishes.

Put the dishes in a roasting pan, pour hot water at the bottom of thepan so that it comes halfway up the sides of the ramequins. Cook for a bout 15-20 minutes ir until it appears set ion the edges but still a little wiggly in the center.

Let cool.

For the Crema:

You can enjoy it at room temperature or eat like my husband: very cold with a cup of steamy coffee.

For the Honey Coconut Brulee variation:

sprinkle some sugar and cocnut on top and put under the broiler until nice golden brown, or use a blow torch if you have one. I was not patient enough (remember.. a week full of oddities and weirdness) so I did not wait for mine to get brown…

Dulce de Leche Brioche Rolls

A little prep does a lot of good! Start these on saturday evening and you will be rewarded with the most comforting sunday breakfast or brunch. As a baker/cook I know that a little preparation and planning is best, but in the case of yeasted breads, I tend to get a craving at odd times of the day (read late afternoon) and find myself baking late at night, thus smelling fresh brioches and rolls right when I am about to go to bed. Granted it makes my dreams extra nice and warm but I get up to a slightly older loaf when I’d rather have a fresh piping hot roll on sunday morning.

I started these rolls on saturday evening as we decided to spend a cozy night at home, and relied on my stand mixer to do most the kneading. I divided the recipe in half, made a regular brioche with a portion of the dough and used the other half for rolls. I was thinking pecan sticky buns, or cinnamon rolls but then again I wanted creamy and caramel so I filled them with cream cheese and homemade dulce de leche, parked them in the fridge overnight and baked them on sunday morning….and reaped the rewards sitting on the couch reading the morning paper…my idea of a good day off.

Dulce de Leche Brioche Rolls, adapted from Epicurious:

1/3 cup warm water (105°F to 115°F)

1/3 cup warm milk (105°F to 115°F)

2 envelopes dry yeast

3 3/4 cups all purpose flour

2 teaspoons salt

3 large eggs

1/4 cup sugar

1 1/2 cups (3 sticks) unsalted butter, each stick cut into 4 pieces, room temperature
1 egg, beaten to blend with 1 tablespoon water (for glaze)

Place 1/3 cup warm water, warm milk, and yeast in bowl of standing heavy-duty mixer; stir until yeast dissolves. Fit mixer with dough hook. Add flour and salt to bowl; mix on low speed just until flour is moistened, about 10 seconds. Scrape sides and bottom of bowl.
Beat in 3 eggs on low speed, then add sugar. Increase speed to medium and beat until dough comes together, about 3 minutes. Reduce speed to low. Add butter, 1 piece at a time, beating until each piece is almost incorporated before adding next (dough will be soft and batter-like). Increase speed to medium-high and beat until dough pulls away from sides of bowl, about 7 minutes.
Cover bowl with plastic wrap. Let dough rise at room temperature until almost doubled in volume, about 1 hour. Lift up dough around edges and allow dough to fall and deflate in bowl.
Cover bowl with plastic and chill until dough stops rising, lifting up dough around edges and allowing dough to fall and deflate in bowl every 30 minutes, about 2 hours total. Cover bowl with plastic and refrigerate an hour.

Take the dough out of the fridge and divide in half.

For the buns: roll out the dough to a 14×9 inch rectangle. Spread 1/3 cup softened cream cheese, leaving a 1 inch border. Spread the Dulce de Leche on top, it is messy, it will spread but hey! it’s good. Roll into a log and cut into 12 pieces. Place them in a buttered 9 inch round pan, cover and refrigerate until the next morning. The dough will rise slowly overnight.

In the morning, bake at 350 for 20-25 minutes.

You can repeat with the other half or make a brioche loaf like I did (for another post).

Dulce de Leche:

I use "boil til done" method: take a 14 oz. can of sweetened condensed milk and put in a large stockpot or dutch oven. Fill with water well above the can. Turn the heat on high and let it boil for a couple of hors. Make sure there is always enough water to cover the can.

Nostalgia & Riz Au Lait

Rice pudding is not something I make on a regular basis. Adding to the things you did not know about me, I have carbs/desserts food quirks: I don’t know why I can easily justify the carbs of a cake but yet have a difficult time justifying carbs like bread or rice puddings for dessert…I guess it’s got to do with the visiualisation of the grain/sin at hand. I know, I know..I have probably passed a lot of wonderful recipes that way but I am changing…

I usually think about desserts like rice pudding as the ultimate cold weather food, the kind awaiting you after a long walk in the snow or a breezy stroll on a northern seashore. Well, I live in a warm region of the US and the numbers of cold days we have had so far is still in the single digits, not very enticing for long braised dishes, stews and warm puddings. We are grilling, in our shorts and sandals and enjoying massive amount of ice cream, tarts and cakes. I am not really complaining, but a little cold makes you appreciate a warm evening by the fire, and would give me the desire to turn the oven on. For my fellow bloggers up north: I am not complaining….!

If you have read this so far, I have just given you what would be perfectly good reason for me not to make Rice Pudding… so why oh why did I make it? Well, a couple of days ago I called my mom and we started talking about the few flecks of snow they had just had during the night, how my grandfather was feeling the cold weather in his arthritic knees, how much he was missing my grandmother and of course how much she dislikes northern weather being from Montelimar, but as long as there was sunshine she was ok. From that moment on and until we hung up, I could feel my heart fill up with nostalgia, the faint aroma of my grandmother’s rice pudding drifting through my kitchen and when I closed my eyes I could taste the soft vanilla sugar each spoonfull would leave on my mouth. Miles away from home and from the people I hold dear and miss everyday, I had found myself in their space, in their present thanks to another food memory, and if you knew my grandmother, it would not surprise you a bit.

While I was home this past Christmas, I asked my grandfather if I could look through her boxes of recipes. Two large biscuits (cookies) tins that she had filled over the years with various magazine clipped recipes, many handwritten ones for family favorites or from friends. There were many duplicates, which made us laugh aplenty…how many rabbit terrines recipes does one woman need? We found 5, all the same…. I was looking for a few specific ones: her apple tart, clafoutis, chocolate and lemon cakes, and her rice pudding. I am pretty sure I am the only one who remembers it. See, it was not real dessert…it was the magical dessert she would make us when we were sick. Hers was soupy if you were really bad, sweeter if you were on the mend. Me, I liked being in the middle, especially because she would add some fruits to it and she would never forget to put a whole vanilla bean in it.

If you have read my last post, you know that I am known as the "Queen of sticky rice". I don’t cook fluffy grain, I always end up with mush, no matter what tutorial or chef I follow. I think I gave Chef Roland a few grey hair back at the restaurant! But it’s grandma’s "Riz au Lait" we are talking about! You can imagine it took me less than 30 seconds to put the saucepan on, the vanilla out and the Nostalgia in! Here is her recipe, no specific source given which was rare for her, so I am guessing it was a recipe that evolved with time and she finally came to a combination if ingredient that she liked and worked for her.

Mamie Paulette’s Riz Au Lait (Rice Pudding):

Serves 4

3 cups whole milk
1 cup sugar
2 oz arborio rice
1 vanilla bean
1 oz. butter

In a heavy saucepan, combine the milk, sugar, vanilla bean split in half, and the rice. Cook over low heat until all the milk is absorbed and the rice is nice and tender. Take the pan off the heat, remove the vanilla bean, and whisk in the butter. Pour into ramequins and serve warm or refrigerate if you have to wait to eat it…but that would be a shame!
Serve with fruits or plain drizzled with some honey.

I never realized how a simple bowl of this rice pudding would bring on such a complex feeling called Nostalgia: bitter-sweet memories that make you the person you are today an yet so difficult to visit.

I am entering this recipe in Ellie’s event "Nostalgia" for March. Head over to her blog for more details and scrumptious recipes written with care and witt.

In Case You Were Curious

A couple of weeks ago Mrs. B from Eating Suburbia tagged me to participate in the "5 Things Meme" going around the bloggosphere. So here they are, 5 things you probably don’t know about me:

1/ My husband is 19 years older than I am, we have been married 9 years (july). Yet, it feels like we were married yesterday and he acts like a kid, much like his own father. When I met my husband, I felt home for the first time in months. Something was telling me to stop running, that I had found inner peace…the first day we met. My husband wrote me a 2 page letter trying to make sense of our meeting and of what forces had brought us together and left it on my doorstep…the day after we met.

2/ I have diplomas, Masters degrees, I can speak and read many languages, I can pull sugar, run marathons, and yet I CAN’T cook rice…unless it is sticky rice you want!

3/ I listen to every genre of music. My dad played classical music all the time when I was growing up and I snobbed it for a while, the college years, then I came back to it. I remember quiet weekends with us doing crafts and my dad painting while listening to music. Music is always on at our house. B. plays trombone in a Jazz band and he is always humming or listening to something and I am never faithful to one genre of music. If you were to put salsa on then and there, I would get up and start shaking my hips….if you were to put on some rock, I would start jumping up and down….or calm down with a good classical piece. I am versatile.

4/ There is a dark pink mark on my right upper thigh…not a birthmark….but the place where my brother bit me over 20 years ago….I think I said something I should not have! Ah!!

5/ I am addicted to…”Cheez It”…Yep! Discovered them when I first moved here…don’t get me the white cheddar, the spicy jalapeno, the gourmet parmesan, don’t try to repackage the reduced fat ones or buy them at the healthfood store…I am addicted to the orange neon cheddar full fat '"Cheez It"….Na! I said it! I am sure in a few years I will glow in the dark!

I am tagging:

Esther from Boxcar Kitchen

Jen from Canadian Baker

Gilly from Humble Pie

On A Quest: Gerard Mullot’s Cerisai Cakes

Gerard I need your recipe! I want it so bad I am ready to make them as many times as necessary until I get the consistency right. The originals were divine.

When I went home for Christmas, B. and I left the family for a few days and booked a hotel room in the 6th neighborhood right across from the famed bakery of Gerard Mullot. Macarons, croissants, fig and walnut bread, chocolate ganache tarts became our regular fare for breakfast. One morning I asked for one mini cake called a Cerisai: a pistachio cake with sour cherries inside…and it was heavenly light, flavorful…and B. only got my crumbs… I vowed to re-create them once I’d be back in the US and since then I have been looking for a recipe that would come close or that I could adapt and play with until I find the right way to make them. Maybe Carol can coax the man into giving the recipe away…in the meantime I’ll keep trying.

I was playing catch up on my blog reading one day and visited one of my favorite French blogs, Eggs and Mouillettes, written by the talented and witty Fabienne. She posted a recipe that made me think I would have a good start reproducing Mullot’s original. It was close to a Financier recipe and full of pistachios. I had sour cherry jam on hand so I got cranking. I had planned to follow the recipe to a T…multi-tasking with dinner and a sick dog made me leave the butter completely out of the recipe. They still turned out nice in shape and pistachios flavor but I am sure that the butter would have added a little softness to the finish product. I will try it again just as Fabienne posted it, but I already have made a list of several changes to try in upcoming attempts in re-creating them. I am that fixated…I will keep you posted with each one I make until I find the right one!

Mini Pistachio and Sour Cherry Cakes, adapted from Florence Edelmann

Makes 6 -8 cakes

100 gr. powdered sugar

40 gr. flour

125 gr. unsalted pistachios, finely ground

(120 gr. melted butter…that I forgot)

5 egg whites, lightly beaten to a foam

1/2 tsp. vanilla extract

1/2 cup sour cherry jam

Preheat oven to 350.

Sift together the flour and powdered sugar. Add the pistachios, the butter (if you don’t forget it), the egg beaten egg whites and the vanilla. Mix with a spatula without working it too much.
Spoon 1/4 cup in the bottom of buttered muffin tins and add a heaping Tb. of sour cherry jam. Spoon another 1/4 cup of batter on top of the jam and bake bake for 15 to 20 minutes.

Don’t get me wrong, these were very good but they were no where close to what I had in Paris…so back to the drawing board!

All Dressed Up…

…as Lemongrass Panna Cotta on a Blood Orange Meringue Disk with Banana Fritters and Blood Orange Mousse…and no where to go…

It was really bad not having a voice. Never take anything for granted, never…So, big deal you might say, 'at least you were not coughing, you didn’t have a fever,…you were fine otherwise'. Yes! And that was the problem. I tried to go shopping and had to write everything down in my little blue notebook for the deli guy. At the cash register I pointed at my throat and mouthed a "hello, how are you?" just to hear the girl say "excuse me, what did you say? what is wrong with your voice?"…..ahhhh pleeeaaase!! Having to stare at the caller i.d while fighting the urge to pick up when friends would call. Relying on text messaging and emails (I type faster than I can text. message so I had to drop the former) to communicate with the world. It was all a little too uncomfortable…even if I tend to be the quiet one.

The connection with this dessert?

Since I had to be on complete voice rest for 3 days, I figured the easiest way to do this was to stay put, away from talking temptations. I spent more time at home enjoying the pier, walking the dog on the beach, baking and doing some craft projects.
I found myself being inspired by this book and got started on simple Panna Cottas and this is where the rest took place: I am not trying to get all fancy on you but I had time on my hands to bake and guild the lillies and so I did more than just Panna Cottas and I still have 4 of them in the fridge and still no where special to go.

Lemongrass Panna Cottas, inspired by Richard Leach:

Serves 4-6 depending on your mold size

1 cup heavy cream

1 cup milk

1/4 cup sugar

3 stalks lemongrass, chopped

zest of 1 lemon

3 tsp. powdered gelatin

Soften the gelatin, by sprinkling it over 1/3 cup water. In a heavy saucepan, heat the cream and milk with the lsugar and lemongrass until almost to boiling point. Remove from heat, let cool 2-3 minutes. Add the gelatin and stir until dissolved. Add the lemon zest. Pour the cream into ramequins, molds or glasses and refrigerate until set (4-6 hours)

Blood Orange Meringue Disks (adapted over time from amny different recipes)

Makes about 30

3 egg whites

200 gr. powdered sugar

125 gr. ground almonds

30 gr. granulated sugar

zest of 3 blood oranges

red food coloring

Mix the powdered sugar, ground almonds and orange zest together. Set aside. Whip the whites to a light foam, incorporate the granulated sugar one TB. at a time until you get stiff, glossy egg whites (not dry)

With a spatula, incorporate the almond/sugar with the egg whites, taking care not to break and deflate the whites too much. Add a few drop of red coloring to intensify the color.

Banana Fritters, adapted from Richard Leach:

1/2 cup + 2 Tb flour

1/4 cup granulated sugar

1 1/2 tsp. baking powder

1/2 cup cold water

2 bananas, peeled and cut into 1-inch lengths

1 cup Panko breadcrumbs

vegetable oil for frying

Heat oil to 350.

Combine flour, sugar, baking powder ad water in a bowl until smooth. Dip bananas in fritter batter. Roll in breadcrumbs. Deep fry until golden brown.

Blood Orange Mousse, adapted from different recipes

Prepare a blood orange curd:

grated zest of one blood orange

1/2 cup strained blood orange juice

1/4 cupsugar

1 egg

1 cup heavy cream

2 Tb. powdered sugar

Combine zest, juice and sugar in a small saucepan on the stove and bring to a simmer. In a separate bowl, whisk the egg until light. Beat some of the hot blood orange mixture into the egg. Scrape the egg mixture back into the saucepan. Cook, stirrring constantly and reaching all over the bottom and sides of the saucepan. Continue to cook and stir for 15 seconds. Pour through a strainer set over a bowl and cover with plastic wrap to prevent forming a skin, allow to cool before use.

Whip the heavy cream to stiff peak with the powdered sugar. Gently fold the cream into the blood orange curd with a spatula.

To assemble:

Unmold a panna cotta, set it on a meringue disk, position 3 banana fritters on the side and pipe the blood orange mousse in the middle of the fritters. Decorate with sugar decorations if desired (see here)

The weather has been so nice and warm (upper 70s) that this was a great dessert to share with a loved one. The flavors really went well together and the fritters are so light, makes you want to go for seconds…or thirds!

Easy Like Sunday Mornings


After our baking group adventures into rich dark and buttery flourless chocolate, I wanted to take it easy…which for me means making dough and kneading bread. I prepared a Danish dough last night and assembled them this morning while a couple of brioche were taking it easy rising on the countertop.
You could say that there is nothing grand about a danish but if you ever had one fresh right out of the oven I know you would disagree (unless you dislike them of course). That buttery and flaky goodness, topped off by a dollop of cream cheese, jam or frosting…Mmmm!
That’s how I like my morning: sweet, soft and looking like a pillow.

I thought about using my usual Danish dough, but I had bookmarked another one weeks ago so it was great timing to give it a try. If you have not visited Gattina's blog yet, go…no run…move those little fingers across the keyboard fast and enjoy…The girl knows her dough!
This particular version attracted me because of the way the butter is incorporated, not as a block and then tucked it, but dispersed throughout the dough. Hey! I said I like my sunday mornings easy, didn’t I?!

Rapsberry Danish, adapted from Gatttina’s:

(Recipe courtesy Beatrice Ojakangas’s The Great Scandinavian Baking Book )

Yield: 24 servings

14 g active dry yeast
1/2 cup lukewarm water
3 1/2 cups unbleached all purpose flour
330 g chilled unsalted butter, cut into 1/4 slices. (about 3 sticks)
1/2 cup heavy/double cream
2 pinches of salt
2 eggs
1/4 cup sugar
1/2 cup to 1 cup raspberry jam or preserve

Dissolve the yeast in lukewarm water and let stand for 5 minutes. Stir in cream, salt, eggs and sugar .
In a large mixing bowl, add flour and sliced butter, use a pastry blender to further cut the butter to the size of kidney beans
Add the yeast mixture into flour mixture, combine carefully with a big rubber spatula, the mass is just moistened enough and hold together. Cover, refrigerate 4 hours or overnight.
Lightly flour the work table, turn out the chilled dough, pound and flatten to make a 16 – 20 inch square. Fold into thirds making 3 layers. Turn dough around and roll out again. Fold from the short sides into thirds.
Rest in refrigerator for half an hour, repeat folding and rolling one more time. Wrap and chill the dough 30 minutes or overnight before you proceed pastry making.
Cut the dough in half and working one portion at a time (refrigerate the unused one in the meantime), roll the dough to make a 12X9inch rectangle. Cut out 3 inch squares. Fold the corners of each square toward the center and make an indentation with the back of a spoon. Cover with plastic wrap and let rise for about 45 minutes.
Before putting them in the oven preheated at 375, brush with eggwash (egg beaten with a dab of milk) and fill the centers with jam (or cream cheese,…)
Bake for 15 minutes or until golden brown.
Ice if desired with a mixture of owdered sugar dissolved in milk.

As I said: Mmmmm! No icing necessary!

Chocolate Intensity…Heaven

The flavor and taste of this cake is heaven, but I know I will probably go to hell because I am lusting after a cake…. It is facing me…sitting pretty…there….chocolaty, bittersweet, all glazed up, all dressed up…and it is too early for cake… But I think my throat could use a little love right now….and I need to take my meds with food….See what a simple flourless cake does to your head?!!!

After our croissant making weekend, our little baking group decided to go for a slightly less time consuming dessert and we settled on a flourless chocolate cake. There are as many ways to make a flourless chocolate cake as there are ways to bake them. I have some before where egg whites were beaten stiff then incorporated into the chocolate mixture, most of the time with very little butter and you end up with a very light almost meringue like cake. Not this one! My arteries kinda screamed a little when I looked at the ingredients: 3 sticks of butter, 6 whole eggs…oh! Wait! There is actually 8 ounces of Antioxidant Powerhouse dark bittersweet chocolate so I should not feel so bad!!! Even more if you count the glaze…why worry?!

Worried I became last night when I pulled these babies out. The original recipe calls for baking the cake in a 9 inch pan in a water bath. As I went to get the pan out of the cupboard, I figured I could try to make some demi sphere or pyramid cakes with the silicon pans I had, and pour the remaining batter in a 6 inch pan. The recipe is a breeze to make, seriously…I did not use the recommended chocolate but Lindt 70% bittersweet, and a dip of my fingertip in the prebaked batter gave me confirmation that this cake was going to be intense.
I baked the cakes, let them set to cool and then I could not wait any longer and cut one…and then the worrying begin. Let me explain: the taste was awesome, but the texture did not appeal to me. I don’t like puddings that much and that’s what it was, 20 minutes after sitting on the counter top….Normal I thought, I am sure that a good 6 hours in the fridge is going to concentrate all of that.. Around midnight last night, I was still up reading and decided to go ahead and make the glaze. The little spheres looked so good…They seemed a little heavier in my hands, as if they were "fudging up" so my worrying was going away.

Since I can’t talk, I can’t teach my classes or train my clients, so I have plenty of time on my hands…something I am not used to…but took the opportunity to play around with the dessert and give justice to its name by dressing up a little. I added caramelized hazelnuts, hazelnut and cocoa nibs praline and banana chips.
Thank you Mary for putting the recipe up. Head over to her blog to get the full lowdow and go check out what my other talented and witty partners in crime have created!

Here are the elements I added to plate the cakes and their respective recipes:

Caramelized Hazelnuts: (You will use the leftover caramel for the praline)

200 gr. sugar

12 hazelnuts, skin off

Fix a toothpick into each hazelnut. Cut a large block in styrofoam or use a sturdy piece of carboard. You will fix the hazelnut on it after they are dipped in the caramel.
On medium high heat, melt 100 gr. sugar to a light amber color. Add the remaining 100 gr. sugar and stir and cook until deep amber. Stop the caramelization by setting your saucepan in bowl filled with ice and water. Wait 30 seconds for the caramel to thicken a bit and dip the hazelnuts. Fix each on the styrofoam and invert it on the edge of your countertop with a pan underneath to catch the sugar. I have got an easier way by inverting the styrofoam on the edge of the open dishwasher so that any piece of caramel is washed away next time I turn it on.

Hazelnut and Cocoa Nibs Praline:

Over medium heat, re-heat the caramel you have used for the hazelnuts until liquid again, Quickly stir 1/4 cup chopped hazelnuts and 2 Tb. cocoa nibs. Pour on a parchment lined baking sheet. Allow to cool completely and break in pieces.

Banana Chips:

1 ripe banana
granulated sugar

Puree one banana in a food processor until completely smooth. Cut out stencils in plastic or heavy paper. Line a couple of baking sheet with silicone mats and pour some puree into each stencils. Remove your patterns, sprinkle a bit of granultated sugar over the shapes and bake at 200 degrees F. for 40 minutes.
Peel them carefully off the mat and use a rolling pin if you ant to bend and shape them