
Jahresarchive: 2011

Asparagus & Pea Soup With Herb Crackers

Asparagus Soup & Herbed Crackers


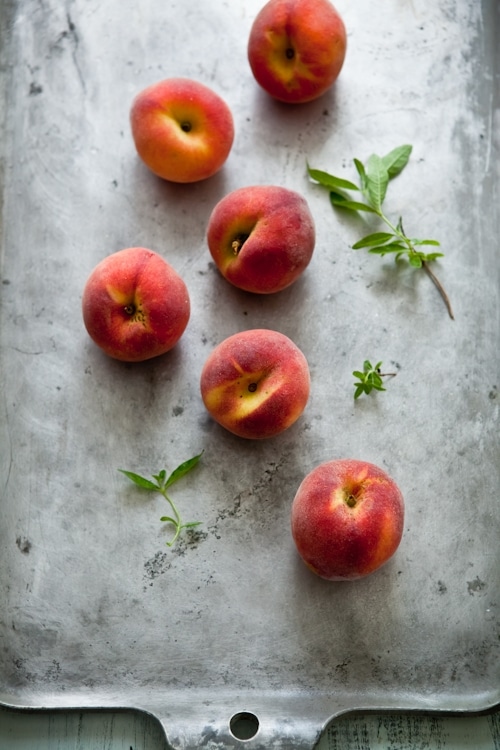
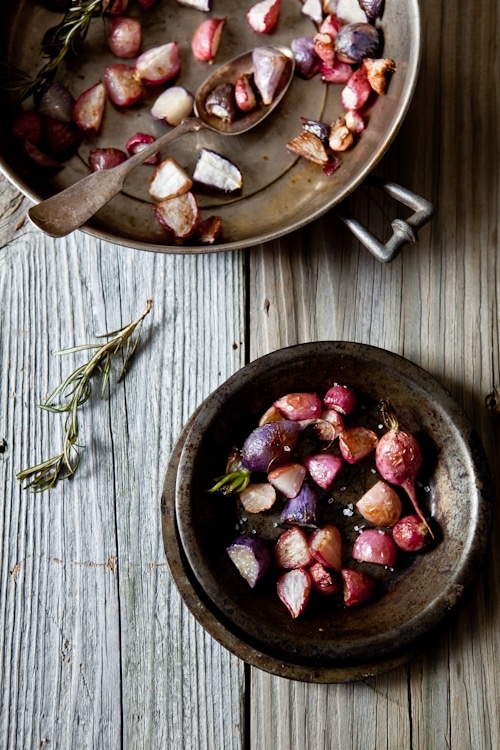
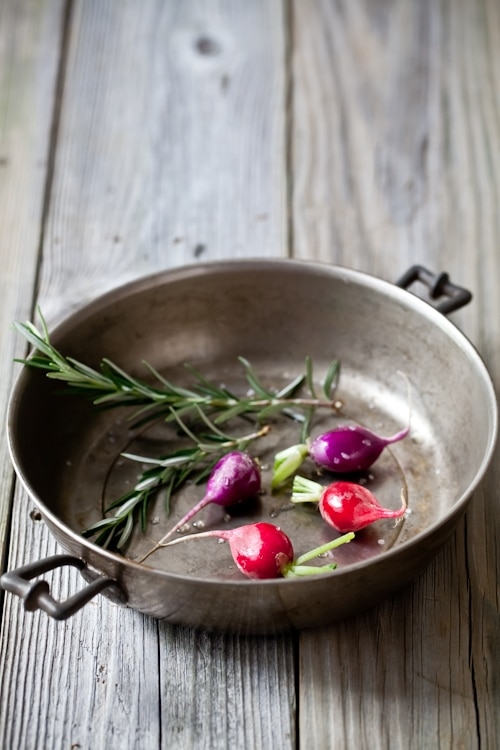
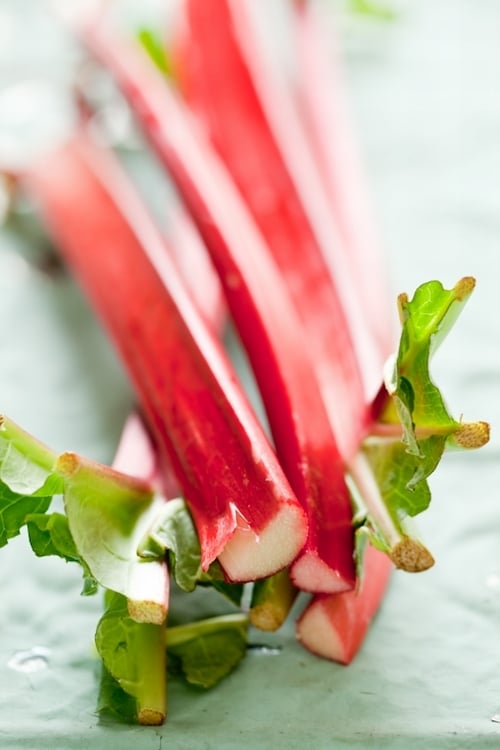
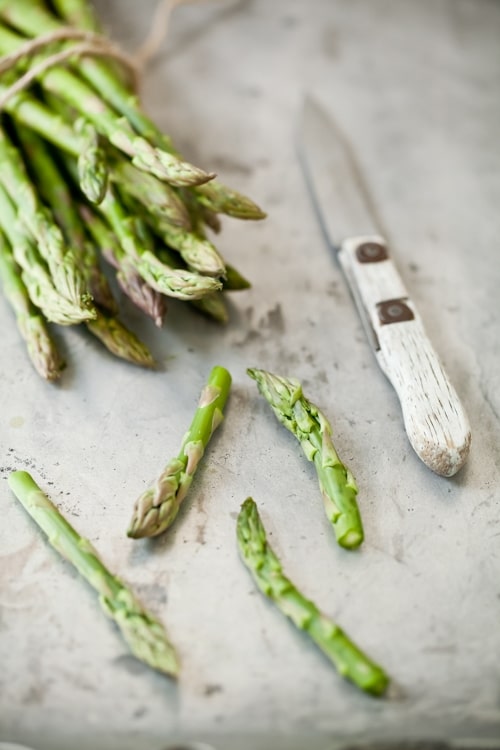
With the temperatures well into the 90s already, it’s crazy to feel that Spring almost feels like a distant memory. But it is. Almost. I know how short the seasons can be for fruits and vegetables when I am able to find asparagus at the farmers market one week and hardly the next. I love seeing the display of these vibrant green or sometimes purple stalks.

Asparagus season always brings about fond memories of Sunday dinners back home in France. My heart strongly swayed in favor of freshly steamed artichokes but my mother had a knack for making steamed asparagus so perfectly well that my palate was all out of sorts when it came to pick a favorite. My favorite way to eat them was when she’d serve them with a light vinaigrette. Just like I liked artichokes in vinaigrette or leeks in vinaigrette. Clearly, I have a thing for vinaigrette!

Herbed Crackers


However, there are enough salads and vinaigrette in my Southern warm life to want to change things up. One of our other staples for dinners is often a big bowl of soup and a poached egg on top. We are big fans and big believers of the "life is better with poached egg on top". Makes leftovers take on a brand new life, brings a simple dish of sauteed kale and garlic to new and wonderful heights and well, just makes us weak in the knees to see that yellow yokey goodness from a farm fresh egg …

I disgress…Soup! Yes! Soup holds a special place in our meals. When I was growing up, my mom would start every dinner with a small cup or bowl of soup. Just veggies, pureed smooth, no starch. Piping hot with a little swirl of creme fraiche. It was her ritual to ensure we’d get our veggies in. I created a whole game around it to try and name as many veggies she included as possible. I think it played a major role in developing my palate over the years.

Asparagus


When I was planning my move to the US in the late 90s, there was no doubt in my mind that I would keep this tradition of having soup at dinner. Then I moved to the South. The hot and humid climate of the region turned me away from steamy soup for a while. I went all out on gazpacho, Vichyssoise, cold cucumber and dill, etc… Slowly, over the years, I went back to warm, sometimes piping hot soup, no matter the weather. Not just vegetable soups like I had eaten all my life. I was onto lentil soup, chowders, single vegetable based soups, etc…

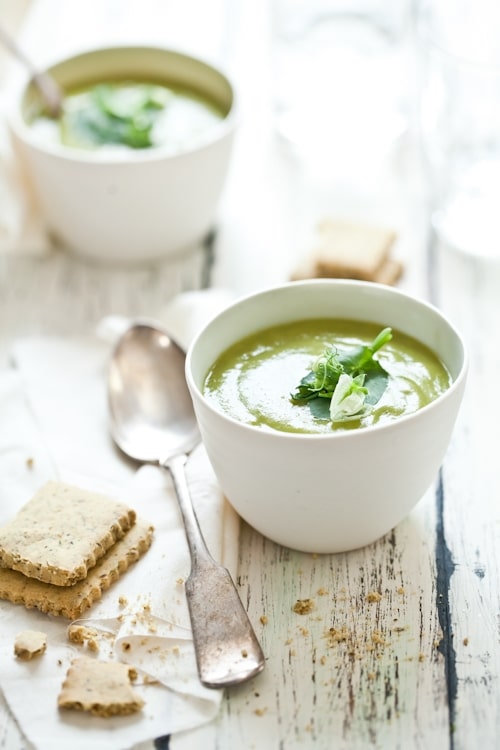
One day last week that I was making dinner for my parents(they are visiting us here), it felt as if I had turned their world upside down when I said I was going to make Asparagus and Pea Soup as a starter for dinner. We never had a soup with just two veggies when I was growing up! I knew this one would win them over just the way it had won B. over a couple of weeks before.

Pea Blossoms


Some really tasty meals can come out of throwing a bit of this and a little of that together in a pot. It happened with this soup. One I could make time and time over and eat just about as much. It tastes a bit different every time. It wraps the house with the softest smell of Spring.

I guess you can make it all year long and still enjoy some of the lovely flavors. You can have anything pretty much all year long the way supermarkets are set up these days. But I encourage you to take advantage of the ingredients in season where you are. Their taste is so intense that it will often surprise your tastebuds with this "I had forgotten an eggplant had this much flavor!"

Herbed Crackers


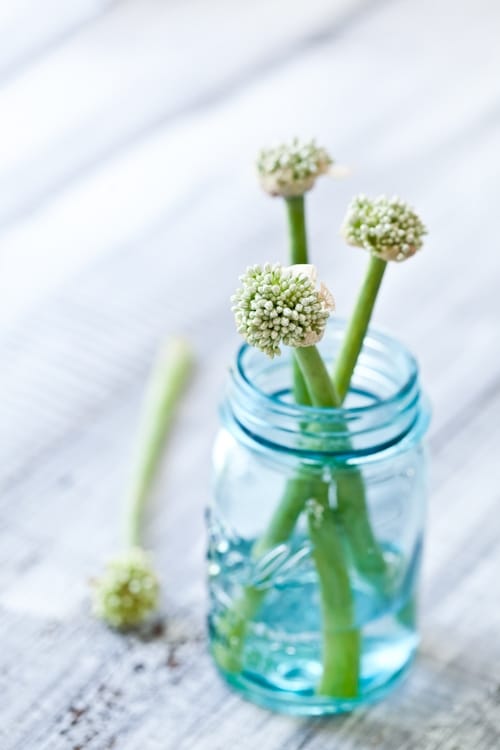
It happened with this soup when I combined the first asparagus of the season with a few handful of pea blossoms I picked up at the market. I knew the season would be short and I had waited long enough for each ingredient! That’s also why I love seasonal cooking. The wait and anticipation of the first raspberries, squash blossoms. Then the explosion of flavors in our mouths sending signals of goodness all through our souls.

This soup fits the bill perfectly. Simple. Satisfying. I bet it would be even better with a poached egg on top but the herb crackers I made to go along were a great complement and a nice change to croutons. Worth waiting another Spring for!

Asparagus Soup


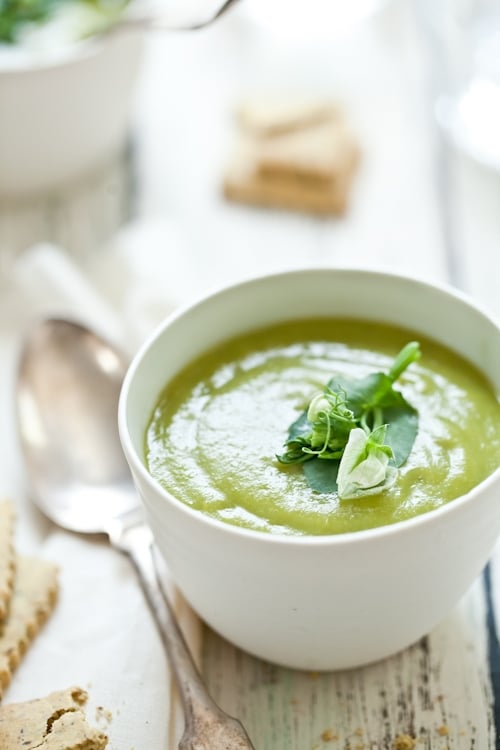
Asparagus And Pea Soup with Herb Crackers:

Serves 6 to 8 as an appetizer and 4 as meal

Ingredients:
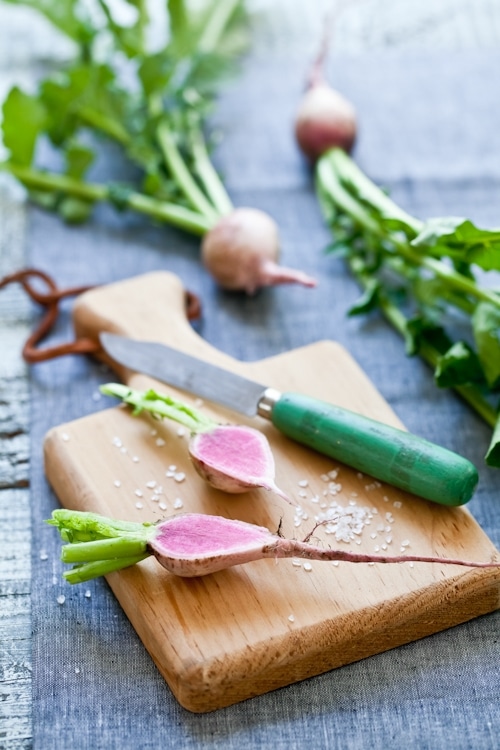
1 bunch asparagus (about one pound)
1 to 2 cups pea blossoms, pea shoots or peas (fresh or frozen)
2 gloves garlic, skin removed
salt and pepper to taste

Directions:
Snap the ends of the asparagus. Bring a large pot filled with water to a boil over high heat. Throw in the asparagus and cook them for 5 minutes. Remove from the heat and remove the asparagus from the water with a slotted spoon and place them in a blender or food processor (or deep bowl if using an immersion blender). Do not discard the cooking water. Bring back to a boil, throw in the pea blossoms, pea shoots or peas and cook for about 3 minutes if using pea shoots/blossoms, and 5 if using fresh or frozen peas. Add the garlic at the same time you add the peas. Remove from the heat and remove the pea shoots/blossoms/peas and garlic with a slotted spoon. Reserve the cooking liquid. Place in the blender with the asparagus and puree until smooth. You might need to add some of the cooking liquid to reach the consistency that you like. Season with salt and pepper and serve either hot or room temperatures.
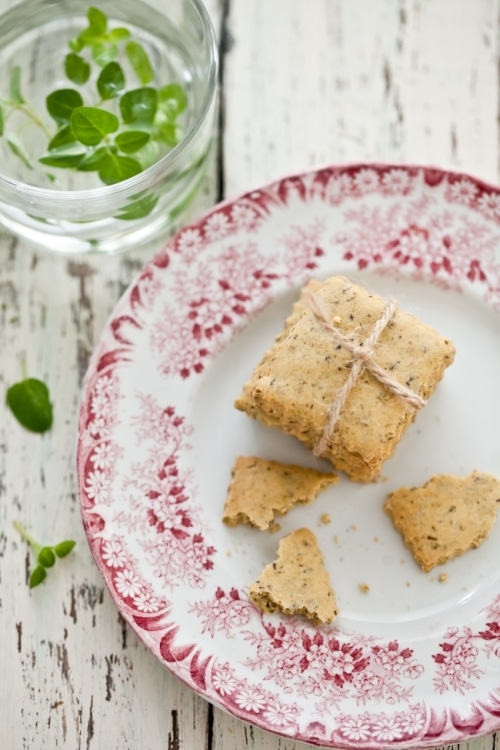
Herbed Crackers:

Makes about 24 small ones

Ingredients:
1 stick butter at room temperature
2 egg yolks
1/2 teaspoon salt
1/4 teaspoon pepper
1 teaspoon finely chopped oregano
1 teaspoon finely chopped thyme
1 cup millet flour
1/2 cup sweet rice flour
1/4 cup milk (optional)

Directions:
In the bowl of stand mixer fitted with the paddle attachment, whip the butter and egg yolks together on medium speed until creamy looking. Add salt and pepper and the herbs and whip for 10 seconds just to mix them in at low speed. Add the millet and sweet rice flour with the mixer still on low speed. If the mixture feels too crumbly add a little bit of milk to obtain a smooth but not too wet dough. Start with one tablespoon at a time.
Gather the dough into a bowl and refrigerate for about 2 hours.
When ready to bake, turn the oven to 350F and position a rack in the middle.
Roll the dough in between 2 sheets of parchment paper and roll to about 1/4 to 1/8-inch thick. Cut cookies out in the dough and place them on a parchment lined baing sheet. Bake for 10-12 minutes or until golden.
Serve with the soup.

Thoughts On My Ace Camp Photography Workshop In Sante Fe, New Mexico

Blossoms


Follow your heart, but be quiet for a while first. Ask questions,
then feel the answer. Learn to trust your heart.

—Anonymous

Ace Camp Group Shot

Ace Camp Group Shot.

These were the words in my heart as I was traveling to Sante Fe a couple of weeks ago to teach an Ace Camp Workshop. These were the words I wanted to give to the attendees the same way they were given to me. As a gift from someone on a creative journey. Indeed, my editor Jenny gave me this quote one day I was having a difficult time telling her how I approached assignments. "That’s it!" I exclaimed.

Sante Fe Window


I wanted to give it so badly to the attendees but I refrained as much as possible. I wanted them to feel what these couple of lines were telling them without explicitly writing it out.

Leslie & Kay

Leslie and Kay.

Together, twelve attendees, myself and Angela who organized everything made an unspoken pact when we signed on for a photography camp in Sante Fe. We agreed to discover and share. To like, dislike and grow. To find our own battles and obstacles. To reach out within our strength and ask of others. To give and take. As a whole, alone, out with words or in our hearts.

Lisa & Megan

Lisa and Megan.

We knew we’d have to be out there and vulnerable. We knew we’d come out stronger. I personally had no idea that twelve people would impact my life this much in the span of four days. I miss everyone of them. Not a day goes by that I think about someone from the workshop. Every single one of them gave me something huge right from their heart: they left them open and free. In a world where we are sometimes misinterpreted or judged without being known, this was a gift indeed.

Olive Oil at Oleaceae

Olive oil at Oleaceae.

As Angela noticed in her recap post, I had come prepared. Well, I was following some big footsteps of creative workshops and Angela was trusting me to bring the same level of quality and care to our camp. Hence, I could not fly by the seat of my pants…well not completely…!

Chickpea Salad


Our workshop schedule was intense but so were the hours spent laughing and coming together as a group striving to learn and have a positive impact on one another. At the end of the day, our sessions ended with a group discussion and critique of all the shots taken that day. As you can see in the post here, a glass of wine made the whole exercise way smoother. That’s the French in me, always trying to mix work and play…!

Elysia & Mike

Elysia and Mike.

Seriously though, I wanted to make sure that each attendee had the opportunity to explore the journey behind their picture. I challenged everyone to shoot at the complete opposite of what they usually did and then take the whole group through their own reactions to help them word what they had learned, disliked and liked in the process.

Selah & Julie

Selah and Julie.

Maybe they would try one new thing in the future, maybe two. Maybe none. At least they tried and were not left to fly solo on this discovery.

Salad Styling Session


There were laughters and frustrations. Moments of discoveries and growth. There were moments that moved me as a teacher and moments that touched me as a photographer. It changed me.

Xarene & Janice

Xarene and Janice.

Leslie, Kay, Lisa, Megan, Elysia, Mike, Selah, Julie, Xarene, Janice, Sasha, Pilar and Angela: Thank you. You have made me a better person, a better teacher and an even more motivated photographer.

Sasha & Pilar

Sasha and Pilar.

Yes, if you ever have the chance to take an Ace Camp with Angela, do not hesitate one second! Angela will feed your belly well (just look at this spread!) and your soul and creativity will soar!

Sante Fe


When the doors of perception are cleansed. Man will see things as they truly are…infinite.
– William Blake.

Honeysuckle And Jasmine Cupcakes & The Little Gifts In Life

Honeysuckle & Jasmine Cupcakes


I did not make a cake for my birthday this year. I have a "coeur d’artichaut" you see: I change my mind at the drop of a hat. Last Wednesday I wanted chocolate and caramel in my cake. The day after I was on to lemon and vanilla. In the morning I was all set to make it a three tier with luscious curls of chocolate on top. Maybe a few piped flowers. Maybe. At the end of the day, I was seriously finding the repetitive motion of icing a few cupcakes a much better option.

Honestly, I just had one of the best birthday weekend. Really. Intensely focused on being, breathing, family and friends. No material gifts. I just wanted to spend some quality time with the people I loved the most. My parents are here and strolling the gorgeous streets of Charleston with them on a gorgeous day last Friday was just a much awaited moment. A late lunch at my favorite place, a good nap and I was a happy gal.

Honeysuckle


I did receive a gift. Seeing my parents pride and joy as I was giving them a copy of my book Plate To Pixel. That was pretty priceless… You all wonderful readers have also given me the most wonderful birthday present with your lovely tweets, messages and emails about the book. I am thrilled when you send a picture of the book of your kitchen counter or next to your camera. I want to hug you silly when you say you had many a "ha ha" moments reading it and getting some concepts that were escaping you until now.

You are given me the greatest gift ever. You got it. You got that Plate To Pixel was written with you in mind and from where I was myself when I started in my journey with food photography. The goal was to give you tools, tons of them, and examples. But not all the tools. That’s for the sequel…ahaah! To reassure you that the only way to get going at this photo thing, was to just…get going. What was the worst that could happen? More learning time, more practice round, more growth and getting inspired and moved. Yeah…that would be awful (insert sarcastic laugh).

Onion Flowers

An edible bouquet to say "Thank you".

Witnessing all the good, motivation, sharing, learning, laughing, talking. Seeing all this happening in this community, around food, the people who make it, the people who tell its story, the people who enjoy it, the people who document it…I am moved and inspired. This is my birthday present. Thank you.

And I thank whoever came up with cupcakes, tea cakes, mini cakes and the like. I dig them. They are fun to make and fun to eat, highly transportable and I rarely meet someone turning one down. Especially not these. I got the idea of honeysuckle and jasmine flavored cupcakes from my good friend John, chef at Lana’s Restaurant who used jasmine syrup to soak lemon cake layers one time.

Jasmine & Honeysuckle Simple Syrup


Luckily we have lots of honeysuckle and Confederate jasmine growing around the yard so a little of both picked out the other day and I was on my way…I made a simple syrup first with equal parts water and sugar and let it cool for about five minutes before I threw in some honeysuckle and jasmine flowers. I poured some over the cupcakes right when I took them out of the oven and added some to the buttercream.

I do live with a coconut thread hater but to my surprise, B. agreed that the toasted coconut sprinkled on top was a really nice way to round up all the flavors. When he says things like that, I immediately go hide a couple for me because I know we’re going to fight over the last one. And we did….!

Honeysuckle & Jasmine Cupcakes


Honeysuckle and Jasmine Cupcakes:

Makes 16 cupcakes

Note: Honeysuckle and jasmine grow wild in our backyards but I still washed them and patted them dry to before using. Only use edible grade flowers when baking or cooking. You can prepare the syrup a day ahead and keep for about 5 days in the refrigerator after it is made (strain the flower after a couple of days). I freeze mine in ice cubes and use for cocktails sometimes.
You can replace all the gluten free flours with 2 cups all purpose flour if desired.

For the cupcakes:
2 large eggs
1/2 cup granulated sugar
3/4 cup olive oil (don’t skimp on the quality)
1 cup plain yogurt (low or full fat)
zest and juice of a lemon
1 cup rice flour
1/2 cup millet flour
1/2 cup sorghum flour
1 tablespoon baking powder
pinch of salt
shredded coconut to decorate (optional)

For the honeysuckle and jasmine syrup:
1 cup water
1 cup sugar
1/2 cup flowers

For the buttercream:
3 egg yolks
1/2 cup sugar
1/4 cup water
1 1/2 sticks unsalted butter, at room temperature
zest of half lemon
2 tablespoon honeysuckle-jasmine syrup

Prepare the cupcakes:
Preheat the oven to 350F and line cupcake tins with cupcake liners, slightly brush the inside olive oil.
In a large bowl, whisk together the eggs and sugar for about 2 minutes. Add the olive oil, yogurt, lemon juice and zest and whisk again so that everything is well mixed. Add the rice flour, millet flour, sorghum flour, baking powder and salt and mix until the batter is smooth. (You can do this in a stand mixer if desired)
Divide among the muffin tins, filling no more than 2/3 of the way up. Bake for about 15-20 minutes or until a toothpick inserted in the middle comes out free of crumbs.
Let cool completely before frosting. Once frosted, add a few pieces of shaved coconut if desired.

Prepare the syrup:
Place the sugar and water in a heavy medium saucepan and bring to a simmer, stirring once or twice to make sure the sugar is dissolved. Remove from the heat, let cool 5 minutes and throw in the jasmine and honeysuckle flowers. Let steep while the cupcakes cool.

Prepare the buttercream:
Place the yolks in a stand mixer, fitted with the whisk attachment.
Bring the sugar and water to 238F in a medium saucepan set over high heat. Slowly pour the hot syrup over the egg yolks and continue to whisk until cold. Change to the paddle attachment and beat in the butter, one tablespoon at a time. Add the lemon zest and the syrup. Continue to beat for a few seconds until completely smooth.

To assemble:
Poke holes in the cupcakes with a toothpick or a fork and pour 1 to 2 tablespoons of the flower syrup over them. Place the buttercream in a piping bag fitted with star tip and pipe frosting on top. Decorate with shredded coconut if desired.

Squash Blossoms Two Ways: Brown Wild Rice, Feta Squash Blossoms & Crispy Fried Blossoms

Wild Rice & Feta Stuffed Squash Blossoms


Every Saturday that we are at the farmers market, I wish I could be there with my mother. She’d get a kick out of the scarlet queen red turnips, the juicy strawberries and the soft squash blossoms. My dad would enjoy strolling down the painters row filled with gorgeous watercolors or photo representations of the city, the beach houses and everything Charleston.

This coming Saturday, it will finally be a reality. My parents are arriving tomorrow and staying throughout the month. I can’t wait. It’s been almost a year since I last saw them and due to work, family circumstances, health and other, it has not been possible for either of us to get together. But tomorrow….oh tomorrow...all the hugs and kisses from my mama will be mine!

Wild Rice & Feta Stuffed Squash Blossoms


I can’t wait. Even though work won’t stop while they are here, I am looking forward to my mom taking over in the kitchen here and there. Her food is legendary good and she will have as much fun at the market as I do every weekend. I can’t wait to see my dad’s familiar frown and pondering face as he explores the art and exhibitions during the Spoleto festival starting up soon.

I’m just looking forward to just be with them and take every minute they give me. I know there will be a small period of adjustment. That’s to be expected. I often found that those adjustment times are quickly solved with a walk on the dock to see the sunset, quietly making dinner together, having breakfast on the back deck overlooking the water. All these moments where we let distance and time apart quickly fade and find each other again.

Squash Blossoms


So many things have changed since they visited last March. More work. More accomplishments. More friends. We have many things to celebrate and many new friends to celebrate them with. I am thrilled for my parents to see some old friends again and to meet new ones. My day-to-day is often what makes my parents the happiest but that’s often what I fail to talk about on the phone once we’re done with everyone’s news in the family.

So this trip, it’s all about saying thanks for the big things and celebrating all the little things. It’s about hugs. Growing up. Being my own and being their child.

Wild Rice & Feta Stuffed Squash Blossoms


I realized how much a combination of both my parents I was this weekend while leading a workshop in Sante Fe on food photography. I had the seriousness of my dad and the "well, there’s a plan, but it’s ok if we change it" attitude of my mom. I realized how far I had come and how much I’d still had to go.

I will post a longer recap of the workshop once I go through all the pics I took and gather posts from the other attendees about their own recap of the weekend. In the meantime, you can check this portrait gallery I made of the attendees and look through Ace Camps Facebook pics. To say that I had the most incredible time would be an understatement. Everyone worked so hard during the weekend and all their efforts truly paid off. There were many a "ha ha" moments around and I am only glad I was able to help others enjoy food photography as much as I do.

Fried Squash Blossoms


When I got off the plane yesterday evening, B. asked if I wanted to grab a bite in town. Non, pas vraiment (no, not really) I said. I wanted to get home, hug my pups silly and be quiet for a while. The fridge was pretty bare but we had eggs and chives which turned into an awesome omelette for two. We had an avocado, a handful or radish sprouts and a couple of tomatoes. Paired with some bread chunks and we had an incredible panzanella salad.

I also pulled a tray of Brown & Wild Rice & Feta Stuffed Squash Blossoms that I had made the week before. I gave them a quick sautee in a hot pan and we sat down to an incredible makeshift feast. My favorite kind of meal.

Fried Squash Blossoms


Every Spring that the farmers market starts, I can’t wait for squash blossoms to pop up on vendors stalls and they seem to be coming in earlier than usual this year. Obviously it does not bother me and we have enjoyed them simply sauteed with salt and pepper, crispy fried and stuffed with all sorts of delicious market leftovers. I have to say that this filling combination of brown and wild rice with feta, thyme, oregano, garlic and a touch of lemon is my favorite so far.

It made this "so happy to be home after traveling all day" meal that much more delicious. A nice change also to the usual quiche and salad tradition we have in the family when people travel. Although I might fix one for my parents tomorrow. Who knows…

I am curious though. What is your favorite meal to cook or eat when you get off the plane after a long day of traveling?

Wild Rice & Feta Stuffed Squash Blossoms


Brown Wild Rice & Feta Stuffed Squash Blossoms:

Serve 4 as an appetizer

1 cup brown and wild rice blend, cooked and cooled
1/3 cup feta cheese, crumbled
1 teaspoon chopped fresh thyme
1 teaspoon chopped fresh oregano
1 garlic clove, minced
zest of one lemon
salt and pepper to taste
12-16 squash blossoms, washed and patted dry (some I get come with a squash attached which I cut close to the stem and stir fry separately)
2 tablespoons olive oil, divided

Combine the rice, feta, herbs, garlic, lemon zest together in a medium bowl and season with salt and pepper to your liking.
In a large saute pan, heat one tablespoon olive oil over medium heat.
Delicately fill the inside of the squash blossom with about 1-2 teaspoons of the filling. When all the blossoms are filled, place half in the sautee pan and cook about 2 minutes per sides until golden brown.
Remove from the pan and keep warm under a piece of tin foil. Heat the other tablespoons of oil and sautee the second batch of stuffed blossoms.
Serve warm.

Crispy Fried Squash Blossoms:

Serves 4 as an appetizer

1/3 cup millet flour
1/3 cup flour superfine rice flour
salt and pepper to taste
1 egg white
3/4 cup beer or club soda
12 to 16 squash blossoms, washed and patted dry
canola oil for frying

In a medium bowl, combine the flours, salt and pepper. Add the egg white and beer (or club soda) and whisk until smooth.
Heat canola oil in a medium deep pan (I use a 9-inch round, 2-inch tall cast iron skillet) until it reaches 375F.
Dip the blossoms in the batter and fry 2 or 3 blossoms at a time in the hot oil. Do not overcrowd them or it drops the oil temperature down which makes them cook longer, soak in more oil and get soggy.
Heat at once!

Poached Peaches & Lemon Verbena Ice Cream. A Bit Of News Too…

Lemon Verbena Ice Cream & Poached Peaches


Leave it up to me to pick one hot evening to churn a fresh batch of ice cream thinking we were nicely gearing up for Summer early as usual only to get up to a little-big drop in temperatures. Intriguing. I like that last attempt of a crisp morning trying to wrap us up with a little breeze and a soft chill.

While taking the pups outside that morning, I was not thinking ice cream at all. More something like a hot cup of coffee and a warm piece of toast. But I instantly busted "this feels so nice! Like a juicy fresh peach on a warm Summer day!" I went back inside with that odd feeling that the weather had misplaced a chip somewhere. The pieces did not quite fit.

Baking With Peaches & Lemon Verbana


The season was going so well that in fact I had gotten the juiciest tiniest yellow cling peaches at the market a few days before. Dubious, I only got three. Once home and after the first bite, I wished I had gotten three more. As good as candy, albeit two months early in the season. Wacky. Yet good enough to make my toes curl so I wanted to do them justice and use them in a dessert somehow.

Yes. My measuring scale to things, foods, life, love, is how much something will make my toes curl. When I fall in love with people, my toes curl. When there is a dish that makes my brain circuits implode from intense pleasure, my toes curl also. For some it’s just an expression. For me, it’s a true manifestation that I am completely in tune with the moment, the person, the taste. I often put a piece of music on and realize 20 minutes into it that my toes are indeed curled from appreciation.

Lemon Verbena


That morning, in the cheer satisfaction of the present moment, a clemency in the weather, a few minutes of calm all to myself, my mind wandering about and around ice cream and peaches, my toes started to curl. Immensely. And as I am sitting here taking a break from packing, my toes are curling once more over a bowl of Lemon Verbena Ice Cream and Poached Peaches. Fragrant, refreshing and the perfect thing to break for.

I am heading to Sante Fe, New Mexico to teach a 2-day workshop organized by Angela Richie of the world renowned Richie Camp workshops. I’m heading out a bit early to get a chance to see the town before I immersed 12 people in an intense food photography and styling adventure. When I look at the list of instructors and hear feedback from attendees, my toes curl at the honor to be part of such a group!

Lemon Verbena Ice Cream


There are a couple of other things that make me enjoy a little serving of ice cream this evening. I realized I put the news on Twitter last month but never made a formal announcement here. Back in April, I got contacted by Chris from Primary Reps Photo Agency who expressed the wish to add me to his roster of photographers. My goal for 2011 was to get photography representation, a mutual partnership of work and more work and someone other than me futzing over contracts and quotes.

I liked Chris. I liked his honesty and clear approach to work. I liked him and he represents my dear friend Matt Armendariz too. My toes curled. Yes. Well, I am thrilled to announce that I am now represented by Primary Reps for anything and everything photography related and you can view my galleries here and here.

Peaches


And here is announcement number 2. Things happen outside of my comprehension but I trust my soul that they happen when right. Things at work are fast and furious and I am loving every part of it. Contracts, clauses, presenting my work the best way possible while juggling everything else can get a bit crazy. When Amy Hughes, literary agent from McCormick & Williams in New York got in touch and asked if I had considered getting a book agent, I looked up to the clouds and uttered a quiet "Thank you!".

We met. We chatted. We asked questions. And my toes curled up again. Today I am psyched to announce that Amy is indeed my book agent. She is my sounding board and best advocate for current projects as well as others I have been asked to consider and work on. I am passionate about my work and when my toes kept curling more and more in the last few months, that’s when I knew it was time to team with people who knew how and where to best focus my energy.

Lemon Verbena Ice Cream & Poached Peaches


I am extremely grateful and can’t wait to get to work every morning! But now that it is almost midnight and my ice cream bowl is just about empty, I must go and finish packing my gear for Sante Fe. I doubt I’ll have time to post while I am there but I will try to post updates and phone pictures on Twitter (@SweetTartelette) and Facebook (page is here) and share info and tips as we workshop!

Have a wonderful rest of the week and gorgeous weekend!

Lemon Verbena Ice Cream And Poached Peaches:

Serves 8

For the lemon verbena ice cream:

4 egg yolks
1 cup (100gr) sugar
1 cup (250ml) heavy cream
1 cup (250ml) whole milk
1 small handful lemon verbena leaves.

In a large bowl, whisk the egg yolks and one cup of sugar until pale and thick. In a saucepan set over medium heat, bring the cream, milk, and lemon verbena to a simmer, without letting it come to a full boil. Slowly pour the hot cream over the egg yolks mixture while whisking to temper the egg yolks. Pour the whole mixture back into the saucepan and cook over low heat, stirring constantly, until the cream coats the back of spoon. It should register 170F on a candy thermometer. At this point you have made a custard sauce, also known as "creme anglaise". Let cool completely, and refrigerate until cold.
Once the custard is cold, strain and process according to your ice cream maker manufacturer’s instructions.

For the poached peaches:
4 peaches
1 vanilla bean split in half
juice of one lemon

Prepare the peaches:
Place the peaches, vanilla bean, lemon juice and enough water to cover them in a tall saucepan and bring to a boil over medium high heat. Lower the heat and let them simmer for 15-20 minutes or until the peaches are just soft (poke with a toothpick to check).
Remove from the water using a slotted spoon and allow to cool on paper towel or baking rack.

To plate: cut each peach into thin slices and serve with a generous scoop of ice cream. Sprinkle with chopped pistachios if desired.

Rosemary Roasted Radishes & Turkey Brie Panini

Roasted Radishes


Little announcement…The giveaway winners are: ReL from The Dedicated Flash and Elissons from Sugar Symphony (all the way in Latvia!) who won a copy of Plate To Pixel. Congratulations also to Colorado76Gal from Baking Doux who won the set of 4 plates by Asya at gleena.com. Email me with your mailing addresses at mytartelette at gmail dot com. Thanks!
*******************************************
What a discombobulated week this has been! Life at its finest. It pushed and it pulled. And challenged. It gave and took away. The joys of many followed by the sorrow of others. Chances are that yourself can apply any one of these circumstances to your week I am sure. It happens everyday and we are left to keep going.

Moments like this, all out of sorts, caught between joy and pain, make me want to celebrate the simple things. Friendships, love, crushes, food, images,… Things I can count in my life as well as those I am working towards. People without a home or a loved one this week have little use for the romantic idea of the "unknown". I sympathize with that.

Rosemary


I have the greatest partner, a wonderful relationship with my in-laws, parents I adore, and the unconditional love of two crazy dogs . I have friends who keep me straight and make me laugh. I take timeouts just so that I can be there for whatever they need of me in return for all the wonderful days and warm fuzzies they give me.

Then there is work. Things tangible and things in project. Whatever we need to do to keep a roof over our heads. These are the only truths I know and the the ones I can have an impact on by keeping at it well and diligently.

Easter Egg Radishes


One thing I do, even more than usual, is to keep things as simple and clear as possible. Starting with the food. We had friends over for dinner just about everyday this week. Every one wanted to help me celebrate the release of the book and raise a glass of Champagne. Or two. It was kind of surreal. Still…

You guys sure knows how to make a girl blush. Everytime I’d see on Twitter or Facebook a picture of the book barely out of the box, my heart went pitter patter. I love that you are grasping the sheer amount of work that went into it and information I included. My friend Ez at Creature Comforts summed up the core of the book in this very touching post.

Easter Egg Radishes


I wanted to give you as many tools as possible to get the shot that makes you giddy, getting things right before you pressed the shutter button so you’d spend less time "fixing" in post processing and more time playing with your camera or with your loved ones. Or time in the kitchen fixing great foods to shoot…!

Sneaky segue to announce the winners of this week’s giveaway…ah!
Well..Tada! Congratulations to ReL from The Dedicated Flash and Elissons from Sugar Symphony (all the way in Latvia!) who won a copy of Plate To Pixel. Congratulations also to Colorado76Gal from Baking Doux who won the set of 4 plates by Asya at gleena.com. Email me with your mailing addresses at mytartelette at gmail dot com. Thanks!

Brie, Turkey And Spinach Panini


Out of all the great dishes we shared with friends this week, I made Roasted Radishes and Turkey and Brie panini more than once. I picked up these colorful Easter Egg radishes (yep, not making this up) at the farmers market and after roasting them with rosemary, olive oil and salt, I was glad I had picked up more than one bunch.

We usually eat radishes as I did growing, with some butter and sea salt. But, the simple act of roasting releases the natural sugar of the radishes, changing their spicy and peppery nature to pure savory like candy.

Watermelon Radishes


We had them as a side dish, snack and mixed with local goat cheese for vegetarian ravioli (using this dough). Can’t get enough. This week however I picked some watermelon radishes (pictured right above) for a change. These are so peppery, they will be wonderful thinly sliced in veggie sandwiches such as this one.

Talking about sandwiches…I was shooting a feature on paninis so it wasn’t too difficult throwing an extra one on the press at the end of the day. And when it involves thinly sliced roasted turkey, fresh arugula and melting Brie…it’s hard to say no. We did not. No regrets there. Even done in a pan grilled-cheese style. Oh yes!

I hope you’ll give both these ideas a try. Would love to hear what’s on your menu this weekend!

Roasted Radishes


Roasted Radishes:
1 bunch radishes
1 tablespoons olive oil
1 -2 sprigs rosemary
salt and pepper to taste

Heat the oven to 400F – 425F.
Wash and pat dry the radishes to remove fuzzy hairs and dirt.
Place the radishes in a 8×8-inch roasting pan (or other you prefer), drizzle with olive oil, sprinkle with salt and pepper and roast until they start getting golden on the edges. About 20-25 minutes. Enjoy warm or room temperature.

Turkey and Brie Panini (adapted and with permission of Carrie Vitt in Deliciously Organic, IFP, 2010)

Serves 4

8 slices whole grain bread (regular or gluten free)
softened unsalted butter for spreading
1/4 cup raspberry jam (I used homemade strawberry jam)
8 oz thinly sliced turkey
1 cup arugula
6 oz Brie, sliced thin

Butter one side of each piece of bread. Spread a thin layer of jam on the unbuttered side. Top with some turkey (about 2 oz), a few leaves of arugula and a couple slices of Brie. Top with another slice of bread, unbuttered side toward the filling.
Heat in a panini press, pan or skillet until both sides are golden brown and he cheese has melted inside.

Celebrating the release of my first book! A Video, A Chocolate cake & Two Giveaways!

Happy Easter!


"Thank You"…

I have written and erased the first sentence of this post fifty times it seems.It makes me smile a little considering the number of sentences I started and erased fifty times more since last November. The best one I could think about today was "Thank you".

I have thought a few times about this week. Right here. Right now. The week when my first book, "Plate To Pixel. Digital Food Photography & Styling" is out into the world. From November to March, it was the hard work of a team that did not stop until it was right. This week the book is yours. Ours.

Wow… it still is just barely sinking in. Once the book in my hands, it took a full 24 hours for my shoulders to relax and a smile to timidly cross my lips. Then as I was standing there in the rain with Bailey, that smile grew to a stupidly wide expression of gratitude and excitement.

I bolted back inside to Taylor who was getting his video equipment together and said "let’s do this! Let’s show people how awesome food photography can be with a little help from a friend!"

And so we shot this video promo of "Plate To Pixel. Digital Food Photography & Styling". Words fall short to tell Taylor what an amazing job he did on it. Thank you dear friend!

Plate to Pixel Promo Video from Taylor Mathis.


I come from a family of crafters. My dad is a published author and a painter. My mom designs frames for other people’s art. My brother Arnaud is constantly building and crafting objects and toys. My brother Thierry was a talented photographer. Writing this book feels a bit like my way of contributing to the family DNA!!

I loved working on this book so much! I wrote it with you in mind. And you is a lot of people with different likes and dislikes, different ways to go about life. But we all have the same goal. Take pictures of food and have a wonderful experience doing it.

Whether you need just a little push, a lot of help or just reinforcement that you are on the right track. I compiled information, hands-on visuals of bouncing, diffusing, white balances, exposures, depth of field, … Composition and styling techniques, equipment setup so you can see the full how-tos of a picture, step by step styling demos…and the list goes on!

I will be doing fun giveaways in the coming weeks to express my thanks for your support and kind words these past few months and your enthusiasm these past few days.
But today is especially awesome to celebrate the release of the book. There won’t be one lucky person but three!

– I am giving away 2 signed copies of Plate To Pixel and a little surprise inside…
– my super talented friend Asya from gleena.com who is the artist behind the numbered ceramic plates I love to use here, is giving away four white ceramic dessert plates numbered 1 through 4 (like the ones in the picture below)

All you have to do is leave a comment here between today, April 26th 2011 and Friday April 29th 2011, midnight Eastern time.
Guidelines: one entry per person, no anonymous comment, leave 24hrs for your name to appear in giveaway as I manually moderate entries.

Note: Plate to Pixel is currently available online on Amazon (US, UK, Germany, etc…), Wiley, Book Depository, Barnes & Noble, Borders. It will be in stores in about 10 days or so!

Now…how about some Double Trouble Chocolate Cake to really celebrate?!!

Double Trouble Chocolate Cake


Double Trouble Chocolate Cake:

Serves 10-12

For the cake:
1 stick (113gr) butter
1 cup (200gr) sugar
1/2 cup (45gr) natural cocoa powder
2 eggs
1/2 cup superfine rice flour
1/2 cup millet flour
1/2 cup gluten free oat flour
1 teaspoon (5gr) baking powder
1 teaspoon (5gr) instant coffee powder
1/2 teaspoon (2.5gr) baking soda
1 cup (250ml) warm water
Note: for a non gluten free version, you can use 1 1/2 cups all purpose flour instead of the rice, millet and oat flours.

For the ganache:
12 oz bittersweet chocolate (chips or chopped)
pinch of salt
1 1/2 cups heavy cream

Prepare the cake:
Preheat oven to 325F. Butter one deep 9-inch round baking pans, sprinkle some rice flour into the pans, shake it around and tap the excess off. Line the bottoms with one 9-inch circle of parchment paper. Set aside.
In a mixer fitted with the paddle attachment, mix together the butter and sugar until light and creamy. On low speed, add the cocoa and mix until incorporated. Add the eggs, one at a time, beating well after each addition. Scrape the bowl with a spatula to make sure they are properly mixed in. Add the flours, baking powder, coffee powder and baking soda and mix on medium-low speed while slowly adding the warm water and mix until smooth. Pour the batter in the prepared pan and bake for 30 to 40 minutes or until a toothpick inserted in the middle comes out clean. Let cool to room temperature and unmold the cake. Divide in three horizontally.

Prepare the chocolate ganache:
Place the chocolate and salt in a non reactive bowl and set aside. In a heavy bottom saucepan set over high heat, bring the cream to almost boiling (really hot basically!). When hot, pour it over the chocolate and salt. Let stand for 5 minutes before slowly whisking the mixture to bring it together to a smooth and silky ganache. If it’s not completely smooth, return to very low heat for a few seconds to melt the chocolate some more. Brands vary so this step may be necessary if the chocolate is not completely melted.

To assemble the cake:
Let stand the ganache about 15-20 minutes so it is thick enough to apply between the layers of chocolate cake. Leave about 1 to 1.5 cups for the top and sides and set and slightly warm it up a bit so it spreads more easily.

Raspberry Rhubarb Tapioca Puddings & Lemon Poppy Seed Muffins

Raspberry Rhubarb Tapioca Pudding With Poppy Seed Lemon Muffins


I got to say, social media and the way we interact is pretty phenomenal. And I mean that in all possible ways. I do love it. Being able to connect fast and furiously with people. Meeting new and interesting folks all the time. Being able to exchange links to pictures, recipes, news almost instantly. I like hearing my phone send me a little ring-a-ding "you got mail". Really I do!

Tapioca Puddings & Lemon Poppy Seed Muffins


Last week, I posted on Flickr a photo of tapioca puddings and lemon poppy seed muffins I was taking to our neighbors for dinner. I linked that to Twitter and then closed the computer and went next door. My phone in my pocket. Then my phone had a party. All by itself. It started ring-a-dinging with intensity. Tweets back and emails started coming in asking me to please share the recipes for the puddings and the muffins.

To tell you the truth I had not really planned on it but I had made more than enough to share with more friends. Here. One spoonful deep in that dessert, one whiff of lemon and poppy seed later and I was secretly giddy to have an opportunity to sample them again.

Rhubarb


The Raspberry Rhubarb Tapioca Puddings are so good. Soothing. Little beads of tapioca rolling off your tongue. Smooth. Rhubarb and raspberries gently cooked until just barely soft. The distant scent of cherry blossom extract. The perfect crunch of lightly roasted pistachios.

And the muffins. Ah…gobbled up in a flash. Good thing I tend to cook and bake like my grandmother. Doubling a recipe, or more, is just a normal thing happening here. What can I say? I love to give and see the smile on someone’s face when they receive. The lovely part with these muffins is you can built upon the base any way your heart desires. Oranges, instead of lemons, nuts instead of poppy seeds, vanilla, rose, caramel…anything.

Raspberry Rhubarb Tapioca Pudding


Quite a few many events are shaping up for this Spring and Summer (actually up ’til January…ugh!) that have me jumping up and down with excitement! I will make sure to keep everyone updated on workshops or conferences.

Right now I must get the house and studio tidied up a bit since Taylor is coming tomorrow and staying a few days to shoot the promo video of my book "Plate To Pixel". I heard the book was officially shipping out next week! I am extremely nervous but glad we practiced a little a few months ago. Remember this? I can’t believe this is all happenings. Months of hard work just about to see the light!

Raspberry Rhubarb Tapioca Pudding With Poppy Seed Lemon Muffins


Another fun little tidbit that I forgot to post here: last month the printed issue of Elle Magazine published a feature "Cooking In Code" for which I was interviewed along with Heidi of 101 Cookbooks and Molly of Orangette as well as Eddie Gehman Kohan, Krista Garcia, Amanda Kludt. Extremely honored. Well, now the online version is live on the Elle magazine website. Click on any of our pretty mugs and you’ll be able to catch up on our interviews.

Ok…now I must really go clean the house for Taylor. I’ll try to post sneak peeks of the shoot with Taylor throughout the weekend. Should be fun!

Raspberry Rhubarb Tapioca Pudding


Raspberry Rhubarb Tapioca Pudding With Lemon Poppy Seed Muffins:

Serves 6

For the pudding:
1 cup chopped rhubarb
1 cup raspberries
1/4 cup lemon juice
2 tablespoons honey
1 cup small pearl tapioca (not instant)
2 cups milk
1/4 cup honey
1 teaspoon cherry blossom extract (or rose, or vanilla)
Toasted pistachios for garnish

In a large saucepan, combine the rhubarb, raspberries and lemon juice and bring to a boil. Reduce heat to low, to a simmer, add the honey and stir briefly. Cover the saucepan and let cook for about 10 minutes. Uncover and check the fruit. If there is a lot of liquid, cook a bit longer over low heat, uncovered until very little liquid remains at the bottom of the pan. Let cool to room temperature and then divide evenly among 6 ramekins or glasses.
In a separate and large saucepan, combine the tapioca, milk and honey over medium high heat. Bring to a boil then reduce the heat to low and let the mixture cook until the tapioca looks translucent (about 20-30 minutes). Let cool to room temperature and divide in between the ramekins or glasses with the raspberry/rhubarb mixture. Top with chopped pistachios.

For the lemon poppy seed muffins: (makes 12)
2 eggs
1/2 cup honey
1 cup yogurt
zest and juice of one large lemon
1/2 cup olive oil
2 tablespoon coconut oil (or melted butter)
1 cup millet flour
1/2 cup brown rice flour
1/2 cup potato flour
pinch of salt
1 tablespoon baking powder
1 tablespoon poppy seeds

Preheat the oven to 350F. Line the inside of 12 muffin cups with muffin liners and grease slightly with melted butter or cooking spray. Set aside.
In a large bowl, whisk the eggs and honey until smooth. Add the yogurt, lemon juice and zest, olive oil, coconut oil and whisk until combined. Add the millet, brown rice, and potato flour, salt, baking powder and poppy seeds. Whisk until fully incorporated. Divide evenly between the muffin liners and bake 15-20 minutes.

Food Blog Forum Orlando & A Sangria Recipe!

Food Blog Forum Orlando


Hard to believe that just last weekend I was in lovely Florida teaching a hands-on photography workshop to a great bunch of bloggers or food enthusiasts. That Sunday was just the icing on the cake actually of an already darn good time in Orlando where I had come to speak at Food Blog Forum (FBF).

When Jaden asked if I wanted to be part of FBF Orlando for the photo sessions, I did not hesitate long. Jaden’s energy, kindness and genuine interest in people know no boundaries. She’s always been great of great counsel to me and I always feel relaxed and smiling after a few hours in her presence. After the intense rhythm of the past 6 months I needed to relax. Mapping out the next six months made me realize it was now or never to give myself a mandatory break.

Food Blog Forum Orlando

With Jaden and Julie.

I was thrilled to see Julie again and let me tell you, she deserves a long line of kuddos, and "thank yous" for organizing the event so successfully. Not only did she organize the main event on Saturday but she also helped put together an extra hands-on worshop on Sunday for people who wanted to practice more or could not make it to FBF the day before. Thank you Julie!

It does sound cliche but I was thrilled to see familiar faces as well as finally meet the people behind my weekly reads. I love this community. Food bloggers are the best! The generosity of the food community in Florida is awesome. It made me even more excited to be back that way later in the summer and I am looking forward to seeing those wonderful peeps again.

Food Blog Forum Orlando


The weekend kicked off with a little mixer/get together at Whole Foods where we were showered with attention, food and wine. Everything from small savory bites, chocolate mousse in chocolate cups to live cooking demos. Every one had the chance to mingle and introduce themselves as well as get all revved up for the next day’s events.

Indeed, Saturday was packed. I love events such as these because there is always something to learn, something to contribute and something to walk away with whether you are a speaker or an attendee. It was like a grand big talk where everyone was at ease to speak, listen and as questions.

classroom_jdeily

Picture courtesy of Julie at The Little Kitchen.

It was a treat listening to Jaden and Scott, Jeff Houck from the Tampa Tribune, Heather McPherson from the Orlando Sentinel, Peter Scott from Izea, Lindsay Landis from Purrdesign and Dawn Viola from Wicked Good Dinner. Tons of topics were covered so that everyone could find something that pertained to where they were in their blogging journey. Branding, working with newspapers, working with brands, SEO, blog design, and photography and styling.

My presentation was broken in two parts with the first one covering basics of camera modes, natural and artificial light while the second part was a live composition and styling demo. I focused the demo on two items, one was a pretty and colorful mixed salad and the other a goopy brown scoop of sun dried tomato and white bean spread. I took the group through my thought process for composing my shot and styling the food just as if I were at home working blog or in the studio with a client.

Food Blog Forum Orlando


Here is a recap of the styling photo composition session. Bear in mind that these were just decisions I took on that specific occasion. I am in no way saying that these are the decisive steps to style salads or dips. Every time I style salads and spreads I find myself doing it in a myriad of other ways:
– The salad was to be composed of mixed greens, mixed bean salad, cucumber salad, grilled shrimp and grape tomatoes.
– I decided not to scatter the ingredients all over the salad because they would get lost and would make it hard for the viewer to tell what was what.
– Instead I created small clusters of each component and placed them on the outside so that the bulk of the greens would still be visible and indicate it was a salad indeed.
– I cut a couple of the tomatoes open to add visual interest with a different angle and cut.
– I did not have vinaigrette for the salad but if I’d had some, I would have waited until the last minute to use it on the salad to keep the greens as fresh as possible.
– there were only white plates or rustic yellow bowls available as props (I had brought linens and my styling kit).
– I picked the yellow bowl to play with the all the colors of the salad components and it complemented the linens and surface I was working on.
– kept a 3/4 camera point of view so that I could show the bowl in its entirety without any weird angle and without being too "in your face" which is not helpful when you are trying to see the bigger picture.
– I picked and a medium depth of field, not too shallow that you could not tell the ingredients apart and not too deep that they were all in focus. It helped hide the fact that the cucumber was a bit passed its prime too.

Food Blog Forum Orlando


The spread came from a standard grocery store plastic container which I decided not to keep for aesthetics reason and instead decided to show what one can do with a "goopey mess".
– Instead of plating a mound of spread, surrounded by bread slices and a few salad leaves for garnish, I decided to show a progression and use the spread in action so to speak.
– it allows one to play with shapes and angles and not be restricted by just one direction and composition.
– Spreads and dips are less difficult to style and more interesting to shoot if you make them do something.
– I placed a large spoonful of the spread on the side as to show my starting point
– I cut out some slices of bread and spread some of the dip on half the slices, leaving the remaining half without to show that there were still plenty to be used.
– I left the knife on the plate to reinforce this idea of movement from the starting scoop of dip to using the bread to eat it with, etc…
– I used a spring of thyme as it was part of the herbs listed in the ingredient list and it added a nice touch to the plate. I could have scattered more around but it was not really necessary with the view point I wanted to try for taking the shot.
– I went with a closer/tighter camera angle and viewpoint than the salad because there was no reason to show more of the spread/dip than necessary. It was not pretty in its natural state so it was best to focus on the best toast with dip on it.
– I chose a shallow depth of field to keep the background element of more spread and bread which were not that visually interested out of focus but still part of the plate.

Food Blog Forum Orlando

Picture courtesy of Christian Stella.

Beside picking out the ingredients to style, I did not think a whole lot about what I would do until it was time to do the demo. I wanted to keep things as spontaneous as possible and talk participants through issues or decisions as I was encountering them myself. It also showed them that there is no trick or scientific formulas behind all this. The magic one creates is nothing but a series of decisions and attempts. I also stressed out that this is what I went for that specific day but I could have gone many different ways on many different days depending on light, props, ingredients, time, mood and feel I wanted to portray. There is no wrong or right. Just do what feels sincere to you.

That was the focus of the Sunday workshop which took place independently from FBF. I pretty much let the group lose at Whole Foods (!) to pick a few items to style and we went more in details about camera modes and angles, natural light and how to use its different sources for different purpose, diffusing, bouncing, speedlight and studio light for those who have to shoot late at night. After that everyone styled and composed a shot and I went around giving tips and techniques they could also use.

Food Blog Forum Orlando

Adam and Joanne from Inspired Taste with Jaden. After the Sunday worshop, they surprised me by asking if I’d mentor them in photography. I said "of course!"…of course!

My goal was to give them as many tools as possible whether they decide to use one or ten. Knowledge is power. So is coming up with your own visual identity. I was thrilled to have 12 participants come up with 12 different ways to view their relationship with the camera. What a breath of fresh air! It was the best 4 hours spent before an airplane ride back to Charleston.

Thank you to all the people who attended FBF! If a Food Blog Forum comes close to you one day, hurry to be part of it. You won’t regret it. You can read more opinions, recaps, thoughts and takeaways on the event at the bottom of the Food Blog Forum Orlando page, here.

Food Blog Forum Orlando


It’s another packed Sunday here with friends as well as scheduling work and we are all in the kitchen making Sangria, one of the drinks served at the FBF Saturday reception held at McCormick & Schmick’s. I was so busy playing that I forgot to ask them for the recipe but I knew that my buddy Taylor had a scrumptious one on his blog. Head after the jump to read more about it.

Happy Sunday!

The winners of Super Natural Everyday by Heidi Swanson are: Avery at Love Veggies and Yoga and Janna from Knitting Relaxes Me. Email me your mailing addresses at mytartelette [at] gmail [dot] com so I can pass them on to the publisher. Congrats!

Blood Orange & Blackberry Sangria,reprinted with permission of Taylor Mathis:

3 blood oranges
1 cup blackberries
1.5 liter of good red wine
1/4 cup honey
1/2 cup Grand Marnier

Save one of the blood oranges for garnish. Squeeze the juices from the remaining oranges and combine with the blackberries, wine, honey, Grand Marnier into a large pitcher or punch bowl. Stir the mixture until everything is combined.
Chill the sangria over night. Right before serving, cut the blood orange into thin slices and add them to the pitcher or punch bowl. Serve cold.

Cooking My Way Through Super Natural Everyday By Heidi Swanson: Macaroon Tart and Shaved Fennel Salad & A Giveaway

Macaroon Tart

Macaroon Tart.

*******************GIVEAWAY ENDED APRIL 14TH************************************
Last night, as I was waiting for my flight in Orlando for my flight back home, all I could think about was the serving of Heidi’s Macaroon Tart awaiting me back in Charleston.

Wild Blackberries


I have had a great time teaching at Food Blog Forum on Friday and I can’t wait to share pictures and information of what was shared a little later next week. My head is still full and my heart is bursting at the seam. I knew it already, but let me say it again, Food Bloggers Rock! Thanks to Julie who helped plan the whole weekend, I was able to teach a photography and styling workshop today before my flight. Awesomeness again…

Wild Rice Casserole

Wild Rice Casserole.

Today, I really want to talk about Heidi Swanson's book Super Natural Everyday except everything I want to say never seems enough. Everytime I get a book for review, I make sure to devote a chunk of the week to cook from it. It helps see the thread use by the author to build the book. the stories, the photography. All the dishes I cooked this past week from her book led me down the same path: practical, satisfying, energizing, good and good for the soul.

Black Bean Salad

Black Bean Salad.

In one word. I can’t wait to cook from it even more. The food is tasty, fresh and Heidi’s personality and wonderful soul shows at every turn of the page. A beautiful soul with a wonderful message to share. Good food, made with wholesome ingredients does not have to come in gargantuan portions nor is it difficult or time consuming to make. The flavors in all of Heidi’s dishes are a burst of everything that is good with eating and cooking in this world.

Tomatoes


And the photography…always loved how Heidi’s lets her readers eat with their eyes first. Her photography is authentic and hers. Just as she is. Just as her food.

Millet Muffins & Strawberry Jam

Millet Muffins & homemade strawberry jam.

I emailed her publicist a few days ago and asked if I could hold a giveaway of a copy of Heidi’s book for you guys. To my delight, I am happy to be able to share two copies with you guys! If you need a little enticing, check out the recipes for her Shaved Fennel Salad and Macaroon Tart after the jump!

Frittata & Millet Muffins

Millet Muffins and Frittata.

heidi cover


To enter the giveaway:
leave a comment on this post starting today until Thursday April 14th midnight Eastern time.
– one comment per person
– no anonymous comment please
– two winners will be picked randomly by the hand of the wise, my husband
Note: it may take up to 24 hrs for your comment to appear on the page.

Pixie Tangerines


Heidi has this fabulous Buttermilk Cake recipe that she makes with plums but I used Pixie tangerines since they were in season.

Buttermilk Cake With Pixie Tangerines

Buttermilk Cake.

I had such a blast cooking, eating and photographing her recipes. I take immense pleasure at shooting other people’s recipes and Heidi’s was not exception. When it comes from the heart, the photography part becomes a source of intense joy. I hope the next few shots entice you to get her book and start cooking from her book soon.

Fennel, Zucchini, Dill & Arugula Salad

Shaved Fennel Salad.


Shaved Fennel Salad, with permission of Ten Speed Press:

Serves 4 to 6

1 medium large zucchini, sliced into paper thin coins
2 small fennel bulbs, trimmed and shaved paper-thin
2/3 cup/.5oz/15g loosely chopped fresh dill
1/3 cup/80ml fresh lemon juice, plus more if needed
1/3 cup/80ml extra virgin olive oil, plus more if needed
fine grain sea salt
4 or 5 generous handfuls arugula
honey, if needed
1/2 cup/2 oz/ 60g pine nuts, toasted (I used walnuts)
1/3 cup/2 oz/ 60g/ feta cheese, crumbled

Combine the zucchini, fennel and dill in a bowl and toss with the lemon juice, olive oil and 1/4 teaspoon slat. Set aside and marinate for 20 minutes, or up to an hour.
When you are ready to serve the salad, put the arugula in a large bowl. Scoop all of the zucchini and fennel onto the arugula, and our most of the lemon juice dressing on top of that. Toss gently but thoroughly. Taste and adjust with more of the dressing, olive oil, lemon juice, or salt if needed. If the lemons were particularly tart, you may need to counter the pucker-factor by adding a tiny drizzle of honey into the salad at this point. Let your taste buds guide you. Serve topped with pine nuts and feta.

*******************************************************************************
Macaroon Tart, with permission of Ten Speed Press

Makes 24 bite size servings (I made 2 rectangular tarts with one recipe)

Crust:
1 1/2 cups/6oz/ 170g white whole wheat flour (I used 1 cup brown rice flour and 1/2 cup millet flour)
3/4 cup/ 2 0z/ 60g unsweetened finely shredded coconut
3/4 cup/ 3.75oz/ 106 g sifted and lightly packed natural cane sugar
Scant 1/2 teaspoon fine grain sea salt
10 tablespoons/5oz/140g unsalted butter, melted

Filling:
2 cups/50z/140g unsweetened finely shredded coconut
1/2 cup/2.5oz/70g sifted and lightly packed natural cane sugar
4 large egg whites
8 ounces/225g fresh blackberries, halved
1/3 cup/1.5oz/45g pistachios, crushed

Preheat the oven to 350F/180C with a rack in the middle of the oven. Butter an 8×11-inch tart pan (I used two 14×5 ones) and line the bottom and sides with parchment paper.
To make the crust, in a large bowl, combine the flour, coconut, sugar and salt. Stir in the melted butter and mix until dough is crumbly but no longer dusty looking. Firmly press the mixture into the bottom of the prepared pan (it should form a solid, flat layer). Bake for 15 minutes, or until golden. Remove and set aside to cool for a few minutes.
In the meantime, prepare the coconut macaroon filling by combining the coconut, sugar, and egg whites. Mix until well combined.
Evenly distribute the blackberries across the tart base. Now drop little dollops of the macaroon filling over the tops of them (dirty up your hands for this part), and mush and press the coconut topping around into the spaces behind the berries. Be sure to let at least some of the colorful berries pop through for visual flair.
bake for 20 to 25 minutes, until the peaks of the macaroon filling are deeply golden brown. Let the tart cool, then garnish with the crusted pistachios before slicing into small squares.