Jahresarchive: 2010

French Word A Week – Pamplemousse & A Giveaway

Grapefruit


Planning this edition of French Word a Week was a complete "house" collaboration this time around. My dad picked the word, my mom got tickled pink when I got her involved into styling the picture. What did B. do? What he does best: ate the props! A little family project is always a fun when there is French and English simultaneously flying around. I just watch and take it all in.

I admit I drew a blank when picking this week’s word (too many options I guess) until I stripped it down to the bare essential of something we see or eat daily. It has to be grapefruit for us. My dad eats half a grapefruit daily, B. drinks a glass every morning and I nosh on grapefruit sections in the afternoon for a little vitamin pick-me-up. Mom? She buys them. By the crate. Especially when we are all together!

Grapefruit


Today’s word, pamplemousse, makes me think of plump, ample, soft, sunshine. It’s one of those words I love to hear B. say outloud. It makes me giggle. You can listen to the pronunciation here.

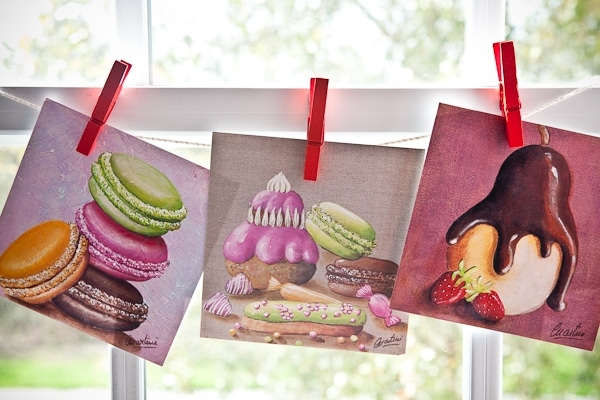
Thanks to my mom I recently discovered the artist Catherine Martini who dedicates her work to painting all sorts of sweet things. I love the burst of colors, the shapes and subjects she choses to illustrate. Visiting her site always brings in some sunshine in the house. I wanted to share her work with you and thought a giveaway would be fun.

Catherine Martini's Card Set


But…it’s not all. I am throwing in a copy of "Unforgettable Desserts" by Dede Wilson which contains 140 thorough recipes for desserts you can make all year round. The handful of recipes I made from it were a hit with everyone so I am confident you will find something tasty in it also.

To enter to receive a set of 3 cards from Catherine Martini and "Unforgettable Desserts": leave a comment on this post (one entry per person) between Friday March 26th 2010 and Monday March 29th, 11pm (US Eastern time). Anyone can enter, I’ll ship worldwide.

We will be out of town this weekend and since I moderate the comments manually, bear with me if you don’t see yours appear right away.

Have a great weekend!

Roasted Root Vegetable Soup

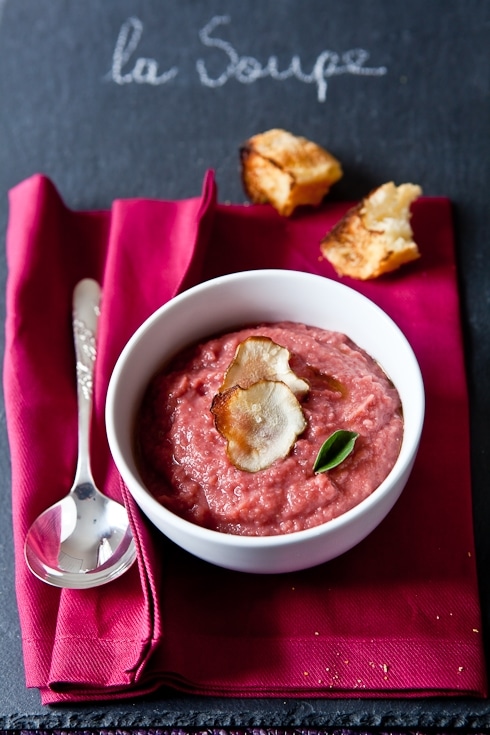
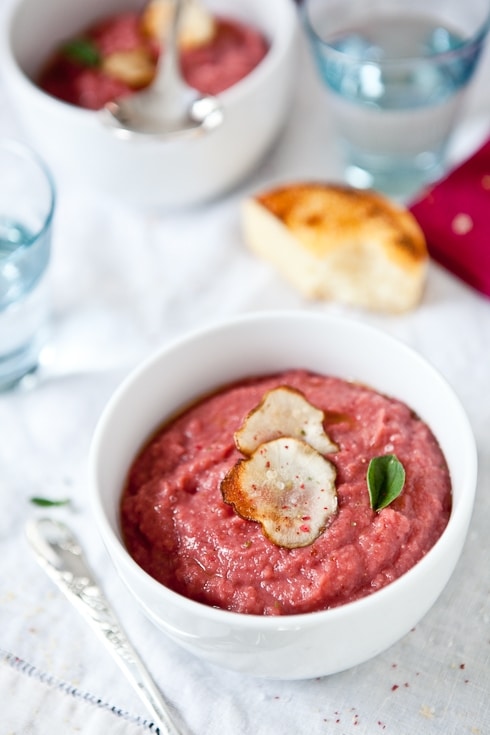
Roasted Root Vegetable "Pink" Soup


Growing up, root vegetables were not something my mom would cook often. Except for potatoes and carrots it was pretty much never actually. Too many turnips and rutabagas during the shortages of World War II made my mother a little reluctant to use them, even decades later. I don’t think my dad would have minded at all. He never minds anything he can eat. That’s what I like about him. He’s always game to try new things. Mom too don’t get me wrong. Even pink soup.

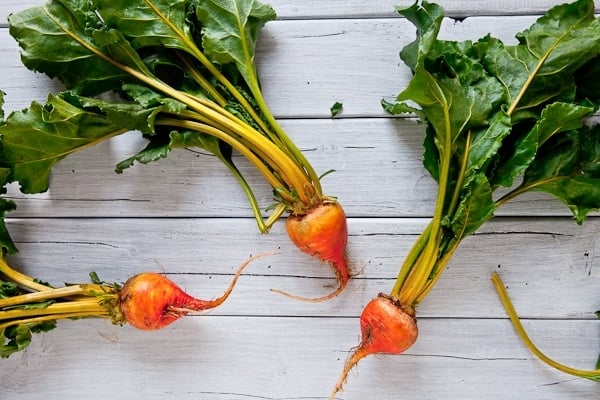
Golden Beets


Yes, looks like I did channel my inner Bridget Jones when I put a bunch of roasted vegetable in the blender and walked away for a minute to turn some dough. You see, after an ok venture into blitz gluten free puff pastry with Shauna in Seattle a few weeks ago, mom and I have been working on cracking our own puff pastry code. Her health condition benefits from a little less gluten too and it’s been really fun to come up with gluten free versions of her favorites. Seeing what Jeanne did, I know we’ll get there.

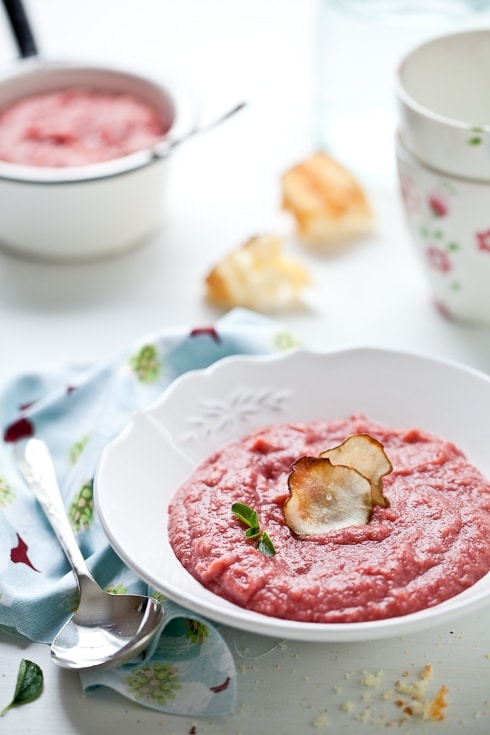
Roasted Root Vegetable "Pink" Soup


Here I was, giving our doughs one last turn when I heard my mom go "hmmm…sweetie. The soup is pink. Did you make it pink on purpose?" Ugh no…shoot! Wait! What did I do? Who is going to want to eat pink soup? "Oh no! Les betteraves rouges! (the red beets!) I forgot to remove the red beets!" I had roasted a mix of root vegetables for soup, pushed some red beets to the corner of the pan for a salad and instead just dumped the whole thing in the blender. Hence, the pink soup and B. calling me Bridget when he saw it.

There is always one kitchen blooper when my parent come visit. Too many things, too many languages going on at once. Too many jokes and giggles. And there you have it, one of us has a brain freeze. Or two.

Roasted Root Vegetable "Pink" Soup


But they love me, discombobulated or not, and ate the pink soup. Yes, Bill ate beets. People in Charleston surely did not feel the earth shatter from it but we did. Actually we held our breath as he looked hard at the soup in front of him. "Interesting. I don’t think I have ever had pink soup before." I told him it was a bunch of roasted root vegetables, including roasted red beets. "not pickled? not boiled? not raw?" he asked. As I shook my head negatively three times in a row, he exclaimed "Well then. It’s lovely. Just as it is. Bridget."

Roasted Root Vegetable "Pink" Soup


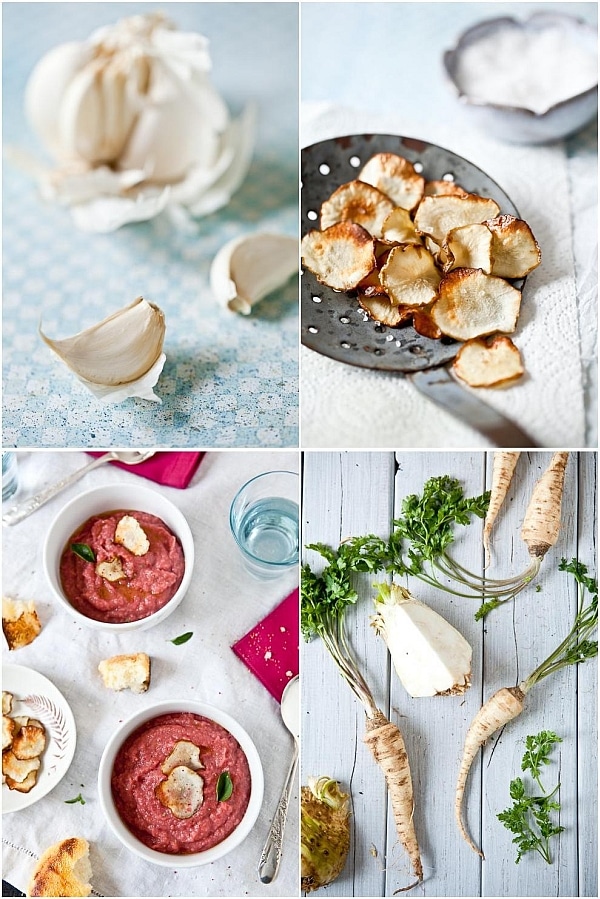
The soup is a mix of parsley roots, celery root, sunchokes, golden and red beets, potatoes. To add some depth, I added roasted garlic and oregano from our garden. I saved one sunchokes that I sliced thin and pan fried in a bit of olive oil until golden brown to garnish the soups with and served them with gluten free English muffins. The nex day we had leftover with freshly picked crab and gluten free puff pastry croutons (!). It was a hit with everyone which made me wish I had made a bigger batch right from the start.

P.S: My brother says "thank you" for all the birthday wishes. You really made his day!

Roasted Root Vegetable Soup:

Serves 4 to 6

6 parsley root, peeled and diced
1 medium celery root, peeled and diced
2 potatoes, peeled and dice
3 golden beets, peeled and diced
3 red beets, peeled and diced
3 garlic cloves, smashed, skin removed
1 spring oregano
6 sunchokes, peeled and diced
1/4 cup olive oil
salt and pepper

Place all the vegetables in a large bowl and drizzle with the olive oil, salt and pepper to taste and mix well. Place them all in a large roasting pan and roast at 375F – 400F until tender and golden brown. Remove from the oven, remove the oregano (discard) and let cool completely.
Once cooled, place all the vegetables in a blender and add as much as little water as you like to reach the soup consistency that you prefer (we like ours on the thick side) and puree until smooth.
To serve, reheat as needed and serve with bread, croutons, oregano leaves, etc…

Upside Down Pear Cardamom Cake (GlutenFree)

Gluten Free Pear Cardamom Cakes


Growing up, my brother and I did not have any kind of special relationship. We did not dislike each other but we did not like each other either. I guess you could say we had one typical brother-sister relationship. I had crushes on his friends just about every week and he found my friends a bit too Strawberry Shortcake for his taste. We had wrestling fights, screaming fights, pillow fights and he often hid in my closet to scare me before bedtime. Typical.

I often wondered if we would ever find some common ground. Some place of understanding. We did find it when our brother passed away. Right there, in front of me, stood a broken man. He was not this "my brother-this pain in the rear" boy anymore. He was in pieces. I was too. And we picked them up together. We held each other up and found each other then. There is no reason why things happen. They just do. And we knew what we had to do then. And we still do it. Our way.

Baking With Pears


We still don’t call each other that often. Or send cards. Or email. He knows I got his back and he’s got mine. He’s always smart with business and techie advice for me. He loves food and is an amazing cook. He gave me two beautiful and smart nieces.

While chatting on the phone the other day, we were catching up on each other’s work, progress, accomplishments and to hear him say that he was proud of me was the biggest validation of my life. Like Christmas had come in March. There was also a pause. Very unusual if you know the speed of my brother’s conversations. That’s when he dropped a line that I didn’t expect…

Gluten Free Pear Cardamom Cakes


"Hey, I really like when you write me a post on your blog for my birthday. I also really like when all your virtual friends come wish me a happy birthday." Silence on my part. A bit surprised that he would admit this. I laughed. Out loud. Then I apologized and promised that, yes, I would post something on his birthday. I virtually made him some (gluten free) Upside Down Pear and Cardamom Cakes that we quickly devoured last night.

As a kid, his birthday dinner would always include frog legs with tons of parley and garlic and a chocolate cake with walnuts and oranges that I was not particularly fond of. I did think about making it for him again as a wink to the past but my mom had brought over the new French Saveur and Elle a Table and I kept coming back to the article on upside down cakes in Elle a Table. So many variations from one simple base that it would have been difficult not to find one that suited everyone.

Gluten Free Pear Cardamom Cakes


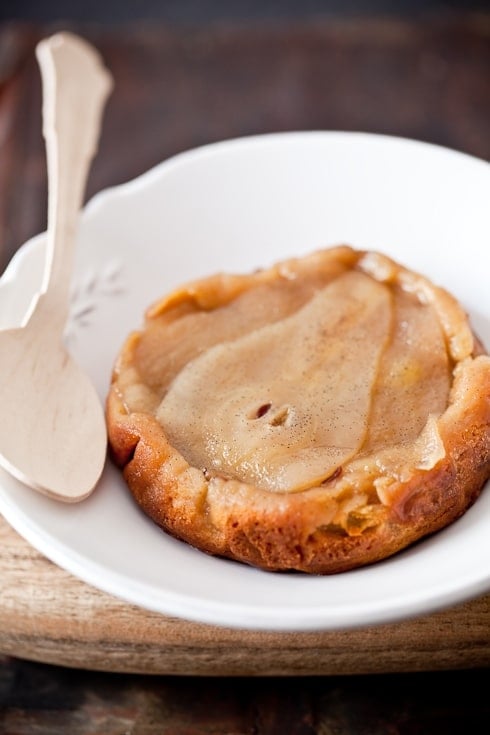
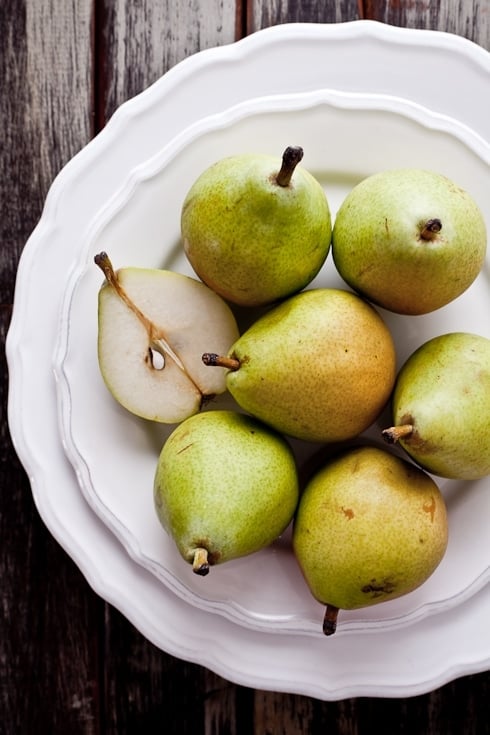
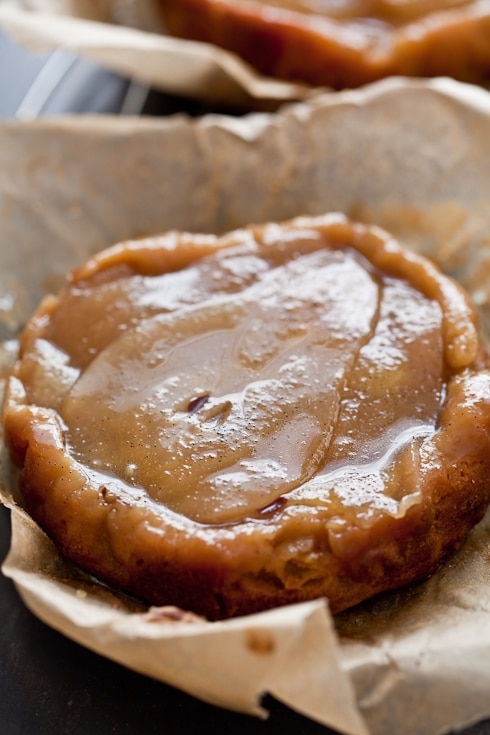
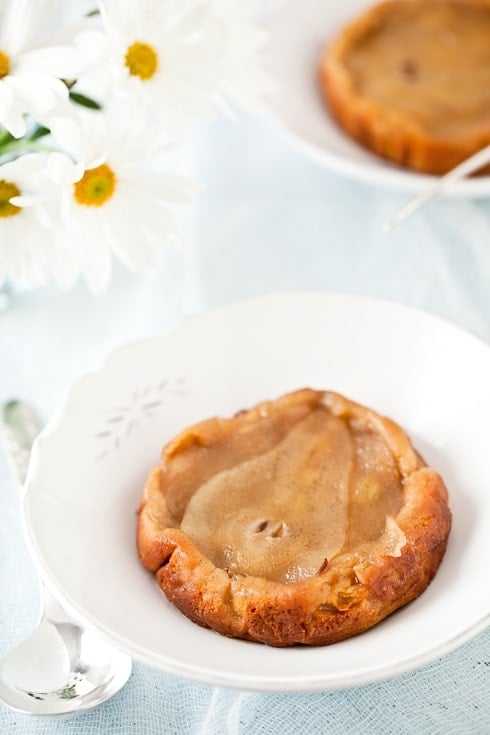
I adapted the base recipe to make it gluten free and added some cardamom to the ripe pears I used in the cake. There is something about pears and cardamom that is almost magical once baked together. Instead of doing the cakes and the caramel with sugar, I used wildflower honey. I am really enjoying baking with sucanat, honey and maple syrup versus regular granulated sugar these days. So much more fragrant. So many more health benefits too.

The cake was moist from the millet and sweet rice flour, oozying with honey and vanilla bean caramel, and the smell permeating the kitchen was unbelievable. We quickly brewed some fresh coffee and sat down with some cake.

Gluten Free Pear Cardamom Cakes


So here’s to you Arnaud! Happy Birthday! Joyeux Anniversaire!

Upside Down Pear Cardamom Cakes, adapted from Elle A Table

Makes four 4-inch cake or one 8-inch cake. Serves 6-8

For the honey caramel:
1/2 cup honey
1/4 cup water
1/2 vanilla bean, seeded

For the cake batter:
3 pears, peeled and thinly sliced
3 large eggs
1/2 cup (125ml) honey
1 1/2 (160gr) stick unsalted butter, melted and cooled
3 1/2 oz (100gr) superfine sweet rice flour
2 oz (50gr) millet flour
1/2 teaspoon ground cardamom

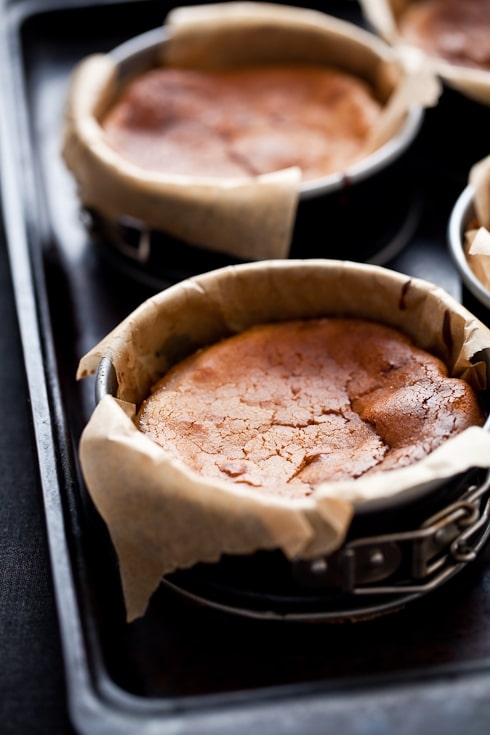
Preheat oven to 350F. Line the inside of four 4-inch springform pans or one 8-inch pan with parchement paper. Place the pans on a baking sheet and set aside.

For the caramel:
In a large heavy bottomed saucepan, place the honey, water and vanilla bean seed and bring to a boil over high heat. Reduce the heat to medium and let the syrup simmer down until thickened, should take 5-8 minutes. Remove from the heat. Divide the caramel among the prepared cake pans.

For the cake:
Divide the pear slices among the bottom of each cake pan and set aside.
In the bowl of an electric mixer, beat the eggs and honey on medium speed for about 2 minutes. Slowly add in the melted butter. Add the flours and cardamom and mix until fully incorporated, about 1 minute. Divide the batter in between the pans and bake for 30-40 minutes or until golden brown.

Remove from the oven and let cool to room temperature. Unmold carefully over a plate. Watch out for the oozing honey caramel.

French Word A Week – Topinambour

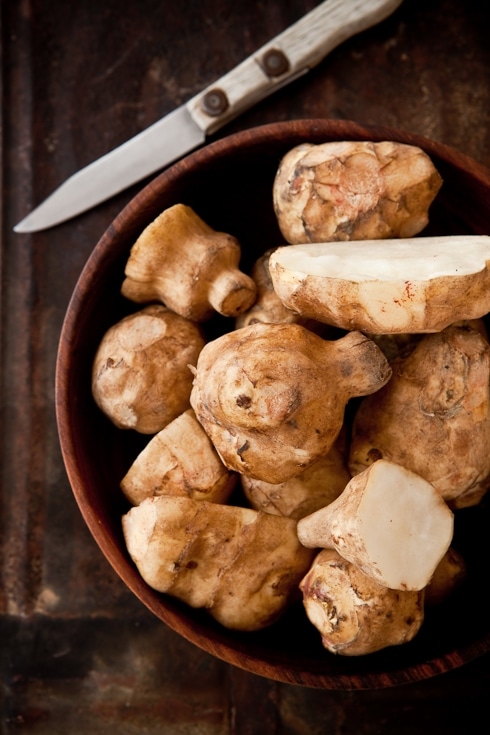
Sunchokes


It hit me the other day at the store that it was taking me longer and longer each year to remember a few French words. Primarily because they were already rarely part of my vocabulary but I realize that they are as much fun to remember as they are for Bill to pronounce and learn.

In the spirit of sharing and remembering, practicing and growing I have decided to start a new category to this blog, related to food of course, a "French Word A Week" type thing.

Today’s word is "topinambour" a.k.a sunchoke or Jerusalem artichoke. (listen to the pronunciation here)

That word in French always make me smile and hearing Bill say it is even cuter. And you know what…they are delicious! I wish my mom had cooked more with them when we were kids, but now I do everytime they appear at the market. Stay tuned for an upcoming recipe with sunchokes. Won’t be dessert though!

P.S: I realize I forgot to add the recipe instructions in French for the Chocolate Whiskey Pots de Creme the other day and will remedy that tonight.

Chocolate Whiskey Pots de Creme

Chocolate Whiskey Pots de Creme


It hit me while on the plane back to Charleston last week. I was fidgetting with excitement at the thought of seeing B. again soon. I did have a blast in L.A and Seattle but it would have been nice to share that with him. All the moments. On the moment. I just couldn’t wait to get home and tell him all about the week. I still need to sift through my hundreds of pictures and thoughts.

The people I met, the friends I saw again. The exchange of information. Being part of a community. All these things are always better shared. He laughed with me and listen to my stories. Dozens of names he had never heard before. Patiently. He asked questions and encouraged me. And so, while sitting on the plane, about ready to take off, it hit me: Saint Patrick’s Day was just around the corner.

Comfort


This household is half Irish after all. I had to do something to mark the occasion. Knowing us we will be debating the virtues of historical markers versus those of green foods, green shirts and green beer. Still, he never fails to help me keep up with my roots so I wanted to do the same for his. Minus the green. Plus whiskey instead.

Green is far from being my favorite color to start with and I also did not feel like messing with green coloring. There was plenty of that during the Seattle workshops, well done and beautifully mastered. I was worried of ending up with Shrek green instead of Irish green. (I did before, hence the reference).

Chocolate Whiskey Pots De Creme


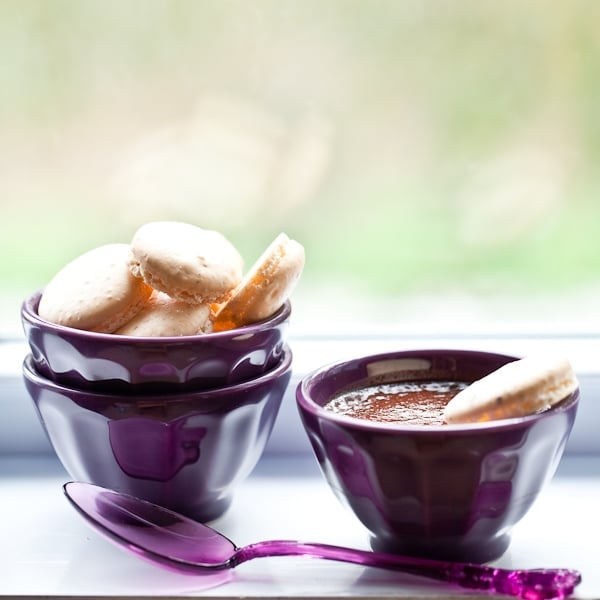
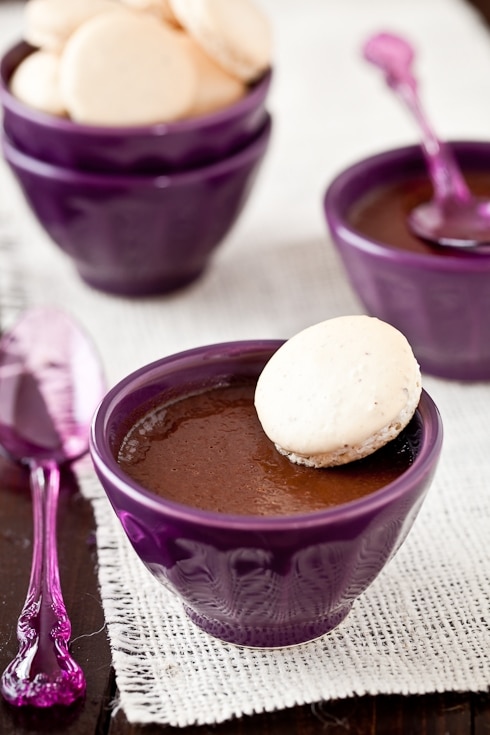
I like to have an easy dessert ready to be served for the first meal after my parents get in town. Tonight it’s quiche and salad and these Chocolate Whiskey Pots de Creme served with some plain almond macarons to use up the egg whites left from the custard recipe. It’s pretty sums up perfected comfort this time of year when the days still have this distinct nip in air. A foot in between two seasons.

Pots de creme always make me think of a warm motherly embrace. Trust me. We’ve been hugging. And catching up. My parents got here last night and in the middle of my mom’s health problems, it is no small battle. But she’s a rockstar. She’s my rockstar. Even when she tells me half of everything (grrr…) She also tends to agree that a lot of problems are better solved around a good glass of Irish liquor. Whiskey is not my thing. Unless it is surrounded by chocolate. Oh yes…

As soon as I am done squeezing my mom silly, get done with work this week and go through my thoughts, I’ll post more about the workshops but you can start by reading Rachael’s recap of L.A here.

Chocolate Whiskey Pots de Creme:

Serves 6 to 8

6 large egg yolks
1/4 cup (60ml) honey
1/2 cup (125ml) whole milk
1 cup (250ml) heavy cream
6 oz (180gr) bittersweet chocolate
3 tablespoons to 1/4 cup Irish whiskey

Place 6 to 8 ramekins into a roasting pan and set aside. Preheat oven to 350F and position a rack in the center.
In a large bowl, whisk the egg yolks with the honey for 2-3 minutes.
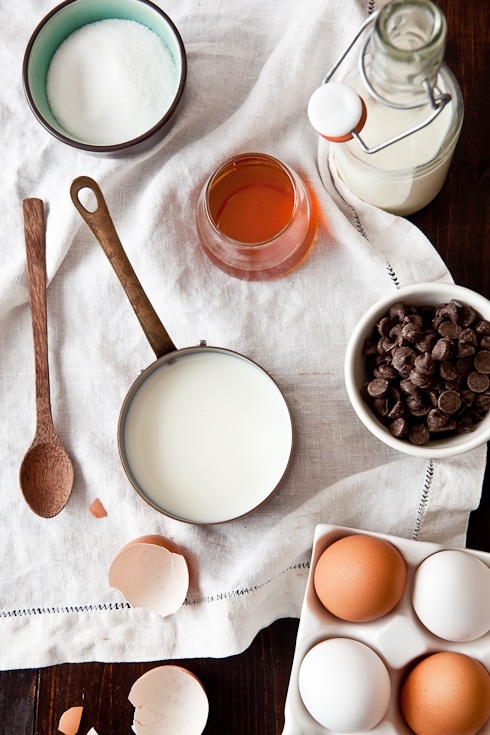
In the meantime, bring the milk and cream to a simmer in a large saucepan set over medium high heat. Remove from the heat and add the chocolate to the mixture. Slowly whisk until the chocolate is completely melted. (return over low heat if it needs a bit more heat to dissolve). Slowly pour the chocolate mixture over the egg yolks and honey, whisking constantly until both mixtures come together. Add the whiskey and stir briefly.
Divide the chocolate batter evenly among the ramekins. Pour hot water into the roasting pan so that it reaches halfway up the sides of the dishes. Bake for 30 to 40 minutes or until the cream appears just set. Remove from the heat and let cool to room temperature. Refrigerate at least 2 hours before eating.

Pots de Creme Chocolat Whisky:

Pour 6 a 8 personnes

6 jaunes d’oeufs
60ml miel
125ml lait entier
250ml creme entiere liquide
180gr chocolat 60%
3 – 4 cs whisky

Prechauffer le four a 180F et mettre une plaque au milieu.
Dans un grand bol, battre les jaunes d’oeufs et le miel pendant 2-3 minutes.
Dans une casserole, faire chauffer le lait et creme jusqu’a ebullition. Retirer du feu et ajouter le chocolat et remuer jusqu’a ce que le chocolat soit fondu.
Verser l’appareil sur les jaunes d’oeufs. Ajouter le whisky et melanger.
Verser l’appareil dans 6 a 8 ramequins et les mettre dans une plat profond allant au four. Verser de l’eau chaude jusqu’a a la moitie de la hauteur des ramequins. Faire cuire 30 a 40 minutes.

Unexpectedly So…

Getty Villa - L.A


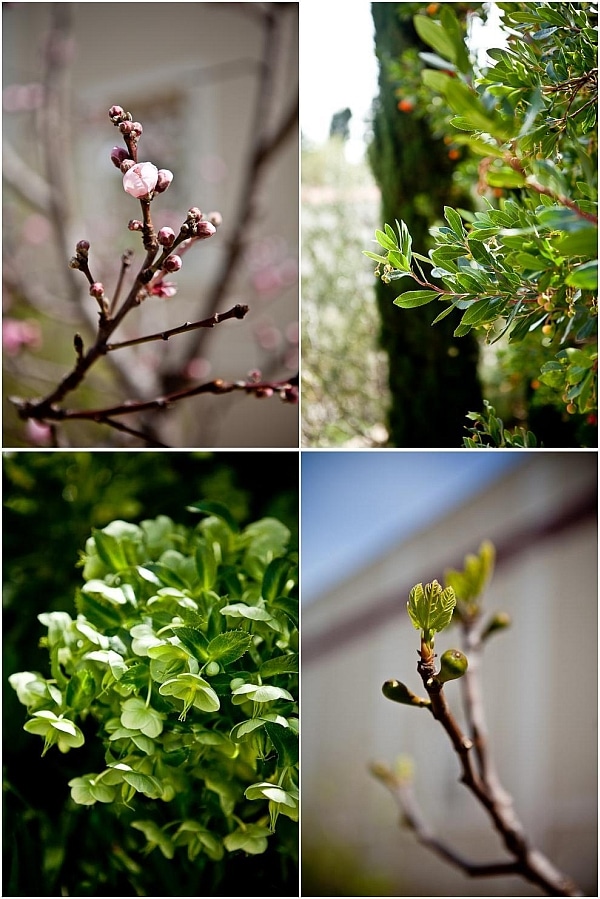
Just looking at this picture, I’d say it looked I just took a trip to my beloved Provence. But I did not. This was taken at the Getty Villa in California last week, in between two workshops.

Getty Villa - L.A


If I did not know any better I’d think these were shot right outside the window of the house where I grew up. Cherry blossoms. Figs just starting to budd. Olive trees. Cypresses. Sun and warmth. The ocean in the distance. Still at the Getty Villa.

Getty Villa - L.A


More cherry tree blossoms. Just because I can’t get enough. Because I even love baking with their extract. Because I grew up surrounded by them. In another South. Feeling dangerously like home. Mine. Back home across the other ocean.

Monkey Tree - Vashon


Lunch at the Monkey Tree on Vashon Island, Washington where I stayed with Shauna, Danny and Lu for a couple of days. Giggled with Lu reading books after books. Baked gluten free goodies and ate with friends. Family now.

Monkey Tree - Vashon


Warmth and comfort. Blackboard specials and used wood. Worn. Shared. Felt a community coming together in a great little quaint spot around a good bowl of soup and a crusty loaf of bread.

Monkey Tree - Vashon


On top of the piano at The Monkey Tree. Where things that don’t belong suddenly start to make sense.

Monkey Tree -  Vashon


If I did not know any better, I’d say I were in North Carolina for a couple of days. This cafe. The trees. The fields. The houses and the greens. I could get used to this. There are piers, docks and seagulls. I’m thinking this is so easily familiar…

Monkey Tree - Vashon


Oh Vashon! Temptress… I could easily forget I can’t have any of these. Not with friends who are constantly searching a way to make great foods just a tad bit differently. That’s all. We tried and experimented. The process. The friendship.

Snowy Lucy


And this little one. Who steals my heart each and everytime. And the snow. Big fluffy watery flakes of snow that made the moment just that much more magical.

Thank you dear friends…

All The Way Away In L.A

Blossoms


I bet that when you think about L.A, Japanese plum blossoms are not the first things coming to your mind. Me neither but when your first night in town start with dinner at Todd and Diane’s, this is one of the things you can expect. A delectable tour of their edible garden, a fantastic dinner and plenty of great discussions, laughs and good times. Made my heart giddy with happiness and gratitute. And that was just day one…

Pacific


Since I am staying on the beach, the first thing I did was to go check out the Pacific ocean. Nice plump and beautiful waves. The kind we usually see at the beginning of a storm here but it’s nice to be close to something familiar. I keep thinking how much fun Bailey would have in these waves…crazy pup.

Jen


Yes, I made it to L.A without a glitch on Wednesday and it’s pretty much been a whirlwind since then. Jen has been the most wonderful host. Attentive and generous of her time, making sure we see everything that makes L.A while avoiding the tourist pitfalls. Jen is definitely a rock star!

Dinner at Todd and Diane's


Back to Todd and Diane for a second. I was so thrilled to finally walk around in their beautiful edible yard. Fruit trees, salad, root vegetables…you name it. Nothing beats dinner where most of the ingredients come directly from their labor of love over their gorgeous space and sanctuary. Add dinner guests such as Matt and Adam and Broderick and you can expect flying jokes and hilarious work stories. Hmmm…hmmm….what a night!

Matt and Adam invited me to come by their studio the next morning and see their creative space. Oh my! I wanted to move in. Or make myself so tiny they’d forget I was there. A couple of hours talking and laughing away and Jen and I were back gallivanting around town.

Jimmy Stewart - L.A


She knows my heavy addiction for old Hollywood movies, my crushes on Jimmy Stewart or Cary Grant and at the detour of a conversation, I found myself staring at the famous actors footprints at the Grauman’s Theather on Hollywood Boulevard. And so I snapped. Happy to be doing the same thing everyone was doing. At least this once. Let’s face it: I don’t get to L.A that often (read never) to pass on the opportunity to get this close to dear old Jimmy. Heck no! Ahahah….

Oscar Time!


And Oscar. It just so happened that I am in L.A during Oscar week. Pretty cool considering my TCM addiction. Almost makes me want to see ghosts of actors passed. Almost…

Time to get a few more things done before tonight’s workshop…

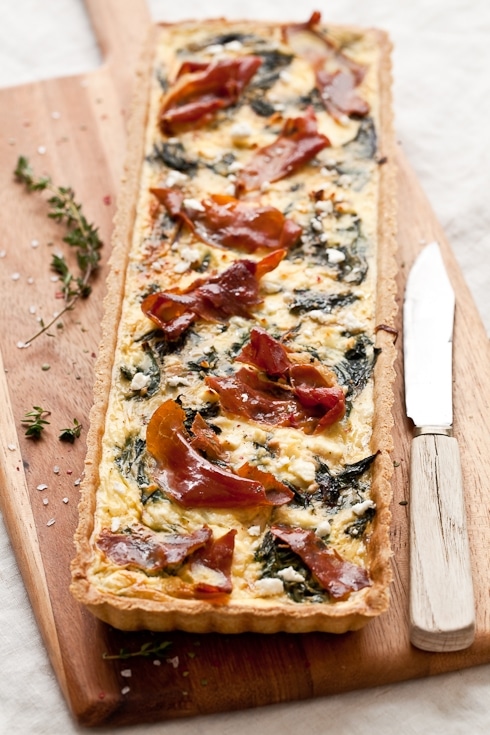
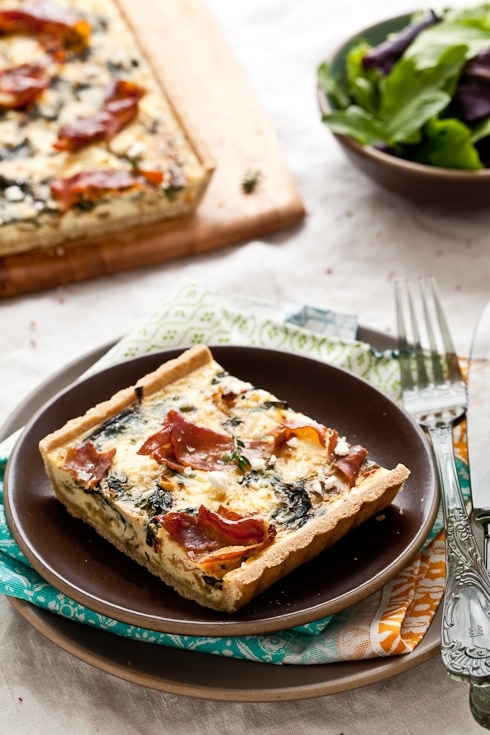
Swiss Chard, Goat Cheese and Prosciutto Tart

Gluten Free Swiss Chard, Goat Cheese and Prosciutto Tart


Almost a week without posting makes me feel like I am missing out on all the fun. Can’t believe February is over and gone. Makes me wonder why so much always gets packed into such a short month but I am relieved that all the projects have been completed and deadlines met. So, "Hello March! Let’s get going!" Yep, this month is definitely another kind of busy, filled with travels, workshops and visits and you can bet I am looking forward to the change of scenery. Oh yes.

Taking small breaks throughout the work day is vital for everyone. You’ve probably noticed it just by peeking your head outside for 10 minutes or taking a walk with a colleague. One thing I find most invigorating is lunch. I can’t do without. I guess it stems directly from my childhood when my mom would pick us from school for lunch. She had nothing against cafeteria meals but she enjoyed taking the time to do it. It was nothing fancy really but breaking away for an hour also meant picking up a new book at the library, getting more stickers at the book store, stopping by the bakery for a treat. A little fun in the middle of a long work day. Always a treat when you are a kid. Or an adult.

Swiss Char, Goat Cheese and Proscuitto Tart


I love a good salad with tons of colorful vegetables, sometimes topped with a hard boiled egg, or two. Soups are another favorite staple but nothing says lunch break more than a savory tart and a side salad to me. Quintessential French bistro food. One that warms my very soul being so far away from home. One that makes me feel all grown up although I have been there for a while. Savory tarts are the perfect vessels to get a good dose of all the food essentials your brain and body need to function properly without too much effort or planning. Once you have the crust, thrown in anything that strikes your fancy or whatever you have on hand. The sky is the limit regarding fillings, spices, herbs, etc…

Funny thing is that in my family a savory tart is also the meal of choice for any exhausted traveler. Whenever we go home, I know our first meal will be my mom’s quiche Lorraine with a salad and my dad’s shallot vinaigrette. Whenever they come visit, there is quiche ready for them to get a quick bite after a long day of travel. How did it come to be this way? I don’t know. It’s tradition. And you don’t mess with tradition. Well at least no this one, ehehe.

Swiss Chard, Goat Cheese and Proscuitto Tart


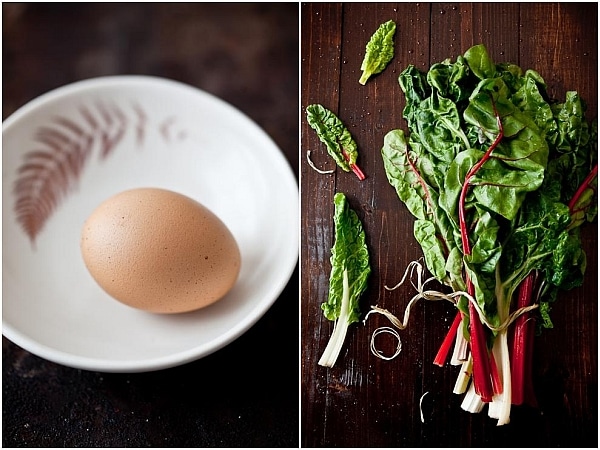
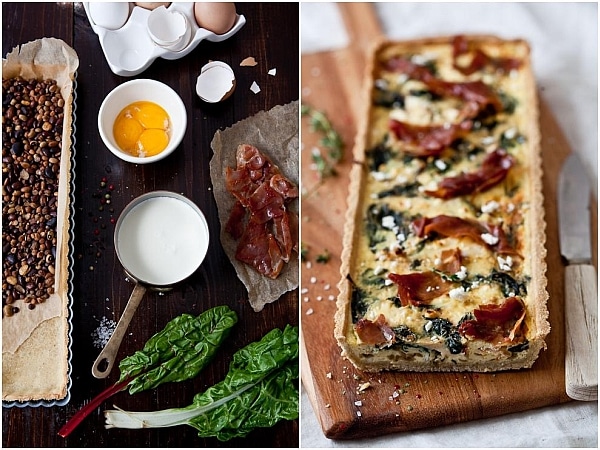
I guess you can call this Swiss Chard, Goat Cheese and Prosciutto tart a rehearsal of sort for my parents' arrival in two weeks. I finally came up with a savory gluten free crust that I am in love with. Tastes good, bakes good and rolls like a charm. For the filling, I used what I had on hand: a bunch of Swiss chard languishing in the fridge, some goat cheese and prosciutto left over from a tapas night with friends. Next time it might simply be bacon and onion. Who knows…

I can’t believe I’ll be in L.A on Wednesday and Seattle on Sunday! If you are registered for any of the workshops, well, "thank you" in advance and I can’t wait to meet you! There are some tweet-ups/meet-ups being organized as I write this so if you are interested, the best thing is to check my Twitter feed (@SweetTartelette) or any of the (crazy – awesome – fun) gals who will be showing me around town this week: Rachael (@fujimama), Jen (@jenjenk) and Gaby (@WhatsGabyCookin).

Since I know it’s going to be pretty tight to get any major post in and to avoid a major "post travel" blog post, I thought I’d do quick and fun entries throughout the weeks. Capturing the moment. I have never been to any of these cities so I figured it’d be fun to post quick accounts of things that strike me. Landscape, people, food, the macaron and photography workshops, whatever… I am looking forward to it all and everything in between.

Gluten Free Swiss Chard, Goat Cheese and Proscuitto Tart


Gluten Free Swiss Chard, Goat Cheese and Prosciutto Tart:
Serves 4

For the crust:
5 tablespoons (70gr) unsalted butter, at room temperature
1 teaspoon Dijon mustard
3 egg yolks
pinch salt
1/2 cup (80gr) brown rice flour
1/2 cup (60gr) millet flour
1/4 cup (30gr) sorghum flour
1/4 cup (40gr) tapioca starch
(or 1.5 cups of all purpose flour if not using gf flours)
1/2 teaspoon xantham gum

For the filling:
2 tablespoons olive oil
1 medium onion (I used 1/2 of a giant sweet Vidalia), sliced thin
1 bunch Swiss chard (red – green rainbow – your choice), washed and patted dry
4-6 slices prosciutto
3 eggs, slightly beaten
2/3 cup whole milk
salt and pepper
pinch of freshly grated nutmeg
4 to 6 oz (120gr – 180gr) crumbled goat cheese
a few sprigs of thyme

Prepare the crust:
In a mixer, whip together the butter and mustard on medium speed until light and airy. Add the egg yolks, one at a time and beating well after each addition. Mix until incorporated. Add all the different flours, and the xantham gum and mix briefly. Dump the whole mixture onto a lightly floured (use more rice flour) board and gather the dough into a smooth ball. Flatten the dough into a disk, wrap it in plastic wrap and refrigerate for an hour.
Preheat oven to 350F and position a rack in the center.
When the dough is nice and cold, roll it out on a lightly floured board or in between two sheets of plastic to fit your prefered pie pan. (I went with rectangular this time) If the dough tears while you roll or/and transfer into the pan, just patch it with your fingertips. Line the dough with a piece of parchment paper, fill with pie weights or dy beans and par bake for 15-20 minutes until completely done. Remove the weights and parchment paper. At this point you can refrigerate the baked crust for up to 5 days if not using right away or freeze it for up to 3 months.

Prepare the filling:
Preheat the oven to 350F and position a rack in the middle.
Heat the oil in a large sautee pan over medium high heat and cook the onion until translucent (about 3-4 minutes), add the Swiss chard and cooked until wilted. Remove from the pan and set aside to cool. In the same pan, quickly sautee the slices of prosciutto to get them nice and crispy. Remove from the pan.
In a large bowl, whisk together the eggs, milk, salt, pepper and nutmeg. Layer the onion and Swiss chard at the bottom of the crust and slowly pour the egg mixture over it. Top with slices of prosciutto and crumbled goat cheese.
Bake for about 30-40 minutes or until the tart starts getting golden brown and the custard is cooked. Spinkle with freshly chopped thyme.

————————————————————————————

Le P’tit Coin Francais:

Tarte aux Bettes, Chevre et Prosciutto:

Pour 4 a 6 personnes:

Pour la pate:
70gr beurre mou, non sale
1 cc moutarde de Dijon
3 jaunes d’oeuf
pincee de sel
80gr farine de riz brun
60gr farine de millet
30gr farine de sorghum
40gr de farine de tapioca
(ou de 210gr de farine blanche)
1/2 cc de gomme de xantham

Pour la garniture:
2 cs d’huile d’olive
1 oignon moyen, coupe en tranche fine
1 petite bottes de bettes
4-6 tranches de prosciutto
3 oeufs, legerement battus
150ml lait entier
sel, poivre
pincee de muscade fraiche
120gr a 180gr de fromage de chevre emiette
quelques brins de thym

Preparer la pate:
Dans le bol d’un mixer, battez le beurre et la moutarde pendant 2 minutes. Ajoutez les jaunes d’oeufs un a un, tout en melangeant bien apres chaque jaune. Ajoutez les farines sans gluten, le sel et la gomme de xantham. Melangez brievement et verzes le contenu sur un plan de travail. Ramassez en boule et metter au refrigerateur pendant une heure.
Prechauffez le four a 180C et positionnez une plaque au milieu.
Etalez la pate sur un plan de travail legerement farine (farine sans gluten de preference), ou entre deux feuilles de papier sulfurise. Foncez en un plat a tarte (rectangulaire ou rond), mettre une feuille de papier sulfurise dans le fond, et des pois/riz. Faire pre-cuire 10-12 minutes. Sortez la tarte du four et laissez refroidir.

Preparez la garniture:
Prechauffez le four a 180C.
Dans une grande poele a feu moyen, faites revenir l’oignon dans l’huile. Ajoutez les bettes et cuire jusqu’a ce qu’elles apparaissent fanees. Retirez de la poele et faites-y revenir les tranches de prosciutto. Laissez refroidir.
Dans un grand bol, melangez les oeufs, le lait, sel, poivre et la pointe de muscade.
Repartissez les oignons et bettes au fond de la tarte. Versez dessus le melange oeufs/lait, parsemer des tranches de prosciutto et de fromage de chevre. Faites cuire 30-40 minutes. Parsemez de thym frais a la sortie du four.

Rhubarb And Red Berry Crumbles

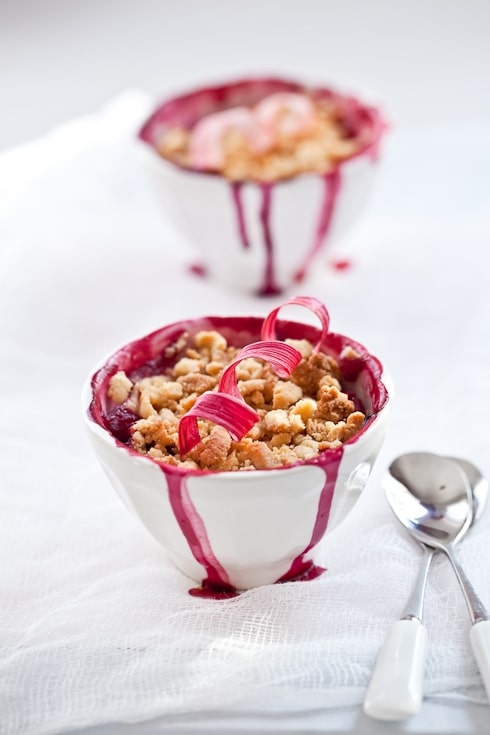
Rhubarb & Red Berry Crumbles


I get giddy pretty often. I can’t help it. It’s my self defense mechanism against discontent, routine, hardship. My heart does a happy dance reading a friend’s book feeling so proud of her as I realize the depths of her talent. My toes start moving in my shoes while listening to a perfect piece of music. I get giddy pulling out a perfectly moist and tender gluten free banana bread out of the oven. The little things deserve inner celebrating. I get giddy.

This week it was finding rhubarb for the first time this year. Yes, I know. I am easy. Making Rhubarb and Red Berry Crumbles was even easier.
Rhubarb & Red Berry Crumbles


It’s a bit early still to have outdoor cultivated rhubarb over here (April/May) and I knew by the intense red color that this one was hothouse rhubarb (grown in heated greenhouses). I also knew it would be sweeter than its outdoor sister which was perfect on so many levels mixed in with berries in a crumble. B. wondered if he would have to drown his crumble under a mound of vanilla ice cream to offset all that tartness. Nope.

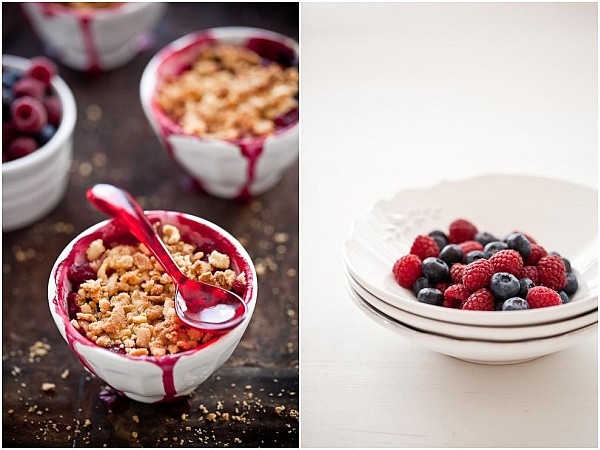
As I was mixing the crumble topping, I started going over my reasonning with him and that’s when my husband looked at me as if I were the biggest baking geek out there. This type of rhubarb would be tart enough to make you notice it but would round the tartness of the raspberries while boosting up the flavor of the blueberries. Add a gluten free crumble topping with a pinch of cardamom and you have the perfect dessert to brighten any day.
Rhubarb & Red Berry Crumbles


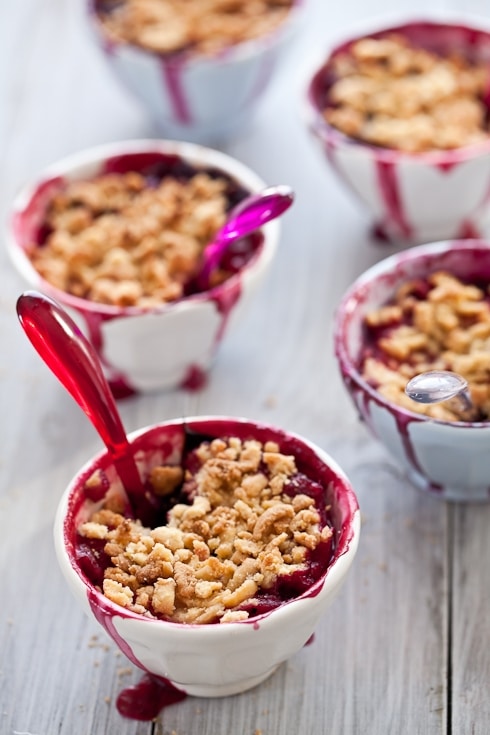
Come to think of it we are big geeks. We start on a topic and bounce off ideas, questions and solutions all the time. Can be his trombone playing, my baking, writing, photography, vintage car fixing, the moon, the stars and everything in between. Absolute fun but it drives my parents insane when they come visit as they are trying to keep up.

Speaking of which…I know I will be making these crumbles again very soon when my parents come to visit. They will be here in just three weeks! They arrive 2 days after my return from teaching baking and photography workshops in Los Angeles and Seattle. Talk about timing! No time to noodle around to get the house ready and the fridge full! It’s been over a year since they have come to visit. Oh! I just can’t wait!
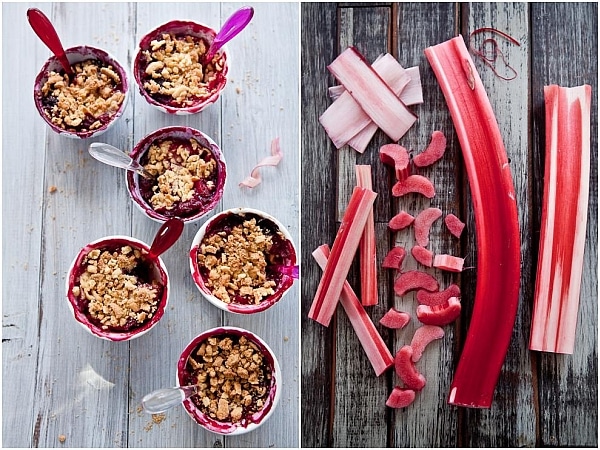
Rhubarb & Red Berry Crumbles


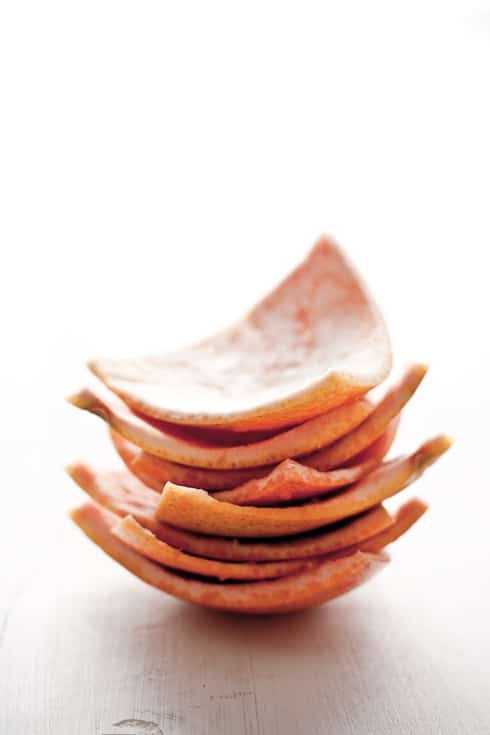
My mom loves stewed fruits of any kind. That’s the fate we usually reserve for over ripe fruits back home. Growing up it was my breakfast and dessert of choice: stewed fruits over her homemade yogurt and a sprinkle of muesli for crunch. I guess that’s why I love crumbles so much. Similar in texture, contrasting soft fruits and crunchy topping. Yet a tad more decadent with a scoop of vanilla bean ice cream. One night I even got fancy and candied some rhubarb peel on top. Inner happy dance…

One more thing: my friend Valentina who is an insanely talented photographer is teaching young kids the art of photography but the school needs a little help either in the form of used cameras or donations to purchase cards. It would only take 150 of us giving $10 each to help them meet their goal. That’s not much. I love the idea of teaching children such crafts and arts at an early age. They can learn so much more than just how to take a picture: architecture, technology, discipline, community, etc… Click here for more information on how to help.
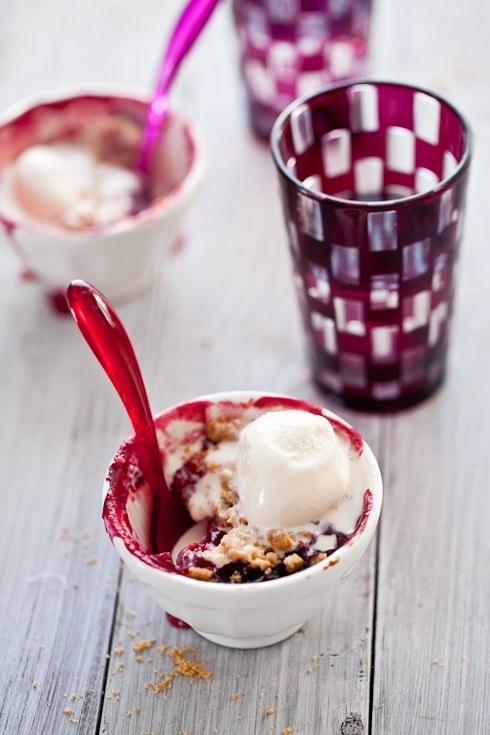
Rhubarb & Red Berry Crumbles


Rhubarb and Red Berry Crumbles:

Serves 6-8

Notes: I start by preparing the crumble first so I can freeze it while I prepare the fruit and preheat the oven. This way, I can easily grate it over the ramekins or baking dish before baking and not get it too soft in between my fingers as I top the fruits with it. If you tolerate gluten, replace all the gf flours with 1.5 cups of all purpose or soft whole wheat flour.

For the topping:
3/4 cup (90gr) millet flour
3/4 cup (120gr) brown rice flour
1/2 cup (65gr) tapioca starch
1/4 teaspoon ground cardamom
pinch of salt
1 stick (115gr) unsalted butter, cold, in small pieces
1/4 cup (80gr) honey

For the fruits:
3 cups (365gr) rhubarb, fresh or frozen
1 cup (125gr) raspberries, fresh or frozen
1 cup blueberries (150gr) fresh or frozen
2 tablespoons (16gr) cornstarch
juice and zest of half a lemon
2 tablespoons (40gr) honey

Prepare the crumble topping:
In a large bowl, stir together all the flours, cardamom and pinch of salt. Add the butter and honey and start mixing everything together with your fingertips. You want to form a few large clusters of dough. It will be easier to grate once cold. Freeze the mixture while you prepare the fruits.

Preheat the oven at 350F and position a rack in the middle.

Prepare the fruits:
If you are using fresh rhubarb, peel it first then cut it in small pieces (about one inch). Use frozen as it is.
In a large bowl, mix together the rhubarb and berries along with the cornstarch, lemon juice and zest and honey. Stir the whole mix delicately as not to break the raspberries too much. Divide the mixture into lightly buttered ramekins or one 13×9-inch baking pan.

Assemble:
Grate the cold crumble mixture right over the fruits with either a cheese grater or a microplane with large holes.
Bake for 20-30 minutes or until the fruits start to bubble and the topping is golden brown. Handle with care – bubbling juices are very sneaky!

If you desire to candy and twirl some rhubarb strips, it’s pretty easy actually:
Start by heating on the stove on medium high, equal parts sugar and water until the sugar dissolves (simple syrup.
Preheat the oven at 200F.
With a vegetable peeler remove long strips from the rhubarb stem. Dip them in the simple syrup and lay them flat on a baking sheet lined with either parchment paper or a silicone mat and let dry in the oven for about 1 hour. Remove from the oven and quickly twirl the rhubarb strips around wooden spoons, skewers, etc..let cool completely.

————————————————————————————-

Le P’tit Coin Francais:

Crumble Rhubarbe Et Fruits Rouges:

Pour 6 a 8 personnes

Notes: je prepare le crumble avant les fruits car je le mets au congelateur pour pouvoir le gratter a meme les ramekins avant la cuisson. Une gratte a fromage ou une "microplane" a grands trous suffisent. Si vous ne desirez pas utiliser de farines sans gluten, remplacer les par 190gr de farine normale.

Pour le crumble:
90gr farine de millet
120gr farine de riz brun
65gr farine de tapioca
une pincee de cardamome
pincee de sel
115gr beurre non sale, froid, coupe en petits morceaux
80gr de miel

Pour les fruits:
365gr rhubarbe, fraiche our surgelee
125gr framboises, fraiches ou surgelees
150gr myrtilles, fraiches ou surgelles
16gr maizena
jus et zeste d’un demi citron
40gr miel

Prepare le crumble:
Dans un grand bol, melangez les farines, cardamome et le sel. Ajoutez le beurre en des et le miel et melanger le tout du bout des doigts. Formez de larges boules de pate et mettez les au congelateur pendant que vous preparez les fruits.

Prechauffer le four a 180C et positionnez une grille au milieu.

Pour les fruits:
Si vous utilisez de la rhubarbe fraiche, epluchez-la d’abord et coupez la ensuite en petits morceaux.
dans un grand bol, melangez la rhubarbe et les fruits rouges. Ajoutez la maizena, le zeste et jus de citron et le miel. Melangez doucement pour ne pas casser les framboises. Repartissez les fruits dans des ramequins legerement beurres ou dans un plat rectangular de taille moyenne.

Assembler:
Sortez le crumble du congelateur et grattez le au dessus des fruits pour bien les recouvrir. Cuire le tout 20 a 30 minutes ou jusq’a ce que le crumble soit d’une belle couleur doree.

Pour les accordeons de rhubarbe: faites un sirop simple en diluant la meme quantite d’eau et de sucre a feu moyen. Trempez dedans de longue bandes d’epluchures de rhubarbe et les mettres sur une plaque recouverte d’une feuille de papier sulfurise ou de silicone. Faire secher a feu tres doux pendant une heure. A la sortie du four, les tortilloner autour de cuillieres en bois ou autre les laissez refroidir completement.

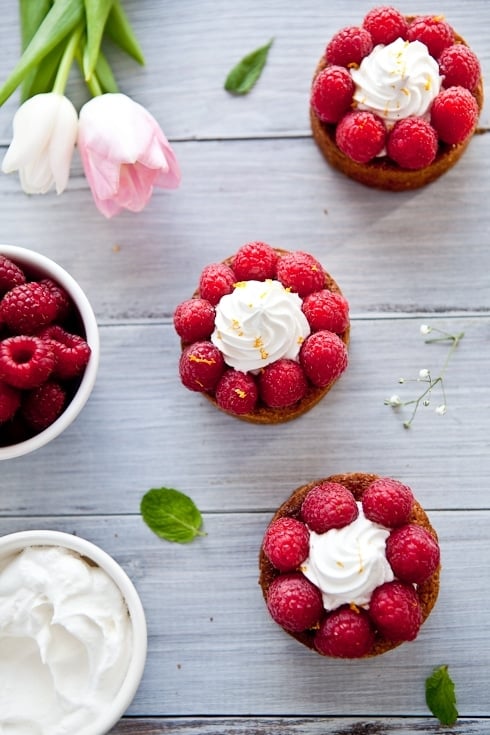
Raspberry Pistachio Frangipane Tarts With Meyer Lemon Chantilly

Raspberry Pistachio Frangipane Tarts With Meyer Lemon Chantilly


If it weren’t for a bit of a chill early morning (pre-sun rising), you’d be hard pressed to feel like it is still winter here. It seems like it all happened in the past couple of days. No more need for a coat, no more fires. Piping bowls of soup are not preciously close to the body and used as hand warmers anymore. The skies are changing color. That wintry filter in front of the sun is slowly disappearing each day.

Even produce at the store is losing its marbles. It’s a bit of a mess during this seasonal transition. There’s everything everywhere. Usually it starts bugging me by late February except this year. I needed this off season produce frenzy to work on Carrie’s book as I was covering four seasons, breakfast items, main meals and desserts. I hate to admit it but for once, the fact that I could find plump and gorgeous tomatoes from California in the middle of February was making me jump for joy instead if mumbling "not the season yet damn it".

Tulips


My seasonal cook preference to find the berries stands completely void of raspberries this time of year was quickly meant with slight panick when I needed a bunch for a few recipes (had to be fresh). Good thing there was lots of other things to work on but you can bet that when the shelves filled up again, so did my cart! I had a couple of pints left over and decided to make these Raspberry Pistachio Frangipane Tarts With Meyer Lemon Chantilly.

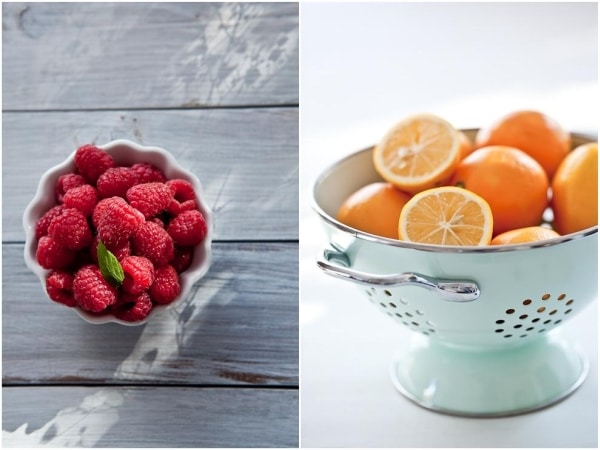
I thought I was commiting another seasonal faux pas when I loaded my basket with (incredibly cheap) Meyer lemons for an article but Sam, my produce guy, told me their season could extend as late as April. I raised an eyebrow and said "that’s awesome. If you are in California. Since they’re not indigenous to our parts so really, we should take it to the streets and strike!" to which he replied "You’re so French. Striking!". We were both joking but deep down not so much.

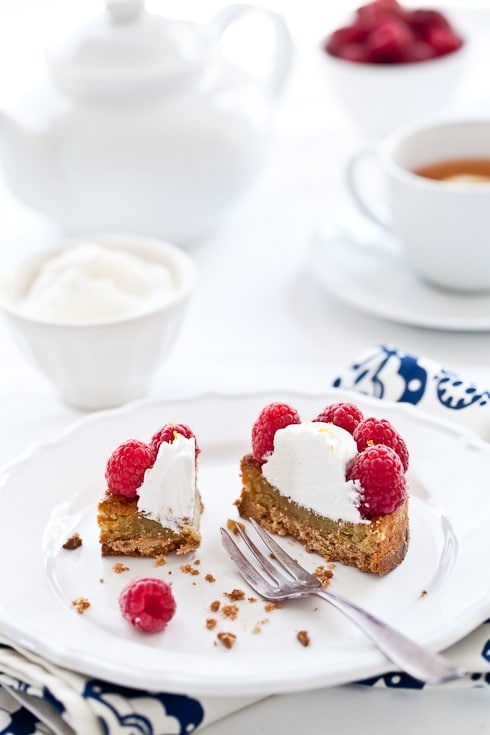
Raspberry Pistachio Frangipane Tarts With Meyer Lemon Chantilly


To sum it up, don’t do what I did for these tarts unless raspberries are in season where you are. They were good but I felt like I was holding a box of diamonds at $6 a pint. Trust me, even though the photo gig is over, I am still making the last pint last to the last berry. They’re good, don’t get me wrong but I *know* they will be way better in a couple of months.

On the other hand trust me when I say that the combination of shortbread dough, topped with pistachio frangipane and fresh raspberries was pretty darn good on its own. Believe me again when I add that the Meyer lemon chantilly will wrap this whole thing in the best bite of tangy whipped cloud that will make you giggle in all the right places.

Raspberry Pistachio Frangipane Tarts With Meyer Lemon Chantilly


Raspberry Pistachio Frangipane Tarts With Meyer Lemon Chantilly:
Serves 8

Notes:
– I used eight 3-inch mousse rings to bake mine but you can fit the whole thing into an 8 or 9-inch pie plate. The tart filling will probably need extra baking time (add 10-12 minutes) at the same temperature.

– I used a combination of basic gluten free flours but you can substitute all purpose or whole wheat flour in the same quantity.

– As you can imagine, when I was preparing the dishes for Carrie’s book I had to use the exact same ingredients she does in her recipes. There were only two I was not much familiar with, one of which was "organic whole cane sugar", an unrefined and unbleached sugar with nice molasses undertones (and much healthier). It’s not organic cane sugar, nor organic brown sugar and you will find it with the names rapadura or sucanat sometimes. I love molasses so I have fallen completely in love with it. It doesn’t go with every dessert but it worked really well in the shorbread dough. Of course, feel free to substitute regular granulated sugar or a strong brown sugar like demerara or dark muscovado.

– The other one was coconut oil. I knew of it, I knew some about it but I never used it in my cooking. I do now everyday (while keeping using butter, olive oil, avocado oil, etc…) A little goes a long way but make sure to get the best kind: unrefined, extra virgin cold pressed. It is more expensive than most store bough coconut oil but a little goes a long way. It does smell like coconut but not as strongly (if at all) when cooked or baked.

For the shortbread bottoms:
1 stick (115 gr) unsalted butter or coconut oil, at room temperature
1/2 cup (95gr) whole organic cane sugar (or granulated or dark brown)
1 large egg yolk
1/2 cup (80gr) brown rice flour
1/2 cup (80gr) white rice flour
1/4 cup (30gr) sorghum flour
(Or use 1 1/4 cup all purpose flour instead of the 3 mentioned above)
2 tablespoons (20 gr) tapioca starch
pinch of salt

For the pistachio frangipane:
1 stick (115 gr) unsalted butter, at room temperature
1/2 cup (95 gr) organic whole cane sugar (or granulated)
1 cup (100 gr) ground pistachios
2 eggs
1/4 cup (60ml) heavy cream

For the Meyer lemon chantilly:
1 cup (250ml) heavy cream
1 tablespoon honey
zest of one Meyer lemon

2 pints fresh raspberries

Prepare the tart shells:
In a mixer, whip together the butter and sugar until light and fluffy. Add the egg yolk and mix until incorporated. Add the flours, tapioca starch and salt and mix briefly. Dump the whole mixture onto a lightly floured board and gather the dough into a smooth ball. Flatten the dough into a disk, wrap it in plastic wrap and refrigerate for 30 minutes to an hour.
Preheat the oven to 350F and position a rack in the middle.
When the dough is nice and cold, roll it out on a lightly floured board or in between two sheets of plastic (it tears easily). You will need half the amount of dough to make the tartelettes. The other half can be kept in the fridge for up to 5 days or frozen, well wrapped for up to 3 months. Cut out eight rounds with a 3-inch pastry ring, dock with a fork and place on a baking sheet lined with parchment paper and bake for 8-10 minutes. Let cool completely.

Prepare the pistachio frangipane filling:
Preheat the oven to 350F and position a rack in the middle.
Place the butter, sugar, ground pistachios, and the eggs in a large bowl and whisk until smooth (can also be done in a food processor). Add the cream but stir it in carefully instead of whisking it (you do not want to emulsify it or it will rise while baking). Refrigerate for 30 minutes. Place the 8 baked rounds of dough in eight 3-inch pastry rings, divide the cream evenly among the rings and bake 20 minutes. Let cool.

Prepare the Chantilly:
In the bowl of a stand mixer (or hand held) whip the heavy cream together with the honey and lemon zest to medium stiff peaks.

Assemble the tarts:
Pipe or spoon a generoud dollop of chantilly in the middle of each tart and place raspberries all around. Oh yeah…Eat!

————————————————————————————-
Le P’tit Coin En Francais:

Pour la pate sablee:
115 gr beurre non salee, a temperature ambiante
95 gr de sucanat (ou sucre integral – voir ici) (ou un bon sucre brun)
1 jaune d’oeuf
80gr farine de riz brun
80gr farine de riz blanc
30gr farine de sorghum
(Ou utilisez 160gr de farine au lieu des trois mentionees ci dessus)
20 gr de farine de tapioca (ou maizena)
pincee de sel

Pour la frangipane pistache:
115 gr beurre non sale, mou
95 gr sucanat (ou sucre brun)
100 gr de pistaches en poudre
2 oeufs
60ml de creme liquide entiere

Pour la chantilly au citron:
250ml de creme liquide entiere
1 cuilliere a soupe de miel
zeste d’un citron Meyer ou autre

500 gr de framboises fraiches

Preparer les fonds de tartes:
Dans le bol d’un mixer, fouetter le beurre et le sucre pendant 2-4 minutes. Ajoutez le jaune d’oeuf et battre jusqu’a ce que le melange soit homogene. Ajoutez les farines, le tapioca et le sel et melanger brievement pour obtenir une pate a biscuit. Formez la pate en boule sur votre plan de travail et refrigerer 30 minutes a une heure. (la moitie suffit pour la recette mais la pate se garde bien au congelateur pendant 1-3 mois).
Prechauffer le four a 170C.
Sur votre plan de travail etalez la pate sur une epaisseur d' un demi centimetre. Decoupez 8 cercles de 5cm de diametre environ et piquez les a la fourchette.
Faites les cuire environ 8 minutes. Laissez les refroidir completement et posez les dans des cercles a tarte de 5cm de diametre et de 2 cm de haut.

Preparez la frangipane:
Prechauffez le four a 170C.
Dans un grand bol, melangez tous les ingredients et ajoutez la creme doucement pour ne pa l’emulsionner ou la creme risquerait de gonfler au gour. Gardez la au refrigerateur 30 minutes a une heure.
Dressez la creme sur les fonds de tarte et cuire environ 20 minutes. Laissez refroidir completemet avant de garnir avec la chantilly.

Preparez la chantilly au citron:
Dans le bol d’un mixer, montez la creme en chantilly avec le miel et le zeste de citron. Garnir une poche a douille avec la chantilly et deposez des rosettes de creme au centre des tartes. Ajoutez les franboises tout autour.