
Jahresarchive: 2010

French Word A Week: L’ete – Les Cerises – Les Vacances!

Summertime...And The Living Is Easy


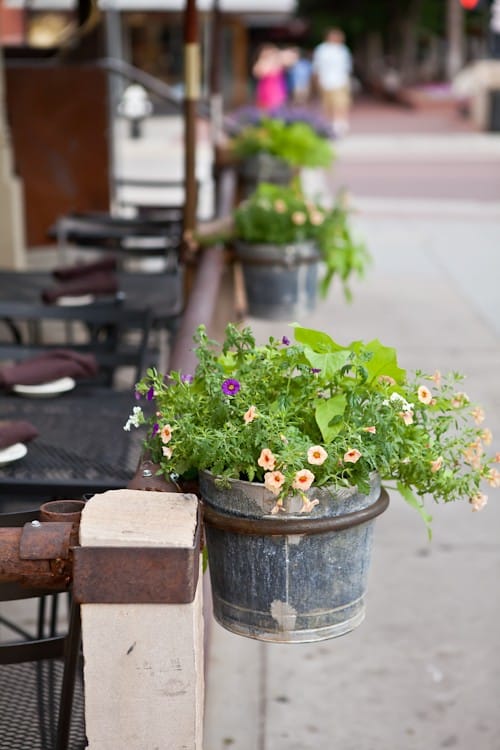
Summer….easy living, easy going. When the casual becomes upscale and the impromptu becomes routine. I love that. Summer evenings around here are something to be savored, never rushed. In that regard, I have retained a great deal of my home country in the way friends and family gather around our dinner table. Long evenings with simple, fresh and seasonal dishes, something cold to sip on and a light summer dessert to end.

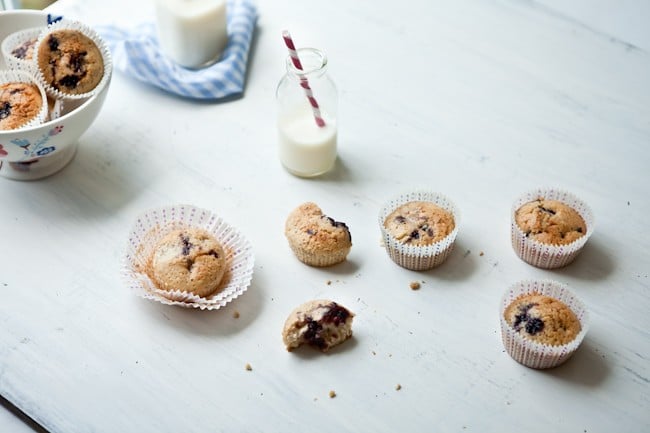
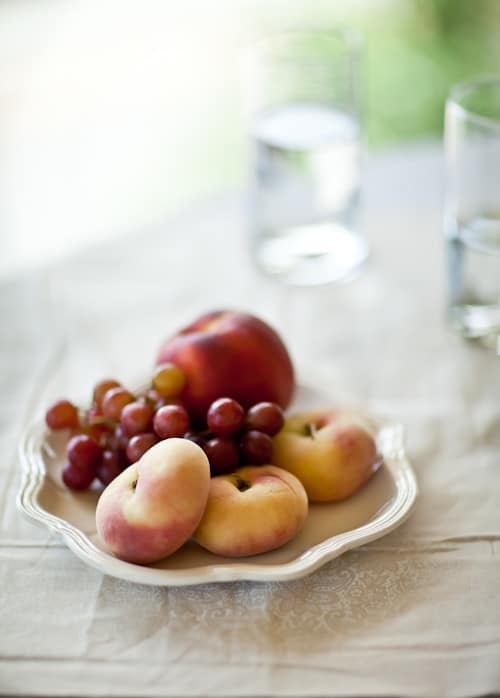
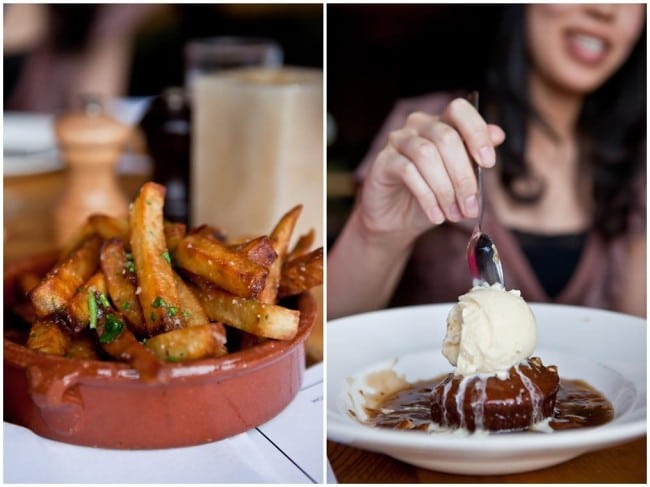
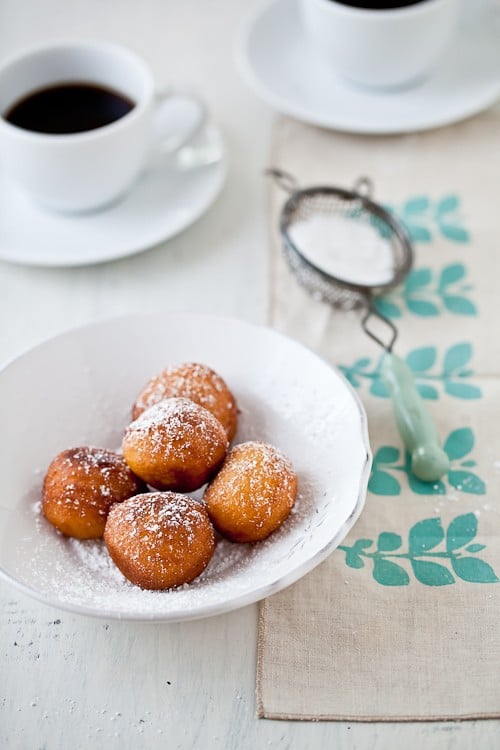
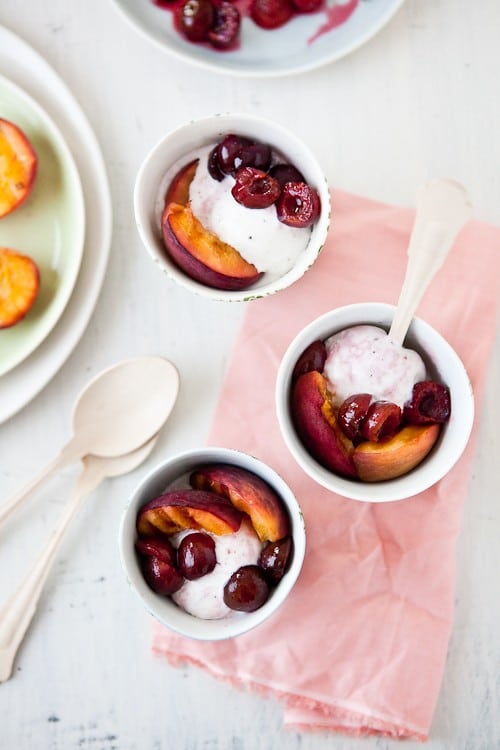
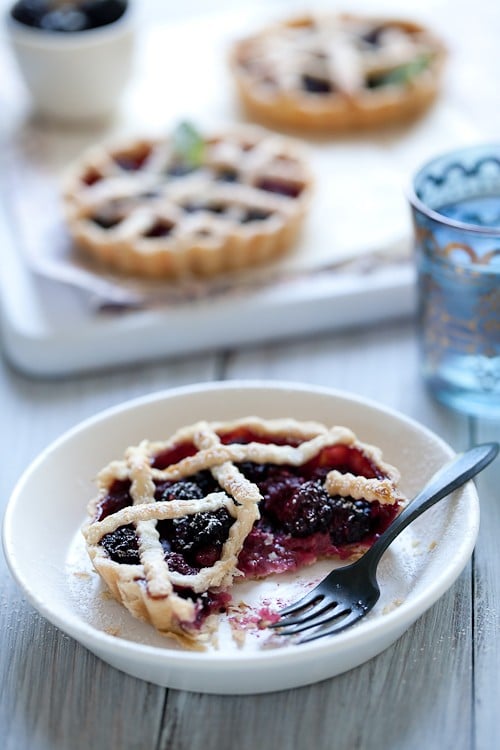
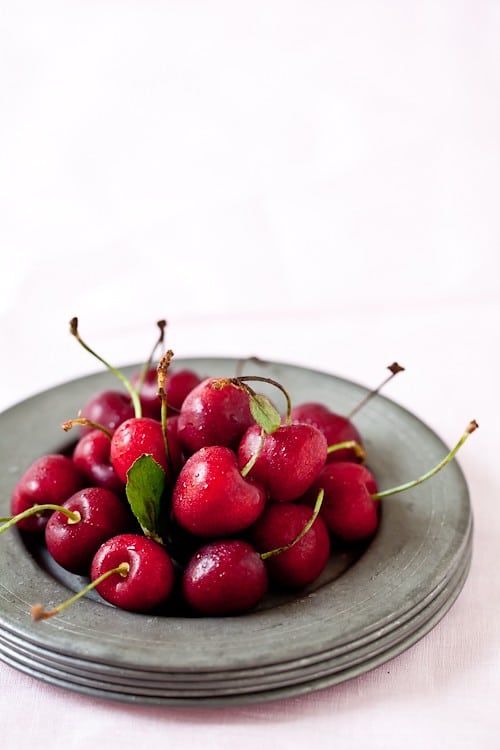
Growing up, summer desserts rarely consisted of cakes or pastries and chocolate was pretty much forgotten until the Fall. Not always but often. Instead we would always have some fruit, either raw or slightly grilled, a drizzle of lavender honey and maybe a dollop of fresh cheese. Sometimes it was ice cream. Sometimes it was sorbet. Sometimes it was just a plate of cherries and some cheese.

Coconut Cherry Ice Cream


This week French Word feature is all about l’ete (summer), les cerises (cherries) and les vacances (vacation) (lucky you!)

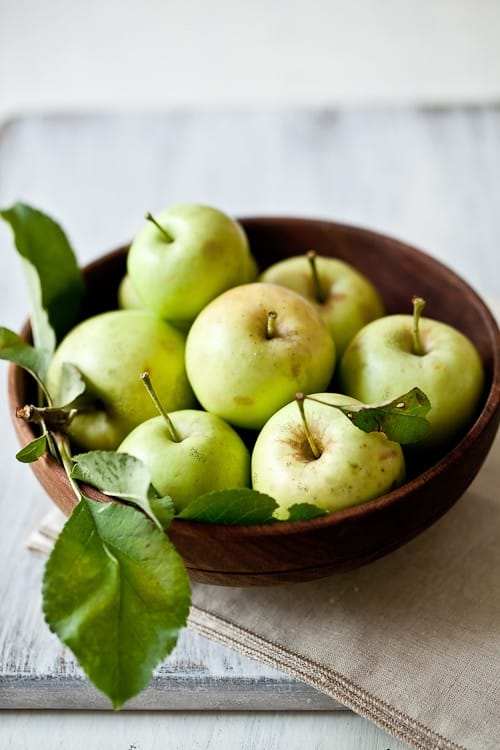
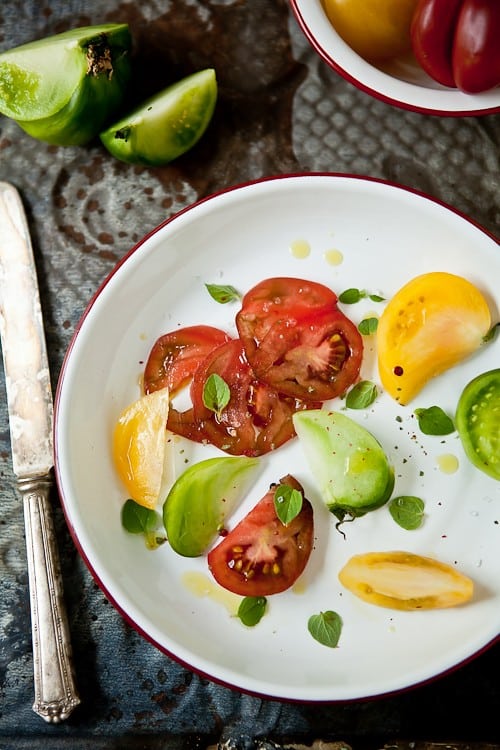
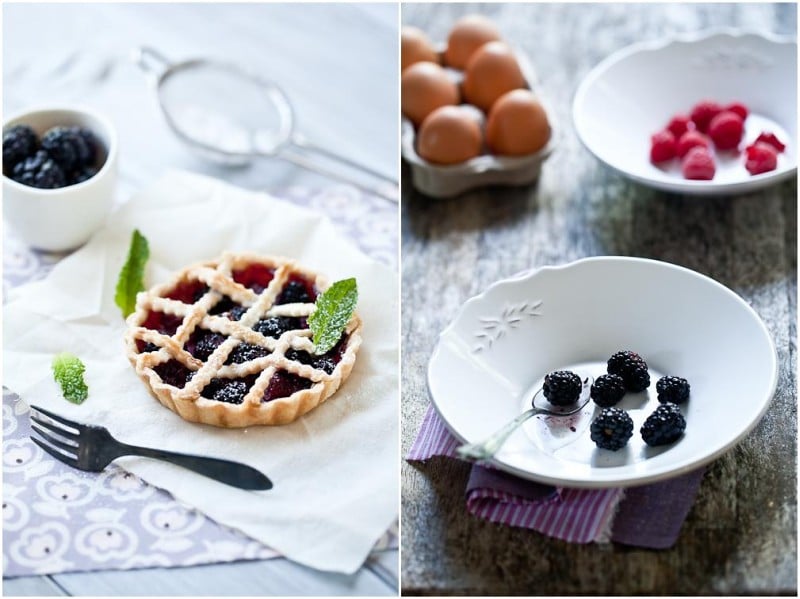
Taking advantage of the bounty of summer. Letting your senses get their fill of fragrant peaches, apricots, lavender, your taste buds get tickled with tart raspberries and red currant while your eyes can’t get enough of all the colors around. Red. Yellow. Green. Orange. I can easily get lost in everything that the season brings forth. Hurricanes and heat waves included.

All Cherried Up...


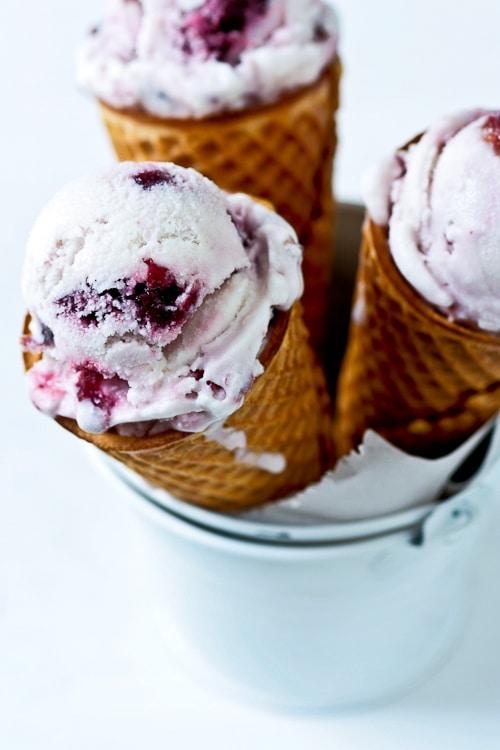
After a busy workday, I find myself craving simplicity. A lot. Summer is perfect for that. The South is prefect for that too. I love bumping into neighbors and settling on their or our front steps, talking for hours. Often times, I make a quick run to the house and bring back some ice cream, some cones and some bowls and we just sit there in the magic hour of the sunset and laughing life away.

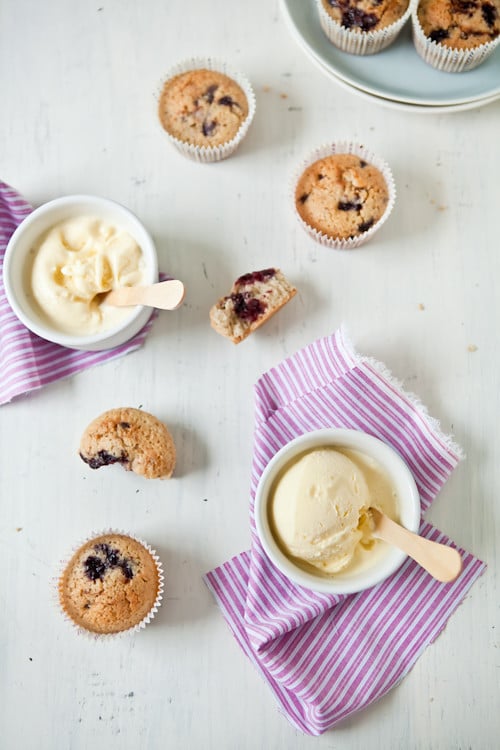
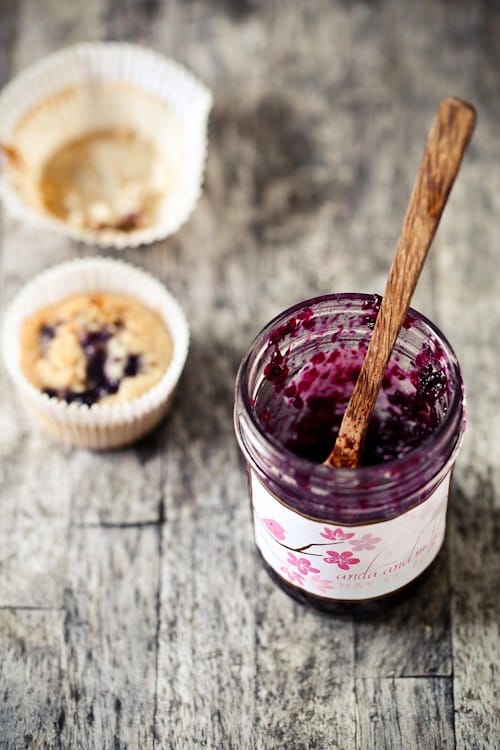
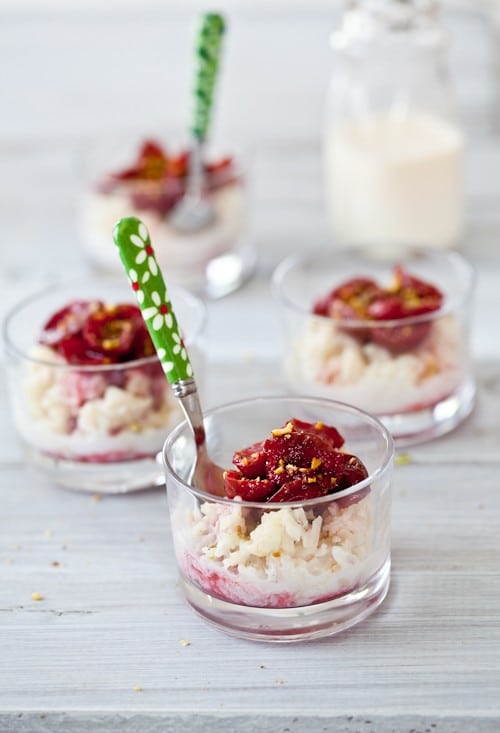
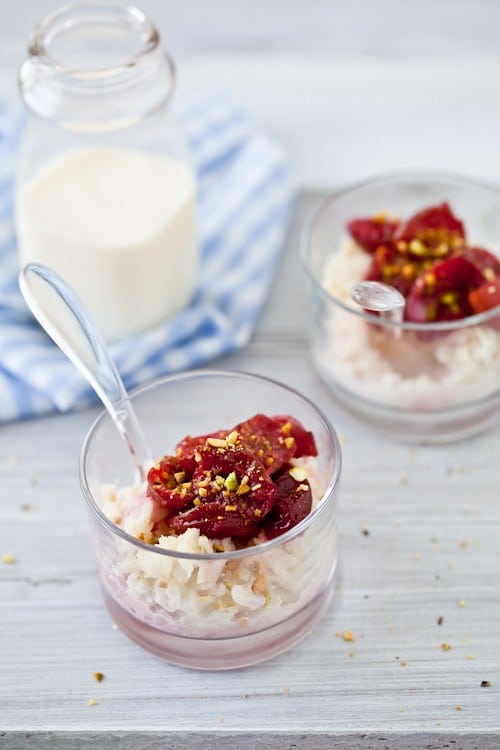
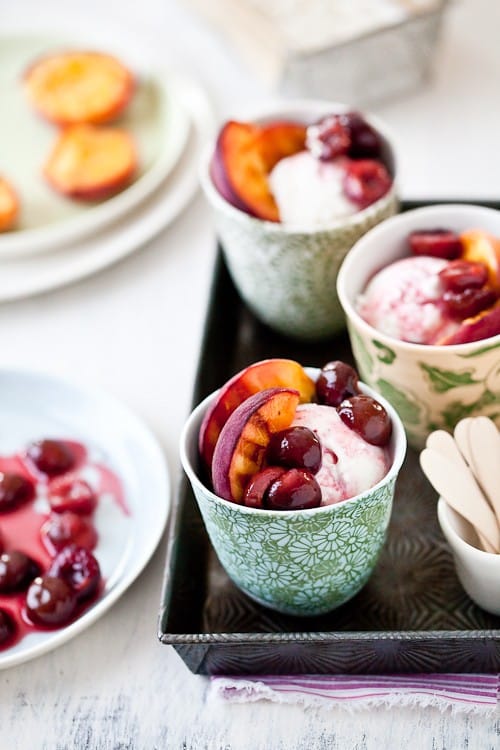
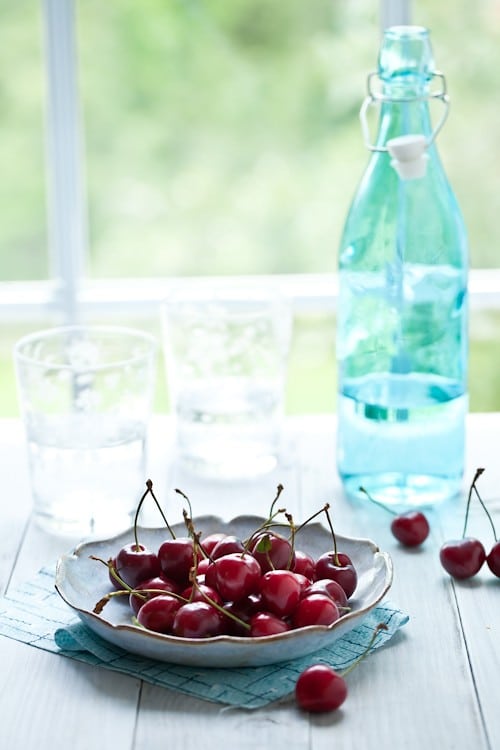
I am dipping (pun intended) into the archives today to bring you a recipe I’ve made about every other month since I first posted it: Cherry Rose and Coconut Ice Cream. It’s got all my favorite in one nice scoop: coconut flavor, cherry bits, and a hint of rose. Sometimes I skip the latter but this is by far the most requested ice cream flavor I get from my friends and I am far from complaining. Hehehe!

Hope you have a wonderful weekend!

Coconut Cherry Ice Cream


Cherry, Rose and Coconut Ice Cream:

Makes a little less than a quart.

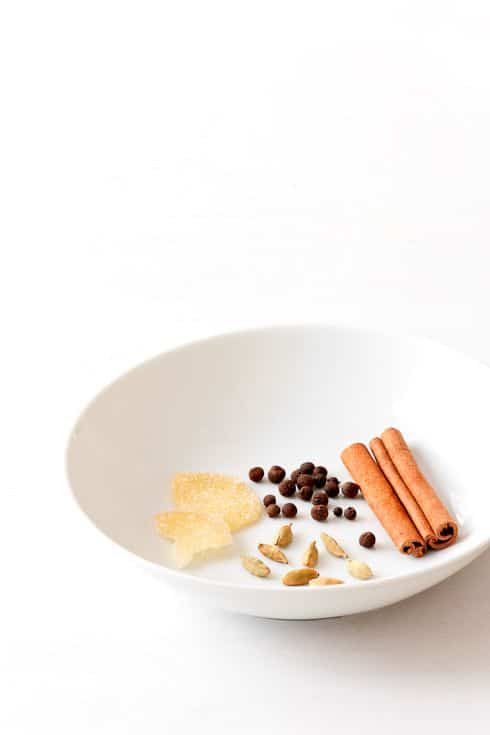
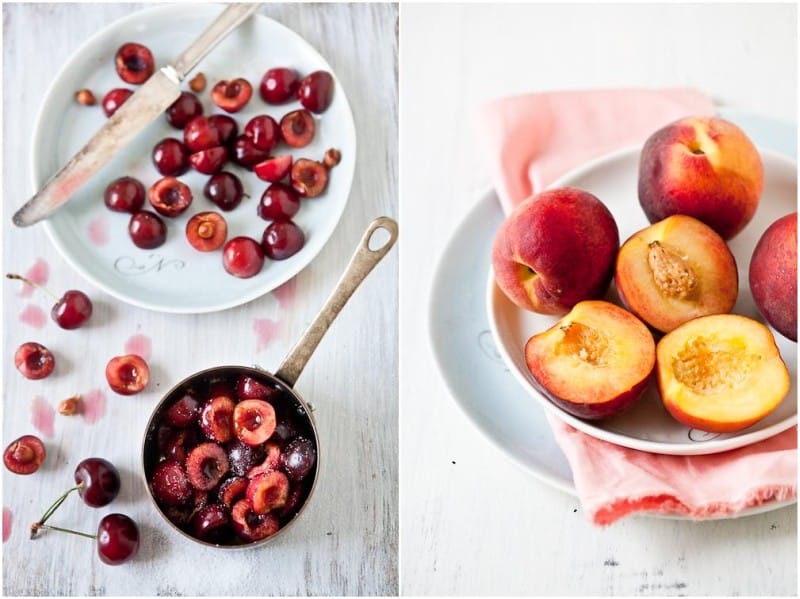
Notes: don’t just go use any dried rose for this! Make sure to get food grade, organic and non treated rose petals or rose buds. Most can be food at health food store in the bulk spices and tea section and are quite cheap. I got about 1 cup for $1.50.

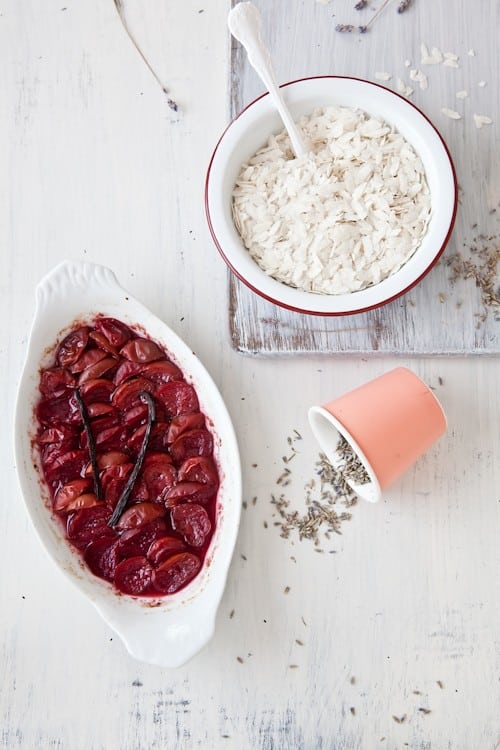
For the rose infused cherries:
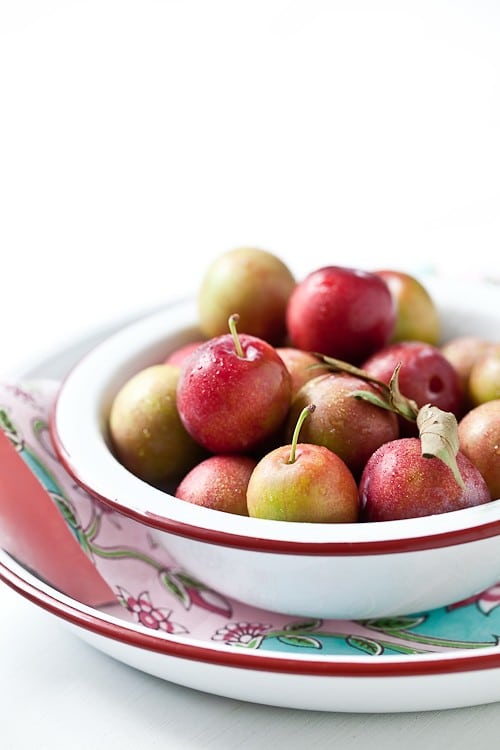
1 cups (145gr) pitted and halved cherries
1/4cup (60ml) water
1 tablespoon lemon juice
1/2 cup (100gr) sugar
6-8 food gradedried rose buds (more or less depending on your own liking)
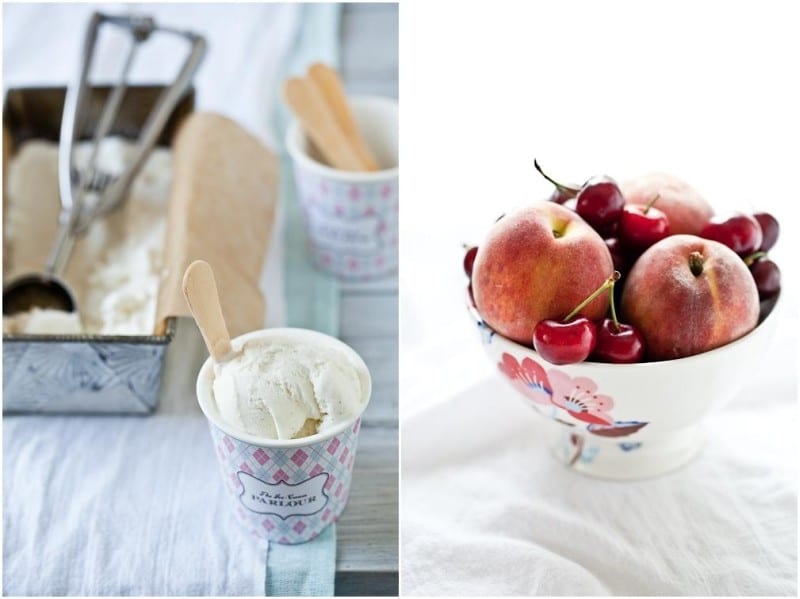
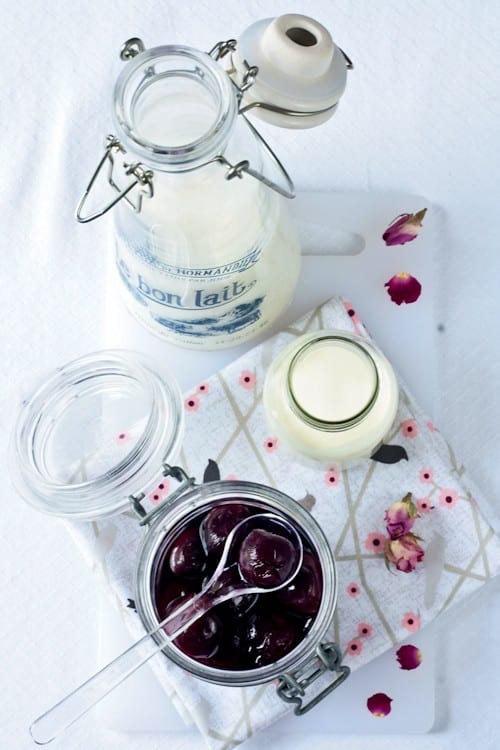
For the ice cream:
1 cups (250ml) heavy cream
1 cup (250ml) whole milk
1 cup (250ml) whole coconut milk
1 cup (200gr) granulated sugar

Prepare the cherries:
Place all the ingredients in a heavy saucepan and bring to a simmer over medium heat. Turn the heat off and let steep one hour (longer for an even intense rose flavor). Remove the rose buds and refrigerate until ready to use.

Prepare the ice cream:
In a large saucepan set over medium low heat, bring the cream, milk, coconut milk and sugar to a simmer, stirring occasionally until the sugar is dissolved. Remove from the heat and let it cool to room temperature. Refrigerate, preferably overnight.
Process the mixture into your ice cream maker according to the manufacturer’s intructions.
Once the ice cream has reached soft serve consistency, pour into a freezable container. With a spatula, swirl in the cherries and a few tablespoons of their liquid. Freeze a couple of hours.
No ice cream maker? No problem, but really it is worth the $50 investment. Pour the cream into a freeze proof container and freeze for a couple of hours. Take it out and whip it with an electric mixer or immersion blender, freeze it again, whip it again….do that four or five times. The mixture won’t be quite the same but pretty darn close.

Ollalieberry Financiers & Toasted Coconut Ice Cream

Olallieberry Financiers


It only took twelve years to admit this but I must say that in spite of the heat and humidity I really love summers here in the South. Yes. I’ve said it. Love them. You might wonder what else is to summer here that would make me forgive the mosquitoes, head bashing heat and stick-to-your-clothes-like-frosting-on-a-cupcake humidity. Well…Thunderstorms! Rain! Afternoon showers! Tea breaks and evening swims!

Olallieberry Financiers


It was not until a recent conversation with my parents that I realized what summer here was like versus what I thought it should be: it’s like back home. Just a tad stronger. Every afternoon around 4pm the skies darken and the rain slowly moves in. Thunder. Lightning. The skies get a thick cloud cover and the house is nothing but shadows. It reminds me so much of the summer months of my childhood that it makes it bearable.

Fresh Figs & Financiers


This weekend was no exception and we gladly took the opportunity to do as much as early as possible and cozy up in the afternoon. That’s the thing to do during summers here, start early and keep going until the rain stops you or the craving for a cold drink and a sit down become too strong. We set up on the dining room table and started working on our respective tasks, facing each other. Looking up once in a while. Bouncing ideas off of each other as they came along. Drawing directions and paths to the life we want to live.

Olallieberry Financiers


We did just that on Saturday in the later part of the afternoon just as the rain was starting to fall against the window and we sat there quietly listening. A new summer ritual. A good cup of French press coffee or a cold glass of milk, a plate of still warm tea cakes or a handful of cookies. I suddenly got a hunkering for the coconut ice cream I had made specially for profiteroles to celebrate our anniversary the next day. Instead of a snack we stayed true to the past 12 years being married and did the opposite of what was planned. We had dessert before dinner.

Olallieberry Financiers & Coconut Ice Cream


Toasted coconut ice cream from David Lebovitz via my friend Jen, financiers made with the olallieberry jam that Anita had given me in Boulder, a plate of fresh figs. The first we’ve had this season.

I like summers here after all…

Olallieberry Financiers


Olallieberry Jam Financiers:

Makes 12

Note: you can substitute any type of jam for the one I used here. You can also use about 3/4 cup of fresh cut fruit or 3/4 cup fresh berries instead.

1 stick (115g) unsalted butter, at room temperature
1 cup (100gr) unsifted powdered sugar
1/2 cup (60gr) ground almonds
1/4 cup (30gr) rice flour
pinch of salt
4 large egg whites
1/2 cup olallieberry jam

Preheat your oven to 375F and position a rack in the center. Lightly butter the inside of 12 financiers molds or muffin tins and place them on a baking sheet. Set aside.
In a medium saucepan set over medium high heat, melt the butter until it turns to a rich hazelnut brown color. Remove from the heat and let it cool for 5 minutes. Strain and reserve.
Mix together the powdered sugar, flour, ground almonds and salt in the bowl of a stand mixer fitted with the paddle attachment. Add the egg whites and mix on low speed until all the ingredients are coming together. Add the brown butter, increase the speed to medium and beat until smooth.
Divide the batter among your molds, drop about 1 to 2 teaspoons of jam in the middles and swirl with the tip of a knife. Bake for about 15 to 20 minutes or until golden brown.

Toasted Coconut Ice Cream, adapted from The Perfect Scoop by David Lebovitz.

1 cup (230gr) dried shredded coconut, preferably unsweetened
1 cup (250ml) whole milk
2 cups (500ml) heavy cream
pinch of salt
5 large egg yolks
1/2 cup (100gr) sugar
1 teaspoon rum

Preheat the oven to 350°F (175°C). Spread the coconut on a baking sheet line with parchment paper and bake for 5 to 8 minutes, stirring frequently to prevent it from burning. Keep a close eye on it as it toasts rather fast and goes from perfect to burnt even faster. Remove from the oven when it is golden brown and let cool completely.
In a large saucepan set over medium high heat, warm the milk heavy cream, salt and add the toasted coconut. Cover, remove from the heat, and let steep at room temperature for 1 hour.
Re-heat the cream mixture over medium heat until hot. In the meantime, whisk the egg yolks and sugar until pale and thick. Slowly pour the cream mixture over the egg yolks, stirring as you do. Whisk well. Place the mixture back into the saucepan over medium and cook until the mixture thickens and coats the back of a spatula. Remove from the heat and pour it through fine mesh strainer set over a large bowl. Press the back of your spoon against the coconut to extract as much liquid and flavor as possible. Add the rum and let cool to room temperature (you can place a piece of plastic wrap and poke holes through it to prevent condensation if you are concerned about leaving things uncovered at your house).
Once cooled, refrigerate the mixture until completely cold (I let mine in the fridge overnight) then freeze in your ice cream machine according to its manufacturer’s instructions.

———————————————————————————–
Props:
– flower bowl: GreenGate
– cupcake liners and paper straws: Bake It Pretty
– plates: Gleena
– green bottle: Stein Mart
– stamped flatware: Monkeys Always Look on etsy
– linen napkin: Jewelweeds on etsy

French Words A Week – Breakfast Edition: Le Petit Dejeuner

Olallieberry Jam


It could have seemed as if I had forgotten the French Word A Week feature lately, right? I have not. Trust me. I did not think as many people cared about it until my inbox started filling up with messages to have it again soon. One of you even sent a "Missing! – French Word A Week. Bring It Back" which made me giggled like crazy. It does not take much to make me giggle as you know but I also did not realize the feature was as much fun for you as it was therapeutic for me. Thank you for that…

During Breakfast


In that regard and to make up for lost time, I am giving you not one but four (4) illustrated words this week (just click on the words to get the pronunciation). More summer homework…darn! I remember summer homework….mine was filled with maths problems. Did it help? Noooooo….but we won’t tell the kids right?! So….

Chocolate Croissant Bribe


If you ever find yourself in France one day and you are wanting to start the day on the right foot, might was well start with breakfast – "petit dejeuner". Do not think about resisting a good "pain au chocolat". But if a "baguette" is more your thing in the morning, find yourself some good "confiture" to spread on it.

Julia Child's French Bread


I am extremely lucky to be in possession of olallieberry preserve thanks to my dear friend Anita from Dessert First who handed me a jar during the Food and Light Workshop in Colorado. We don’t have such berries here so I have been using it judiciously in a couple of different desserts I’ll share with you next week.

Have a great weekend!

Roasted Plum & Creamy Chai Rice Pudding

Roasted Plum & Creamy Flat Rice Pudding


Let’s start with the winner of the Chefs Catalog giveaway, shall we? Congratulations to "misreneer"! Send me your address at mytartelette[at]gmail[dot]com and we’ll get that package on its way to you!

At the end of the Food Photography workshop I taught during Evo 10 in Park City Utah, a new blogger came to me and asked if I ever got tired and cranky from blogging. I tried my best to keep my eyes from popping like UFOs while keeping my enthused answer to normal decibel level. You guessed it, my answer was "Nooooo! Heck no!" Adding that if anything I get cranky not being able to post and not from having to post.

Like the blogger next to you, we both blogged differently. Yet, we both took immense pleasure in what we did. This space is true comfort for me. The food, the feelings, the people, your visits. It’s all pure joy. What I write, photograph, cook or bake. It’s authentic. It’s life with us. It’s not what we expected or wished for sometimes but it is what we have and what we live. It’s ours. It’s also the space I keep free of insurance and bank talks or the dozens of work emails imploding the inbox. It’s a journal.

Plums


A space I define and refine constantly as I define and refine what I do and who I am. It’s authentic. It’s got joys, tears, friends, family. That’s enough emotions not to throw my mortgage into the mix. Yes. We blogged differently but for the same reason. Because we felt comfortable to be ourselves and tell of ourselves in that space we created.

I like slipping into the comfort of this page late at night when the house is asleep. It’s like digging my spoon into that last bite of rice pudding and feeling at peace with all sorts of emotions and feelings. I also let my thoughts be dark and grey. I let myself get upset and weary before I can be ok again. Coming here forces me to put value and words to those emotions and decide which ones are worth sweating over and which ones are better off letting roll off my back.

Making Plum Rice Pudding


As you and I get closer and closer to write and read post #700 I realize that in the end you may read about the small stuff, the little things, the nostalgia and that’s because they make me who I am and give me what I see.

As I was packing for Utah and Colorado a couple of weeks ago (darn summer- stop flying by so fast!), I was trying to use up produce that I knew B. would not touch while I’d be gone. As I mentioned before, cooking is not his things, let alone baking. Eating is. I started thinking about desserts that would evoke comfort for him. The kind he’d want to grab after a long day working outside in the hear followed by a few hours of teaching in the evening. Alright, I confess: desserts that would also make him miss be a little bit…eheheh!

I made shortcakes, filled a container of sliced strawberries and whipped up some cream to go along. He shared those with the neighbors. I made his favorite Southern banana pudding from scratch complete with wafers and chopped praline. He invited his parents over to dig through it (praise from my mother-in-law…hallelujah!). Lastly I made my grandmother’s rice pudding and we shared some that morning before my flight. Every time I looked at the pictures on my laptop, I felt instantly closer to home. The home in our hearts, not my house or the space we live in. That’s changeable. Comfort is where your heart is first.

Chai Spices


One thing my grandma knew was rice pudding. Riz au lait. One thing I know very well is to take her recipe and run with it as the season change or as my emotions flutter. Sometimes I change the spice, from vanilla to chai. Sometimes I take liberties with the flavors and add a slash of rum or a sprinkle of brown sugar. Other times I’ll hide some salted butter caramel right in the middle, or some spiced chocolate ganache. The name may not be all that exciting but the possibilities are closer to sexy than you might think.

This time, I took advantage of a small basket of plums I had just purchased at the farmers market. Tiny, tart and full of flavor. I simply roasted them for a short period of time with a sprinkle of vanilla sugar. For the rice, I used a flattened rice from India that I got while visiting my dear friend Bina. I like this one a lot because it cooks a bit quicker and you can serve it slightly undercooked (to keep more shape) without having it taste raw. I added a pinch of cardamom to the milk I cooked the rice with and voila….one heck of a creamy and comforting dessert topped with some of the best of the season’s bounty.

Roasted Plum & Creamy Flat Rice Pudding


Roasted Plums and Creamy Rice Pudding:

Serves 4-6

For the plums:
1/2 vanilla bean
3 tablespoons sugar (I used sucanat)
pinch of edible lavender
12 small plums, halved and pits removed

For the rice pudding:
1/2 cup (100gr) flattened rice (use arborio if not available)
1 1/2 cups (315ml) whole milk (I used raw)
1/2 cup (60ml) heavy cream
1/4 cup (50gr) sugar
Pinch of salt
1/2 teaspoon ground cinnamon
1/4 teaspoon ground ginger
1/4 teaspoon ground cardamom
1/4 teaspoon ground allspice

chopped pistachios (optional)

Prepare the plums:
Preheat the oven to 400F and position a rack in the middle.
With the tip of a knife, slice the half vanilla bean lengthwise and scrape the seeds into a small dish or ramekin. Add the sugar and mix with your fingertips until the vanilla bean seeds are well distributed.
Place the plums in a baking dish and sprinkle the vanilla sugar and lavender evenly over them. Bake for 20 minutes or until juicy. Let cool.

Prepare the rice pudding:
In a stainer, rinse the rice under cold water for a minute to remove some of its natural starch.
In a medium saucepan set over medium heat, bring the rice, milk, cream, sugar to a simmer. Cook until tender, stirring occasionally for about 20 to 30 minutes. Add the salt and spices, stir briefly and remove from the heat. Let cool for a few minutes and divide the pudding evenly among ramekins. Divide the roasted plums evenly in between the dishes and sprinkle with chopped pistachios if desired.

Food & Light Photography Workshop Recap & a Chefs Catalog Giveaway!

Still Life - Food & Light Workshop

Going around the tables taking some shots. Still life styled by Diane.

It hit me at the Atlanta airport that I was really back on the East Southern side of things Wednesday night. Unlike in Salt Lake City or Denver, you could feel the humidity seeping out through the walls and permeating the air at the gate. A part of me wanted nothing more than to turn around, click my heels and head out West again. The bigger part of me wanted to be home, hug my better half, play with the pups and slowly go through all the emotions and images of the past week.

Food & Light Workshop

The Rembrandt Yard where the workshop was held – look at all that light!
The main reason for my being out West last week was to teach at the Food & Light Photography Workshop that Jen from Use Real Butter had been planning for months. From the moment she asked me to be one of the instructors until the day the workshop began, the excitement of the event was beginning to make my head burst. A HUGE thank you to Jen for organizing with such detail and apparent grace the workshop. From creating the website, downloading all sort of info for attendees (hotels, camera manuals,…) to gathering sponsors and prizes.

Food & Light Workshop

Todd and Diane (left) and Jen (right) sharing their knowledge.

I was honored to be among the instructors with kickbutt Jen and the ever talented Todd and Diane from White On Rice Couple. I was equally honored to be among such a tremendous group of attendees. They were all so enthusiastic to learn, practice, share and help one another, talk with us, ask questions and practice some more. It made the whole two day workshop that much more enjoyable and well, plain awesome.

Food & Light Workshop

Hungry Girl Lynn practicing.

I had done workshops before in which 1 or 2 hours was devoted to hands on practice after a presentation but this time, 2/3 of the workshop was devoted to hands on, time-on-tool practice. Time to really put into play what the instructors had just talked about and as we were circulating from table to table, we could repeat or elaborate what had been shared and discussed before.

Lisa At Work

Lisa working on styling and light bouncing.

The instructors time was divided in such a way that students got the best of everything that we got and boy we did cover a lot! Jen kicked off the workshop with a thorough and interactive presentation on camera basics and fundamentals such as exposure, metering, aperture, shutter speed, ISO. Todd and Diane presented on natural light workflow, lenses and focal lengths. On the second day, Todd and Diane presented half a session on artificial light while I presented the second half on natural light, both addressing how use either or depending on the desired photographic goal. The last session tackled food styling which Diane and I shared with a bonus styling demo to boot.

At The Rembrandt Yard

At the Rembrandt Yard.

Beside the reward of learning and practicing for 2 straight days, Jen scored some neat prized to give out to attendees in different categories. Picking from all the entries posted to the Food and Light Flickr pool was tough! See the list of winners on Jen’s post. Congratulations to all of you guys – everyone did a fabulous job! Watch out for Elena’s son, Ethan…Such a young fella but his creativity and skills are already really strong!

The Kitchen Upstairs - Boulder

The Kitchen Upstairs.

The Kitchen Upstairs

Cocktails and good times.

To celebrate such a strong end to this fabulous workshop, the "break-down crew" (Lisa, Anita, Dana, Annie, Todd, Diane, Jen and Jeremy) headed out to happy hour at The Kitchen Upstairs.

Jen & Lisa

Jen and Lisa.

The Kitchen Upstairs - Boulder

Garlic Fries and Sticky Toffee Pudding.

After hearing rave reviews from Jen for months I was thrilled to finally sit down to good cocktails and good food. The Kitchen did not disappoint, from the lovely details and atmosphere to the wonderfully crafted small plates we shared.

The Kitchen Upstairs - Boulder

Mac N' Cheese enjoyed by Annie.

The Kitchen Upstairs - Boulder

Beets and Olives – so good!

I laughed for a straight two hours…it felt good. I wish I could have stayed to hike with Jen, Jeremy, Todd and Diane the next day but flying back East takes about an entire day and there is much to be taken care of at home these days (trips, work, family, etc…). Jen’s backyard is like my backyard in the Alps. Beautifully breathtaking and a sight I miss everyday.

The Kitchen Upstairs - Boulder

Chocolate Pots de Creme and some pretty stylish water.

No reason to feel left out if you could not attend though. Jen found herself with three extra swagbags at the end of the workshop and decided that we (Jen, Todd and Diane and myself) should put them up for giveaways. So here you go: THREE chances to win one of these awesome bags very generously filled by Chefs Catalog (coincidentally my go-to source for kitchen stuff ever since I move to the US). Each tote is filled with 4 large wooden spoons, 1 silicone spatula, a ceramic peeler, a 6-inch Wusthof bread knife and cutting board set, 3 kitchen towels, 4 stainless steel prep bowls with lids (love those!).

Here are the rules to enter:
– leave a comment on this post by Monday July 5th at midnight Eastern time
– one entry per person (duplicate will be deleted)
– participants must have US shipping addresses
– the winner will be picked at random by my wonderful better half

Don’t forget to increase your odds of winning by entering the two other giveaways on Use Real Butter and White On Rice Couple!

Boulder

In Boulder.

Good luck! I’ll be back to a regular recipe posting and sharing after the holidays.

Have a wonderful 4th of July!


Gluten Free Nutella Doughnuts & A Cookbook Giveaway!

Nutella Doughnuts


I’m in Utah folks! Got in Salt Lake City yesterday afternoon and I’m heading to The Canyons Resort in Park City Utah where the Evo 10 Conference is held this year. To say that I am honored and stoked is putting it mildly. Yesterday as I was watching my inbox implode in between two planes, I just smiled and thought "breathe – take the travel time as a time out". I am looking forward to this week, complete with the workshop in Boulder. Work does pile up when you can’t look! It’s fine though. It’s actually better than fine. It’s impossible to complain when mixing work and play in such beautiful scenery as the mountains of Utah and Colorado.

Nutella Doughnuts


Before I left I treated B. to a couple of special treats and of course stocked the fridge and freezer. When I made these Nutella Doughnuts from Lorna’s cookbook, The Newlywed Kitchen, they almost ended up being dinner. We just could not stop eating them. Pop. Pop. Pop. Oops… Tender, moist, tangy and filled with Nutella….the one thing we truly fight over in the kitchen. If you finish the jar and do not replace it, be ready to face a mini temper tantrum. And not necessarily from me…!

Nutella Doughnuts


Last week I raved about the simplicity of the Parmesan Roasted Asparagus Tomatoes and Eggs I made from her cookbook. Well, let me raved about how spending a little bit of time in front of the stove to fry these babies up was worth it. Ten times that even. The recipe comes together in no time and the size of the doughnuts makes them the perfect little bite to have after dinner or as a treat (but you won’t stop at one, let me tell you that!). The oozing Nutella in the center? Literally the proverbial icing on the cake. Per-fect.

Sour Apples


I love drop doughnuts and the simplicity of Lorna’s recipe makes them so easy to adapt gluten free. If you are afraid of deep drying. Fear no more. The temperature given for the oil is right on for these. They turn into perfect airy pockets with a slight tang coming from the ricotta and lemon zest. Love how the Nutella plays so well with the lemon zest. Just the right touch of it too. They are so good plain too. Filled with some strawberry jam I made last month. I even filled some with compote I made after the neighbors gifted me with a basket full of sour apples.

Nutella Doughnuts


Another successful bite from Lorna’s book! And guess what? Today is your chance to get your hands on a copy to see and taste what I am talking about! That’s right! Lorna is graciously giving away a copy of her book to one of you. All you have to do is leave a comment on this post (anonymous please sign a name) – between today Thursday June 24th and Sunday June 27th, midnight Easter time. A winner will be picked at random from the comment pool by my better half.

Salt Lake City Bloggers Meet-Up


While in Salt Lake City I stayed with Maria and Josh, the team behind Two Peas And Their Pod and we are heading together to the conference, meeting up with Kristen, Katie, Amy and a whole bunch of people I’m thrilled to meet for the first time. Since this morning is pretty much the most quiet time I foresee for the rest of the week, I thought I’d post some snapshots of our "Bloggers Meet Up". I’ll try to post snapshots of the conference, attendees and speakers as I go along.

Salt Lake City Bloggers Meet-Up

Maria and Christie.

Maria organized a little get together for me and Christie from The Table Runner graciously hosted it at her beautiful home. We spent hours talking about life, blogging, food, kids and so much more. Made me go to bed with a full heart and a skip in my step. Thank you ladies for your generosity!

Salt Lake City Bloggers Meet-Up

Group Shot

From left to right: Becky at Project Domestication, Barbara from Barbara Bakes, Maria from Two Peas and Their Pod, Brooke from Cheeky Kitchen, Holly from Phemomenon with baby Kayla, Bonnie from City Home Country Home, Dara from Cookin' Canuck, Becky from The Vintage Mixer and Chrisie from The Table Runner up front.

Salt Lake City Bloggers Meet-Up

Dara.

Salt Lake City Bloggers Meet-Up

Becky

Salt Lake City Bloggers Meet-Up

Jaime from Sophistimom makes the best Italian sodas….

Good luck in Lorna’s cookbook giveaway!

Nutella Doughnuts


Nutella Doughnuts, courtesy and copyright Lorna Yee from "The Newlywed Kitchen" cookbook.

Makes about 14 doughnuts

Note: to adapt these gluten free, I replace the flour with 1/2 cup superfine sweet rice flour, 1/4 millet, 1/4 cup sorghum flour, and added 1/4 teaspoon xanthan gum for a smooth dough.

3 large eggs
1/4 cup sugar
8 ounces whole-milk ricotta
1/2 teaspoon kosher salt
1 teaspoon vanilla extract
1 cup all-purpose flour
2 teaspoons baking powder
Canola, vegetable, or peanut oil for frying
Powdered sugar for dusting doughnuts
1 cup Nutella

In a large mixing bowl, stir together the eggs, sugar, ricotta, salt, and vanilla extract. Add the flour and baking powder, and mix until just combined.

Heat 3 inches of the oil in a deep pot until it registers 375 degrees F on a deep-fat thermometer. Drop a tablespoon of batter into the oil and cook for about 3 minutes on one side, and 2 minutes on the other side. (Do not make the doughnuts much bigger, as the outside will brown too quickly and they won’t cook through.) Don’t overcrowd the pot–you will probably need to fry the doughnuts in three batches. Cut one doughnut open to make sure it’s cooked through before removing the rest of the batch from the oil. When the doughnuts are cooked, scoop them out and allow them to drain on paper towels. Repeat with remaining batter.

Dust the doughnuts with powdered sugar and pipe Nutella into the center of each one. These doughnuts are meant to be devoured warm out of the fryer, so make them just before you’re both ready to eat them.

Variation: Add 1 1/2 teaspoons grated lemon or orange zest to the dough and fill the doughnuts with your favorite jelly or lemon curd.

Parmesan Roasted Asparagus, Tomatoes and Eggs

Parmesan-Roasted Asparagus, Tomatoes and Eggs


I have a friend. Her name is Lorna. She writes The Cookbook Chronicles. She is drop dead gorgeous. Kindness and intelligence dance with every word she says. She is generous and humble. Humor and good disposition seem to like her. I have no idea if she is high or low maintenance but if she is the latter, I want to know how she does it. She’s got taste and she’s got gumption. And she wrote a book. A quirky, funky, well written, beautifully photographed cookbook, The Newlywed Kitchen. No wonder Henri asked her out and then asked for her hand in marriage. Smart man.

Lorna and Henri are newlyweds. They both love food. This is not a loose statement. They met on a food forum. In Lorna’s words "Our relationship was founded on our mutual love of food and our desire to nourish one another’s stomachs as well as our spirits." It could sound superficial and barely enough to hold a couple together but as she chronicled the making and writing of the book, you could tell that they were like the vast majority of couples. They love to share with others, spend time learning and give back what they know. Lorna did it with "The Newlywed Kitchen".

Roasted Asparagus & Tomato From The Newlywed Kitchen Cookbook


I am not a newlywed and yet I, we, thoroughly enjoyed the book. It does not pretend to be the "essential guide to cooking as a couple", instead it focuses on clean, simple recipes that can be at the foundation of any new couple repertoire. Narratives of other well known couples are dispersed throughout the book and add a charming and quaint little thing to it. I caught myself chuckling along as I was reading with that familiar feeling of "been there done that" of kitchen mishaps and victories. Pictures of newlyweds throughout the book are a little too quaint at times but they’re here to illustrate a point: there is plenty in this book to bring people together in many different ways.

Some of the recipes are kicked up classics like the "Four Cheese Mac-and-Cheese", the "Chicken Pot Pie with Cheddar Thyme Crust". Some are best saved for your first dinner cooking for the in-laws, "Holiday Rib Roast Wtih Thyme Gravy", "Chicken Piccata with Mushrooms and Leeks". Others are made for lazy Sunday mornings in newlywed Bliss like the "Topsy Turvy Apple French Toast", the "Smoked Salmon Frittata". And who would not want to cozy up with their better half with some "Chocolate Mudslide Cookies", "Nutella Doughnuts" or some "Lemon Sour Cream Pound Cake"?

I just made myself hungry…

Roasted Asparagus & Tomato From The Newlywed Kitchen Cookbook


My better half does not cook. He barely boils water. We have shared custody of the grill. I don’t even know if he’s any good at it, he’s just not interested. And as he says "I married a chef, why would I even consider crossing the line? You don’t come in the garage and bleed the break of the MG now do you?". Touche. So you might wonder how this cookbook fared with us…

It did exactly what it was intended to do for a couple like us regarding food: I’d hold the book in one hand, pencil in the other and ask him whether "Grandma’s Italian Meatballs" sounded good for dinner or would he rather have the "Fall Apart Pot Roast"? Should I take the "Red Velvet Cake" or the "Strawberry Rhubarb Pie" to a dinner party with friends? My man may not cook or enjoy cooking but he loves to eat and knows his food, making it a pleasure and never a chore for me to cook everyday.

Tomato Heaven


Finding a recipe to illustrate this review was a no brainer (I picked two actually and will write about the other one next week – with a little surprise you guys reading). The "Parmesan Roasted Asparagus, Tomatoes and Eggs" is exactly the kind of dish I like to fix us for lunch on Saturdays when we come back from the market or on Sundays when we set out to "not have a schedule". It’s simple, it’s fresh, it comes together fast and needs nothing but maybe a glass of wine and a piece of bread.

It’s the kind of meal we enjoy as a couple. It fits us and it felt even more special when we sat down to ingredients we had just picked up at the market from people who loved food as much as we do.

Let’s make lunch this week "French Word A Week" feature: "dejeuner". One of our favorite activity and time of the day. (click on the word to hear the pronunciation).

Check out Jen at Use Real Butter making Grandma’s Italian Meatballs from Lorna’s book. I also love this review of the book from Becky at Chef Reinvented (and don’t forget to click on the video link – adorable).

Roasted Asparagus & Tomato From The Newlywed Kitchen Cookbook


Parmesan Roasted Asparagus, Tomatoes and Eggs, courtesy and copyright Lorna Yee for "The Newlywed Kitchen"

Serves 2

1 pound asparagus
1 cup grape or cherry tomatoes
3 tablespoons olive oil, divided
1/4 cup grated Parmesan or pecorino (I used shredded)
1/2 teaspoon salt
1/2 teaspoon freshly grounded black pepper
2 large eggs
3 spoonfuls pesto (optional)

Preheat the oven to 425F.
Wash the asparagus. Break the bottom stems off and discard. Toss the asparagus spears and tomatoes in 2 tablespoons of the olive oil, then place them on a parchment paper or Silpat lined baking sheet. Sprinkle with the Parmesan, salt and pepper. Roast the vegetables for 12=14 minutes, or until tender and cooked through..
Meanwhile, fry the two eggs in the remaining oil, seasoning them with salt and pepper to taste. Place an egg in each portion of the cooked vegetable and top with a dab of pesto if desired.

Disclosure: I received a free copy from The Newlywed Kitchen from Sasquatch Books.

Celebrating A Birthday With Lemon Vanilla Cupcakes

Lemon Vanilla Cupcakes


I don’t make cupcakes very often. Rarely. As in four times a year maybe. I have nothing against cupcakes. I am as picky with them as I am about any small bite I make, bake or eat. They’d better have a higher interestingness to frosting ratio for me to pay attention. In about everything I do, I go straight for the good stuff. I skip the fluff (rhyming unintentional) but today is special. It’s my dad’s birthday!

Joyeux Anniversaire mon p’tit papa!

I wasn’t going to say anything or blog about it but I know I have written Mother’s Day posts and birthday posts to my maman before, made macarons and cakes for my brother, shared a tear with you reminiscing about my grandparents but never about my father. Time to fix this wouldn’t you say? Note to my family: don’t expect a post per family member’s birthday or it would be the only thing people would read. I’d rather make lemon curd instead, ehehe.

Lemon Curd


My father. The unsung hero of this blog seems like! Without diving into the melodramatic, allow me to put down in writing a few things about him. These cupcakes made me think of him in many different ways. They are soft like his hugs. Tangy like his sense of humor. Creamy like…well if I say love, it sounds tacky, right? Well then, be it. Now that years have softened him. Or he’s always been a softie but spent a great deal of effort hiding it? I don’t know. All I know is that he deserves to be in the spotlight for a little while. If only on his daughter’s site.

To know my father, Jacques, is a gift I hope many more people would experience. To say that I am 50% my father and 50% my mother is no understatement. I am as reserved as I am public. I am as righteous as I am mischevious. I am as poised as I am exuberant. I am as leveled as I am dramatic (my dad being the first of all these adjectives).

Lemon Vanilla Cupcakes


My father lost a lot in his life. He’s also gained the never ending respect of his family by the way he’s always conducted himself. I could give you a few very sad sad stories to illustrate this point but like him I’d rather look on the brighter side of things so here goes the moment I realized at 6 years old that my dad would always be a "put your money where your mouth is" kind of guy. That story that makes us laugh a great deal now even if I get red cheeks every time it goes around.

I call it "the day I got (justifiably) whipped back into shape for misbehaving".

One evening my parents had an important dinner on Base (my father is a General in L’Armee de L’Air), my brother Thierry was put on babysitting duty of my brother Arnaud and myself. Everything was just dandy until I thought it’d be hilarious to throw peas across the table with my spoon, catapult style. My brothers got quiet. My father looked at me straight in the eyes and said "you do that one more time and you will get spanked. Bare bottom." For my father to say that, you know I had crossed some major line. I looked back as straight as I could hold it, lifted my fully pea-loaded spoon and catapulted them across the table.

Lemon Vanilla Cupcakes


Silence fell upon the room. My brothers were looking at me like as if I was a green alien with red antennas. Without flinching my dad commanded me to come see him after I was done with my dinner. Going up the stairs to meet my fate felt like the 12 steps up to my room suddenly were 120. Five minutes later, I was sporting my father’s hands neatly and naturally tatooed on my derriere. The one and only time this would ever happen.

However difficult it was for him (and he told me so years later), he was right. We both had to own it. He did gain my respect and my trust forever. Different times, different ways. Let me end by saying that this blog is not the place to have a "how to raise your child, slapping-no slapping" argument. This is just a story of why every time I see parents counting to 3 and then 3 more I think about that day almost 30 years ago. Not sure it would have worked the same with my brother though.

Note to my dad: it had the desired effect but no need to slap me to get your point across anymore. Bringing me chocolate will, ahaha!

Lemon Vanilla Cupcakes


My father is one heck of a man. He’s resilient and patient. He wrote a novel. He paints beautiful sceneries that my mom frames. He’s patient. Yes, I know. I’ve said it just a second ago but that’s because I debited a lot of my "father’s patience" credit this past year without collateral. He did not say a word and let me find my way and establish myself in my work. I hope that being too busy to call as promptly as before is a good indicator that I am paying him back rightfully. I hope so.

I love you Papa! Hope you spend the rest of the week celebrating, you deserve it.

Lemon Vanilla Cupcakes


Cupcake liners from Bake It Pretty.

Lemon Vanilla Cupcakes:

Makes 24

Note: for non gluten free readers, replace the sweet rice, millet, sorghum flours and cornstarch with 3 cups all purpose flour. Omit the xanthan gum.
I use sucanat for the lemon curd which gives it a bit of a molasses taste and a darker color but regular sugar works the same.

For the cupcakes (adapted from Thomas Keller’s Ad Hoc At Home):
1 cup superfine sweet rice flour
1 cup millet flour
1/2 cup sorghum flour
1/2 cup cornstarch
1/2 teaspoon xanthan gum
2 teaspoons baking powder
1/4 teaspoon salt
6 tablespoons unsalted butter, at room temperature
6 tablespoons coconut oil (solid stage preferably)
2 1/2 cups sugar, divided
1 teaspoon vanilla extract
1 1/4 cups milk
6 egg whites (use the yolks in the buttercream)

For the lemon curd:
zest of 2 lemons
1/2 cup (125ml) lemon juice
1/4 cup sucanat (or sugar)
1 egg + 1 egg yolk
4 tablespoons unsalted butter, at room temperature

For the buttercream:
6 egg yolks
1 cup sugar
1/2 cup water
3 sticks unsalted butter, at room temperature
1/2 vanilla bean

Prepare the cupcakes:
Preheat the oven to 350F. Lightly butter 24 cupcake liners.
Sift together all the flours, cornstarch, gum, baking powder and salt. Reserve.
In a stand mixer fitted with the paddle attachment, beat the butter, coconut oil and 1 cup sugar at medium speed until pale and thick. Add the vanilla, then the dry ingredients in 3 additions, alternating with the milk. Transfer the batter to a separate bowl and wash your stand mixer bowl very well.
In that clean bowl, whip the egg whites to a foam at medium speed. Increase the speed and slowly add the remaining 1 1/2 cups sugar, 1/4 cup at a time, until you get a glossy and firm meringue with stiff peaks.
Fold 1/3 of the whites into the flour batter to lighten it and then fold in the rest carefully not to deflate the meringue completely.
Divide in between the prepared cupcake liners and bake for 20 minutes.
Let them cool completely. In the meantime, prepare the curd and buttercream.

Prepare the lemon curd:
In a heavy medium saucepan, stir together the lemon zest, juice and sugar and bring to a simmer over medium heat. In a small bowl, beat the egg and egg yolk to break them up. Beat some of the lemon mixture into the eggs to temper. Scrape the mixture back into the saucepan and cook stirring constantly until it thickens up, about 5 minutes. Remove the curd from the heat, let cool five minutes then whisk in the butter slowly, one tablespoon at a time. Let cool completely before using.

Prepare the buttercream:
Place the yolks in a stand mixer, fitted with the whisk attachment.
Bring the sugar and water to 238F in a medium saucepan set over high heat. Slowly pour the hot syrup over the egg yolks and continue to whisk until cold. Change to the paddle attachment and beat in the butter, one tablespoon at a time. Split the vanilla bean open and scrape the seeds out. Add to the butter mixture. Continue to beat for a few seconds until completely smooth.

To assemble:
With a pairing knife or the large opening of decorating pastry tip cut a whole in the center of the cupcakes. Fill with lemon curd and top the hole back with the cupake piece you just cut. Frost as you like either with a straight or star tip or just by "spatulating" some buttercream on top.

Grilled Peaches, Poached Cherries and Vanilla Bean Ice Cream

Grilled Peaches Poached Cherries & Fresh Vanilla Bean Ice Cream


B. jokes that every four years, he loses me to the World Cup. I smile and add "and the rugby Six Nations Championship, the Tour de France and the Formula One races throughout the year. Let’s not forget the 24 hours of Le Mans". That’s the environment I was raised in. I grew up with Platini, Maradona, Sella, Camberabero, Prost, Schumacher, Fittipaldi, Bernard Hinault, Laurent Fignon. All year long. All these years.

And yet no one in my family actually played a sport past 16 years old! That is unless you consider four or five- hour long dinners a sport, which my husband happens to do, especially after many a Sunday dinners shared back home. Competitive longest meals followed by competitive moonshine. My uncle Jacques is still reigning supreme in the "moonshine so strong it will bleach your coffee cup" department.

Poached Cherries & Grilled Peaches


I have mentioned Sundays in passing with my grandmother’s apricot tart but they were much more than that. They usually started with a trip to the market behind our house where my grandmother would get tiny grey shrimp and peppery radishes. Getting flowers, setting up the table, cutting saucisson for the aperitif. Waiting for everyone to finally start lunch around 12.30pm and linger all afternoon in between the TV room and the dessert plates. Coffee, petits fours, chocolates. Heaven.

Desserts were most often kept very simple with a big bowl of fruit salad. Some cookies. Some ice cream. Came summer, the table was graced with an abundance of deep dark cherries and juicy peaches. Two of my favorite summer fruits.

Vanilla Bean Ice Cream, Peaches, Cherries


Perfect French Word A Week opportunity if you ask me. And that’s two words to boot.
If you ever travel to the South of France, they will quickly become crucial to know as they are everywhere in those parts. Perfectly kissed by the Provencal sun.
Click on the words Peche (click on word for the pronunciation).

When sports start to tie up the little bit of free time I have, especially in the summer time, I’d better have something quick and easy ready for us, whether we dine alone or get together with friends. I have a strong affinity for ice cream paired with fresh fruits when warmer and sunnier days roll around and things happen a lot more in a impromptu manner.

Cherries - Cut Peaches


If they are perfectly juicy, ripe and a bit tangy, then I am in heaven. Sometimes, dessert needs to remain this easy. Sometimes, it needs a little pimping out and it gets even better. Over the years, I have become completely addicted to grilling stone fruits and serving them with fresh yogurt, fresh cheese or ice cream. The combo is just brilliant. When it comes to cherries, B. is not a big fan unless I poach them with honey until soft and tender.

Such a simple combination and so easy to put together with friends around the barbecue one summer evening. Homemade vanilla bean ice cream, grilled peaches and warm juicy poached cherries. Next time I think I’ll pair lavender ice cream and grilled apricot. Non?

When I combined the two the other day, it got me a two-day free pass to not have to walk the dogs during a World Cup game. I took it. Right now, it’s better than a free laundry pass to me, eheheh!

Grilled Peaches Poached Cherries & Fresh Vanilla Bean Ice Cream


So…what is your secret culinary weapon to earn yourself some "house points"?

Before I forget: Thank you Mom for the pretty plates from Asya at www.gleena.com for my birthday! They arrived still warm from the kiln. Kidding. Just about.

Grilled Peaches, Poached Cherries and Vanilla Bean Ice Cream:

Serves 6-8

Notes: once the ice cream is set, everything else comes together in less than 20-30 minutes. You can also start with the cherries and let them cool while you prepare the peaches.

For the ice cream:
4 egg yolks
1 cup (100gr) + 2 tablespoons (25gr) sugar
1 cup (250ml) whole milk
1 cup (250ml) heavy cream
1 vanilla bean, split open and seeded

In a large bowl, whisk the egg yolks and one cup of sugar until pale and thick. In a saucepan set over medium heat, bring the milk, cream and vanilla bean to a simmer, without letting it come to a full boil. Slowly pour the hot cream over the egg yolks mixture while whisking to temper the egg yolks. Pour the whole mixture back into the saucepan and cook over low heat, stirring constantly, until the cream coats the back of spoon. It should register 170F on a candy thermometer. At this point you have made a custard sauce, also known as "creme anglaise". Let cool completely, strain and refrigerate until cold.
Once the custard is cold, process it according to your ice cream maker manufacturer’s instructions and freeze for 2 hours or more.

For the fruits:
4 peaches (preferably not completely ripe so they don’t disintegrate)
1 to 1/2 cups cherries
1/4 cup honey
1/4 cup orange juice

Prepare the peaches:
Wash them thoroughly but do not peel them. Cut them in half and remove the pit. Preheat the grill to medium-high heat and lightly oil the grill grate. Place the peaches cut side down on the prepared grate, and grill for about 5 minute. Remove and set aside.

Prepare the cherries:
Wash them thoroughly, cut them in half and remove the pits with the tip of a sharp knife. Place them in a large saucepan with the honey and orange juice over medium heat and cook for about 10 minutes until soft. Remove from the heat and let cool a bit. Too warm and it will melt the ice cream way too fast.

To assemble, simply layer the ice cream and the fruits in bowls, cups and ramekins.

Fresh Berries Tartelettes

Fresh Berries Tarts


I love that my mother stopped asking me about the weather a month ago. My answers were fast turning into "hotter" "sticky crazy humid" "yuck". I could complain about it until the cows come home. I try not to but sometimes it just feels good to vent it out loud. Especially if you’re in line somewhere. Then it’s instant validation that you’re not exaggerating. It really feels sticky as glue out there.

Except today. Today was one of those days you just want to hug. Like Lucy hugs the snow. I wanted to hug today. It looks cuter with a toddler than a 35 year old though. But heck, if Jen is willing to give it a go during the Food And Light Photo workshop this month, maybe we can do a little "Helen hugging the gorgeous Colorado" weather photo shoot. Nah….it still is not as endearing as little Lu.

100% Sweet


You could think that now would be the time we only eat ice cream or frozen treats. And we do. Some. Not only and not always. The only things keeping us cool are the shades and a quick dip into the ocean. As far as desserts go, we don’t really change our eating habits that much beside more salads instead of cooked vegetables and more sorbets than usual. Honeydew and peach sorbets are currently "curing" in the freezer actually.

With B’s college friends visiting these past few days I made sure that we had plenty of food to put on the grill, cold drinks to be mixed and lots of homemade ice cream to dig our spoons into. Turns out, the first thing they asked me to make was some tartelettes. Go figure. They’ve known my nickname upon ten minutes of meeting me 10 years ago.

Fresh Berries Tarts


We are extremely lucky to have bushes upon bushes of wild blackberries in the neighborhood and I seem to be the only one interested in picking them. One morning, I took my sweet time and picked about three cups worth. We ate some with creme fraiche one morning, they were sweet and juicy but remembering all the scratches I got and spiders I met on my picking expedition, I decided to freeze the precious blackberry loot.

Fresh Berries Tarts


Dear friends call for uncorking the bubbly, busting out the pretty plates and using said precious berries in simple and fragrant tartelettes.

This is pretty much my go-to recipe for fresh fruit tarts. The dough is really easy to come together and is sturdy enough to give just the right amount of crunch. I chose a mix of blackberries and raspberries from the market but you could make these with any fruit that is in season. The trick, what sets them apart, comes from the 20 minutes that the fruit spends marinating in a fragrant herb sugar.

Baking Mixed Berry Tarts


Yep. That’s my little secret: I simply rub some sugar with one of the herbs growing in the garden for a minute and let the fruit steep in it. If it’s just us, I won’t remove the herbs at all but for guests, I’ll usually strain the sugar before sprinkling it on the berries. Right now I am on a lemon thyme or lemon balm kick but mint, lemon verbana, chamomille work quite well.

Such a simple thing to do and yet it takes the tarts from good to intriguing. Like adding another layer of goodness. One simple step. I hope you will give it a try and let your imagination or your garden lead you to discover new flavor combinations.

Fresh Berries Tarts


Fresh Berries Tartelettes:

Makes four to six 4-inch tarts

Notes: if you are not baking gluten free, replace the rice, millet, sorghum flours and cornstarch with 1.5 cups of all purpose flour and omit the xanthan gum.

I use this flour combination the most because 1/ these are the least expensive gluten free flours out there and like most of us who bake a lot, I have to pay a close eye on the budget and 2/ because their flavors combined are mild enough that non gluten free folks are not taken aback by the taste or the texture.

If you choose to make one 9-inch tart with this, you might want to double up on the berries and add more sugar to taste.

I used a combination of butter and leaf lard (more info on this here) but feel free to use all butter or half shortening – half butter which keeps the crust nice and flaky. Lard also has less saturated fat than butter.

For the crust:
5 tablespoons (70gr) unsalted butter, at room temperature (I used half butter and half leaf lard I got at the market this time)
3 egg yolks
pinch salt
1/2 cup (80gr) superfine sweet white rice flour
1/2 cup (60gr) millet flour
1/4 cup (30gr) sorghum flour
1/4 cup (40gr) corn starch (or tapioca flour)
1/2 teaspoon xanthan gum
2 tablespoons to 1/4 cup cold milk

For the filling:
1 pint blackberries
1 pint raspberries
1/2 cup sugar
1 chopped tablespoon lemon thyme (or your favorite herb)

Prepare the crust:
In a mixer, whip the butter on medium speed until light and airy. Add the egg yolks, one at a time and beating well after each addition. Mix until incorporated. Add the salt, and all the different flours, and the xantham gum and mix briefly. Add enough milk to moisten it. Dump the whole mixture onto a lightly floured (use more rice flour) board and gather the dough into a smooth ball. Flatten the dough into a disk, wrap it in plastic wrap and refrigerate for an hour.
Preheat oven to 350F and position a rack in the center.
When the dough is nice and cold, roll it out on a lightly floured board or in between two sheets of plastic to fit your prefered pie pan. If the dough tears while you roll or/and transfer into the pan, just patch it with your fingertips. Line the dough with a piece of parchment paper, fill with pie weights or dy beans and par bake for 10-15 minutes until almost completely baked. Remove the weights and parchment paper. At this point you can refrigerate the baked crust for up to 3 days before using. Roll some extra dough to form lattice pattern on top if desired. You can also freeze the extra raw dough for up to three months.

For the filling:
Place the berries in a non reactive bowl. Rub the sugar and thyme together and sprinkle over the fruit. Gently mix with a spatula. Let the fruit marinate for about 20 minutes.

Assemble:
Divide the berries among the tart shells, top with lattice if desired and bake 20 minutes. Let the tarts cool completely before eating. Depending on the water content in the fruits, some may release more juice than others so be aware when you eat…it might drip.

———————————————————————————–

Tartelettes Aux Fruits Rouges:

Pour 4 a 6 tartelettes

Pour la pate:
70gr beurre mou, non sale (j’ai utilise moitie beurre et moitie panne)
3 jaunes d’oeuf
pincee de sel
80gr farine de riz
60gr farine de millet
30gr farine de sorghum
40gr de maizena
(ou de 210gr de farine blanche)
1/2 cc de gomme de xanthan
2 a 4 cc de lait

Pour la garniture:
215 gr de mures
215 gr de framboises
100 gr de sucre
1 cc de thym citron

Preparer la pate:
Dans le bol d’un mixer, battez le beurre pendant 1 minute. Ajoutez les jaunes d’oeufs un a un, tout en melangeant bien apres chaque jaune. Ajoutez le sel et les farines sans gluten, le sel et la gomme de xantham. Ajoutez assez de lait pour humidifier la pate. Melangez brievement et verzes le contenu sur un plan de travail. Ramassez en boule et metter au refrigerateur pendant une heure.
Prechauffez le four a 180C et positionnez une plaque au milieu.
Etalez la pate sur un plan de travail legerement farine (farine sans gluten de preference), ou entre deux feuilles de papier sulfurise. Foncez en un plat a tarte, mettre une feuille de papier sulfurise dans le fond, et des pois/riz. Faire pre-cuire 10-15 minutes. Sortez la tarte du four et laissez refroidir. Roulez des bandes supplementaires de pate pour faire le motif du dessous si desire.

Pour la garniture:
Placer les fruits dans un bol non reactif. Melanger du bout des doigt le sucre avec le thym citron. Verser en pluie sur les fruits et melanger delicatement avec une spatule. Laizzer macerer 20 minutes.

Assembler:
Repartir les fruits rouges au fond des tartes, ajoutez les bandes de pate si desire et cuire 20 minutes at 180C.