
Monatsarchive: May 2009

Cherry, Rose and Coconut Ice Cream

Rose, Cherry And Coconut Ice Cream


Before I start waxing poetic about this delicious Cherry, Rose and Coconut Ice Cream, it is high time I announced the winner of Michel Roux’s Pastry picked at random by my better half: congratulations Sadiya! If my memories serves me right from an email baking question last year, the book is going all the way to Bahrain!

I meant to post this much earlier than today but it has been a very strange week, complete with a computer virus in the middle of it. I think my funky little computer is back up and running correctly. With no one at McAfee, Gateway, Microsoft, Comcast able to help us out unless we forked $100, we blindly relied on internet forums to find the solution. If you are going to go into your computer without really knowing what you are doing, I strongly suggest having this Cherry, Rose and Coconut Ice Cream nearby. Made everything less stressful. Fun even. In a geeky sort of way.

The end of the intructions to our problem read "Now restart your computer. The problem should be fixed". Suspended to this line as if we were flipping the last page of a murder mystery book, we starred at the screen with our spoons up the air, ice cream lingering on our tongues. Barely breathing. Finally a huge sigh of relief came over us and we released that one bite down our bellies. "Sweet!" was uttered by both and I know we meant a lot more by it than just getting the computer running again.

Cherry-Rose and Coconut Ice Cream


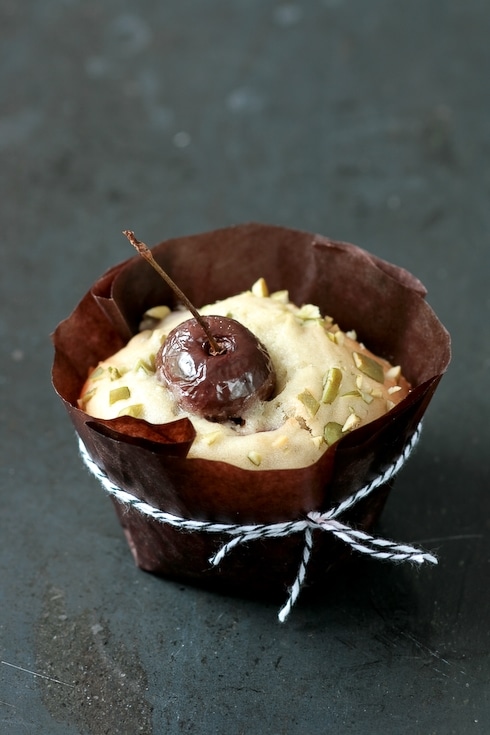
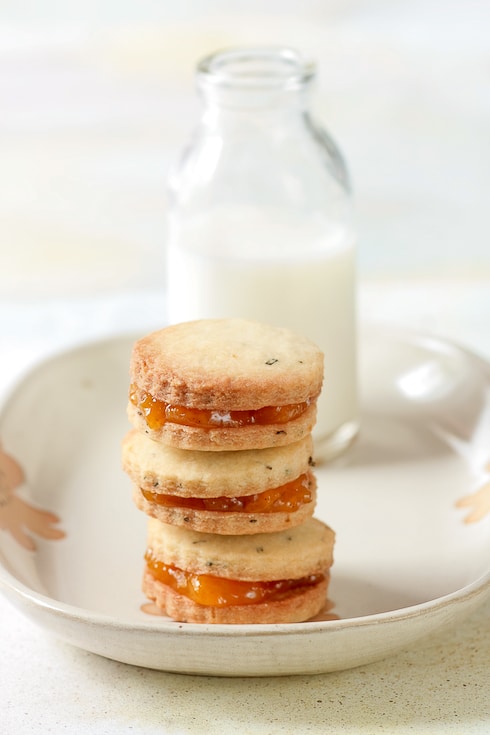
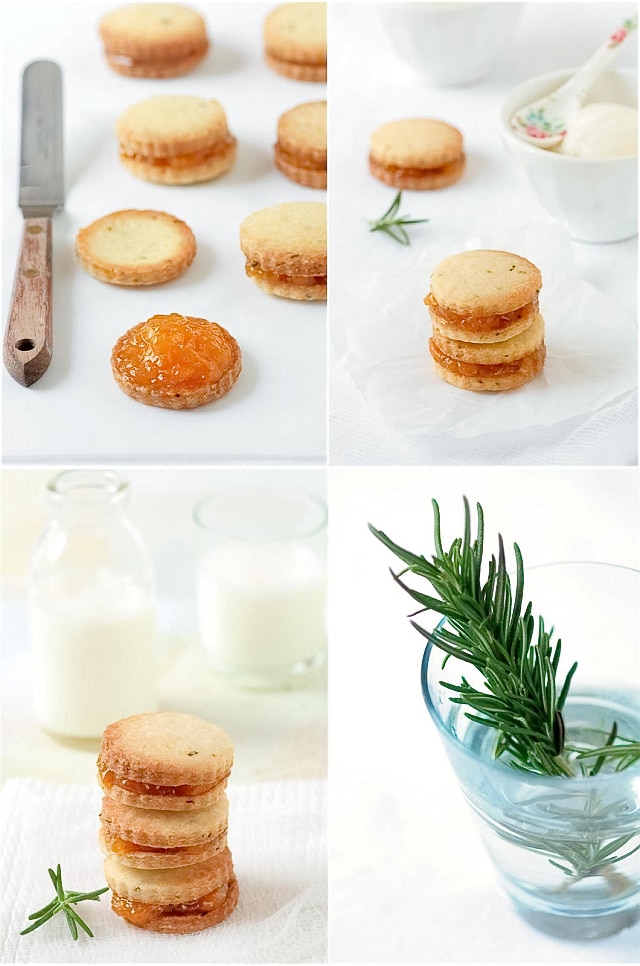
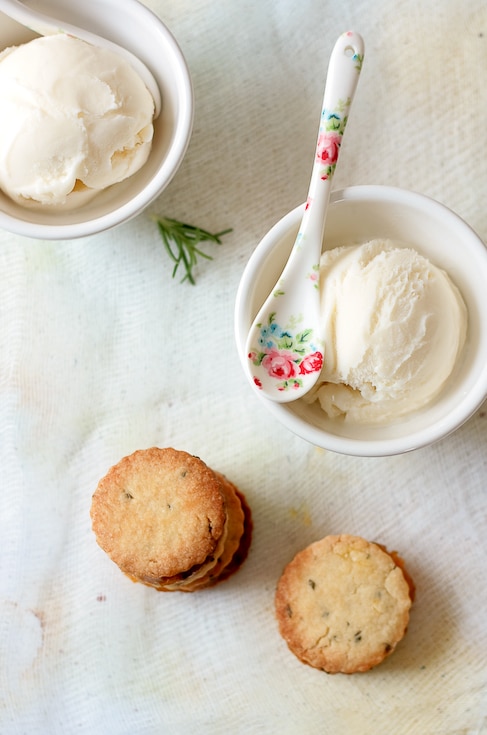
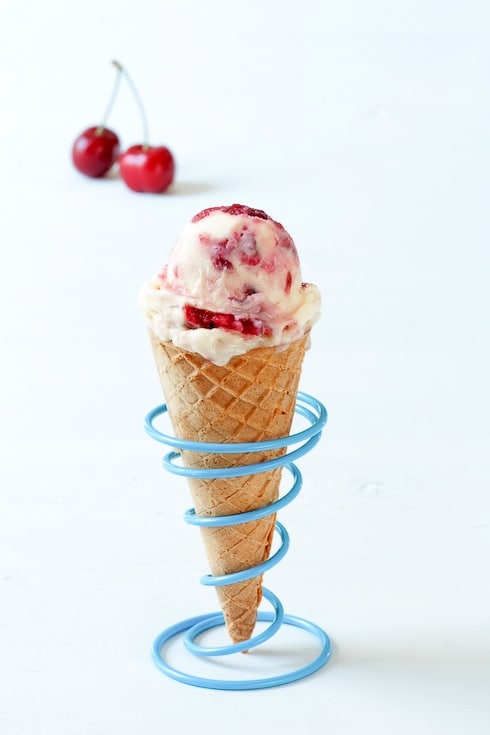
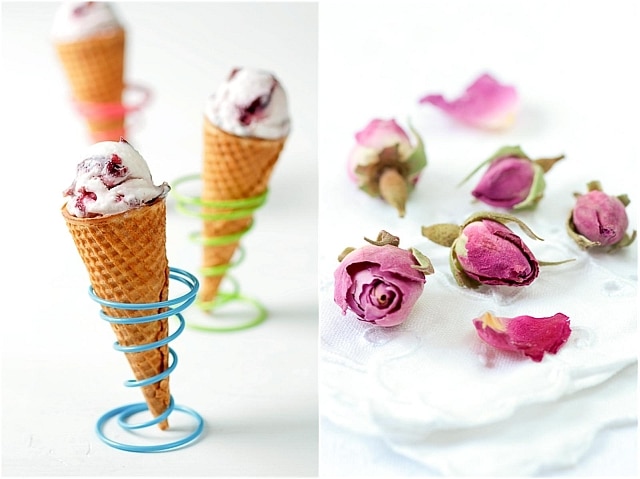
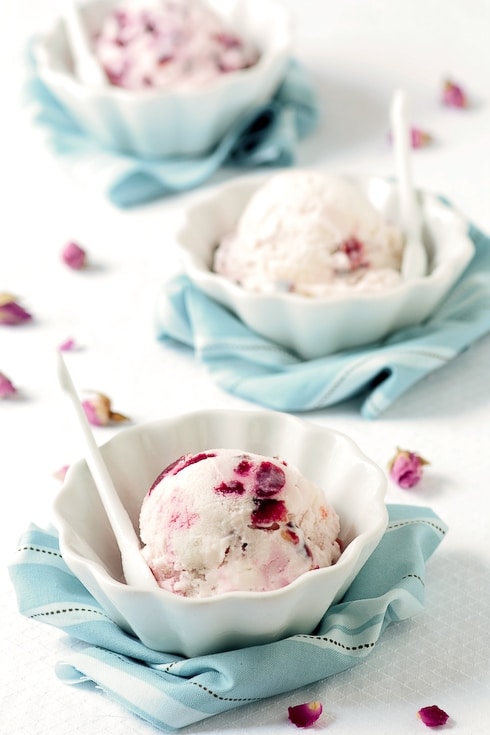
Life with a scoop of this ice cream becomes smooth and comforting. The scent of dried rose buds infusing coconut milk and cherries is intoxicating and invigorating all at once.

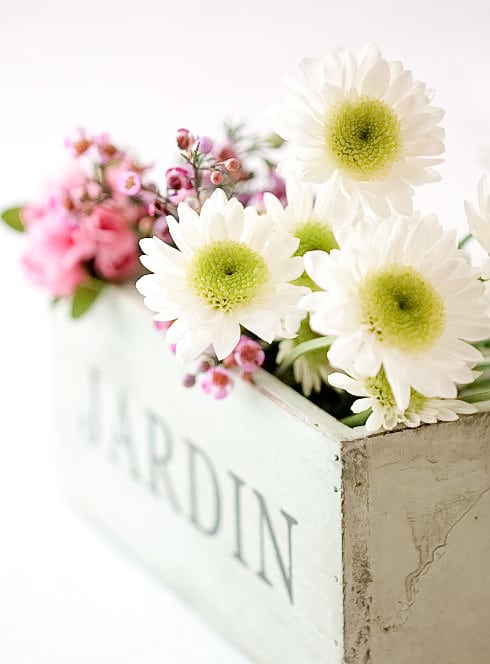
The other day at the store, I was fiddling with the bulk teas, dried chamomille flowers and dried rose buds to make my own concoction when I realized that rose and cherries were quite lovely together. How did my thought process get to associate those together with cream, coconut milk and ice cream, I do not know. Actually I partially do: having several containers with "un fond de ", or a wee bit of something left over (and a strong dislike for waste).

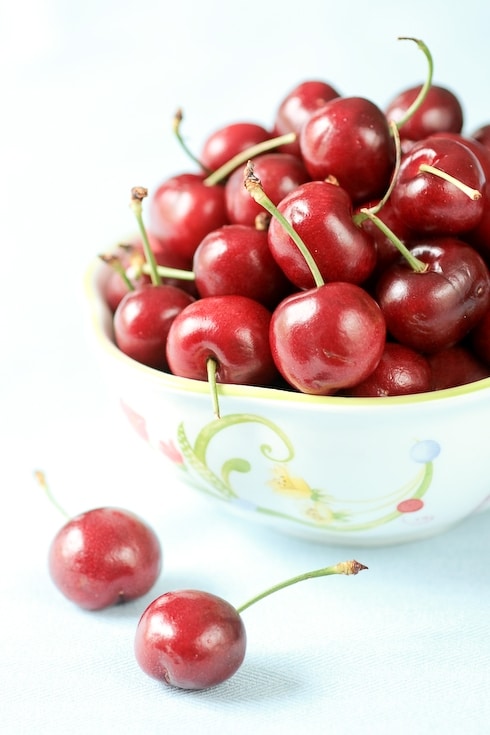
I am not a great fan of rose essence or rose water which I find give me slight headaches, unless toned down by surrounding flavors. But I had a handfull of cherries and coconut milk left from a couple of previous desserts and set out to make a simple ice cream with all three ingredients.

I love custard base ice creams, but I find myself drawn to the most simple flavors of milk and cream when dealing with delicate flavors such as rose, herbs and spices as I find the scents come forth better, clearer.

Cherry-Rose and Coconut Ice Cream


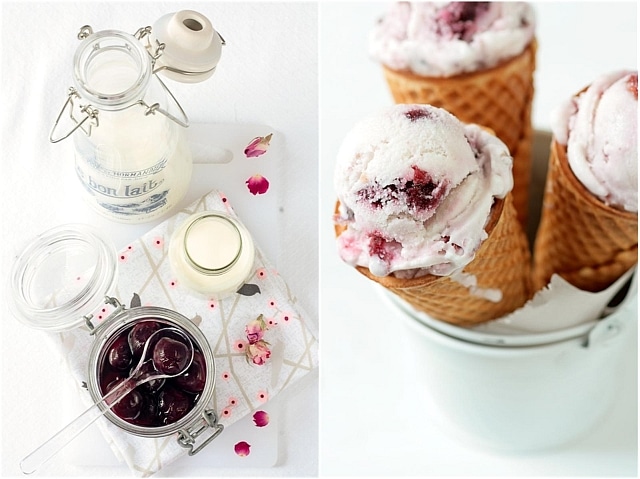
Such a simple process and such wonderful results! I cooked the cherries with a little sugar, water and a few dried rose buds then let them sit to infuse for about an hour before removing the rose buds. In the meantime I prepared the ice cream base by heating up some coconut milk, whole milk and heavy cream and sugar. After an overnight stay in the fridge, I processed the ice cream and added the cherries and some of their syrup towards the end. I couldn’t help but dig into the soft ice cream at this point and felt all happy at the prospect of how delicious it would be after another to hours in the freezer. Homemade ice cream can’t be rushed but the results are so rewarding that you forget about the process as you scoop.

Cherry-Rose and Coconut Ice Cream


One year ago: A Citrus Sugar High Friday Round Up.
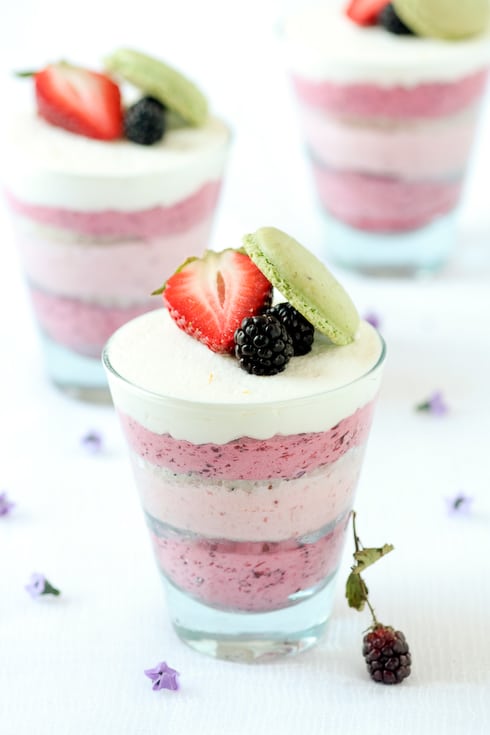
Two years ago: Lemon Macarons

Cherry, Rose and Coconut Ice Cream:

Makes a little less than a quart.

Notes: don’t just go use any dried rose for this! Make sure to get food grade, organic and non treated rose petals or rose buds. Most can be food at health food store in the bulk spices and tea section and are quite cheap. I got about 1 cup for $1.50.

For the rose infused cherries:
1 cups (145gr) pitted and halved cherries
1/4cup (60ml) water
1 tablespoon lemon juice
1/2 cup (100gr) sugar
6-8 food gradedried rose buds (more or less depending on your own liking)

For the ice cream:
1 cups (250ml) heavy cream
1 cup (250ml) whole milk
1 cup (250ml) whole coconut milk
1 cup (200gr) granulated sugar

Prepare the cherries:
Place all the ingredients in a heavy saucepan and bring to a simmer over medium heat. Turn the heat off and let steep one hour (longer for an even intense rose flavor). Remove the rose buds and refrigerate until ready to use.

Prepare the ice cream:
In a large saucepan set over medium low heat, bring the cream, milk, coconut milk and sugar to a simmer, stirring occasionally until the sugar is dissolved. Remove from the heat and let it cool to room temperature. Refrigerate, preferably overnight.
Process the mixture into your ice cream maker according to the manufacturer’s intructions.
Once the ice cream has reached soft serve consistency, pour into a freezable container. With a spatula, swirl in the cherries and a few tablespoons of their liquid. Freeze a couple of hours.
No ice cream maker? No problem! Pour the cream into a freeze proof container and freeze for a couple of hours. Take it out and whip it with an electric mixer or immersion blender, freeze it again, whip it again….do that four or five times. The mixture won’t be quite the same but pretty darn close.

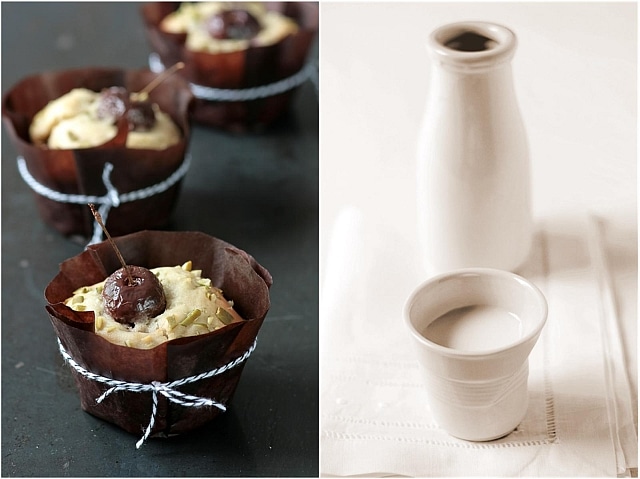
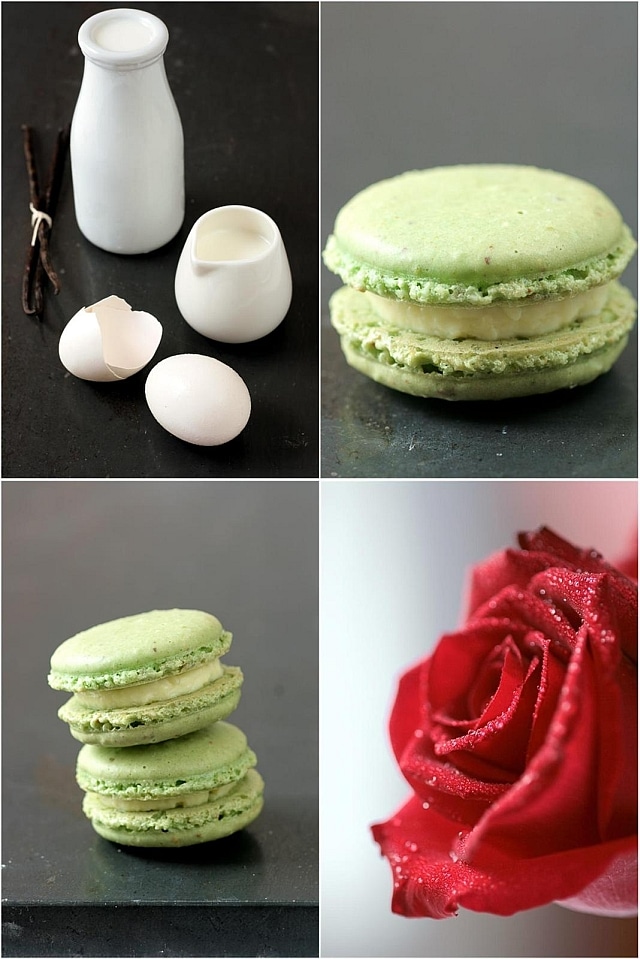
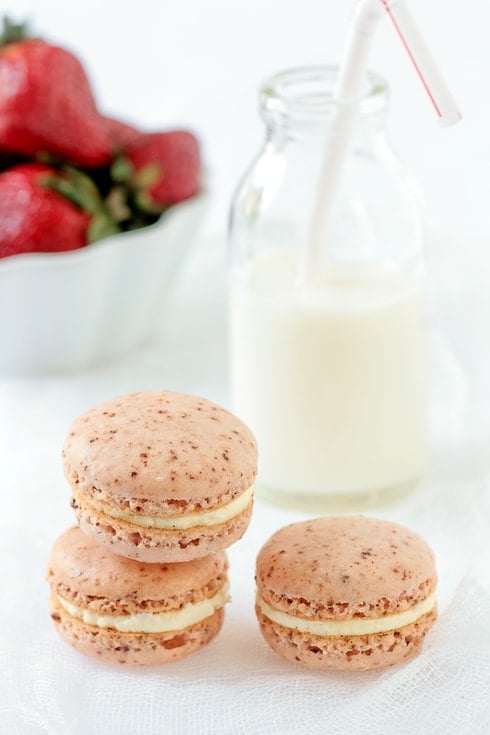
Note: I receive quite a few email regarding the milk bottles I used for props and I am happy to share my sources:
– You can find the one pictured here at Farmhouse Wares, impeccably ran by the lovely Betsy.
– The small milk bottles featured here and there are from WallMart and labelled as "bud vases", but you know I can’t get stuck by labels so they went to be used for milk and cream instead.
– The bottle with the closing cap featured here once contained wonderful Vermont Maple Syrup sent to me by the ever so creative Deb from Bonbon Oiseau.

Lastly, the cute fabrics used here are from another budding creative mind: Michelle from Cicada Studio.

Daring Bakers Strut Their Strudels

Mascarpone Ricotta Tarts in Strudel Rings


It’s been a long time since I made strudel dough and it’s been even longer since I made it for our own eating pleasures. When I first moved to the US, one of my first pastry jobs was at a German bakery where we would make strudel dough by the buckets, starting fresh and early around 3am. I made so much strudels in that one year there that I overdosed a little and never made it at home after that. When I saw that the Daring Bakers challenge for May was strudel I had a split reaction. A "meh" followed by "oh wait I have always wanted to do this and this and this…"

The instructions were to make the strudel dough per the recipe given but allowed us to get creative as far as the fillings, shapes and sizes. I started with one idea and as (most) usual, I ended up with three. My first idea was not to make a traditional strudel and I blame Richard Leach for that. I have been itching to make his Ricotta Cheese Tarts in Strudel Rings since the first day I flipped the pages of his book "Sweet Seasons". I refrained from it up until now because of that studel making overdose mentionned above. Ha! No more! I had the perfect opportunity!

Tarts and Rhubarb Sorbet In Strudel Cups


For the strudel rings, I rolled and stretched the dough until I could see through it and cut four 1 1/2-inch strips that I rolled around a 3-inch cake rings about 3-4 times. I baked them just until the rings were golden brown. I let them slide of the cake rings and let them cool while I prepared the mascarpone tart base. It is really like a light cheesecake baked right inside the rings. Once they were cooled, I placed them inside the strudel rounds and plated some with fresh cherries and others with lemon balm infused cherries. Both versions were equally good but my heart goes toward the lemon balm one.

Rhubarb Sorbet In Strudel Cups


Of course the strudel dough recipe would give me a lot more than the quantity necessary for the strudel rings. I used the same technique to make slightly higher rings with the intention to use them as baskets for ice cream or sorbet. I even made handles for them but a mini trip over pupp Bailey and the handles flew across the room and broke to pieces. Sorbet cups would have to do. I made Garrett’s rhubarb sorbet over the weekend and it was a wonder there was enough left to fill the cups. If you have the chance, run to make it! Absolutely delightful. My only change to his recipe is that I did not strain the rhubarb but pureed the heck out of it. Worked like a charm. Pink, smooth and creamy all at once.

I still had plenty of dough to make a traditional strudel like most of my Daring Bakers partners. I filled this one with roasted quince that I had in the freezer and fresh roasted white peaches. I sprinkled a basic hazelnut crumble on the dough before layering the fruits and rolled the dough in a log. In the cacophony of friends coming over for brunch, I completely forgot to take pictures of the log and had just a split moment to take pictures of the small strudel bites I cut for everybody to sample.

White Peach & Quince Strudel Bites


I found the dough a litte bland at first but paired with a punch of flavors it really took a life of its own and today I am glad to have leftovers of all three desserts to chose from after dinner!

See below for all the recipes and my notes.


The May Daring Bakers’ challenge was hosted by Linda of make life sweeter! and Courtney of Coco Cooks. They chose Apple Strudel from the recipe book Kaffeehaus: Exquisite Desserts from the Classic Cafés of Vienna, Budapest and Prague by Rick Rodgers.

Mascarpone Ricotta Tart in Strudel Rings


One year ago: Daring Bakers' Lavender White Chocolate Opera

Strudel dough
from “Kaffeehaus – Exquisite Desserts from the Classic Cafés of Vienna, Budapest and Prague” by Rick Rodgers

Notes: I used a printed tablecloth so I could see better how thin the dough was getting and how much I could keep on stretching. I found out that no pleats or wrinkles was much better or the dough will take on those at the same time you roll.
Use plenty (and more) flour to roll and instead of rubbing my hands on the cloth to make the flour stick down, I rolled my rolling pin over a few times. Do not refrain from kneading a full 8 to 10 minutes. It will develop all the gluten strands necessary to make this dough stretch like a breeze

1 1/3 cups (200 g) unbleached flour
1/8 teaspoon salt
7 tablespoons (105 ml) water, plus more if needed
2 tablespoons (30 ml) vegetable oil, plus additional for coating the dough
1/2 teaspoon cider vinegar

Combine the flour and salt in a stand-mixer fitted with the paddle attachment. Mix the water, oil and vinegar in a measuring cup. Add the water/oil mixture to the flour with the mixer on low speed. You will get a soft dough. Make sure it is not too dry, add a little more water if necessary.
Take the dough out of the mixer. Change to the dough hook. Put the dough ball back in the mixer. Let the dough knead on medium until you get a soft dough ball with a somewhat rough surface.
Take the dough out of the mixer and continue kneading by hand on an unfloured work surface. Knead for about 2 minutes. Pick up the dough and throw it down hard onto your working surface occasionally.
Shape the dough into a ball and transfer it to a plate. Oil the top of the dough ball lightly. Cover the ball tightly with plastic wrap. Allow to stand for 30-90 minutes (longer is better).
It would be best if you have a work area that you can walk around on all sides like a 36 inch (90 cm) round table or a work surface of 23 x 38 inches (60 x 100 cm). Cover your working area with table cloth, dust it with flour and rub it into the fabric. Put your dough ball in the middle and roll it out as much as you can.
Pick the dough up by holding it by an edge. This way the weight of the dough and gravity can help stretching it as it hangs. Using the back of your hands to gently stretch and pull the dough. You can use your forearms to support it.
The dough will become too large to hold. Put it on your work surface. Leave the thicker edge of the dough to hang over the edge of the table. Place your hands underneath the dough and stretch and pull the dough thinner using the backs of your hands. Stretch and pull the dough until it’s about 2 feet (60 cm) wide and 3 feet (90 cm) long, it will be tissue-thin by this time. Cut away the thick dough around the edges with scissors. The dough is now ready to be filled.

To make strudel rings and cups:
Cut four 1.5-inch strips of dough, brush them with melted butter and roll them around cake rings. Bake at 350F until golden brown, about 15 minutes.
Cut four 2-inch strips for the sorbet cups. Proceed as with the rings.

For the hazelnut crumble, quince and white peach filling:
Notes: this will make enough for 1/3 of the dough. Adapt if necessary.
2 white peaches, cur in half and pitted
1 large quince, peeled and cored
2 tablespoons (25gr) sugar
equal parts light brown sugar, flour, butter (cut in 1/4-inch cubes) and chopped hazelnuts (I did 50gr of each)

Place the peaches and the quince in a medium baking pan lightly sprayed with cooking spray and roast at 350F for 30 to 40 minutes until caramelized. Check at half time and add 1/4 cup of water to the pan is necessary to prevent them from scortching. Once baked, let cool completely to room temperature. Slice the fruits thin.
In a large bowl, stir together all the crumble ingredients and mix with your fingertips until the mixture forms pea size crumbs.
Fill the strudel with a layer of crumble and top with the roasted fruit. Roll from the short end, lightly brush with melted butter and bake at 350 for 30 minutes (more if you are doing the whole quantity of dough as a regular strudel).

Mascarpone Ricotta Cheese Tarts In Strudel Rings, adapted from Richard Leach.

Makes 4

Tart Rings:
See above

For Lemon Balm Cherries:

2 cups (290gr) pitted and halved cherries
1/2 cup (125ml) water
juice of 1/2 lemon
1/2 cup (100gr) sugar
4 leaves lemon balm, roughly chopped

For the Mascarpone-Ricotta Tarts:

3/4 cup (180gr) mascarpone cheese, at room temperature
1/4 cup + 2 tablespoons (90gr) ricotta cheese
1/4 cup (50gr) sugar
1/2 vanilla bean, split in half and seeded
1 whole egg
1 egg white
1/4 cup (60ml) heavy cream

Prepare the cherries:
Place all the ingredients in a heavy saucepan and bring to a boil over high heat. Reduce heat to medium and simmer 5 minutes. Remove from the heat and let cool. Strain to discard the lemon balm. Use to decorate the tarts.

Prepare the tarts:
Wrap four 3-inch dessert rings with foil and place them on baking sheet. Lightly spray the inside with cooking spray.
Preheat the oven to 350F and position a rack in the middle.
In a mixer fitted with the paddle attachment, whip together the mascarpone, ricotta, sugar and vanilla bean seeds at medium speed, until smooth, about 2 minutes. Reduce the speed to low and add the egg and egg white and beat until smooth, scraping the sides and bottom of your bowl if necessary. Still on low speed, add the heavy cream and whip until incorporated.
Divide the mxiture evenly among the prepared cake rings and bake for 20 minutes or until just set. Let cool completely.
Once cooled, place a strudel ring around each tart and spoon some marinated cherries around the tarts.

Rhubarb Sorbet For Strudel Cups, adapted from Garrett’s.

3 1/2 cups of chopped fresh rhubarb (4-5 stalks)
2 1/2 cups of water
1 2/3 cups of sugar
2 teaspoons of lemon zest
2 tablespoons of corn syrup (I used glucose)

Placethe rhubarb, sugar, water, and lemon zest in a large and heavy saucepan. Bring to a boil over high heat. Reduce heat to low, and simmer 5 minutes, uncovered.
Let cool to room temperature. Working in batches, purée the mixture in a blender until smooth. Stir in the glucose. Cover and refrigerate until completely cold, preferably overnight.
Process the ice cream according to your machine’s manufacturer’s instructions. The sorbet will have a soft texture right out of the ice cream maker. Freeze a couple of hours before serving.

Pistachio And Strawberry Mousse Mille Feuilles And A Giveaway

Pistachio Strawberry Mille Feuilles


I just laughed and giggled at all the comments about the Pistachio Creme Brulee Macarons from last week and your thinking that I can take Pierre Herme any day. Clearly an interesting idea but sadly one that will never take place because the man is king in the pastry department. I did get an email from Pierre Herme though, well ok, more precisely from La Maison Pierre Herme. And it was not personal at all. But I loved it all the same. It actually inspired me to make these Mille Feuilles filled with mascarpone, pistachio and strawberry mousses.

I like staying close to home by subscribing to French cooking magazine, watch French news feeds anytime I can, and also by receiving PH’s monthly newsletter in my inbox. An attractive list of all the seasonal goodies coming up in his shops. And there it was, the whole PH House of Pastry, tempting with more amazing tastes and textures than before. I read it carefully and sighed at their current signature flavor: all PH’s creations in pistachio and strawberry. The "Montebello" line was attractive and indeed perfectly seasonal, even for an expat like me, three thousand miles away from home.

Pistachio Strawberry Mille Feuilles


In my last post, I mentionned how a client needed an anniversary dessert with cherries and how I was not completely satisfied with their flavor yet. I care about my craft too much to keep silent if something is not 100% up to par. With a head filled of PH' Montebello desserts and a nose intoxicated with the fragrance of strawberry, I settled on creating something along those lines (no recipes come with the newsletter). A mascarpone – pistachio mousse sharing space in between two sheets of "rough" puff pastry with a mascarpone – strawberry mousse

I do receive a lot of cookbooks for preview and in March I received Pastry by Michel Roux. With little time on my hands, I figured his "rough" puff pastry recipe would be perfect to try for this dessert. As much as I love the process of traditional puff pastry, I was positively surprised at the results I got with this one. Flaky, tender, fast. Precisely what I need now that the heat is back. For the mousses, I made a simple mascarpone base and used half with finely ground pistachios and half with pureed strawberries, some whipped cream and that was it. Rich, light, flavorful all at once.

Pistachio Strawberry Mille Feuilles


If you ever want to master all sorts of pastry doughs, this is the book to get. Clear instructions with plenty of pictures along the way and a myriad of examples and recipes both sweet and savory to go along. His "rough" puff pastry yielded such great results that I decided to give away one of the two copies I have.

To win a copy of Michel Roux’s Pastry (and who does not want a free book, especially on this fine Memorial Day weekend?), all you have to do is leave a comment between today, Sunday May 24th and Tuesday May 26th at midnight. The winner will be chosen at random by my better half. No anonymous comments please, just sign Zorro if you must.

Pistachio Strawberry Mille Feuilles


Two years ago: Gateau Saint Honore – Daring Bakers

Pistachio and Stawberry Mousse Mille Feuilles:
Makes 4

For the rough puff pastry, adapted from Michel Roux.
2 1/4 cups (300gr) all purpose flour
1 1/4 cup (300gr) unsalted butter, cold and cut into 1/4-inch cubes
1/2 teaspoon (3gr) salt
1/2 cup (125ml) ice-cold water

Place the flour in a large bowl and make a well in the center. Add the butter and salt right in the well and work them together with the flour, using your fingertips, gradually drawing in more flour into the center. When the butter pieces have reached pea sized pieces and the mixture appears grainy, gradually add the ice water and mix until it is all incorporated. Do not overwork the dough. Roll it into a ball, cover with plastic wrap and refrigerate 20 to 30 minutes.
On a lightly flour work area, roll the dough to an 8×4-inch rectangle. Fold it into three and give it a quarter turn. Roll it into another 8×4-inch rectangle again and fold it in three again. These are the first 2 turns. Cover with plastic wrap and refrigerate again for 30 minutes.
Give the chilled dough 2 more turns, rolling and folding as previously described. The pastry is ready then. Cover with plastic wrap and refrigerate for 30 minutes.
When ready to use, roll the dough to a 1/8- inch (3 mm) thick rectangle and cut out eight 4×2 pieces. Place them on a parchment paper lined baking sheet. Dock the dough with a fork to let the steam out while baking so your rectangles will be evenly puffed. Bake at 350F until golden brown. (if they puff too much, cover with a sheet of parchment paper and place a small baking sheet on top). Let cool completely before filling with the mousses

For the pistachio and strawberry mousse:
8 oz (240gr) mascarpone cheese, at room temperature
1/2 cup (100gr) sugar
1/4 cup (30gr) finely ground raw pistachios
1/2 cup pureed fresh strawberries
1 1/2 cups (375ml) heavy cream, kept cold, divided

In a large bowl, whisk together the mascarpone and sugar until completely smooth. Take half the mixture and place it in another large bowl. Add the pistachios to one of them and mix until incorporated. Add the pureed strawberries to the other mascarpone mixture. In a mixer, whip the heavy cream to stiff peaks. Fold half into the pistachio mascarpone mix and the other half with the strawberry one. The pistachio mousse is probably stifff enough to be used right away but you might have to refrigerate the strawberry one until the mascarpone hardens a bit otherwise it might be too soft to pipe easily. Divide the mixture into piping bags fitted with medium plain tips (I use Ateco pastry tips) (or do the pistachio mousse first, wash your bag and tip and then do the strawberry one). Pipe dots of mousse onto half the puff pastry sheets, alternating the pistachio and strawberry. Top with another sheet of puff pastry and refrigerate at least 30 minutes.

Have a wonderful Memorial Day Weekend…No barbecue for us but brunch with friends this year.

During Breakfast


Coconut Cherry Petits Gateaux

Coconut Cherry Petits Gateaux


The temperatures have dropped here in the last few days which is extremely bizarre for us this time of year. Humid is a given, hot is pretty much the norm, hotter is, well, summer. I always take the dogs out barefeet in the morning. I love to feel the dew tickling my feet and waking me up. The other morning was no exception only for the fact that my ritual was paired with a sounding "Oh la vache c’est froid" ("Holy cow, it’s cold"). Hurried my little flock back inside, made hot tea and sat with Bill with a few Coconut Cherry Petits Gateaux while he was reading the morning paper.

Obviously, I have forgotten what cold really is having been in the South so long but I actually look forward to a good wind and a cold front. I take it all in, making "cold memories" to dip into when August rolls around and I wilt going from the house to the car. Times like this usually give me an urge to make cakes and tea cakes. When I see cherries I am immediately thrown back to our house in Provence where we had two giant cherry trees giving us what seemed like a house full of fruit each year. Maybe it looked that dramatic because I was 4 and everything seems disproportioned at that age.

Cherries


Yes, I know, cherry season won’t be in full force until June here but a patron asked me to come up with an anniversary dessert containing cherries. I sampled a few at the store and while they were ok, it was not something I would have spent my money on this early in May, but it was a job not a choice. I dropped by her house so she could taste them and she turned to me and said "yeah you are right, why don’t you keep them then. I am sure you’ll know how to doctor them up". Geez, thanks! I think I did allright though.

I love the fact that B indulges me in making him repeat in French all the ingredients I am using. He appeals to his inner teenager and I just about crack a rib everytime we do this. "Pour le petits gateaux" (for the tea cakes)"commence par le sucre" (start with sugar), "ajoute les oeufs" (add the eggs). It quickly became a mix of English and French: "add the lait de coco" (add the coconut milk), "now les cerises" (now the cherries). He stopped abruptly and exclaimed "you know, even in French I understand you are trying to make me eat two things I dont' care for, coconut and cherries even though it sounds way better this way!".

Ha! I did not trick him though, he likes coconut milk and he likes cooked cherries. I can’t never get him to eat them fresh from the bowl while I can go through a pound of them without fliching. Well, when these came out of the oven, he grabbed a couple and a glass of milk and went back up to his study. I only found the wrappers and a happy man later on.


Since I wanted to boost their flavor a bit, I used coconut milk instead of cow’s milk in the batter, added a drop of coconut extract and sprinkled them with chopped raw pumpkin seeds to change from pistachios.

Coconut Cherry Petits Gateaux


One year ago: Cherry Blossom and Hibiscus Macarons
Two years ago: Floating Islands

Coconut Cherry Petits Gateaux:

Makes 8 to 10

1/2 cup (100gr) sugar
2 eggs
1/2 (125ml) coconut milk
2 tablespoons (30gr) unsalted butter, melted and cooled
1/4 teaspoon coconut extract
1 3/4 cups (220gr)all purpose flour
2 teaspoons baking powder
1 cup cherries, pitted and halved
3 tablespoons raw pumpkin seeds, chopped

Preheat the oven to 350F and position a rack in the center. Lightly spray or butter muffin tins or cupcake molds. Set aside.
In the bowl of a stand mixer, fitted with the paddle attachment (or with hand held beaters) whisk together the sugar and the eggs on medium speed for 5 minutes. With the machine running on low speed, add the coconut milk, melted butter and coconut extract. Beat for a minute to incorporate all the ingredients thoroughly. Add the flour and baking powder and mix until smooth. Stop the machine and fold in the cherries with a spatula. Divide the batter between the prepared muffin tins and sprinkle with the chopped pumpkin seeds. Bake 25-30 minutes or until a skewer inserted in the middle comes out clear.

Creme Brulee Pistachio Macarons

Creme Brulee Macarons


Thank you immensely for the warm birthday wishes and emails. You guys are the best! Phew! This past week was filled with opportunities to take me away from updating more often. Work related issues to ponder, projects, family. I decided to put my mind on a break for a few days. Break is over now. Does that happen to you too? This feeling that the cup is full and you need to just press "pause" for a couple of days? There is always a sweet moment involved for me though. One filled with Creme Brulee Pistachio Macarons for example. As good as a red rose on your birthday.

Jen emailed me recently that she was making macarons and that sent me into a mini brainstorming session. I quickly replied with "I’ve had this idea for a while to make a creme brulee filled macarons. I just need to sit on the logistics for a minute". I pretty much knew how to go about it but there is always this doubt that your idea may be better in your head than the actual production.

Creme Brulee Macarons


When I told Bill about it, he gave me this look of "You and your macaron ideas! Why?". In a cocky French way I simply replied "I want Pierre Herme to personally email me and say "I give up – You win". Yes, just that. I am never that bold about what I do which surprised me a great deal. I am such a dork! I think I even scared Y one evening we were talking about it and she got utterly confused when I said "I am having a throw down with Pierre Herme, except he does not know about it. It’s all in my head".

What can I say? Engineering macarons relaxes my brain cells.


For the filling I used a basic creme brulee recipe, and baked it into an 8×8 square pan lined with foil and set in a larger roasting pan filled with water. I turned the heat lower than for regular creme brulees and watched it carefully. Once baked and cooled to room temperature I refrigerated the pan overnight before using it in the macaron. To fill, I used a small cookie cutter and cut out rounds in the baked creme brulee, gently lifted them onto a macaron shell and topped it with another one. Make sure to refrigerate these a couple of hours before eating so that all the flavors have the chance to meld. Take these out of the refrigerator only 15 to 20 minutes before serving. The creme brulee my turn on you or become too soft to be handled properly.

Speaking of engineering… I’ve got something to share with you that has me so excited I could burst!! Two weeks from now Bill and I will be sitting down with Jen and Jeremy at a table at The Kitchen. In Colorado. Yeah!! B. is going there for work and Jen graciously invited me over so I could spend some time with her in the kitchen, in town and on the trails. When all the oks came in, I started mapping out the drive, getting guides, etc… Yes, you read right, we are driving the 1700 miles or so to get there. We are well aware of all the bumps in the road (no pun intended) with a road trip but I plan on making a bunch of sweet treats to smooth things out if needed. No argument can last long with a macaron in hand!

Creme Brulee Macarons


One year ago: Lemon Madeleines.
Two years ago: Rhubarb Cupcakes.

Creme Brulee Pistachio Macarons:

For the shells:
90 gr egg whites (preferably aged overnight in the fridge or on your countertop if the kitchen is relatively cool)
30 gr granulated sugar
200 gr powdered sugar
55 gr almonds
55 gr raw pistachios
powdered green food coloring (I only used a tiny amount to bump up the green from the nuts)

For the creme brulee filling:
1/2 cup (125ml) whole milk
1/2 cup (125ml) heavy cream
1/2 vanilla bean, seeded (see note)
1/4 cup (50gr) sugar
2 egg yolks

In a stand mixer fitted with the whisk attachment, whip the egg whites to a foam, (think bubble bath foam) gradually add the sugar until you obtain a glossy meringue (think shaving cream). Do not overbeat your meringue or it will be too dry. Place the powdered sugar, almonds and pistachios in a food processor and give them a good pulse until the nuts are finely ground. Add them to the meringue along with some food coloring if using, give it a quick fold to break some of the air and then fold the mass carefully until you obtain a batter that falls back on itself after counting to 10. Give quick strokes at first to break the mass and slow down. The whole process should not take more than 50 strokes. Test a small amount on a plate: if the tops flattens on its own you are good to go. If there is a small beak, give the batter a couple of turns.
Fill a pastry bag fitted with a plain tip (Ateco #807 or #809) with the batter and pipe small rounds (1.5 inches in diameter) onto parchment paper or silicone mats lined baking sheets. Let the macarons sit out for 30 minutes to an hour to harden their shells a bit. In the meantime, preheat the oven to 280F. When ready, bake for 15 to 20 minutes, depending on their size. Let cool. If you have trouble removing the shells, pour a couple of drops of water under the parchment paper while the sheet is still a bit warm and the macarons will lift up more easily do to the moisture. Don’t let them sit there in it too long or they will become soggy. Once baked and if you are not using them right away, store them in an airtight container out of the fridge for a couple of days or in the freezer. To fill: pipe or spoon about 1 big tablespoon of butterceam in the center of one shell and top with another one.

Prepare the creme brulee filling:
Preheat the oven to 300F and position a rack in the enter. Line a 8×8-inch square pan with foil and lightly coat with cooking spray or melted butter. Place this pan in a larger roasting pan and set aside.
In a medium saucepan set over medium heat bring the milk, heavy cream and vanilla bean seeds to a simmer. In the meantime, whisk together the sugar and egg yolk together in a large bowl until the mixture is pale. When the milk/cream is hot, slowly pour it over the egg yolk and sugar, whisking constantly to prevent the eggs from curddling. Let the mixture cool to room temperature, skim the foam on top and pour it into the prepared baking pan. Fill the roasting pan with water so that it comes about halfway up the side of the creme brulee pan. Bake for 20 to 25 minutes. It is ok if the center still appears a little wiggly. It will set as it cools.
Let cool to room temperature before refirgerating preferably overnight.
Note: to seed a vanilla bean: place it on a flat surface and cut it in half lenghtwise without cutting all the way through. Scrape the seeds inside with a pairing knife. You can add both seeds and pods to the milk and cream as they heat up but remove the pod before whisking the liquids into the eggs and sugar.
Do not throw away your bean! Wash it, let it dry and add to some sugar for vanilla scented sugar in a pinch.

When ready to assemble the macarons, cut out rounds smaller than the diameters of the shells into the brulee filling and place it on top of a shell. Top with a second one but do not press down.

Berry Mousse and Lemon Poppy Seed Cake Verrines

Berry Mousse - Lemon Poppy Seed Cake Verrines

"Whatcha making?" Bill asked when he stepped into the kitchen area on Sunday. "My birthday cake" I replied, scraping the last bit of batter onto a sheetpan. He then pointed at the two bowls filled with strawberries and blackberries, the couple of lemon and the bottle of Limoncello. "Yes, yes, yes…all those for my cake". His eyes lit up in anticipation and he left the room uttering "hmmhmmhmm".

A few hours later, he tried to sneak a peak into the refrigerator to see the final product and opened and closed the refrigerator door a couple of times. "Where is it? Are you done yet? I can’t see it!". I pulled out a tray of glasses and handed him a spoon. "It’s not a cake! Wait…I am sorry. It’s your birthday, I should have known better…"

Lemon poppy seed cake brushed with straight Limoncello and layered with strawberry and blackberry mousse. There is cake, there is cream and there is enough space to stick a candle in it. I am ready to celebrate!

Berry mousse - Lemon Poppy Seed Cake Verrines


Yes, it’s my birthday and since I like to make myself something I really want, it is most often one of three things (and sometimes all at once): it usually contains lemons, it must be small and preferably in a verrine (glass). The sound of spoons digging that last bit of dessert in the bottom of a ramekin or glass is music to my ears. It doesn’t mean the end. It means everybody reached the bottom and "cling-cling" wishes for more. Happy sound.

With the abundance of local strawberries and the hot days we have been having, I started craving something light and refreshing. Everyday I’ve also been getting wild blackberries from the woods across the street and my mere one cup harvest grew to a whopping 1 pound on Sunday morning. I don’t think the new neighbors have realized yet the treasure laying at their feet just a few yards away. I am already scheming blackberry pies, cobblers, sorbet and secretly wish they don’t figure out what I am doing in the morning, reaching down into the bushes. I want it all….I promise to share the results of my baking though. Promise. Yes, really!!

As I was eating my (early) birthday treat, I started thinking about Bea, Anita and Jeannette, also celebrating another year this month and Kate to-day! There is also one tiny person who now can be added to the list of May babies and that is Kristin's newest addition, Leah Katherine, born on Monday night. This dessert is for you all!

Berry Mousse - Lemon Poppy Seed Cake Verrines


One year ago: Lemon Meringue Cake with Lemon Ice Cream.Two years ago: Birthday Girls and a chocolate cake.

Berry Mousse and Lemon Poppy Seed Cake Verrines:

Makes enough for ten to twelve 6 to 8 oz ramekins or glasses

For the cake:
1 1/2 cups (185gr) all purpose flour
1 cup (200gr) sugar
1 tablespoon (14gr) baking powder
1/4 (1.5gr) teaspoon salt
1/2 cup egg whites (about 3-4)
3/4 (175ml) cup milk
1/4 cup (62.5ml) lemon juice
grated zest of one lemon
1 tablespoon (9gr) poppy seeds
1 stick (113gr) unsalted butter, melted and cooled

For the strawberry mousse:
2 teaspoons powdered gelatin
1 tablespoon water
8 oz (210gr) strawberries, pureed
1/4 cup (50gr) sugar
1/2 teaspoon lemon zest
1 tablespoon lemon juice
3/4 cup (6oz – 190ml) heavy cream

For the blackberry mousse:
2 teaspoons powdered gelatin
1 tablespoon water
8 oz (210gr) blackberries, pureed
1/4 cup (50gr) sugar
1/2 teaspoon lemon zest
1 tablespoon lemon juice
3/4 cup (6oz – 190ml) heavy cream

Limoncello

Prepare the cake: preheat oven to 300F. In a large bowl, stir together all the dry ingredients for the cake. Set aside. In a separate medium bowl stir together the egg whites and the milk. Make a well in the center of the flour mixture and slowly add in the egg white mixture while stirring with a whisk. Stir in the lemon juice, zest, the poppy seeds and the melted butter. Mix with a whisk until smooth. Line a quarter sheet pan with parchment paper, lightly spray with cooking spray and pour in the batter. Bake for 20 minutes or until a toothpick inserted in the center comes out clean. Let cool completely and cut out as many disks as you need to fit inside your ramekins or glasses.

Prepare the strawberry mousse: sprinkle the gelatin over the water in a small bowl and set aside to bloom (soften).
In a medium saucepan set over medium heat, stir together the strawberries and sugar just until hot. Add the gelatin and stir until it is completely melted. Let cool to room temperature. In the meantime, whip the heavy cream to soft peaks. Once the strawberries are at the right temperature, carefully fold the whipped cream into the fruit base.

Prepare the blackberry mousse the same way.

Assemble the verrines: brush Limoncello on each of the cake pieces or rounds that are going to be used in the glasses. Place a cake round at the bottom of the glass, top with blackberry mousse, one cake round, strawberry mousse, one cake round, blackberry mousse. Finish with more wipped cream if desired (I added lemon zest to mine).

Lemon Basil Lemon Tartelettes

Lemon Tartelettes - Late Afternoon


I know I talk a lot about my family back home and the times, desserts and events shared over there but I also have a strong sense of my being and living here in the States, in the present moment. And I am always very aware of things coming up this fine weekend of May. It’s Mother’s Day. Except it does not phase my own mother much because that special day is not celebrated until the end of the month in France. However she enjoys the fact that with my being here and celebrating Bill’s mom, I can’t wait another two weeks to tell her anyway. And I realized while making these lemon-basil infused lemon tartelettes that there was a whole of "mothers" going into them.

My mother-in-law is "mama Ruth" to me. She welcomed me to the family like a daughter and she treats me as such and never refrains anything, the good, the bad and the ugly, just like a mom does. She also has what I call a very acute "pantry 6th sense". I can be thinking that I need sugar and Bill comes home with a bag courtesy from his mom (they live 10 minutes away). It’s downright freaky some days. Sometimes we shop in doubles like we did last week and I found myself with three big bags of lemons which is why you get one more strawberry free – not yet blackberry post. "Mother moment #1".


I started coming up with various recipes to use all these lemons and since I had some pate brisee left from another project, "tartes au citron" easily came to mind. I have a recipe typed up in my brain from the restaurant menu but I also like to try new ones and it was a good opportunity to flip through the pile of cookbook I own but rarely have time to open. I picked up Pierre Herme’s Larousse Des Desserts that my mom sent me last year, figuring that he, of all people would have what I needed. "Mother moment #2".

Lemons


I settled on a very simple and 100% lemon recipe for the tarts but changed a couple of things around nonetheless. PH uses a shorbread crust but I had pate brisee in the freezer and used it instead. I also wanted to had a little depth to the lemon filling by infusing the melted butter called for in the recipe with lemon basil. I almost wished I had added more than I did. It really gave the filling a lovely grassy quality. I had to refrain though as I am trying not to deplete too fast that lovely lemon-basil plant Mama Ruth picked out at the nursery for me. "Mother moment #3".

As I was baking, I started to think about all these "mother moments" and began to smile bigger and bigger with each step of the process. From prepping and baking to photographing. A lot of you send emails asking me about the props I use and the answer is almost always "mom". My mom. The best personal shopper a food stylist could ever dream of. Rolling pin, tart rings, microplane, pretty lemon bowl…Mom. Care packages with ingredients, tablecloth, napkins, jars, cups and spoons…Mom. She really gets a kick out of it and I am always floored by the cool stuff she finds in the most unexpected places.

So you see, even if I did not intend to make the lemon tarts for Mother’s Day, it became quite clear that they really ought to be blogged about this weekend. Thank you Mama Ruth and Maman for all the things you say and do. All the love and forgiveness. Happy Mother’s Day to all of you reading this and being celebrated this Sunday!

I also want to thank Suzanne from S.HopTalk for including one of my pictures in this amazing Why Moms Matter video. Pass it along to any mom you know! I hear an ebook is soon to follow…

Lemon Tart-2


One year ago: Lemon and Honey Tangerines Gratins.
Two years ago: Meet My Sugar Daddy.

Lemon Basil Tartelettes, adapted from Pierre Herme:

Makes six 4-inch tarts

For the pate brisee:

1 1/4 cups all purpose flour
1/4 tsp salt
5 tablespoons butter, cold and cut into small slices
3 to 4 tablespoons ice cold water

For the filling:
5 tablespoons (80gr) unsalted butter
1/4 cup lemon basil, chopped
3 eggs
1/2 cup (100gr) sugar
5 lemons, zested and juiced

Prepare the dough:
Mix together the flour and salt in a large mixing bowl. Cut in the butter with a pastry cutter or a fork until the mixture forms pea-sized pieces. Sprinkle 2 tablespoons of water over the flour mixture and toss with fork until moistened. Repeat with the remaining water, one tablespoon at a time and gather the dough into a ball with your hand. Do not handle the dough too long. Wrap into a sheet of plastic wrap and refrigerate for 30 minutes. This will allow the dough to relax and make it easier to roll, keeping it from becoming tough. Roll dough on a lightly floured surface, applying pressure from the center to the edges until it is about 1/4-inch thick. Cut out six 6- inch circles onto the dough and press them into the tartlet molds or rings (or one 9 inch pan if making a larger tart). Place the rings or molds on a baking sheet. Prick the dough with a fork, apply a piece of parchment paper inside the molds and fill with dry beans or pie weights. Refrigerate 30 minutes. Preheat oven to 350F and when ready, bake for 10-12 minutes. Let cool completely and remove the pie weights and paper. Keep the oven at 350F.

Prepare the filling:
In a small saucepan set over medium heat, cook the butter and lemon basil until the butter is just melted. Let cool and strain to remove the lemon basil. In a large bowl, whisk together the eggs, sugar, the juice and zest from the lemons and the melted butter. Divide evenly among the tarts and bake for 15 to 20 minutes. Serve room temperature.

At The Flower Shop

Rosemary And Apricot Shortbread Cookies

Rosemary Shortbread Cookies


Tada! No strawberries! I can do this. A completely strawberry free post right in the middle of the season. Didn’t hurt either. Ok, maybe a little but the pain was eased by the handful of blakberries gathered today in the yard and having a batch of these Rosemary and Apricot Shortbread Cookies while working through various deadlines. Crumbly shortbread specked with freshly chopped rosemary and filled with homemade apricot jam. Sigh…there is only one left.

I realized that unless I am nicely bribed by friends to make cookies, I don’t usually make or post many on this site, except for macarons but they are in a league of their own. I guess cookies are not in my DNA, I am more a tea cakes, and tarts kind of gal. Bill on the other hand has the reputation among his family and friends to be The Cookie Monster. I guess this was his lucky weekend.

A few weeks ago I was asked to post links back to Better Home and Gardens and specifically to their Spring Dessert and cookie recipes, as did my pal Jen who posted the most lucious lemon cake I have seen in a while. Like her, I did not feel comfortble blindly posting about something I was not familiar with and decided the best way to approach this would be to try one of their recipes myself.

Rosemary Shortbreads & Goat Cheese Ice Cream


I like BH&G and I did get the chance to read quite many of their magazines while living with my in-laws when we were building our house. Fifteen months can be long without having a real place of your own and I did enjoy day dreaming while reading about their house renovations and decorations. But I admit that I never quite paid attention to the recipe section. No particular reason other than having a pretty big database of my own and many recipes still to get to on my to do list. Until now…


There were so many pop-ups ads that I almost stopped browsing the recipe section after I had found one that I liked. But for the sake of doing this right, I persevered and finally settled on these cookies. Except I had a senior moment while shopping for ingredients and it’s not even my birthday yet! I meant to make the Apricot Sage Cookies but my brain got stuck on rosemary instead. I think it worked out for the better because neither Bill or I are great fans of sage in sweet things. Rosemary, thyme, lemon basil…oh yes!

The cookie recipe is very straightforward and it has just the right amount of herb to play with the buttery flavor of the shortbread. I used homemade apricot and vanilla bean jam that I had in the freezer but any good quality jam will do. I got to tell you though, they are addicting! We had friends over the day I made them and I almost wished I had baked a double batch! To add sweet insult to dessert injury, I served these with homemade goat cheese ice cream and that, as Shuna will agree, was just the right combination.

Rosemary Shortbreads & Goat Cheese Ice Cream


One year ago: Lemon Rhubarb Mascarpone Mousse Cake.
Two years ago: Vanilla Cardamom Ice Cream.

Rosemary Apricot Shortbread Cookies, from and with permission of Better Homes and Gardens

Notes: I baked these at 350F in a convection oven instead of 375F and I used a smaller cookie cutter which yielded 25 cookies once assembled.

Makes 20

1-3/4 cups all-purpose flour
1/3 cup sugar
1/4 cup yellow cornmeal
1/2 cup butter
2 Tbsp. snipped fresh rosemary or 2 tsp. dried rosemary
3 Tbsp. milk
Apricot spreadable fruit

Preheat oven to 375 degrees F. In a bowl stir together flour, sugar, and cornmeal. Using pastry blender, cut in butter until mixture resembles fine crumbs. Stir in sage. Add milk. Stir with fork to combine; form into ball. Knead until smooth; divide in half.
On lightly floured surface, roll half the dough at a time to 1/4-inch thickness. Using 2-inch round cookie cutter, cut out dough.
Place cutouts 1 inch apart on ungreased cookie sheet. Bake about 10 minutes or until edges are firm and bottoms are very lightly browned. Transfer cookies to wire rack. Cool.
Spread bottoms of half the cookies with spreadable fruit. Top with remaining cookies. Makes 20 sandwich cookies.
To store: Place in layers separated by waxed paper in an airtight container; cover. Store at room temperature up to 3 days. Or freeze unfilled cookies up to 3 months. Thaw cookies; fill with spreadable fruit.

Powdered Strawberry And Vanilla Bean Macarons

Powdered Strawberry Macarons


I think I have quite possibly turned this site into an ode to strawberries just by looking at my latest posts. Hmmm…Hope you’ll still tune in for one more next week and then I might tempt you with the lovely wild blackberries I see appearing on the edges of the yard. Gosh I love Spring! It would be a shame not to take advantage of what is at my fingertips and right now the fridge is about to burst with local strawberries and lemons.

It seems like I have a magic fridge these days. Just when I think I am reaching the bottom of the bowl of strawberries there is another one appearing from the other side. I did find out from B. that his mom dropped off some, as did a neighbor because "{I} would know what to do with them." I did ponder that thought while I was slicing strawberries for a tart. What to do with all these ugly little end pieces that I was not going to use? That’s when the idea of dried strawberries popped into my head again and how to incorporate that into another dessert, a macaron especially.

One of the trickiest thing to do with macarons is to flavor the shells without messing up the texture. Adding liquid to the batter is to me like jumping off a plane wishing your parachute is going to work properly. In that regard, I stick to things I know are not going to interfere with the final result like citrus zest, dried and fresh herbs, etc…

And here I was staring at my sheet pan of dried strawberry slices, my sudden urge to make some macarons and well you can pretty much guess how the rest went…

Dried Strawberry Macarons


I ran the dried strawberries through a coffee grinder I use only for spices and seeds. I then added that powder to the almonds and powdered sugar before running those through the food processor. That extra grinding step makes the powder super fine and smooth to fold into the macaron batter. The fragrance was wonderful but the color was a little bland so I added just a touch of cherry pink coloring, to bring out the specks from the strawberry powder. For the filling I used some leftover vanilla bean buttercream from a previous batch that I had kept in the freezer and just let it thaw at room temperature before filling the macarons.

I did want to make something special to introduce you to my new adoptee, Anja from Deelish Dish. For the past 3 years, Kristen from Dine And Dish has been the Master mind behind "Adopt A Blogger" in which she pairs novice bloggers with more seasoned ones. I mentored the first year, totally spazzed on the second and got lucky to catch up with her on the night she was making the pairs and volunteered my help again.

When Anja sent me an email to introduce herself I could not but catch her enthusiasm and joie de vivre. Her food, well, let’s just say that right now she has me at Banoffe Pie and Chocolate Gingerbread Bars. If you must have dessert last, then why not start with her Spinach and Ricotta Pastries? Et voila, I am hungry again…

So here’s to you Anja, a virtual batch of Powdered Strawberry and Vanilla Bean Macarons. Let’s hope I don’t fall short as a mentor.

Powdered Strawberry Macarons


One year ago: Lemon Yogurt Scones
Two years ago: Chocolate Ice Cream Pops

Powdered Strawberry Macarons and Vanilla Bean Buttercream Recipe:

For the strawberries:
1/2 cup strawberries, hulled and thinly sliced

For the macaron shells:
90 gr egg whites (about 3) preferably aged 3-5 days in the fridge
30 gr granulated sugar
200 gr powdered sugar
110 gr almonds
powdered strawberries
powdered pink food coloring

Prepare the strawberries: preheat your oven to 250F and position a rack in the center. Place the strawberry slices in a single layer on a parchment paper lined baking sheet and let them dry in the oven for about one hour. Let them cool completely. Process until extremely fine. Reserve.

Prepare the macarons: in a stand mixer fitted with the whisk attachment, whip the egg whites to a foam, gradually add the sugar until you obtain a glossy meringue. Do not overbeat your meringue or it will be too dry. Place the almonds, powdered sugar, reserved powdered strawberries and food coloring in a food processor and give them a good pulse until the nuts are finely ground. Add them to the meringue, give it a quick fold to break some of the air and then fold the mass carefully until you obtain a batter that falls back on itself after counting to 10. Give quick strokes at first to break the mass and slow down. The whole process should not take more than 50 strokes. Test a small amount on a plate: if the tops flattens on its own you are good to go. If there is a small beak, give the batter a couple of turns.
Fill a pastry bag fitted with a plain tip (Ateco #807 or #809) with the batter and pipe small rounds (1.5 inches in diameter) onto parchment paper or silicone mats lined baking sheets.
Preheat the oven to 280F and position a rack in the center. Let the macarons sit out for 30 minutes to an hour to harden their shells a bit and bake for 15 to 20 minutes, depending on their size. Let cool. If you have trouble removing the shells, pour a couple of drops of water under the parchment paper while the sheet is still a bit warm and the macarons will lift up more easily do to the moisture. Don’t let them sit there in it too long or they will become soggy. Once baked and if you are not using them right away, store them in an airtight container out of the fridge for a couple of days or in the freezer. To fill: pipe or spoon about 1 big tablespoon of butterceam in the center of one shell and top with another one.

Vanilla Buttercream:
see recipe here but ommit the violet.