Monatsarchive: April 2009

Daring Bakers: One Cheesecake, Two Cheesecakes, Three Cheesecakes….

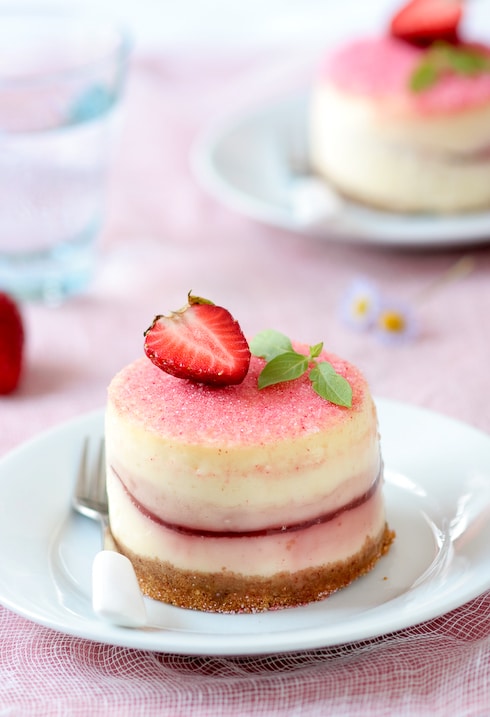
Cherry Blossom Strawberry Cheese Cake


I giggle everytime I look a the picture above. It’s Daring Bakers time today and my Cherry Blossom Strawberry Cheesecake looks like it is smiling. Maybe it’s just me as I am eating some while typing this and smiling to know there is plenty left in the fridge.

And when I mean plenty, I am not exaggerating! For a household of two people this month challenge just kept on giving and we had no problem with it! We were given a simple cheesecake recipe and let loose with our creativity. If you let me loose in the kitchen on a Daring Baker’s challenge this can happen, or this.

It might look like I did again but really I did contain myself (no snorting Jen). Somewhat…
Daring Bakers Cheesecake Challenge


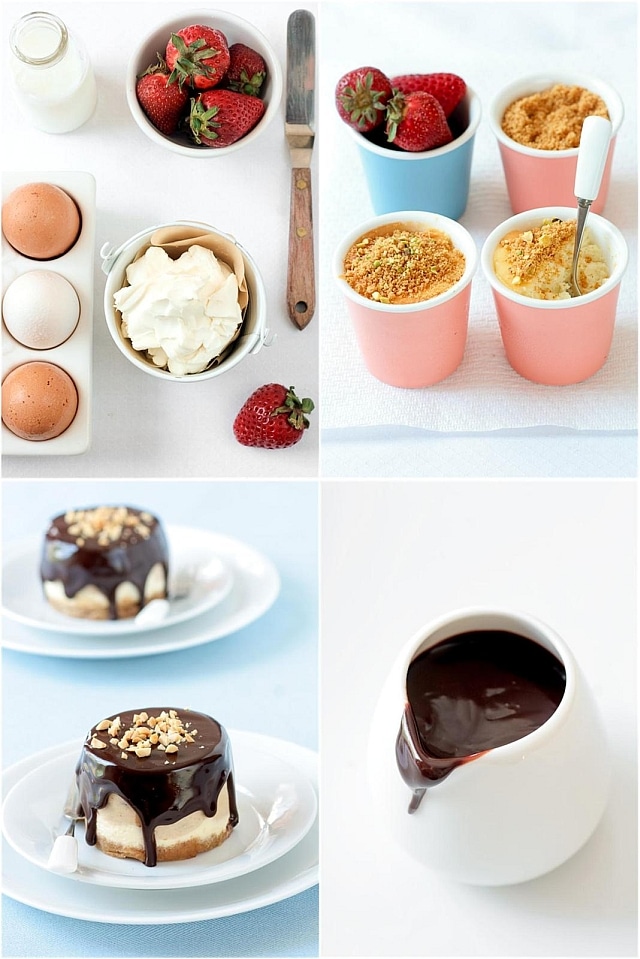
This recipe was really straightforward and the end result was smooth, creamy and not overly sweet which I really like. I started by making the entire recipe and used half to make 4 individual cheesecakes. Two were Cherry Blossom and Strawberry Lava Cheesecakes and two were Peanut Butter topped with a chocolate ganache. I piped the remaining batter in different cups and jars and played a bit.

I drew my inspiration from Spring since cherry trees are still blooming and used cherry blossom extract that Rachael from La Fuji Mama sent me while she was still in Japan. For the strawberry lava center, I cooked about a cup of fresh strawberries with some sugar, strained it and thickened it on the stove before spooning it in between the cheesecake layers.
Daring Bakers Cheesecake Challenge
For the Peanut Butter ones, I just followed B’s strong desire to have a peanut butter and chocolate dessert. I mixed some of the batter with chunky peanut butter and added a few tablespoons of heavy cream and poured a simple bittersweet chocolate ganache on top with chopped roasted peanuts.

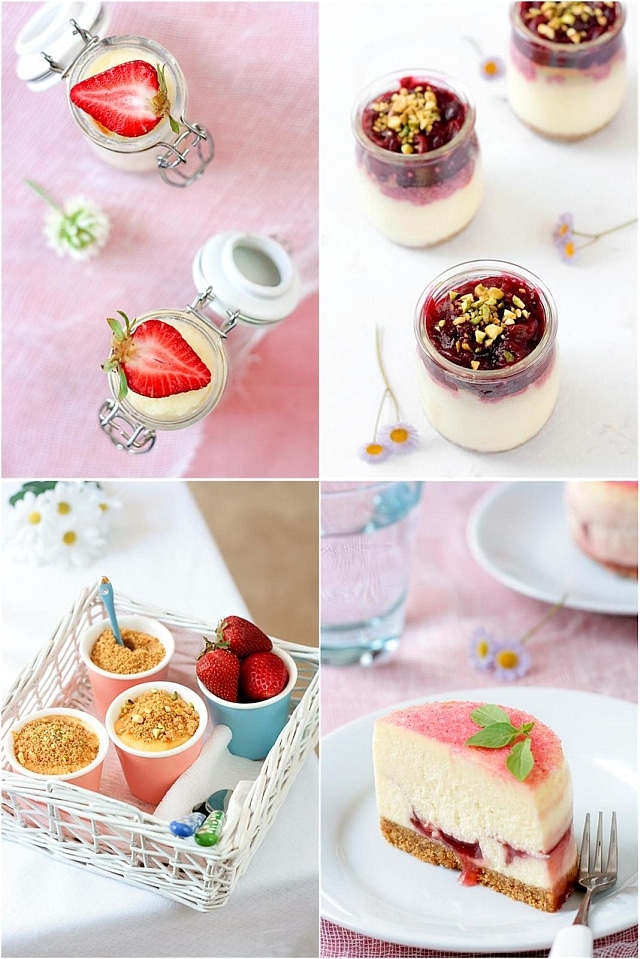
For the remaining batter, I spooned some of the graham cracker crumbs in different jars and topped with some plain cheesecake batter. The others were topped with a quick cranberry compote using frozen cranberries, sugar and lemon zest. And some were baked without crust and topped with a sprinkle of graham cracker crumbs and chopped pistachios.
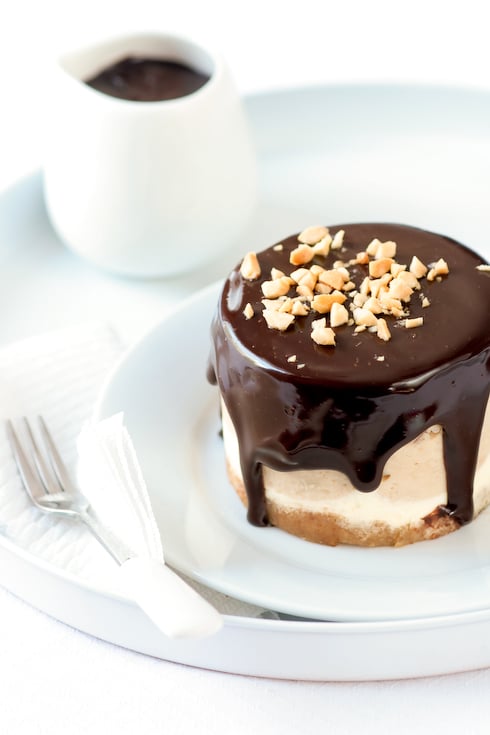
Peanut Butter & Chocolate Cheesecake


One year ago: Daring Bakers – Cheesecake Pops.
Two years ago: Outrageous Brownies

The April 2009 challenge is hosted by Jenny from Jenny Bakes. She has chosen Abbey’s Infamous Cheesecake as the challenge.
Abbey’s Infamous Cheesecake:

Helen’s Kitchen Notes: For the cheesecakes baked in individual dessert rings, I lined them with parchment paper and wrapped them around a couple of layers of foil to prevent leaking since they were to be baked in a water bath. Just don’t be shy with the foil or you will have some leakage. I lowered the oven to 275F (convection) and baked them for the same amount of time. I also baked all the jars and cups in a water bath at 275F. The possibilities are endless with such an easy going recipe thus I including the recipe as given by the host and my variations and tips at the end.

crust:
2 cups / 180 g graham cracker crumbs
1 stick / 4 oz butter, melted
2 tbsp. / 24 g sugar
1 tsp. vanilla extract

cheesecake:
3 sticks of cream cheese, 8 oz each (total of 24 oz) room temperature
1 cup / 210 g sugar
3 large eggs
1 cup / 8 oz heavy cream
1 tbsp. lemon juice
1 tbsp. vanilla extract (or the innards of a vanilla bean)
1 tbsp liqueur, optional, but choose what will work well with your cheesecake

Preheat oven to 350 degrees F (Gas Mark 4 = 180C = Moderate heat). Begin to boil a large pot of water for the water bath.
Mix together the crust ingredients and press into your preferred pan. You can press the crust just into the bottom, or up the sides of the pan too – baker’s choice. Set crust aside.
Combine cream cheese and sugar in the bowl of a stand-mixer (or in a large bowl if using a hand-mixer) and cream together until smooth. Add eggs, one at a time, fully incorporating each before adding the next. Make sure to scrape down the bowl in between each egg. Add heavy cream, vanilla, lemon juice, and alcohol and blend until smooth and creamy.
Pour batter into prepared crust and tap the pan on the counter a few times to bring all air bubbles to the surface. Place pan into a larger pan and pour boiling water into the larger pan until halfway up the side of the cheesecake pan. If cheesecake pan is not airtight, cover bottom securely with foil before adding water.
Bake 45 to 55 minutes, until it is almost done – this can be hard to judge, but you’re looking for the cake to hold together, but still have a lot of jiggle to it in the center. You don’t want it to be completely firm at this stage. Close the oven door, turn the heat off, and let rest in the cooling oven for one hour. This lets the cake finish cooking and cool down gently enough so that it won’t crack on the top. After one hour, remove cheesecake from oven and lift carefully out of water bath. Let it finish cooling on the counter, and then cover and put in the fridge to chill. Once fully chilled, it is ready to serve.

Pan note: The creator of this recipe used to use a springform pan, but no matter how well she wrapped the thing in tin foil, water would always seep in and make the crust soggy. Now she uses one of those 1-use foil "casserole" shaped pans from the grocery store. They’re 8 or 9 inches wide and really deep, and best of all, water-tight. When it comes time to serve, just cut the foil away.

Prep notes: While the actual making of this cheesecake is a minimal time commitment, it does need to bake for almost an hour, cool in the oven for an hour, and chill overnight before it is served. Please plan accordingly!

Variations I used:
For the strawberry lava center: cook down 1 cup of clean strawberries with 1/4 cup of sugar and 1 tablespoon of lemon juice. Strain and cook the syrp until reduced by half. Let cool. Spoon some cake batter over the crumb crust, add some strawberry juice and seal with more batter.

For the peanut butter cheesecake: I added 1/3 cup of peanut butter to 1/4 of the recipe and added 3 tablespoons of heavy cream to make sure the batter would remain smooth.

For the chocolate gananche: I heated up 1/3 cup of heavy cream over medium heat and poured it over 2/3 cup of bittersweet chocolate. Let stand 2 minutes and stir to smooth.

For the cheesecake in souffle cups: I just buttered the cups and baked them without the crust which I sprinkled later on with some chopped pistachios.

For the cranberry topped ones: I poured some crumb crust at the bottom of glass jars, topped with the batter and baked them like that. Once cooled I added the cranberry compote that I made by cooking 2 cups of frozen cranberries with 1/4 cup of sugar, a dash of cinnamon and some lemon juice.


In The Kitchen With Lemonpi

TheAnzacTart6[1]


To say that I am thrilled to have Yuie from Lemonpi guest blog today is an understatement. I am honored that she jumped right in when I asked and look at that dessert she made for the occasion!
We don’t know each other much outside our blog but I have been following hers for quite some time and it is always a feast for the eyes and a delight for the brain. I love her sense of humor and the girl is extremely talented. Her ideas are always fresh and her plating is exquisite. Could I have a little bit of a blog crush? Oh yes…Everytime I visit her blog I want to scream "Somebody give this gal prime position in a pastry kitchen!" She is too good to be someone’s assistant!
Let your eyes wander upon her latest creation and recipe right after the jump, and please tell me you agree: talent…


Where is your country? he said.
I dont know, said John Grady. I dont know where it is.
I dont know what happens to country.

–All the Pretty Horses by Cormac McCarthy

I’ve been feeling nervous about guest-posting for Helen this week. It’s a little like being asked to do a jig to entertain the crowd before Michael Jackson turns up to do the moonwalk. You just know it’s going to be a tough crowd.

Add my fear of public speaking into that mixing bowl, and you have one big cake of anxiety. In fact, I still clearly remember the last time I was required to give a presentation. It was at school, and the topic was Conflict Resolution. I was so fearful of having to stand in front of a whole class, that I didn’t. Instead, I gave my presentation using sock puppets, so that I could hide under the desk and let my hands do the talking instead. My sock-puppet-chefs, fought, exchanged strong words, came to blows and finally resolved their conflict. I even stapled turkey frills to each sock, to indicate chef hats.

But anyway.

For this guest appearance, I thought I would come up with something that I hope embraces the spirit of 'Tartelette'. One of the reasons why I love Helen’s blog is because she has a really strong sense of self. Her desserts are firmly embedded in the seasons from which they’re conceived and they lovingly recall aspects of her childhood and her current life.

AnzacTartdip3b


I was born in a tropical country and didn’t exactly spend my early childhood surrounded by rustic baking or elaborate pastries (I wish). Now that I have been living in Australia for so many years however, I feel so much a part of the culture and way of life. This is home.

I’ve made something in honour of Anzac Day which is observed every year in Australia on the 25th of April. My dessert, 'The Anzac' essentially consists of a sticky oatmeal tart topped with a layer of coconut bavarian and Anzac 'streussel'. Bursting with coconut, oats and golden syrup, it celebrates the textures and flavours of the famous Anzac biscuit/cookie.

Hope you enjoyed the brief sugar rush, and thank you for bearing with me. Don’t worry, Michael Jackson won’t be too long now. (Helen? Helen?? …)

anzatartdip1bc


One year ago: Polka Dot Matcha Tea Cake.
Two years ago: Litchee Rose Parfaits and Orange Blossom Macarons.'The Anzac' Recipe :
(makes two 6 ½” tarts)

For the Anzac biscuits/cookies:
Recipe is here. Either bake as cookies and later crumble what you need into pieces to use as the tart topping, or scatter the raw mixture on a baking tray as you would a streussel, and bake it that way.

For the tarts:
2 x 6 1/2” tart cases, blind baked

310g golden syrup
85g quick-cooking rolled oats
60g ground almonds
1 large egg
150ml thick cream
½ teaspoon vanilla extract (or ½ a vanilla bean, scraped)
2 tablespoons strawberry jam

Preheat the oven to 350F (180C).
Place the tart cases on a baking sheet. Spread a thin layer of jam into each tart case. Put the rest of the ingredients in a food processor. Process until smooth. Divide the filling between the tart cases. Bake for 10 minutes, then lower the temperature to 300F (150C) and bake for a further 20 minutes until the browned and set. Remove from the oven and allow to cool on a wire rack.

Helen’s recipe for coconut bavarian:
1 tablespoon (7gr) powdered gelatin
3 tablespoons water
4 egg yolks
1/4 cup (50 gr) sugar
1 cup (250 ml) coconut milk
1 cup (250ml) heavy cream, cold

In a small bowl, sprinkle the gelatin over the water and let stand to soften while you prepare the cream. In a large bowl, whisk the egg yolks with the sugar until very pale. In the meantime, in a medium large saucepan set over medium heat, bring the coconut milk to a simmer. Slowly pour the milk over the yolks, whisking constantly to prevent them from curdling. Pour the mixture back into the saucepan over medium low heat and cook until the cream coats the back of a spoon (as if making creme anglaise). Add the softened gelatin and stir until melted completely into the cream. Let cool to room temperature. In a stand mixer fitted with the whisk attachment, whip the cream to soft peaks on medium speed and fold it into the cooled cream base. Pour this mixture into two
6” rings (1 1/4” high) lined with acetate. Chill overnight.

To assemble:

Unmould the bavarians and place it on top of the tarts. Top each bavarian with the crumbled Anzac biscuits/cookies. Dust with icing sugar and serve..

Strawberry Charlottes

Strawberry Charlottes


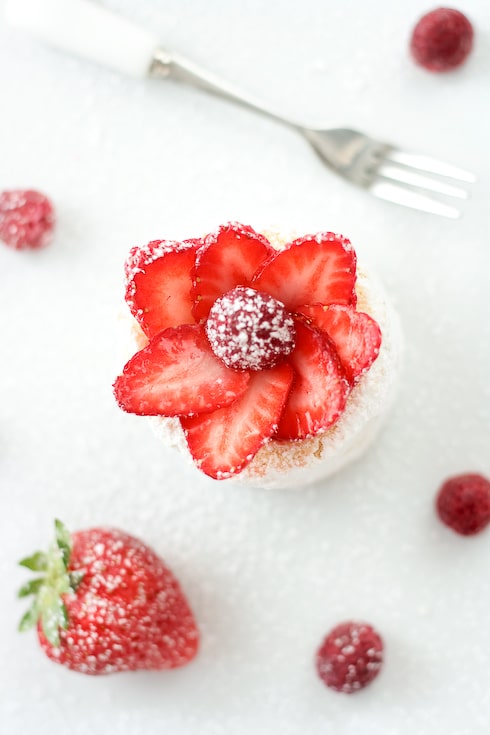
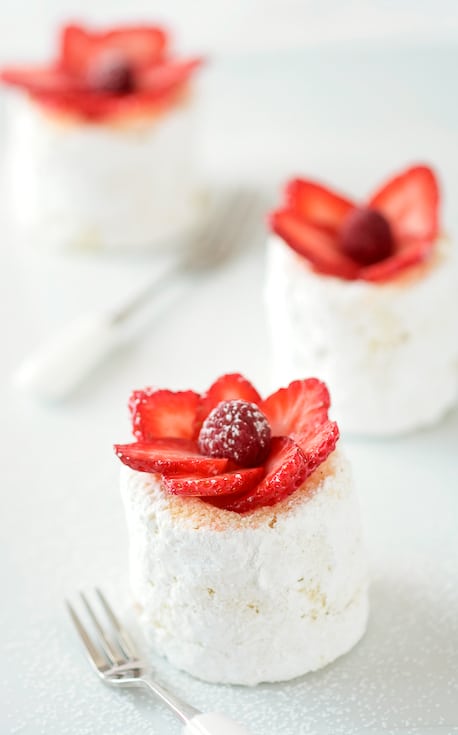
I know it’s really Spring when strawberry season starts around here. I think I could live on strawberries alone until the end of June! I almost did on Sunday actually. We went to friends' house for brunch and as we were talking outside on their patio, I dawned on me that it was also the weekend of the Strawberry Festival when strawberry picking really kicks off. We hopped in the car and loaded our baskets! I have already baked a couple of things with local strawberries I got both there and at the farmer’s market but in the meantime I wanted to share these Strawberry Charlottes.

As you can guess, the little bit of fun we had today with our friends was extremely welcome. I have to say, with last Sunday I am loving how such good weekends are giving me so much energy during the week. Welcome Spring!! Sorry Jen…we are not making snow angels in the snow but rolling in wild flowers. I keep filling the house with all sorts of buds and flowers that I find in the wood across the house. Bailey also makes sure that the ones from the florist are as tasty as the ones on his morning walks.

Unexpected


I made the Strawberry Charlottes a few weeks ago but did not get to post them until today. I have become so OCD about backing up text and picture files for the book that I did not realize I was backing up a bunch in the wrong folder including these. They were so good that I was getting a little sad knowing I would not have much time to make them again soon, until I looked under the "house stuff" folder. Why did I file them there, I don’t know…Actually I do and it scares me a bit so close to being another year old..

Strawberry Charlottes


I am getting mushy brains for sure. No, it’s not that I am losing it but I notice that my focus is so tense on the thing I am working on at a particular time than anything that does not relate to that is relegated to a dark part of my brain. My inner dialogue goes something like this these days "Phone bill? What phone bill? Keys? Where the heck did I last see them? Speaking of which…where are my dogs?"

All day today I wished I still had a couple of these to share at brunch. I got inspired one more time by Japanese Pastry Chef, Hidemi Sugino who captured the essence of charlottes as my grandparents and their parents before them would have had them. Before people started using ladyfingers to build the charlottes, the most usual way to make them was actually to line your mold with day old bread and let the juice and moisture from your feeling permeates the layers to make them soft. Times have changed but Sugino had a recipe in one of his books using that idea which I interpreted my way by using angel food cake that I had leftover instead of bread. The filling is a simple vanilla pastry cream. Simple, clean, delicious

Strawberry Charlottes


One year ago: Macarons 101.
Two years ago: Banana Pistachio Bonbons.

Strawberries and Vanilla Charlottes Recipe:
Makes 4 to 6
Note: for this recipe I used cake that I had already baked just to eat as is, that’s why it’s made only for 4 to 6 cakes. Angel food cake gets its name from the quantity of egg whites used. Homemade beats store bough, hands down and it makes a lot to share with friends. Freeze the yolks for a later use or make custards, puddings, ice creams, creme brulee, etc…You can use pound cake, yogurt cake, day old bread, like an uncut loaf of pullman bread, etc…Since I was talking about leftovers, I still felt it was courtesy to give the recipe for angel food cake.

For the Angel Food Cake:
18 egg whites
1 pinch salt
1 1/2 (300gr)cups sugar
1 cup (140gr)cake flour, unsifted
1/2 cup (60gr)confectioners' sugar, unsifted
1 teaspoon lemon zest

For the Pastry Cream:
½ vanilla bean
1 cup (250ml) whole milk
1 egg + 1 egg yolk
2 tablespoons (25gr) sugar
2 tablespoons (16gr) cornstarch

1/2 pound to 1 pound (250gr to 500gr) strawberries, hulled and thinly sliced
Powdered sugar

Make the cake: preheat oven to 350F and position a rack in the middle.
Sift together the cake flour and confectioners sugar together. Reserve.
In an stand mixer fitted with the whisk attachment (or with hand held beaters), whip egg whites with a pinch of salt until foamy (think cotton candy). Gradually add sugar while beating, and continue to beat until very stiff (think shaving cream).
Carefully fold the egg whites into the reserved flour mixture along with the lemon zest. Pour into a 10 inch tube pan lightly spray with cooking spray.
Bake for 45 minutes. Remove it from the oven and invert the pan and set it over a longneck bottle (water or wine). It is necessary to invert the pan when making angel food cake because while it cools, the weight of the cake is enough to collapse it if you let it sit on the counter top. Upside-down, the weight of the cake will keep the cake tall. Release the cake from the pan when it is completely cooled. Cut four to six 2-inches thick slices. Place a 3-inch cookie cutter on a slice of bread, insert and run a knife around the cutter to form one cake base. Hollow out each cake with a spoon or melon baler. Repeat for the other slices. Place the powdered sugar on a large plate and roll the cakes in it. Reserve.

Make the pastry cream: on a flat surface, cut the vanilla bean in half lengthwise and scrape the seeds from the pod.
In a medium saucepan, combine the milk and vanilla bean seeds and pods over medium high heat. Bring the mixture to a simmer.
In the meantime, whisk together the egg and the egg yolk with the sugar and cornstarch.
Once the milk mixture is hot, remove the pod and slowly pour it over the egg yolk mixture, whisking constantly to prevent the eggs from curdling. Pour the mixture back into the saucepan over medium low and cook whisking constantly until the mixture thickens to a thick pudding like consistency. Transfer to a container. Place a piece of plastic wrap over the cream to prevent a skin from forming and let cool completely before using. Fill the cavities of each reserved cake. Decorate with the strawberry slices.

Chocolate Mango And Coconut Cream Cake

Chocolate Coconut & Mango Entremet


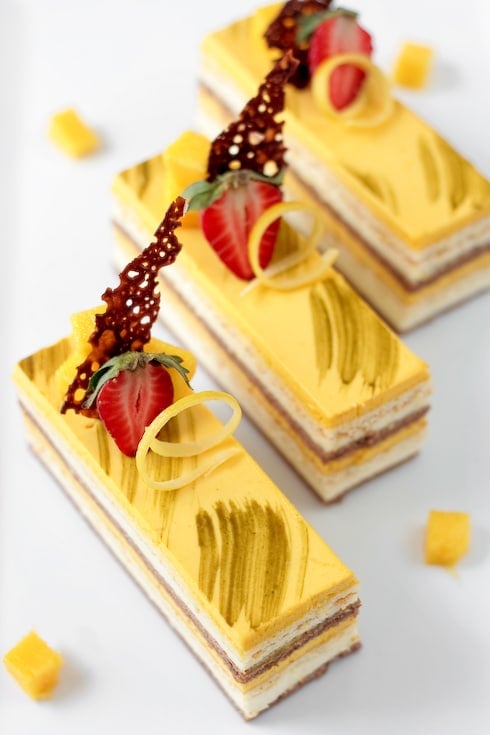
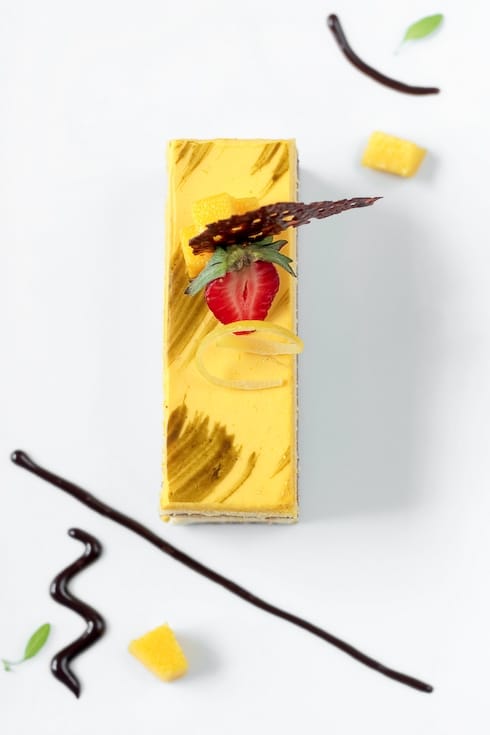
When others were painting eggs for Easter last week, I was busy painting a cake. Well, applying brush strokes to a birthday cake would be a more accurate description. Carol and Fifi paint, very well I might add. I just fiddle with a pastry brush because I am short on time to come up with other things to decorate this delicious Chocolate Mango And Coconut Entremet Cake.

I know, I know, being short on time and making a multi layer cake does not seem right in the same sentence. Well, welcome to my logic! It’s true I am not the most logical person for "real life" things although I am improving with each year that passes. The only domain for which I am extremely logical is in the kitchen and with food. Do not ask why. And just in case you needed proof, let me tell you a little story…


I was about 10 or 11 and learning maths and how to solve logical problems starting such as "if train A leaves the station at 11.35 and train B…" and this was about as far as my brain would register. Two trains, two times, one station…oy! My favorite though was the "mantel problem" (yes, yes, I did say mental mantel). It always went something like "if your mantel measures x across by y across, how much fabric do you need to go around it, leaving k amount for the corners as well as the top and bottom" (or something like that). I would just stare at my dad and feel really sorry for it that I could not wrap my head around the solution. Did not make sense. Long minutes of complete silence during which I could hear my dad shoes start to tap the floor under the dining room table. Oh that awful feeling of letting him down…

Most time it would end in excruciating diagrams and long line of equations that burried me further into maths and logic oblivion. Until one fine day when my dad finally understood that if I were going to learn that kind of language, he would have to translate it into my own. Instead of lining that darn mantel piece with fabric, he proclaimed we would line it up with chocolate bars! Yeah!! I can relate to that! Within a few minutes, my eyes lit up and I could start to hear some big motion happening inside my head…I was on a roll…

Chocolate Coconut and Mango Entremet


We did have birthday over Easter weekend in the family and a request for a summery-tropical-beach cake. When I mentionned coconut as part of the cake layers, a few raised their hand in protest. Ah yes, I had forgotten we had "coconut shreds haters" in the family. No problem. No shreds anywhere, just plenty of coconut milk in the Bavarian cream would do. I had just the right amount of Alfonso mango puree leftover from the panna cottas I made recently so it got turned into a lovely and silky mousse and let’s not forget the usual suspects like flour, butter, eggs, cocoa.

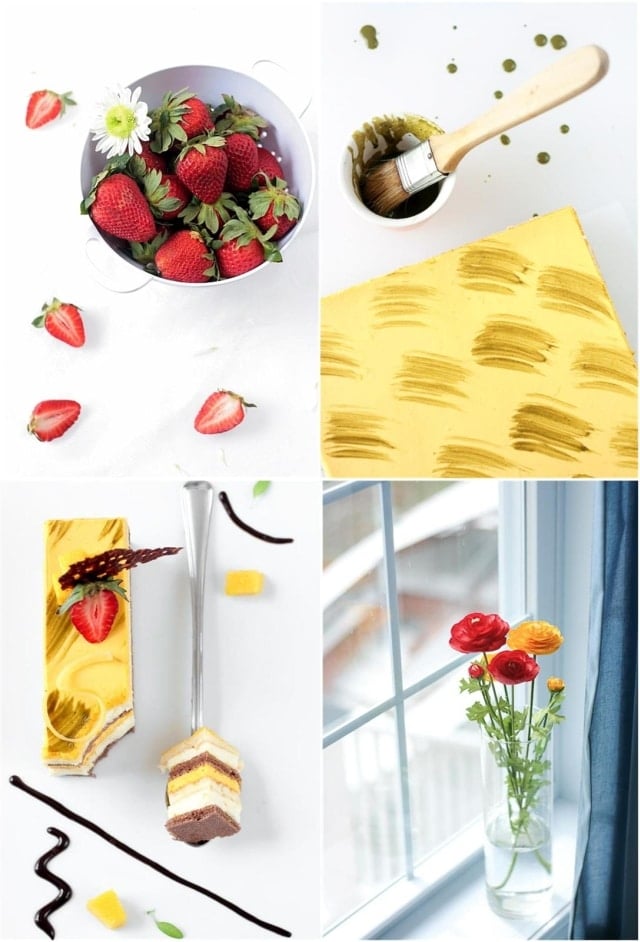
When someone asks for a multi layer entremet cake for a birthday, my logic is to say yes even if work is busy because I know I can make the task easy by spreading the job over a couple of days without fretting. You can make the cake layers ahead of time and keep them well covered in the fridge or refrigerator. The mousses will set up rather fast so make them the day you are ready to put it all together. Since I can’t paint, I gave up on the idea of doing a beach scene on top and used some matcha dissolved in water to brush some strokes on top of the cake.

I was a bit worried of combining so many different layers into one cake but it actually worked perfectly! The coconut milk in the Bavarian cream gave it a very soft flavor and not at all artificial (no one likes to eat flavored SPF 50) while the mango finished up that lovely tropical theme. Since the cocoa genoise was a little too simple on its own, I added some rum flavored simple syrup to flavor it a bit. It was an adult affair anyway. See…I am logical after all!

Chocolate Coconut and Mango Entremet


Chocolate – Mango and Coconut Cream Cake Recipe:

Serves 10-12

For the vanilla genoise:
3 large eggs
3 large egg yolks
1 teaspoon (4gr) vanilla extract
pinch of salt
¾ cup (150gr) of sugar
½ cup (70gr) cake flour
¼ cup (30gr) cornstarch

Preheat the oven to 400F and set a rack in the middle.Lightly spray a 12×17 baking sheet with cooking spray or lightly brush with melted butter. Set aside
Whisk the eggs, egg yolks, vanilla, salt and sugar together in a large bowl over a pan of simmering water. Whisk gently until the mixture is just lukewarm, about 100F on a candy thermometer(or test with your finger – it should be warm to the touch).
Transfer the mixture to the bowl of a stand mixer fitter with the whisk attachment (or hand held beaters) and whip on medium-high speed until the egg mixture is cooled and tripled in volume. The mixture will be thick and will form a slowly dissolving ribbon falling back onto the bowl when the whisk is lifted.
Over a medium bowl or a piece of parchment paper, sift together the flour and cornstarch.
Add one-third of the flour mixture to the beaten egg mixture. Use a rubber spatula to fold in the flour mixture, making sure to scrape all the way to the bottom of the bowl to prevent the flour mixture from making lumps. Repeat with another third of the flour mixture and finally with the remainder.
Pour the batter into the prepared pan and smooth the top with an offset spatula.
Bake the genoise for about 10 to 12 minutes. Make sure the cake does not over bake and become too dry or it will not roll properly. Let cool on a rack. Remove the cake from the baking sheet and invert it on a larger piece of parchment paper. Peel of the parchment paper that was lining the baking sheet. Set the cake aside.

For the cocoa genoise:
Same process but replace the amount of cornstarch with the same amount in cocoa powder and proceed with the recipe the same way.

For the coconut Bavarian cream:
1 tablespoon (7gr) powdered gelatin
3 tablespoons water
4 egg yolks
1/4 cup (50 gr) sugar
1 cup (250 ml) coconut milk
1 cup (250ml) heavy cream, cold

In a small bol, sprinkle the gelatin over the water and let stand to soften while you prepare the cream.
In a large bowl, whisk the egg yolks with the sugar until very pale. In the meantime, in a medium large saucepan set over medium heat, bring the coconut milk to a simmer. Slowly pour the milk over the yolks, whisking constantly to prevent them from curdling. Pour the mixture back into the saucepan over medium low heat and cook until the cream coats the back of a spoon (as if making creme anglaise). Add the softened gelatin and stir until melted completely into the cream. Let cool to room temperature.
In a stand mixer fitted with the whisk attachment, whip the cream to soft peaks on medium speed and fold it into the cooled cream base. Use within one hour.

For the mango mousse:
1.5 teaspoons (3.5gr) powdered gelatin
1 tablespoon (15gr) water
4 oz (120gr) mango puree (to make your own, see here)
2 tablespoons (25gr) sugar
1/2 cup (125ml) heavy cream, cold

In a small bowl, sprinkle the gelatin over the water and let it soften while you prepare the fruit.
In a medium saucepan, bring the mango puree and sugar to a simmer. Remove from the heat and add the softened gelatin. Stir until the gelatin is completely melted.
Transfer the fruit puree to a large bowl and let it cool to room temperature.
In a stand mixer fitted with the whisk attachment, whip the cream on medium speed until soft peaks form. Fold about 1/3 of the whipped cream into the fruit puree to lighten it up (do not worry about losing air at this point). Carefully fold in the rest of the whipped cream. Use within one hour.

Rum simple syrup:
1/2 cup (125ml)water
1/4 cup (50gr) sugar
2 tablespoons (30gr) rum

In a small saucepan set over medium high heat, bring all the ingredients to a simmer until the sugar dissolves, stirring occasionally. Let cool to room temperature.

Lemon glaze:
1.5 teaspoons (3.5gr) powdered gelatin
1 tablespoon (15gr)water
1/4 cup (62.5ml) water
1/4 cup (62.5ml) lemon juice
2 tablespoons (25gr) sugar

In a small bowl, sprinkle the gelatin over the water and let it soften.
In small saucepan set over medium high heat, bring the water, lemon juice and sugar to a simmer, stirring off and on to make sure the sugar dissolves properly. Add the gelatin and stir until completely dissolved. Let cool to room temperature (if the mixture gels, warm up over low heat until barely melted again).

To assemble:
Line an 8×8 baking pan with parchment paper of foil, leaving a border on the sides to make it easy to remove when set. You can also use a cake frame of the same dimensions.
Cut two 8×8 cake layers in each of the genoises. Place one layer of the chocolate genoise at the bottom of your pan and brush with some rum syrup. Pour half the coconut Bavarian on top and smooth with an offset spatula. Top with a layer of vanilla genoise, brush some rum syrup on top. Pour half the mango mousse and smooth with an offset spatula. Repeat the process with the second half of cakes and creams. Refrigerate until set. Pour the lemon glaze over the cake and let set in the fridge.
Cut through the cake with a knife dipped in hot water to prevent breaking the glaze instead of slicing through it.

Cardamom and Saffron Ice Cream

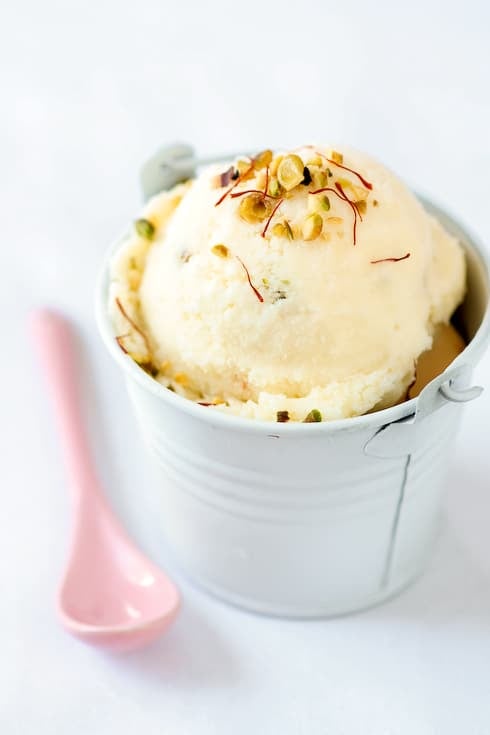
Saffron&Cardamom Ice Cream


I am usually pretty excited when Mondays roll around. New week, new things happening, new people to meet and things to discover. It’s never quite the same and I look forward to the things learned and observed. Except this Monday. It has been such a splendid weekend, I hardly want it to end. We did have an Easter egg hunt for the kids next door and an improvised picnic in the yard with the neighbors. It just filled me with joy, hope and laughter. An instant battery charger for the soul.

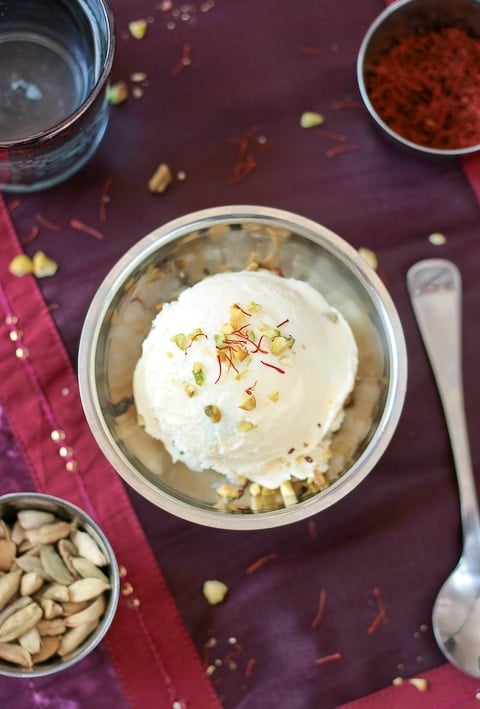
I am usually in charge of desserts when we get together but this time I only had ice cream ready. Actually, I could have cut tiny pieces of what was left of a chocolate coconut and mango cake I had made but that would have been like giving an elephant a thimble to drink from. (more on the cake this week). Instead, I brought down the container of Cardamom and Saffron Ice Cream I was saving for such warm and pleasant days.


Can The Weekend Last All Week?


If I had shown you the inside of the cabinets during Jen’s Kitchen Tour series, it would have confused everybody. I have what B. called "kitchen bougeotte". (To have "la bougeotte" = to be fidgety). With my parents and almost all their sibblings born an raised abroad, there was no standard for cuisine types in the family. Wherever they were they would learn some local dishes and ultimately pass them on to us. Along with all the pots and pans specific to each culture. I realized the tour would quickly require a two-page extension if I included them and I could not subject you and Jen to that. It was long enough already!!

Being here in the States is close to cuisine paradise with some many different nations in one spot, so you can bet my "kitchen bougeotte" is greatly satisfied! I am under heavy French, Asian and Indian flavors. In the pantry, each culture tends to have a specific bin. There is however a couple of spices with their own prime real estate in the pantry. Cardamom and saffron.

I love, love, love cardamom. In baked goods, mousses, cakes, you name it I am there. I use green cardamom for baking while I keep black cardamom for savory dishes. I don’t usually think of saffron when baking but I am pleasantly surprised each time I do. While I don’t pretend to be fluent in Indian cooking, I do enjoy the knowledge and recipes from other bloggers out there. I also have the loveliest of friend who prepared this ice cream the last time I saw her and from the first spoonful, I knew I would have to make it at home….quickly! This ice cream made me week in the knees, literally.

Saffron&Cardamom Ice Cream - All Dressed Up...

No saffron was harmed during the photo shoot…it all went back in its jar. Now everybody can relax."

The flavors of this ice cream are reminiscent of kulfi although the method used here is a bit different than in traditional kulfi recipes. Oh trust me, next on my list is to get me a set of kulfi molds and to try Deeba’s recipe…hmmm… Nothing could be simpler than this refreshing ice cream: cardamom infused cream, pinch of saffron and a handful of pistachios (check your sources given the recent news). Churn and dig…

Cardamom and Saffron Ice Cream Recipe:

2 cups (500ml) heavy cream
1 cup (250ml) whole milk
1 cup (200gr) granulated sugar
4-5 green cardamom pods
pinch of saffron
1/3 cup (40gr) raw pistachios

In a large saucepan, stir together the cream, milk and sugar. On a flat surface, or with a mortar and pestle, gently crush the cardamom pods and add both seeds and pods to the cream mixture. Bring the mixture to a simmer over medium low heat, stirring occasionally to dissolve the sugar. Remove from the heat and let steep as it cools to room temperature. Refrigerate, preferably overnight.
Once infused, strain the mixture and remove the crushed cardamom pods. Add a few threads of saffron and stir.
Coarsely chop the pistachios and add them to the mix.
Process the mixture into your ice cream maker according to the manufacturer’s intructions.
No ice cream maker? No problem! Pour the cream into a freeze proof container and freeze for a couple of hours. Take it out and whip it with an electric mixer or immersion blender, freeze it again, whip it again….do that four or five times. The mixture won’t be quite the same but pretty darn close.

A Pavlova And A Guest

Pavlova5

It’s "Share Your Space Friday" here again!! I have never posted that much in a week and the fun part is that I only had to write an intro!!

I am loving having guest bloggers and not only because it gives me time to frolic in the sun (ugh…no not really…!) but mainly because it is like having a friend stop by and share with you a bit of their day, their personality, etc… And if personality had a name, it would be Kelly from Sass and Veracity. I knew from the first post that I’d be reading forever…I think it was her post on creme brulee and I found myself almost hugging the computer screen just staring at her stove. Meeting her last Fall was the icing on the cake….if only my mom and mother-in-law would let me be adopted by this sassy gal…sigh… She’s got verbage, she’s got class, she’s got ethics and an amazing sense of humor. Most of all, I don’t know better person to cheer anybody on in anything they venture doing.

I am thrilled to have Kelly pop by and share with you this amazingly refreshing pavlova. Read on for the recipe.
Now….doesn’t this look amazing for Spring! Happy Easter everyone!


I’m one of those cooks who is notorious for preparing recipes I’ve never tried before when there’s a special occasion looming. It doesn’t matter whether it’s for family, close friends, or a party for 40, I can guarantee that everything I make will be new to me. I’m sure that to some, I’m either grossly egotistic, or to others, a complete fool. I’d say adventuresome — or a glutton for punishment. The thrill of discovery during the planning process far exceeds any worry I could have about screwing something up. I love sifting through my magazines, cookbooks, and favorite web sites looking for the perfect recipe — especially if it’s something totally new.

So when Helen contacted me about doing this guest post, after initially grinning like a sap, I felt as if I’d been given permission to create the biggest planning mess I’ve made in a while. Cookbooks and magazines everywhere. A bookmarking frenzy on my Mac. Silly questions about "which recipe would be best" posed to my 16-year-old son who patiently indulged me with a more than one-syllable response. It was as if I’d been invited to a lovely party and then realized I didn’t have anything to wear. Even if I actually had a particular recipe in mind, and said recipe came out perfectly, I’d have to take photos.

Ah, the photos. I’ve all but swooned over Helen’s ethereal photos at one point or another. Light and airy, softly beckoning me to linger over what she has prepared, each photo taunts me with a "just you go ahead and try to make this, girlie!" And I think, in time — all in good time after kicking my procrastination skills into high gear. I met Helen last last Fall at the wedding of a mutual friend, and it took no time at all to learn just why her work is as flawless as it appears. She’s patiently persistent, works hard, is extremely focused, works hard, and has a seemingly bottomless reservoir of energy. Did I mention how hard she works? Meeting her was an absolute pleasure. Clearly, I had to make something that would have a chance of gracing the page, right?

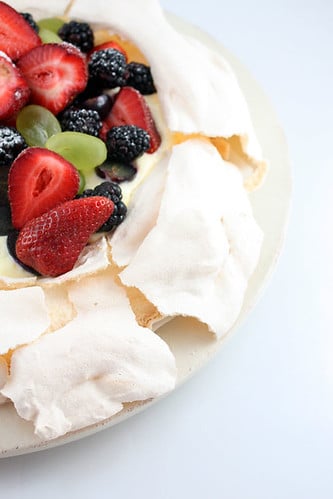
Pavlova

Ironically, I came very close to baking a Paris Brest, something I’ve made before, but at the last minute, changed my mind. I’m sure it has nothing to do with the fact that the last time I made pate a choux, I was less than thrilled with the outcome. Instead, I’ll blame it on the photograph I saw in this month’s issue of Gourmet of the "Pavlova with Lemon Curd and Berries." Its imperfect, simple appearance reminded me of a galette and prodded me to reconsider the long standing issue I’ve had with meringue. Not the meringue on pies — meringue that’s baked. For some reason, I’ve always steered clear of it, not quite relishing the sensation it causes in my teeth when I bite into it. Or maybe it’s the near weightlessness of it. Surely something so light can’t have much substance. Excuses, excuses.

But I was mesmerized by the Pavlova, a dessert named after the famous Russian ballerina who, after touring Australia and New Zealand in the 1930’s, is said to have had this dessert named after her. Although it’s the "light and airy" aspect of her dancing that the dessert was created to mimic, I’m reminded more of a flouncy tutu, fluffed high with tuille. Just beautiful.

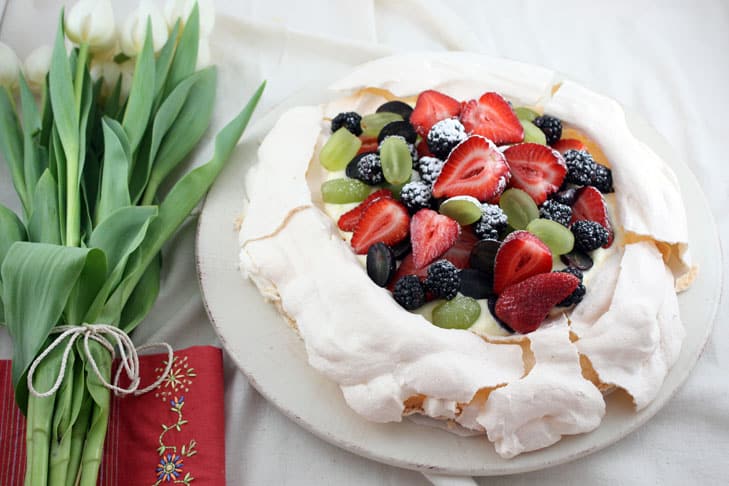
I’ve been savoring this dessert since yesterday, marveling over extreme contrasts in texture and flavor. The meringue crust, so delicate that touching it causes it to shatter, melts on my tongue. In the center, the meringue is a creamy, marshmallow treat, its sweetness tempered by the tartness of the lemon cream. The combination of the berries and grapes add a perfect crunch that brings it all together. Whimsical, unpredictable, and oh so delicious.

Here’s to you, Helen. You’re an inspiration to me in many ways and I’m quite honored to have done this for you.


Pavlova7

Pavlova with Lemon Cream, Berries, and Grapes

For the meringue…
1 cup superfine granulated sugar
1 tablespoon cornstarch
3 large eggs at room temperature 30 minutes
3 tablespoons cold water
1 teaspoon distilled white vinegar

For the filling…
2/3 cup granulated sugar
1 tablespoon cornstarch
1/8 teaspoon salt
1/3 cup fresh lemon juice
1/2 stick unsalted butter
3 large egg yolks, lightly beaten
2 teaspoons grated lemon zest
1 cup heavy cream
2 cups mixed berries
2 cups grapes

Preheat oven to 300ºF and position a rack in the center.
To prepare the lemon cream, stir sugar, cornstarch, and salt in a saucepan. Add the lemon juice and butter, bringing the mixture to a simmer over medium high heat. Continue to whisk at a simmer, about 1 minute. Whisk about 1/4 of the mixture into the beaten egg yolks, then transfer the egg yolk mixture back into the saucepan. Over low heat, continue to cook, but make sure not to boil, whisking constantly until the lemon curd is thick, about 2 minutes. Scrape into a shallow bowl, stir in the lemon zest, and place a piece of parchment over the surface. Refrigerate for about 1-1/2 hours.

To prepare the meringue, line a baking sheet with parchment and trace a circle about 7″ in diameter in the center. Turn the parchment over.
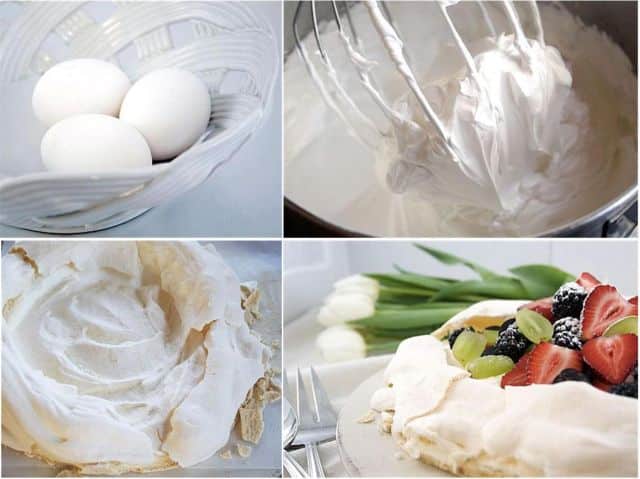
Whisk superfine sugar and cornstarch together in a small bowl. In the bowl of an electric mixer, beat whites with a pinch of salt at medium speed until soft peaks form. Add the water and beat until whites hold soft peaks once again.
On medium-high, beat in sugar mixture 1 Tbsp at a time. After all sugar has been added, beat 1 minute longer. Add vinegar, then beat at high speed until glossy and stiff peaks form, about 5 minutes (longer if using hand-held mixer). The meringue will be extremely thick.
Spread meringue carefully to cover the circle on the parchment, creating a cavity in the center (for the filling). Bake until meringue is pale golden and has a crust, about 45 minutes. Avoid opening the oven door! Turn oven off and prop door open slightly with a wooden spoon. Cool meringue in oven 1 hour. The exterior will be dry and possibly cracked, the inside more like the consistency of marshmallow.

To assemble the pavlova, beat the heavy cream just as it holds stiff peaks, then 1/4 cup at a time, whisk cream into the lemon curd. Check consistency each time before adding more cream. It should be able to mound. Spoon lemon cream into cooled meringue and mound fruit in the center. Serve with extra whipped cream if desired.


Kitchen Tour Series

At Work...And Play...


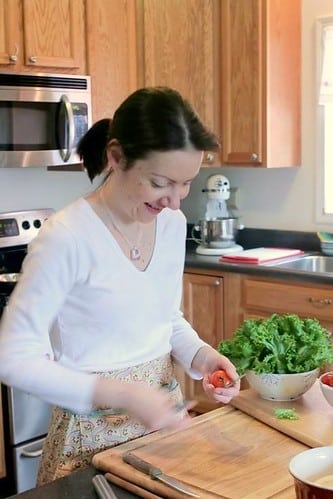
B. and I are hanging out with Jen today and opening up the kitchen as part of her Kitchen Tour Series. We even got the pupps to stay still for a photo op!
Head over to Use Real Butter if you want the lowdown on our kitchen and pantry space.

Thank you Jen for having us over. It’s been a ton of fun doing it!

On another (related) note, a recipe index is finally up although not complete yet. I am slowly working on it during break times but there is already a good bit to start off with!!

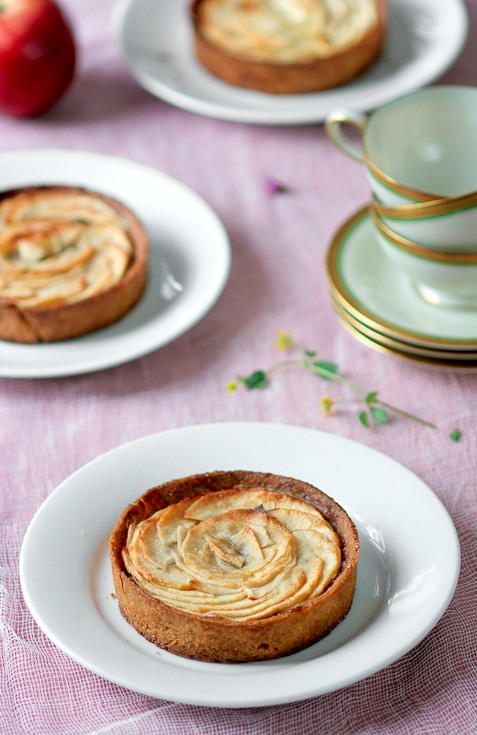
Grandma’s Apple Tartelettes

Grandma's Apple Tarts - Afternoon Baking


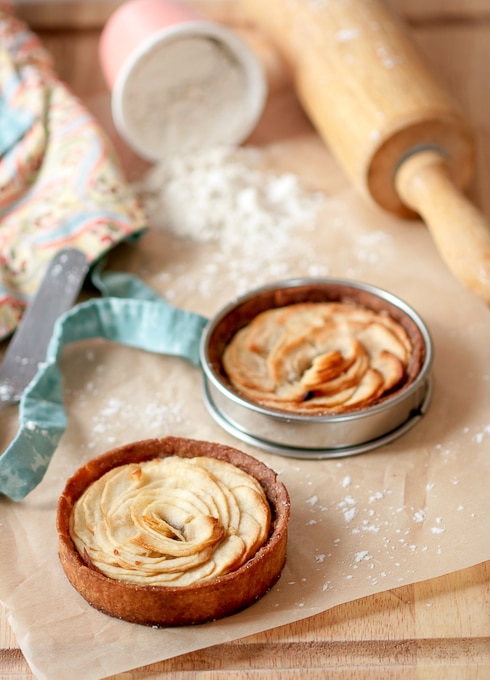
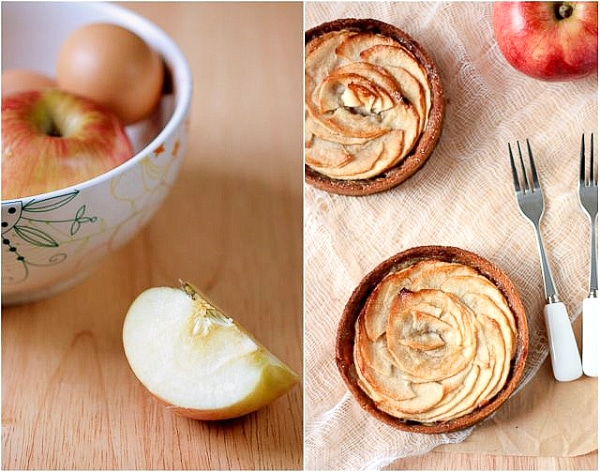
I know I have kept building this up since my mother’s ratatouille and wrote a couple of other things in between. Part of me is thrilled to share my grandma’s apple tart with you and part of me wants to keep it inside just a little longer. It’s unlike me not to share so these past few days I kept wondering why it was so dang hard to write this very simple, very humble yet delicious recipe. A simple pate sucree topped with a vanilla bean apple compote and thin slices of apples. A sprinkling of sugar.

You can guess that it is just not about the tart. It’s the mamie behind it and telling "her" in a few paragraphs in a blog can’t possibly explain why this recipe means so much to us and why we absolutely love to make it. I am willing to try though, because I know that my grandmother is very much like yours. Comforting, simple and sometimes complex.

appledip3b


What can I say that could possibly do justice to my grandmother’s heart and personality? She was married to my grandfather for 71 years (love their wedding picture). This year they would have celebrated 75 years of marriage and I get all choked up when I think know what my grandfather truly wants nowadays. I know he wishes to see her again soon. It never saddens me when I hear him say that. I smile instead. I want to make him her apple tart so that he can smell the wonderful aromas of vanilla beans and apple "compoting" together. So that he can hear the swishing of her apron as I roll the dough for the crust. So that he can pass beside me as I am slicing the apples and say "listen to your grandmother. She knows when they are too thick".

Following her thought that a recipe is a canvas for the baker to give a recipe his or hers personality, she never wrote the ingredients or recipe down. To anyone who asked her about it she would simply jot down "pate sucree – compote de pommes – tranches de pommes". Basically, if you use what you know you like, you can’t go wrong even if it changes every time you make it. I did just that. I added some almonds to the dough for a little earthy flavor. I combined vanilla and cardamom for the cooked apple and I sprinkled the sliced apple with some sugar rubbed with lemon zest. To me that was Mamie. A little bite, a little spice, a good bit of delicious and a touch of pizzaz.

Grandma's Apple Tarts


Apple Tartelettes Recipe:

Makes four 4- inch tartlets

Pate Sucree:
2 tablespoons (20gr) slivered almonds
1/2 (60gr) cup powdered sugar, unsifted, divided
1/2 stick (56.5gr) unsalted butter, at room temperature
pinch of salt
3/4 cup (90gr) all-purpose flour
1 egg yolk

Preheat oven to 350F.
Place almonds and 1 tablespoon powdered sugar in a food processor. Pulse until the nuts are finely ground. In bowl of electric mixer fitted with paddle attachment, cream butter, ground nuts and salt on medium speed until well-combined. Slowly add remaining powdered sugar and flour and mix well. Add the egg yolk and mix until incorporated. Shape dough into a ball and flatten into a disc. Wrap with plastic wrap and refrigerate for two hours or overnight.
Place the dough in between two sheets of plastic wrap or parchment paper and roll it out to about 1/8-inch thick. Cut out four 6- inch rounds and fit them inside four 4- inch tartlet molds, patting the dough in with your fingertips if it breaks on you as you transfer the rounds. Gather the scraps and set aside.
Prick the dough with a fork and refrigerate 30 minutes.
Preheat the oven to 350F and bake the shells for 12 to 15 minutes. Let cool on wire racks.

Apple Compote:
1/2 vanilla bean
1 teaspoon (2gr) ground cardamom
2 tablespoons sugar
4 medium apples (your preference. I went with Fuji)
1/4 cup to 1/3 cup (60 to 80ml) water

On a flat surface, cut the vanilla bean in half lenghtwise without cutting all the way through and scrape the seeds from the pods with a pairing knife. Place them in a large saucepan along with the cardamom and sugar. Set aside.
Peel, core and roughly chop the apples. Add them to the vanilla and sugar mixture along with the water. Bring the mixture to a simmer over medium heat. Turn the heat down, cover and let the apples stew for 30 to 45 minutes. Check every 20 minutes to and add water to the mixture if the liquid evaporates faster than the apples can cook. I tend to cook mine just unti soft so that they keep a bit of texture under the tooth. Remove from the heat and let cool to room temperature. Divide the mixture evenly among the tart shells.

Apple Topping:
2 tablespoons (15gr) granulated sugar
zest of half a lemon
2-3 medium apples

In a small bowl, rub together the sugar and lemon zest so that the citrus natural oils can flavor the sugar.
Peel, core and thinly slice the apples (the thinner the prettier. Decoratively arrange the slices over the compote and sprinkle evenly with the sugar.
Bake at 350F for 20 to 25 minutes or until the top appples are golden brown.