Jahresarchive: 2007

Craving Grandma’s Apricot Tart

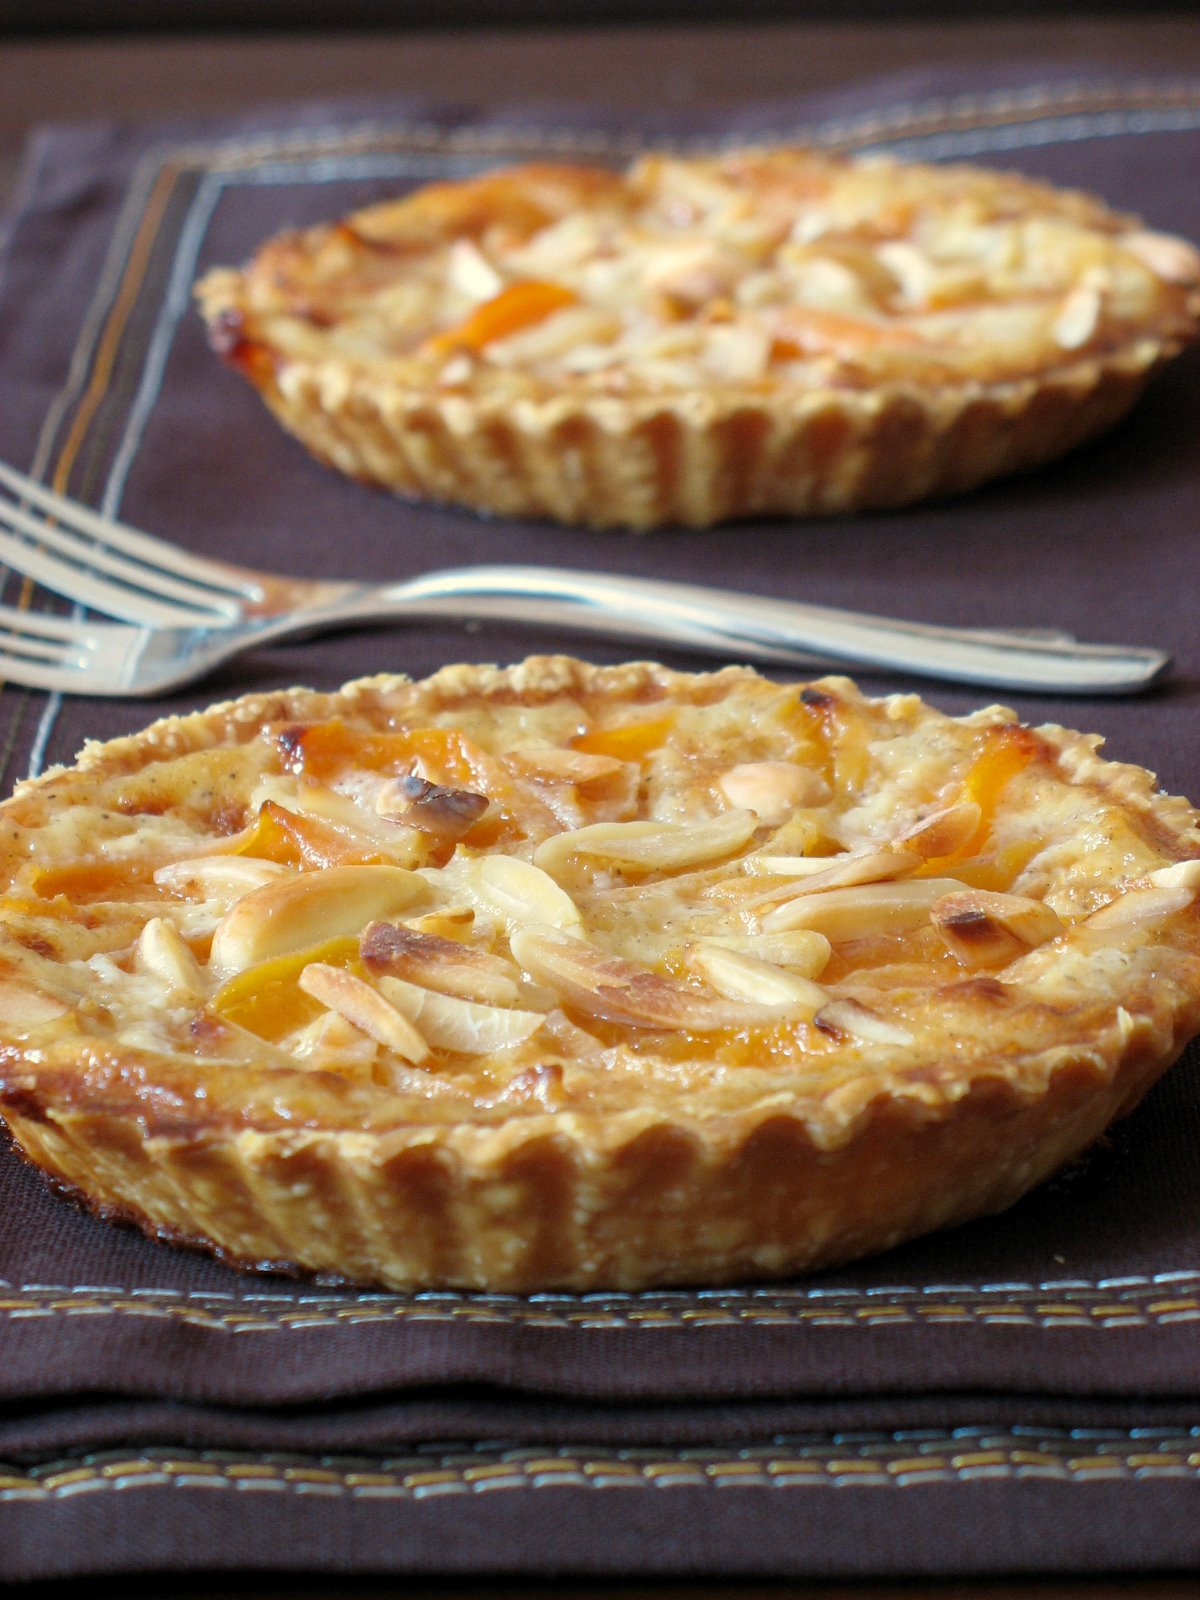
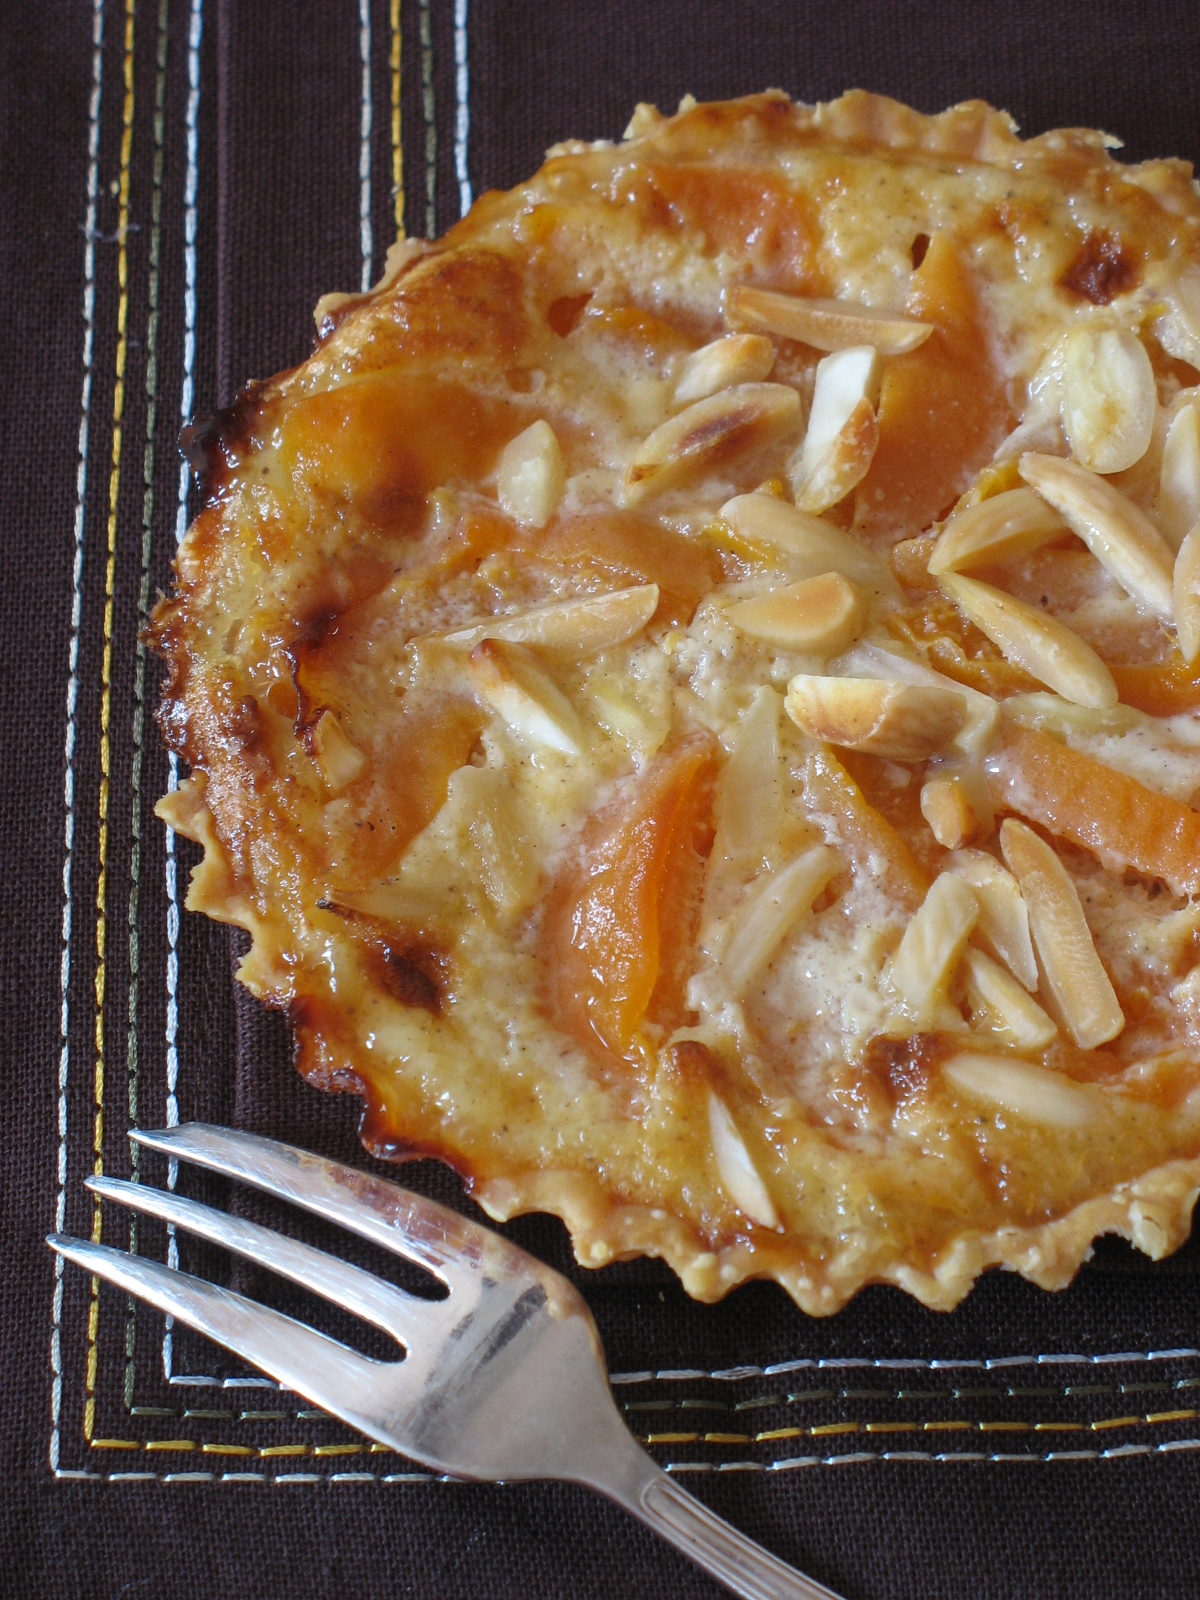
I have been craving my grandmother’s tart ever since I saw the first apricots at the store a few weeks ago. Well, actually I crave it all year long and while it is quite good with quality canned apricots, there is of course nothing like fresh, velvety and fragrant ones. We don’t really need a reason to indulge in our cravings. By definition, giving into them is giving into reckless abandon of our senses and indulging in what brings us comfort and joy, as temporary as it is.

When Jennifer announced this month Sugar High Friday, my brain started racing towards many a childhood favorites (and made me wonder if I did not live in a state of perpetual craving), before the only obvious dessert was Mamie Paulette’s apricot tart. It would also give me the opportunity to spend some time with my memories of watching her make the dough and filling countless times with the same love and care.

Then a few days ago, Ivonne wrote about her Nonna Pia and shared fond memories of her life and approach to cooking. I think that Paulette and Pia would have been great friends if given the chance. They both had six children and both knew how to turn the simplest ingredients into scrumptious dishes. I left Ivonne a comment mentionning Paulette’s apricot tart and she emailed me suggesting that I post about it and share my memories. She also threatened to bug me until I did…! Well, here it is my friend!

I have talked about my grandmother many times before, always mentionning her apple or apricot tarts and always making something else. Her tarts were so simple, yet so absolutely delicious that she knew to keep us happy by always having one ready. My grandparents' house has always been the place of gathering throughout the week and especially on sundays. Four out of six children ended up living within close proximity and thus started the sunday tradition of "coffee and tart" around three in the afternoon meaning if you cannot come for lunch, try to make it for dessert. Even as a teenager and young adult, I would always try to make it for tart…especially if a paper or thesis was calling my name!

There was something so soothing and comforting in seating down with her and my grandfather to sip coffee, talk about the family, the neighbors, their garden, and eat pie.

There is even a funny anedocte associated with her apricot tart. At some point her eyesight got worse and worse, and she often made two pies, freezing one in case she would be too tired one weekend to make a fresh one. We were all gathered at the dinner table one sunday evening and when dessert time came, she asked me to go fetch the tart warming up in the oven (you know, so that the ice cream on top melts faster!). I came back trying to hold the tears of laughers streaming down my face…she had mistakingly put a quiche in the oven and not the tart…. ! Everytime I make quiche or tart, I think about that day and immediately look up at the sky and whisper "Love you Grandma".

Apricot Tart

Serves 6-8 (I made individual one for pictures)

Crust:

1 1/4 cups all-purpose flour
1 1/2 Tbs sugar
1/2 cup chilled (1 stick) unsalted butter, cut in pieces
2 Tbs ice water
1 egg yolk, lightly beaten

Place flour and sugar in the bowl of a food processor, and process for a few seconds. Add butter, and process until the mixture resembles coarse crumbs. Add the ice water then the egg yolk, processing just until the dough holds together. Do not process for more than 30 seconds.
Turn the dough out onto a work surface. Place on a sheet of plastic wrap. Flatten, and form into a disc. Wrap, and refrigerate at least 1 hour before using.

Preheat oven to 350F and blind bake the tart shells: roll the dough out on a lightly floured surface, lay into tart shell, cover with parchement paper or foil, pour dry beans or pie weights on top and bake fro 15 minutes. Let cool before proceeding with the apricots.

Filling:

8 to 10 apricots, halved, pitts removed

1/2 cup milk

1/2 cup creme fraiche (sour cream can be substituted)

1/2 cup sugar

2 eggs

1/4 cup ground almonds

1/2 tsp. vanilla extract

1/2 tsp. almond extract

slivered almonds

Whisk the sugar and the eggs until pale. Slowly add the milk and creme fraiche and whick until combined. Add the extracts and ground almonds and whisk one more time. Slice the apricots, lay them in the bottom of the tart. Slowly pour the batter on top. Sprinkle some slivered almonds on top and bake until the custard is set and the tart is golden brown.
Vietnamese Coffee Ice Cream and White Chocolate Cardamom Tartlets

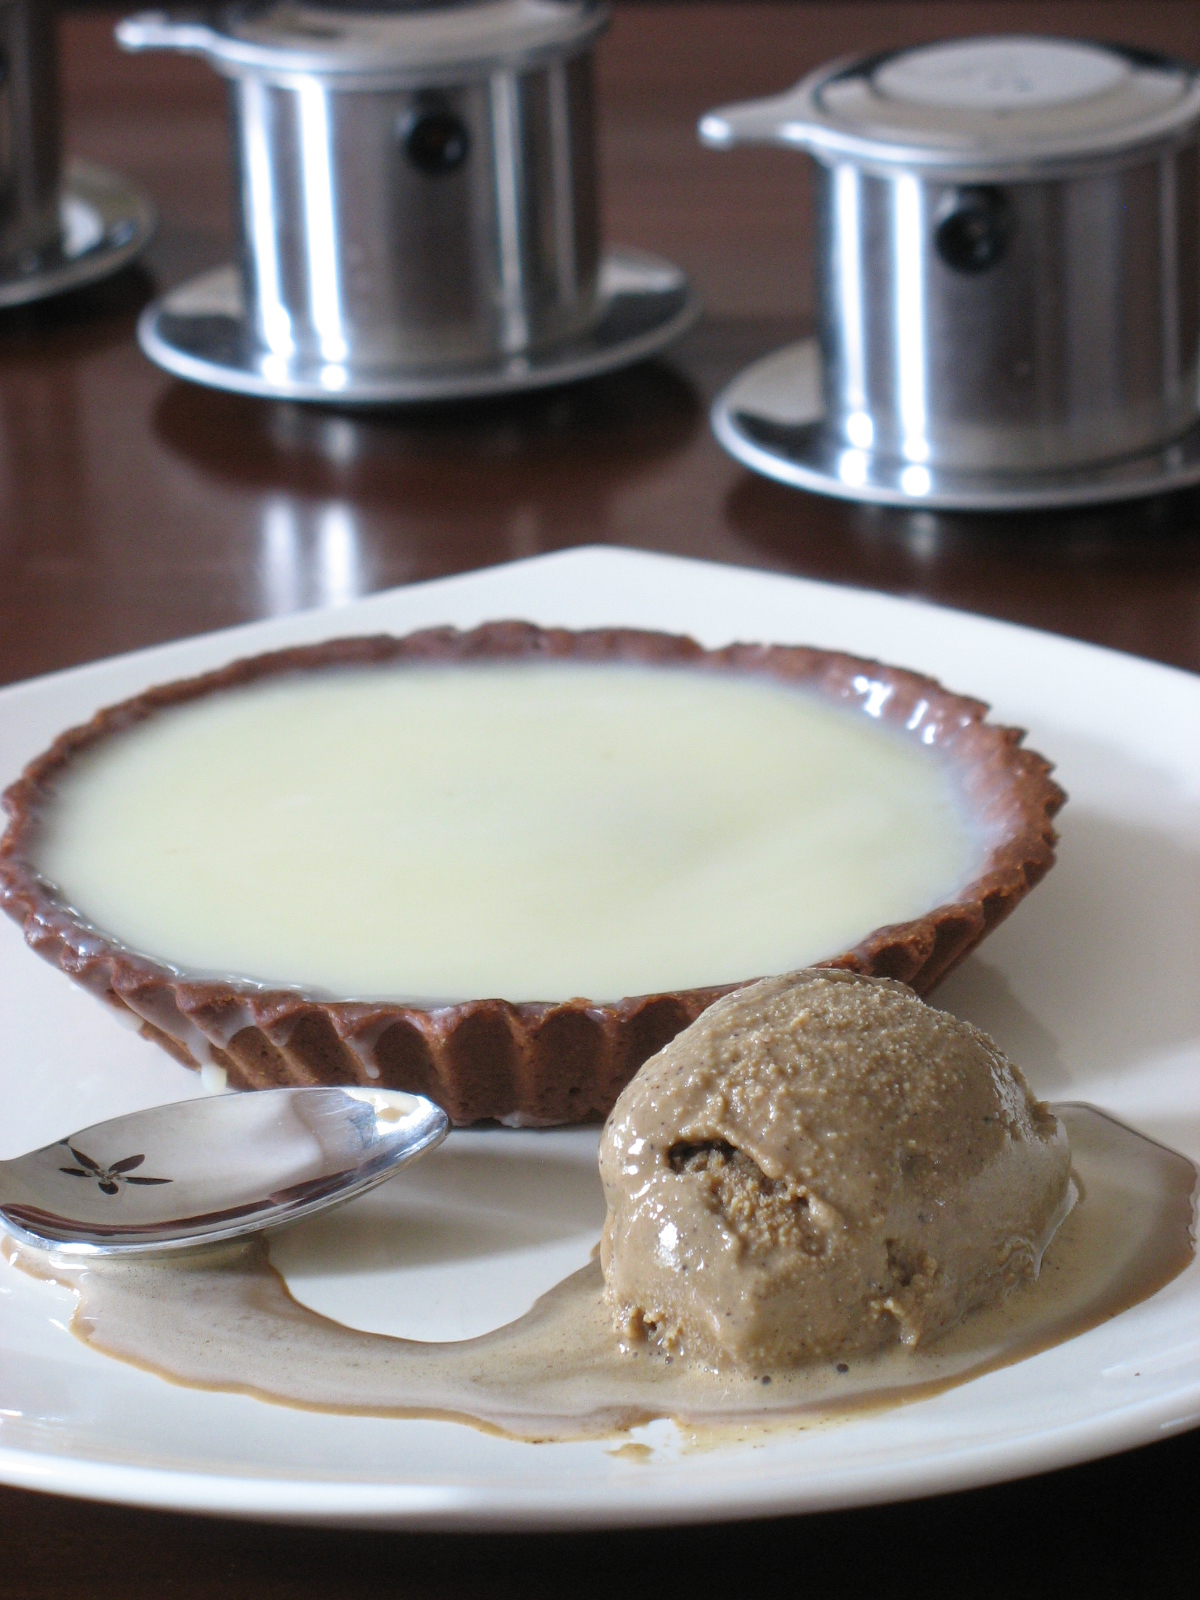
I wish I could remember when I first heard about the Vietnamese coffee filters you see in the pictures. Was it in a magazine, on a food show on tv…dunno… All I know is that I thought they would be a great piece of conversation when time came to serve coffee to my guests. I love having friends over and to me plating foods in fun or interesting dishes is as much important as making or eating it. These work like mini French coffee presses, you just set them up on top of your cup or mug, pour some coffee into them, screw the lid and let the water drip. I have had them for about five years now and I use them constantly not only because they are fun, but they give the best coffee too.

In France, Asian food is very different than here and I remember going to more Vietnamese restaurants than Chinese or Thai, and as a kid I would automatically go for ice cream or fruits and not coffee to ed my meal. My parents would always end up their meal with a little cup of sake, the ladies' cups would have a little flower in the bottom and the men’s the picture of a naked lady…don’t ask me why, but we (the brother and I) thought that was truly hilarious especially around 7-8 years old. Anyway….no Vietnamese coffee in all my childhood years of eating Vietnamese foods…It was not until I got here to the US that "Roomie" introduced me to Vietnamese coffee and I have been hooked ever since! If you are a coffee drinker what not try this sweet but light combination of sweetened condensed milk topped with Vietnamese coffee or if you can’t find it, a French roast or a coffee with chicory.

A couple of weeks ago, Old Chef and I were playing our favorite game: come up with new menu items for upcoming catering functions. B. thinks it is hilarious to watch us elaborate because we seem to have a language of our own, a mix of French and English, words flying across dishes and piles of notes, sketches of towering concoctions of sugar, butter, cream, fruits, nuts,… We love doing that over a good cup of coffee at the end of an event or after a long day on the phone placing orders and visiting purveyors. I knew he would like Vietnamese coffee as much as the filters necessary to make it and after a cup or two, we had come up with a couple of different desserts featuring it. These tartlets and ice cream are one of them….yes, you’ll have to stay tuned for next week’s second installment because today’s dessert is not the one we decided we would keep in the end.
This one was not bad but the white chocolate ganache was overly sweet. Since we try to be cost effective, and we foresee people leaving half the tart on their plate even if we make them smaller, we decided to make another version. Don’t get me wrong, the flavors are great: coffee, cardamom, white chocolate, dark chocolate, and work well together but the white chocolate is the overkill with a condensed milk sweetened Vietnamese coffee, no matter how powerful.

In the meantime, here is part one of our experiments:

Vietnamese Coffee Ice Cream:

6 large egg yolks
2 cups whole milk, divided
1/4 teaspoon salt
1 (15-ounce) can sweetenedcondensed milk
1/4 cup freshly ground French roast coffee

Whisk egg yolks in a large bowl and set aside.
In a medium saucepan over medium heat, heat the milk to scalding with the groud coffee. Pour 1/3 hot milk over yolks, whisking constantly until well combined. Pour in remaining hot milk, then pour mixture back into saucepan and return to low heat. Stir constantly until mixture has thickened enough to coat back of wooden spoon. Remove from heat and stir in the condensed milk. Strain in a fine mesh colander to filter out as much of the coffee grounds as possible. Let cool to room temperature, cover ad refrigerate until completely cold. Freeze in an ice cream machine according to manufacturer’s directions.

For the Dark Chocolate Tartlets Dough:

1/4 cup toasted and skinned hazelnuts
1 cup powdered sugar, divided
1/2 cup (1 stick) unsalted butter
1/4 cup cocoa powder
1/4 teaspoon salt
11/3 cups all-purpose flour
2 large eggs

Place hazelnuts and 2 tablespoons confectioners’ sugar in food processor. Pulse until the nuts are finely ground. In bowl of electric mixer fitted with paddle attachment, cream butter, cocoa powder, ground nuts and salt on medium speed until well-combined. Slowly add remaining powdered sugar and flour and mix well. Slowly add eggs and mix until incorporated. Shape dough into a ball and flatten into a disc. Wrap with plastic wrap and refrigerate overnight.

When ready to use, roll in between sheets of plastic wraps and cut out rounds to fit 4 4-inch tartlet molds. Prick with a fork and bake at 350F for 15 minutes. Let cool completely.

For the Cardamom White Chocolate Ganache:

2 pods cardamom, crushed
1 cup heavy cream
12 oz white chocolate

Set the white chocolate in a bowl. Heat the cream with the cardamom until very hot. Pour the cream over the white chocolate. Let sitfor a couple of minutes and stir until completely smooth. Pour into the cooled dark chocolate tartlet shells.and refrigerate until set.

To plate: make yourself a nice cup of coffee and serve the tartlets with a generous scoop if ice cream.


Note: I was going to post this tuesday night but decided to do a little roud of my favorite blogs and went right away to visit my girl Anita at Dessert First and stumbled upon her latest delectable creation: Chocolate and Vietnamese Coffee Tart ! I am not surprised anymore when Anita, Bea and I share a dessert with you guys and they are eerily similar in concept or taste (and believe me it has happened more than once!)….all 3 of us are Taurus!

Hazelnut Quince Tartlets, Tea Time Style

Quinces are one of the fruits I miss the most since I moved to South Carolina. My mom used to make the best quince jelly and I remember freely spreading it on fresh bread, spooning it into my yogurt in the morning. Little did I know back then that I would have such a difficult time finding it here and that the mere thought of it would send me into severe nostalgia!

Marce’s post a couple of weeks ago made me come up with these little tartlets. I could taste the quince in her tart right through the monitor screen. I left a comment saying that I had found quinces, but at $1.99 a quince (yes, you read right) I was really hesitating investing just to satisfy a nostalgic craving! Well, I broke down and bought one…yep, just one…It was small, but smooth and fragrant and my little orphan quince was nice enough to allow me to make 4 little tartlets, perfect for an afternoon tea.

I first thought about making quince tartlets after seeing a picture in this wonderful and magic book, La Cuisine des Fees. Each recipe is inspired by a dish featured in a well known fairy tale and here the character of the "King of tartelettes " in "L Oiseau de Verite" by E. Le Noble inspired beautiful round glistening quince tarts.
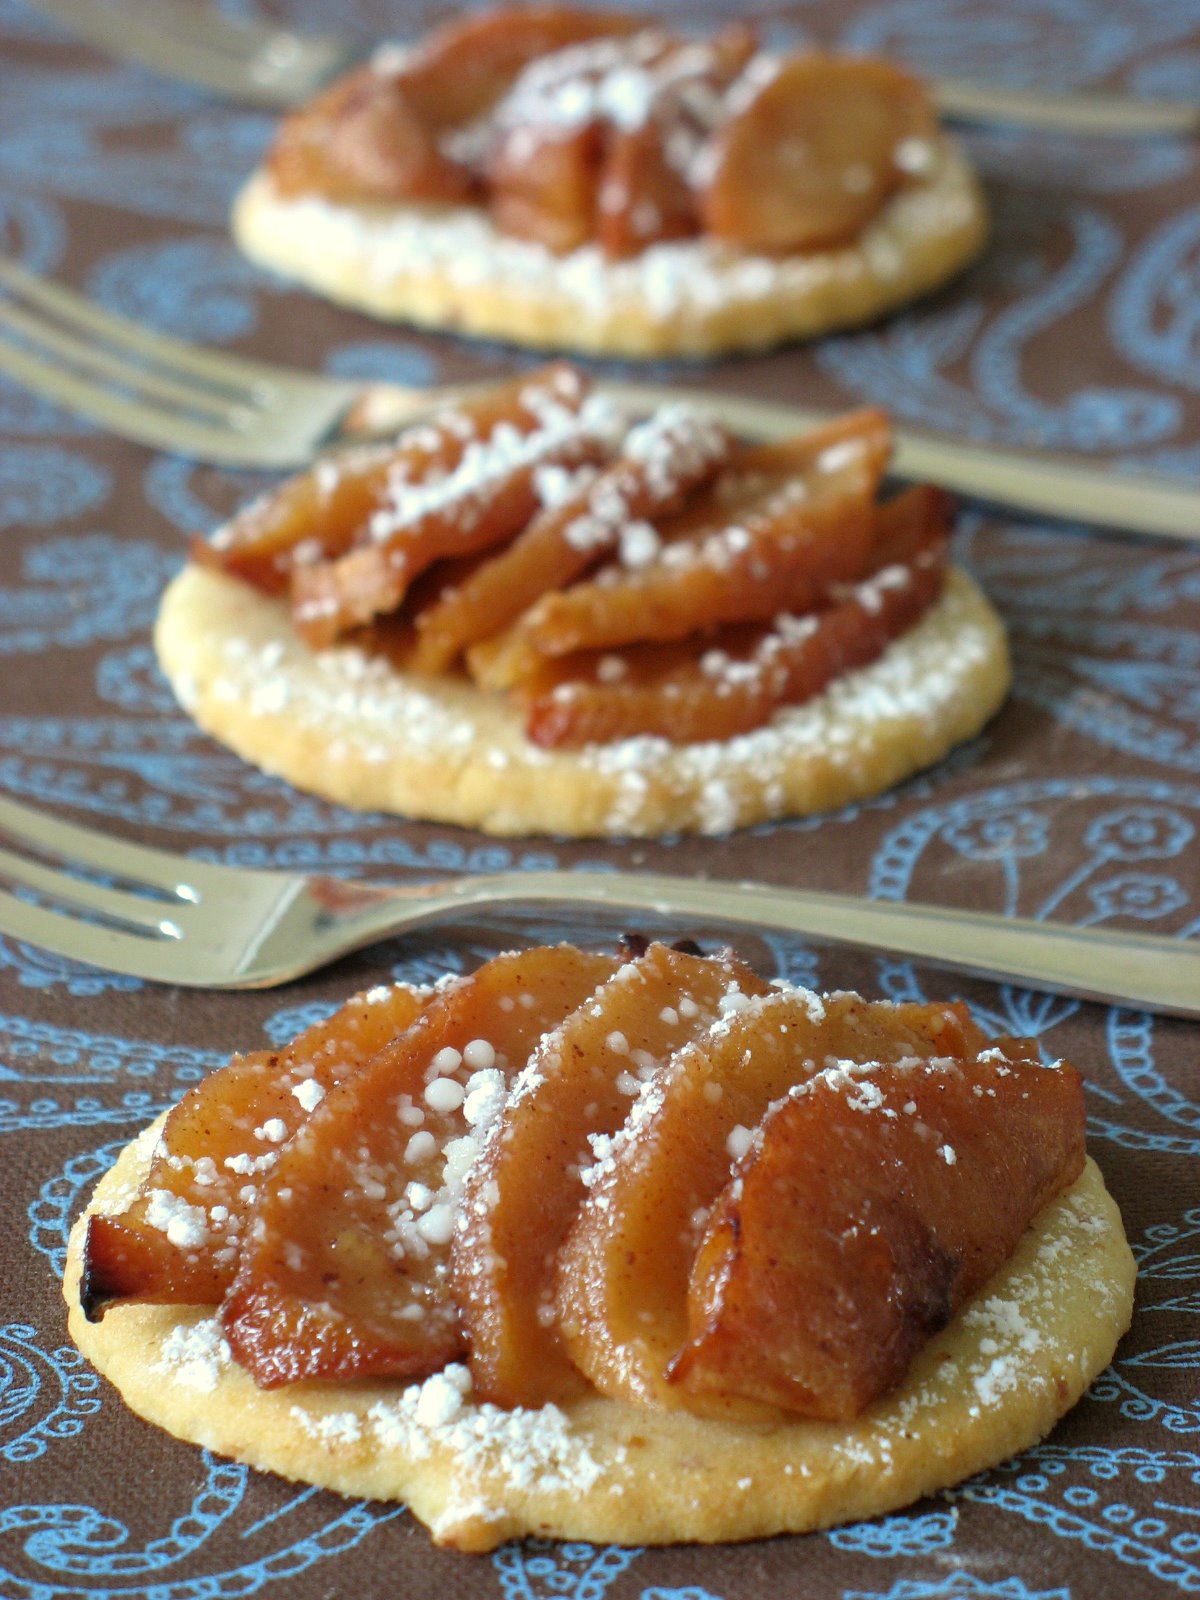
Well, the recipe required 4 plump fruits and my single quince needed to be stretched further than that! I made a hazelnut shortbread dough for the tartlets base and carefully sliced and roasted thin slices of the quince with some spices and in no time at all, I had the best four-bite snack, satisfying my craving and sending me back to the time I used to put a stool by the stove and help my mom stir the quince jam she was making.

Quince Tartlets, inspired by La Cuisine des Fees:

Serves 4

For the dough:

170 gr. flour (6 oz)
60 gr. powdered sugar (2 oz)
100 gr butter, at room temperature (3 1/2 oz)
1 egg white
40 gr skinned hazelnuts (3 1/2 oz)
pinch of salt

In a food processor, place the hazelnuts and powdered sugar and pulse until finely ground. add the flour, egg white, salt and butter and pulse until the dough just comes together. Gather into a ball, flatten it between two sheets of plastic wrap and refrigerate until firm, about 2 hours. This can be prepared the day before.
When ready to use, roll the dough out in between the sheets of plastic wrap as it becomes soft and sticky very fast. Cut out 4 inch rounds with a cookie cutter.
Bake at 350 F until light golden. Let cool while you prepare the quince.
Bake cookies with the remaining dough or save and freeze for another project.

For the roasted quince:

1 quince, cored, peeled and cut into thin slices
2 Tb butter
1/8 tsp. ground cardamom
1/8 tsp cinnamon
2 Tb brown sugar

Layer the slices in a baking dish, sprinkle with the spices and sugar. Add the butter into small pats all over. Roast at 350 F, until golden brown. Remove from the oven and allow to cool.
To assemble: divide the quince slices evenly among the tartlet bases and sprinkle with powdered sugar if desired. A scoop of vanilla bean ice cream would be great with it too!


You can be sure that the day quinces go on sale, this little Tartelette is stocking up!

Canneles Pretenders

I can’t believe I have waited this long to make "canneles" (ka-ne-lays), just because I did not have the proper canneles molds. This specialty tea cake from the region of Bordeaux is one of my all time favorites but when I moved to the US, those little shiny molds where not part of the "must have" items I took with me. Literary folks, I moved here with 2 suitcases full but not much from the home country. My parents have been filling the gaps and fulfilled my nostalgic demands with every visit they make but very soon after my moving here the craving started to hit really bad.

To fix my sweet tooth, I started baking them in muffin tins and small ramequins but I always hesitated posting about them, fearing "canneles" traditionalists and purists woud give me the evil eye and roll their shoulder in disappointment. Well, that was until I read this post by Melissa at The Traveler’s Lunchbox. It made me realize that if something is good, does it really matter if the shape of the final product is different than the traditional? Isn’t respecting the ingredients and baking method the most important?

How to describe a "cannele"…hmmm…that’s kind of a tough one. Dark but not burnt on the outside, soft and chewy on the inside. The batter is like a thick crepe batter turning into a cake right before your very eyes while wrapping your senses in an intoxicating aroma of vanilla and rum. Do not wait to get the right molds to try these as the one you eat quickly becomes two and three and pretty much you forget they were supposed to make it to the neighbors' house (oops!). When the time came to make these the other day, I could not find my little blue notebook with all the recipes I had gathered before I left France and after looking at many recipes and variations for canneles, I finally settled on this one which gave me the most wonderful little morsels.

Canneles Pretenders:

Makes 12 muffin sized ones

750 milk (2 1/2 cups)
50 gr butter (1 1/2 oz)
3 eggs plus 3 egg yolks
300 gr granulated sugar (10 oz)
1 Tb vanilla extract
6 Tb rum
150 gr all purpose flour (5 1/4 oz)

In a saucepan, bring the milk to a simmer, add the butter cut into dices. Mix well and let cool to lukewarm.
In a bowl, mix the eggs, egg yolks, sugar and vanilla and whisk until foamy. Slowly add the rum and flour. Add the milk slowly and whisk until smooth. Pass it through a sieve if neessary.
Let the batter rest in the fridge for a ouple of hours or overnight. (I make mine the day before)
When the batter has rested, preheat the oven to 425F and divide it evenly among the muffin tins, generously coated with cooking spray or well buttered. Bake for 45 minutes to an hour.
If you can wait, you will find that they are better the next day.

Apologies to all "canneles" purists but what is a girl to do when the cravings strike and cannot wait?

Berry Salad on Yuzu And Mascarpone Creams


It is probably no news that I love berries, lemons, and mascarpone, but what I love when two bloggers give me the chance to put them together. Lisa from La Mia Cucina and Kelly from Sass & Veracity got together and concoted a Salad Extravaganza event in their quest to shrink their hips and thighs.

I first thought about doing a simple fruit salad with a drizzle of honey and lemon juice, maybe a dollop of barely sweetened whipped cream. However, after several email exchanges with Lisa and her desire to keep the taste and bang factor while watching what she eats, I wanted to share with her that one can keep that "wow" factor by using regular ingredients but decreasing the portion size. I too have had my battle with my thighs and over the years I have found out that they respond well the old "quality over quantity" phrase (although I have been known to have my cake and eat it too!).

I first tried yuzu in a tart purchased from the amazing pastry chef Sadaharu Aoki while in Paris last Christmas. How to describe the taste? Sometimes it is like a grapefruit or a perky tangerine in your mouth, sometimes it has a lemon kick to it, the kind that makes you gums go "ouyee" overall it just is plain good if you love citrus! I cannot find fresh yuzu fruits here but thanks to the internet the juice is easily accesible.
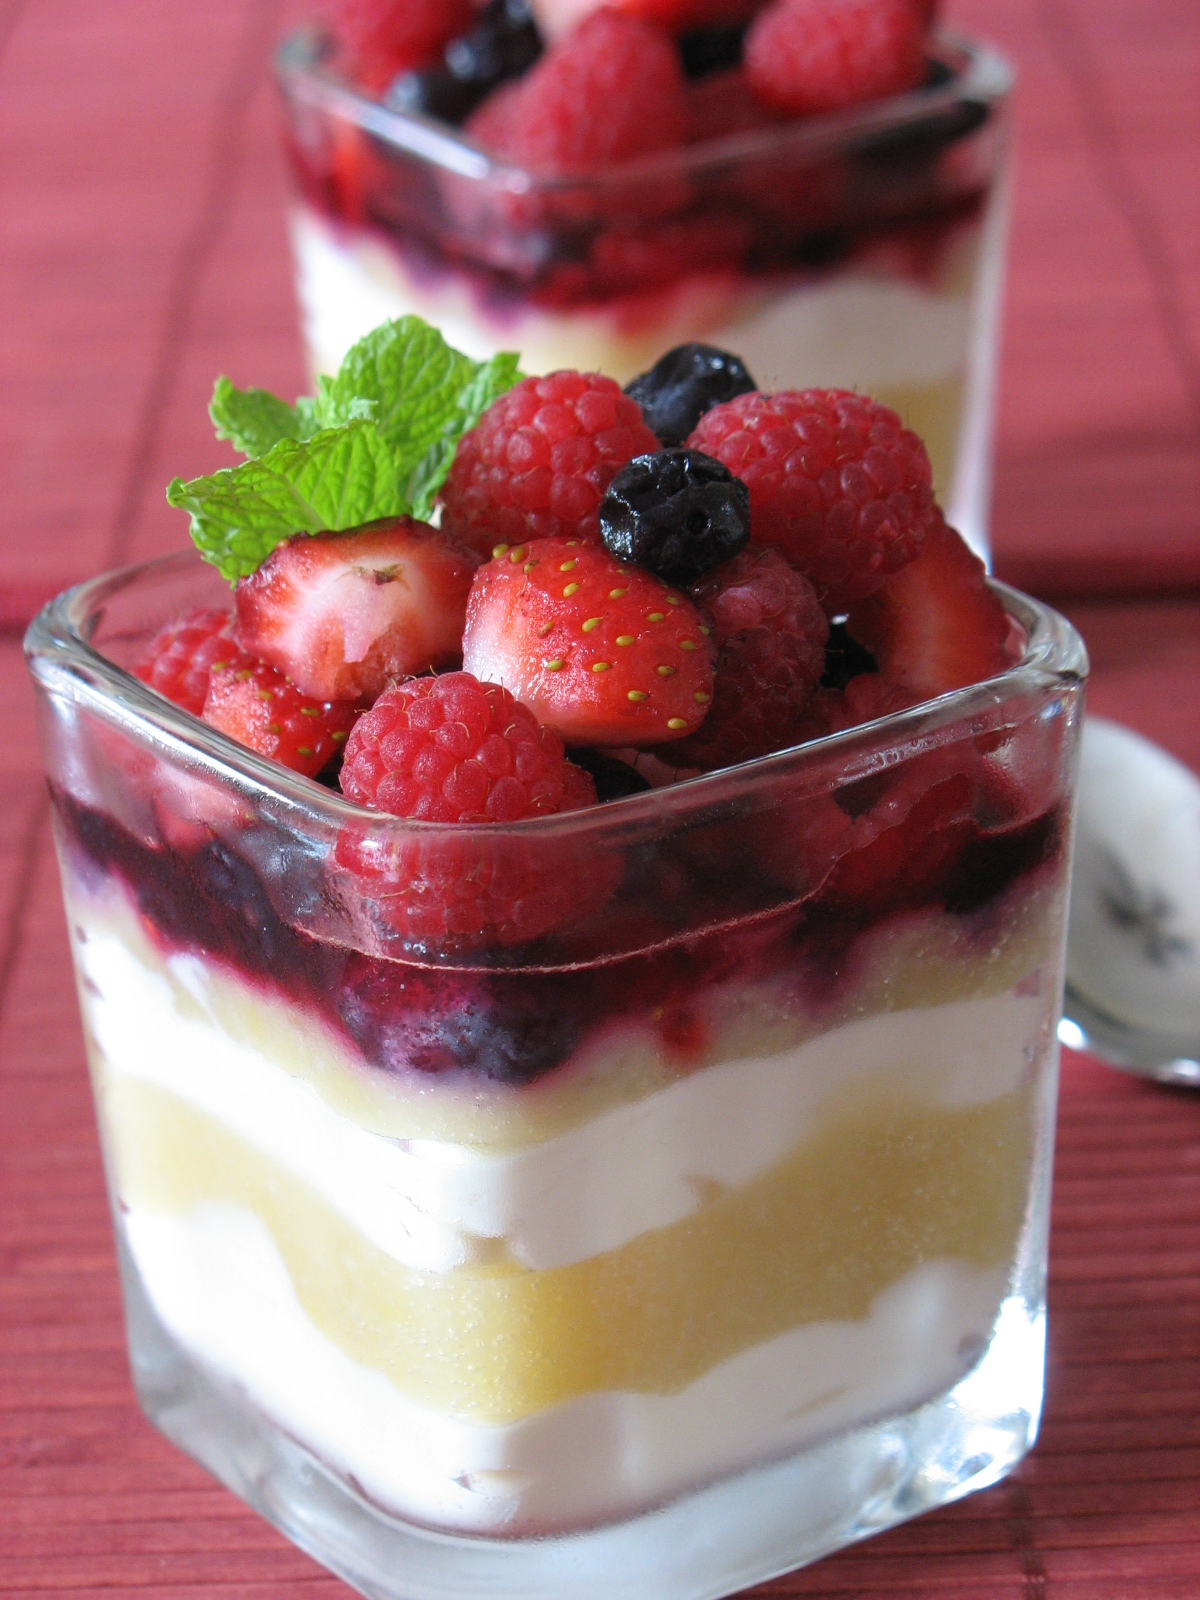
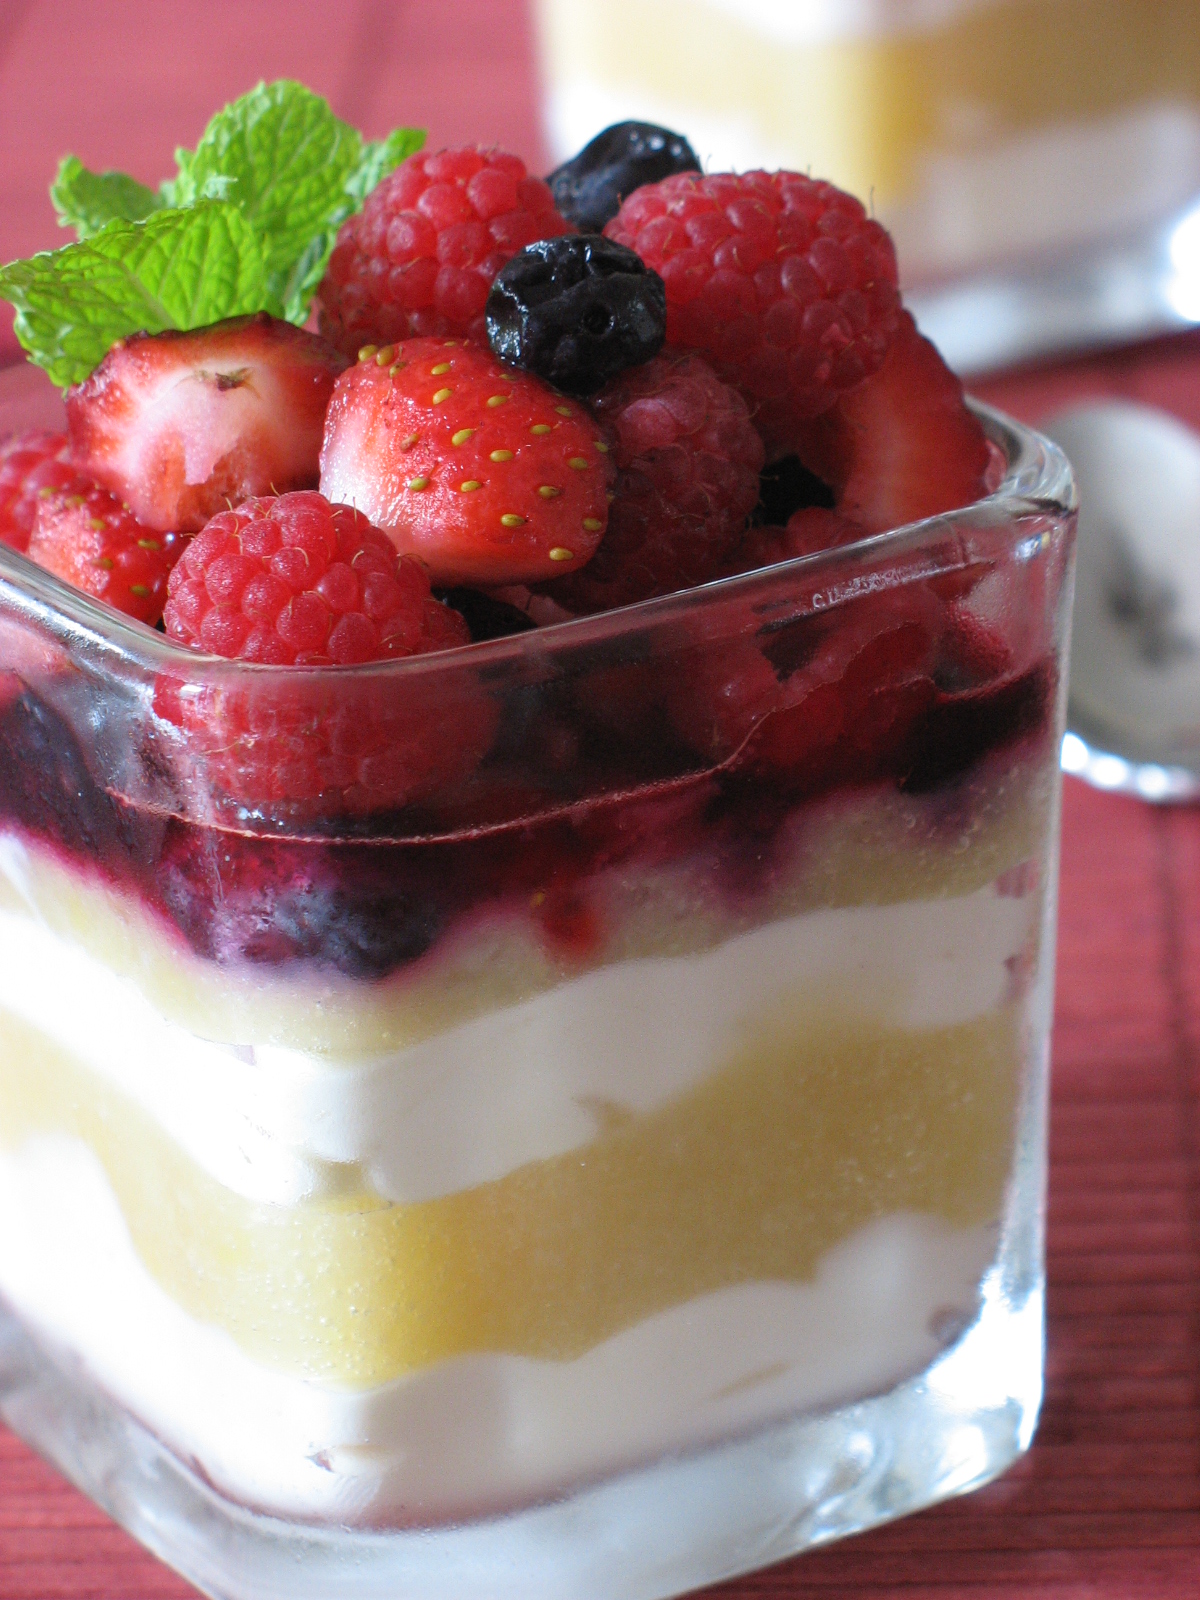
These "verrines" are a dessert we have often as it is light and tasty, easy to put together and extremely refreshing. Don’t tell be but I even enjoy a few spoonful in the morning before my run. With the yuzu juice, I make a simple (lower calorie) curd that I layer with a mascarpone cream spiked with lemon zest. The berries don’t really need anything else as you dip your spoon and mix them with the creams.

Berry Salad on Yuzu and Mascarone Creams:

Serves 4

For the yuzu curd:

2/3 cup yuzu juice
1/3 cup sugar
2 eggs

Combine the sugar and juice in a saucepan, and bring to a simmer.
In a small bowl, beat the eggs until light.
Beat some of the yuzu mixture into the eggs to temper. Scrape the mixture back into the saucepan and cook stirring constantly until it thickens up, about 5 minutes.Strain and refrigerate, covered with plastic wrap until ready to use.

For the mascarpone cream:

8 oz mascarpone, at room temp
1/4 cup powdered sugar
grated zest of one lemon

Mix all the ingredients together and keep at room temperatue, it will be easier to layer.

For the mixed berry salad:

1 cup cut up fresh strawberries
1 pint fresh raspberries
1 pint fresh blueberries

To assemble: layer the yuzu curd and mascarpone cream in glasses or cups and top with a generous amount of the mixed berry salad.


Hope you enjoy it ladies!

Lemon Blueberry Tartlets…Such A Steal…

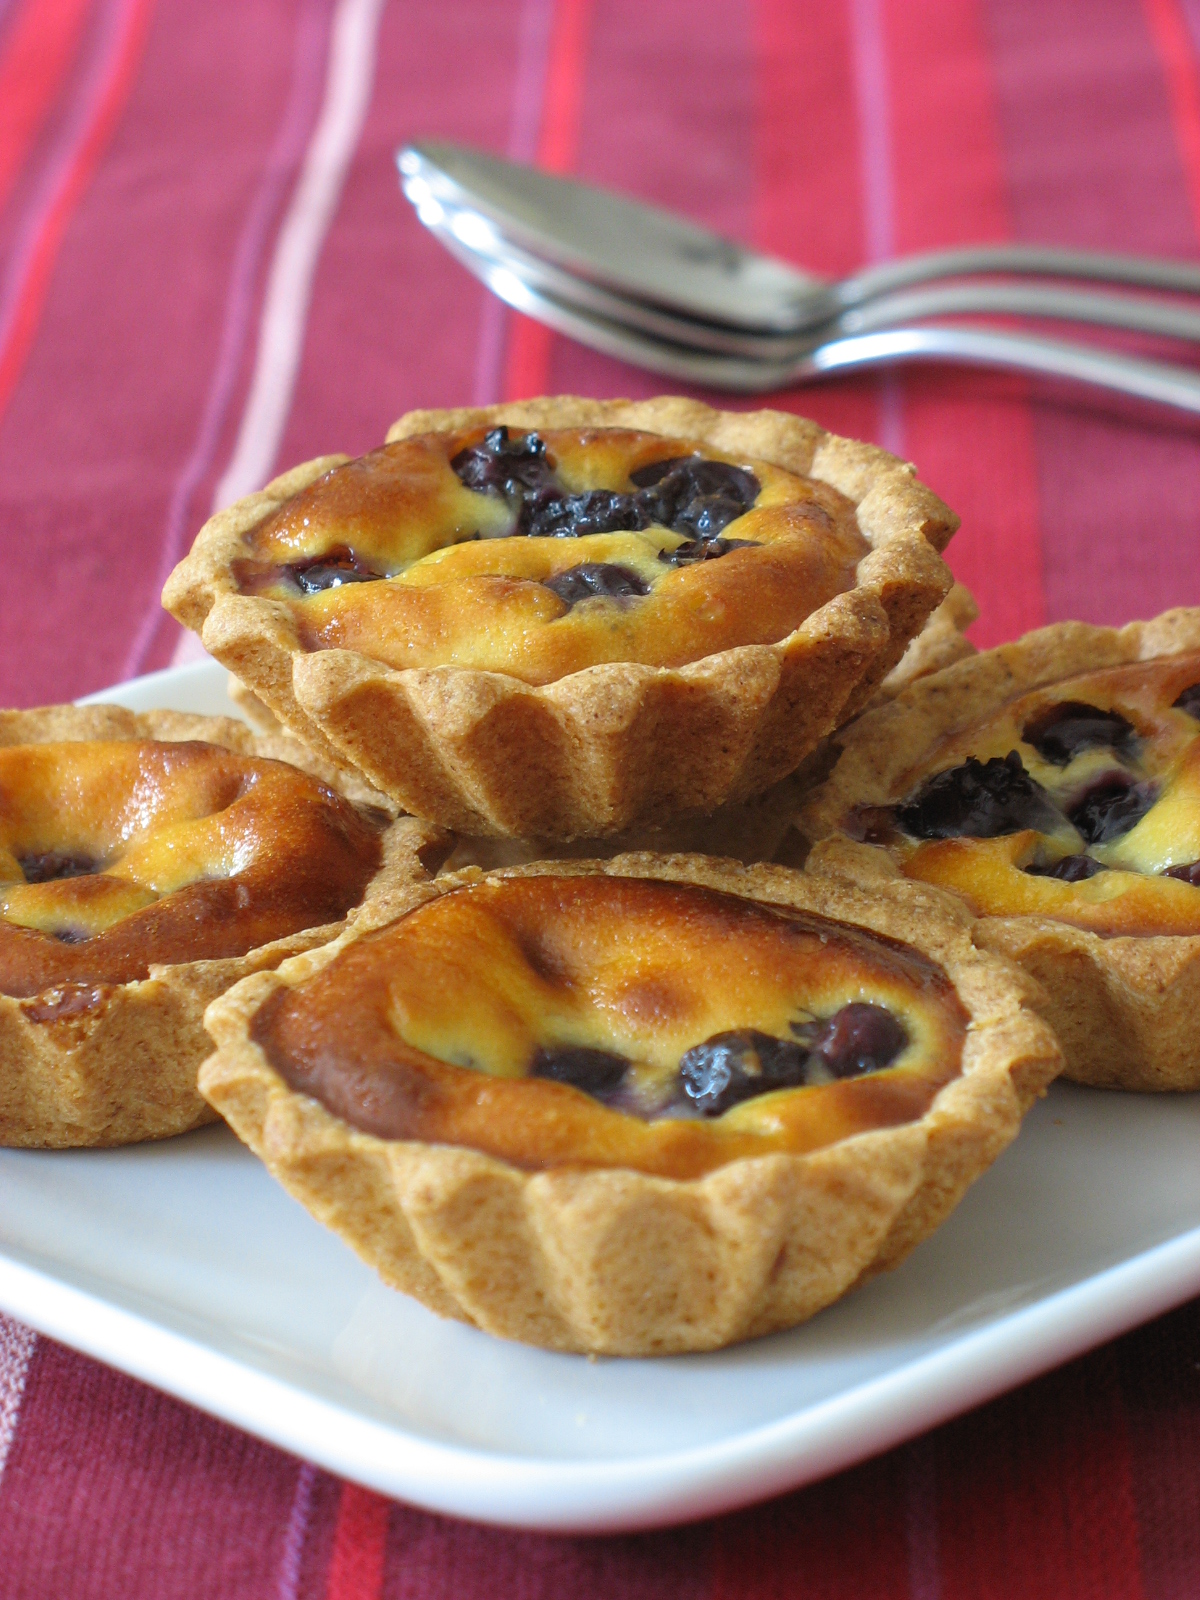
Why were these cute little tartlets a steal? As soon as Meeta posted the round up for her Monthly Mingle Birthday Bang, I started going through each post, each time more tempted than the next, (such beautiful creations), until I stumbled upon Asha's Strawberry Yogurt Pie.
I don’t particularly like baked or cooked strawberries, unless in jams or preserves, and I had an abundance of blueberries and plenty of yogurt, so the decision to include them into our sunday brunch spread was easy.
Old Chef liked them so much that he wants "plenty" , which in his world means anywhere from 100-200, for an event next week….arghhhh!

The pie is easy to put together, has great flavor and very versatile as far as ingredients used. I made mini tartlets instead of mini ones since we already had plenty to share and the cute factor certainly helped make the table a little bit more inviting but feel free to make one large pie. Either way you will not be disappointed!

Lemon Blueberry Tartlets, adapted from Asha:

For the crust:
6 Tb butter at room temperature
1/4 cup sugar
1 egg
1 cup flour
1/2 tsp baking powder
grated zest of one lemon

In a food processor, combine the butter and sugar. Add the egg and blend well. Combine the flour, lemon zest and baking powder and mix them into the wet ingredients to form a soft dough.With flour-dusted fingers, pat the sticky dough into the bottom of a pie pan or individual tartlet molds. Push the dough up to cover the sides of the pan.
Refrigerate until you make the filling.

For the filling:
2 eggs
1/4 cup sugar
1 cup plain yogurt
2 tbsp lemon juice
1 tbsp cornstarch
2 cups blueberries, fresh or frozen.

Mix all the filling ingredients except the blueberries until smooth.
Put the berries into the pie shell or mini ones and gently pour the fillings so the berries are coated and evenly distributed.
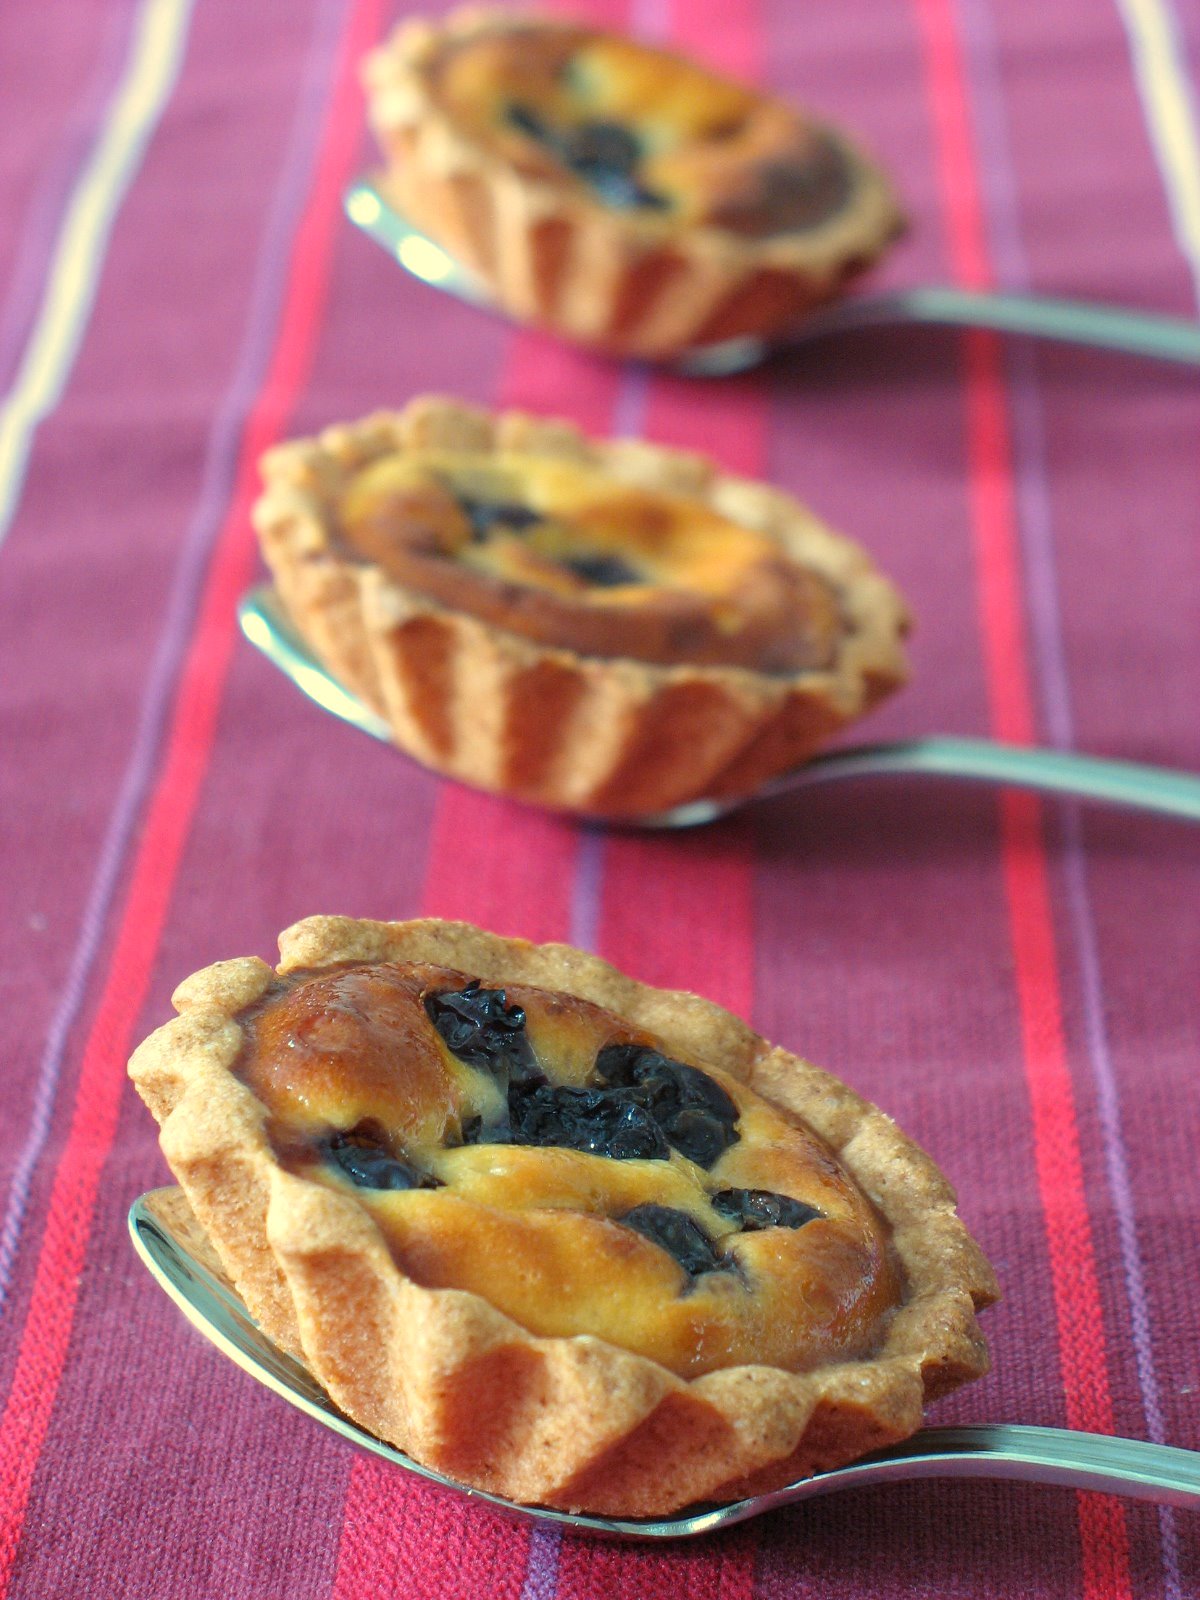
Bake for 50 or 60 minutes, at 350 until the crust is lightly golden and the custard has set.
For the mini ones, 30 minutes were plenty.

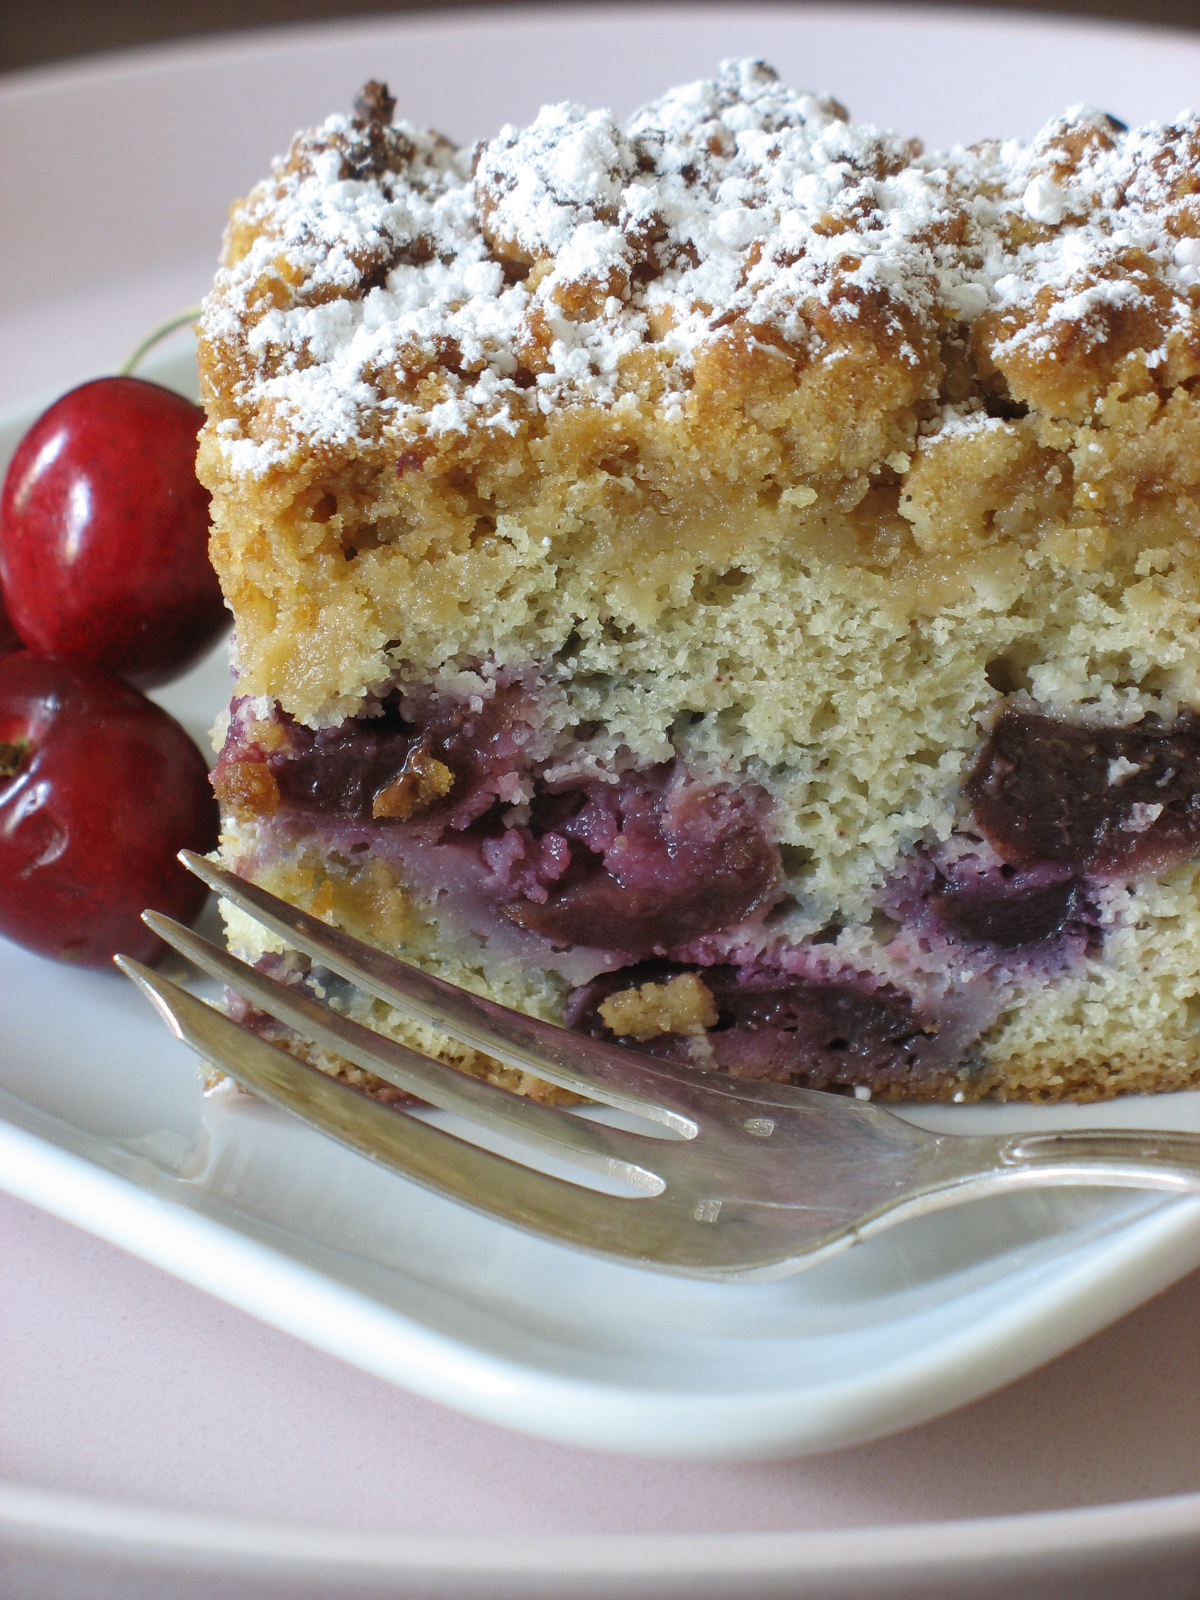
Cherry and Coconut Coffee Cake


As I am writing this there is only one piece left of this delectable coffee cake. We had company over this morning and the six of us practically devoured it all. It took all the persuasion in the world to save this little piece for a photo opportunity. "Good" would be a small word to describe it…it brought silence to a table of people mighty hungry after a boating excursion.
I usually have a brioche ready for sunday brunches, either toasted with butter or turned into French toast, but I kept seeing coffee cakes popping on a couple of blogs and my stash of fresh cherries was demanding some attention, other than clafoutis or muffins.

I fell in love with coffee cakes a few months after moving to the US. What’s not to love in a cake filled with spices or fruit and topped with shortbread crumbs? What’s no to love in a cake so versatile that you can adapt it to the seasons ans have any time of the day? Made with coffee or served during coffee breaks, it seems to have taken a life of its own regarding ingredients much like creme brulee has its variations.

I figured that there was only a few authorities capable of giving me the "perfect" recipes, and I turned to our trusted Dorie Greenspan for ideas. I adapted her original recipes to fit the ingredients I wanted to use and since I am still on my coconut and cherry kick, well, here they are again!

Cherry and Coconut Coffee Cake, adapted from Dorie Greenspan

Serves 8

For the crumb topping:
5 Tb unsalted butter, room temp
1/4 cup sugar
1/4 cup packed brown sugar
1/3 cup all purpose flour
1/4 tsp. salt
1/2 cup almond, chopped
1/2 tsp. ground ginger

Put all the ingredients, minus the nuts in a food processor and pulse until it forms coarse crumbs. Put into a bowl, sit in the nuts , cover and refrigerate while you prepare the cake.

For the cake:
2 cups, fresh pitted cherries (can use frozen, not thawed)
2 cups plus 2 tsp. all purpose flour
2 tsp. baking powder
1/2 tsp baking soda
1/4 tsp. salt
1/4 tsp ground cinnamon
2/3 cup sugar
grated zest of one lemon
6 Tb. butter, room temp
2 eggs
1 tsp. coconut extract
1/2 cup coconut milk
1/2 cup grated unsweet coconut

Toss the cherries with 2 tsp. flour and set aside.
Combine the remaining flour, baking powder, baking soda, cinnamon, salt and grated coconut together.
With a mixer, cream the butter and sugar together with the lemon zest. Add the eggs, one at a time and add the coconut extract. Scrape the bottom of the bowl to make sure it is all combined. Reduce the speed of the mixer and add the the flour mixture and coconut milk alternately, starting and ending with the dry ingredients.
Gently stir in the cherries.
Pour the mixture in a 8×8 inch square baking dish lined with foil and coated with cooking spray. Spread the top with the crumb topping.
Bake at 350F for 50-60 minutes, or until a knife inserted in the middle comes back clean.

I have to say that this is one cake I am looking forward to make on a weekly basis and adapt it to whatever I have in the fridge or pantry.
I hope it will make a nice addition to Rosa's Sunday Brunch Event .

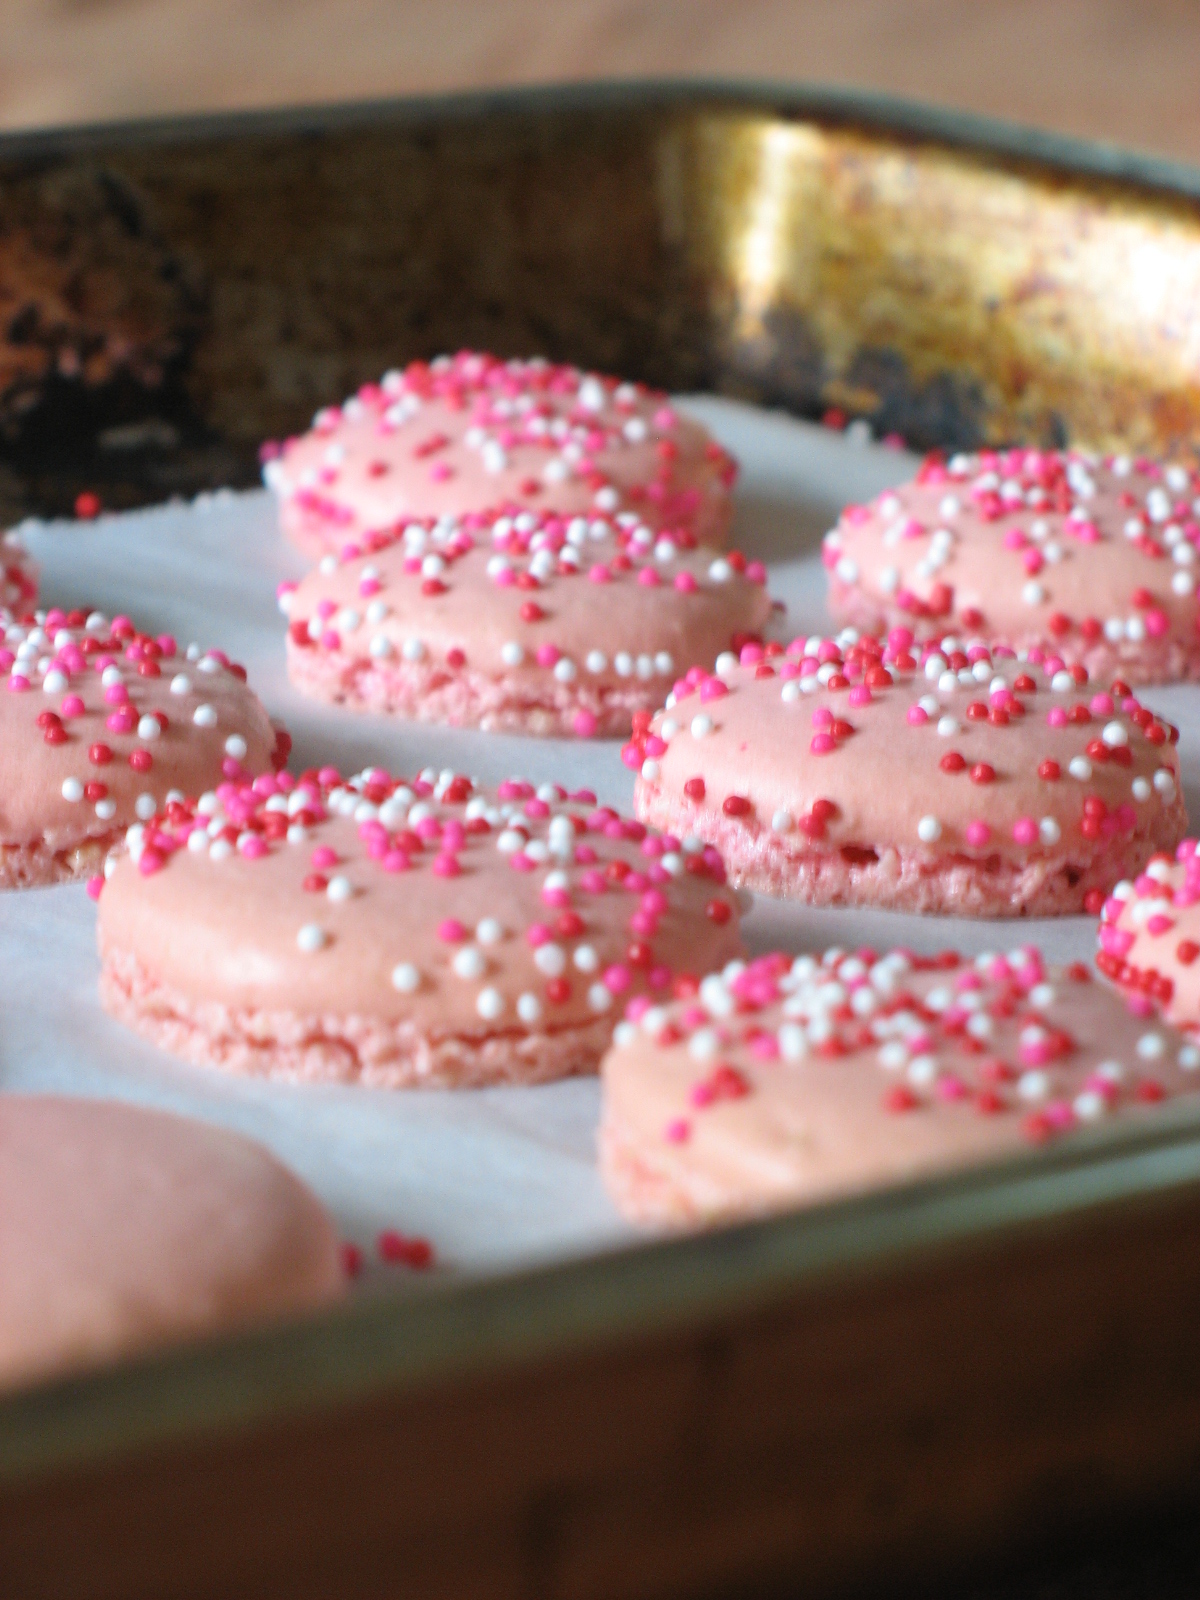
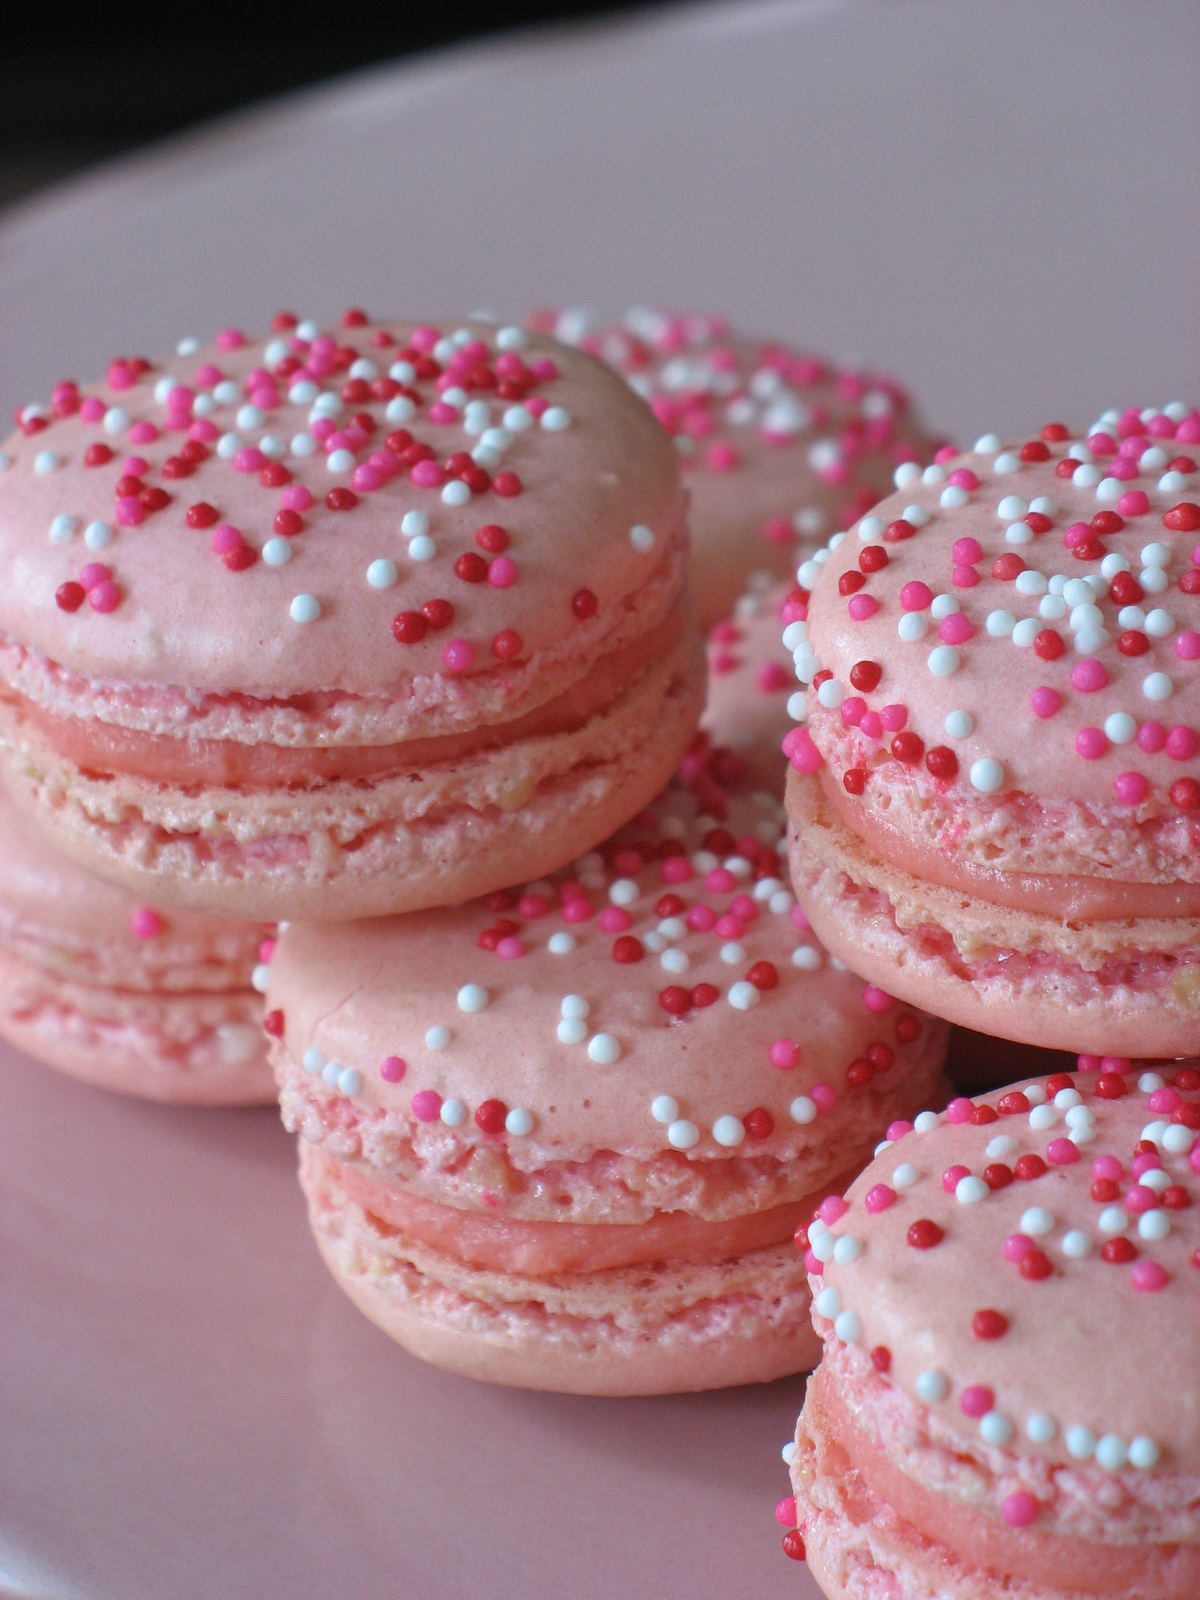
Pink Tagada Macarons

Pink Tagada Macarons
Pink macarons, ok…but what is "tagada" you may ask. "Fraises Tagada" is one of my childhood favorite candies, and it is pink, and it is good and it makes me giddy like a kid again. I just like saying the name over and over! Since I introduced B. to the line of Haribo candies, the licorice rolls and "fraises tagada" have become his favorites, so it was no surprise that when we came back from Christmas with my parents in France that we had several bags tucked away in our suitcase. I thought we had gone through all the stash when I found a bag that had fallen behind my pastry box. The candy is like little pink pieces of strawberry flavored marshmallows.
I know I said May was the month of things pretty and delicate but when you read the reason why I made these, you will understand.

I started thinking about these ever since I saw Requia' post about a pink event to support the fight against breast cancer. I wanted to make them very pink and very giddy…Well, yeah I am weird: just looking at them makes me happy, feels me with hope and the color even calms me down. I put it in the back of my mind until Bea’s savory pink "verrines" reminded me it was high time I cranked up the mixer.
Cancer makes no distinction of gender, reace, age and social status. We live with cancer, know somebody with it and hold the hands of too many friends going through the same thing. Cancer is global, cancer is universal…so is hope, so is the fight against it. A few weeks ago I participated in Barbara's yellow event for LiveStrong Day, and today I want to pay tribute to all the women and men devasted by breast cancer.

I also wish to pay tribute to my grandma who found out in her early 8os (yes, you read right) that she had breast cancer. When her doctor suggested biopsies, exams, breast removal and what not, she looked at him straight in the eyes and said "you’re crazy…let me live". AH!!! And there you have it, my grandmother in a nutshell…and the essence of the way I lead my life. She passed away at 93 from a cancer that had invaded her tiny frame but never her spirits or her will to live.

Now, and before you all start to yawn…These are just plain macarons shells colored with neon pink powder dye, with different pink sparkles and filled with a "fraises tagada" and white chocolate ganache. For the macaron shells I followed a different recipe than my favored Italian meringue one, and with good results. The first tray looked like the meringue was not folded enough so I gave it a couple of extra turns and the remaining tray turned out beautiful…I think I could get addicted to this lazier method!!

Pink Macarons and Fraises Tagada White Chocolate Ganache

Shells: (original recipe here)

3 egg whites at room temp

100 g almond powder

160 g powdered sugar

40 g granulated sugar

a few drop of neon pink coloring

pink sprinkles of your choice

In a food preocessor, grind the almonds and powdered sugar togther to make sure they are really fine. Pass through a sieve and set aside.

Note: when I process them very fine, I usually skip the sieving step and just break any lumps with my fingers.

Start whipping the whites on low speed to break them up, and slowly increase as to obtain a soft foam. Slowly add the granulated suage, one TB at a time until the meringue is tight and glossy.

Stop the machine and fold in the coloring and the almond/powdered sugar. The batter should flow like magma. Try a spoonful on a plate. The little peak created by the meringue should flatten when tapped on the counter top.

Line 2 baking sheet with parchment paper and preheat the oven to 300 F.

Fill a pastry bag with the batter and drop rounds on the baking sheet. Add the sprinkles. Let dry for 30 minutes and bake for 10-12 minutes.

Once they are cooled. Fill each with about 1 Tb. of the ganache.

Fraises Tagada White Chocolate Ganache:

2 cups fraise tagada candy

1 cup white chocolate chips

1/2 cup heavy cream

Heat the cream until hot. Drop the chips and candy into the cream and stir until all are melted and come together. Let cool.

Pink Tagada Macarons

If you read French, here are some more "Fraises Tagada" recipes:

– Emmanuele’s mousse

– Samania’s yogurt

– Paris Breakfast’s fun post about the candy

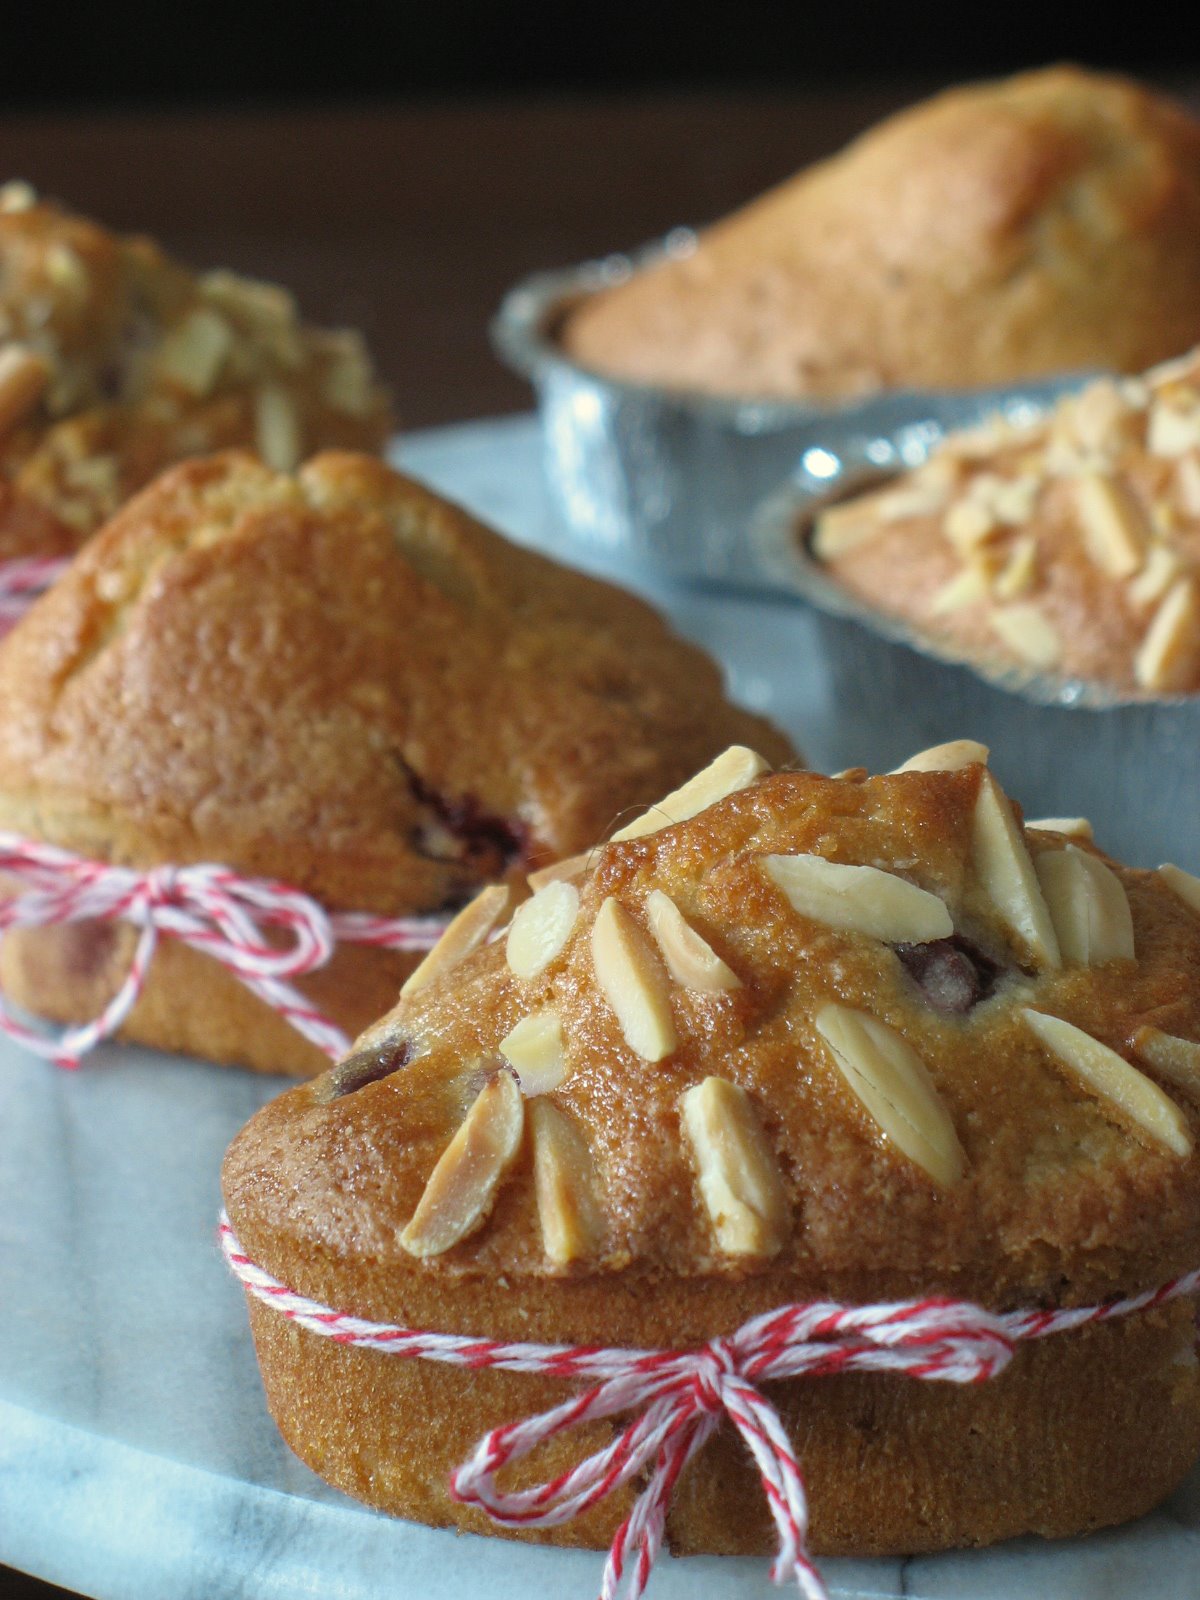
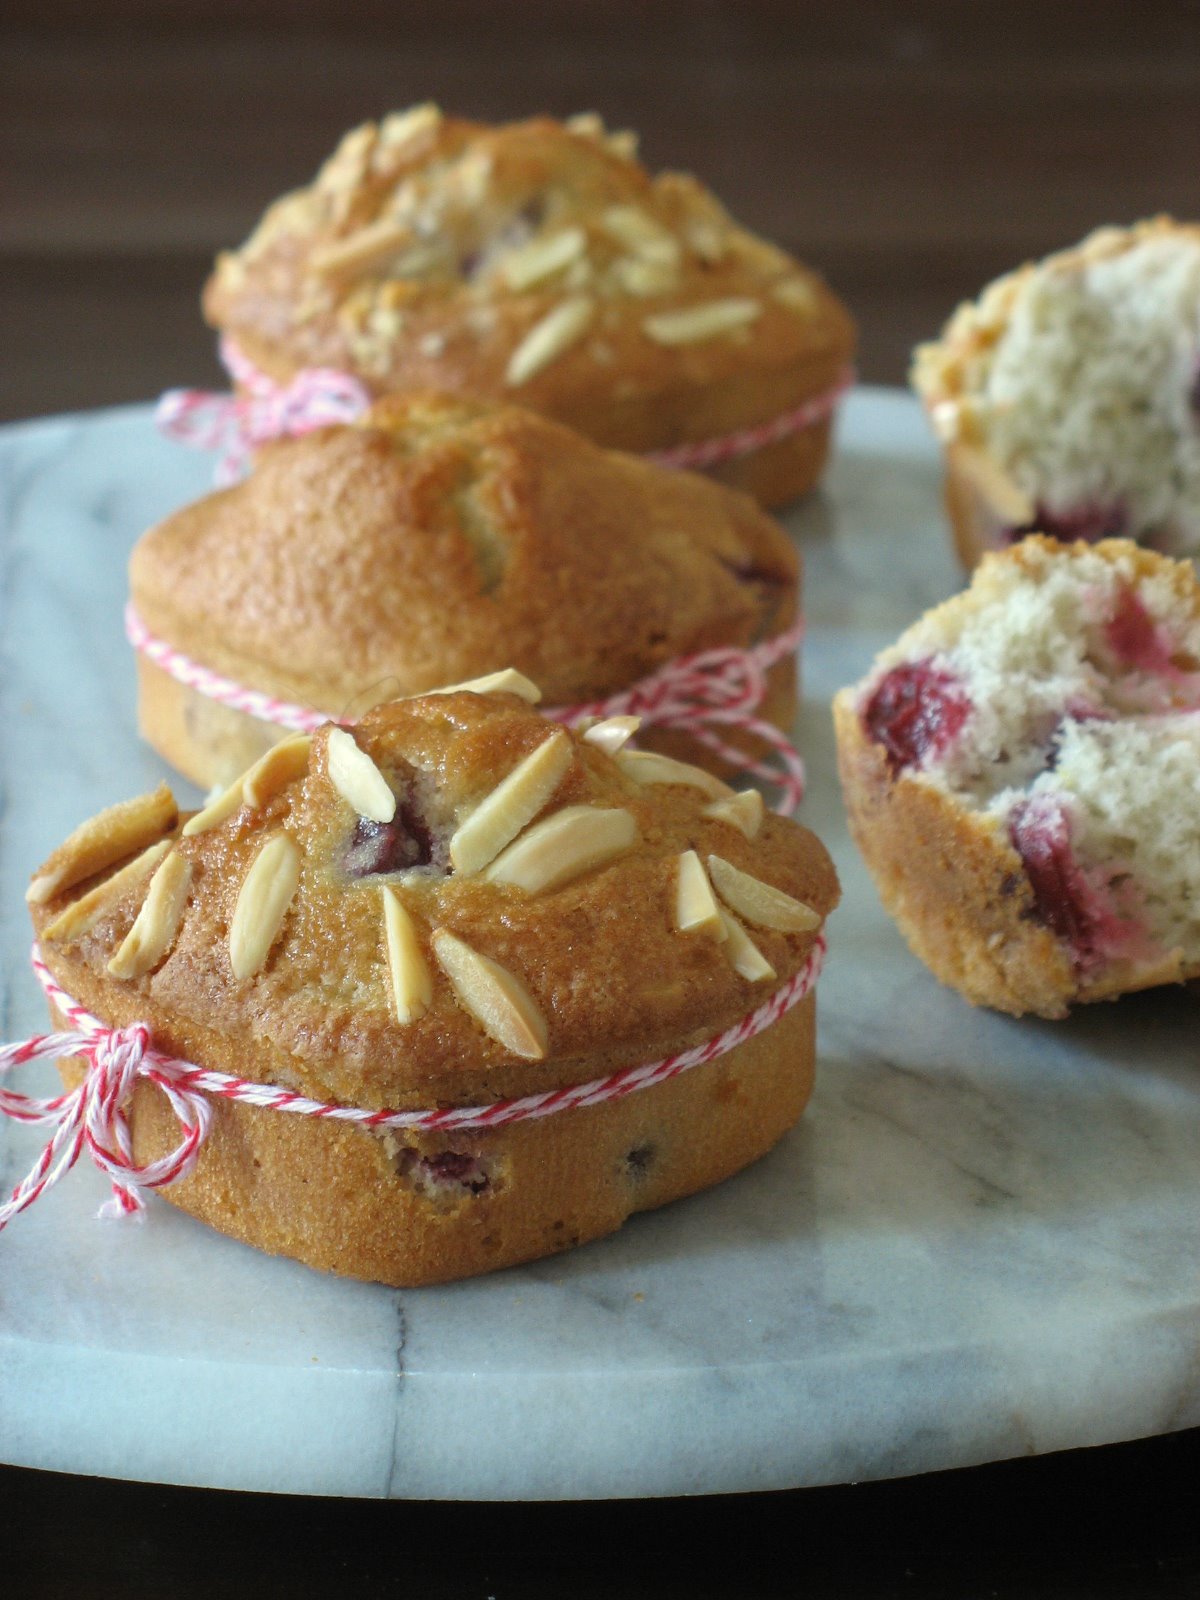
Cherries and Coconut Mini Cakes

How is it that every time I turn the computer on and spend more than 30 minutes looking at the screen, my "favorites" box ends up being full of luscious, simple, adventurous, down to earth recipes that I know I won’t have time to get around? How is it that everytime I hit the market, my produce guy, Sunny, hands me a box of the best he’s got around and charges me pennies for it? Maybe because he knows I will bring you a share of whatever I end up making.
Sunny knows my love for berries, blood oranges, lemon, all things tart and puckery, and naturally of all things "cherries". He tried to compete with Beverly for all things local and homegrown but when it comes to cherries, he knows one tree is not enough for me…so he brings me case after case.

Every night this past week, I sat down at the dinner table, covered in old newspaper and I pitted cherries, pound after pound. I have preserved, jammed (oh yeah, I am cool like that), jellied, pickled and froze 30 pounds so far. Crazy? maybe, I don’t know…I see red everywhere…If I see one more pit I might scream…I think people wonder why I paint under my nails…! But there you have it: first installment of a very cherry summer to come (oh, yeah , I am funny like that) in the form of mini cakes inspired by 3 different recipes I had bookmarked from other blogs, and as a Taurean, not quite capable of making up my min,d I decided to combine all three and make my own little tambouille (French slang for nosh).

Cherries and Coconut Cakes

Makes 8-10

8 oz flour (230 gr)
6 oz sugar (170 gr)
2 eggs
2 Tb. melted butter

1/2 cup coconut milk

1 tsp. coconut extract
1 tsp. baking powder

grated zest of one lemon
pinch of salt
1 cup fresh or frozen pitted cherries

1/2 chopped almonds or coconut

In a large bowl, whisk the eggs, sugar, melted butter, coconut milk and extract.

Sift the flour, baking powder and salt. Add to the wet ingredients. Fold in the cherries. Sprinkle with almonds. I wanted to use coconut but ran out after another baking project.

Divide between muffin tins lined with cupcake liners, or other molds. I used Reynolds heart shaped molds, coated with cooking spray.

Bake at 350 F, for 20-25 minutes

Birthday Mingle: Lemon Mascarpone Charlottes

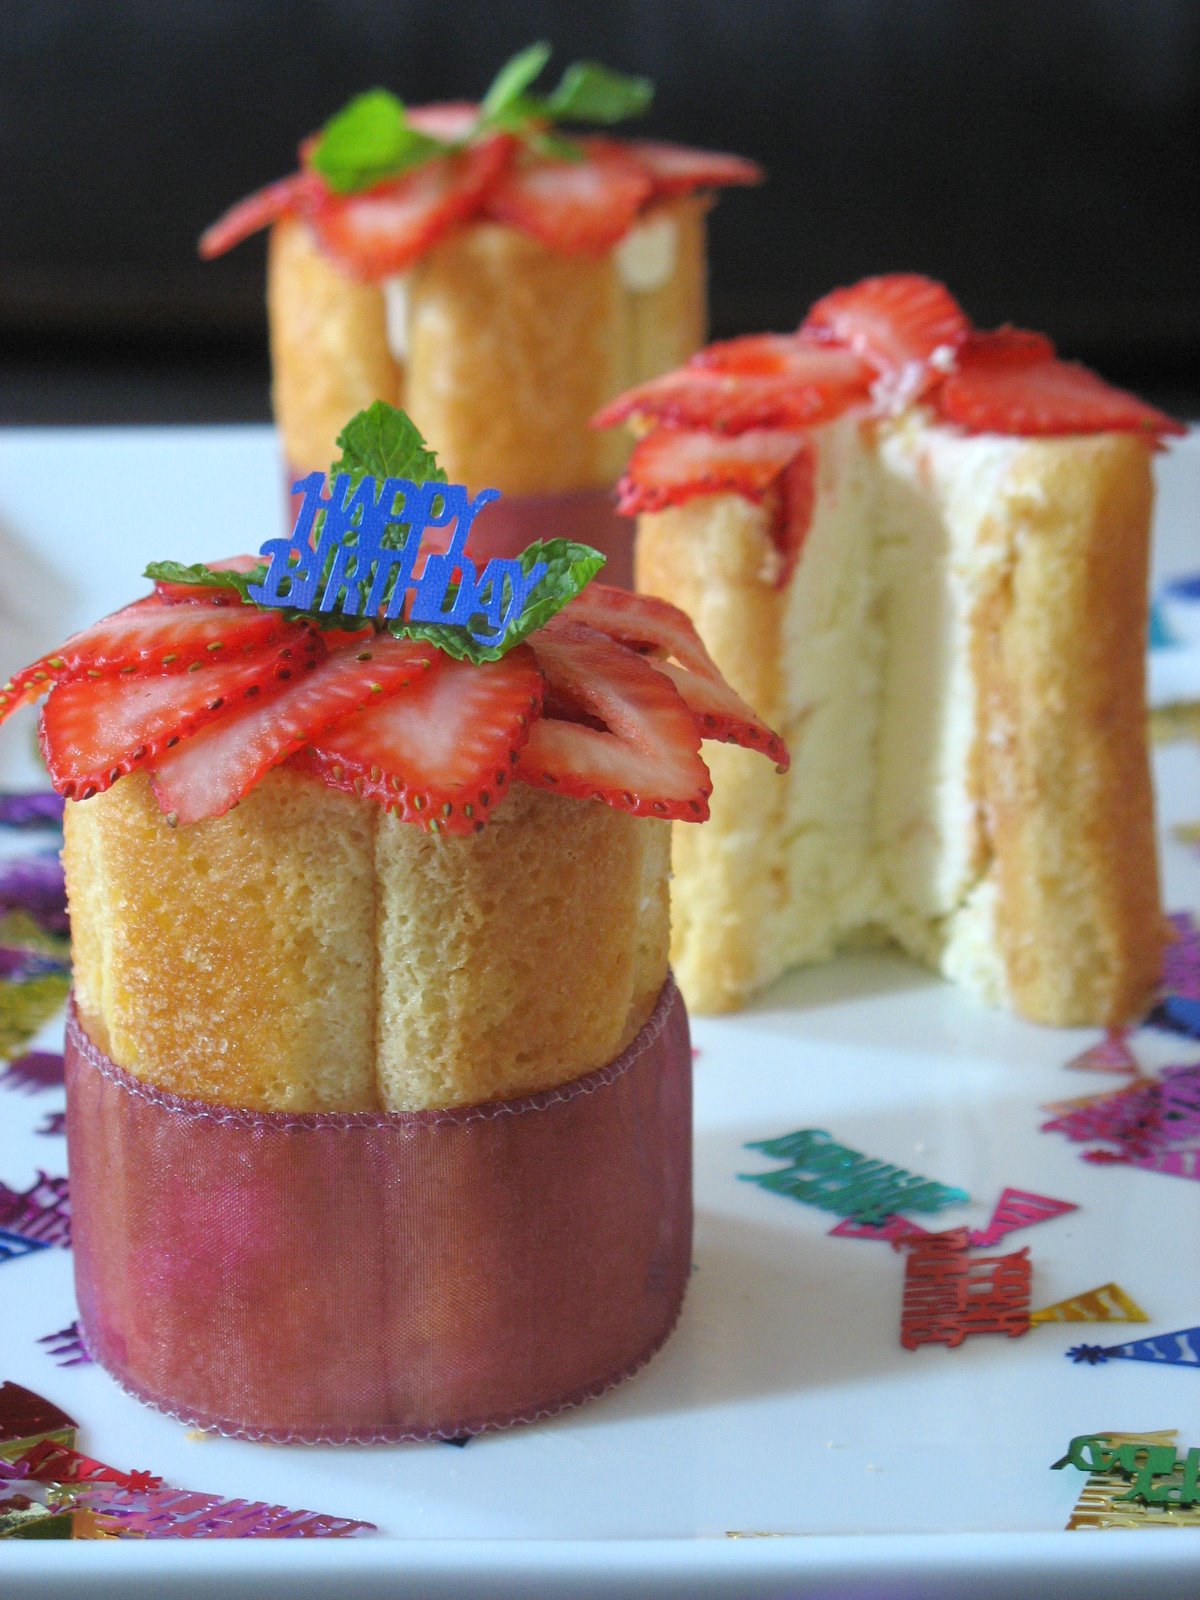
Yesterday, June 2nd was one special lady’s birthday: Meeta from What’s for Lunch Honey? blew another candle and knowing her I am sure it was done in style surrounded by many friends and family members. Happy Birthday one more time, dear Meeta!

During the last roundup of her event Monthly Mingle, she realised it was also a year ago that she started the Monthly Mingle event. Thus, she invited us for the June edition entitled Big Birthday Bang, to make a dish for her, the guest of honor. Smart woman, not only does she get to make her birthday last a little longer but given the past roundups, she can be sure to be served some pretty tasty things!

I have only known Meeta for a few months and through her blogs (she also writes The Daily Tiffin, and asked me to join its writers pool last month), The Daring Bakers, and emails and yet I imagine her to be strong willed, warm, organized and detailed, attentive, a great friend, wife and mother. I also imagine her stylish, feminine and full of pep and colors.

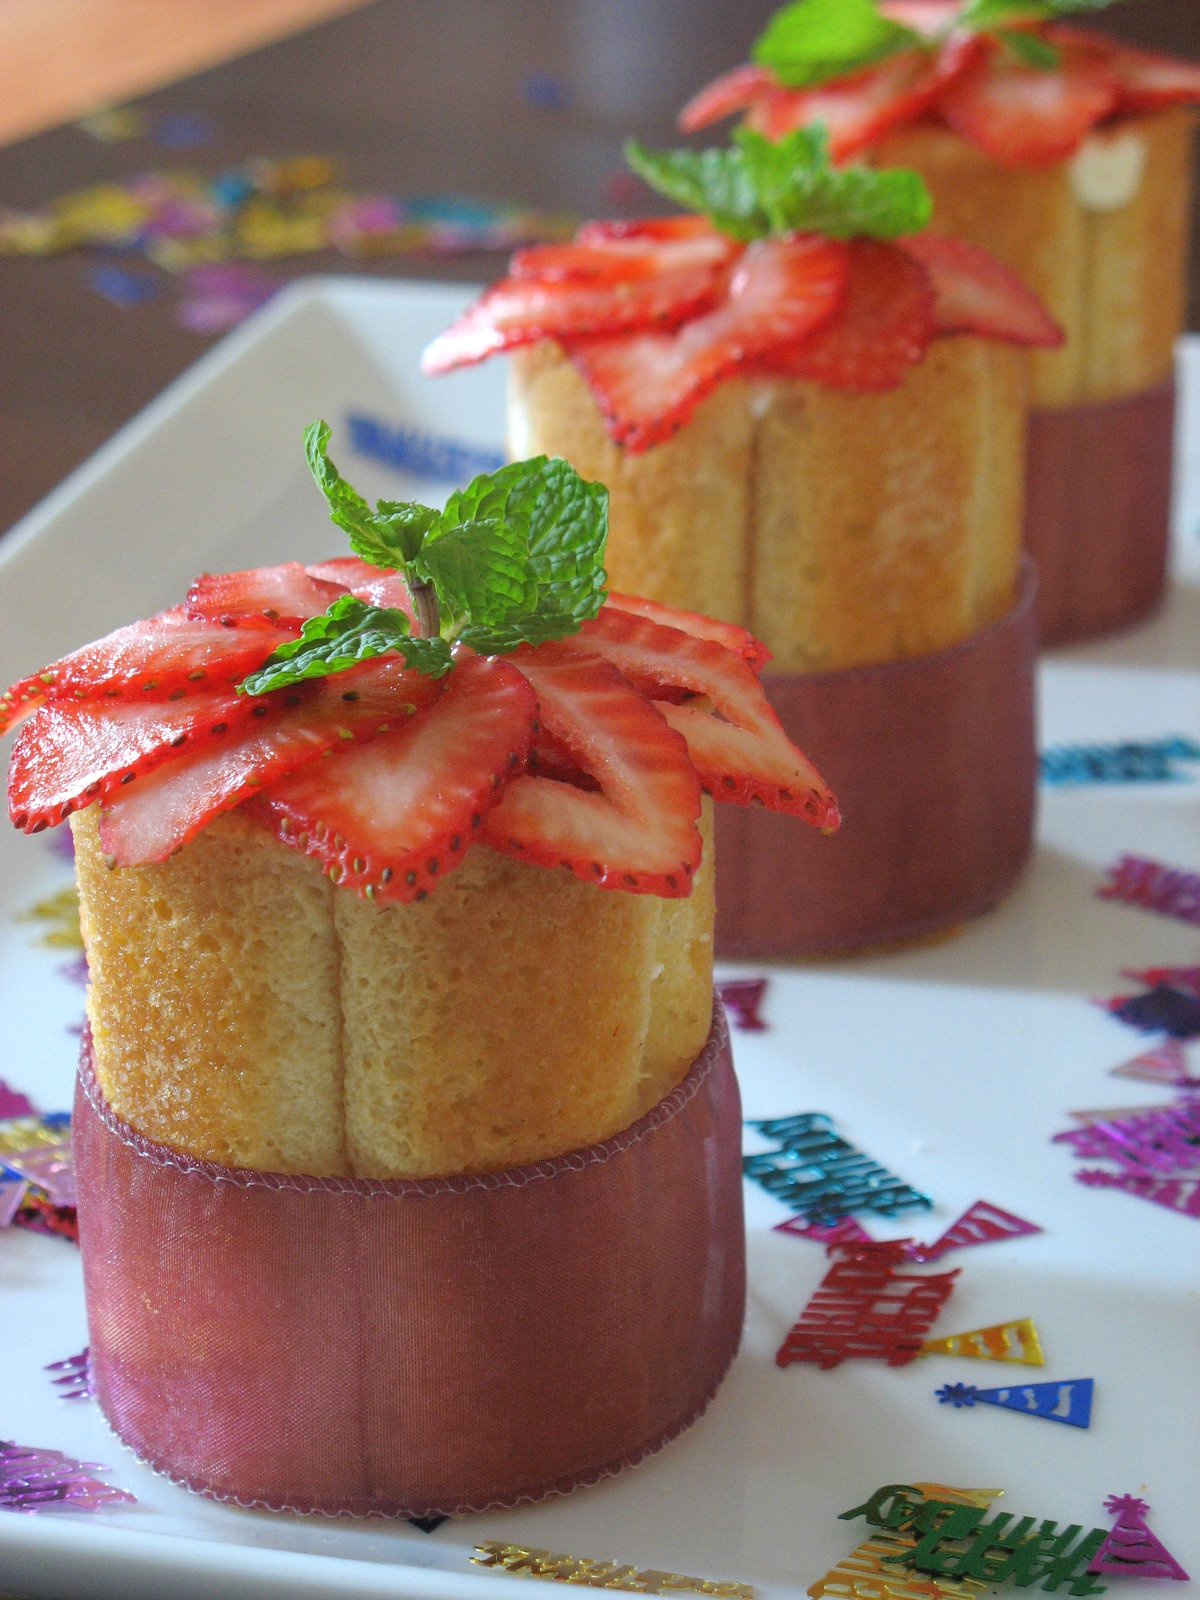
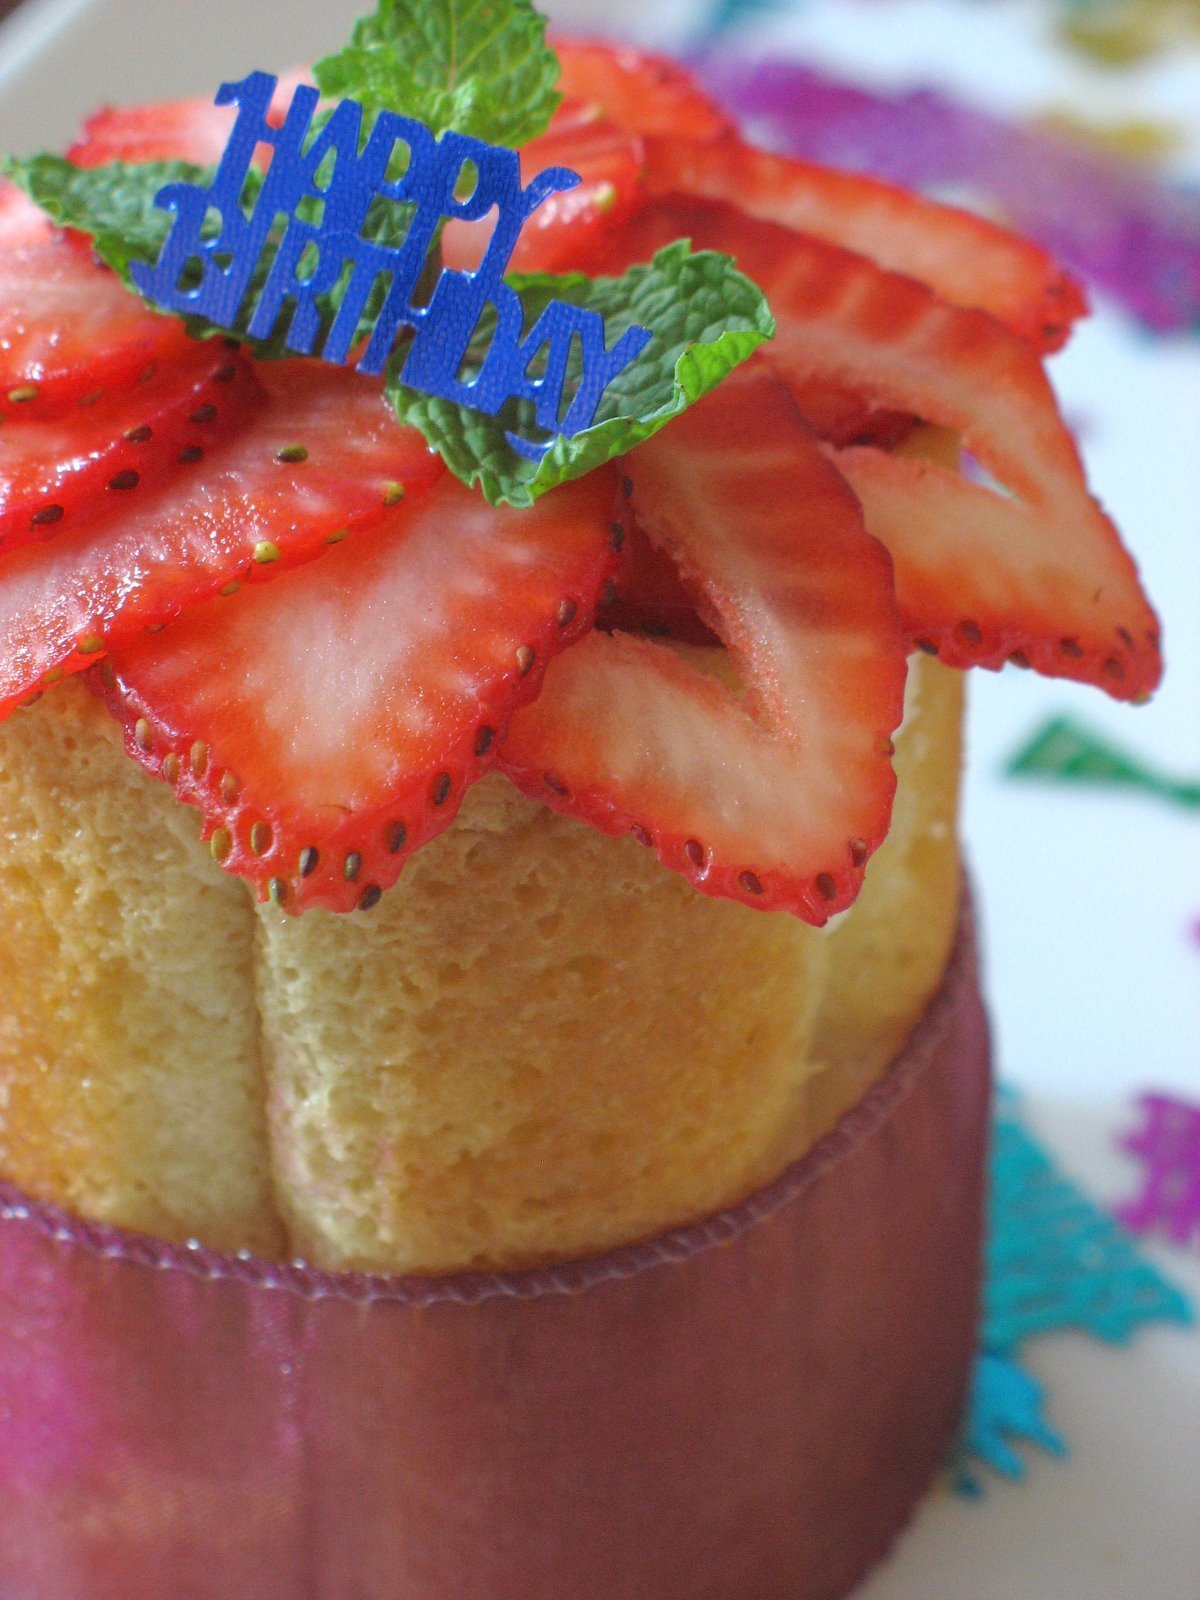
I had a list a mile long list of different birthday cakes I thought about making for her and that special day but once I imagined these Lemon Mascarpone Charlottes, I really found them fit for the event. Just like I envision Meeta, they stand tall with confidence, soft and strong in flavor and yet playful at the same time. A soft and just a bit decadent lemon mascarpone surrounded by Limoncello dipped ladyfingers…enough to make you happy, not tipsy!

Lemon Mascarpone Charlotte, inspired from Mercotte:

Serves 6

1 package Italian style ladyfingers
2 eggs, separated
1 1/2 oz sugar
4 oz mascarpone cheese
150 ml. heavy cream, divided
2 tsp. powdered gelatin (1 sheet) + 1/4 cup water
zest and juice of one lemon

Syrup to dip the ladyfingers:
1/4 cup water
1/4 cup Limoncello

Sprinkle the gelatin over the water, stir and let sit to bloom.
In the meatime, warm up 5o ml. heavy cream until hot but not boiling hot. Stir in the gelatin and allow to cool.
In a large mixing bowl, whisk the mascarpone with the sugar, add 2 egg yolks and whisk until well incorporated. Add the lemon juice and zest.
Whip 2 egg whites until stiff, fold them into the mascarpone mixture.
Whip the remaining heavy cream to medium stiff peaks, and fold into the mascarpone.

To assemble the charlottes, I used 2.5 inch diameters pvc pipe cylinders (I use pvc for cold molded desserts and metal for baked ones), but you can use the diameters that you like best.
Dip the biscuits very briefly (1 second/turn/1 second/done…yes, that fast or you will end up with mush) in the Limoncello water and stand them straight one next to the other into the molds, fill with the mousse. Refrigerate until set. Trim the tops.
At this point I like to freeze the charlottes for a couple of hours, so it is really easy to unmold them. Just push through the bottom, they slide out of the molds very easily.
Decorate with sliced strawberries or whole raspberries.