Jahresarchive: 2007

Milk Chocolate And Caramel Tart: How To Be A Daring Godmother!

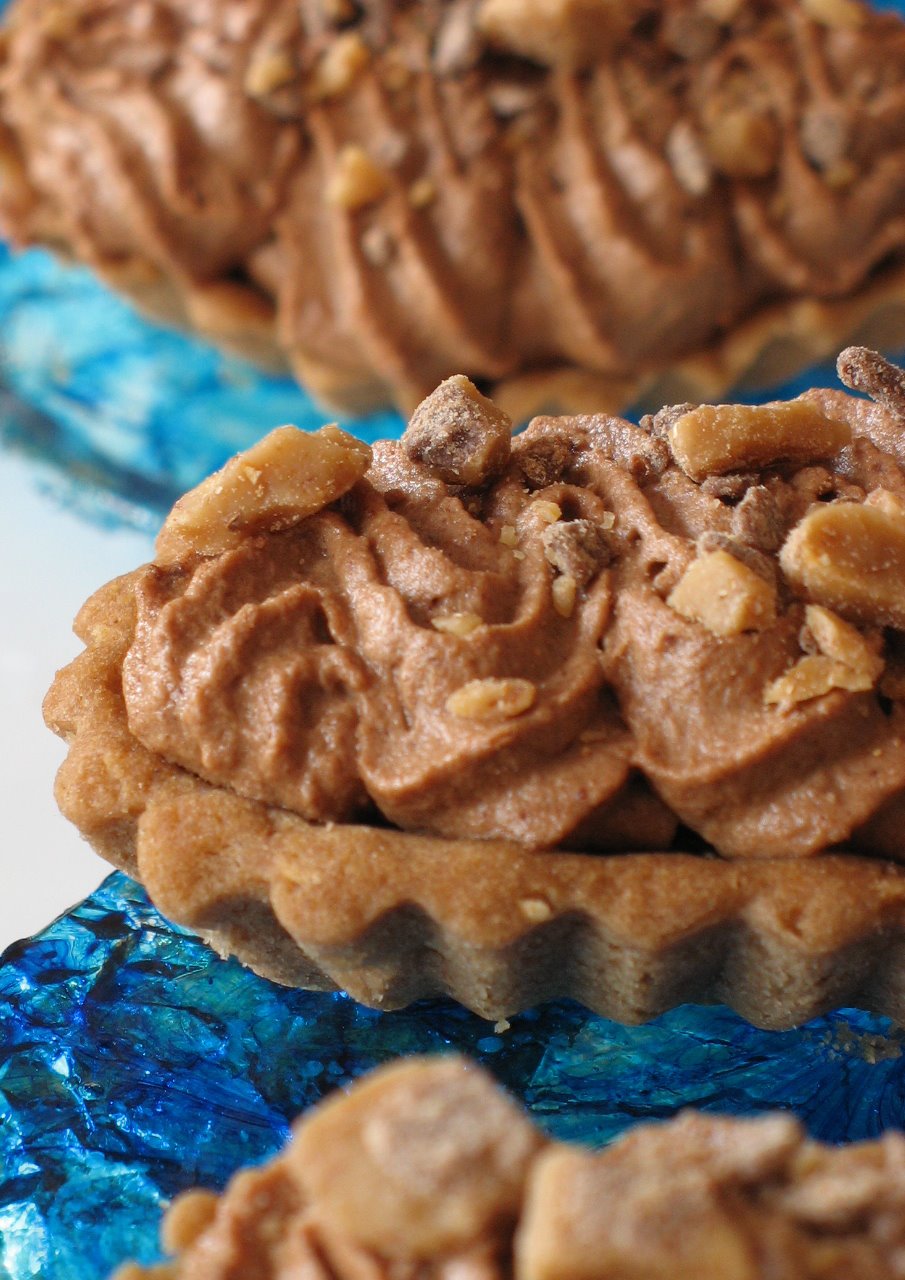
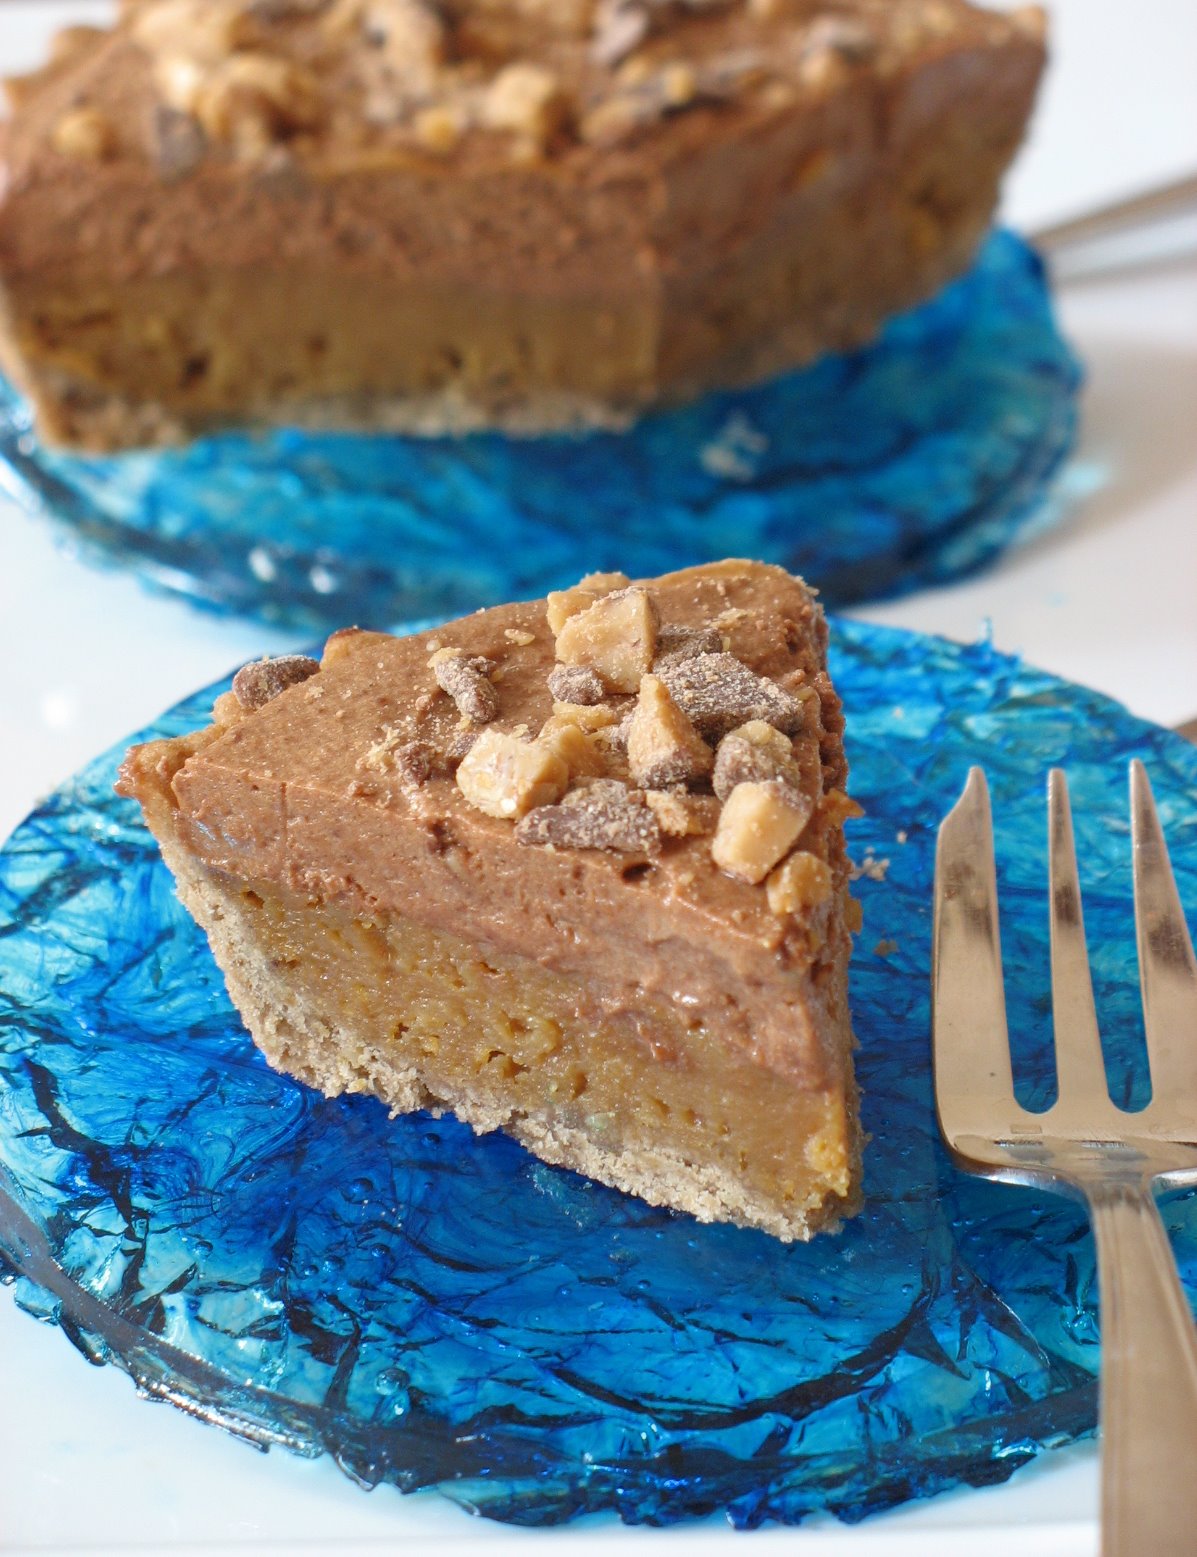
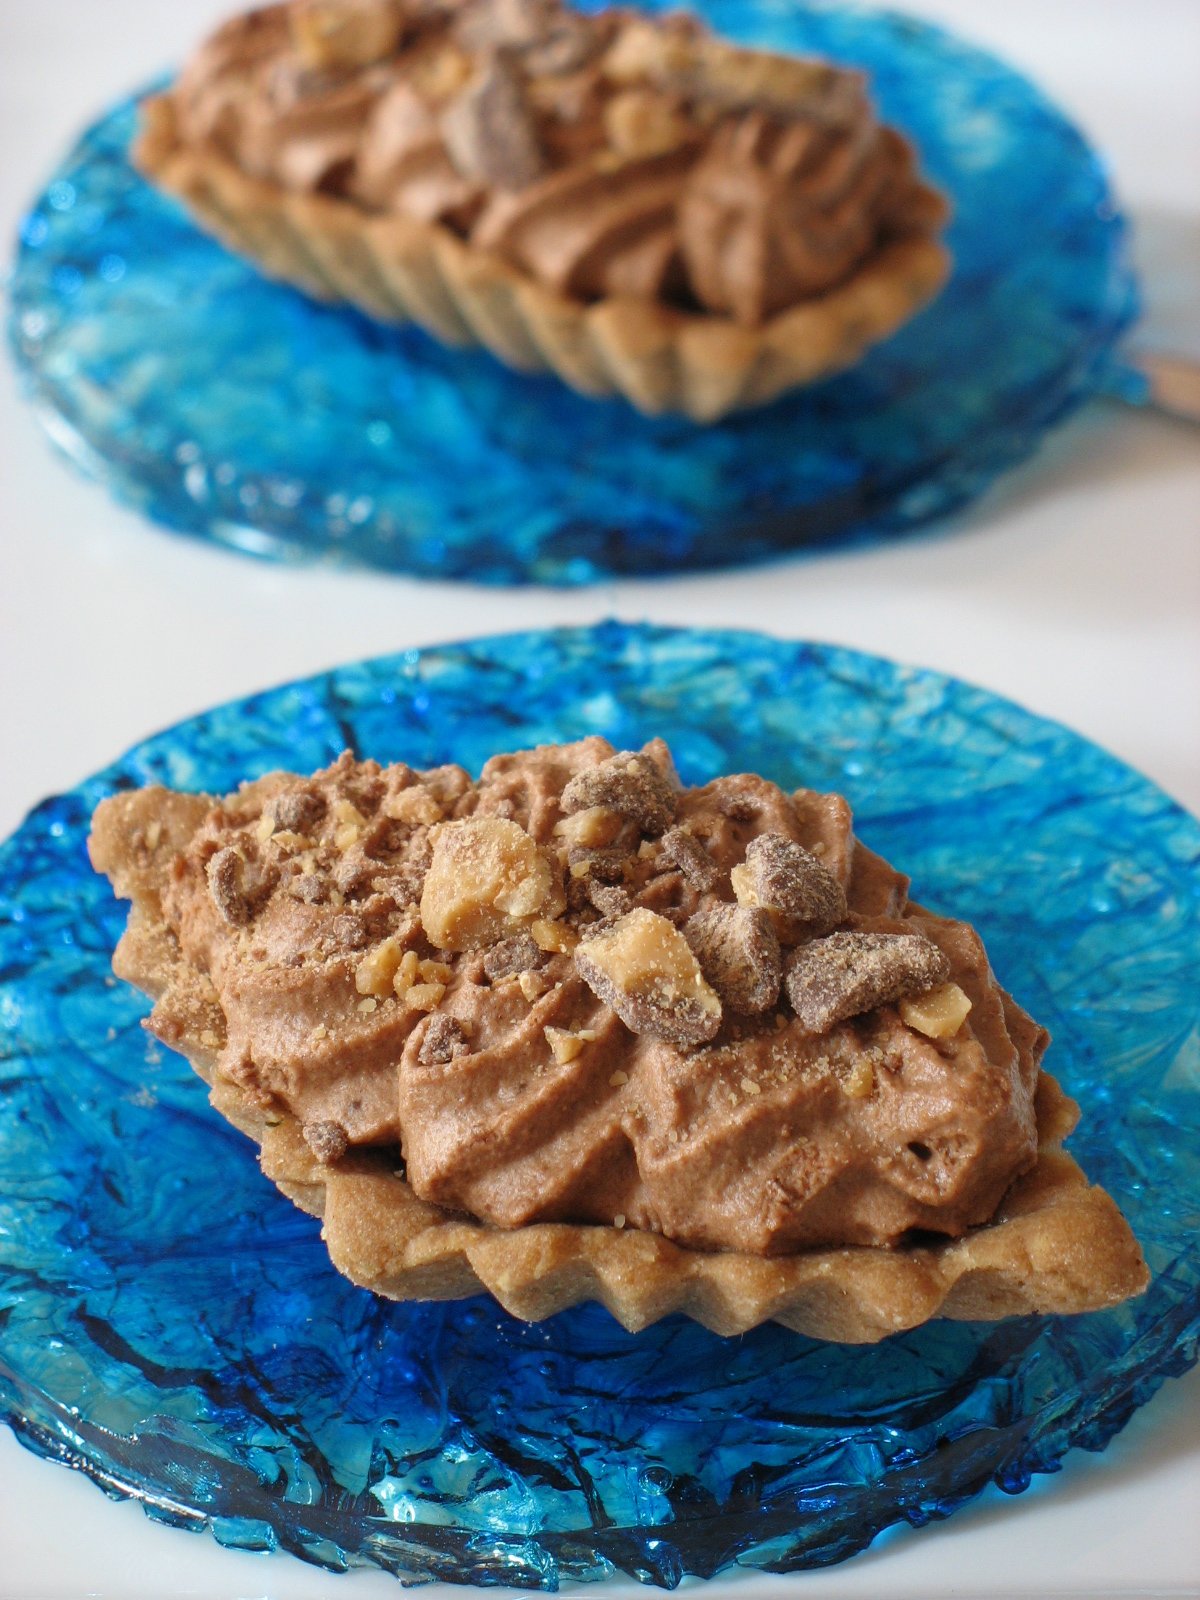
Milk Chocolate and Caramel Tart Tart on Clear Caramel Marbled Plates

How to combine a house guest, a Daring Baker challenge and a sunburn…just ask your crazy little Tartelette!
The challenge this month took on a complete different meaning for me. If you have been following my posts lately, you have noticed that they have been fewer and quite short in story telling, kind of drive by but not exactly. Well, you see, I had the very important job this month to be Godmother extraordinaire to a beautiful 18 year old soul named Sophie. My god child is a little storm of a woman and I bet you she will melt a thousand hearts before she meets the right guy. In the meantime, I wanted to melt hers and become the coolest godmother ever….and when Veronica and Patricia announced the Daring Bakers’ August challenge as a Milk Chocolate and Caramel Tart from Eric Kayser’s Sweet and Savory Tarts, I knew I had just the ticket….except we only got to it this past weekend!!
I was too busy taking her around town whenever I had a day or afternoon off , or even an hour to go shoe shopping (guys take a hint here for your daughters…works like a charm to fix “boys issues”). Her last days were just around the corner and still no tart….Oh believe me, we got quite busy in the kitchen, especially making sourdough bread every other day (those French and their bread!), making lasagna, pizza, Financiers, brownies, macarons…well, you get the picture.

Saturday night, we took her out to dinner at Middleton Place (watch The Patriot) and took the time to stroll the plantation’s gardens and ate a fabulous meal of seafood and pecan pies…and it was on a very satisfied stomach (read I ate my pie and finished hers) that I started on the tart. No way I was going to loose my crown of Coolest Godmother by not completing the challenge.

The tart is based on 3 components that you can spread out over several days if necessary plus a decoration element, which I took some liberty with by the look of my tarts (blue sugar plates). The recipe is very straightforward and the tart presents no major hurdle if you know some about sugar. The chocolate shortbread crust came together without a glitch but I had to omit the cinnamon (with Veronica’s approval) called for because Sophie does not like it (and remember I am Zee Coolest Godmother). I wish I had made some with though because it needed that extra kick in my opinion.

The caramel layer seemed to have given some trouble to other Daring Bakers. Lisa, I still don’t know why yours was so liquidy….and yes, people think I am officially crazy when I take your phone calls in the middle of grocery shopping! Anyways, I would love to say I know why mine set out just fine and not others, truth is that Sophie and B. were so involved in a game of Othello that I had to make sure she was saving the family’s honor and I completely forgot about the tart in the oven….I think I baked them for 25 instead of 15 minutes, and the explanation might be in the translation of the book and temperature conversions, not given appropriately in English. I made the caramel layer Sunday after a full day at the beach and a double dose of sunburn. I made the caramel using the dry method, as it is the one I am most familiar with. I understand it scared some Daring Bakers and some did actually ruin a few pots trying it, I have to admit that I had the luxury of burning a few restaurant saucepans and never my own learning it so I see why they would feel tempted to use the alternative given by Veronica to make a water/sugar/corn syrup caramel which takes longer but is somewhat foolproof. My word of advice for novices who are tempted by the dry method: low/medium heat is best and sugar clumps “declump” if you lower your heat and let the sugar melt at its own pace.

Monday during my lunch break, I came home to make the final part of the tart. I found Sophie and B. watching Donkey Skin. : “A fairy godmother helps a princess disguise herself so she won’t have to marry a man she doesn’t love”…(See where I am going with this?) Time to finish this baby and get my stripes!!
The mousse sent me back to my restaurant days big time. When I learned how to make mousse it was the old traditional way: melt chocolate, separate eggs, add yolks to chocolate, whip the whites to firm peaks and fold in the chocolate mass. In a large restaurant turning tables 2-3 times a night, this method can be quite costly and it’s not before long that you have to resort to the quicky approach of melted chocolate folded in whipped cream. Now you understand why my eyes popped and had to smirk when I read that even Eric Kayser used this method…the fraud…no just kidding….I don’t really like mousses like that, and I can’t say whether it is because I used to make it day in and day out or because I find too heavy. Egg whites mousse are really delicate and intense in flavors whereas the whipped cream ones are too dairy tasting. Just my thoughts people, don’t start coming at me with your spoon to bang me on the head….I just expressed an opinion, nothing else.

Milk Chocolate and Caramel Tart

Milk Chocolate and Caramel Tart:
Preparation time: 40 minutes
Baking Time: 30 minutes
Refrigeration time: 1 hour

½ lb (250 g) chocolate shortbread pastry (see recipe below)
1 ½ cups (300 g) granulated sugar
1 cup (250 g) heavy cream (30-40 percent butterfat) or crème fraiche
¼ cup (50 g) butter
2 whole eggs
1 egg yolk
2 ½ tablespoons (15 g) flour
1 ¼ cups (300 g) whipping cream
½ lb (250 g) milk chocolate

1. Preheat oven to 325 °F (160 °C).
2. Line the baking pan with the chocolate shortbread pastry and bake blind for 15 minutes.
3. In a saucepan, caramelize 1 cup (200 g) granulated sugar using the dry method until it turns a golden caramel color. Incorporate the heavy cream or crème fraiche and then add butter. Mix thoroughly. Set aside to cool.
4. In a mixing bowl, beat the whole eggs with the extra egg yolk, then incorporate the flour.
5. Pour this into the cream-caramel mixture and mix thoroughly.
6. Spread it out in the tart shell and bake for 15 minutes. Remove from oven and allow to cool.
7. Prepare the milk chocolate mousse: beat the whipping cream until stiff. Melt the milk chocolate in the microwave or in a bain-marie, and fold it gently into the whipped cream.
8. Pour the chocolate mousse over the cooled caramel mixture, smoothing it with a spatula. Chill for one hour in the refrigerator.

To decorate: melt ½ cup (100g) granulated sugar in a saucepan until it reaches an amber color. Pour it onto waxed paper laid out on a flat surface. Leave to cool. Break it into small fragments and stick them lightly into the top of the tart.

Chocolate Shortbread Pastry
Preparation time: 10 minutes
Refrigeration :overnight

1 cup (250g ) unsalted butter, softened
1 cup plus 2 tablespoons (150 g) confectioners’ sugar
½ cup (50 g) ground hazelnuts
2 level teaspoons (5 g) ground cinnamon
2 eggs4 ½ cups (400 g) cake flour
2 ½ teaspoons (10 g) baking powder
1 ½ tablespoons (10 g) cocoa powder

A day ahead
1. In a mixing bowl of a food processor, cream the butter.
2. Add the confectioners’ sugar, the ground hazelnuts, and the cinnamon, and mix together
3. Add the eggs, one by one, mixing constantly
4. Sift in the flour, the baking powder, and the cocoa powder, and mix well.
5. Form a ball with the dough, cover in plastic wrap, and chill overnight.

Alright, so we are now Monday night and it is time to finally taste the tarts. I made several sizes just to see what we could play with and I spooned it in a pastry bag fitted with a large start tip and swirled it around on top of the caramel.
I remembered I had some Milk Chocolate Toffee (think homemade Heath Bar) that I had made a couple of weeks prior and crushed the remainder on top of the tarts.
At first I thought I was not that inspired to dress them up a little for their beauty shots but you know what happens in those cases…my mind goes stir crazy and I decided to give them pretty little glass- marbled like plates made out of clear caramel and food coloring so completely edible if you ever should need more sugar! That part, Sophie did not see come together as I made them after I dropped her off at the airport today. The house was eerily quiet, suddenly too big and although I finally had all my kitchen space back to myself, I did not want it anymore….I wanted to share it with her again…I guess that’s why they put “mother” in godmother…Well, girl, I hope you like them and “non, ca ne pique pas”…!!

Milk Chocolate and Caramel Tart

Well, both Sophie and Bill loved it, or they lie very well….I was not so keen on it. I wish I had made half with cinnamon and half without because it really needed something to offset all that sugar. But I love milk chocolate, hazelnuts and caramel so I have to really thank Veronica and Patricia for choosing this recipe and the rest of the Daring Bakers for going along with it!
Busy…Enjoying Mother Nature


As you may have noticed I have barely been able to manage a couple of posts a week this month. Some of you know that my 18 year-old god-daughter is visiting from France and we have been showing her Charleston and its vicinity everyday. I miss my blog, baking and most of all staying in touch with fellow bloggers out there.
Sophie is leaving Tuesday but I hope this won’t be her only visit to the US. I will be back to posting and baking next week for sure!

In the meantime, I am leaving you with a picture if the pecan tree I look at every morning while enjoying breakfast on the porch. The pecans are still green and I am counting the days until I can make pecan pie!!
Allright, off to the beach now!

Pistachio Cherry Financiers

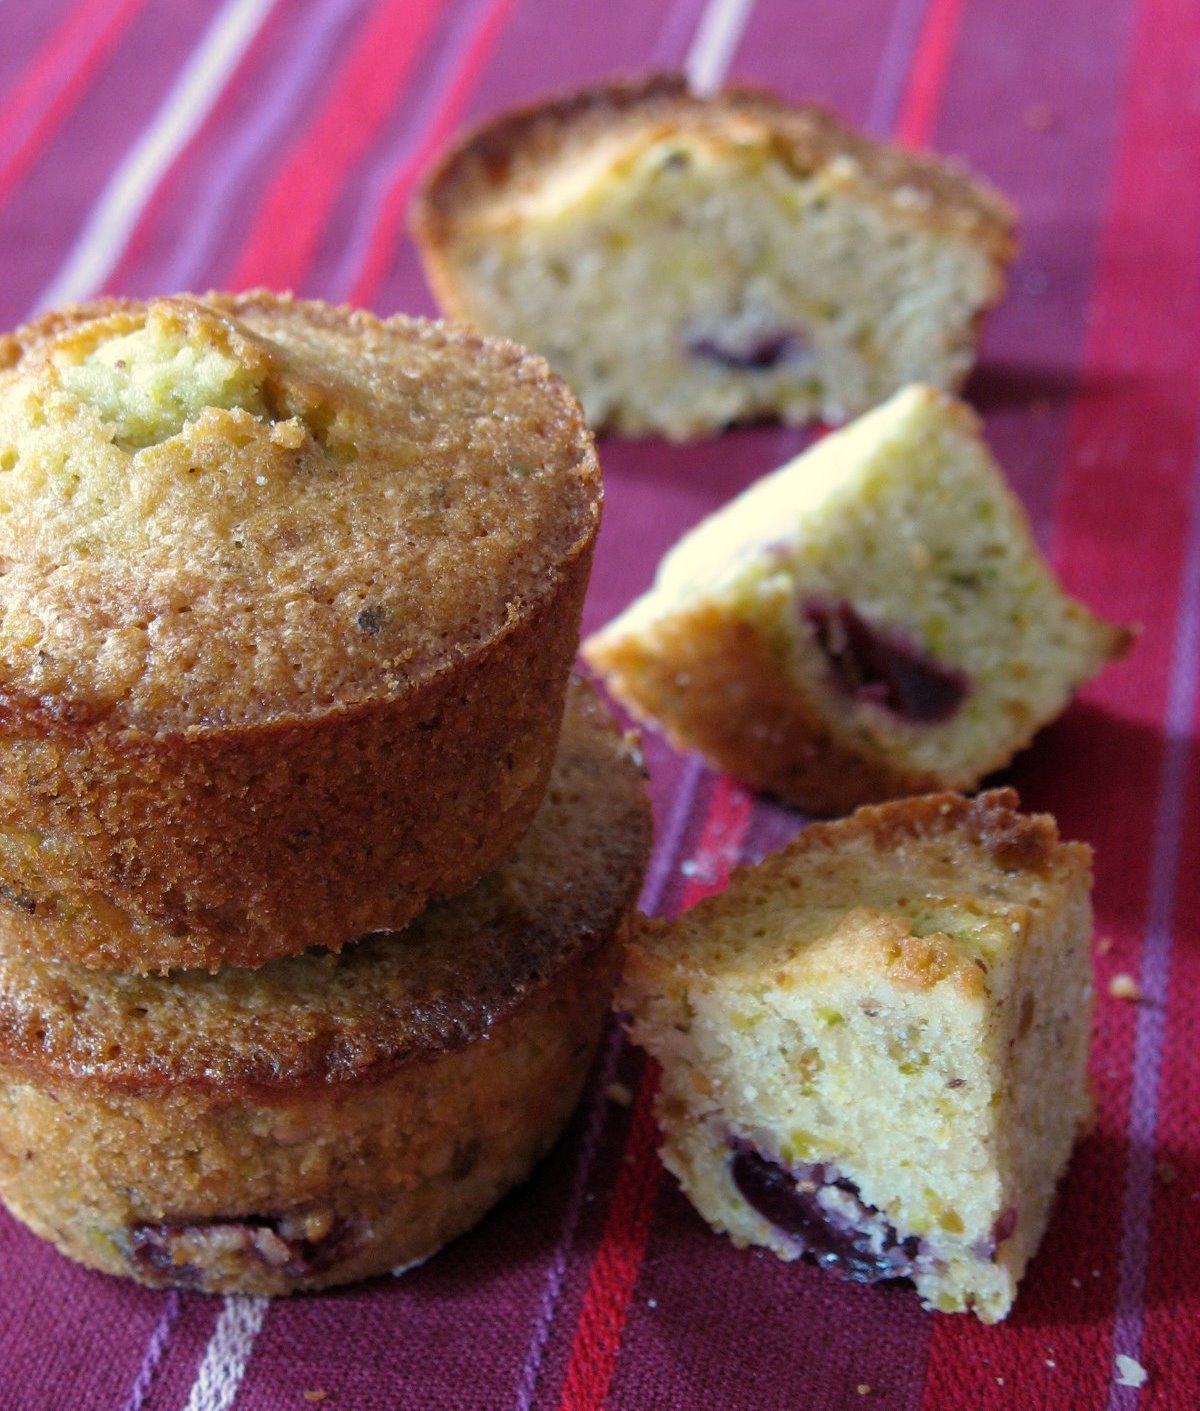
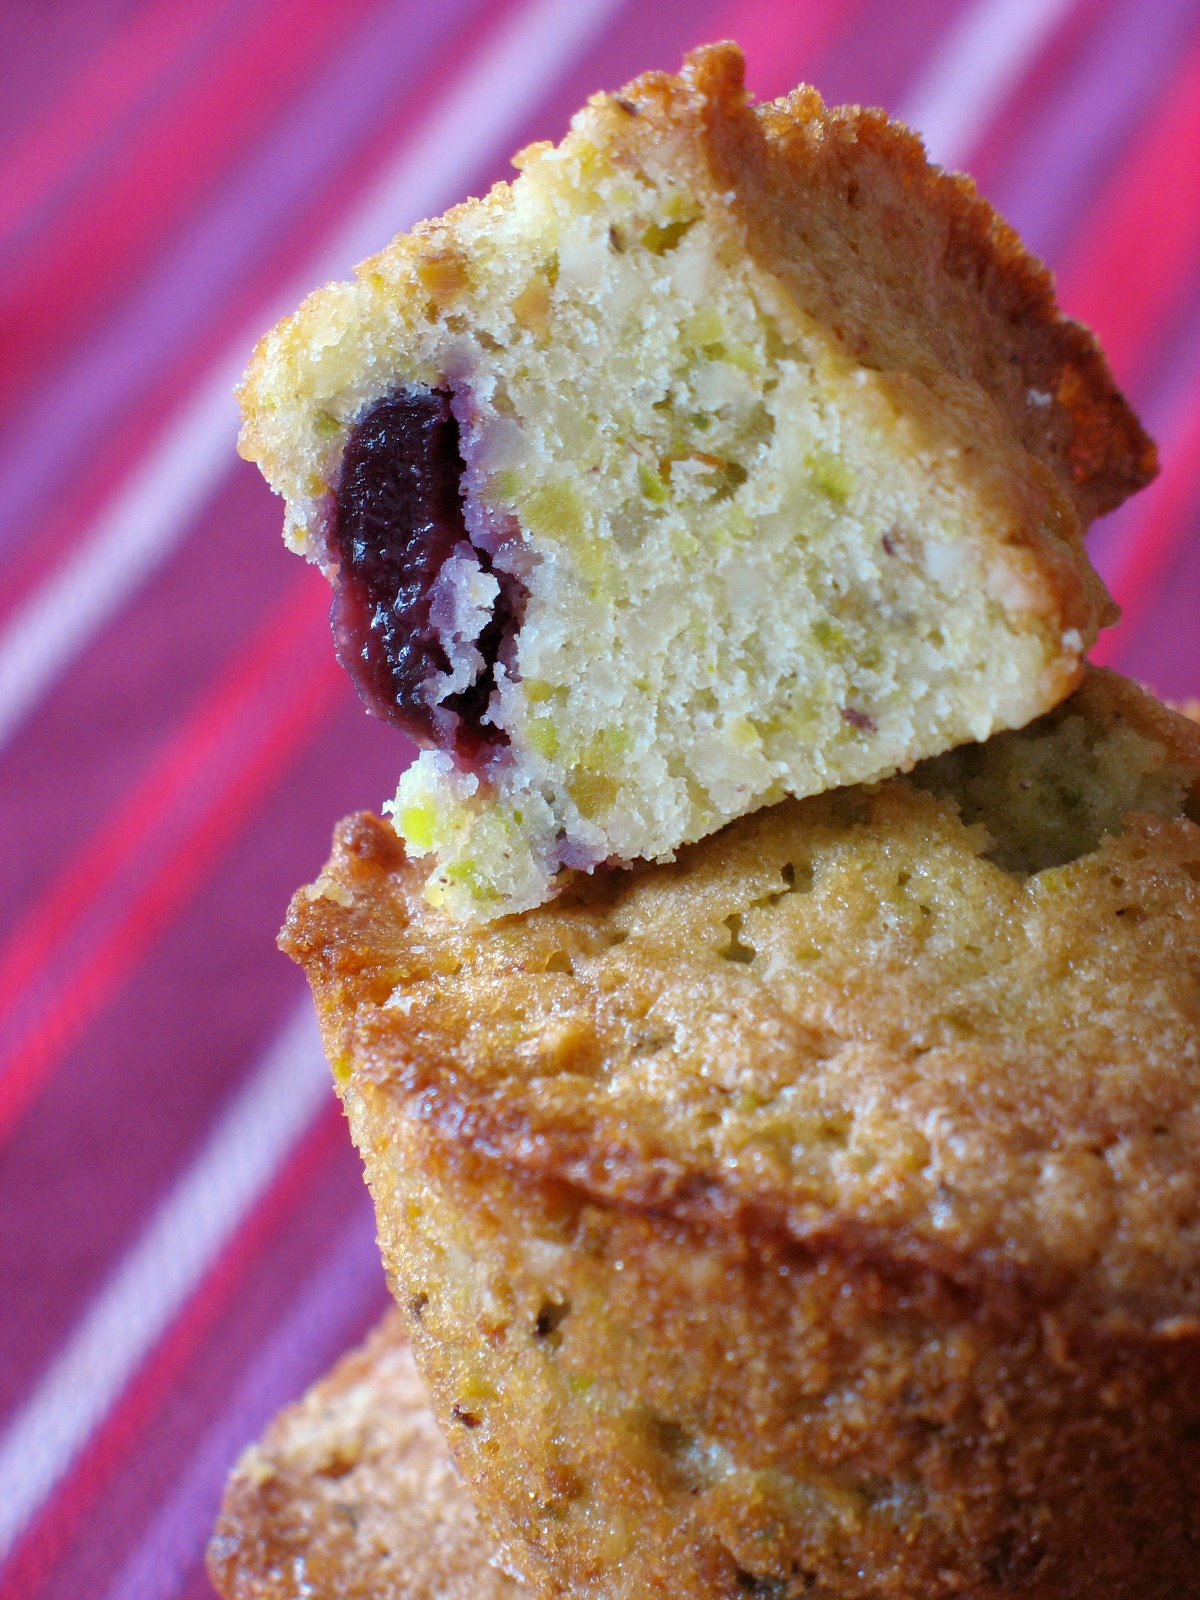
When I went home last Christmas, B. and I decided to spend 4 days in Paris alone and away from the family just to breathe a little and spend some time "en amoureux" (lovey-dovey). While we were walking our way through countless galleries and museums we also ate our fair share of pastries and scrumptious delicacies. One of them being the "cerisai" from Gerard Mullot, located in the 6th "arrondissement", a stone throw away from our hotel. I tried to duplicate that little cake as soon as I got home and although my first attempt did not rise to my expectations, this one came pretty close. The taste was there, the flavor too but I suspect that Mr. Mullot grinds his almonds and pistachios to a finer constistency, almost like powdered sugar.

I got an email last week from a reader asking for a recipe and some help in makeing financiers and especially chocolate kinds. I was actually reading her email while baking these…ah the powers of the internet!!! While one can easily find a lot of chocolate financiers recipe with a quick Google search, I shall, for the purpose of finding the best one for her, make a few batches in the coming weeks (twist my arm) and give you the details of my search/quest/homework.

So, dear Anora, I am not ignoring your request, but I am waiting until my guest leaves next week to devote myself 100% to your questions. In the meantime I hope you accept a token of my appreciation for your nice comment by offering you these.

Financiers will keep well for up to 5 days, and they also freeze beautifully so it’s easy to make a big batch and keep some tucked away for impromptu guests. As a matter, these were made sunday night and Sophie has been impatiently waiting for her godmother to finally take some pics for the blog so she could have a couple. Well, the boy situation is a little iffy so I figured these with a good cup of coffee would help change her mind….and since I am not totally uncool, shoe shopping came next!


Pistachio Cherry Financiers , adapted from Foodie Froggy

Makes 8-10

70g (2.4 oz) ground almonds
70g (2.4 oz) flour
70g (2.4 oz) shelled, unsalted pistachios, ground
6 egg whites
120g (4 oz) sugar
2 tsp orange blossom water
120g (4 oz) unsalted butter, melted
8-10 pitted sour cherries

Pre-heat oven 160°C (325°F).
In a mixing bowl, combine the almonds, pistachios, flour and sugar, using a whisk. Add melted butter and the orange blossom water. In another mixing bowl, beat the whites very slightly, with a whisk.
Add the whites to the pistachio/almond mixture.Mix well.
Fill up finanicer pans or muffin tins with half the batter. Drop 1 pitted cherry (2 halves) in the center and cover with the reamining batter.
Bake for 15 to 20 minutes, until slightly golden.

Fig Almond Tartelettes

Fig ALmond Tartelettes
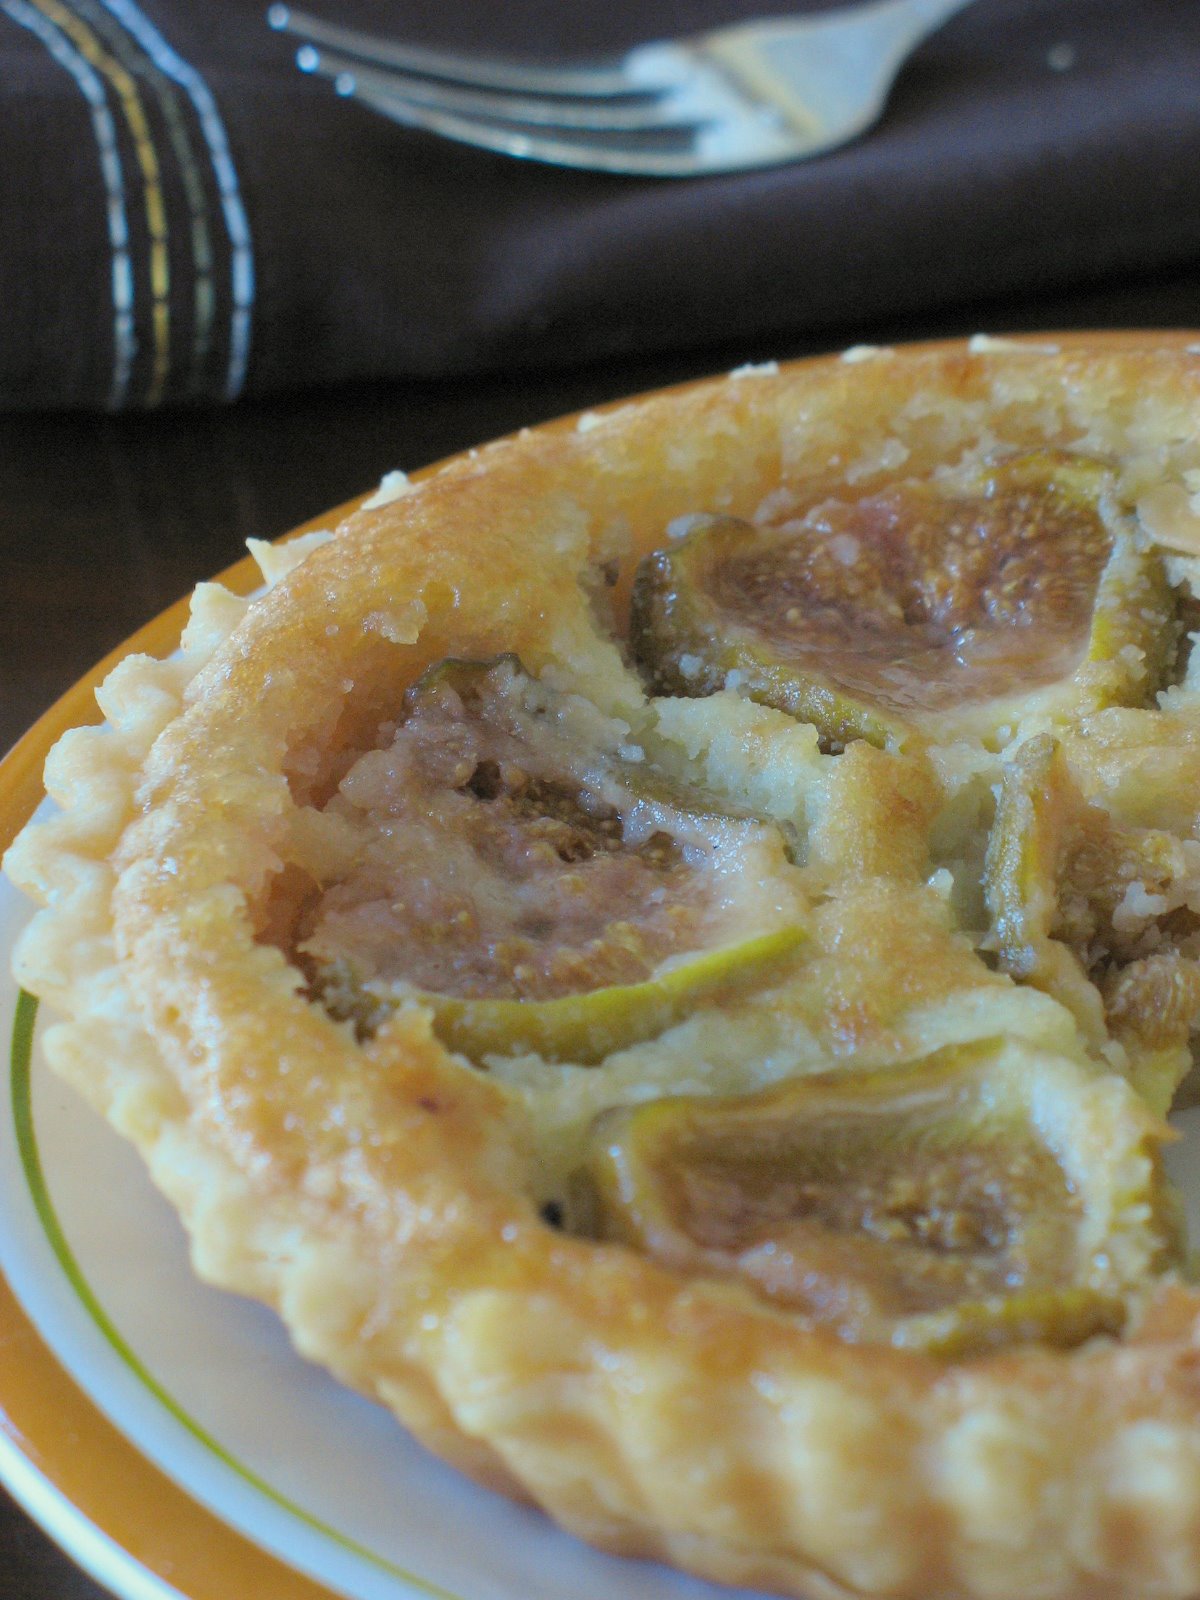
A few many things prompted me to make this lovely "tartelette" seen in the picutures as well as a few others in the past couple of days. Last week I was given a good 10 pound basket filled to the rim with lovely figs from one of my clients' extremely prolific fig tree. "Yippee!" I scream as I love fresh figs. We started eating them fresh, the grilled with melting goat cheese, cut up in salad or with pork tenderloin. Then came the fig chutneys, fig jams, fig cakes and finaly these "Fig Almond Frangipane Tartelettes". It turns out that Sophie likes them too and B. will eat anything covered with sugar!

I was also trying to find a suitable local crop to make a dessert for Sugar High Friday hosted this month by Johanna of the Passionate Cook . It turns out that the earliest colonists from England and Barbadoes landing in South Carolina found a bounty of foods in their new land, including peaches, figs, muscadines, pumpkins, squash, game, fish, nuts, and corn. Fig trees are almost as widespread as pecan trees here (my pecans seems about ready to implode) and the tiny fruits they produce packs a punch of flavor and juice. When I think about it, I don’t recall ever buying a single fig that was not from Charleston since I moved here. The common figs we get may not be the most sought after variety but they work just great for everyday life.

I make this kind of tartlets (and sometimes bigger pie) often throughout the year using different seasonal fruits. I love it with pears,apples, peaches, and plums, but quite frankly I think any fruit tastes wonderful when paired with a fragrant almond frangipane cream.

Fig Almond Tartlets

Fig Almond Tartelettes, adapted from Bon Appetit, October 1998

Makes 3 4- inch tartelettes (enough for 6 or 3 big appetites)

For crust
1 cup all purpose flour
1 tablespoon sugar
1/8 teaspoon salt
1/2 cup (1 stick) chilled unsalted butter, cut into 1/2-inch pieces
2 tablespoons ice water
1/4 teaspoon vanilla extract

For filling
1/3 cup whole almonds (about 2 ounces)
1/3 cup sugar1 large egg
3 tablespoons unsalted butter, room temperature
4 teaspoons rum or brandy
12 ounces ripe figs, cut into halves
1/4 cup apricot marmelade

Make crust:
Preheat oven to 375°F. Combine first 3 ingredients in processor. Using on/off turns, cut in butter until mixture resembles coarse meal. Mix 2 tablespoons ice water and vanilla in small bowl. Pour water mixture over dough. Process until moist clumps form. Gather dough into ball; flatten into disk. Roll out on floured surface to 12-inch round. Cut 3 rounds about 5 inches big, fit into pie plate and trim excess dough. (or use shapes and molds you like) Using fork, pierce dough all over. Bake crust until pale golden, about 30 minutes (crust may shrink slightly). Cool on rack. Maintain oven temperature.

Make filling:
Finely grind almonds with sugar in processor. Add egg, butter and 2 teaspoons rum. Process until batter forms. Pour filling into crust. Arrange fig halves atop filling. Bake until figs are tender and filling is golden and set, about 25 minutes.
Melt jelly with remaining 2 teaspoons rum in heavy small saucepan over medium-low heat. Brush jelly mixture over figs. Cool tartelettes. Serve at room temperature.

Pour mes lecteurs francais: j’ai demande a mes parents de me rapporter de la feve tonka, mais je ne sais ou leur dire de s’en procurer. Ils sont du cote de Versailles-Rambouillet-Paris. Quelques suggestions seraient les bienvenues. Merci.

Gateau Surprise Chocolat Pistache


Note: I apologize for the quick post you read here but I still have company for another week or so and it seems that I am fullfilling my godmother part pretty good. Sophie is quite busy having made some friends her age and discovered the joys (hmm,hmm…) of dating in America. Yes, French people have different dating rules and "games". I try to calm her nerves while waiting for the stupid "three days no call" rules that guys like to play here. In the meantime, I am making her cakes!!

You know a cake has to be good when it pops up over the years on some of the best food blogs out there. I hope I will carry the torch with honor. Clotilde presented the original and Heidi and Jen made some perfectly mouth watering renditions. The cake appealed to me so much that I made it the exact same say I read about it. The only thing that surprised me is in the lengthy steps undertook by my predecessors in mixing the two different batters. The original recipe they followed called for making the chocolate batter first, then rinsing the bowl to prepare the pistachio one. I don’t know about you, but in a 100F + weather and very little intention to mix, rinse, mix, bake, wash, I knew I had to come up with an easier way to achieve the same result.

I remembered my beloved zebra cakes, or my mom’s comforting marbled chocolate-vanilla cake and decided to go the same route: make one plain batter, divide it in half and add to each part the elements they needed to create both the chocolate and pistachio batters. I wouldn’t call this blasphemy, just practicality…especially when a mob of hungry teenagers was starting to crowd my kitchen!


Gateau Surprise Chocolat Pistachio, adapted from this blog:

Makes 12 cakes

270g plain all-purpose flour
2 tsp baking powder
1 tsp baking soda
150g unsalted butter, room temperature
250g caster sugar
4 eggs
1½ cups plain yoghurt or sour cream
1½ tsp vanilla extract
2 tbsp unsweetened cocoa powder
1 cup chocolate chips
1/3 cup shelled pistachio, finely chopped

Preheat oven to 180°C. Grease 12 small paper cake cases.
In a food processor mix together the sugar and butter until fluffy. Add in the eggs one at a time, pulsing in between each addition. Add in the yoghurt and the vanilla extract, pulse again. Add the baking powder, baking soda and all of the flour. Divide the batter in half. In one half, add the cocoa powder, in the other the pistachios and chocolate chips. Then using an ice cream scoop, place one scoop of batter into each paper case. Rinse the scoop and add the pistachio batter on top of the chocolate.use an ice scoop to place the pistachio batter on top. Smooth out the surface using a spatula. Bake in the oven for 30 minutes or until a toothpick comes out clean. Allow to rest for 5 minutes then turn out onto a wire rack to cool completely.

Vanilla Cream Cheese Cupcake Cones

Vanilla Cream Cheese Cupcake Cones
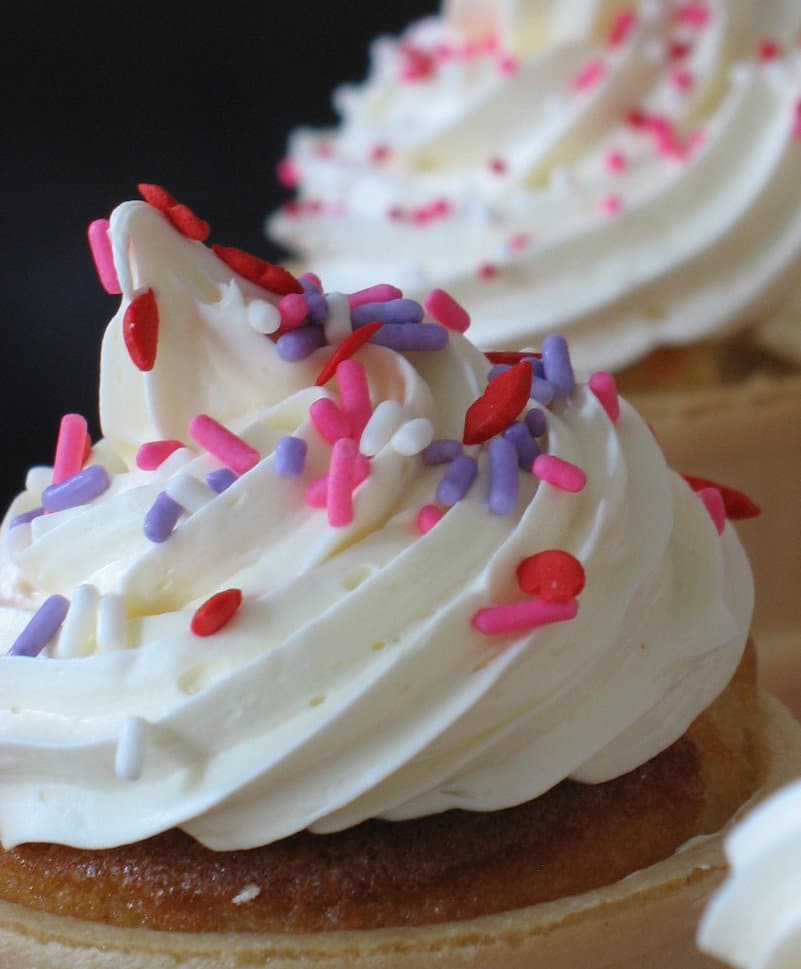
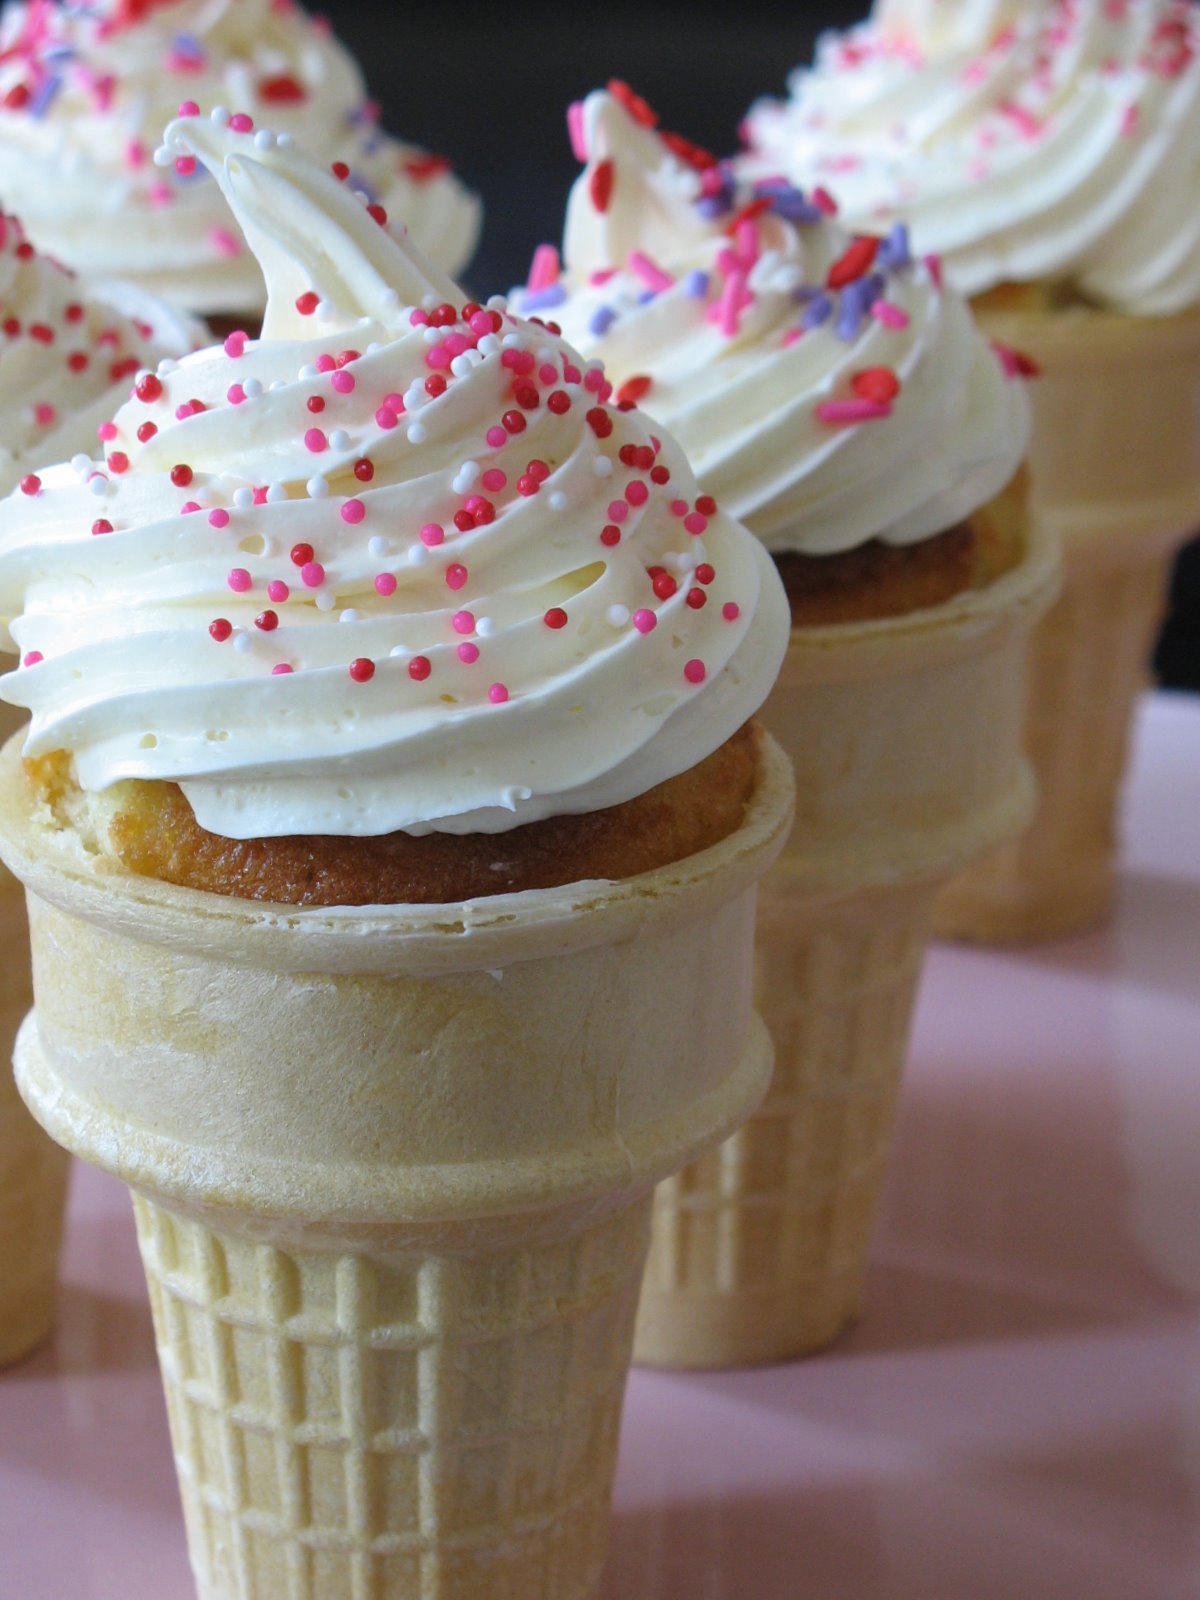
I have seen cupcake cones starting to pop up on several blogs lately and reminded that it had been a while since I last made them, well…ok, about two months. Whenever my friends with children host a birthday party they always call me with large order for them. Truth is, adults and children alike go crazy over them, and I always have to make extras for B., my in-house cookie monster. This time, I had Sophie bake these with me and we had a blast frostig and decorating. I was really tickled to have her try cupcakes for the first time, but most importantly cream cheese frosting, and I think she could become another fan fast! I think I need to make another cake or cupcakes with it in the near future to be sure!

I have used different recipes for the cupcakes over the years and started using the one for the Magnolia Bakery vanilla cupcake on a regular basis because it is just darn good. Moist, vanilla-a plenty, nice crumbs, good base to play with different flavors and extract. I used a vanilla bean paste that I picked up at Trader Joe’s during my visit to Lisa’s home instead of vanilla extract which made the flavor even more intense. The cream cheese frosting is the one I used now all the time, since we (Daring Bakers) made the Red Velvet Cake back in March. It is so easy to make, does not taste too sweet and has nice little tang from the cream cheese.

I made these even though I did not have an order and delivered some (minus 4 for us) to the kids around the neighborhood. With their going back to school, scortching hot temperatures and the end of summer near by, I thought it would sweeten their plate a little. The cones were gobbled up in no time at all, accompanied with a "more please" that always makes me happy.

Vanilla Cream Cheese Cupcake Cones

Vanilla Cream Cheese Cupcake Cones

Makes 24

Cupcake Batter, adapted from Magnolia Bakery

1 1/2 cups self-rising flour
1 1/4 cups all-purpose flour
1 cup (2 sticks) unsalted butter, softened
2 cups sugar
4 large eggs, at room temperature
1 cup milk
1 teaspoon vanilla bean paste.
24 ice cream cones

Preheat oven to 350 degrees.
Place ice cream cones in the holes of a muffin pan so that they will be stable when you transport them to the oven.
In a small bowl, combine the flours. Set aside.
In a large bowl, on the medium speed of an electric mixer, cream the butter until smooth. Add the sugar gradually and beat until fluffy, about 3 minutes. Add the eggs, one at a time, beating well after each addition. Add the dry ingredients in three parts, alternating with the milk and vanilla. Do not overbeat. Using a rubber spatula, scrape down the batter in the bowl to make sure the ingredients are well blended. Carefully spoon the batter in the cones, leaving a two inch space to the top as the cupcake will rise. Bake for 20–25 minutes, or until a cake tester inserted in the center of the cupcake comes out clean.

Cream Cheese Icing:

1 stick (115 grams) unsalted butter, room temperature
8 ounces (227 grams) cream cheese, room temperature
2 cups (230 grams) powdered sugar, sifted

In bowl of electric mixer, beat the cream cheese and butter, on low speed, until very smooth with no lumps. Gradually add the sifted powdered sugar and beat, on low speed, until fully incorporated and smooth. Fill a pastry bag with a star tip with the frosting and pipe on the cupcake cones. Add sprinkles if desired.

Vanilla Cream Cheese Cupcake Cones
In other news, The Traveling Eggs have made a stop in Ohio, check their temporary abode here.

Check back often as I will update their travels here periodically.

I Am A Lucky Girl: A Package And Two Awards

Warning: this post is about giving thanks and paying it forward.

What you see is the content of the package put together by Rachel of Coconut and Lime for the Blogging By Mail – Your Favorite Things event hosted by Stephanie, blogging sorceress extraordinaire from Dispensing Happiness. I am indeed a lucky girl as it seems that many of Rachel’s favorites are also mine…especially the Fuzzy CocaCola Haribo candy which are all gone by now! I also love dried mangosteen and the bag is slowly dwindling down to crumbs, frou frou drink umbrellas, ginger candies and pomegranate body lotion. Things I love but never had in this form: popcorn on the cob (just pop in the microwave!), and mango ketchup. Thank you Rachel!

I also want to thank Barbara from Winos and Foodies for the lovely package I received a couple of months ago. Thanks to her, an herb garden has taken on a whole new meaning. We’ll see what next year’s crop give us!

I know you are with me on this: blogging is much more than baking/cooking, taking pictures and writing a nice blurb about a recipe or an event. It’s about interactions and frienships that transcend our small computer screens and touch us, move us, make us happy, sad and giddy.

When Blogger named me blog of note in July, people started coming out of nowhere and everywhere to tell me they had been reading this blog, when I posted the Amaretti recipe I received over 30 emails with requests for the recipe. I was surprised, touched because they were from people I did not know but who shared a common love for sweets and desserts. Thus, I try to pay it forward by answering your mail and although I can’t answer to all your comments I do try to answer your questions and suggestions. I apologize if I am slow in answering your mail…I will eventually…I hope that cake recipe is not a matter of life and death and that it can wait another week or so.

What surprised me the most was that I have given two awards by people I admire greatly. Lisa, my "other woman", awarded me a Schmooze award .


Lisa thinks I am worthy of an award created to "recognize people who have a positive influence on the blogging community by developing and nurturing relationships. You know — commenting on other’s blogs, joining in on and sustaining a “blogversation.”" Now it’s my turn to pay it forward by extending it to 5 other people:
– Belinda from What’s Cooking In A Southern Kitchen: this lady is always around to leave a commnet, suggestion, give support and she cooks yummy things all the time!
– Guillemette from Chocolat & Caetera: despite the obvious crush I have for her, she has the ability to bring people together through mounds of cream and chocolate as well as showcasingsother people’s talents by re-creating their dishes in her kitchen and screaming out lud thorugh beautiful pictures "ya’ll should give this a try, it’s goooood" and I always fall for it and she’s right!
– Barbara from Winos and Foodies: she is a far better penpal than I could ever be, she was my first BBM partner as a matter of fact. She constantly promotes awareness for cancer and cancer event and has flawless taste in foods and restaurants.
-Ivonne from Cream Puffs in Venice: it’s not because she tried to seduce me with a cake that I think she deserves this, but along with Lisa, she is at the foundation if the ever growing Daring Baker group and adventures as well as countless events. She is one of the ambassador of fine Italian cooking, and bloggers in all countries.
– Bea from La Tartine Gourmande: beside the obvious reason that we are both from the same country and somewhat thinking about the same foods, Bea is always there to give help about cooking techniques, food design and photography. She promotes blogging dialogue and interactions everyday in her posts.

Then, this week Meeta from What’s For Lunch Honey, gave me with the Thoughful Blogger award for “those who answer blog comments, emails, and make their visitors feel at home on their blogs. For the people who take others’ feelings into consideration before speaking out and who are kind and courteous. Also for those bloggers who spend so much of their time helping other bloggers design, improve, and fix their sites. This award is for those generous bloggers who think of others.” (quote from her site). I want to give it back to her because she has provided me with countless suggestions, tips and more on how to improve the look of my blog and more but I feel I should pass this one on too:


– Mary from Alpine Berry: I wish I could meet her in person and give her a great big hug. She has worked hard behind the curtains on our Daring Baker project, but she has also provided me with great info and tips on certain blog template issues that I had. She is also one of the most courteous and thoughtful ladies I know in the bloggosphere.
-Lisa from La Mia Cucina: despite the obvious reason that I now have a friend for life, and contrary to what the bold mouthy style of her blog, I always admire her for the way she handles people and their feelings. When I want to scream "oh c’mon" I always wonder "how would Lisa say it?" The woman is a real gem for international diplomacy I tell you!
– Tanna from My Kitchen In Half Cups: the woman must not sleep! She is always around to comment at the oddest hours of the day. I tried to spot her around at 2am and gave up… and there she was at 2.15am giving someone else a high five on a dessert they did not think was good enough to be blogged about. My memory fails me now on who, but trust me…I could have kissed her! She is one of the wisest woman I know out there and always turn to her in times of crisis and good times as well.
– Deborah from Taste and Tell: no matter what I ramble about, she is always around the corner cheering me on as well as coutless others with the sweetest words. She is an ambassador of international relationships.
– Gilly from Humble Pie: fellow writer of the Daily Tiffin, she is always there when I ask for blogging advice, bread recipe (her oatmeal bread is now a staple at our house). Her kindness, toughfulness and impeccable taste push me to be a better blogger.

There are tons of other people I would love to pass these awards on but I am sure that the people mentioned in this post will do a fine job at passing the torch along. Thanks for reading this long post but I had to give thanks when blessed by so much kindness.

Marbled Ricotta Cheesecake Brownies

Marbled Ricotta Cheesecake

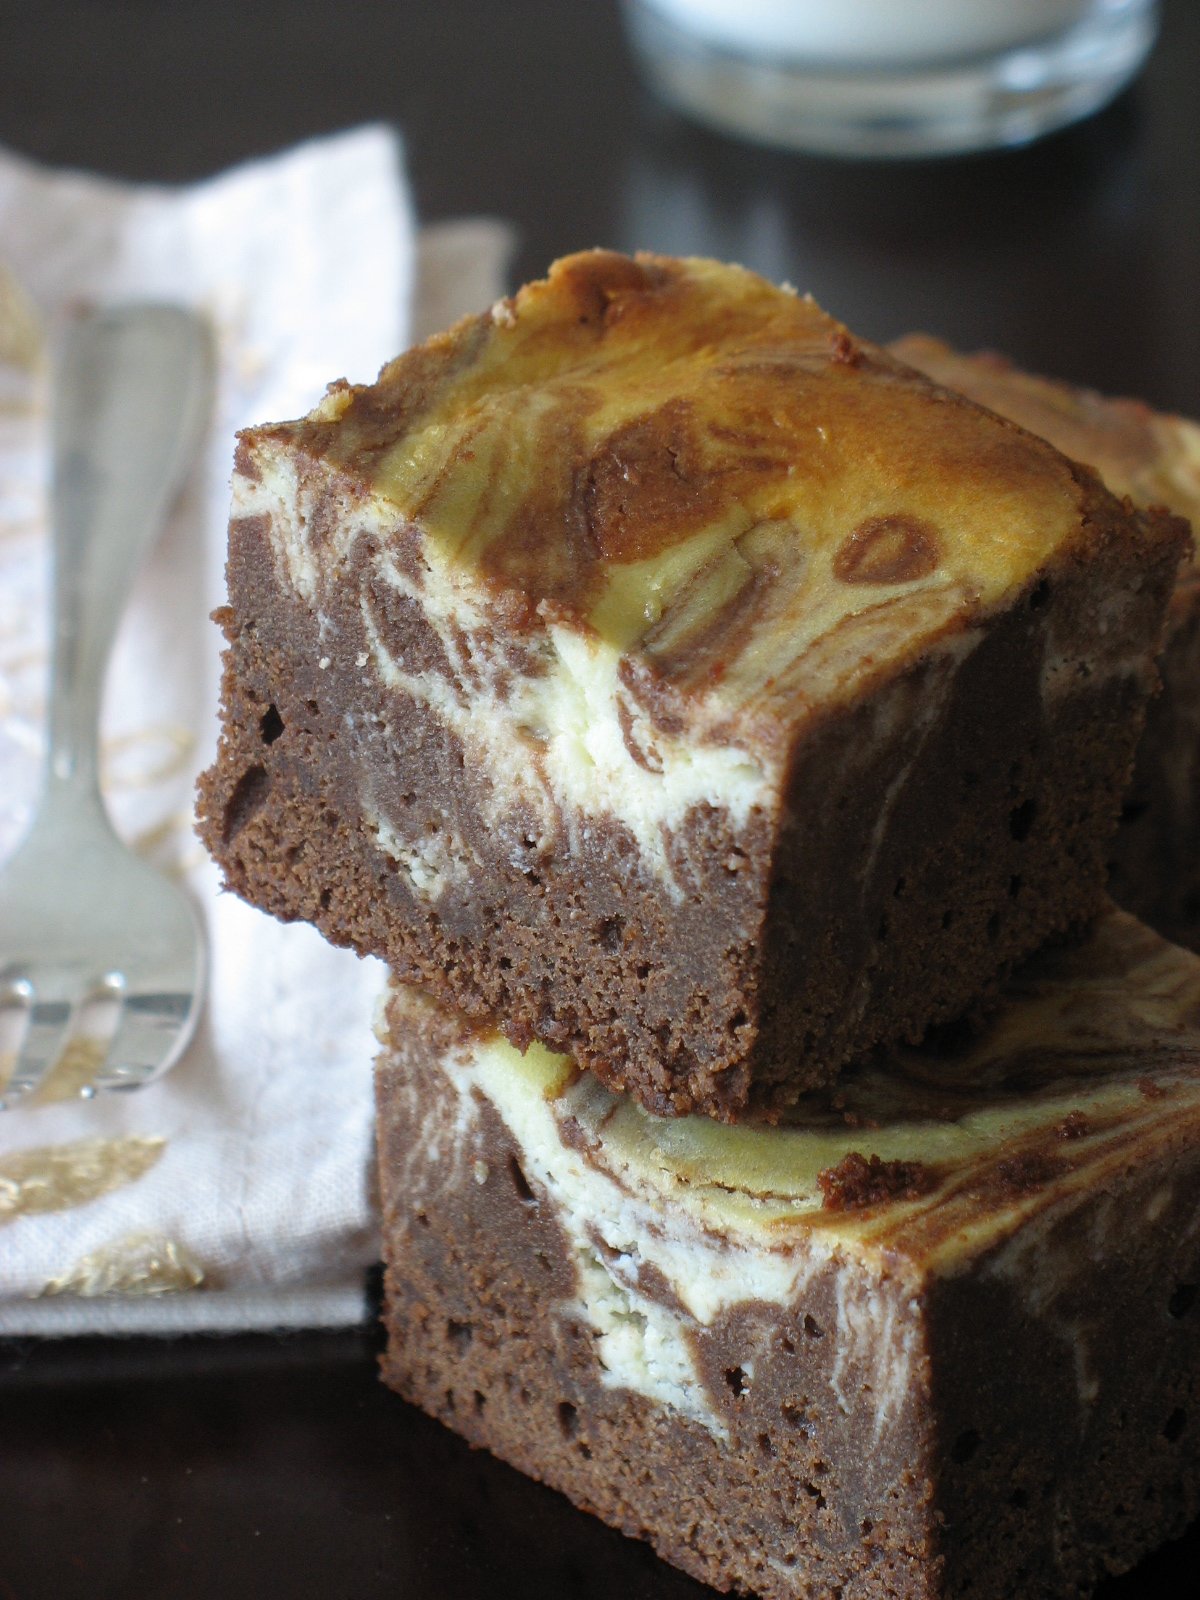
I am not sure these are picture worthy to be a Brownie Babe, but if you could just have a bite of them you would ask, beg, connive for more. After just a sample, B and I became quite protective of the whole batch and reluctantly shared some with the neighbors. I made these the week before Sophie arrived and I know it won’t be long before I make them again as we have been talking them up ever since!

I have made my share of marbled brownies before but I have never used ricotta doing so, always cream cheese. This recipe combines both and it truly makes a difference in the taste. The "cheesecake" part of the brownie is not as tangy than if using just cream cheese, it has a soft, creamy tesxture and flavor…pure delight. The brownies retain that fudgy, deep chocolate quality that I like so much and it only gets better overnight.

I cannot take credit for the recipe and must direct you to my ever ongoing French blog crush, the very talented Guillemette from Chocolat & Caetera. She is also passing it on from another talented blogger, Loukoum and I hope that these brownies keep on making the rounds.
I am sending these to Myriam and stay tuned for an update of the 3rd Brownie Babe round up on her blog.

Marbled Ricotta Cheesecake
Marbled Ricotta Cheesecake Brownies:

maks 35 squares (yeah right…!!)

Cheesecake batter:
250 gr. ricotta (9 oz)
150 gr. cream cheese, at room temperature (5 oz)
1/4 cup granulated sugar
1 tsp. vanilla extract
2 eggs
120 gr. sour cream (4 oz)
2 Tb. all purpose flour

Brownie Batter:
200 gr. butter (7 oz)
300 gr. bitter sweet chocolate (10.5 oz)
6 eggs
200 gr. granulated sugar (7 0z)
1 tsp. vanilla extract
150 gr. flour (5 oz)
pinch of salt

Preheat the oven to 350F. In a bowl, mix together all the ingredeints for the cheesecake batter. Set aside.
For the brownie: melt the butter and the chocolate together in a saucepan over low heat. Let cool a little. In a bowl, mix together the eggs, sugar and vanilla until pale. Add the chocolate/butter and mix until combined. Add the flour and salt.
Line a 13×9 inch with foil, spray with cooking spray. Pour in the chocolate batter. Dot the cream cheese batter over it and with a toothpick or the tip of a knife swirl the batters around.
Cook for 25-35 minutes. Let cool, cut and enjoy!

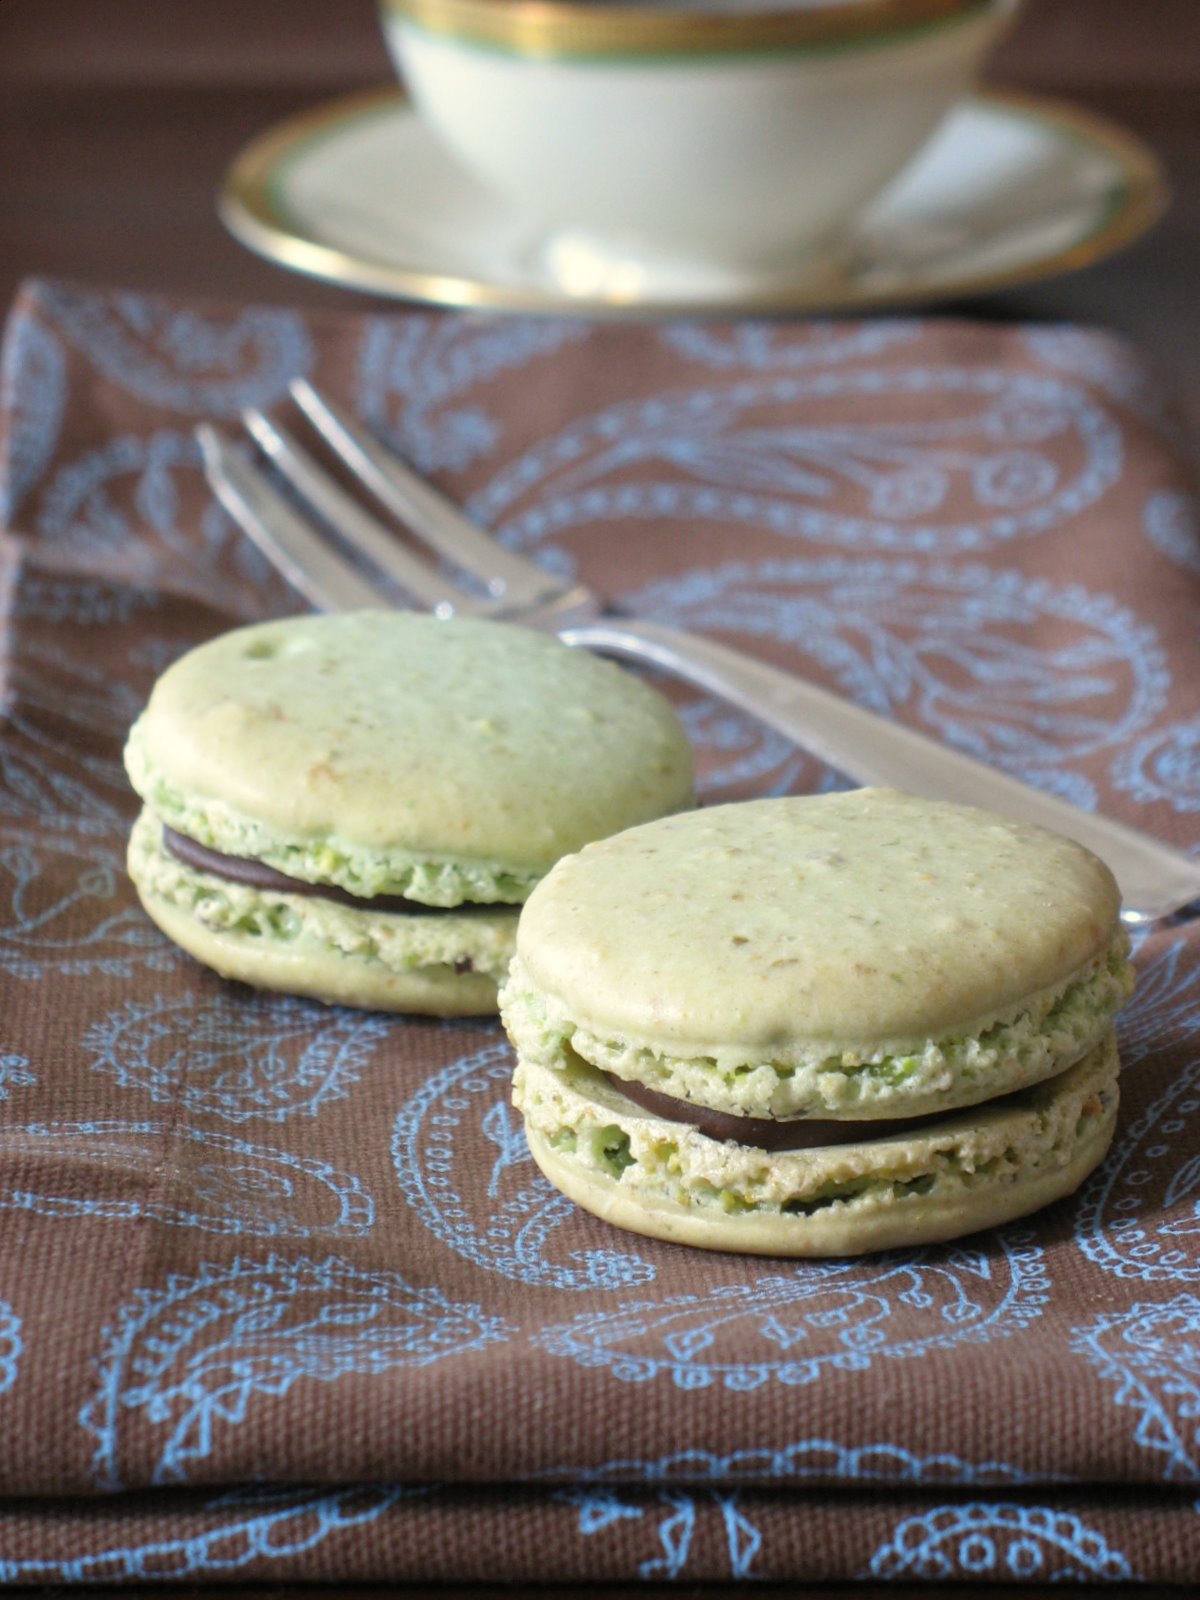
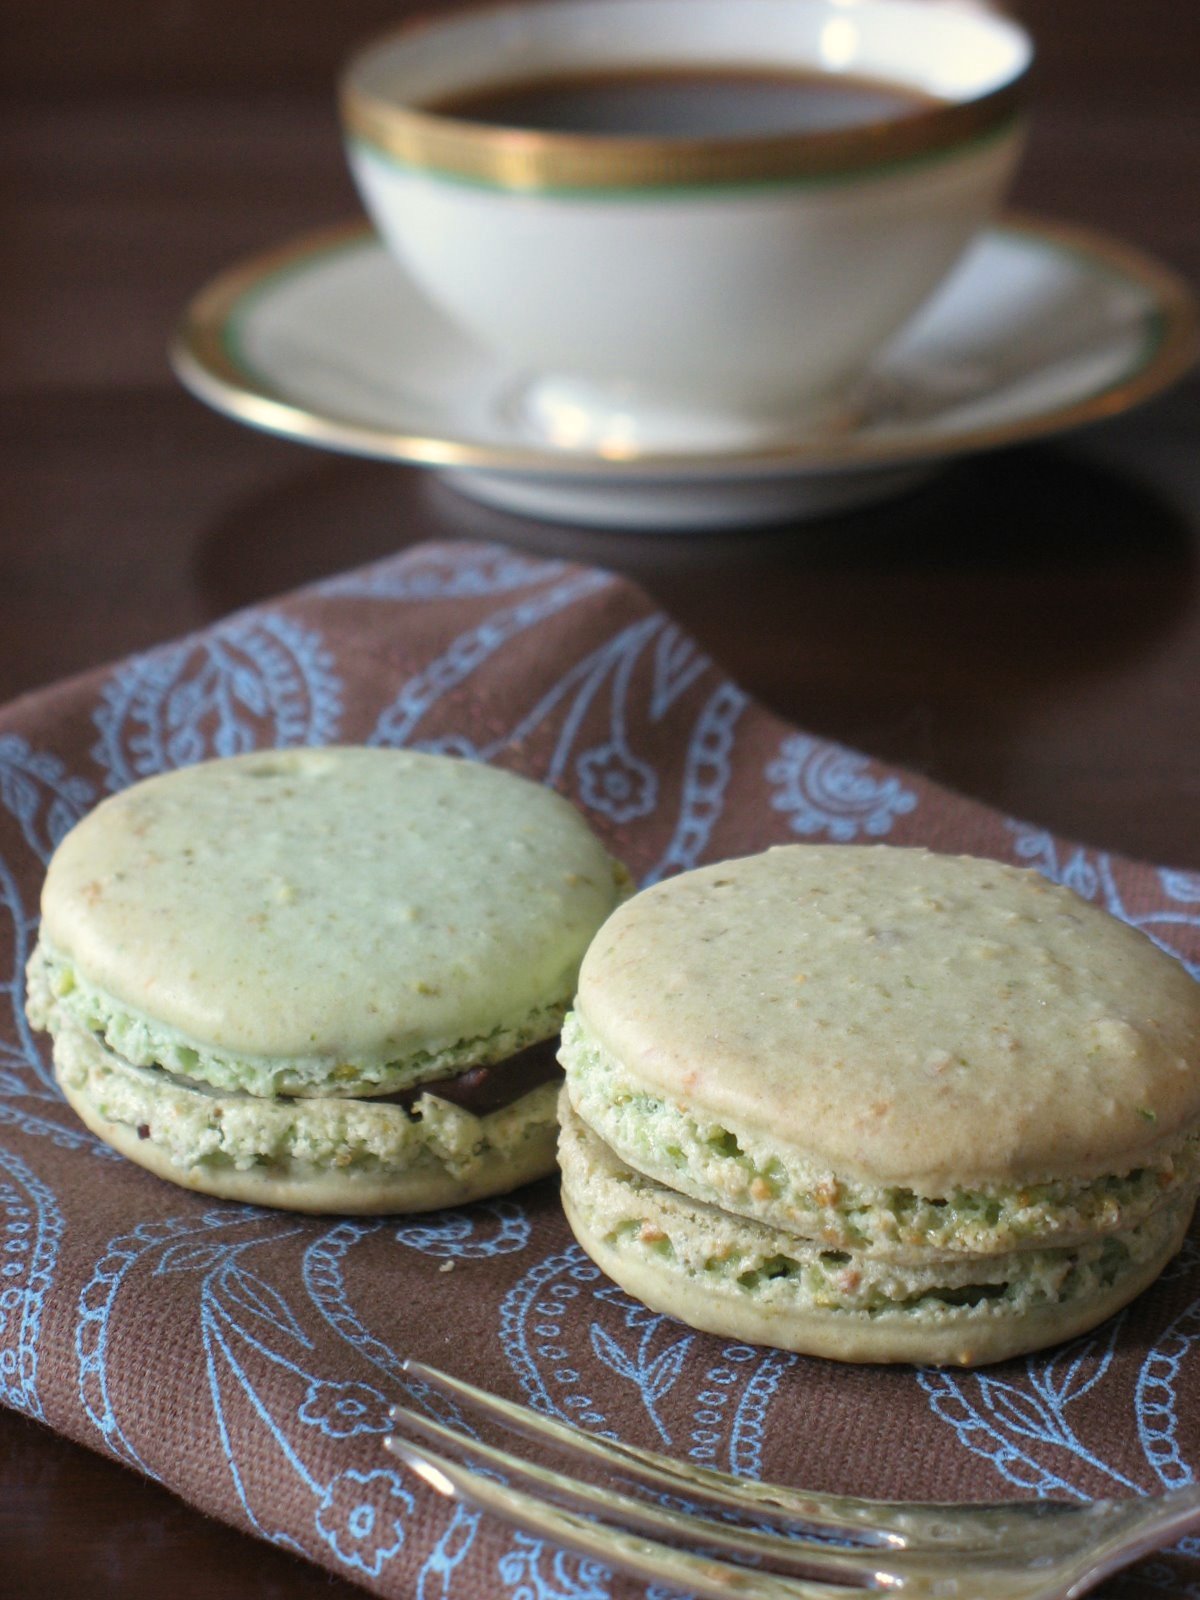
Pistachio Macarons…A Family Affair


It is always a blessing to have family visits. My parents come regularly, so much so that my produce guy often asks me about them and when they will visit next and they are almost on a first name basis with the mail man! I am surprised that only my brother and his family and my cousin in Savoie are the only ones who also made the trip, with all these paid vacations it should be a no brainer for the others to come visit their "favorite" cousin (cough, cough…) and discover a part of the world they do not know. So having Sophie around is absolutely fantastic on very many different levels. I get to talk about the family, speak French and laugh at the simple words I cannot find easily anymore. When I left she was 7-8 years old, so I also get the chance to discover a maturing young woman full of questions, hope, incertainties and love for life.

I also like having visitors as I can show them this country like they have never seen it before, far away from images of huge skyscrapers, bright neon signs and fast food joints. Ok, so we went to Krispy Kremes, but come on folks! that is a mandatory on the list of culinary treats I have to educate her palate about. Charleston is rich in history, landscape and native animals (she saw her first alligator on a canoe ride in the Lowcountry swamps yesterday) and of course rich in food influences from the Barbadoes, Spain, France, England and Africa. The link with macarons? Well, at the end of the day, after trying many a local delicacies, it’s all about the macarons people, and Sophie asked if I could teach her how to make them. As the good hostess that I am I felt it was necessary to fulfill her wishes..twist my arm right?!

For the second time around I went for another recipe than the one I often use for macarons, and opted not to use the Italian meringue method for the shells. Indeed, this recipe does not require that the egg whites be whipped with a hot sugar syrup, but instead mixed in with the powdered sugar/nuts method. The only reason why I chose this method was that it was over 100 degrees outside and after an afternoon roasting at the beach, we did not feel like standing in front of the stove waiting for the sugar syrup to reach proper temperature. I found this particular one for pistachio in one of my new favorites by a talented French pastry chef, Stephane Glacier, in "Un Amour de Macaron". The filling was a simple chocolate ganache with a hint of ground ginger.
We whipped, folded and mixed. We giggled, talked and dipped our fingers in the batter and the ganache. We filled, broke and sampled some…and we packaged half of them in little goodie bags and took some to the neighbors. It’s all about Southern hospitality!


Pistachio Macarons, adapted from Stephane Glacier.

Makes 35

225 gr powdered sugar

60 gr almonds

65 gr pistachios

3 egg whites (about 100gr)

green food coloring (optional) (powdered is better)

25 gr granulated sugar

In a food processor, run the nuts and powdered sugar until the nuts are finely ground. Run through a sieve if needed.

Whip the egg whites until foamy, slowly add the granulated sugar, until they are glossy. Add the green food coloring if using.

Slowly fold the nut/sugar mixture into the whites with a wide spatula. The mixture should remain shiny and flow easily.

Fill a pastry bag with the batter and pipe small rounds onto parchment lined baking sheets.

Let the macarons rest for 20 minutes.

Preheat the oven to 315 and when they are ready, bake them for 12-15 minutes.

Let cool, remove from the paper and fill with the ganache.

Chocolate Ganache Filling:

8 ounces (227 grams) semisweet or bittersweet chocolate
3/4 cup (180 ml) heavy whipping cream
2 tablespoons (28 grams) unsalted butter

1 tsp. ground ginger

Place the chocolate in a medium sized bowl. Set aside. Heat the cream in a medium sized saucepan over medium heat. Bring just to a boil. Immediately pour the boiling cream over the chocolate and allow to stand for 5 minutes. Add the butter and stir with a whisk until smooth. Add the ground ginger. Let cool to room temperature and use as desired.

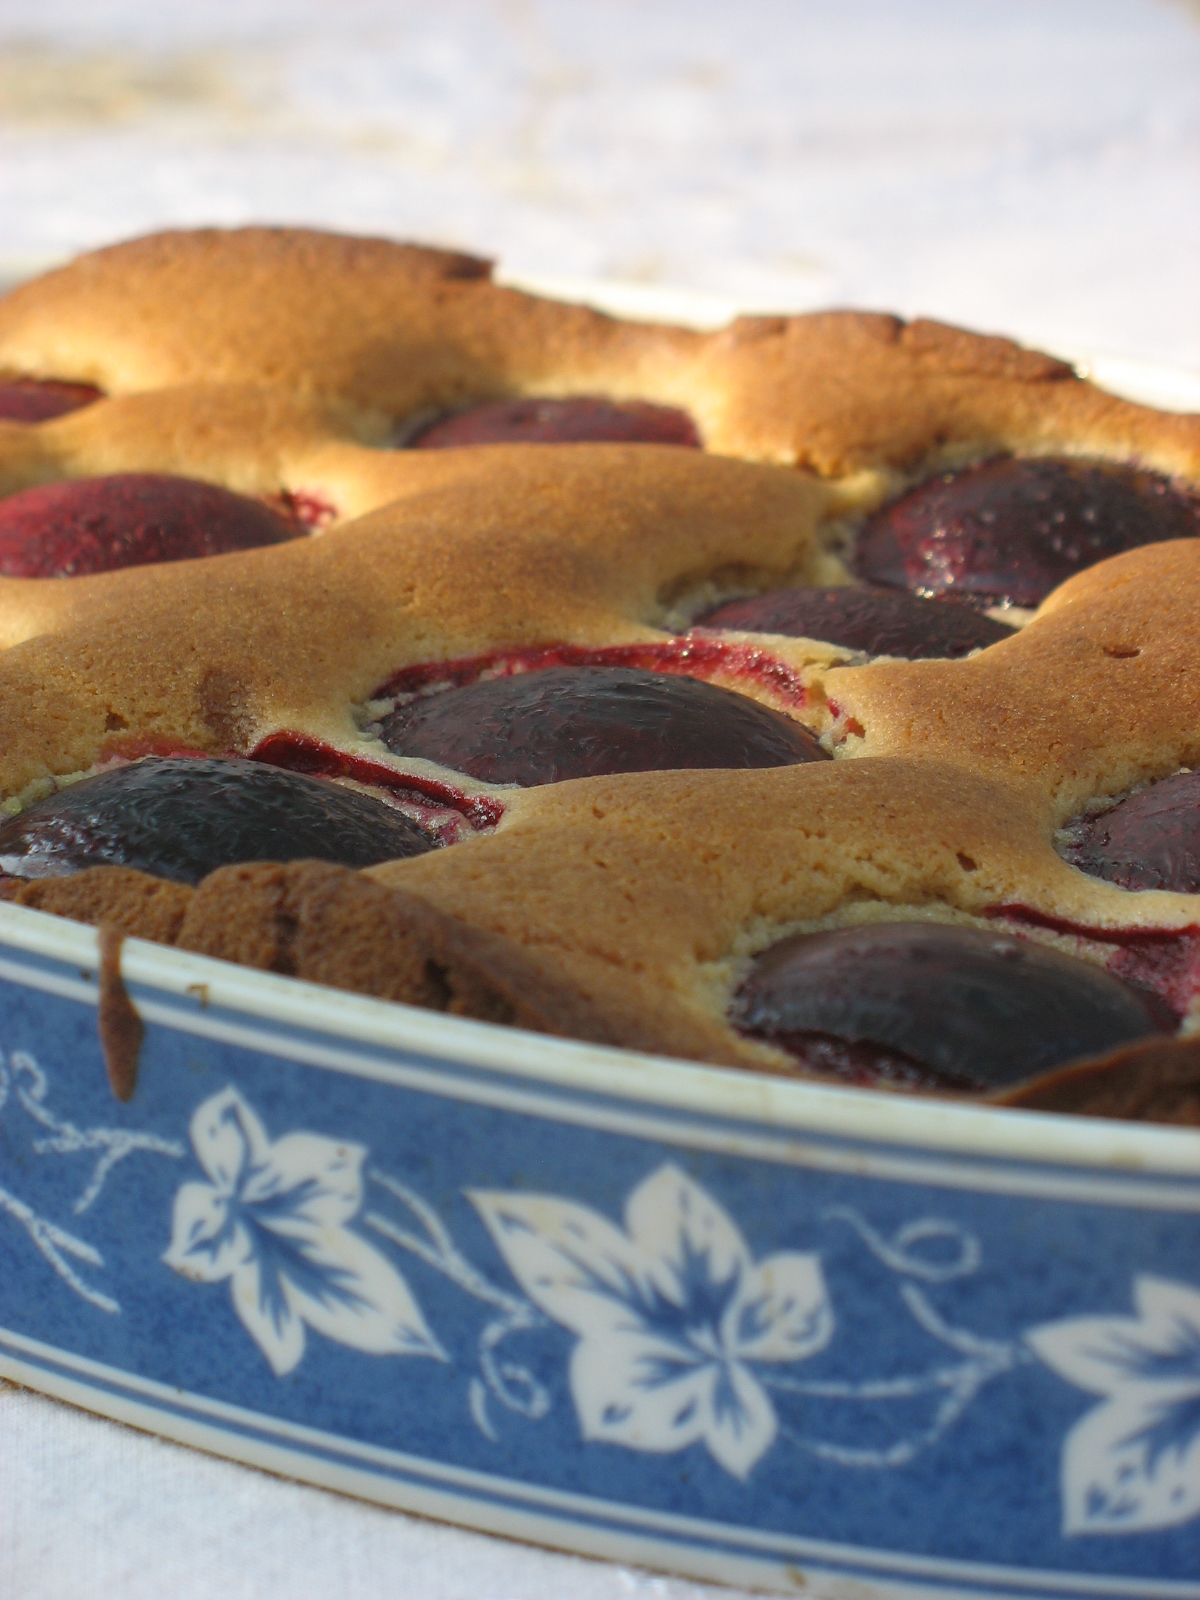
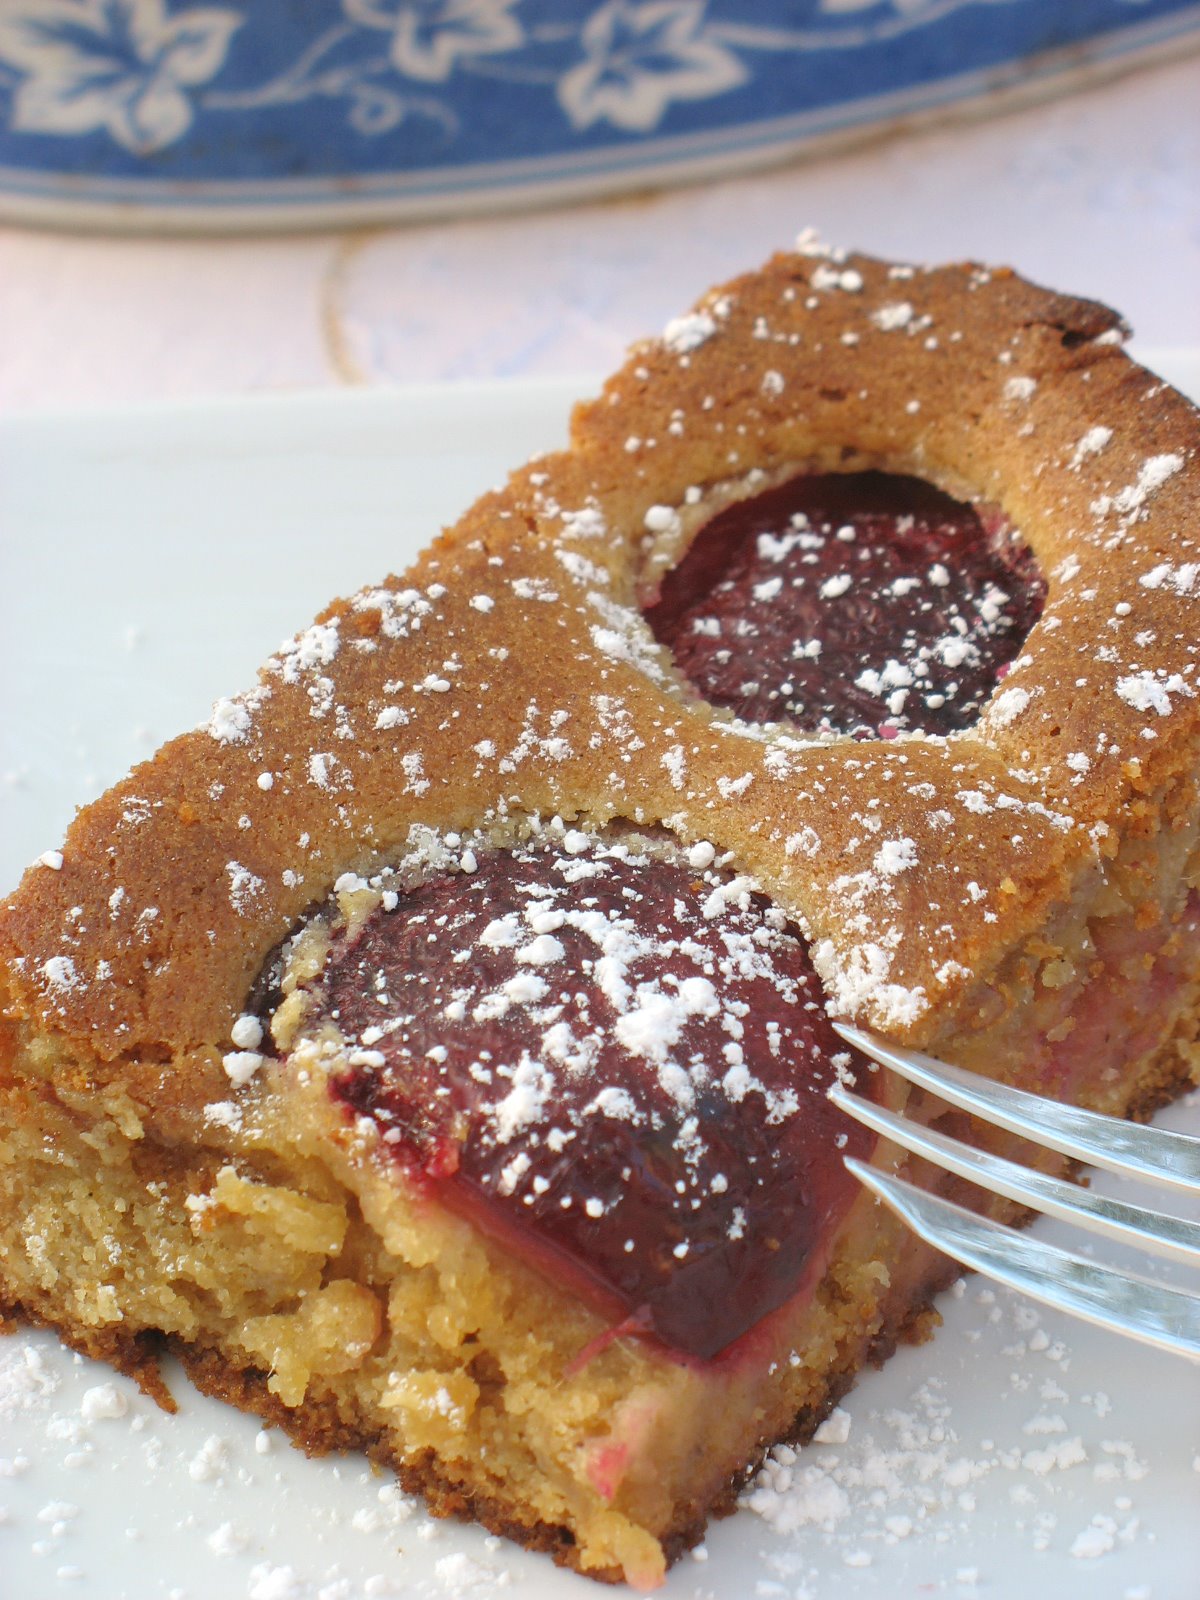
Dimply Plum Cake…When Sophie Read Dorie


Her eyes sparkled when she spotted Dorie's big baking book. "Have you made anything from it yet?" she asked picking it up from the shelf. After a few minutes flipping the pages she exclaimed :"Oh wait! I guess you have, some pages are already glued with sugar!"
Having my god-daughter Sophie over is a lot of fun. She marvels at everything The simplest thing that in my new American have become second nature to me are constant sources of surprises and questions….even baking. She has a keen interest in cooking and baking and is eager to tell me about the cakes she makes in the evening while the rest of the family gathers around and talk. I can tell we share the same blood just by the moments she shares in the kitchen with her mom and other relatives, and by her love of sweets!

She was leafing through the book and her hand stopped on the picture of Dorie’s Dimply Plum Cake. "Oh that looks so good…I need aspirin, let’s go get some plums and make it!"….AND she’s got my logic….any excuse to make a trip to the store if I see something I want to bake! Off we went to the grocery store which was another adventure for her: in France cashiers are seated, there is no bagger and people have to bring their own bags (recycling and minimizing trash).
We looked at all the produce that was somewhat tropical and exotic for her, filled up on loads of cherries (we are truly related!), and a big bag of ripe and juicy plums.
Once home we put some lasagna to warm up and in the meantime we made the cake. Easy, straighforward and within 30 minutes, the house smelled like a bakery again with vanilla and sugar tempting our tastebuds. We could not wait very long once it came out of oven and cut 2 big slices, put some creme fraiche on the side and enjoyed it while looking at the sunset…precious! If I could have hugged Dorie herself for such a sweet moment spent with Sophie, it would have been the icing on the cake!

Dimply Plum Cake, adapted from Dorie Greenspan:

Serves 8

1 1/2 cups all purpose four

2 tsps baking powder

1/4 tsp salt

1/4 tsp ground ginger

5 Tb unsalted butter

3/4 cup packed light brown sugar

2 large eggs

1/3 cup canola oil

grated zest of one lemon

1 1/2 tsp pure vanilla extract

8 purple or red plums, halved and pitted

Preheat the oven to 350F. Butter an 8×8 baking dish and set aside.

Combine the flour, baking powder, salt and ground ginger.

In a stand mixer cream the butter with the borwn sugar. Add the eggs, one at a time, beating well after each addition. Beat in the oil, lemon zest and vanilla. Reduce the speed and add the flour mixture.

Pour the batter in the prepared dish, smooth the top and arrang the plums on top. (Dorie did hers cut side up, I did the opposite). Bake for about 40 minutes or until a knife inserted in the middle comes out clean. Let cool for 15 minutes (if you can).