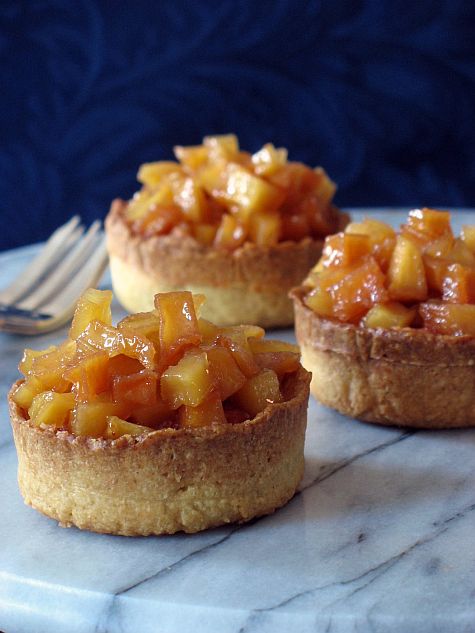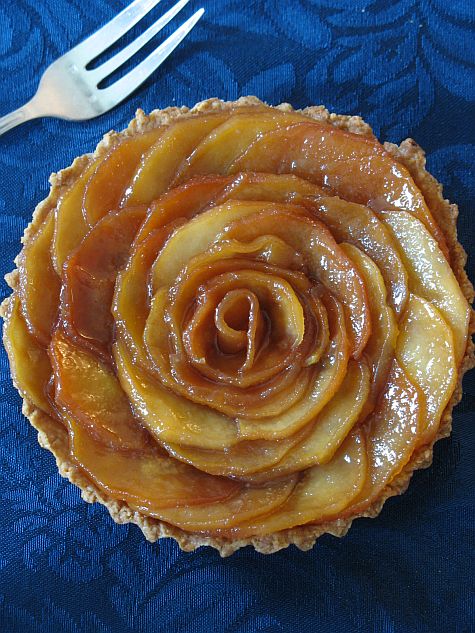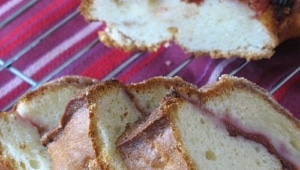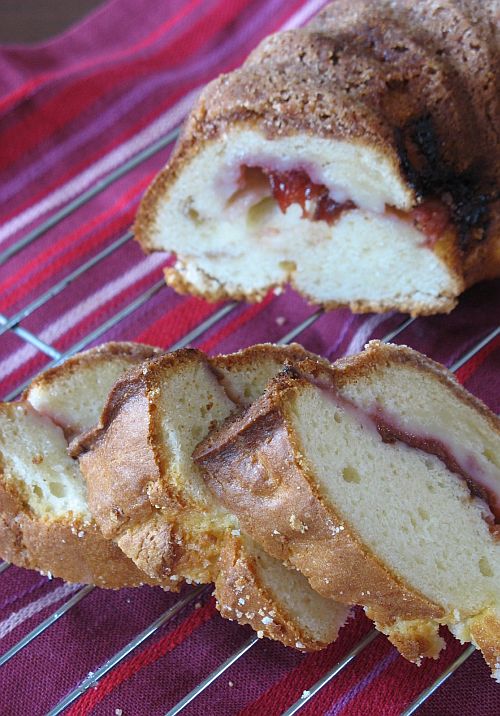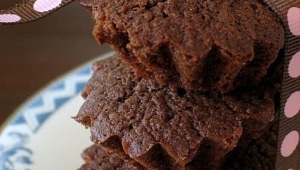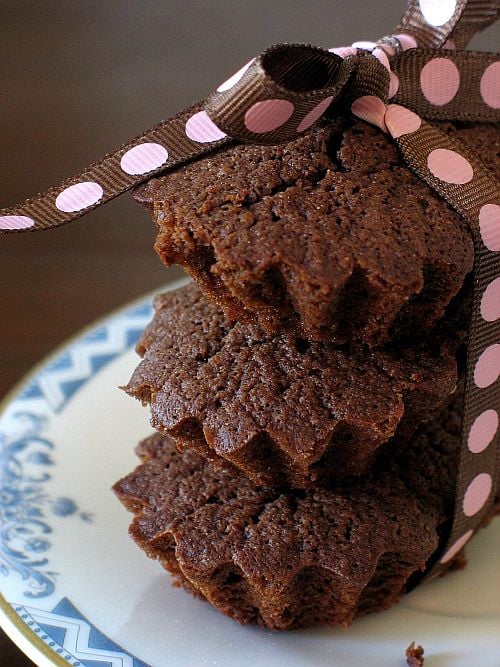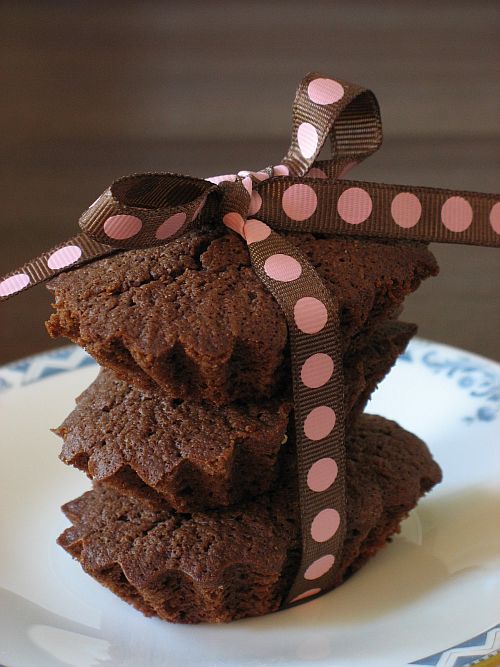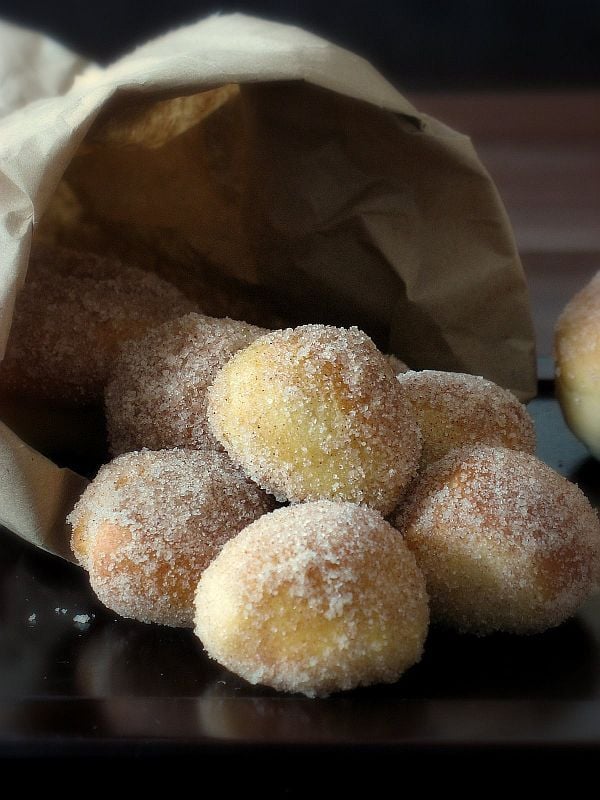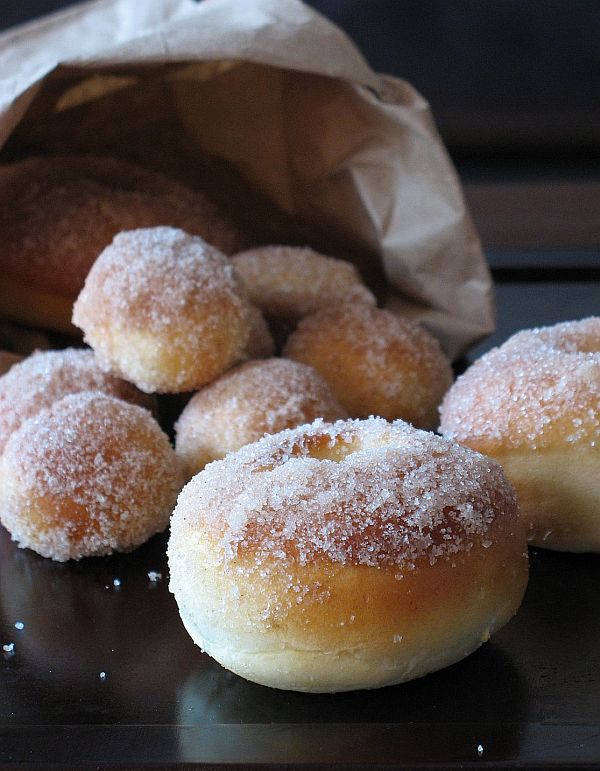

Are you ready for Fall yet? Well, you might with these Cinnamon and Sticky Buns, courtesy of the Daring Bakers, September edition. If I were you I would trust the numerous other Daring Bakers out there (over 100 by now), tempting you with pictures of gooey goodness and telling you how wonderful and soft these are. If anything, trust me: I have made them 4 times since the recipe was announced by Marce from Pip In The City, our hostess this month. Each month takes on a different aspect as far as the challenges and recipes are concerned. Sometimes, it is the challenge of coordinating schedules, sometimes it is trying to be creative with presentation or design, this time it was just difficult to keep them around long enough to share, let alone take pictures!
Everything about this recipe from Peter Reinhart’s The Bread Baker´s Apprentice made me want to make it again and again. Lisa got us started on a comical note as poor lady was suffering tremendously from her back and made the buns within the first week of September while high on painkillers. I expect her post to draw tears from my eyes, but her experience seriously made me crave sticky buns and cinnamon rolls. I made my first batch a couple of days later, in the evening, with the intention to photograph them in the morning and bring some to the neighbors before. When I got up, my husband was long gone…so was my tray of walnut sticky buns when they should have been awaiting their photo shoot! I thought that by no, he would now the rules of baking/blogging: don’t take any, don’t give any, don’t hide any until it has been photographed…nope! I got a sweet note form one of his students a few days later “Thank you Mrs. Tartelette, the sticky buns were delicious and it was great to start the day like this…” Well, I wish I had been there too!!
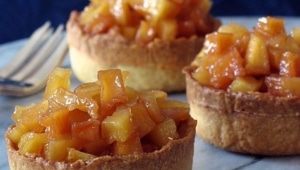
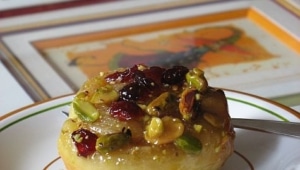
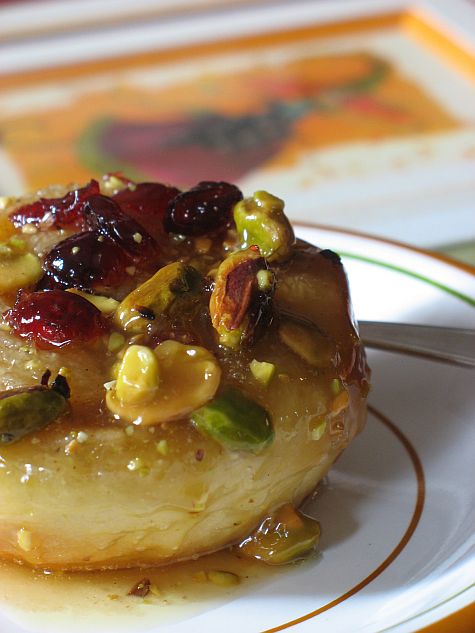
Now, you understand my challenge this month…but it deter me to make them again and again. I froze the cinnamon buns and proceeded to make the buns, this time with cranberries and pistachios. Probably my favorite combo of nuts/berries and it worked really well taste wise and packed a punch of visual appeal when I served them to my parents for brunch a couple of weeks ago. I changed the filling to cardamom instead of cinnamon a few times and it was jsut out of this world. We all loved the buttery goodness, (well, that’s a given with one pound of butter in the caramel part), the moistness of the dough and all the cinnamon flavor we tasted with every bite. I found that there was more than enough cinnamon sugar (used inside the rolls and buns) as well as powdered sugar glaze for the rolls. Turned out B. adds glaze as he eats away so if our mate is anything like mine, who knows?!!
Cinnamon and Sticky Buns (from Peter Reinhart’s The Bread Baker’s Apprentice)
Days to Make: One (1)Active/Resting/Baking Time: 15 minutes to mix, 3 1/2 hours fermentation/shaping/proofing, 20 – 40 minutes to bakeRecipe Quantity: Eight(1) – twelve (12) large rolls or twelve (12) – sixteen (16) small rollsMaking the Dough
6 1/2 tablespoons (3.25 ounces) granulated sugar
1 teaspoon salt
5 1/2 tablespoons (2.75 ounces) shortening or unsalted butter or margarine
1 large egg, slightly beaten
1 teaspoon lemon extract OR 1 teaspoon grated zest of 1 lemon
3 1/2 cups (16 ounces) unbleached bread or all-purpose flour
2 teaspoons instant yeast*
1 1/8 to 1 1/4 cups whole milk or buttermilk, at room temperature OR 3 tablespoons powdered milk (DMS) and 1 cup water
1/2 cup cinnamon sugar (6 1/2 tablespoons granulated sugar plus 1 1/2 teaspoons ground cinnamon, or any other spices you want to use, cardamom, ginger, allspice, etc.)
White fondant glaze for cinnamon buns or caramel glaze for sticky buns (at the end of the recipe.)
Walnuts, pecans, or other nuts (for sticky buns.)
Raisins or other dried fruit, such as dried cranberries or dried cherries (for sticky buns, optional.)
*Instant yeast contains about 25% more living cells per spoonful than active dry yeast, regardless of the brand. Instant yeast is also called rapid-rise or fast-rising.
Making the Dough: Cream together the sugar, salt, and shortening or butter on medium-high speed in an electric mixer with a paddle attachment (or use a large metal spoon and mixing bowl and do it by hand).
Note: if you are using powdered milk, cream the milk with the sugar, and add the water with the flour and yeast.
Whip in the egg and lemon extract/zest until smooth. Then add the flour, yeast, and milk. Mix on low speed (or stir by hand) until the dough forms a ball. Switch to the dough hook and increase the speed to medium, mixing for approximately 10 minutes (or knead by hand for 12 to 15 minutes), or until the dough is silky and supple, tacky but not sticky. You may have to add a little flour or water while mixing to achieve this texture. Lightly oil a large bowl and transfer the dough to the bowl, rolling it around to coat it with oil. Cover the bowl with plastic wrap.
Fermentation: Ferment at room temperature for approximately 2 hours, or until the dough doubles in size.
Form the Buns: Mist the counter with spray oil and transfer the dough to the counter. Roll out the dough with a rolling pin, lightly dusting the top with flour to keep it from sticking to the pin. Roll it into a rectangle about 2/3 inch thick and 14 inches wide by 12 inches long for larger buns, or 18 inches wide by 9 inches long for smaller buns. Don´t roll out the dough too thin, or the finished buns will be tough and chewy rather than soft and plump. Sprinkle the cinnamon sugar over the surface of the dough and roll the dough up into a cigar-shaped log, creating a cinnamon-sugar spiral as you roll. With the seam side down, cut the dough into 8 to 12 pieces each about 1 3/4 inches thick for larger buns, or 12 to 16 pieces each 1 1/4 inch thick for smaller buns.)
Prepare the Buns for Proofing:
For cinnamon buns: line 1 or more sheet pans with baking parchment. Place the buns approximately 1/2 inch apart so that they aren´t touching but are close to one another.
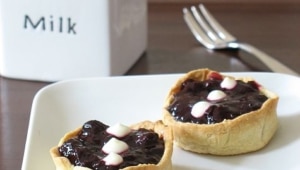
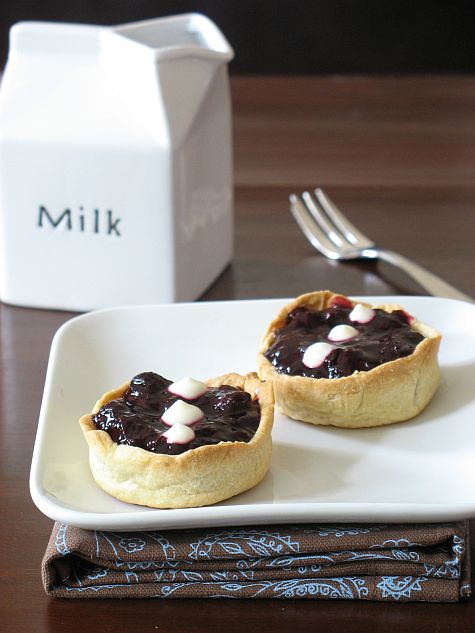
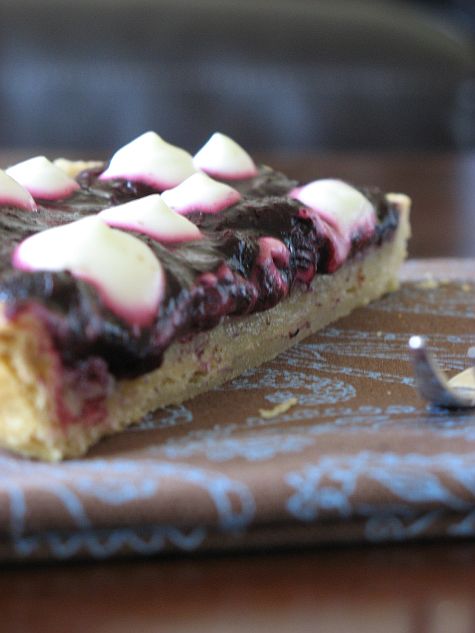
For sticky buns: coat the bottom of 1 or more baking dishes or baking pans with sides at least 1 1/2 inches high with a 1/4 inch layer of the caramel glaze. Sprinkle on the nuts and raisins (if you are using raisins or dried fruit.) You do not need a lot of nuts and raisins, only a sprinkling. Lay the pieces of dough on top of the caramel glaze, spacing them about 1/2 inch apart. Mist the dough with spray oil and cover loosely with plastic wrap or a food-grade plastic bag.
Proof the Buns: Proof at room temperature for 75 to 90 minutes, or until the pieces have grown into one another and have nearly doubled in size. You may also retard the shaped buns in the refrigerator for up to 2 days, pulling the pans out of the refrigerator 3 to 4 hours before baking to allow the dough to proof.
Bake the Buns:
Preheat the oven to 350°F (175°C) with the oven rack in the middle shelf for cinnamon buns but on the lowest shelf for sticky buns.
Bake the cinnamon buns for 20 to 30 minutes or the sticky buns 30 to 40 minutes, or until golden brown. If you are baking sticky buns, remember that they are really upside down (regular cinnamon buns are baked right side up), so the heat has to penetrate through the pan and into the glaze to caramelize it. The tops will become the bottoms, so they may appear dark and done, but the real key is whether the underside is fully baked. It takes practice to know just when to pull the buns out of the oven.
Cool the buns:
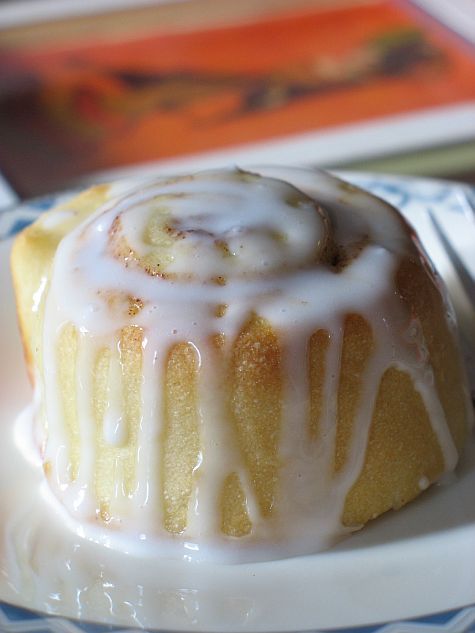
For cinnamon buns, cool the buns in the pan for about 10 minutes and then streak white fondant glaze across the tops, while the buns are warm but not too hot. Remove the buns from the pans and place them on a cooling rack. Wait for at least 20 minutes before serving.
For the sticky buns, cool the buns in the pan for 5 to 10 minutes and then remove them by flipping them over into another pan. Carefully scoop any run-off glaze back over the buns with a spatula. Wait at least 20 minutes before serving.
Toppings for the Buns:
White fondant glaze for cinnamon buns:
Cinnamon buns are usually topped with a thick white glaze called fondant. There are many ways to make fondant glaze, but here is a delicious and simple version, enlivened by the addition of citrus flavor, either lemon or orange. You can also substitute vanilla extract or rum extract, or simply make the glaze without any flavorings.
Sift 4 cups of powdered sugar into a bowl. Add 1 teaspoon of lemon or orange extract and 6 tablespoons to 1/2 cup of warm milk, briskly whisking until all the sugar is dissolved. Add the milk slowly and only as much as is needed to make a thick, smooth paste.
When the buns have cooled but are still warm, streak the glaze over them by dipping the tines of a fork or a whisk into the glaze and waving the fork or whisk over the tops. Or, form the streaks by dipping your fingers in the glaze and letting it drip off as you wave them over the tops of the buns. (Remember to wear latex gloves.)
Caramel glaze for sticky buns
Caramel glaze is essentially some combination of sugar and fat, cooked until it caramelizes. The trick is catching it just when the sugar melts and lightly caramelizes to a golden amber. Then it will cool to a soft, creamy caramel. If you wait too long and the glaze turns dark brown, it will cool to a hard, crack-your-teeth consistency. Most sticky bun glazes contain other ingredients to influence flavor and texture, such as corn syrup to keep the sugar from crystallizing and flavor extracts or oils, such as vanilla or lemon. This version makes the best sticky bun glaze of any I´ve tried. It was developed by my wife, Susan, for Brother Juniper´s Cafe in Forestville, California.
NOTE: you can substitute the corn syrup for any neutral flavor syrup, like cane syrup or gold syrup.
1. In the bowl of an electric mixer, combine 1/2 cup granulated sugar, 1/2 cup firmly packed brown sugar, 1/2 teaspoon salt, and 1/2 pound unsalted butter, at room temperature.
2. Cream together for 2 minutes on high speed with the paddle attachment. Add 1/2 cup corn syrup and 1 teaspoon lemon, orange or vanilla extract. Continue to cream for about 5 minutes, or until light and fluffy.
3. Use as much of this as you need to cover the bottom of the pan with a 1/4-inch layer. Refrigerate and save any excess for future use; it will keep for months in a sealed container.

I might make another batch before this coming week is over! Thanks Marce for picking up such a recipe. Thanks Lisa and Ivonne, founders of the Daring Bakers, for managing this wonderful group with such gusto and taste. Check the blogroll to read more sticky goodness!
I was lucky enough to photograph the buns and rolls on pictures framed by my mom. See, her talent is that she is a framing artist. My dad paints watercolors and that’s how she got started, she took classes to be able to display his work. After many years, the class became more of a group of friends, challenging themselves with new techniques. Last year I ordered a set of prints from a French artist, Anne-Soline, 3 fairies and 3 dancers, and she brought them over this trip, double bubble-wrapped. They made it one piece, which enabled me to play around with the layout of the pictures.