
Jahresarchive: 2006

Chocolate Biscotti – 5 Times Around

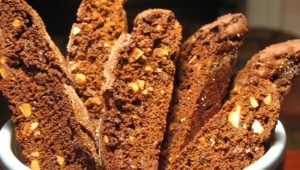
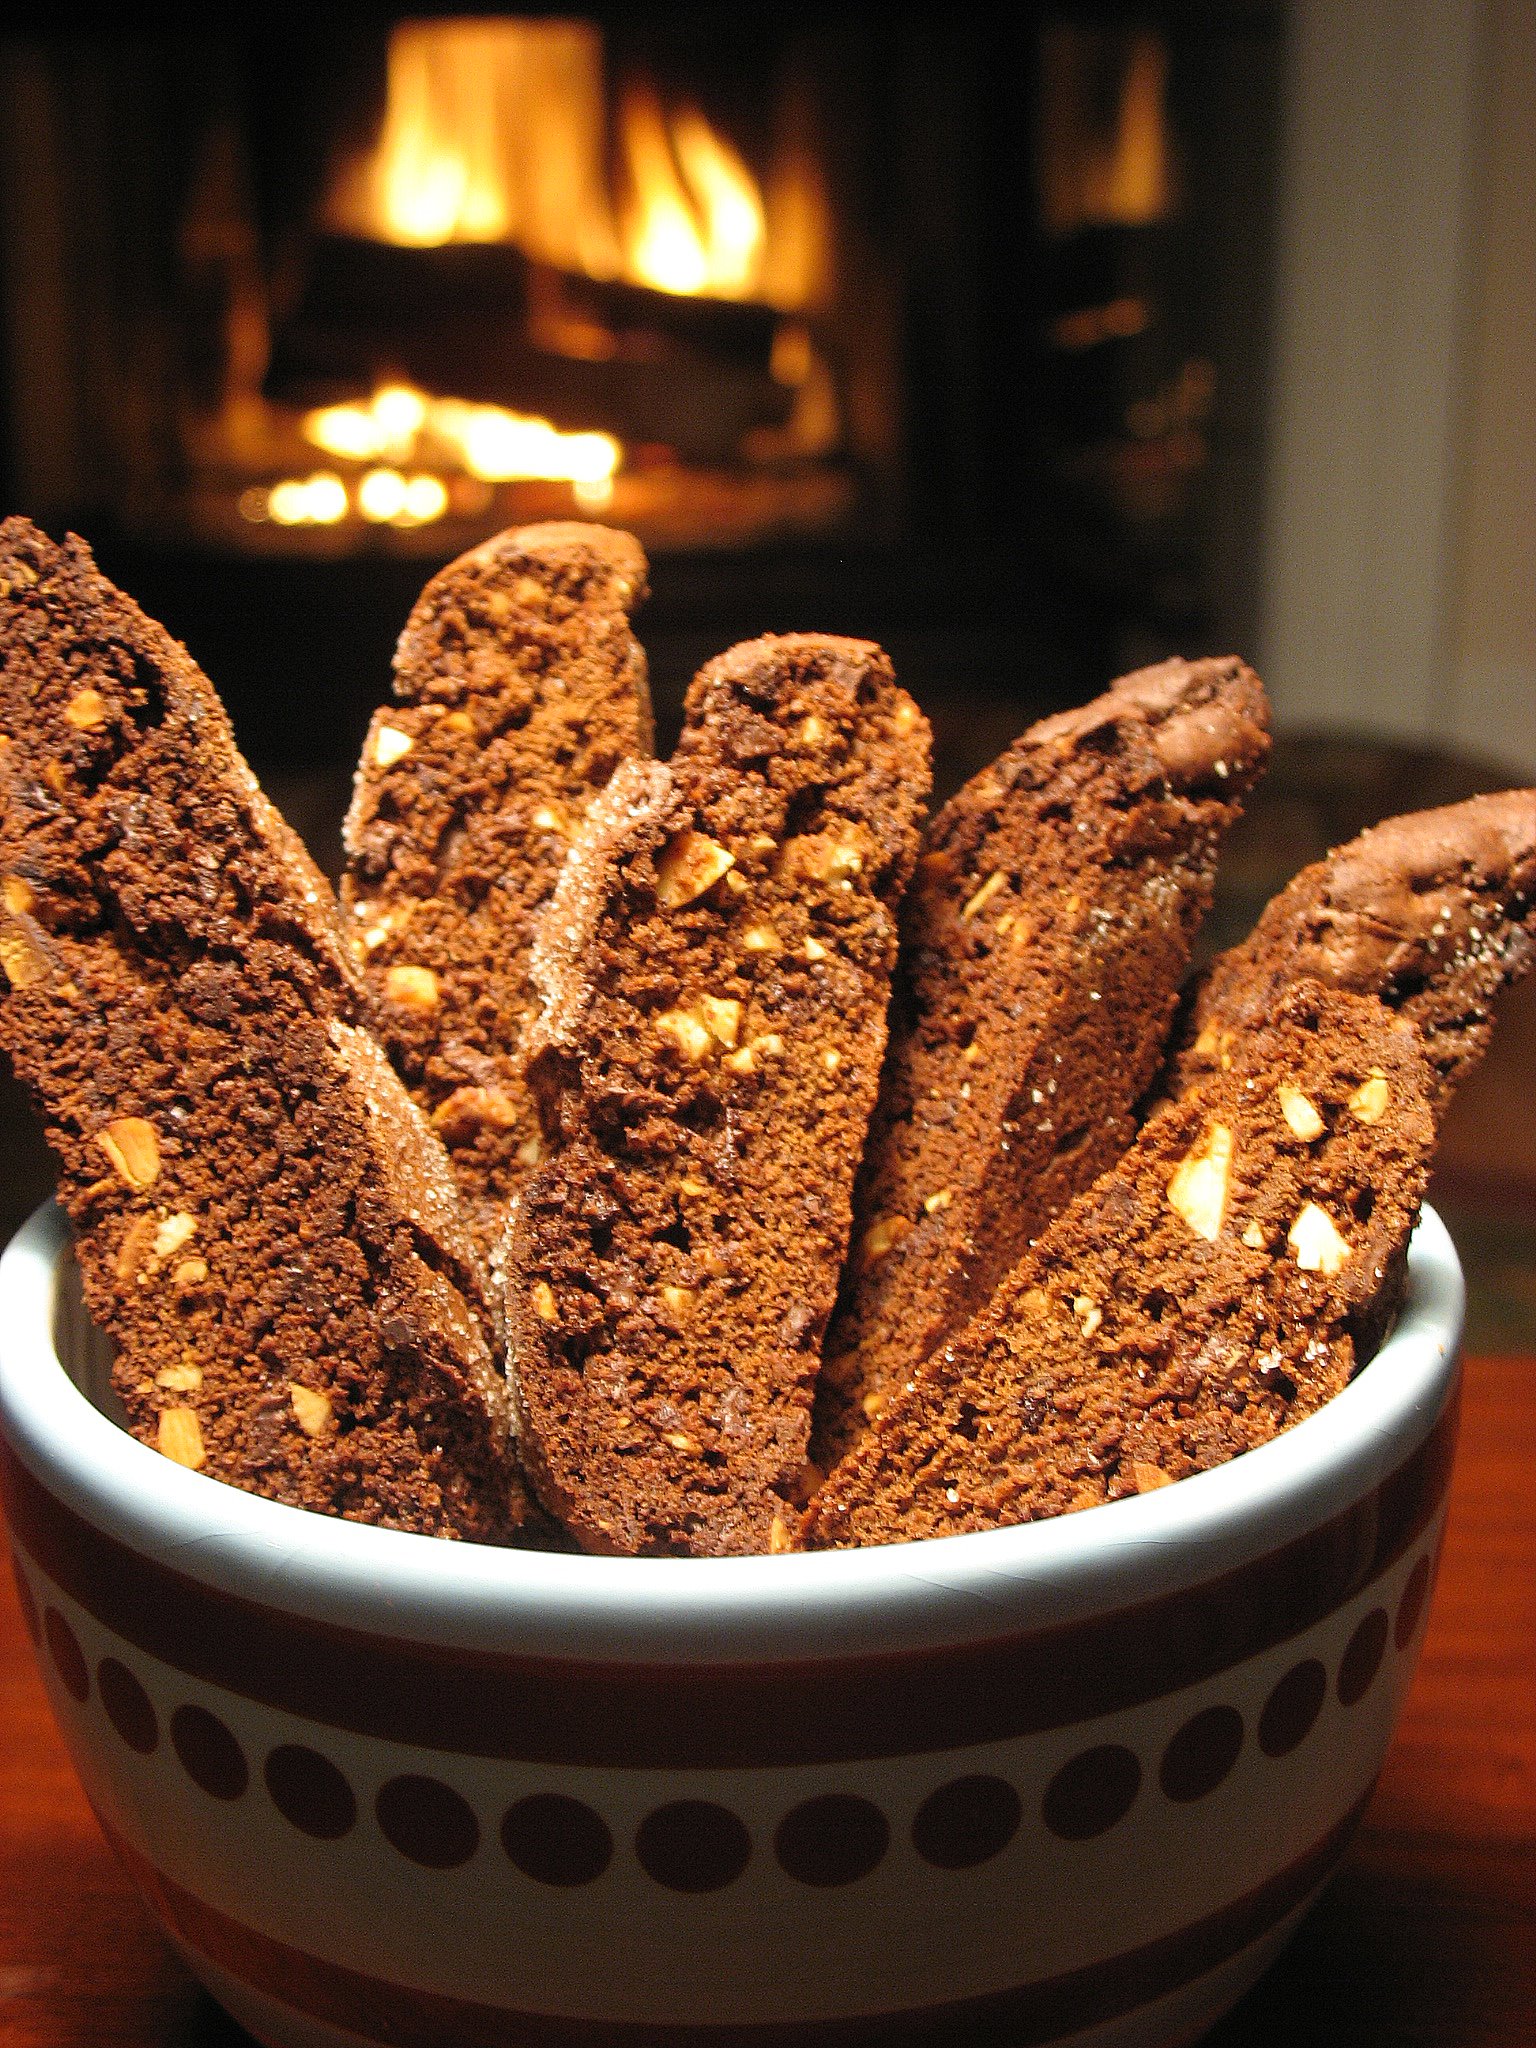
They are indeed 5 of us who conspired to bring you the same biscotti on this nice sunday night. Lisa emailed me the other night asking if I wanted to join her, Yvonne, Brilynn and Peabody in making a chocolate biscotti from Dorie Greenspan’s Baking: From My Home To Yours. I jumped on the project with great enthusiasm as I had been eyeing the recipe for a while now and thought about including it in some of my Christmas baskets.

At the time of this post, I know that Peabody went after my heart by dipping hers in white chocolate, wicked! and Brilynn went all out with a beauiful combinations of all the variations Dorie gives on the sidebar. I went with the recipe as written…with 2 minor changes. A novelty for me which made B. wondered if I was coming down with something! The reason is twofold: I very seldom follow recipe instructions, always adding or changing ingredients depending on what I have on hand, and because I wanted to see what the "base" recipe would taste like before I start using Dorie’s suggestions for variations and add-ons.

My changes: I did not use espresso powder but 2 TB of strong coffee and I toasted the almonds before adding them to the dough. See! Minor I tell you!

I made them last night and add a bite as soon as they were cool enough to handle and I have to say I was a little disappointed. There was something missing, a little "Oh Yumm!" moment that did not happen. We just had another cookie after taking some pics and I can say that the flavor greatly improved obernight. They are actually excellent! We did not say two words, sipping or tea, twirling that biscotti in it, enjoying a nice fire.

Chocolate Biscotti, adapted from Dorie Greenspan:

2 cups all-purpose flour
1/2 cup unsweetened cocoa powder
2 TBSP strong coffee
3/4 tsp baking soda
1/2 tsp baking powder
1 tsp salt
3/4 stick unsalted butter
1 cup sugar
2 large eggs
1 tsp vanilla extract
1 cup chopped almonds, toasted and cooled
4 ounces store bought mini bittersweet chocolate chips

Preheat oven to 350F.
Sift together the flour, cocoa, baking soda, baking powder and salt.
In a stand mixer, preferably fitted with a paddle attachment, or with a hand mixer in a large bowl, cream the butter and sugar together on medium speed until pale, about 2 minutes.
Add the eggs, one at a time, beating well after each addition and the vanilla and coffee and beat for another 2 minutes. Reduce the mixer speed to low and mix in the dry ingredients, mixing only until dough forms. Scrape down the sides of the bowl. Mix in the chopped nuts and chocolate.
Turn the dough out onto a work surface and knead any dry ingredients that might have escaped mixing. Divide the dough in half. Working with one half at a time, roll the dough into a 12 inch long logs. Flatten both logs with the palm of your hand, so that they are 1/2 to 1 inch high, about 2 inches across and sort of rectangular, then carefully lift the logs onto the baking sheet. Sprinkle each log with a little sugar.
Bake the logs for about 25 minutes, or until they are just slightly firm. The logs will spread and crack-and that’s fine. Remove the baking sheet from the oven, put it on a cooling rack and cool the logs for about 20 minutes. Working with one log at a time, using a long serrated knife, cut each log into slices between 1/2 and 3/4 inch thick. Stand the slices up on the baking sheet-you’ll have an army of biscotti-and bake the cookies again for another 10 minutes.Transfer the biscotti to a rack to cool.

Coconut Honey

We just got back from dinner with T&D and I think they were pretty happy with the assortment of goodies I put together: 3 different cookies, spiced nuts, chocolate truffles, homemade marshmallows and this Coconut Honey. The first time I saw the recipe I knew I had to try it as I love everything coconut. My husband B. thought it was a really weird concept but accepted to be my guinea pig, especially when I told him there was no actual coconut thread/flesh in that preserve. It looks funny, sets funny but one spoon on his morning bagel and he was conquered. I tend to give it away for people to try and they always come back for more.

In the spirit of this ongoing series about holiday food gift, here is the recipe for this simple yet luscious spread. I found the original here and adapted it according to the ingredients I could find at the store.

Coconut Honey:

2 cans coconut milk

1 can cream of coconut

600 gr sugar

1/4 cup lemon juice

1 box powdered pectin

Pour the coconut milk, cream and lemon juice in a large pot, add the sugar and slowly heat over medium heat until it boils. Simmer for abut 15 minutes. Stir in the powdered pectin and stir until combined. Boil 2 more minutes. Pour into canning jars. Wipe the mouths of the jars with a clean towel, put the lids on them. Fill a large pot with water, put the jars in it, making sure they are covered with water and boil for 10 minutes. Remove from the water. Withing 10 minutes, you should be able to hear the lid pop inward.

Vanilla and Lemon Syrup

In two weeks we’ll be in my hometown in France and then we will have the chance to visit family, go to Normandy, spend a few days in Paris and spend New Year’s Eve with my brother, his family and 4 other couples and their kids. This means that we will miss the holidays here and all the decorations and preparations of Christmas in the US, and some people among our friends and relatives here are getting worried that they won’t have any holiday sweets because we are leaving…I knew why they really like me now!

The theme here for the first two weeks of December is going to be centered around food gifts and holiday baking.
One year we had difficulties Christmas shopping for the ones around us I decided to make gift baskets for everybody. Some had a theme like "Girls night in", "Movie Night", "Next Camping Trip",…. Some included a gift certificates to the recipients' favorite store, some a homemade card, sachets, picture frame, etc… People liked them so much that they started asking if I was going to do again early October!
Since we are leaving soon and we are already invited here and there for dinner before we go, I decided to start my food gift giving early and post about the different items I will include. There is nothing like something homemade this time of year!

I liked the color and the flavor of this syrup so much that this is where I’ll start. Our friends T&D are new foodies but quickly catching up and they like healthful and balance meals as well as the occasional sunday brunch splurge, so this sauce I found on Cooking Light works perfectly next time they make pancakes or waffles. Not too sweet, with a slight tang from the lemon, great consistency.

Vanilla and Lemon Syrup, adapted from Cooking Light:

1 vanilla bean, split lengthwise
2 cups granulated sugar
1 1/2 cups water
1/4 cup fresh lemon juice, strained
1 tablespoon light brown sugar

Scrape seeds from vanilla bean; place seeds and bean in a small bowl.
Combine granulated sugar and remaining ingredients in a medium saucepan. Bring to a boil over medium-high heat, stirring until sugar dissolves. Reduce heat; simmer 10 minutes. Remove from heat. Add vanilla bean and seeds, stirring gently. Cool syrup to room temperature.

Pour syrup and vanilla bean into a glass container. Cover and chill.

Note: Store in the refrigerator for up to 1 month.

Yield: 2 1/4 cups

The Mighty Cranberry…An Ongoing Story

What to do after drying a pound of cranberries? I could have done some trail mix, but we are not big fan. I thought about granola but I knew I would have eaten it all before I could photograph it. I thought about making brioche or panettone and using them in the dough, but I plan on making fruit stollen next week. Wednesday, B. usually stays home in the afternoon, works on bills, lesson plans or grades papers so around 4 – 5pm, we usually sit down for a cup of tea and a slice of cake. I went online and searched for a fairly easy coffee cake recipe since I did not have much time to bake that morning.

This one looked promising with such high ratings, I modified it a bit using dried berries and I added 1/2 cup eggnog (yes, you read right…homemade). I also skipped the nuts for the topping as I am saving them for food gifts I am giving away before we leave for France. Hard to believe I’ll be home in 2 weeks!

Dried Cranberries Coffee Cake, adapted from Recipezaar:

1/4 cup butter
3/4 cup sugar
1 egg
1/2 cup milk, plus
1/2 cup eggnog
2 cups all-purpose flour
2 teaspoons baking powder
1/2 teaspoon salt
1 cup dried cranberries

Topping:
1/2 cup brown sugar
3 tablespoons all-purpose flour
1 teaspoon ground cinnamon
3 tablespoons butter

Preheat oven to 375. Grease 9 inch springform pan.
Sift together flour, baking powder and salt, set aside.
Cream together the butter and sugar until light and fluffy. Beat in egg. Beat in the flour mixture alternately with the milk and eggnog, mixing just until incorporated. Stir in the cranberries. Pour batter into prepared pan.
In a small bowl, combine topping ingredients.Cut in butter until crumbly.Sprinkle over batter.
Bake for 45 minutes,until toothpick inserted into the center comes out clean. Allow to cool.

Turned out to be easy and delicious, perfect after it has a chance to cool completely. It is perfect with afternoon tea.

The Mighty Cranberry

Well, in this case it was not one solo cranberry that preoccupied my day but rather 4 pounds of the mighty berry!…and I did not even host Thanksgiving dinner. When November comes around and the market stalls are covered with ruby red, plump cranberries and pomegranates I think I lose it. These are relatively new to me as when I left France 10 years ago I knew only of"airelles", a smaller relative (and the only way I had had a pomegranate was in a "grenadine")I have made up for lost time since them and prepared traditional cranberry sauce and used them in upside down cakes and cobblers.

It was about the same time when I visited Tanna’s blog and found out she was in the same kind of situation. I first read about her making cranberry juice from scratch and that really (really) tempted me but all of a sudden I saw many Cosmopolitans dancing in front of my eyes and that was not a good sign, it was only monday for crying out loud!

Her second use for them was an absolutely delicious looking coffee cake. Once again, temptation set in but it called for whole, fresh ones and I was not ready yet to use mine like that. I wanted to do something I had not done before and that is when the words "dried cranberries" became embeded in my brain. I use dried ones anywhere a recipe calls for raisins because B. hates (and believe it is a small word), so I go through a pretty (penny) big supply of them, and I had the perfect opportunity to make my own right at my fingertips. A quick search on the internet, a sleepover in the oven and I finally had dried cranberries in the morning and a whole lot to boot!

Oven Dried Cranberries, adapted from VegFamily:

For any quantity: wash and then plunge them into boiling water for 15-30 seconds, just until the skin 'pops.' Stop the cooking action by placing berries in ice water. Drain on paper towels. Turn on the oven for 10 minutes at 350°F. Then place the cranberries on a cookie sheet in the oven, turn off the oven, and let them sit overnight or until sticky and no longer wet. Once dry, they can be kept at refrigerator temperatures for 18 to 24 months or in a freezer for 5 to 8 years.
I used 2 pounds this time.

Still 2 more pounds to go… I have decided to save one pound fresh for something…not sure yet, but all if a sudden this evening I got very thirsty for a Cosmopolitan, and tuesday is closer to the weekend than monday…right?…please say yes! It was my turn to make Tanna’s homemade cranberry juice and boy I don’t regret it….absolutely delicious. She uses an orange instead of the lemon the original recipe called for, I admit I did not use either and for no other reason that I completely forgot….

Homemade Cranberry Juice, adapted from Tanna:

1 lb. cranberries, washed & drained
1 quart plus 1 c water
cheesecloth
1/3 to 1 c sugar

Cull through the cranberries and discard bad ones.
Place cranberries in a heavy nonreactive saucepan or dutch oven.
Bring to a boil. Reduce heat to medium. Cover loosely and simmer 10 minutes until all cranberries have burst.
Line a sieve with cheesecloth.
Pour cranberry mixture through lined sieve. Do not press on fruit.
Pour juice back into pan. Stir in sugar and boil about 3 minutes. The amount of sugar needed can vary, use according to your own taste.
Cool juice before serving.

Heaven….in a cup!

Sweet Potato and Baby Vidalia Scones

I am really liking all the blog events going on each month and with a baking and pastry blog there are always plenty to chose from. When Zorra started World Bread Day back in October, I had no idea that I would still be looking at participants' entries one month down the line, but there are so many great breads outhere. She came up with the "After Hours Party" event, giving each of us the chance to try somebody else’s bread and post about it. I had fun participating again. A couple of weeks ago, she sent me an e-mail about her latest one-off event "Onion Day"…. and then I got speechless (yes, it is actually possible!). I was torn: I wanted to participate but I wanted to keep with the sweet/baking theme of my blog.

My mind went immediately into bread baking mode and particularly gravitated toward something that would be sweet enough to have a place here but with a type of onion that would complement it. It was not until yesterday afternoon that I found what I wanted to make when I went to the store and stood in front of my produce guy: "I need a very sweet onion for baking, even sweeter than the sweet Vidalia, help!".
Sunny is the man! He went to the back and came back with a case of baby Vidalia. They looked like big eyed leeks with a sweet and smooth fragrance. I had one of the components… On the drive home I had that light bulb effect over my head and remembered the small container of leftover sweet potato puree wasting its life away in the back of the fridge. What do you do with about 1 cup of the stuff…a Sweet Potato and Baby Vidalia Scone!
Not only did my sweet potato puree did not find a fateful end but I’d get the chance to join the festivities and have a yummy breakfast in the morning!

Although I have a recipe for scones that I love and use almost every week, I tought it was hogh time I tried another one and I now have a second favorite. These came out so tender and you can really taste the sweet potato. I bet they would be good with some bacon in them too. We sliced them open and used them as the base for a couple of poached eggs and that was our dinner last night with a side salad. Delicious!

Sweet Potato and Baby Vidalia Scones, adapted from recipezaar:

2 baby vidalia onion or one small one, sliced or diced
1 cup all purpose flour
2 teaspoons baking powder
1/2 teaspoon salt
1 teaspoon sugar
1 cup mashed cooked sweet potatoes
3 tablespoons butter, melted and cooled

Line a baking sheet with parchment paper; set aside.
In a medium pan, saute the onion until tender, set aside to cool.
Sift flour, baking powder and salt into a medium-size bowl; stir in sugar.
In a large bowl, thoroughly mix potatoes and 1 1/2 tablespoons melted butter with a fork. Add the onion.
Add dry ingredients and mix to form a soft dough.
Turn out onto floured surface.
Roll out with a floured rolling pin or pat dough with your hands to make a round about 1/2-inch thick.
Cut into rounds with a 2-inch fluted or plain cookie cutter.
Place 1 to 1 1/2 inches apart on baking sheet; brush tops with remaining 1 1/2 tablespoons melted butter.
Bake about 20 minutes or until light brown.
Split and serve warm with butter and honey.
Makes about 10 scones.

Truffle, How Do I love Thee?

In the bowls, clockwise: dark chocolate, candied ginger, pecan praline.
Molded chocolate truffles, from front to back: dark chocolate pumpkin, Dulce de Lece, coffee buttercream

A lot, obviously! When ThePassionate Cook gave us "Truffles" as the theme for Sugar High Friday 25, I did a little happy dance. Finally a reason to cover myself and my kitchen in chocolate. Finally a reason to go back to one of my true pastry loves: making chocolate. I applaud Danielle for making a single truffle from scratch, but I wanted to play around with my molds that had been in the attic since we moved in last year.

Making truffles is a tradition for me around the holidays. While my grandmother was busy making her marzipan stuffed fruits, I was in the kitchen next to her making and rolling balls of ganache in cocoa powder. I never thought it was a big deal as I was used to making them every Christmas, and then as I grew older, I started experimenting.
At the restaurant, I was in full truffle making mode early December with Christmas parties, wedding and party favors. I do miss certain aspect of the industry, like plating desserts, the availability to order great quality chocolates, butter, produce, molds and pans. I mean, who would not love to say: "and please add a 5o ppound box of that Valrhona couverture you (vendor) recommended last week"?! If I were to do the same desserts here I would be broke buying equipement and supplies, that’s why I stick to more homy concotions.
My husband did not understand my transformation into Mr. Hyde when "truffle time" came around at the restaurant, until he came by one afternoon, and saw that I was like a kid again, hands deep in chocolate and a big smile on my face. Making truffles makes me truly happy. Many an argument with the ex. chef or the husband have been settled around a plate of them.

I am getting excited again and I disgress….
Playing with chocolate (and yeast and sugar) here can get quite tricky because of the high temperatures outside and the high level of humidity, so after a few batches of not so right chocolates some years ago, I purchased "The Art of Chocolate" by Elaine Gonzales, and it has been one of my best technique books so far. The woman knows her stuff! She will guide you from basic hand rolled to tempered and molded chocolates, to beautiful chocolate boxes, roses and more.
I have adopted her techniques for rolled truffles after one summer in South Carolina when no matter what I did, the cocoa powder would sink into the truffle and disappear. If you follow her instructions for hand dipped or molded chocolates, you will become a master in no time.

Classic Hand Rolled Chocolate Truffles:

8 oz bittersweet or semisweet chocolate, coarsely chopped
1/2 cup heavy cream

Heat the cream over low heat unil bubble form around the edges of the pan. Pour the cream into a bowl and let cool 1 minute. Ass the chocolate. When the pieces are soft, start stirring until the ganache mixture is smooth.
Cover loosely and refrigerate for 30 minutes to an hour.
Spoon the ganache into a pastry bag and squeeze mounds, 3/4 inch in diameter. If you want really nice round truffles, use your hand to form them. Refrigerate, uncovered for a day. The trick is to let the truffle form a skin so that when you roll them in the cacao, the powder does stay on for a long time, regardless of the temperature in the room.
Dip into cocoa powder to cover.

For the 3 different hand rolled truffles that I made I doubled the recipe and divided the ganache in 4.
1/ remained plain
2/ I added 1/2 cup crushed up pecan praline
3/ I added 1/2 cup chopped candied ginger
4/ I added 1/2 cup pumkin puree and 2 tsp. pumpkin spice (I used it in the molded chocolate)

Molded Chocolate Truffles:
Source for the molds: Kitchen Krafts

Tempered Chocolate for the shells: (classic method, only used if you don’t have the tempered chocolate chunks required in the seeding method)

1 pound semisweet chocolate, coarsely chopped.

Over a double boiler, melt the chocolate to 115 F. Let cool to 84 F. Reheat until it reaches no higher than 90F. If you exceed this temp. you must reheat the chocolate and start all over again. The remp. may be 2 or 3 degrees lower but not higher.
Your chocolate is now tempered.

Making the Molded Truffles:

Line your work aread with parchement paper. Make sure wyour molds are clean and free of particular. Pour enough tempered chocolate to fill the cavitites completely with chocolate. Tap your mold on your counter to remove any air bubbles. Invert the mold over the parchement paper. Shake it in a circular motion to coax most of the excess chocolate to run out. Using a large spatula scrape the the excess chocolate off of the top and edges. Invert and let the chocolate harden. Fill with your desired ganache or filling.

Seal the cavities: remelt and retemper the chocolate. Spoon chocolate over the filling, going slighty over the rim. Tap the bottom of the molds on the counter. Using a large spatula, scrape the excess chocolate. Refrigerate until set.

To unmold: tap the bottom of the mold once on the counter, and flex the mold a little if necessary.

For the Coffee Buttercream filling:
4 egg yolks
1/4 cup water
1/2 cup sugar
8 oz. butter (2 sticks) room temp.
2 Tb. strong coffee

Whip the egg yolks until light and fluffy with a stand mixer. Combine water and sugar in a saucepan over low heat. Stir occasionally until the sugar is dissolved. Increase the heat and bring the syrup to 238 on a cansy thermometer. Pour over the yolks and quickly stir to combine. Return the bowl to stand mixer and whip at high speed until completely cold. Add the butter and mix in on medium speed. Add the coffee and mix .

For the Dulce de Leche: (prepare one day in advance)

Submerge a small can of sweetened condensed milk in water in a big pan. Bring to a boil and let boil for a couple hours, making sure the can of milk is ALWAYS under water.
Let cool for one day, before opening.
I know there is a cooked method out there on the internet but could not locate it.

I brought this assortment to Thanksgiving dinner to be enjoyed with coffee. I was a bit worried about how the pumpkin ganache would be received but everybody loved it.
Making molded truffles is a lenghthy process but I had plenty of time on tuesday with the cold and rainy day we were having (read: I got lazy and stayed home)

Raspberry Crostada

I am not ignoring pumpkin or pecan pies by bringing raspberries to our table but this crostada has been part of "our" Thanksgiving for a few years now. I need to explain the "our" before I explain the pie. I don’t get to cook Thanksgiving dinner which always leaves me frustrated, so I cook a mini dinner with all the traditional items just for the two of us on tuesday. B. thinks of it as practice, I, on the other hand, like searching for new recipes, setting up the table, enjoying the evening and telling him how thankful I am for his love and friendship. We had this beautiful crostada for dessert instead of the traditional Thanksgiving pies and the reason for it dates back to my first year at the restaurant. After making dozens of pumpkin, pecan and apple pies for that day I started craving something else for dessert and I am thankful that I have a husband ready to indulge my weirdness and my cooking whims so this is what I served that (rehearsal) evening.
Like a lot of people this holiday season, I am always on the lookout for variations of the traditionals dishes and desserts, maybe another brined turkey recipe or a pecan streudel pumkin pie, or a chocolate and pecan pie, that kind of variation. I liked my old recipe for the crostada but when I read about the one I am about to post I knew I wanted to try it. Why? Because it came with a beautiful story.

A few month ago, Mrs. B of Eating Suburbia, asked some food bloggers if they’d be willing to test some recipes for the upcoming release of the book she wrote with Michele Anna Jordan, The World is A Kitchen. I just did it for the fun of it , but as a "thank you", Mrs B. sent me a copy of the book, which I devoured the day I received it. The subtitle explains it all "Cooking Your Way Through Culture Stories, Recipes and Resources". It is chock full of wonderful stories, inspirational cultures and traditions. Monday night, I remembered reading the beautiful story of Giuseppa teaching Caterina how to make Crostada from scratch in her Italian kitchen. Just reading about Caterina’s struggle to grasp the making of the dough or how to respect the food instead of trying to conquer it makes you want to try your hand at it. I believe this has making my new "to go" recipe for rapsberry tart. I used raspeberry but you can use strawberry or plum.

Raspberry Crostada, adapted from "The World is A Kitchen":

For the dough:
2 cups flour
1/2 cup sugar
2/3 cup butter, at room temperature
1 egg + 1 egg yolk
grated zest of a lemon

Filling:
2 cups raspberry jam

Mix the crust ingredients until they form a ball, trying to knead the dough as little as possible. Refrigerate for an hour. Roll out to 1/4 inch to 1/2 inch thick. Fit into a 9 inch pie plate. Cut whatever dough hangs from the sides. Spread jam over the bottom. Re-roll and cut remaining crust and cut out decorative shapes and strips to form a lattice. Bake at 350 for 25 minutes. Cool and serve.

It was delicious. The addition of the grated lemon zest makes the world of difference. The only change I would make would be to blind bake the crust 15 minutes prior to filling it.
If you struggle with your lattice work, head over to Smitten Kitchen where Deb wrote a great post to help out.

Freak Storm, Coffee Cake And A Cream Puff

I had been eyeing a certain coffee cake recipe for a few days and something prompted me to make it last night and bake it this morning. Tuesday is an early day for B. so I figured I had plenty of time to bake at least one in time for his breakfast. The coffee cake was waiting for its fate in the fridge where it had plenty of time to rest and rise overnight and its sight filled me with promise of warmth and comfort this early in the morning.

I looked at the river through the back window and turned around….then I stopped dead in my tracks and had to do a double take…SNOW! It was snowing! Now! in November! In South Carolina! Did the world go upside down overnight? I mean, last week we were in shorts and t-shirts and a little while ago I was complaining about our lack of Fall weather! The weather people called it a "Freak Storm". I called it "Perfect for Coffee Cake". We sat there, at the dining room table, mugs smoking hot with coffee, looking at the snow (big slushy flakes that don’t stay on the ground but nevertheless…snow), and devouring our breakfast.

I completely understand Yvonne when she jokingly wondered if it was bad to eat one by yourself. Bad? No. Wise, absolutely not! Good? The Bomb!
The only changes I made to the recipe were to spread each dough with 1/4 cup cream cheese and sprinkle 1/4 cup broken praline over each before rolling them, instead of using the almond filling. It smelled so good that we skipped the icing, we could not wait!

Raised Almond Coffee Cake, adapted from Wanda’s Pie in the Sky by Wanda Beaver, and Cream Puff

For the coffee cake dough:
1 envelope active dry yeast
4 tbsp. sugar
2 to 3 tbsp. warm water
1/2 tsp. salt
1 large egg, beaten
1/2 cup light cream
2 cups all purpose flour, sifted
1/2 cup unsalted butter, at room temperature

In a bowl, mix together the warm water, yeast and 1 tbsp. of the sugar. Stir to dissolve and let sit for 5 to 10 minutes or until the mixture begins to look creamy and foamy.
Add the other 3 tbsp. of sugar, the salt, the egg and the cream. Combine well.
Pour the mixture in to the bowl of an electric mixer and add 1-1/2 cups of the flour. With the dough hook, mix on low speed until smooth (a few minutes).
Add the remaining flour and mix on low speed until the dough is well mixed. It will be a bit stiff.
Flour a work surface and turn the dough out. Roll the dough to a thickness of a 1/4 inch. Spread the softened butter on two-thirds of the dough.
With a knife, mark the dough into thirds by place a tiny mark at the top edge of the dough. Fold 1/3 of the dough over the middle third. Take the last third of the dough and fold it over that.
Do a quarter turn and roll the dough out again to 1/4 of an inch thick. Once again, fold the dough into thirds. Wrap in plastic wrap and refrigerate for 30 minutes. Repeat the rolling, folding and quarter turn three more times, refrigerating the dough for 30 minutes between each time. Once you’ve completed these steps, keep the dough in the refrigerator until you’re ready to fill it and bake the coffee cakes.

For the coffee cake filling:
1 cup blanched whole almonds
1/2 cup sugar
1/2 cup fine breadcrumbs
2 tbsp. unsalted butter, melted
1 large egg, beaten
1 tsp. almond extract
1-1/2 tsp. vanilla extract
1/2 tsp. cinnamon
1/2 cup unsalted butter, melted

In a blender or food processor, grind the almonds with half the sugar. The almonds should be finely ground, but not pasty.
Add the rest of the sugar, the breadcrumbs, the 2 tbsp. melted butter, the egg, the extracts and the cinnamon. Combine well and set aside.

To assemble the coffee cakes:

Preheat the oven to 350 degrees F.
Remove the dough from the refrigerator and divide in half.
Roll each half into a rectangle that’s roughly 9 inches long by 6 or 7 inches wide.
Take the 1/4 cup of melted butter and brush the surface of the dough with some of the butter.
Spread half the filling over the first rectangle of dough. Be sure to leave a 1 to 1-1/2 inch border all the way around to avoid the filling leaking out.
Beginning with the top edge, roll the rectangle towards you to form a long roll. Join the ends of the roll to form a ring. You may want to wet the ends slightly to ensure that they stick together.
Transfer the ring to a cookie sheet lined with parchment paper. With a knife or with scissors, cut the ring of dough into slices that are about 1 inch thick. Don’t cut all the way through, but cut almost to the centre of the ring. Turn the pieces of cut dough slightly upwards so that you create a fan effect.
Cover the dough with a towel and let it rise for 30 minutes. Repeat with the other rectangle of dough.
Bake the coffee cakes for 30 minutes. Cool completely on a wire rack before glazing.

For the glaze:
1/2 cup icing sugar, sifted
2 to 3 tsp. light cream
1/2 tsp. vanilla extract
1/4 tsp. almond extract

Mix all the ingredients until you have a smooth glaze. Drizzle the glaze over the cooled coffee cakes and let set (about an hour or so).
If the glaze is too thick, add more cream until you achieve the consistency you want.

No Knead Bread…I Am a Follower

Before you say "another No Knead Bread recipe? What is it with you people?", I am telling you to surrender and become a follower! Ah well, when I see a good thing I can’t leave it unattended. When I read about a good thing I know it won’t be long before I end up making it, especially when that particular item has been tried and endorsed by so many of us out there. I hate being left out of the loop! I have to admit that this is probably the first time I have followed a recipe in its entirety.
The bread is really easy to make. I made it in the evening, shaped it and let it rise again the next morning, baked it exactly according to the recipe and we had wonderful grilled cheese sandwiches Sunday at lunchtime. I truly believe that such a great result is achieved by the baking method: preheating your pan, covering the loaf 30 minutes, uncovering it for another 30. When you read such detailed instructions you know you have to respect the baker’s work and do the same. I used a 2 quart Le Creuset casserole dish and I ended up with a beautiful round loaf. I believe it is the reason why I had less air pocket than other loaves I saw on other blogs but I wanted larger slices for sandwiches….hmm…also to spread more butter!

No-Knead Bread, from The New York Times
Yields one 1 1/2 pound loaf

3 cups all-purpose or bread flour, more for dusting
¼ teaspoon instant yeast
1¼ teaspoons salt
Cornmeal or wheat bran as needed.

In a large bowl combine flour, yeast and salt. Add 1 5/8 cups water, and stir until blended; dough will be shaggy and sticky. Cover bowl with plastic wrap. Let dough rest at least 12 hours, preferably about 18, at warm room temperature, about 70 degrees.

Dough is ready when its surface is dotted with bubbles. Lightly flour a work surface and place dough on it; sprinkle it with a little more flour and fold it over on itself once or twice. Cover loosely with plastic wrap and let rest about 15 minutes.

Using just enough flour to keep dough from sticking to work surface or to your fingers, gently and quickly shape dough into a ball. Generously coat a cotton towel (not terry cloth) with flour, wheat bran or cornmeal; put dough seam side down on towel and dust with more flour, bran or cornmeal. Cover with another cotton towel and let rise for about 2 hours. When it is ready, dough will be more than double in size and will not readily spring back when poked with a finger.

At least a half-hour before dough is ready, heat oven to 450 degrees. Put a 6- to 8-quart heavy covered pot (cast iron, enamel, Pyrex or ceramic) in oven as it heats. When dough is ready, carefully remove pot from oven. Slide your hand under towel and turn dough over into pot, seam side up; it may look like a mess, but that is O.K. Shake pan once or twice if dough is unevenly distributed; it will straighten out as it bakes. Cover with lid and bake 30 minutes, then remove lid and bake another 15 to 30 minutes, until loaf is beautifully browned. Cool on a rack.