
Monatsarchive: September 2006

Ashley’s Chocolate Banana Pound Cake or The Art of Adapting

This cake is the perfect example of Ashley's recent post on adapting and changing recipes. I could come up with many reasons why I changed her recipe but here the few that come to my mind:

– I already know what chocolate and banana pound cake taste like, so combining the two is easy to imagine flavor wise.

– I know that since I don’t have mascarpone on hand, I can substitute cream cheese without (purists cover your eyes) altering the recipe too much.

– Since I want to add 1/2 cup finely powdered dry coconut, I need to add a tad more liquid if the batter seems stiff, I chose to add 1/4 dark rum, to enhance to the tropical feeling.

It is easy for seasoned baker and cook to change recipes without messing up. Once you have mastered the different doughs and baking techniques of creaming, sifted, adding, alternating, the sky is the limit!

I think that every baker who wants to take it a step further should spend soe time acquiring the discipline and techniques necessary but after that: Have Fun!

Oh yeah: playing around with a recipe does not always produce success, but we all learn from our mistakes!

Here is her recipe and my changes in italics:
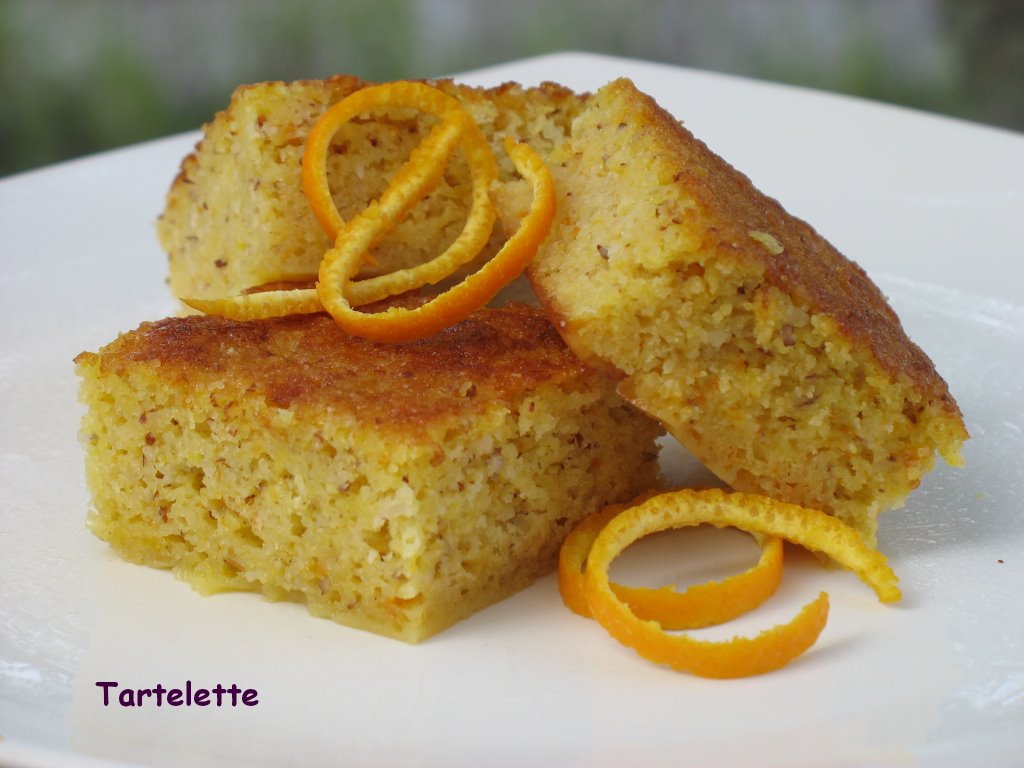
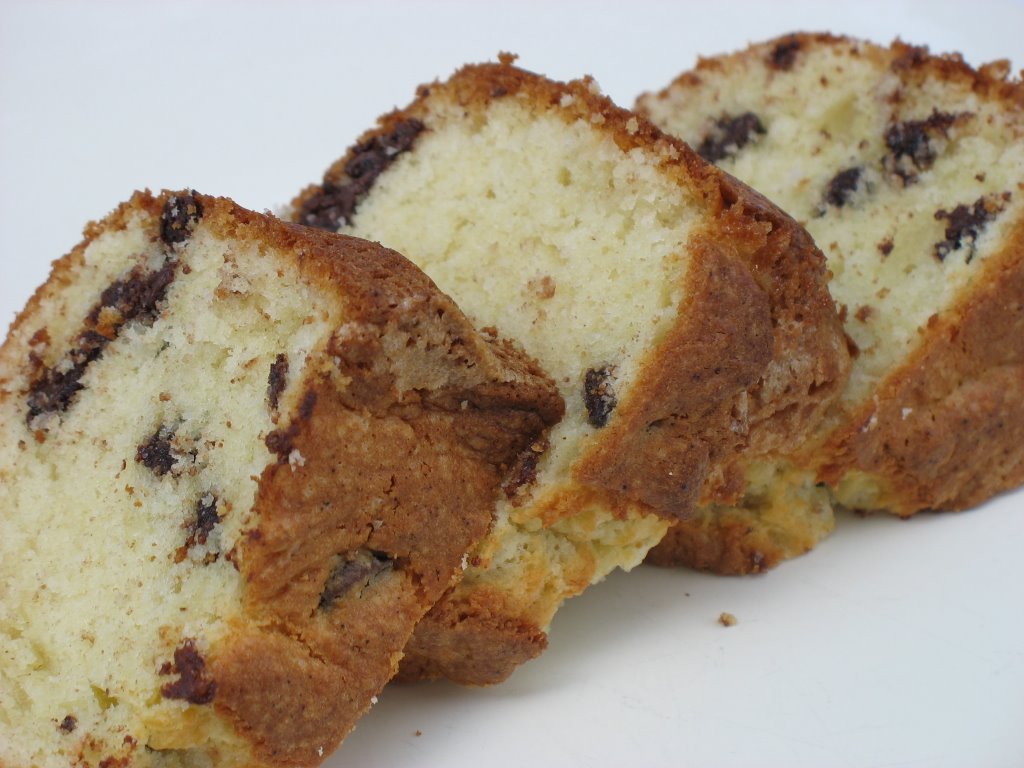
Banana Pound Cake
From Secrets of Baking; Sherry Yard
2 1/4 cups All Purpose Flour
1 Tbl Baking Powder
1 tsp. Baking Soda
1/4 tsp. salt
1/2 cup sour cream
1/2 cup mascarpone (I used cream cheese)
1 1/2 sticks butter, unsalted, softened
1/2 tsp. cinnamon
1 cup sugar
2 large eggs
2 fully ripe bananas, pureed
3/4 cup chocolate chunks

1/2 cup very finely shredded coconut

1/4 rum


Sift dries. Combine sour cream and mascarpone, set aside. Beat butter until soft and gradually add the sugar. It should be super light and fluffy. Add eggs one at a time. Alternate dry ingredients with sour cream and mascarpone mixture. Fold in bananas and chocolate chunks (or chips). Bake 350 for 1 hour to 1 1/2 hour until toothpick comes out clean.

The cake was delicious. It’s like a drug, we keep having a slice at every meal. Sorry neighbors, seems like you won’t taste this one!

KKVKVK # 12: And The Winners Are…

And the winner is : Lilo of Cuisine Campagne, followed by Debo at Les Agapes in second, and Mickymath of Au Jardin des Delices in third.

It seems that there was a lot of controversy this time regarding the voting process but I stayed out of it all because truly, lthough I take every blogging event seriously this should remain a game. The KKV gave me the opportunity to bake something I like, take a picture, blog about it, maybe entice one or two people to make it and first and foremost to see what 96 other bloggers (yes, you read right)would come up with.

Thanks Ninnie for hosting it and "Congratulations" to the winners!

You had me at "Brioche"

That’s what B. told me "the morning after" when I asked what he wanted for breakfast: cereals, toast, waffles, brioche. (so much for those other skills…!)
I just pulled out 3 more loaves of sourdough baguettes (I added oat and wheat flours) and this morning I made 1 big brioche and 6 little ones. I plan on making another batch tomorrow and stock all that until next week. It seems like a big production but trust me, all this is not going to last long in our house!

Here is my favorite brioche recipe, adapted slightly from Bo Friberg.

.

For 18 individual Brioches:

For the Sponge: mix together 1 oz. fresh compressed yeast (or 0.5 dry), 1/2 cup warm milk, 2 Tb. honey and 4 oz. bread flour. cover and let rise until doubled.

For the dough:add to the sponge 2 tsp. of salt, 2oz. granulated sugar, 4 eggs. Mix in 1/2 pound cake flour and 4 to 8 oz. cake flour. Start by adding 4, and if the dough is too sticky continue to add up to 8. Incorporate 4 oz. very soft butterThe dough should not stick to the sides of the bowl and have a shiny appearance. Cover and refrigerate 5 to 6 hours, or until doubled. If you want to use it earlier, let rise at room temp. Punch the dough down and shape into individual molds. Bake at 375 degrees until hollow when tapped, about 20 minutes.

It is hard resisting having one right out of the oven with some butter (more) and honey,

I also made Ashley’s Banana Chocolate Pound Cake but it started raining bad and the light was pretty bad, so that will be for tomorrow.

The French Are Coming

This time it is my parents arriving next Tuesday and staying for a month. We see them once or twice a year and it is always great to have them stay that long. I am not going to lie, the first couple of years were not picture perfect, we all had to find our marks but I believe we have the machine well oiled now and things go relatively smoothly. Well, except for one thing: I have no time for myself, there is always some translating to do, some store to hunt down for cousin so and so looking for a pair of pink converse, child size if you have them, thank you very much, need a pair of jeans that and that, Nintendo game blablabla, you get the picture.

Baking becomes a midnight affair when everybody has retired to their quarter and I can stir and knead in peace. There is however one ritual I have to get prepared for: having bread at every meal, and not sandwich white, non monsieur! As much as I love my grocery store people, I really hate to shell out 3 bucks for a loaf of artisan bread I can make at home. Hence, in preparation of any family member visiting from the continent I start a week ahead of their arrival by stocking my freezer with baguettes, epis, sourdough loaves, brioches, croissants and such.

Today was the first installment with 2 large brioches, 6 mini ones and 6 sourdough baguettes.

For the baguettes I always use the same recipe, the sourdough starter is still alive and well, I pretty much leave it alone in the fridge until I need it (sometimes it can be a couple of months) and then I feed it everyday I use it for bread.

I’ll post the recipe again:

Baguette Monge: ingredients for 3 baguettes
– 500 g. bread flour
– 100 g. starter
– 5 g. yeast
– 10 g. salt
– 27 cl. warm water
Put the yeast into a bowl, add 10 cl water and let bloom for 20 minutes. in another bowl, mix the flour and salt. Form a well with a spoon and add the yeast/water combo, add the rest of the water and the starter. Mix well with the dough hook and either knead by hand or still with the mixer for a few minutes (up to 12). Let rest in a covered bowl for 20 minutes. Divide the dough in 3 parts and shape into rounds, let rise another 40 minutes. Form into baguettes and put on a baking sheet, let rise 1 1/2 hours.
Preheat oven to 425. Sift some flour over the baguettes and cut slits on top with razor blade. Bake for 20 25 minutes.
This bread comes from the Kayser Bakery, located on Monge street in Paris.

Starter: from Eric Kayser, 100% Pain.
Day 1: mix 50g. warm water and 50g bread flour. Let stand at room temp.
day 2: add 100g warm water and 100g flour, add 20g sugar. Let stand at room temp.
Day 3 : add 200g water and 200g flour. Let stand 12 hours.
Remove quantities as needed for recipes, if not used within 8 days, refrigerate and add more water/flour if the starter seems to lose life.

The Weekly Banana Post

You were probably on the edge of your seat wondering what had happened to the weekly banana recipe! Fear not, I got one, just delayed by other baking activities over the weekend. It kept me busy but also took me away from the ripening bananas and today they finally met their fate. I decided that they should not be the only one getting a little treatment and when the grocer handed me a couple of bruised, very ripe pears saying "I know you’ll be able to do something with them, nobody wants them" I knew my bananas would not get toasty alone! I am not evil, I just love the flavors of pears and bananas together. It is kind of tropical, kind of fall. I got inspired by reading several recipes over the internet and combined the recipe for my banana tart with this one for pear tart. Thank you Anne for providing the background for the recipe. For the crust, I used Tuyau’s recipe posted a couple days ago, just look at that crust! Thank you very much Mesdames!

Here is the final result of all these combination:

Banana and Pear Almond Tart:
Crust: (adpated from C.Felder)
200 gr. flour
90 gr. butter, very cold
1 egg
2 Tb. sugar
1-2 Tb. water

Combine flour and sugar, cut the butter and mix with your hand until you have a crumbly texture. Add the egg and mix quickly, add water if you fill the dough is too dry. Act quickly, the more you handle the dough the tougher it gets. Refrigerate 30 minutes.

Filling (adapted from Anne and myself)
2 ripe pears, cored, peeled and sliced
2-3 bananas, peeled and sliced
1/2 cup ground almonds
1 -2 Tb Calvados or brandy
1 cup sugar
1/2 stick softened butter
1/2 heavy cream

In a food processor combine the almonds through cream and process until smooth.

Roll your crust and fill either a 9 inch pie plate or 4 individual tart molds. The ones I used were about 4 inches in diameter.
Whether you make a whole pieor individual ones: pour the filling in pie crust, alternate slices of pears and bananas and bake at 350 for about 30-40 minutes.

Et voila! Dessert tonight! If B. asked for a cookie I am just going to have to smack him! They smell so good, I want one right now, skip dinner!

Cheddar Crackers and BBM Part 3

Yes, this process will see an end! Given the personality of the blogger I have been assigned, I decide to include something salty to my package as I heard that one cannot survive on chocolate and sugar alone (wonder why…). After my take on the very Southern Benne Seed Wafers with Flo Braker’s Sesame Spice Chips, I wanted to add cheddar cheese crackers. I thought about purchasing them through the same company that makes the benne seed wafers here in Charleston and I was standing at the cah registers with a little package of cheddar coins when my ever baking alter ego decided that I could come up with my own at home. I like those littel coins, don’t get me wrong but I am not sure how well these butter loaded (not an insult in this case) morsels would travel to a far away place. After much browsing online I finally settled on a recipe from Martha’s site. Since she had not let me down with her Double Chocolate brownies, I figured this recipe would be a good option. As always I decide to tweak it a bit.

These crackers are a good addition to a cheese platters because you can slather on some good cheese on there and they hold their texture (obviously we tried! What one has to do for blogging purposes!). I would not eat them on their own as they tend to be a bit on the dry side, but nibbled with a good wine, they are good.

Here is my take on her recipe:

Cheddar and Oregano Cheese Crackers, adapted from this recipe by Martha Stewart,

Makes 20 crackers

1 cup all-purpose flour
1 teaspoon coarse salt
1/8 teaspoon freshly ground black pepper
1 tablespoons dried oregano
3 tablespoons chilled unsalted butter, cut into small pieces
1 cup (2 1/2 ounces) finely grated cheddar cheese
1/4 cup plus 1 tablespoon milk

Combine flour, salt, pepper, and oregano in the bowl of a food processor; pulse to combine. Add butter; pulse until mixture resembles coarse meal. Add cheese; pulse until combined. With machine running, add the milk; process until dough comes together and is well combined.
Transfer dough to a work surface. Shape dough into a 2-inch-wide log. Wrap with plastic wrap, and refrigerate for at least 24 hours.
Heat oven to 325°. Slice chilled log into 1/4-inch-thick slices. Transfer slices to a parchment-lined baking sheet. Bake immediately, rotating sheet once, until crackers are golden brown and firm in the center, 25 to 35 minutes. Transfer to a rack to cool. Crackers may be made a day ahead and kept in an airtight container at room temperature.

Now, I have to vacuum seal everything and send this baby off!

Double Ginger Cookies & BBM Part 2

These are going to go into my BBM partner’s package…if I can hide them long enough from the Cookie Monster. I have been making these since I first saw them in Cooking Light Magazine in 2001. Back then I had just realized what cookie fanatic I had married, and I had decided to come up with healthier version of his favorites if I was going to bake that much. If he does not get his cookie fix, I have all the pencils heads chewed up! I bake this about once a week and yet I had never blogged about them before. So here they are, with my changes.

Double Ginger, adapted from Cooking Light

1 1/2 cups all-purpose flour

1 cup whole wheat flour

3/4 cup chopped crystallized ginger (I use 1/3 cup)

1 teaspoon baking powder

1/2 teaspoon baking soda

1/2 teaspoon salt

1/2 teaspoon ground ginger

1 1/4 cups sugar, divided

1/2 cup applesauce

1/4 cup vegetable oil

1 teaspoon grated lemon rind

1 tablespoon lemon juice

1/4 teaspoon vanilla extract

Lightly spoon flours into dry measuring cups, and level with a knife. Combine flours and next 5 ingredients (flours through ground ginger); stir well with a whisk. Make a well in center of mixture. Combine 1 cup sugar, applesauce, and next 4 ingredients (applesauce through vanilla). Add to flour mixture, stirring just until moist; cover and chill dough at least 1 hour. I skip this step and add 1 Tb of water to the dough.
Preheat oven to 350°.
Lightly coat hands with flour. Shape dough into 24 balls (about 2 tablespoons each; dough will be sticky). Roll balls in 1/4 cup sugar. Place balls 2 inches apart on baking sheets coated with cooking spray. Bake at 350° for 15 minutes or until lightly browned. Cool 1 minute on pan. Remove from pan; cool completely on wire racks.
Note: These freeze well. Place cooled cookies in a heavy-duty zip-top plastic bag; store in freezer for up to 1 month. Thaw at room temperature.

I usually get more cookies, 30 – 32.

Note: You probably have noticed a change on this blog. I have decide to add Google Ads, not because I hope to make a buck with this blog, but because I have recently stopped my management position at the gym and teaching classes alone are not enough to finance my baking addiction ot my upcoming vacation to France. As Sarah from The Delicious Life says it : because sugar daddies don’t grow on trees.

Sesame Spice Chips & Blogging by Mail Part 1


When I decided to participate in this month’s Blogging by Mail, I had no idea how difficult it would be to come up with an interesting care package for the blogger I have been assigned. Duh! I don’t know anything about her/him and although it would be easy to throw a bunch of things together and mail it off, I want to be able to relate to her/him, their blog/writing/experiences. I want to peak her/his interest, broaden her/his horizons, appeal to her/his senses. It has been a very interesting adventure to say the least! I decided to include in my package some things bought and somethings made, hoping that everything arrives in one piece. I have not sent it off yet but should be able to do so by the end of the week.
One of the items I decided to include is a beloved treat at my house, Flo Braker’s Sesame Spice Chips.
When I first opened her book, Sweet Miniatures, some years back I knew I had struck gold. It is a pure gem for the avid baker, caterer or fervent holiday/function cookie maker. All the recipes have worked remarkably well for me and all her instructions are really clear and well written.This particular recipe comes together in a flash, makes a lot and the dough is piped rather than scooped.

Sesame Spice Chips, adapted from Flo Braker.
Makes 8 dozens (OK so we already had a few before mailing!)

2 cups unsifted all purpose flour (240 gr)
2 tsp. baking soda
1 tsp. ground cinnamon
1/4 tsp. each ground ginger, allspice and salt
6 oz (1 1/2 sticks) butter, room temp
1 cup (200 gr.) sugar
1 large egg
1/4 cup light molasses (I used honey)
5 oz. sesame seeds

Preheat oven to 35o degrees. Line as many baking sheets as you have with parchment paper.
Sift together the flour, soda, cinnamon and spices. Set aside.
In bowl of an electric mixer, cream the butter until smooth. Add the sugar and beat until creamy. Add the egg and incorporate well. Add the molasses and finally the flour/spices until thoroughly combined
Using a 16 inch pastry bag fitted with a 1/2 inch plain decorating tip (in a pinch, a freezer bag works fine), pipe half teaspoons of dough 1 inch apart on the baking sheets.
Using a damp pastry brush (or wet fingers slightly) flatten the cookies a bit. Sprinkle the sesame seeds over them. Bake for 8 minutes until they are flat, and dark brown.
Stack in an airtight container and store at room temp. up to a week.
Note: they freeze also really well.

Ok, so the recipe is not a fast one but as Monisha said before fast food is not necessarily one that is made fast, it is just eaten that way.
Trust me, these cookies are delicious!

Gourmandise…


I think I just got lucky this summer. It was my first summer in our new house and I felt lucky to spread my ingredients, doughs, batters on new countertops, play on the cooktop or admire the new convection oven capabilities. Despite of a very humid and hot summer my breads, rolls, tarts and sugar creations came out great. I was knocking on wood everytime though. Apparently I did not knock hard enough. Everything I made yesterday turned out to be a failure. I weighed, measured, stirred, sifted, followed recipes, did not disturb science and chemistry and yet everything failed in one way shape or form. Let’s see, first my donuts did not rise, my croissants got blah, my brownies tasted bland, my bread had an identity crisis…. I am telling you! A baker’s hell!
Allright, so maybe it was a sign that we did not need anymore sweets, that maybe my mojo had taken a vacation. Nevertheless, I am "une gourmande" and I have to end the day with something sweet. In desperation I started to make fruit salad, and that alone made me feel terrible: even with a splash of booze, it is nothing to write home about. I was about to cut up an orange when my eyes wandered onto the stack of recipes next to the fruit bowl and there it was, "The sign from the Pastry Gods": Anne’s recipe for an orange and almond cake that looked quite appealing at that precise moment. Everything looked pretty straightforward, no major pastry prouesse but in my state of being that was not a bad thing to attempt!
I toyed with the idea of following the recipe "a la lettre" (to the T), but I felt bold enough to defy my streak of bad luck and changed a couple of things.

Here is the original recipe and my changes in ( ).

2 oranges (mine were big so I only used one)
65 gr. butter
200 gr. sugar
5 eggs
150 gr. ground almonds ( I used half almonds, half semolina flour)
2 tsp. baking powder

Syrup:
200 gr. sugar
125 ml
water
1 orange

Wash the oranges. In a saucepan, put the oranges and cover with water. Cook on medium heat for 45 minutes. Take them out of the water, cut them in half and put them in the bowl of a food processor and puree them, skin and all.
Preheat the oven to 350 degrees.
Beat the butter and sugar until creamy. Add the eggs, one at a time, the baking powder, the almonds and the orange puree.
Pour into a 9 inch cake plate and bake for about 45 minutes. (I put mine in 8′ square one)

For the syrup: put all the ingredients into a saucepan and reduce on low heat for about 20 minutes.
Pour it on top of the cake when you take it out of the oven.

I decided to skip this step as the cake seemed to be plenty moist. The result is an incredebly fragrant cake great to end a light meal or to start the day.
I seemed to have gotten my bad luck episode. We’ll see tomorrow!

La Festa Al Fresco


Two of my favorite bloggers are throwing a party and we are all invited! Yvonne from Cream Puff in Venice and Lis from La Mia Cucina wish to celebrate the end of the summer and are inviting everybody to participate by making a dish using one or more fresh summer ingredient(s).
While at the market today I found small plums, also known as prune plums or Italian plums and I fell in love with the way they felt in my hand. They were perfectly ripe, smelled wonderful, their skin was soft yet still resilient as if they did not wanted to let go of summer.
I did a really broad search for plum recipes and I finally settled on a plum crumble. What better way to say farewell to summer and get ready for the fall than with a crumble? I have a tendency to only make them in the winter or fall, because I do not really like cooked summer fruits. They are usually so good on their own that they never need much handling. I finally reconcialted my dislike of cooking summer fruit with this recipe. It is incredibly fragrant, yummy and oozing of plum juices. I found the recipe in the archives of the New York Times online, you can see it and the whole article here.

Plum Crumble, adapted from the New York Times.

12 Italian plums
2 Tb. brown sugar
1 1/2 Tb. plus one cup flour
1/2 tsp. cinnamon
1/2 tsp. ground ginger
2 Tb. finely chopped candied ginger
3/4 cup sugar
1 tsp. baking powder
1 egg, well beaten
1/2 cup unsalted butter

Heat oven at 350 degrees. Mix together the brown sugar, 1 1/2 Tb. flour, cinnamon, ground ginger, and candied ginger. Add the plums and mix well. Arrange the plums, skin side up in pie plate, baking dish or your favorite dish.
Combine remaining sugar, baking powder, flour. Mix well. Stir in the egg. Use your hands and mix thoroughly to make little particles. Sprinkle the whole thing evenly over the plums. Melt the butter and drizzle over the dish.
Bake for 30 minutes or until brown on top. Remove and let cool. Serve ith ice cream with desired.

I am so excited about having this for dessert tonight!!